Mount - Rear Drive Unit - LH (Remove and Replace)
Correction code 4001200240012002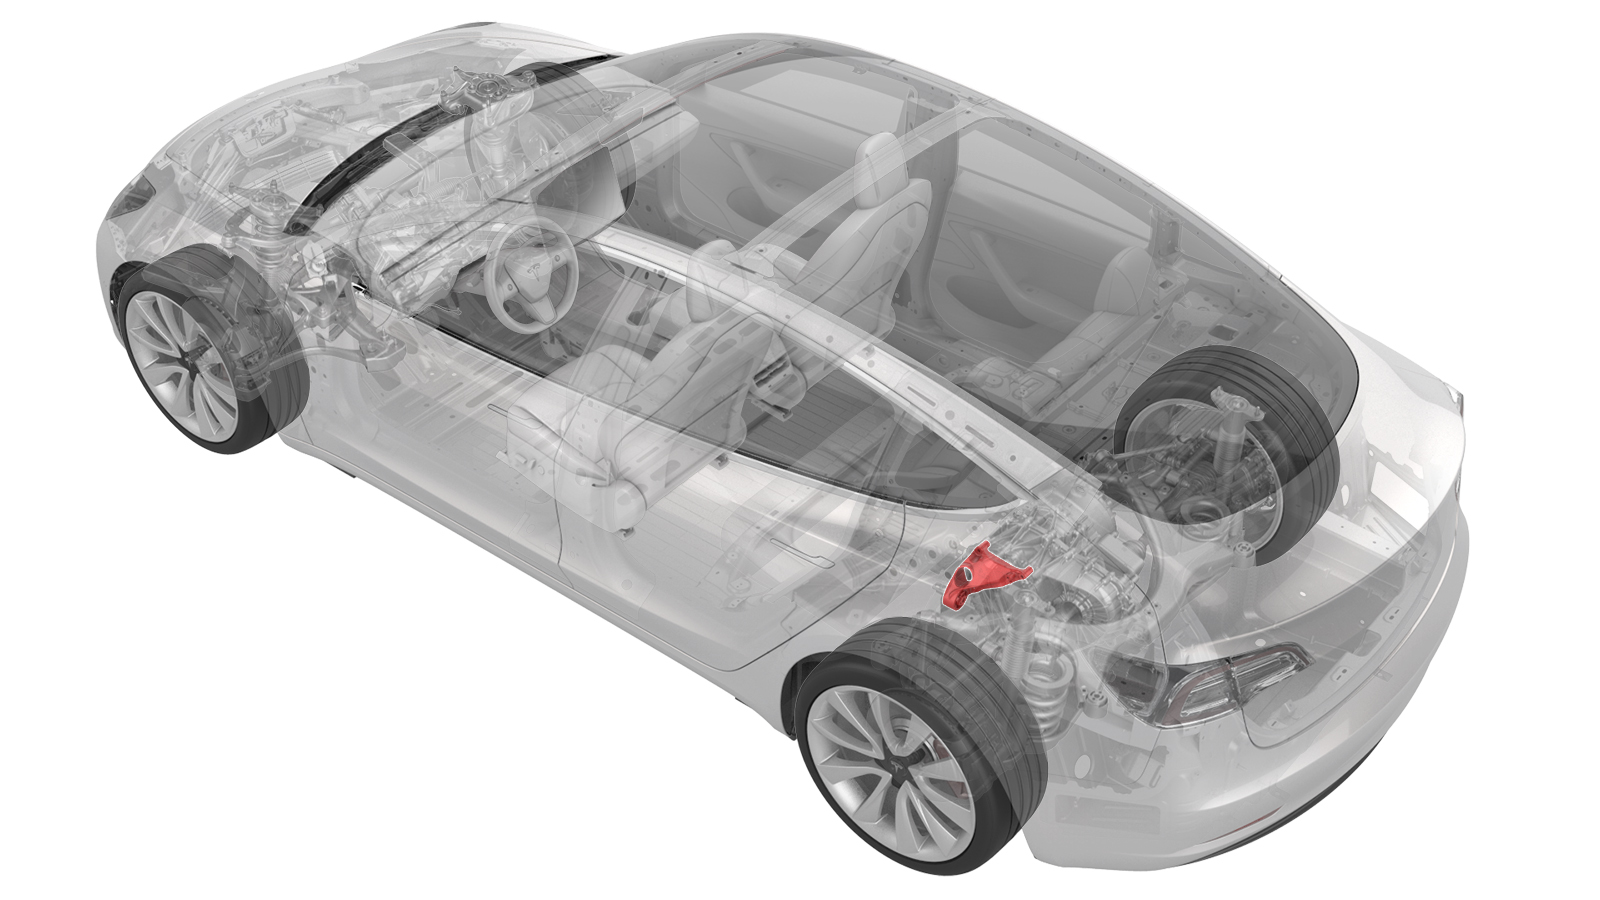
DRAFT
from-cad Warning:
This procedure was derived from pre-production computer models, and might not reflect the real-world situation. Warnings and cautions might be missing. Follow safety requirements and use extreme caution when working on or near high voltage systems and components.
Do not redistribute this content. Provide corrections and feedback to servicemanualfeedback@tesla.com.
Remove
-
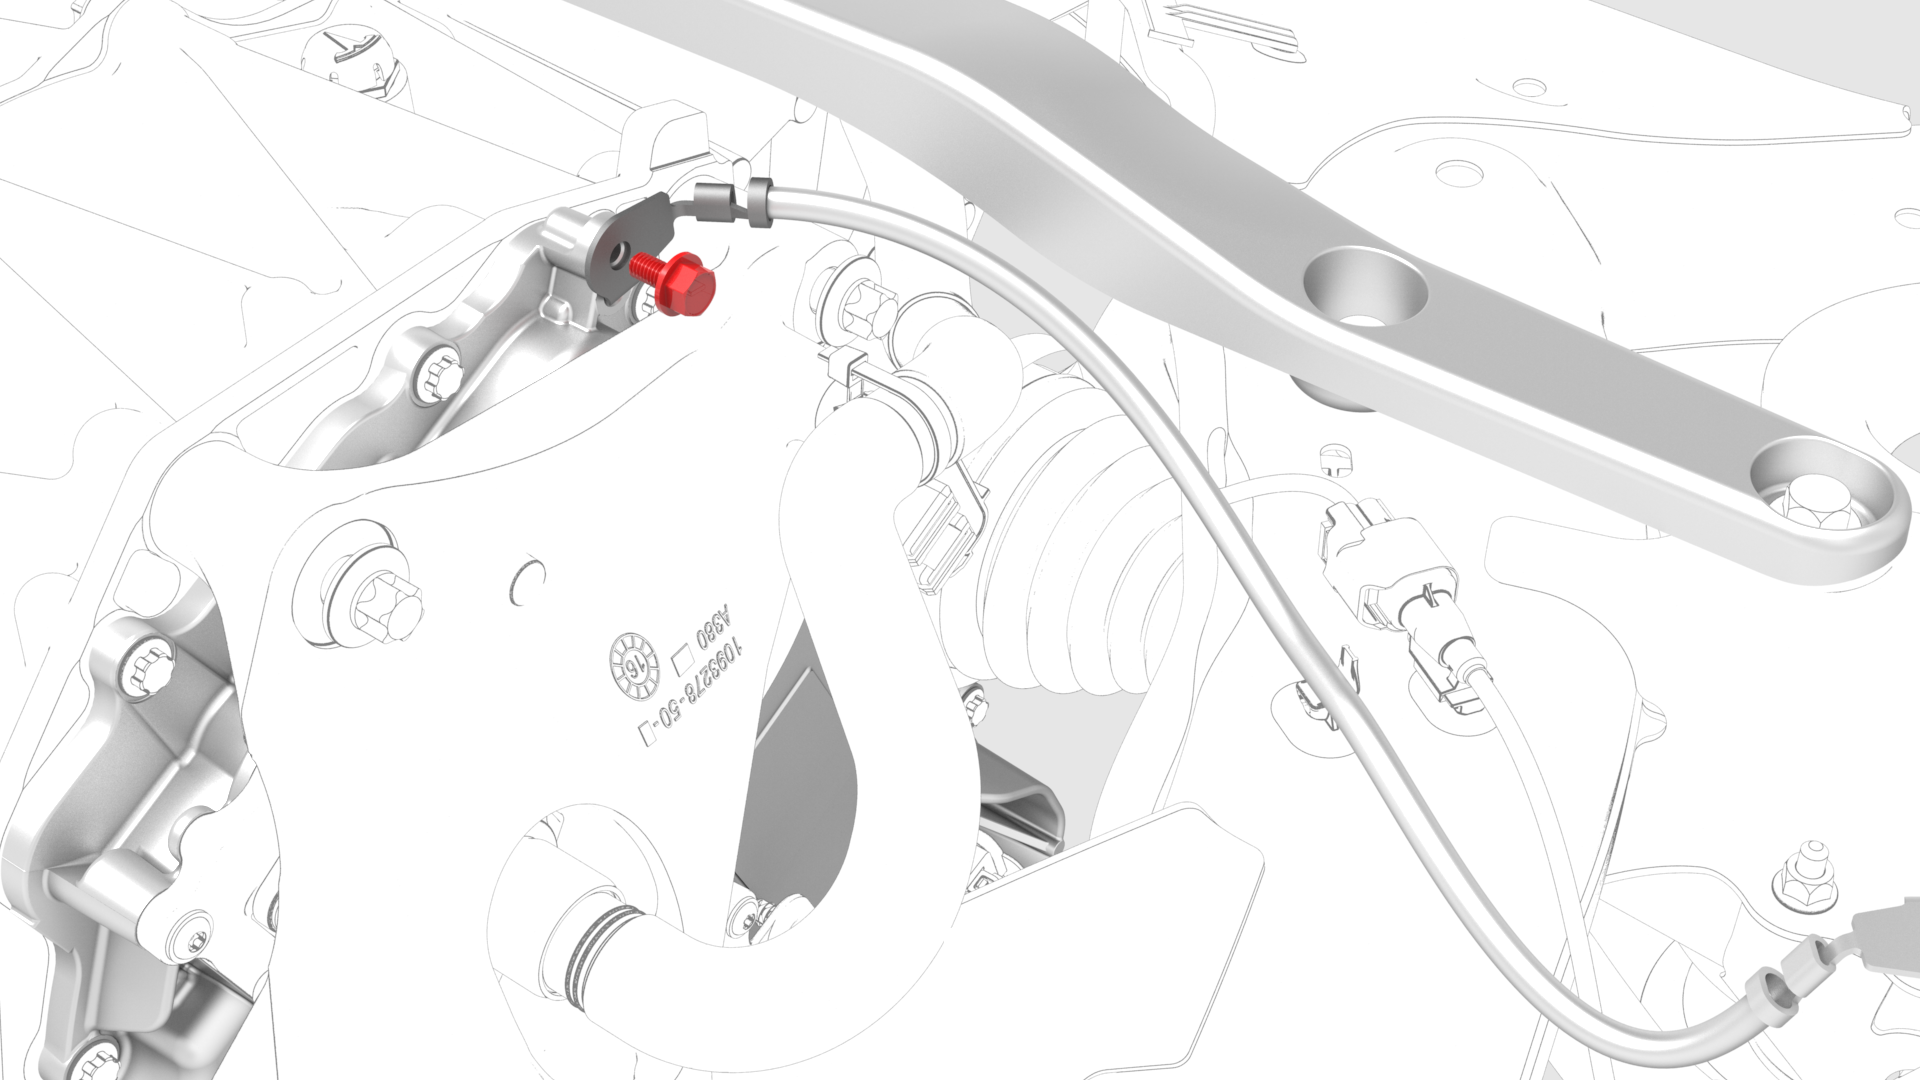
Remove the bolt that attaches the rear drive unit ground terminal to the inverter, and remove the terminal from the inverter.
-
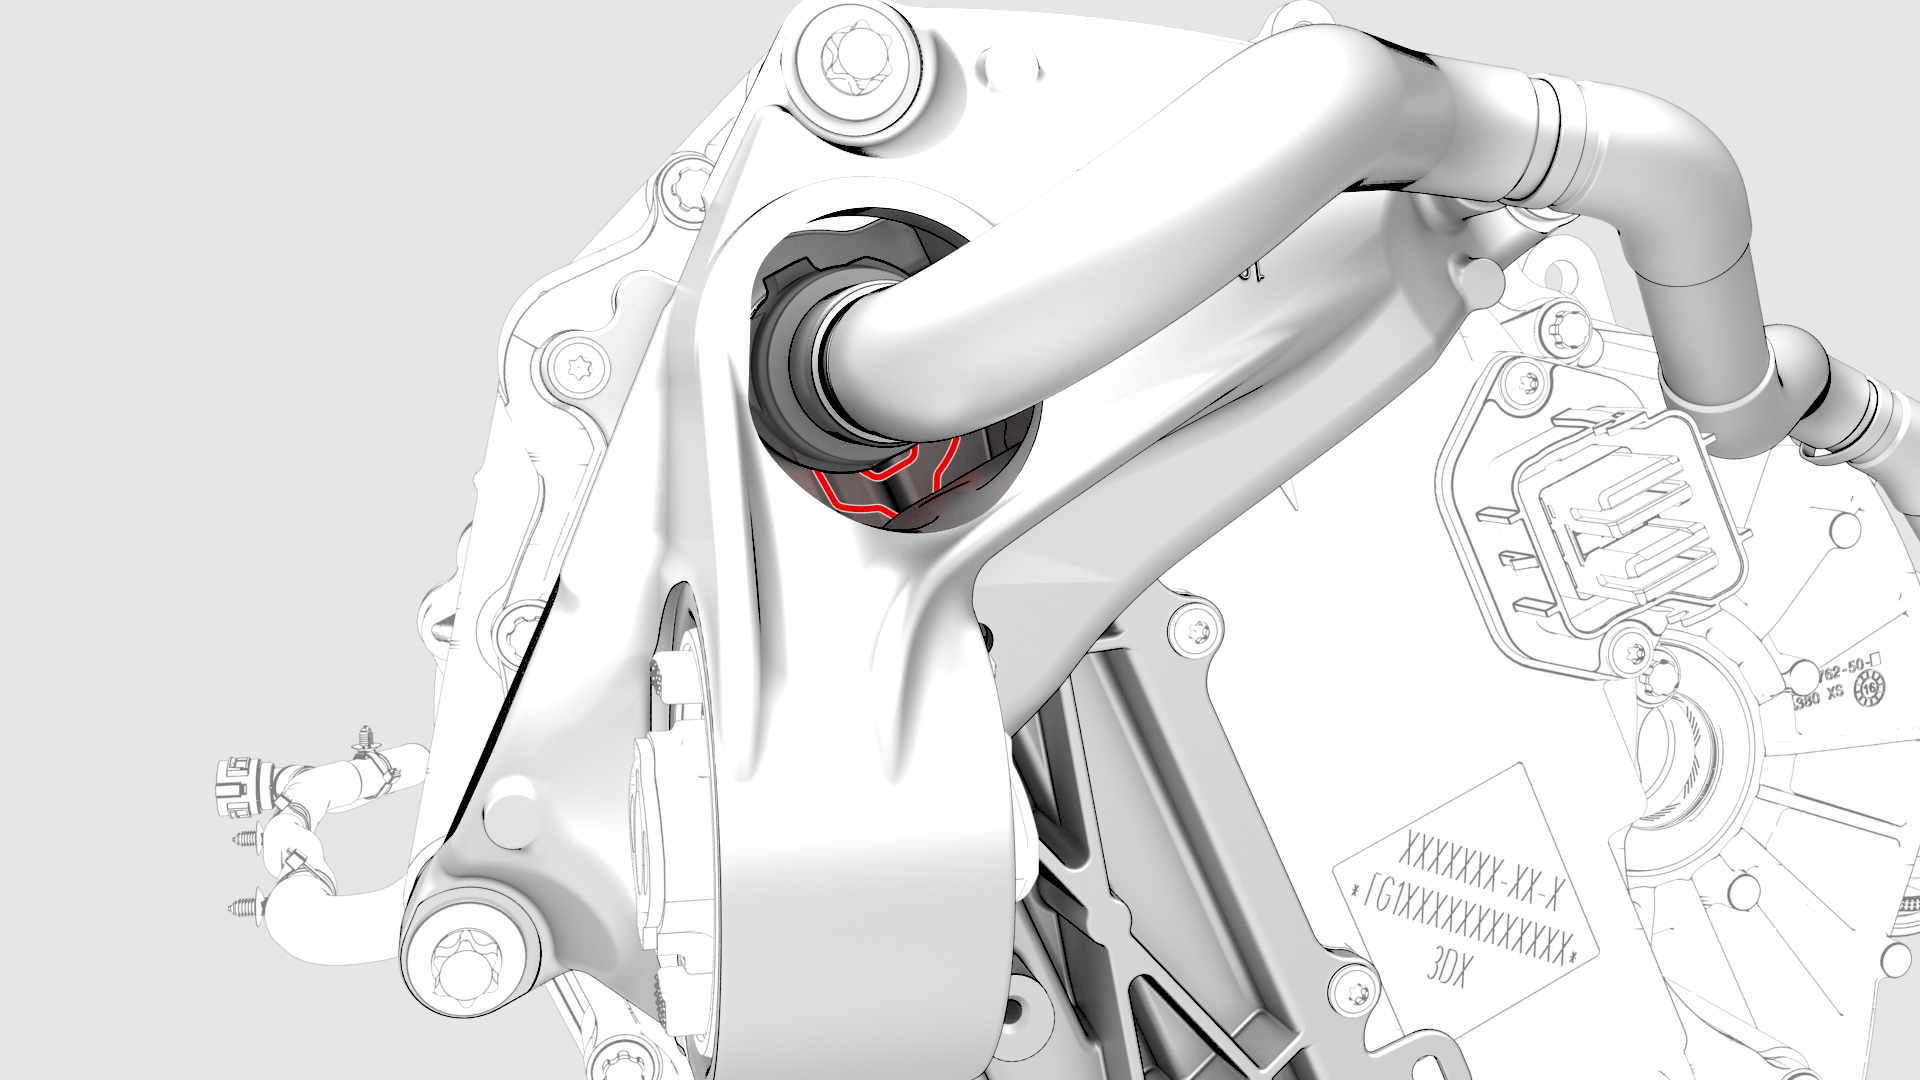
Release the clip that attaches the coolant outlet hose to the LH mount.

-
Release the clip that attaches the coolant outlet hose to the inverter fitting, and remove the hose from the inverter.
-
Remove and discard the nut and bolt that attach the LH mount to the subframe.

-
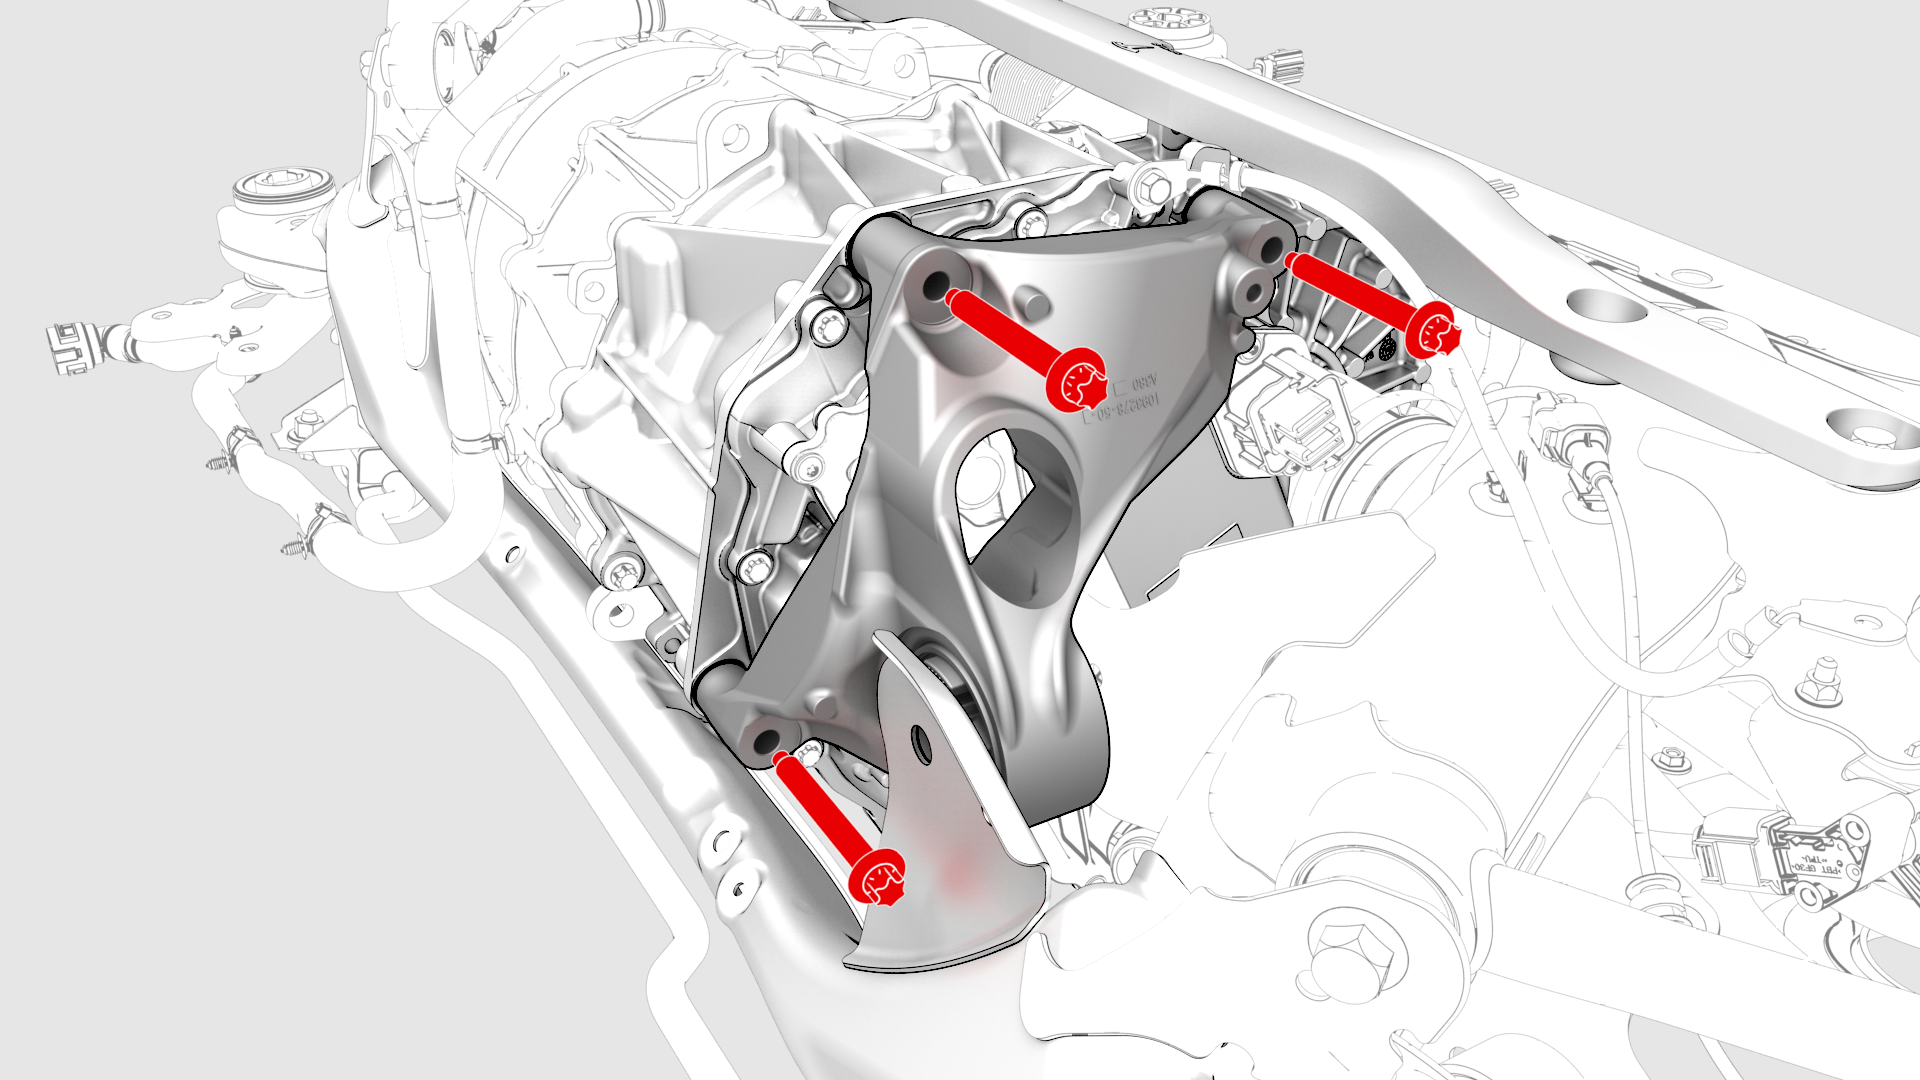
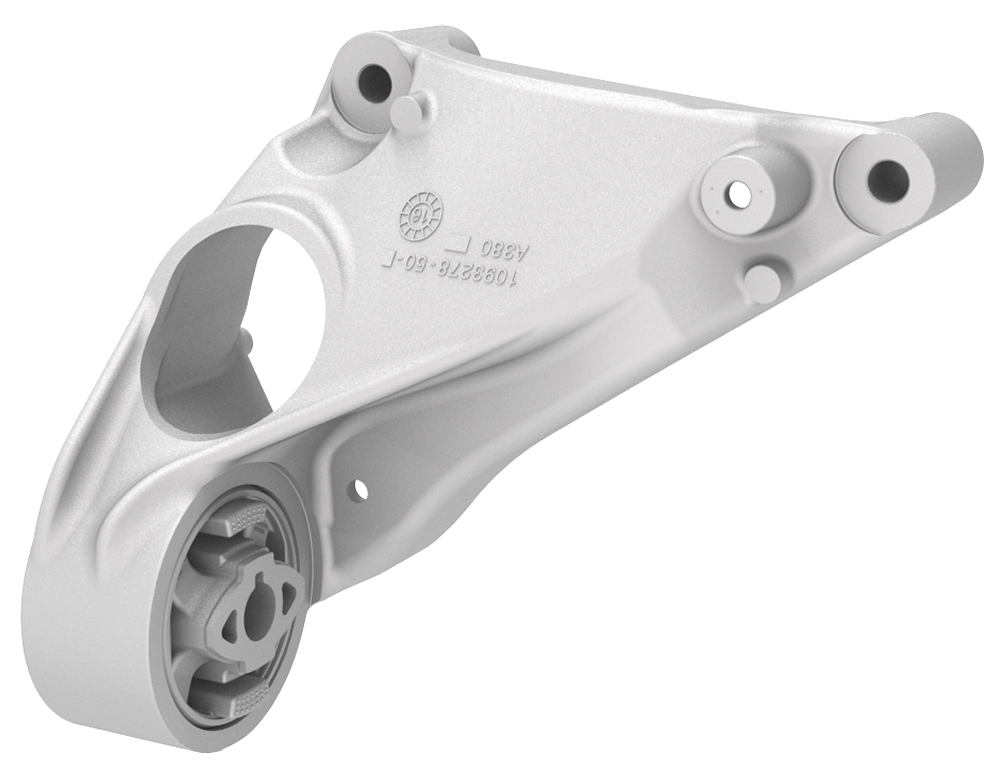
Remove the bolts that attach the LH mount to the rear drive unit, and remove the mount from the rear drive unit.
| 1 | Remove the rear subframe assembly from the vehicle. See Subframe Assembly - Rear (Remove and Install). | ||
| 2 | Support the center of the rear drive unit with rubber or wood blocks. | ||
| 3 | Remove the bolt that attaches the rear drive unit ground terminal to the inverter, and remove the terminal from the inverter. | |
| 4 | Release the clip that attaches the coolant outlet hose to the LH mount. | |
| 5 | Release the clip that attaches the coolant outlet hose to the inverter fitting, and remove the hose from the inverter. | |
| 6 | Remove and discard the nut and bolt that attach the LH mount to the subframe. | |
| 7 | Remove the bolts that attach the LH mount to the rear drive unit, and remove the mount from the rear drive unit. |
Install

Caution:
Replace all patchbolts.
Caution:
Replace all nyloc nuts.
-
Install the LH rear drive unit mount to the rear drive unit, and then hand-tighten the bolts (x3) that attach the mount to the rear drive unit.
-
Tighten the bolts in a two-step, counter-clockwise pattern, starting with the upper-right bolt.
 Torque 35 Nm +55 deg
 -
Install a new nut and bolt to attach the LH mount to the subframe.
 Torque 80 Nm
 -
Connect the coolant outlet hose to the inverter fitting, and then fasten the clip that attaches the hose to the fitting.
Caution:Perform a push-pull test to verify that the hose is fully seated.
-
Install the rear drive unit ground terminal to the inverter.
 Torque 10 Nm
| 1 | Install the LH rear drive unit mount to the rear drive unit, and then hand-tighten the bolts (x3) that attach the mount to the rear drive unit. | |
| 2 | Tighten the bolts in a two-step, counter-clockwise pattern, starting with the upper-right bolt. Torque 35 Nm +55 deg | ||
| 3 | Install a new nut and bolt to attach the LH mount to the subframe. Torque 80 Nm | ||
| 4 | Connect the coolant outlet hose to the inverter fitting, and then fasten the clip that attaches the hose to the fitting. Caution: Perform a push-pull test to verify that the hose is fully seated.
| ||
| 5 | Fasten the clip that attaches the coolant outlet hose to the LH mount. | ||
| 6 | Install the rear drive unit ground terminal to the inverter. Torque 10 Nm | ||
| 7 | Remove the rubber or wood blocks that support the center of the rear drive unit. | ||
| 8 | Install the rear subframe assembly into the vehicle. See Subframe Assembly - Rear (Remove and Install). |