Harness - Windshield (Remove and Replace)
Correction code 1710100117101001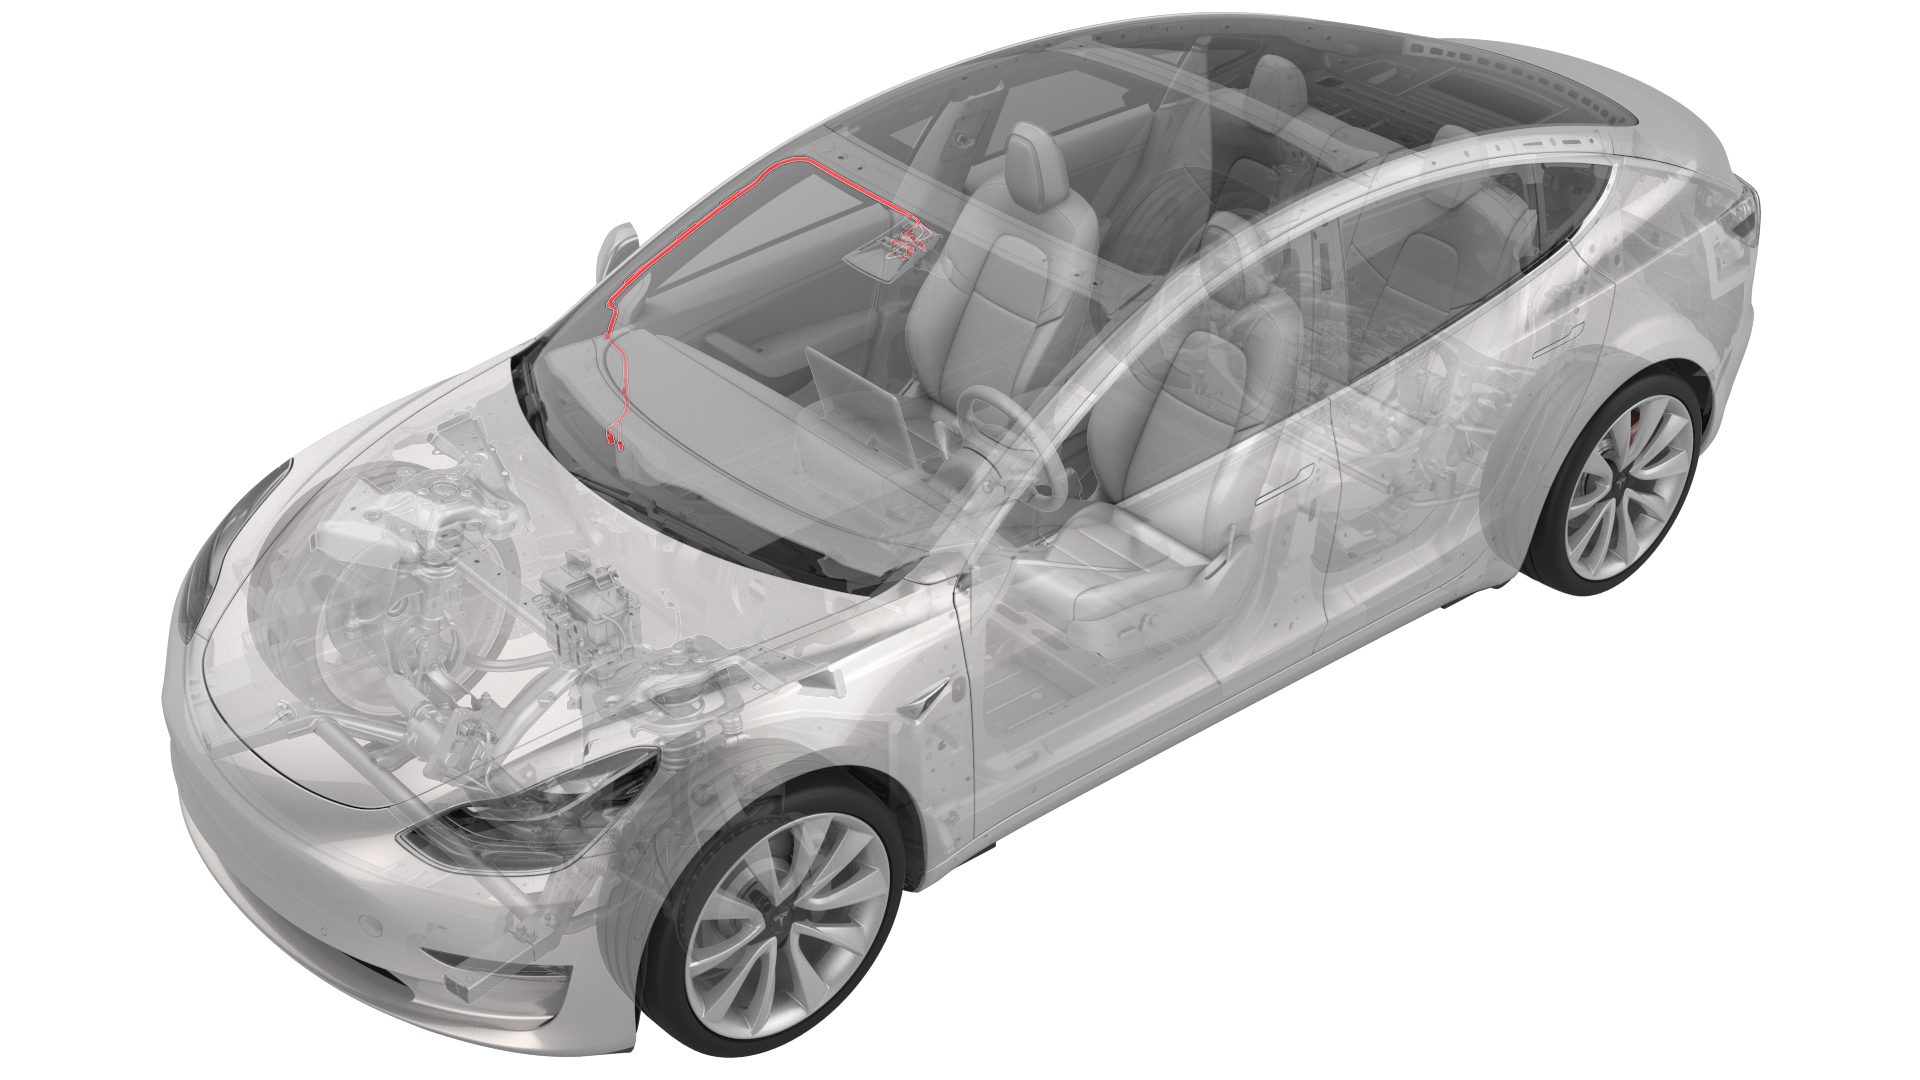
Remove
-
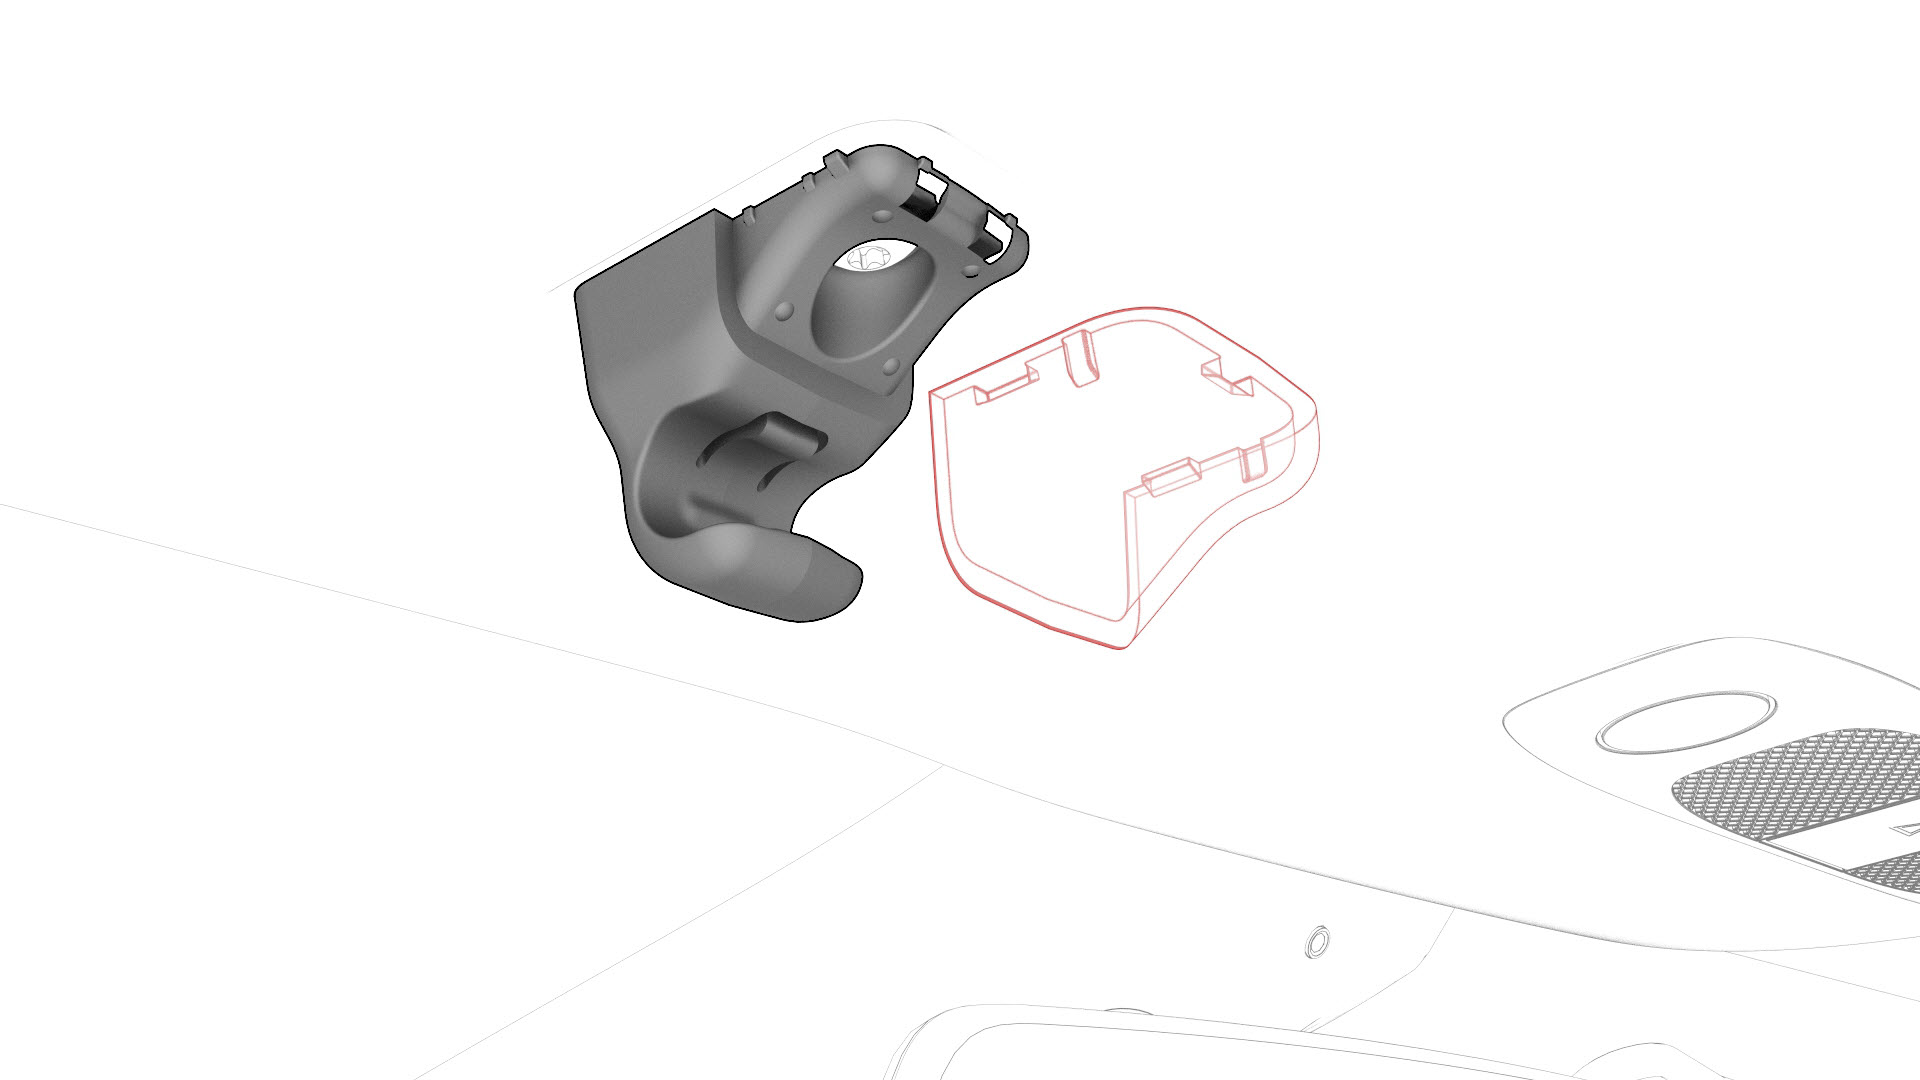
Release the driver sun visor base cover clips, and then remove the base cover from the vehicle.
-
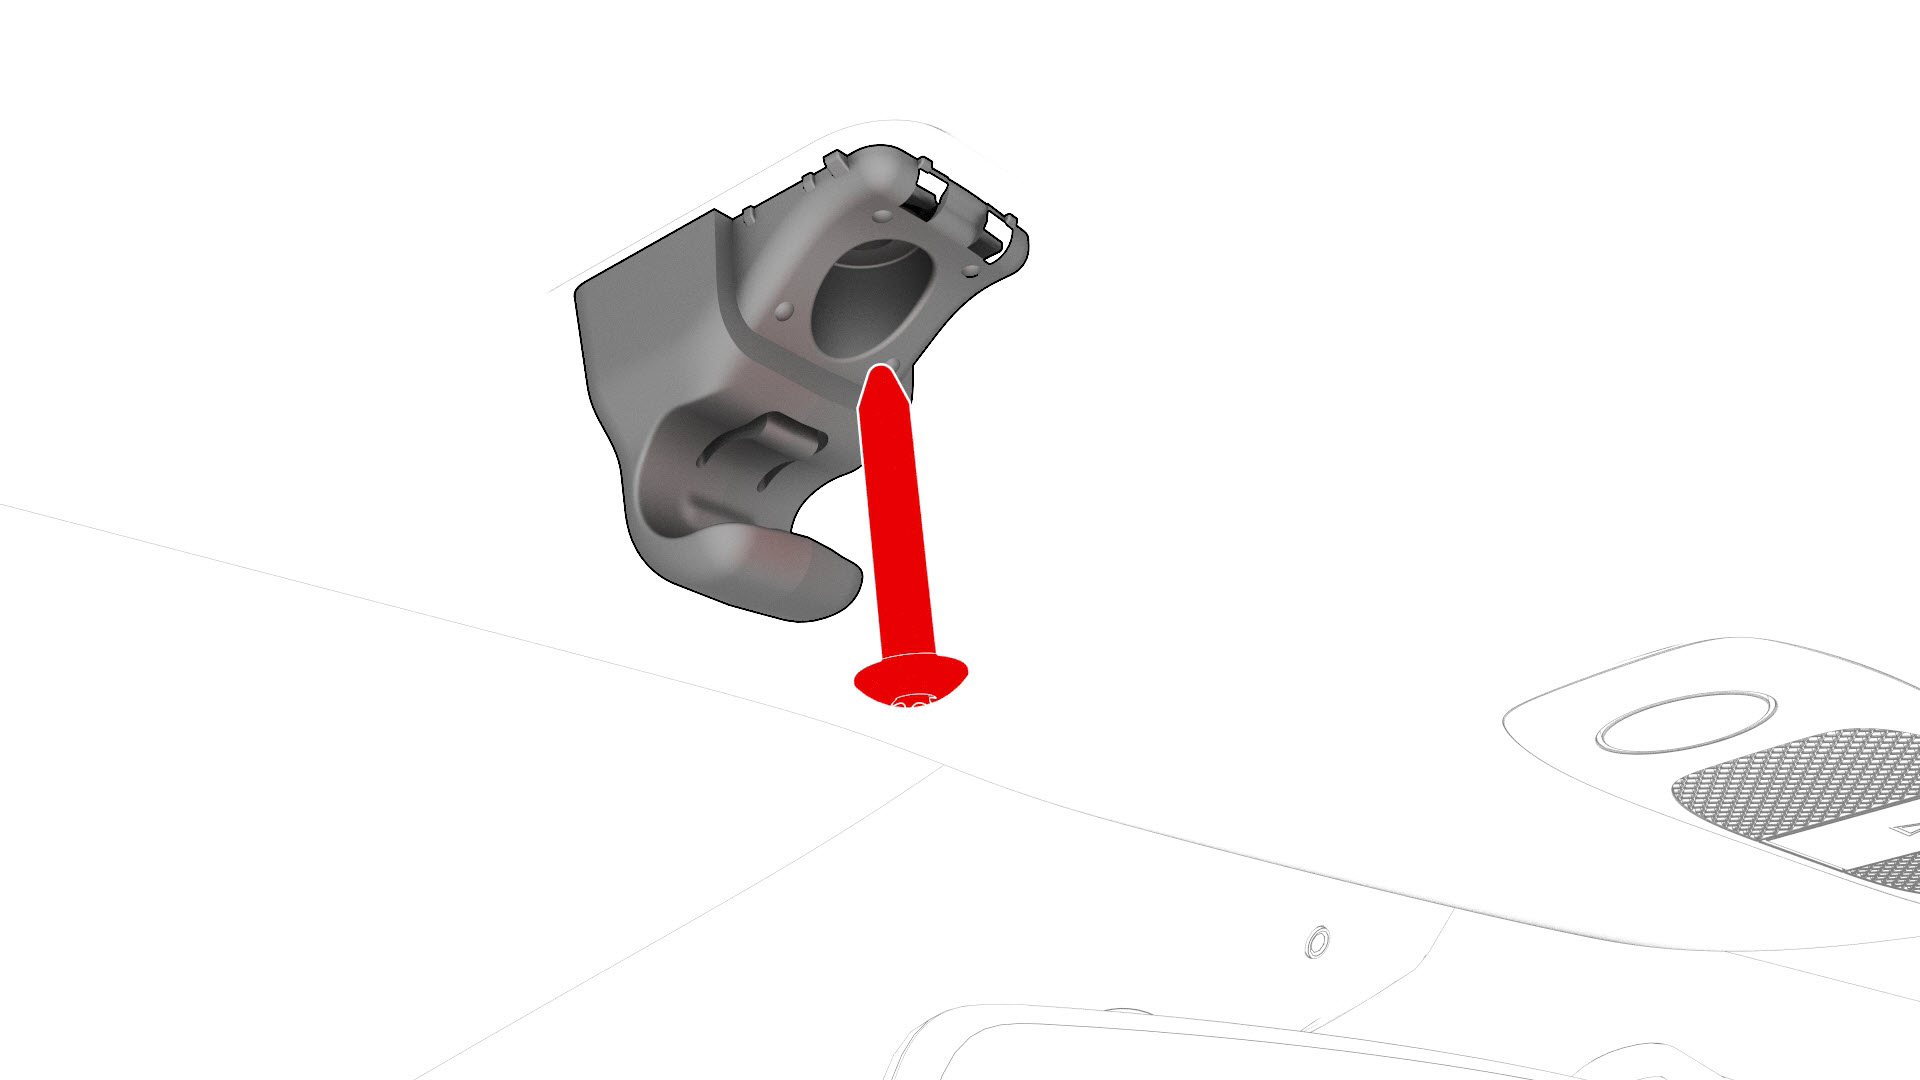
Remove the bolt that attach the driver sun visor base to the body, and remove the base from the vehicle.
-
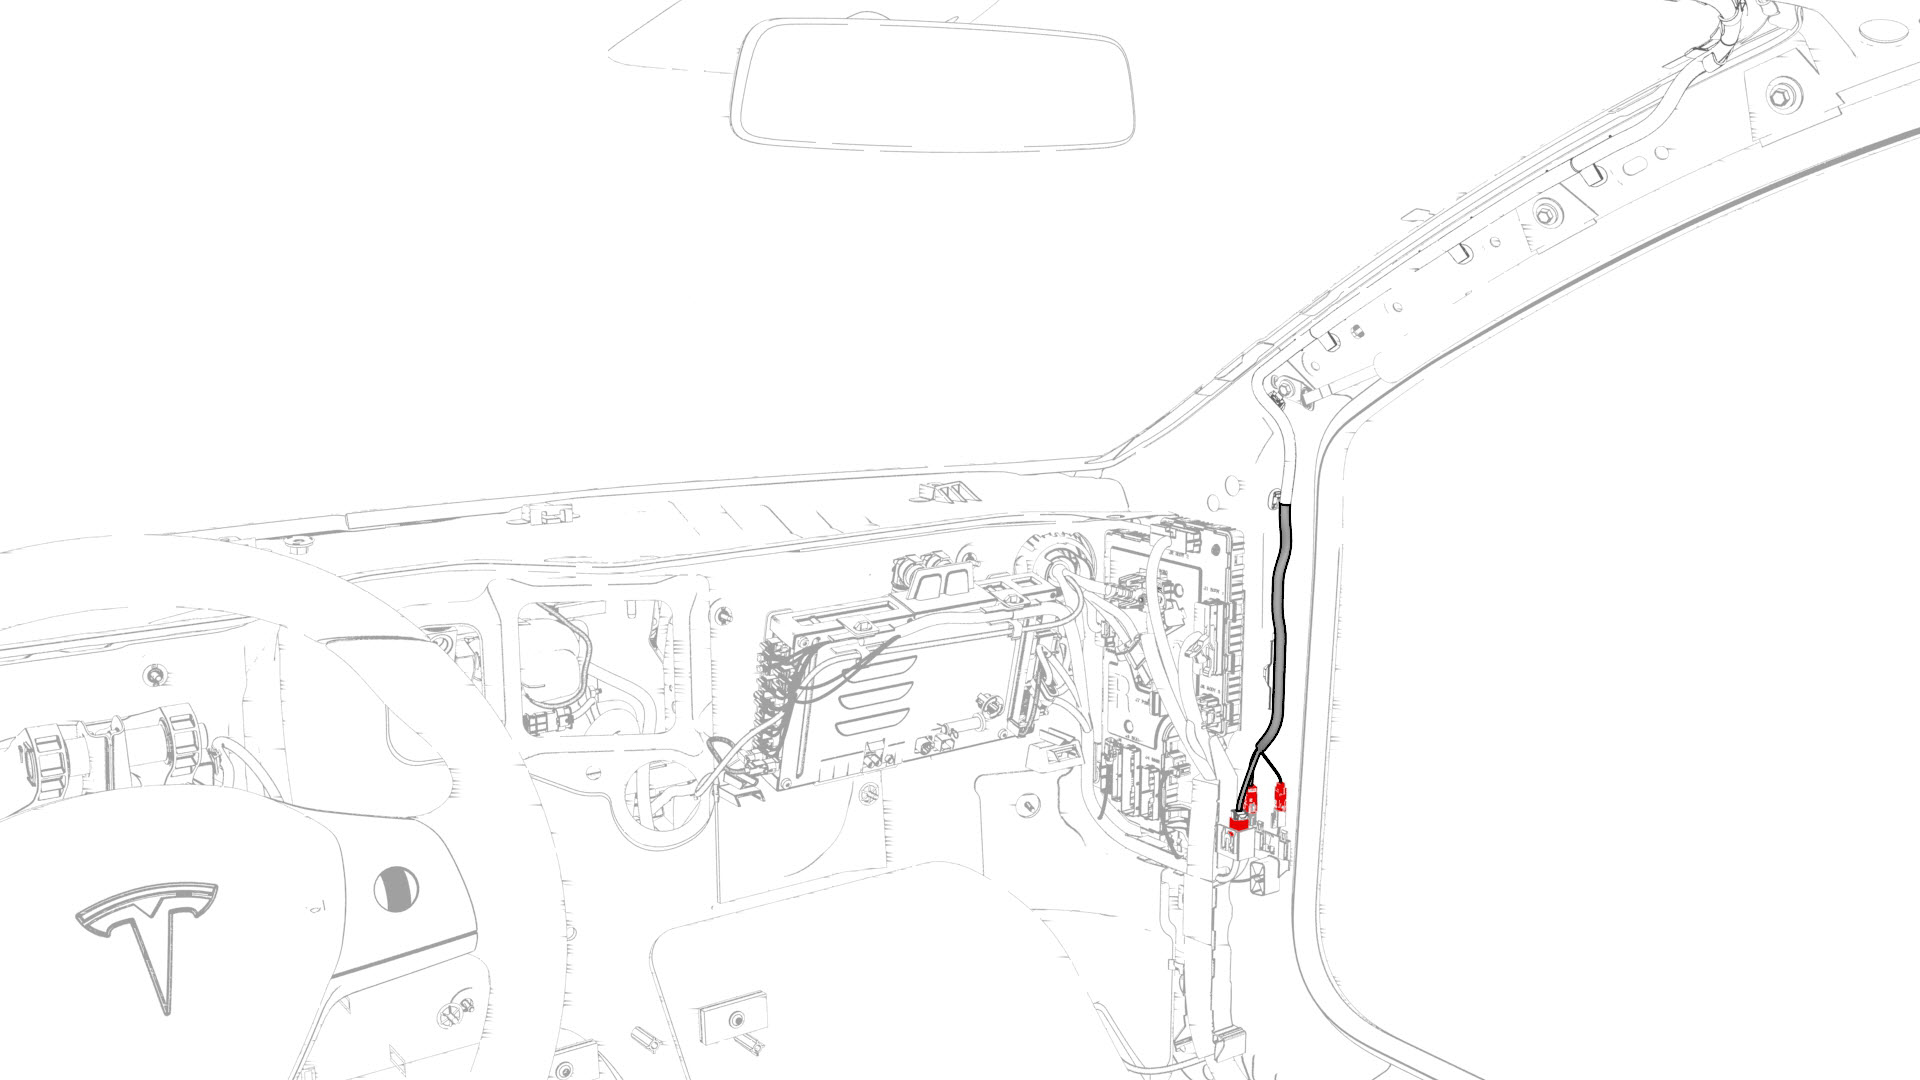
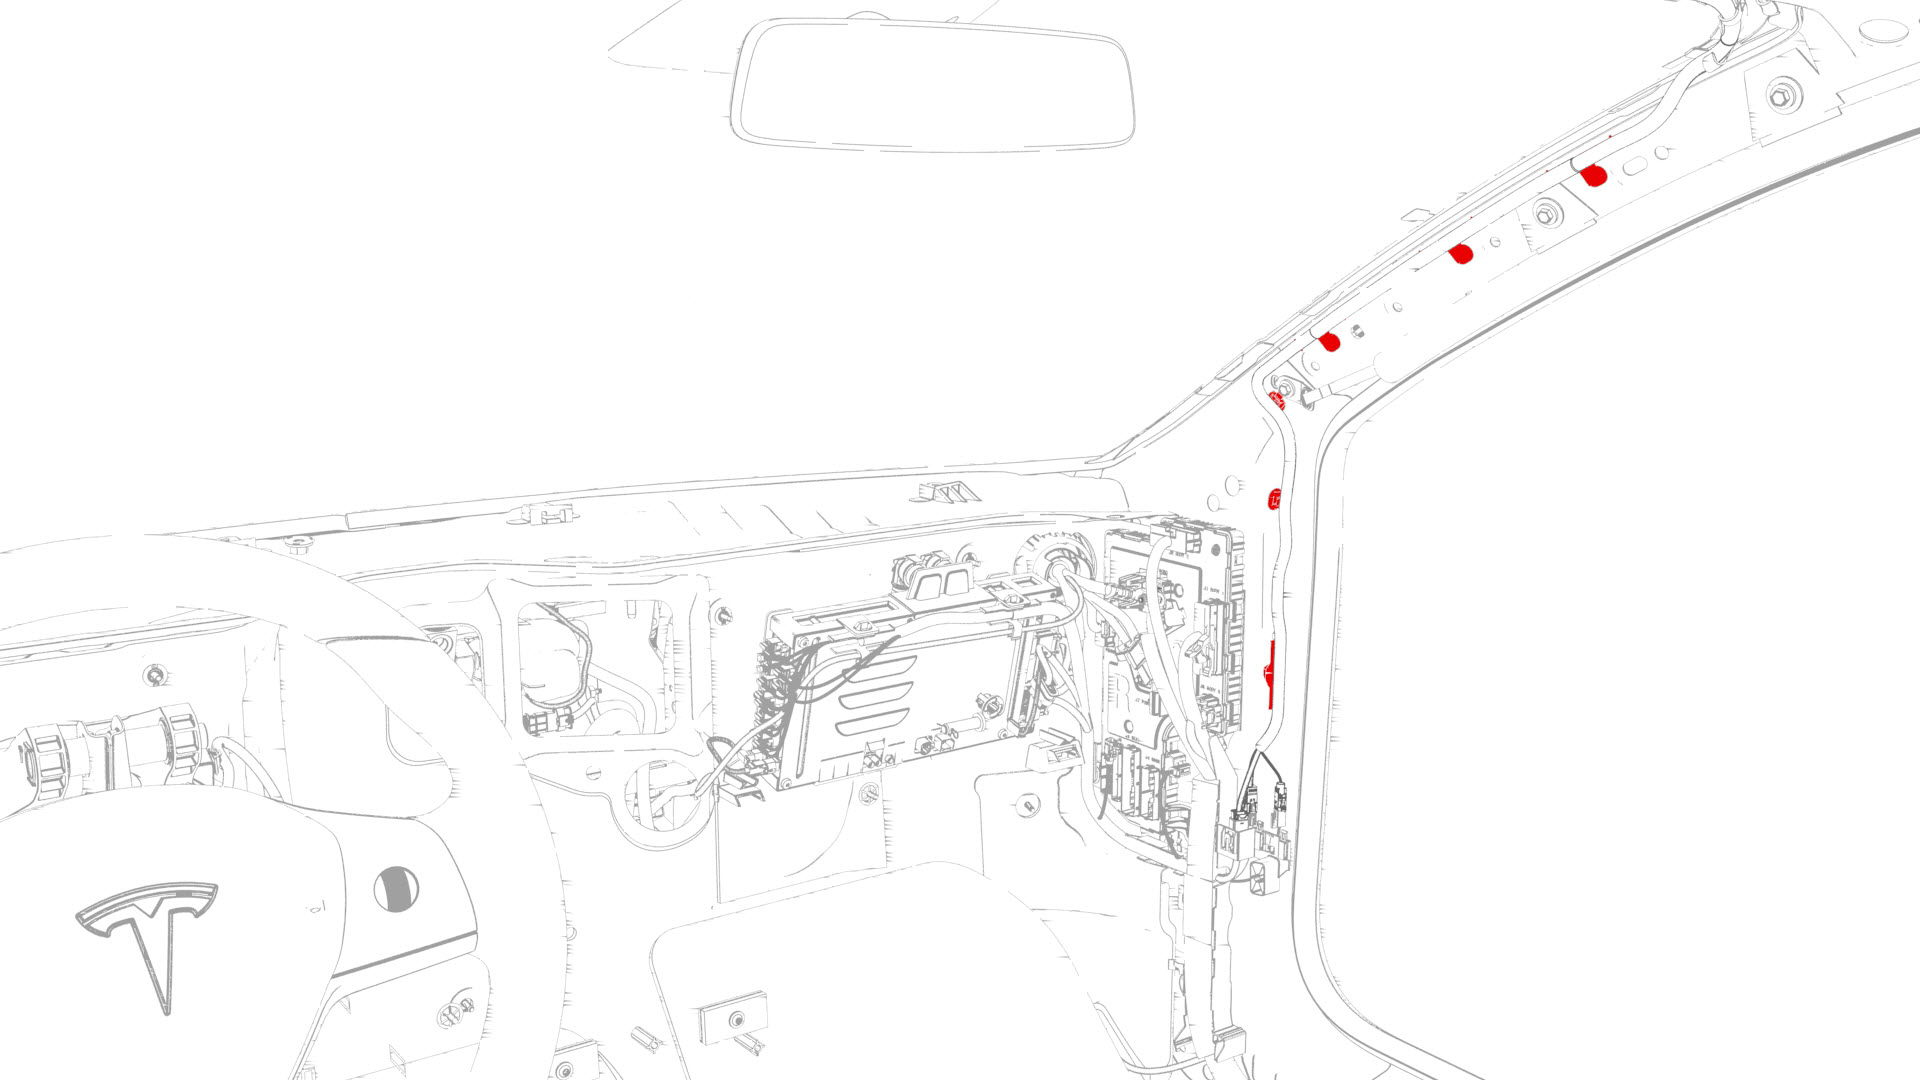
Disconnect the windshield harness electrical connectors, and then pull the windshield harness up through the opening on the instrument panel.
-
Release the clips that attach the windshield harness to the RH A-pillar.
-
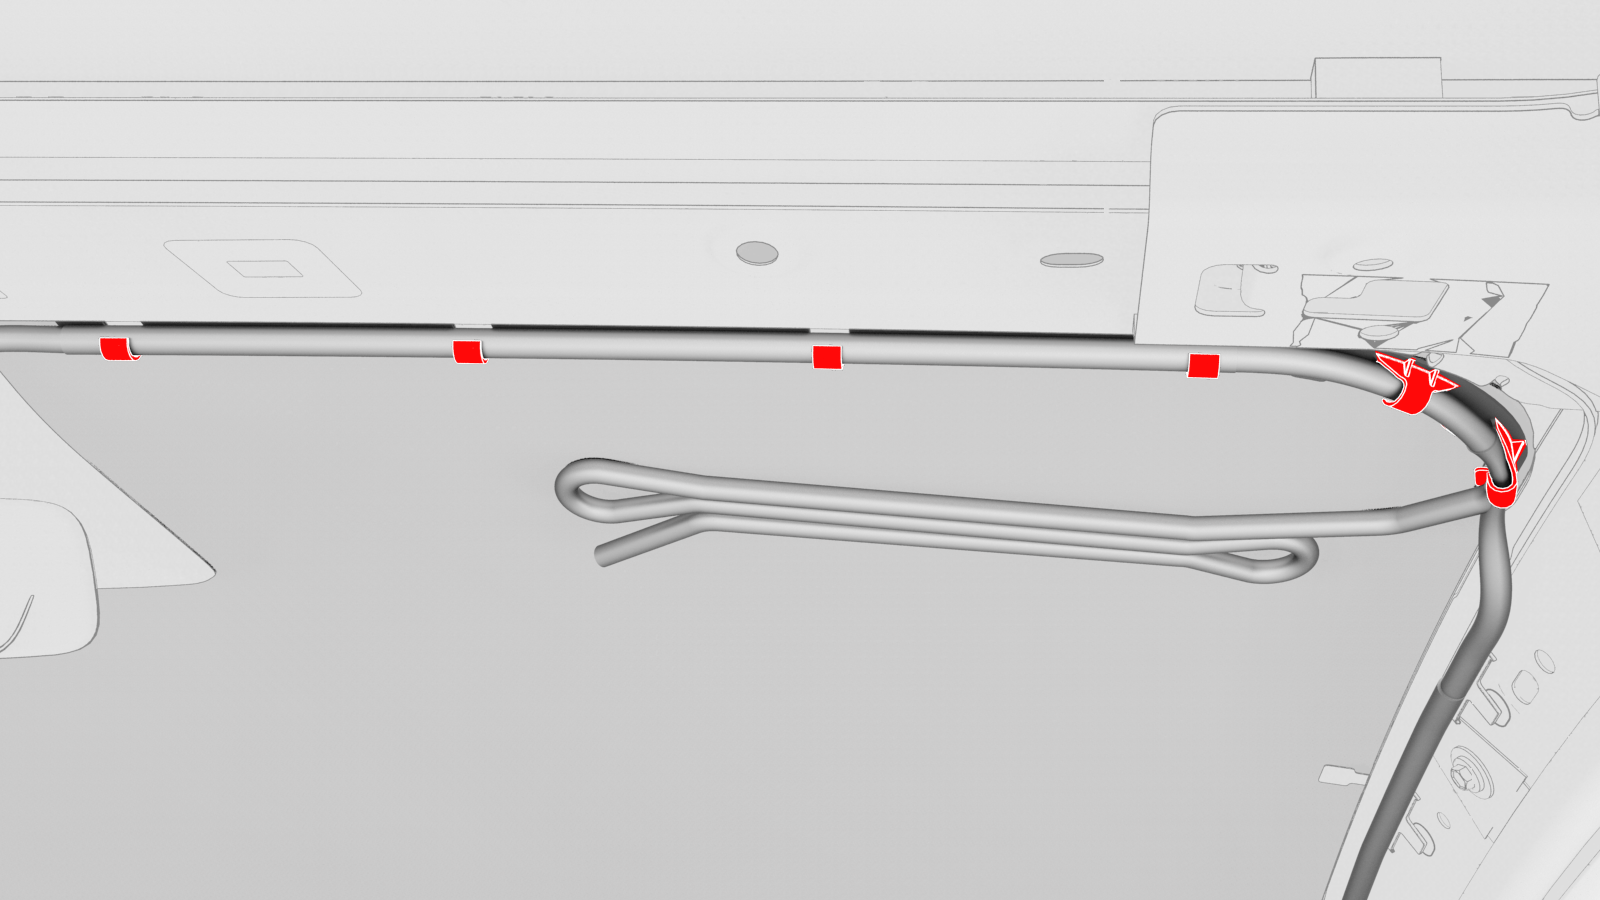
Release the clips that attach the windshield harness along the top portion the windshield, and then remove the harness from the vehicle.
| 1 | Remove the LH instrument panel end cap. See End Cap - Instrument Panel - LH (Remove and Replace). | ||
| 2 | Remove the LH middle A-pillar trim. See Trim - A-Pillar - Middle - LH (Remove and Replace). | ||
| 3 | Remove the LH lower A-pillar trim. See Trim - A-Pillar - Lower - LH (Remove and Replace). | ||
| 4 | Remove the LH upper A-pillar trim. See Trim - A-Pillar - Upper - LH (Remove and Replace). | ||
| 5 | Remove the driver sun visor. See Sun Visor - Driver (Remove and Replace). | ||
| 6 | Release the driver sun visor base cover clips, and then remove the base cover from the vehicle. | |
| 7 | Remove the bolt that attach the driver sun visor base to the body, and remove the base from the vehicle. | |
| 8 | Remove the lower quad camera cover. See Quad Camera Cover - Lower (Remove and Replace). | ||
| 9 | Remove the rear view mirror. See Mirror - Rear View (Remove and Replace). | ||
| 10 | Remove the forward facing camera. See Camera - Forward Facing (Remove and Replace). | ||
| 11 | Repeat steps 1 through 7 on the RH side of the vehicle. | ||
| 12 | Release the clips (x3) that attach the headliner by pulling downwards at the front center of the headliner. | ||
| 13 | Disconnect the windshield harness electrical connectors, and then pull the windshield harness up through the opening on the instrument panel. | |
| 14 | Release the clips that attach the windshield harness to the RH A-pillar. | |
| 15 | Release the clips that attach the windshield harness along the top portion the windshield, and then remove the harness from the vehicle. |
Install
-
Secure the clips that attach the windshield harness to the RH A-pillar.
-
Connect the windshield harness electrical connectors.
-
Secure the windshield harness with the clips along the top of the windshield.
-
Install the bolt that attach the front passenger visor base to the body.
 Torque 3 Nm
LH side shown, RH similar
Torque 3 Nm
LH side shown, RH similar -
Install the front passenger sun visor base cover clips.
| 1 | Secure the clips that attach the windshield harness to the RH A-pillar. | |
| 2 | Connect the windshield harness electrical connectors. | |
| 3 | Install the forward facing camera. See Camera - Forward Facing (Remove and Replace). | ||
| 4 | Secure the windshield harness with the clips along the top of the windshield. | |
| 5 | Install the clips (x3) that attach the front center of the headliner to the body. | ||
LH side shown, RH similar
| 6 | Install the bolt that attach the front passenger visor base to the body. Torque 3 Nm | |
| 7 | Install the front passenger sun visor base cover clips. | |
| 8 | Install the front passenger sun visor. See Sun Visor - Driver (Remove and Replace). | ||
| 9 | Install the RH upper A-pillar trim. See Trim - A-Pillar - Upper - LH (Remove and Replace). | ||
| 10 | Install the RH lower A-pillar trim. See Trim - A-Pillar - Lower - LH (Remove and Replace). | ||
| 11 | Install the RH middle A-pillar trim. See Trim - A-Pillar - Middle - LH (Remove and Replace). | ||
| 12 | Install the RH instrument panel end cap. See End Cap - Instrument Panel - LH (Remove and Replace). | ||
| 13 | Repeat steps 6 through 12 on the LH side of the vehicle. | ||
| 14 | Perform the forward facing camera target calibration procedure. See Camera - Forward Facing (Target Calibration) |