Bracket - License Plate - Front (EMEA) (Retrofit using Template)
Correction code 1207011612070116
Procedure
-
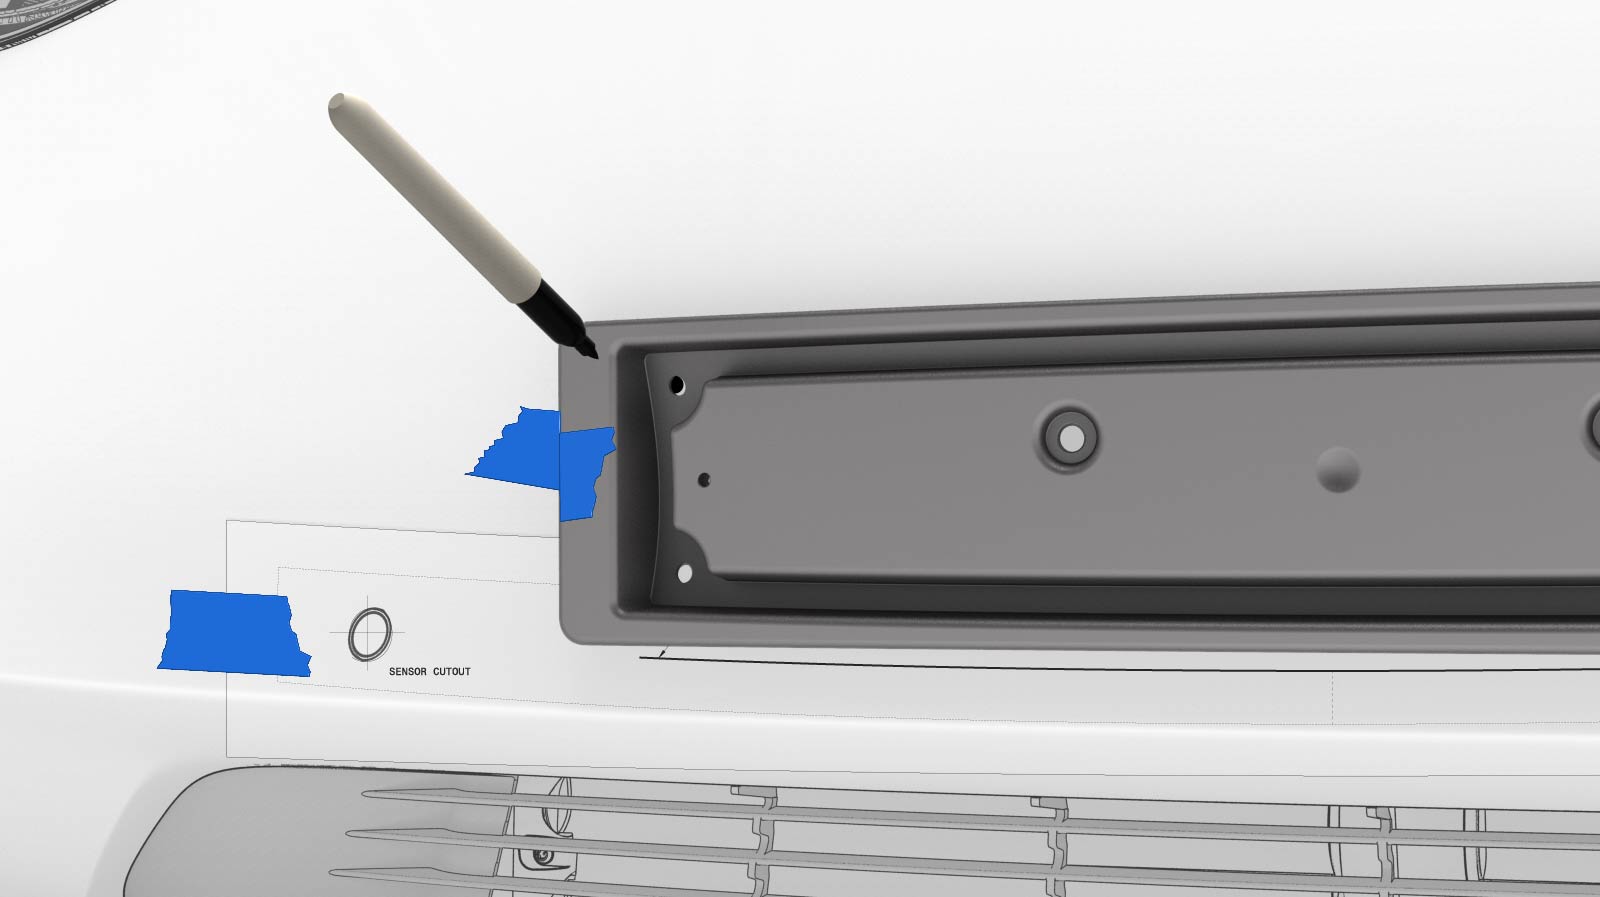
Align the template with the parking sensors, and then use masking tape to hold the template in place.

-
Align the front license plate bracket over the template, and then secure the bracket to the front fascia with masking tape.
LH side shown, RH side similar

-
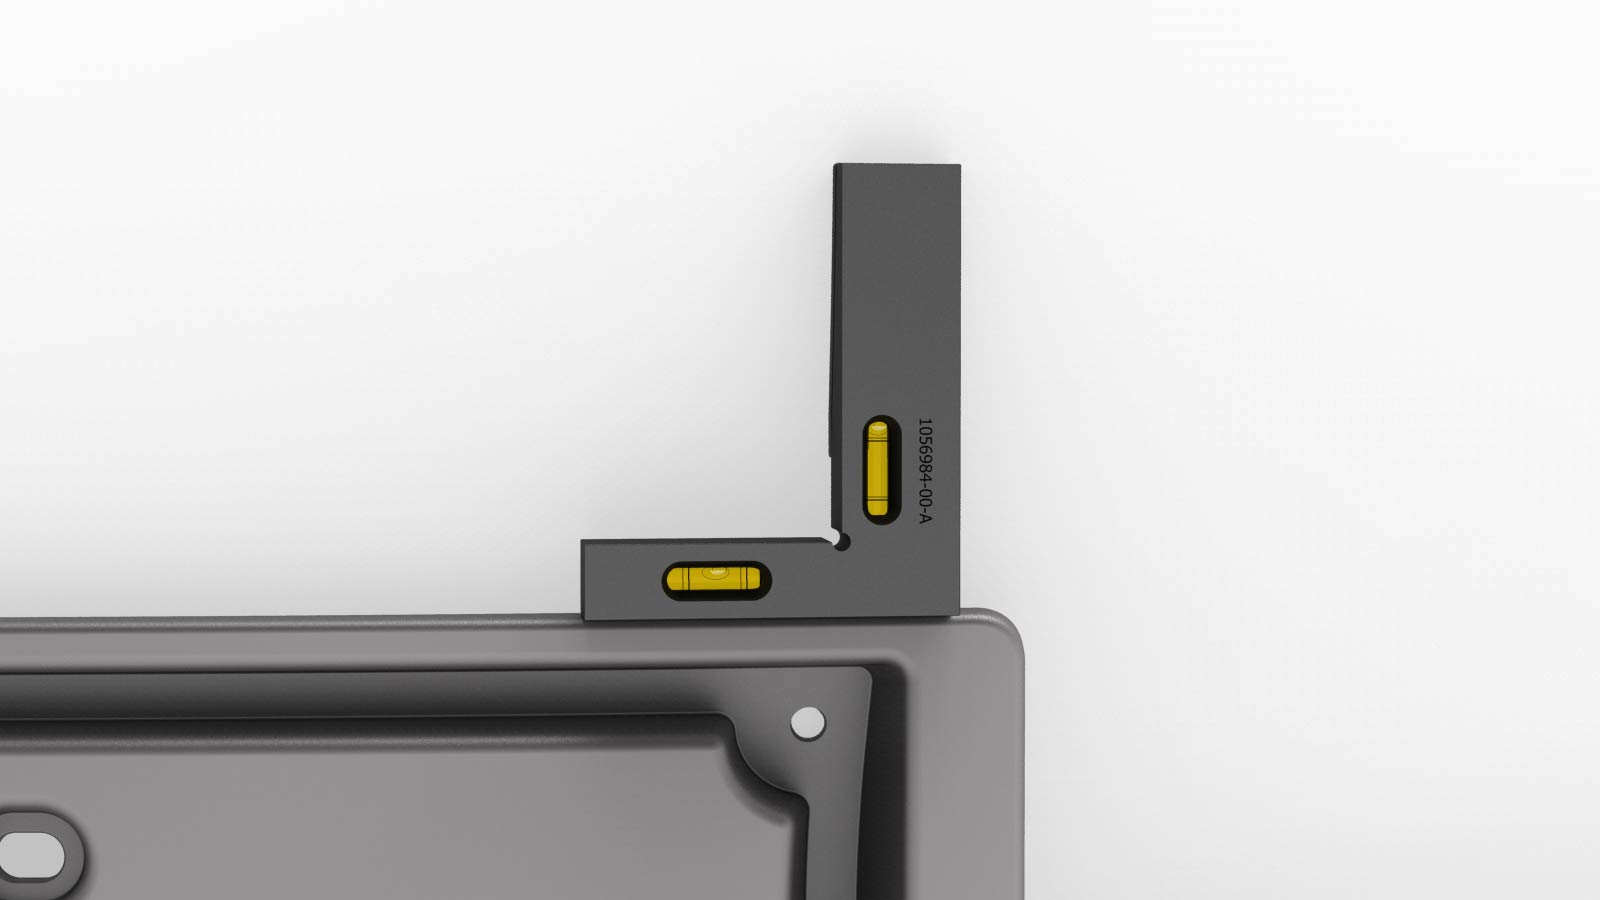
Verify that the front license plate bracket is level with a bubble level. Make sure that there is no variance compared to level ground.
-
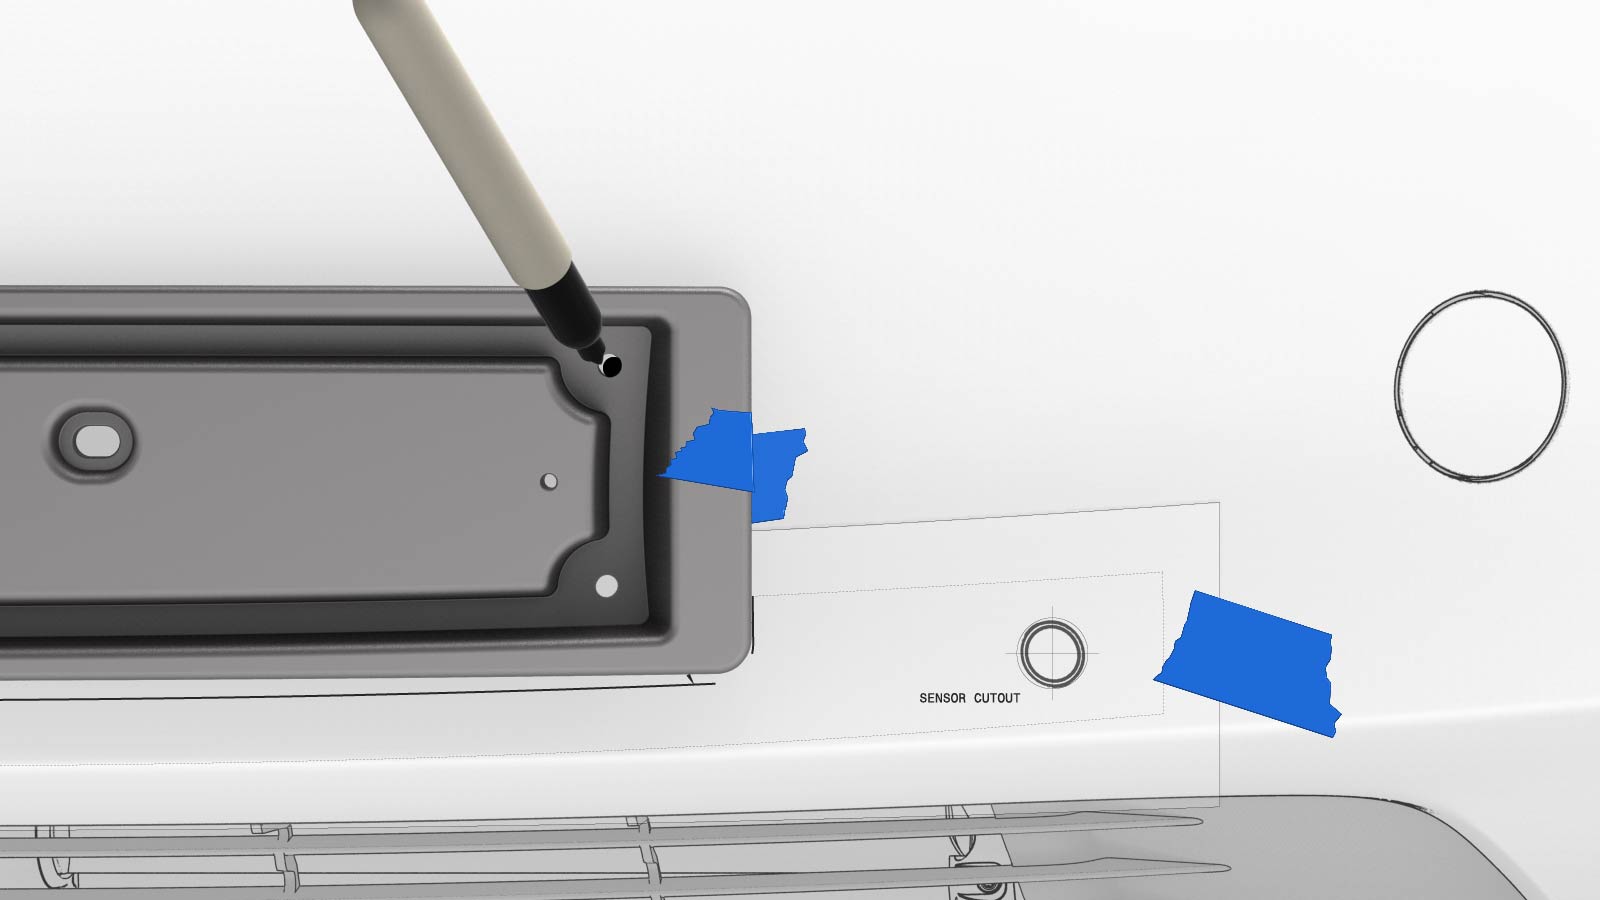
Paint the top 2 bracket holes on the front fascia with a paint marker; use the pilot holes to mount the front license plate bracket. The bottom holes cover the template.
Note: The template must be removed before fastening the front license plate bracket to the front fascia.
RH side
LH side
-
Use a 7/64 in (3 mm) drill bit to drill 4 holes through the front fascia.
 Caution:Only drill though the top surface of the front fascia. Drilling too far can result in damage to the vehicle.
 -
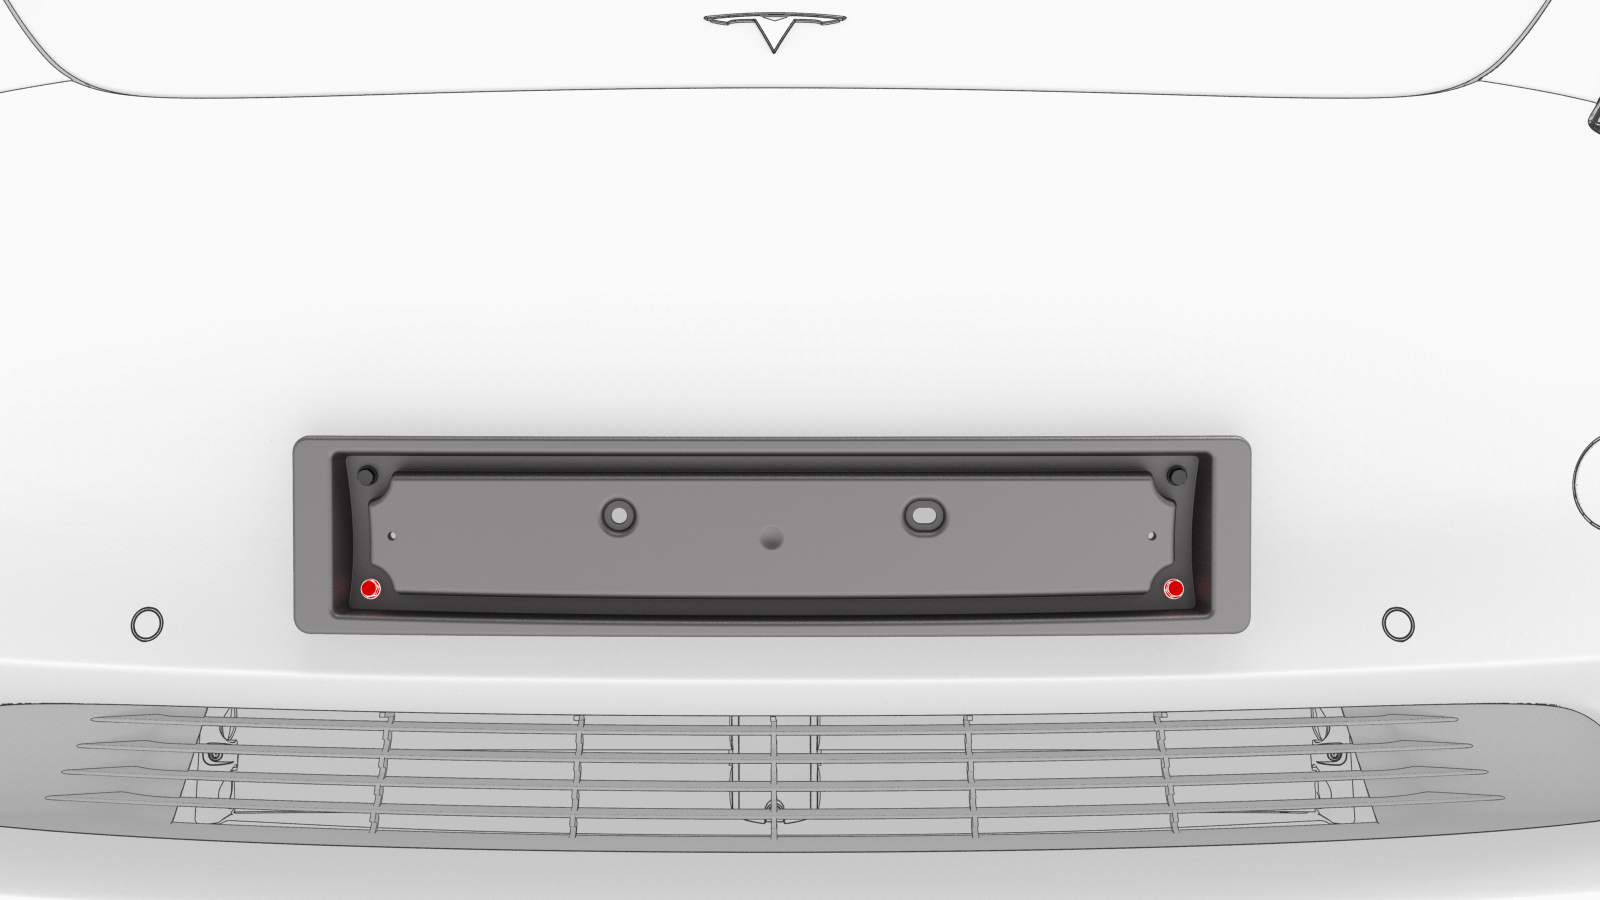
Install the 2 top screws (part number 1104972-00-A) that attach the front license plate bracket to the front fascia.
 Torque 1 Nm
-
Install the 2 bottom screws (part number 1104972-00-A) that attach the front license plate bracket to the front fascia.Torque 1 Nm
| 1 | Clean the front center surface of the front fascia. | ||
| 2 | Align the template with the parking sensors, and then use masking tape to hold the template in place. | |
LH side shown, RH side similar | 3 | Align the front license plate bracket over the template, and then secure the bracket to the front fascia with masking tape. | |
| 4 | Verify that the front license plate bracket is level with a bubble level. Make sure that there is no variance compared to level ground. | |
RH side LH side | 5 | Paint the top 2 bracket holes on the front fascia with a paint marker; use the pilot holes to mount the front license plate bracket. The bottom holes cover the template. Note: The template must be removed before fastening the front license plate bracket to the front fascia.
| |
| 6 | Remove the front license plate bracket and the template. | ||
| 7 | Wear eye and ear protection before continuing. | ||
| 8 | Use a 7/64 in (3 mm) drill bit to drill 4 holes through the front fascia. Caution: Only drill though the top surface of the front fascia. Drilling too far can result in damage to the vehicle.
| ||
| 9 | Install the 2 top screws (part number 1104972-00-A) that attach the front license plate bracket to the front fascia. Torque 1 Nm | |
| 10 | Install the 2 bottom screws (part number 1104972-00-A) that attach the front license plate bracket to the front fascia. Torque 1 Nm |