Latch Actuator - Charge Port (Remove and Replace)
Correction code 4401400244014002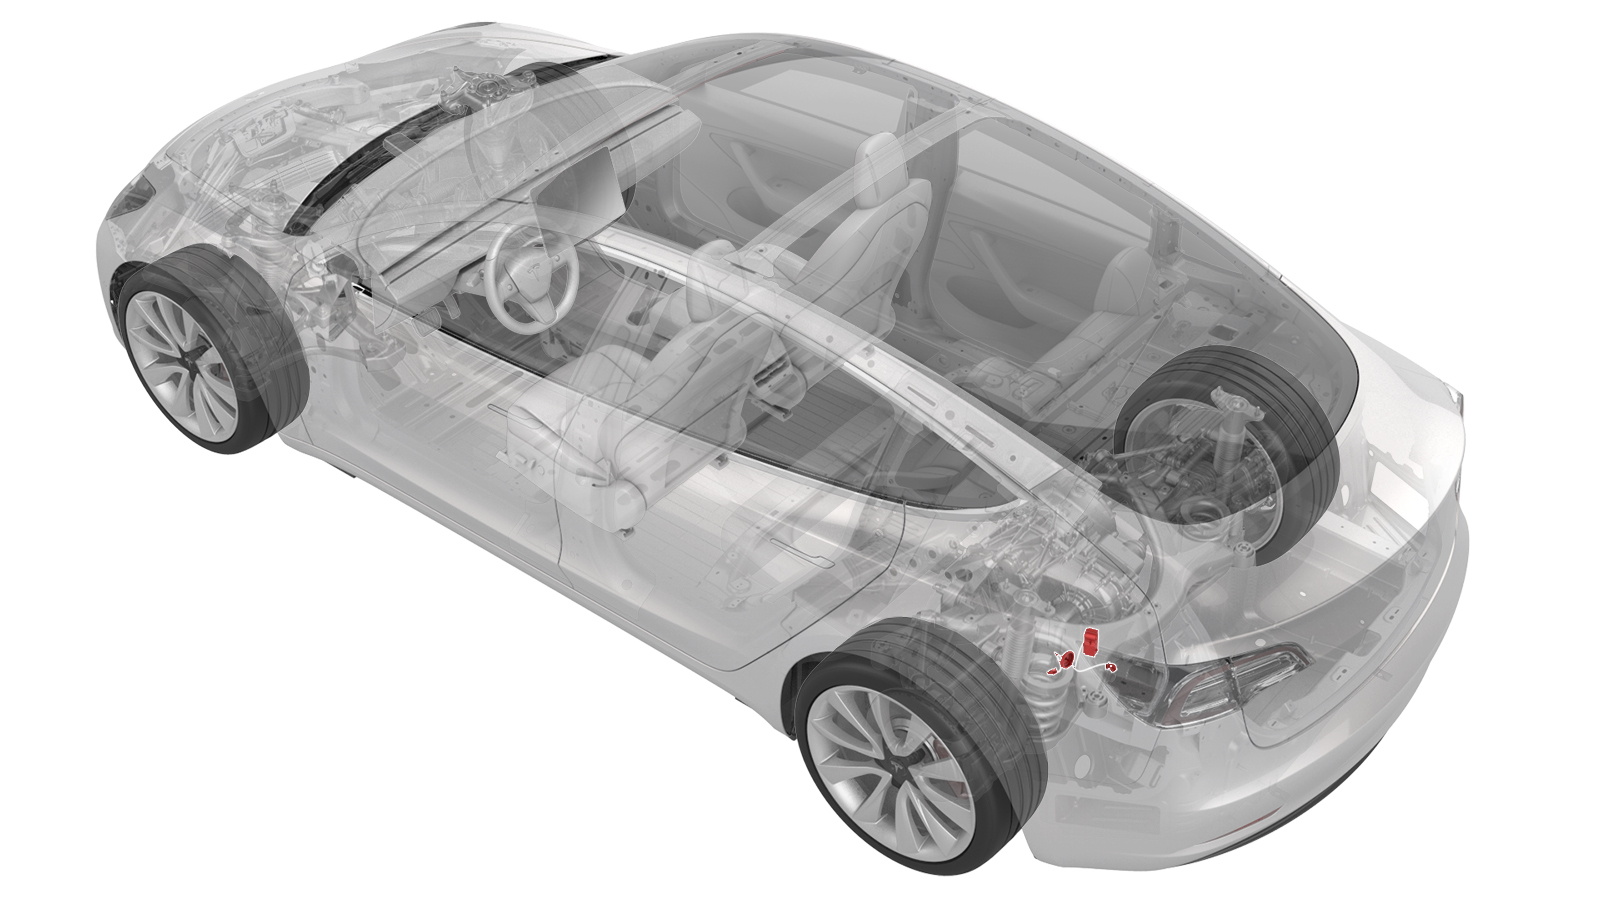
Remove
-
Release the clip that attaches the low voltage electrical wiring harness to the charge port closeout panel.
-
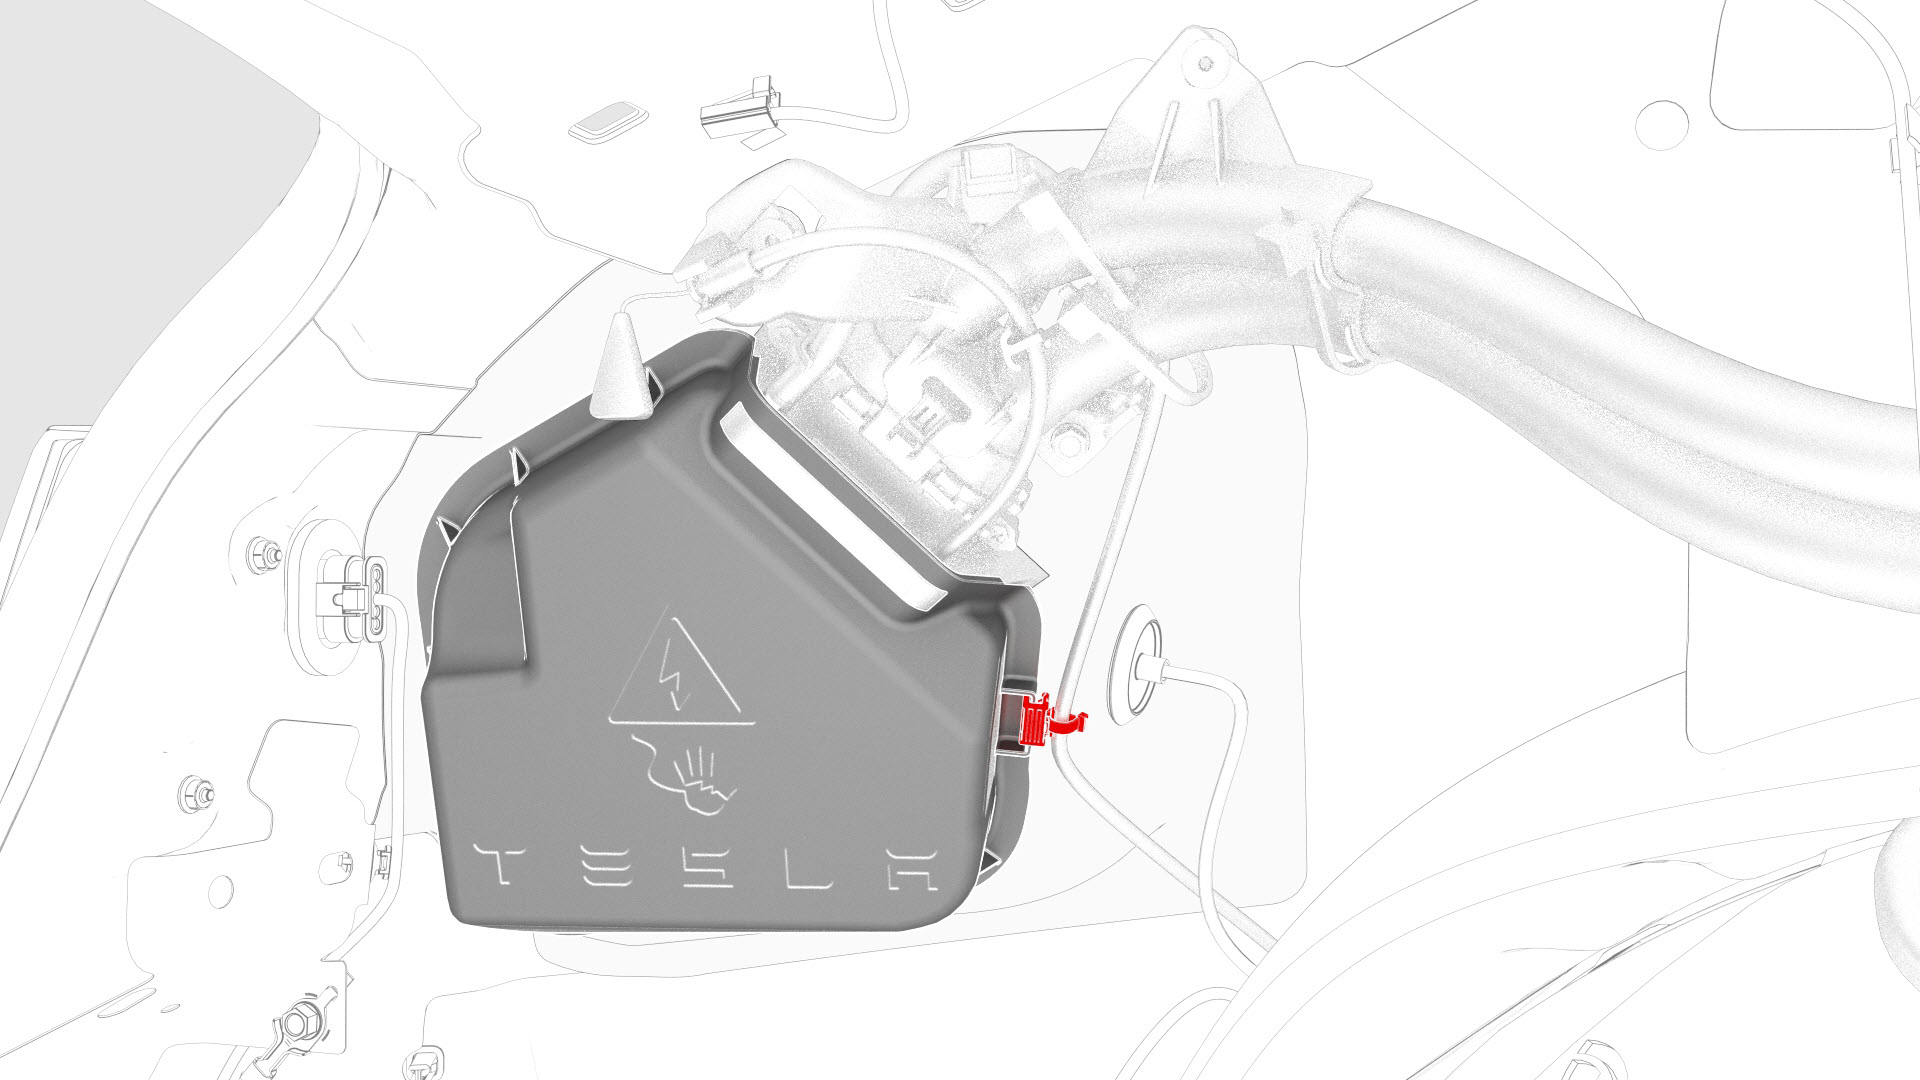
Release the tabs around the charge port closeout panel, and then remove the panel from the vehicle.
-
Remove the bolt that attaches the charge port electrical ground to the body.
-
Remove the bolts that attach the charge port assembly to the body.
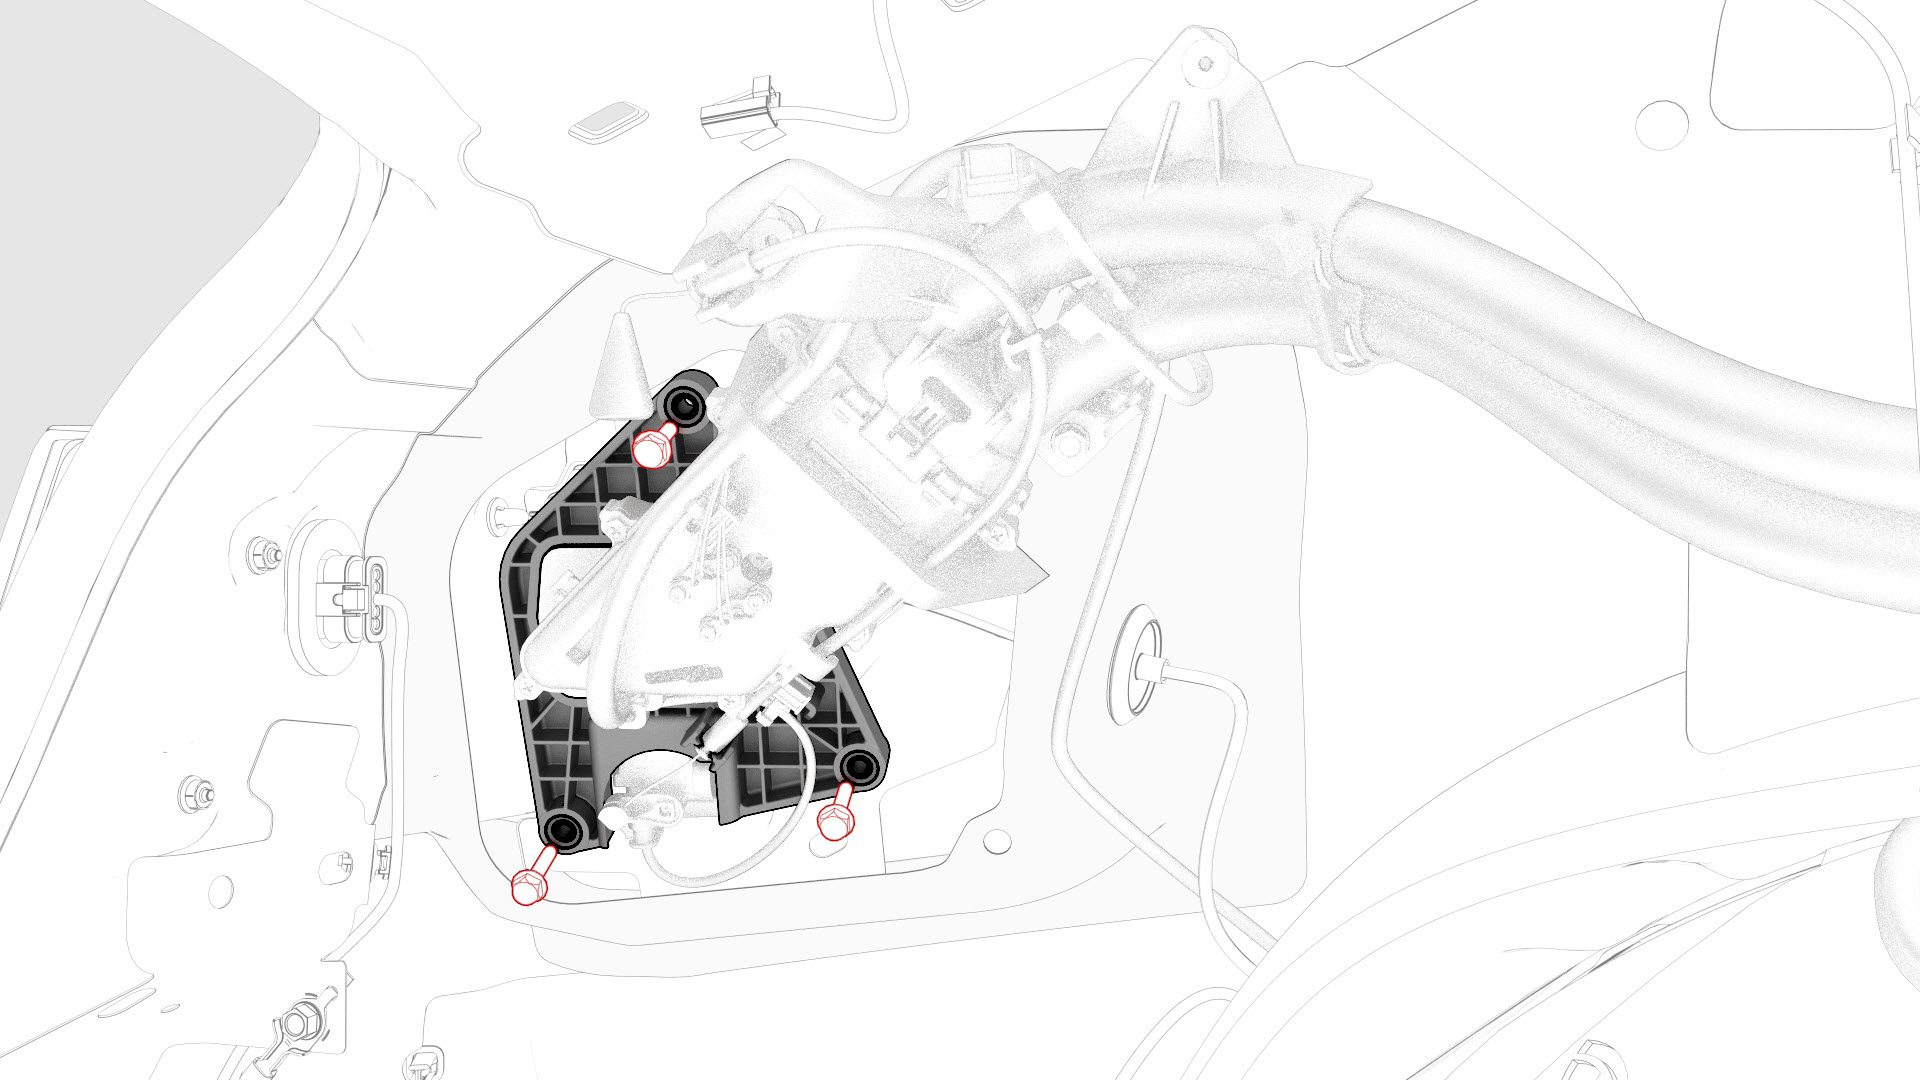
-
Remove the bolt that attaches the charge port bracket to the body.

-
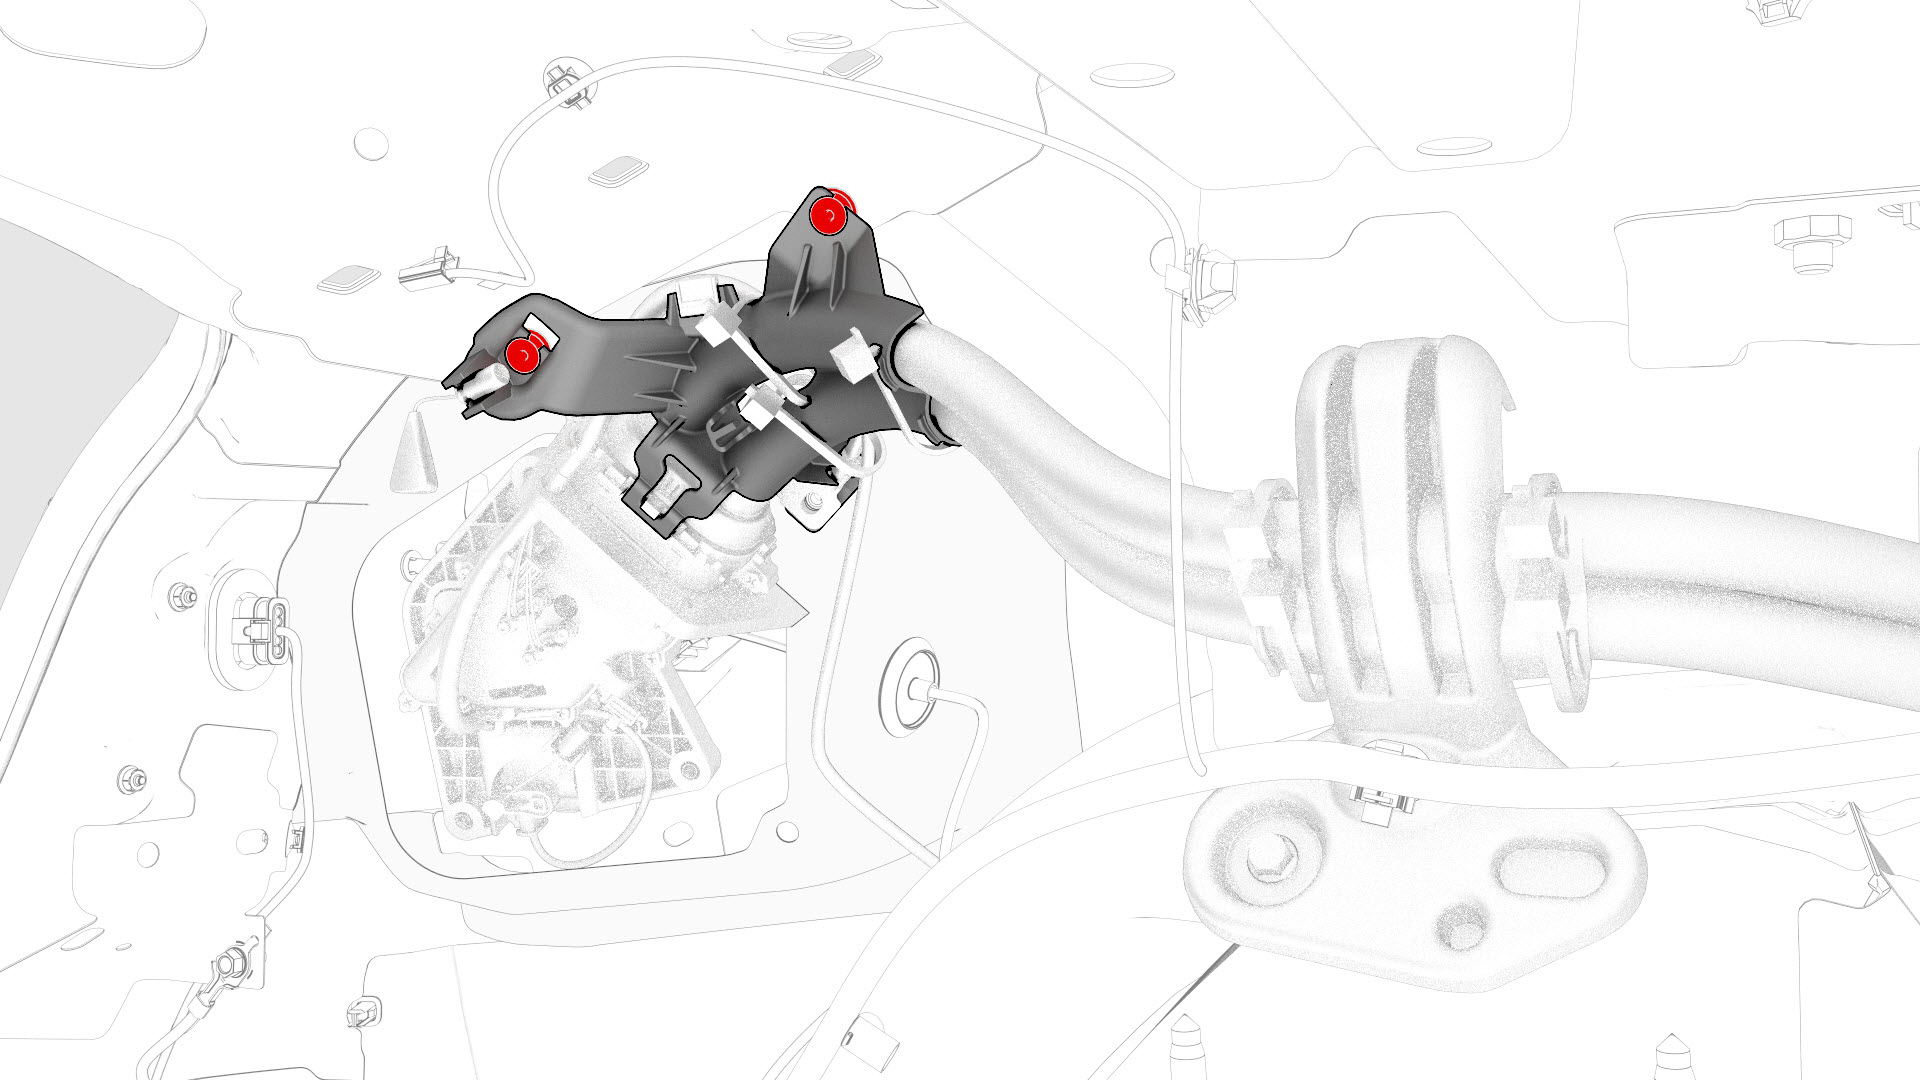
Release the clips that attach the charge port electrical wiring harness to the body.
Note: Pull the charge port away from the body for access.
-
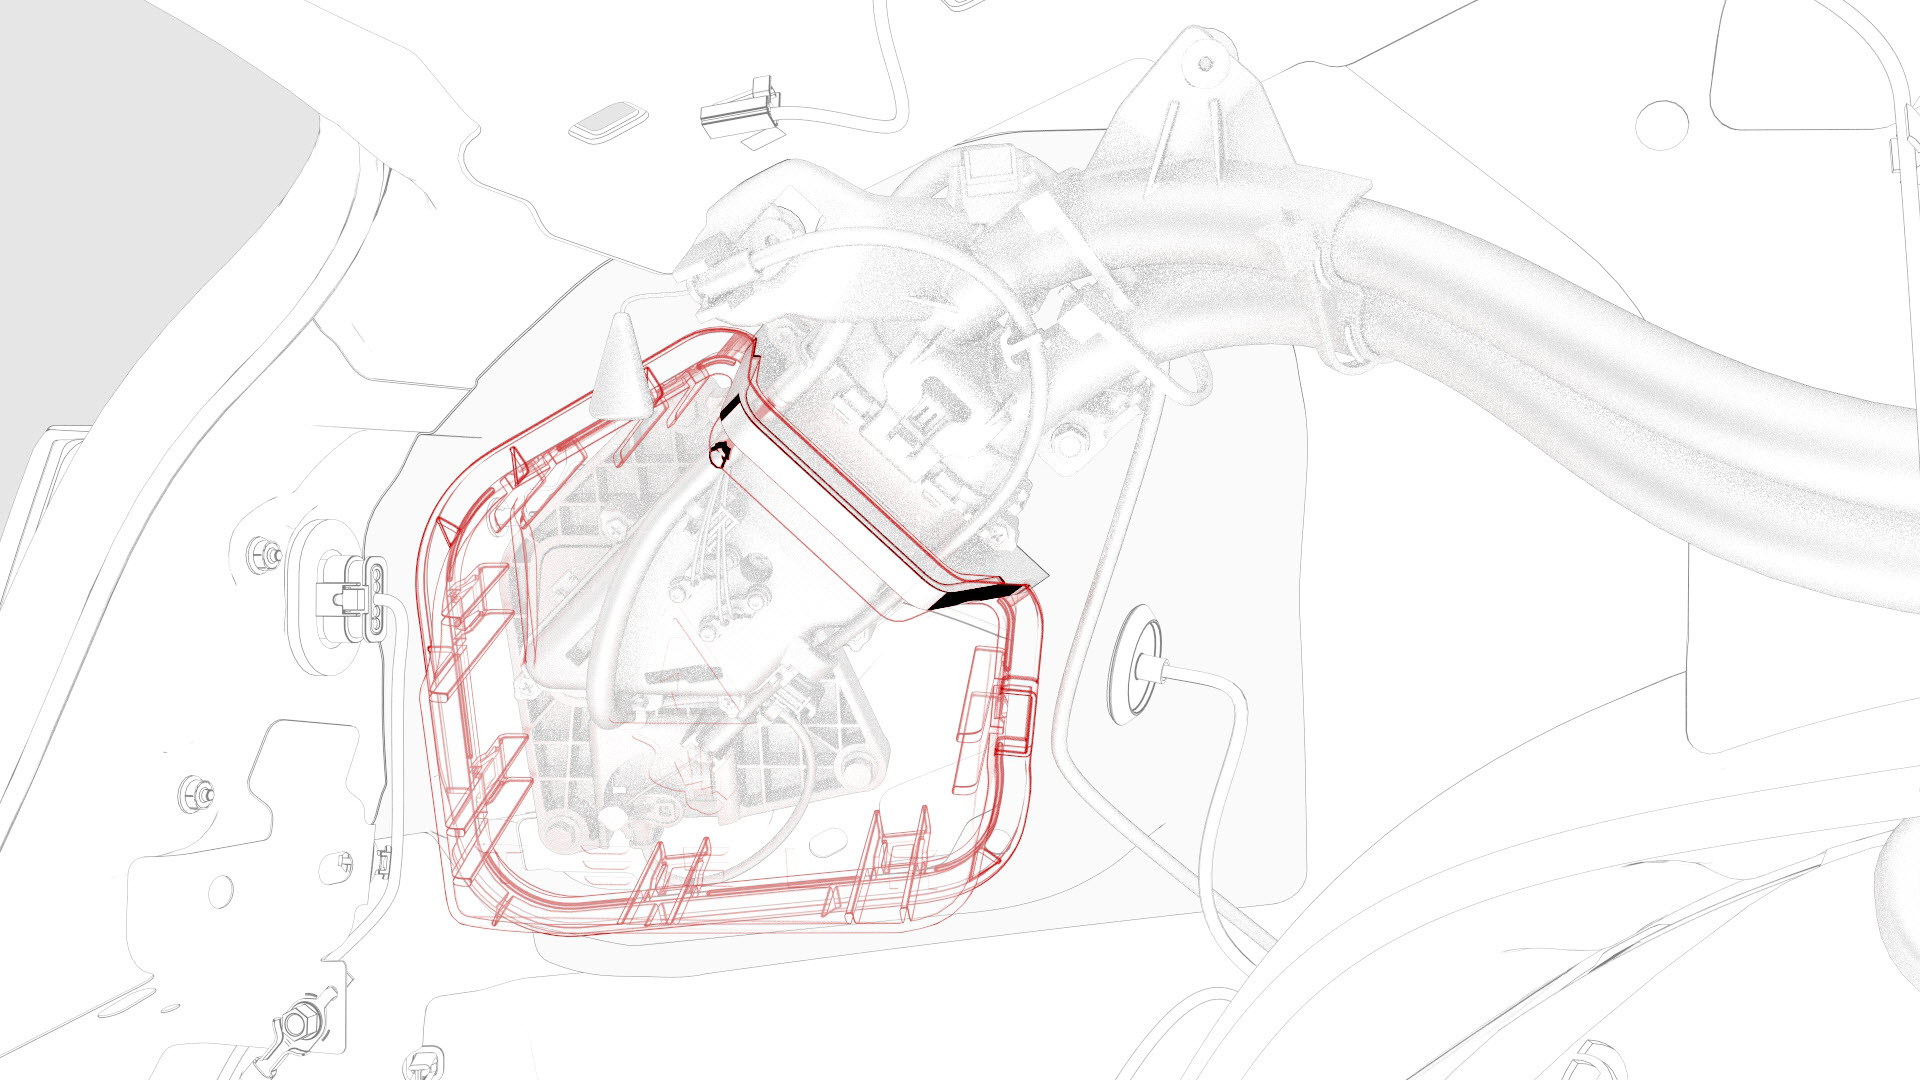
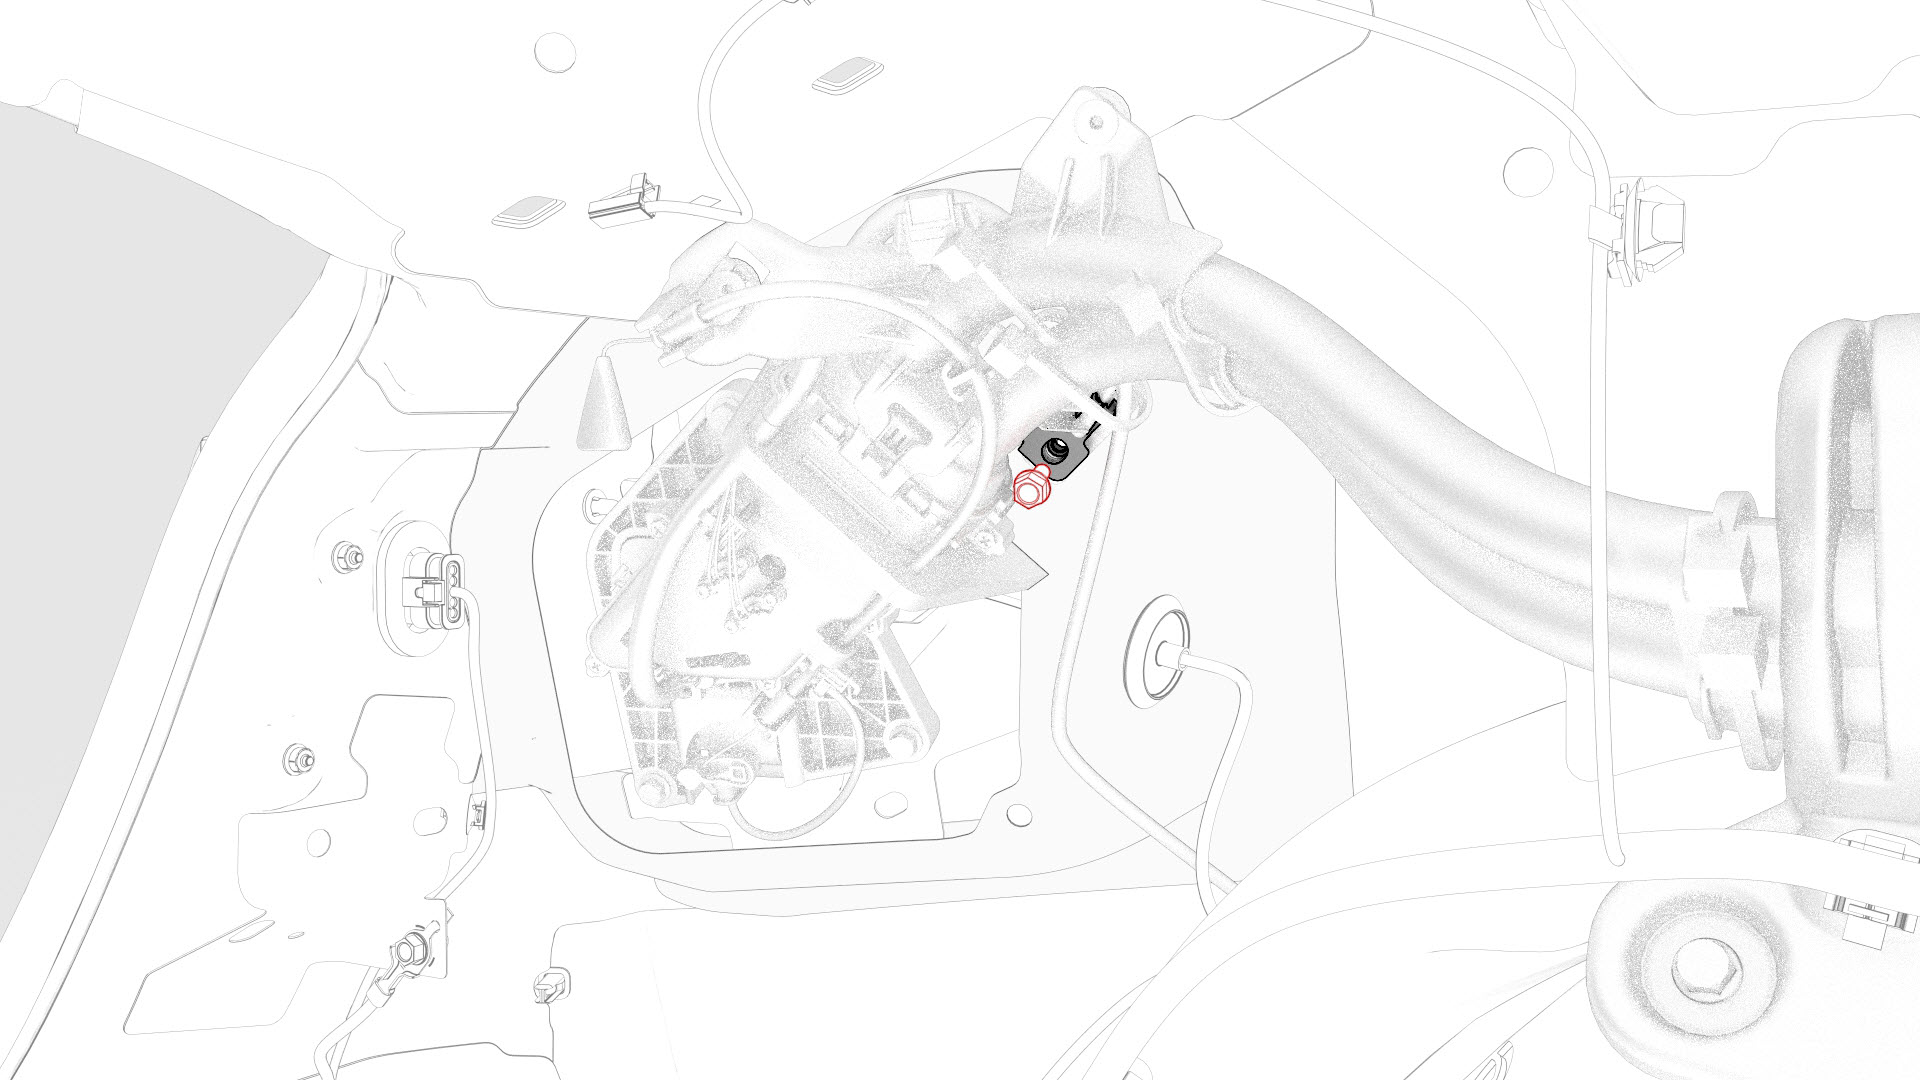
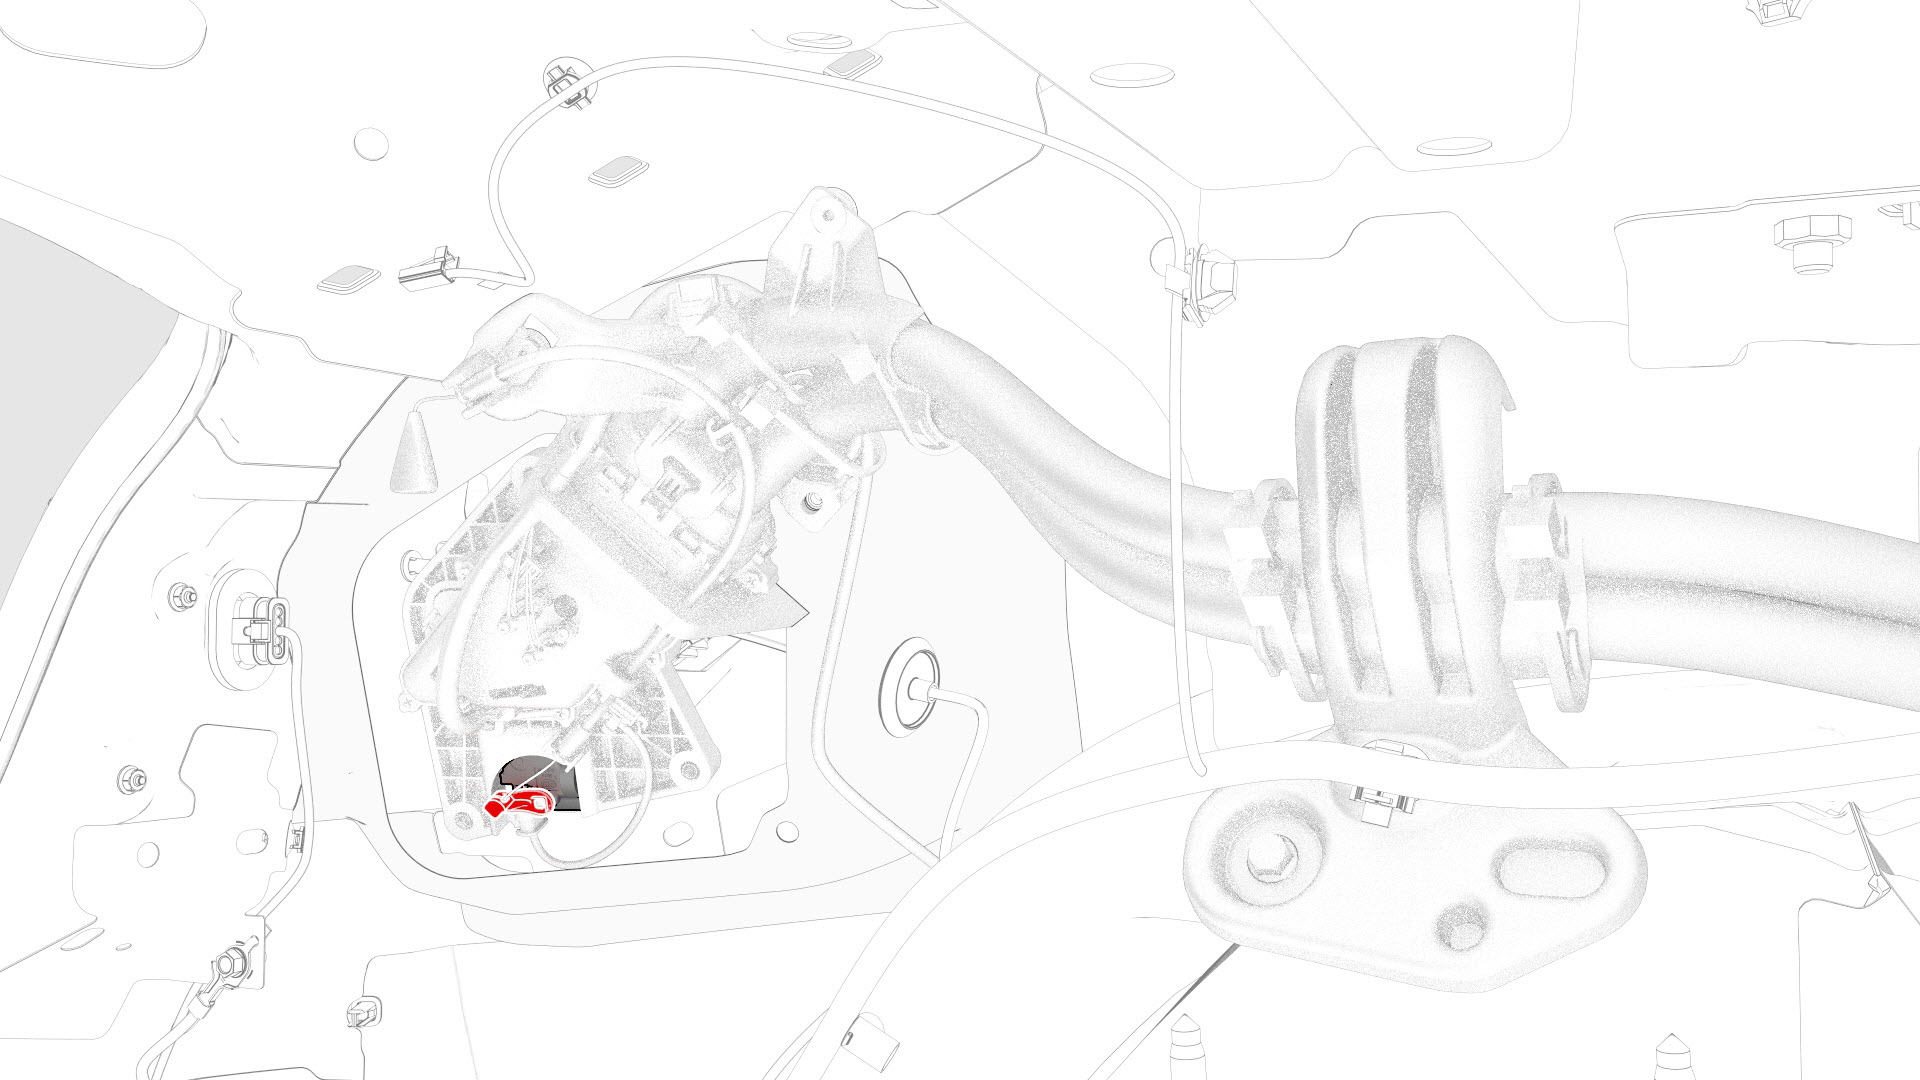
Remove the release arm from the latch actuator.
Note: Note the orientation of the release arm before removing it from the latch actuator.
-
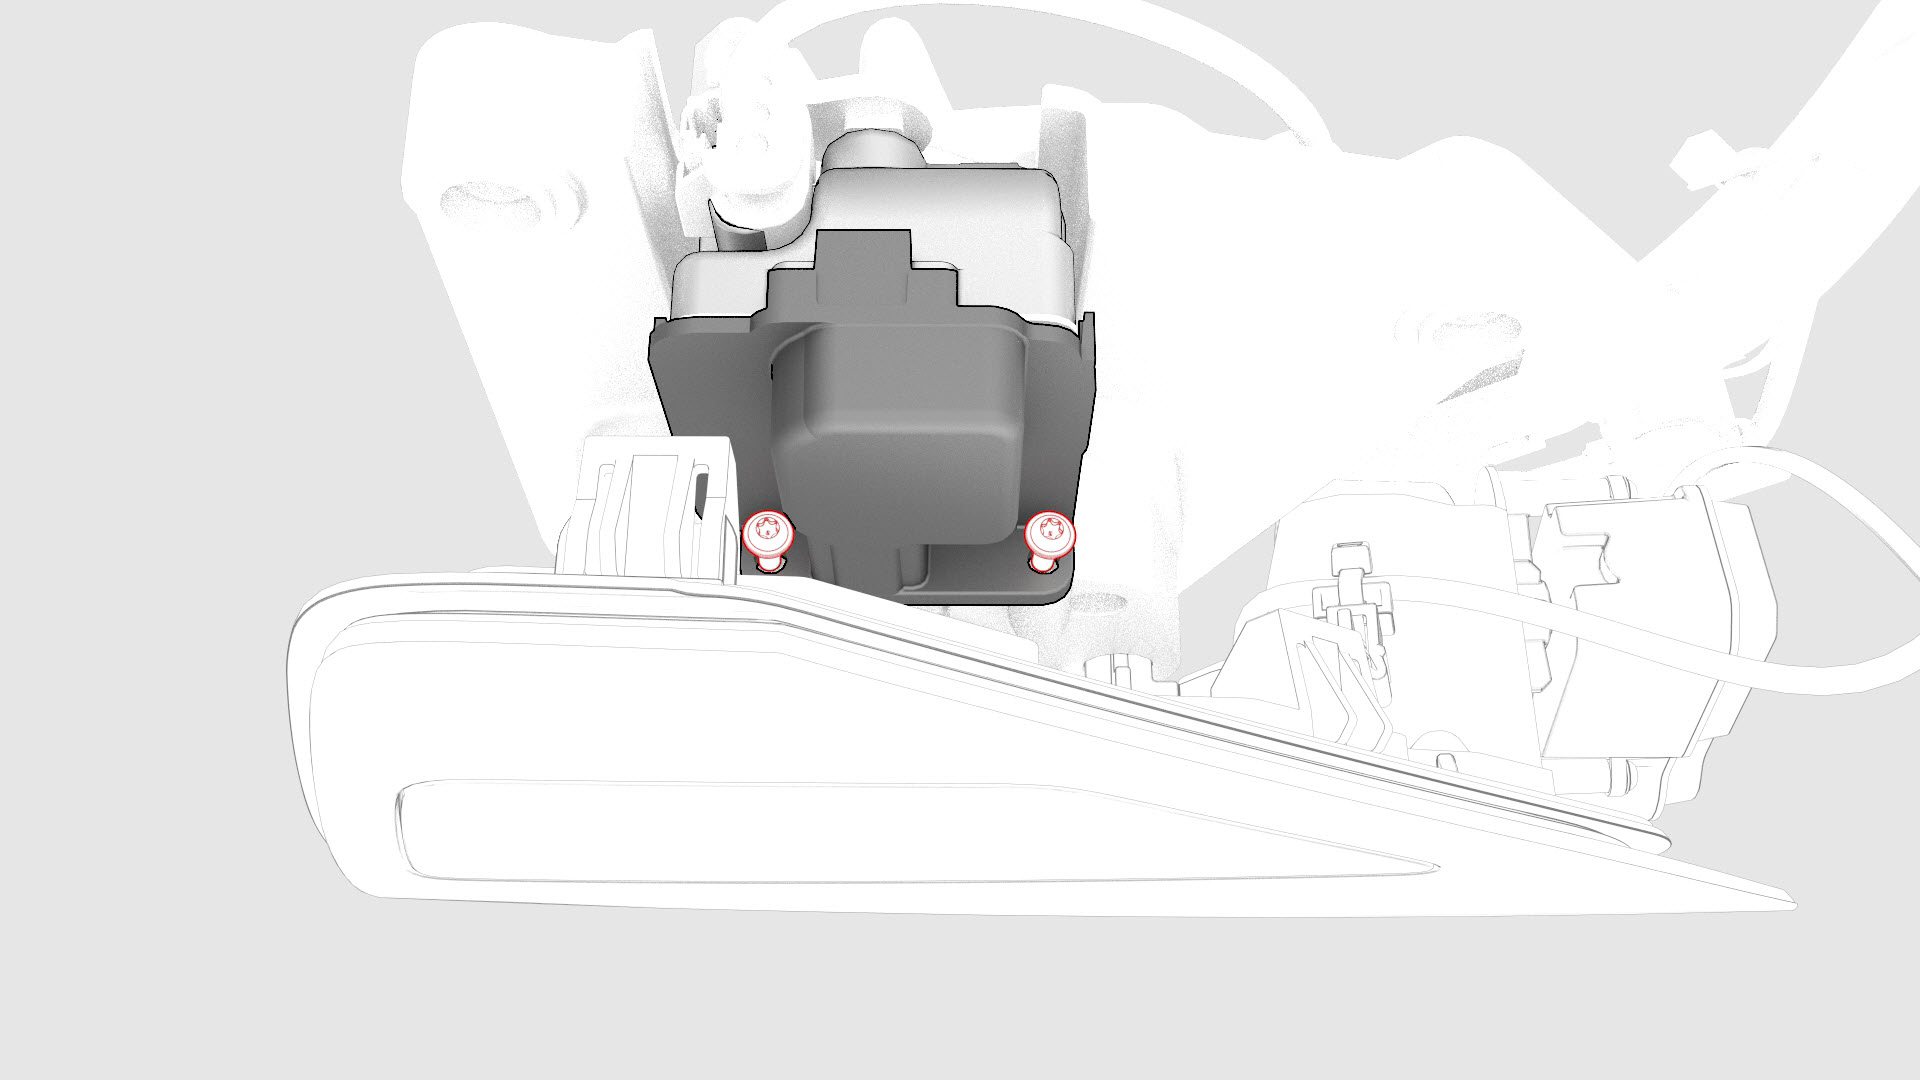
Remove the screws that attach the latch actuator to the charge port, and then remove the latch actuator from the vehicle.

| 1 | Perform the vehicle electrical isolation procedure. See Vehicle Electrical Isolation Procedure. | ||
| 2 | Remove the LH trunk side trim. See Trim - Side - Trunk - LH (Remove and Replace). | ||
| 3 | Release the clip that attaches the low voltage electrical wiring harness to the charge port closeout panel. | |
| 4 | Release the tabs around the charge port closeout panel, and then remove the panel from the vehicle. | |
| 5 | Remove the bolt that attaches the charge port electrical ground to the body. | |
| 6 | Remove the bolts that attach the charge port assembly to the body. | |
| 7 | Remove the bolt that attaches the charge port bracket to the body. | |
| 8 | Release the clips that attach the charge port electrical wiring harness to the body. Note: Pull the charge port away from the body for access.
| |
| 9 | Remove the release arm from the latch actuator. Note: Note the orientation of the release arm before removing it from the latch actuator.
| |
| 10 | Disconnect the electrical harness from the latch actuator connector. | ||
| 11 | Remove the screws that attach the latch actuator to the charge port, and then remove the latch actuator from the vehicle. |
Install
-
Install the screws that attach the latch actuator to the charge port.
 Torque 1.2 Nm
 -
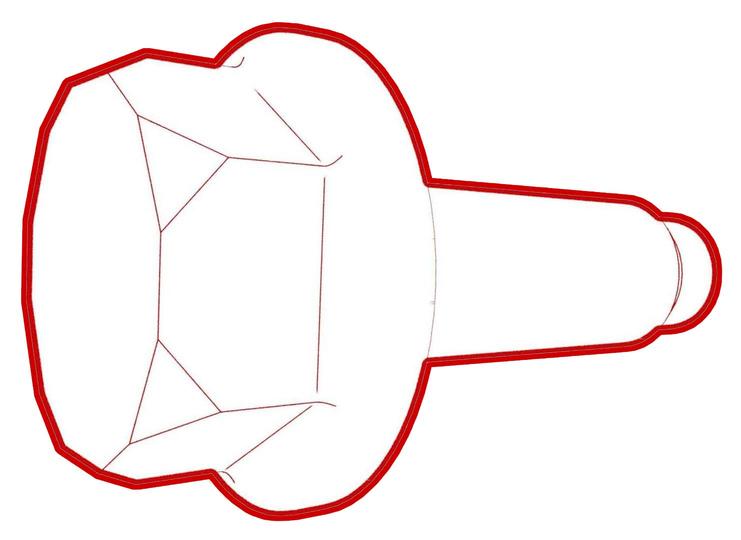
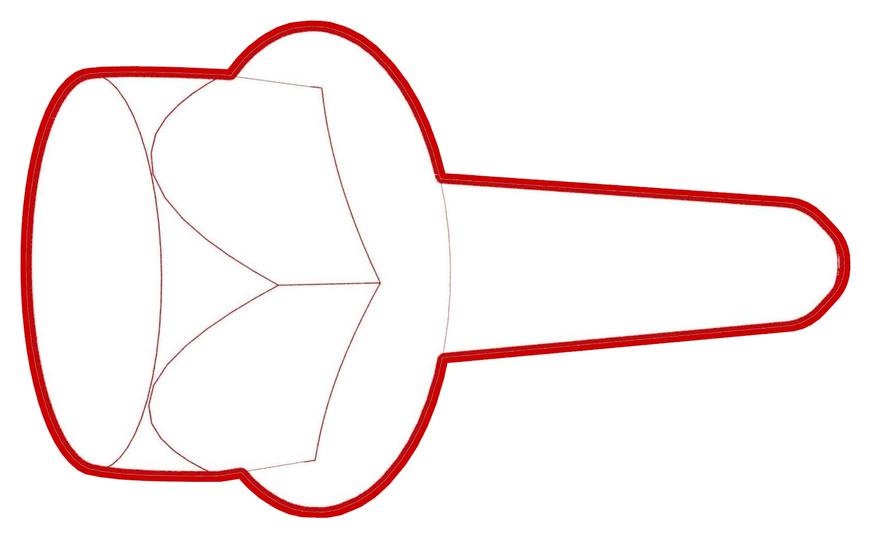
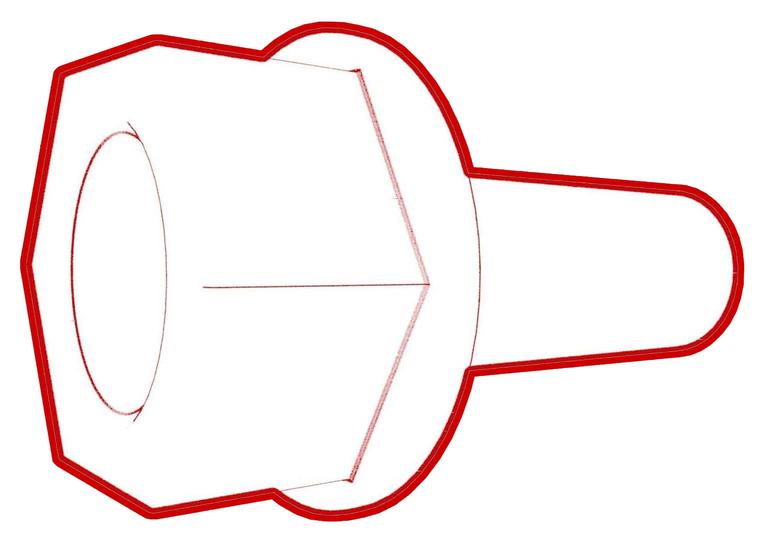
Install the release arm onto the latch actuator in the same position as when it was removed.
Note: After installation, manually rotate the release arm and check that the latch actuator moves.
 Caution:Ensure the latch actuator is oriented correctly, as shown below. Incorrect installation can result in inability to properly latch.
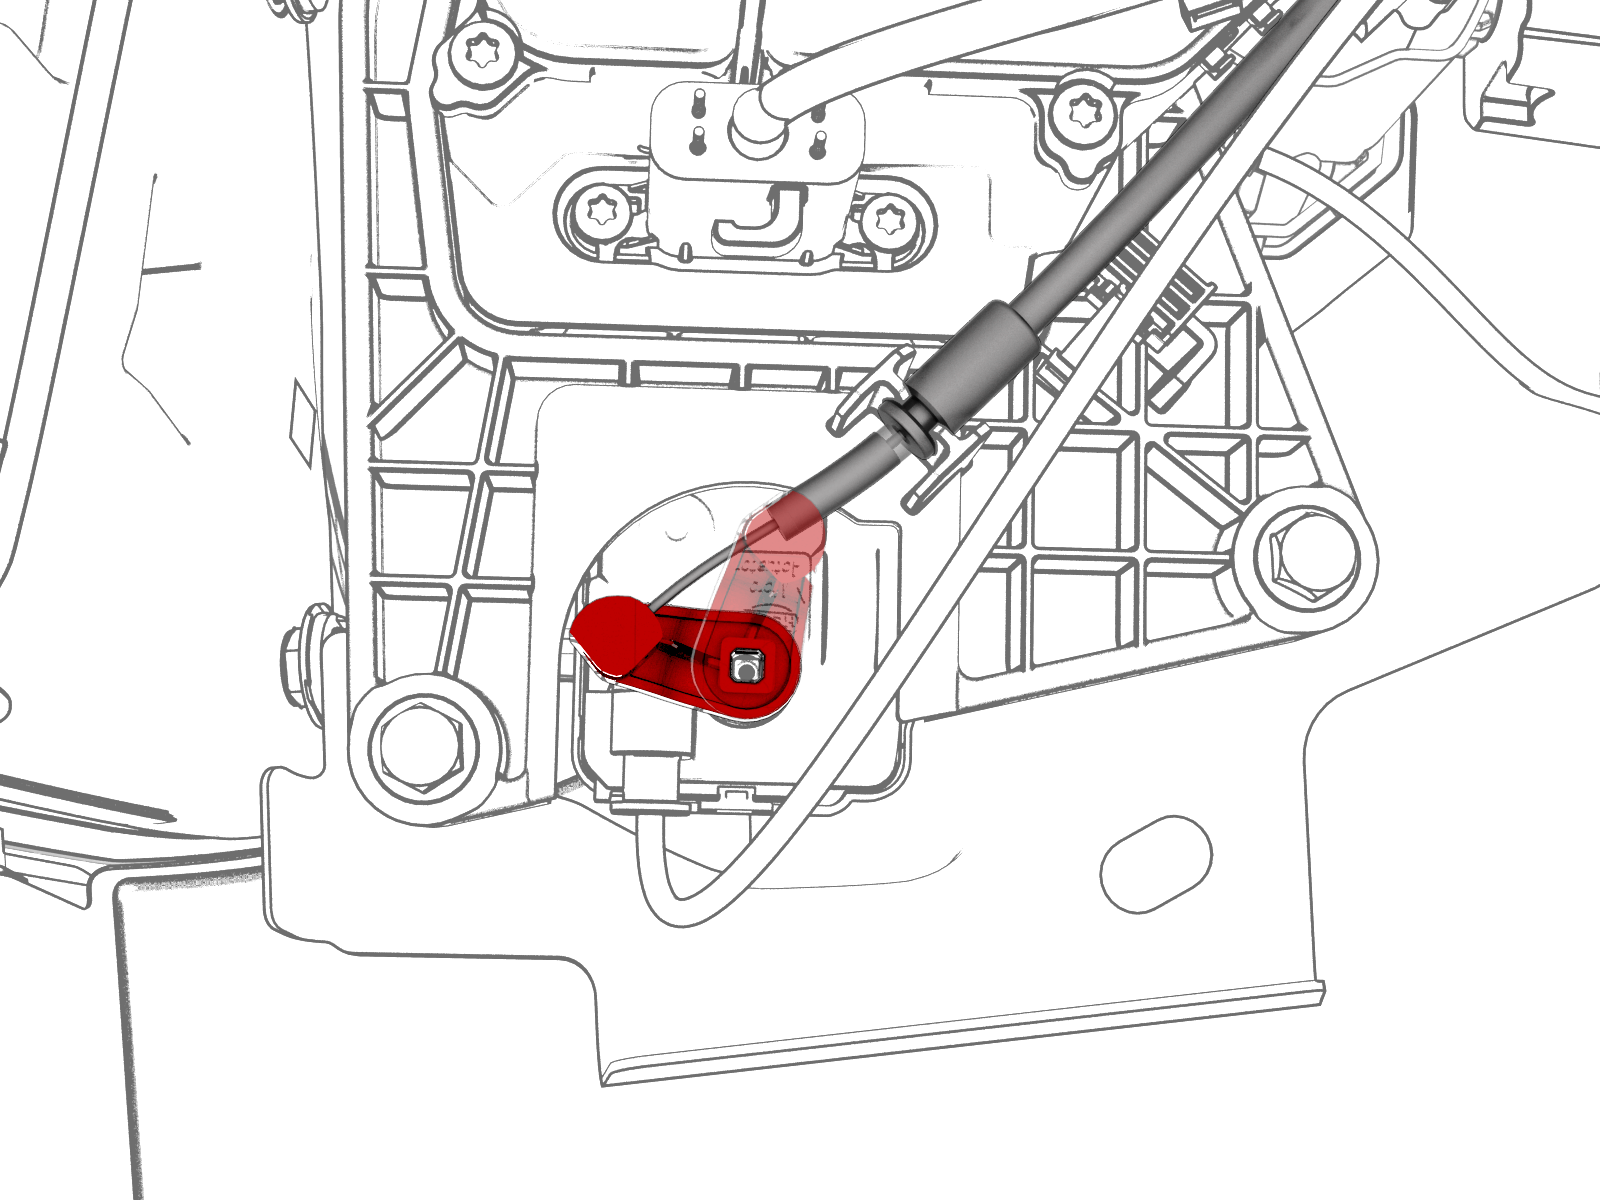
-
Install the bolt that attaches the charge port bracket to the body.
 Torque 6 Nm
 -
Install the clips that attach the charge port electrical wiring harness to the body.
-
Install the bolts that attach the charge port assembly to the body.
 Torque 6 Nm
 -
Install the bolt that attaches the charge port electrical ground to the body.
 Torque 6 Nm
 -
Install the charge port closeout panel to the vehicle. Secure the panel with clips (x7).
-
Install the low voltage electrical wiring harness clip to the charge port closeout panel.
| 1 | Install the new latch actuator to the vehicle. | ||
| 2 | Install the screws that attach the latch actuator to the charge port. Torque 1.2 Nm | |
| 3 | Connect the latch actuator electrical harness connector. | ||
| 4 | Install the release arm onto the latch actuator in the same position as when it was removed. Note: After installation, manually rotate the release arm and check that the latch actuator moves.
Caution: Ensure the latch actuator is oriented correctly, as shown below. Incorrect installation can result in inability to properly latch.
| |
| 5 | Install the bolt that attaches the charge port bracket to the body. Torque 6 Nm | |
| 6 | Install the clips that attach the charge port electrical wiring harness to the body. | |
| 7 | Install the bolts that attach the charge port assembly to the body. Torque 6 Nm | |
| 8 | Install the bolt that attaches the charge port electrical ground to the body. Torque 6 Nm | |
| 9 | Install the charge port closeout panel to the vehicle. Secure the panel with clips (x7). | |
| 10 | Install the low voltage electrical wiring harness clip to the charge port closeout panel. | |
| 11 | Install the LH trunk side trim. See Trim - Side - Trunk - LH (Remove and Replace). | ||
| 12 | Perform the penthouse air leak test. See Penthouse Air Leak Test. | ||
| 13 | Reconnect 12V power. See 12V Power (Disconnect and Connect). |