Car Computer (Remove and Replace)
Correction code 2115100221151002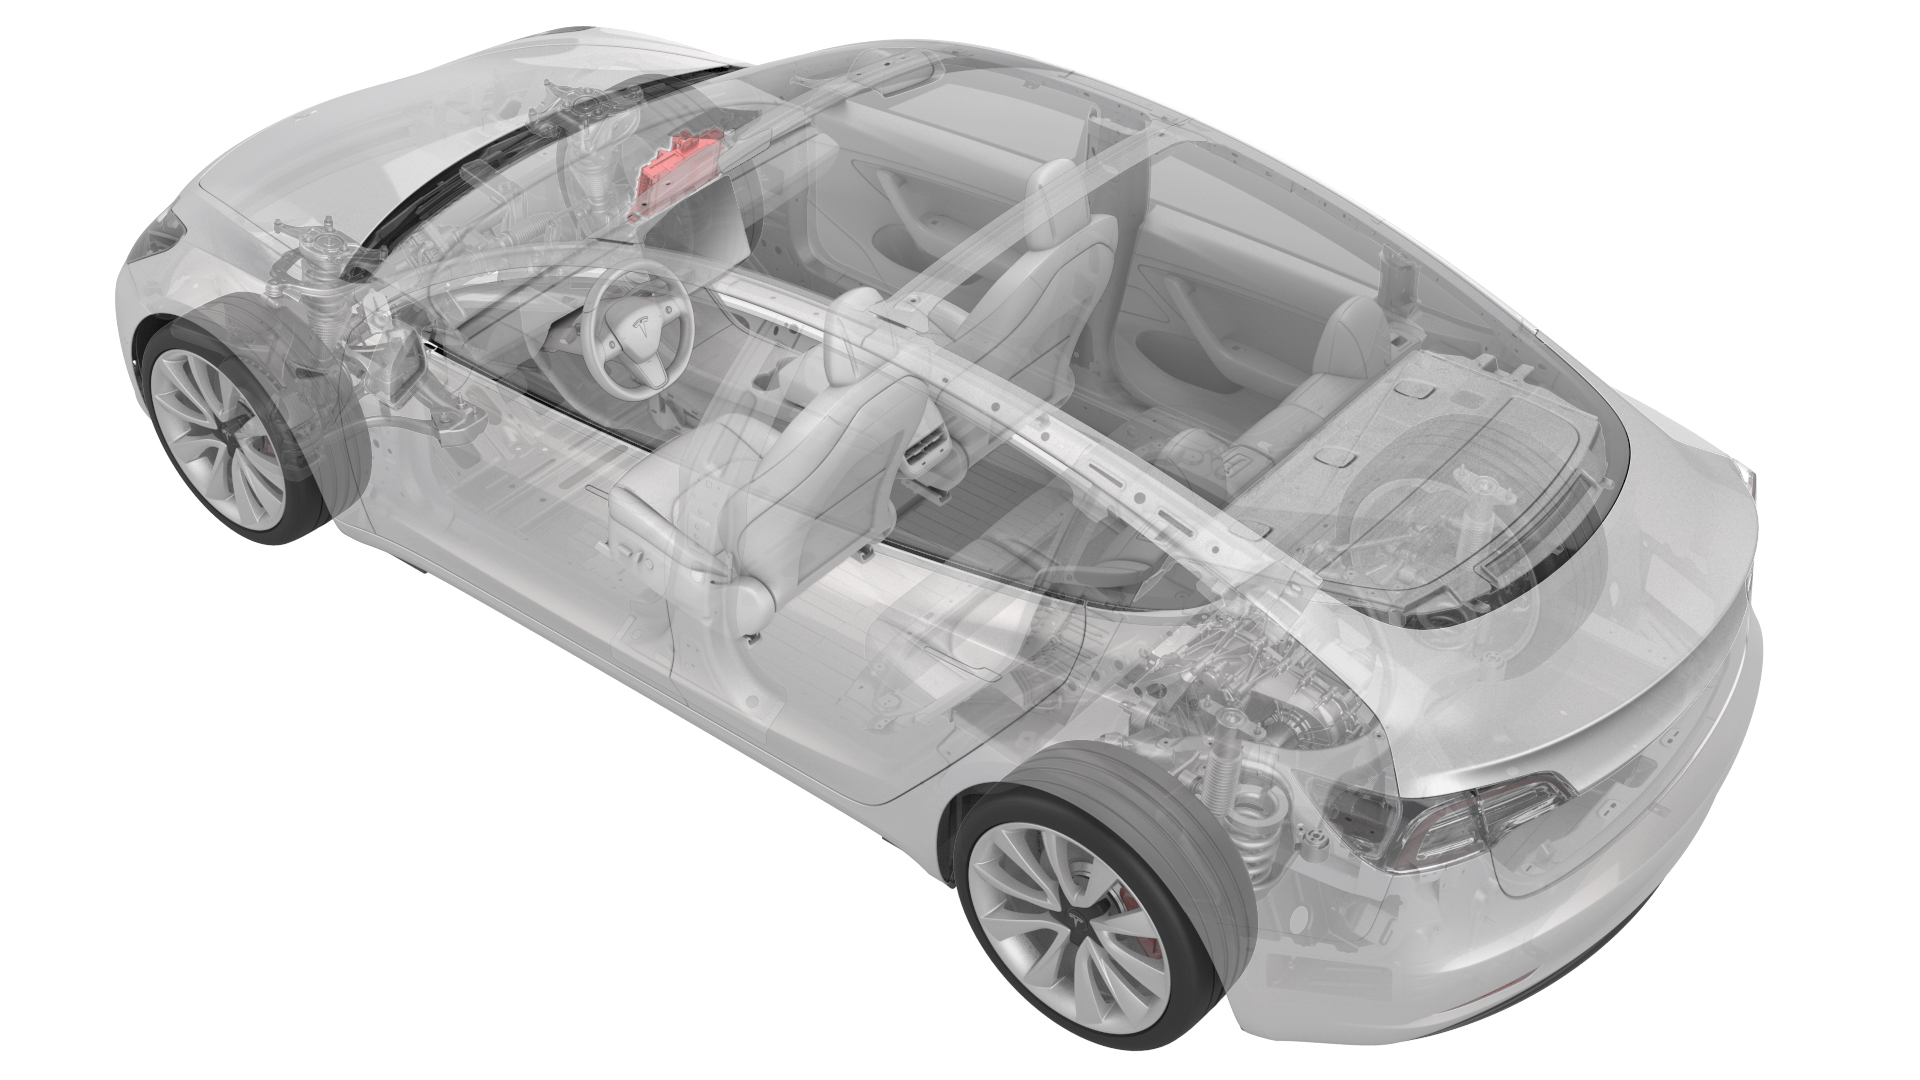
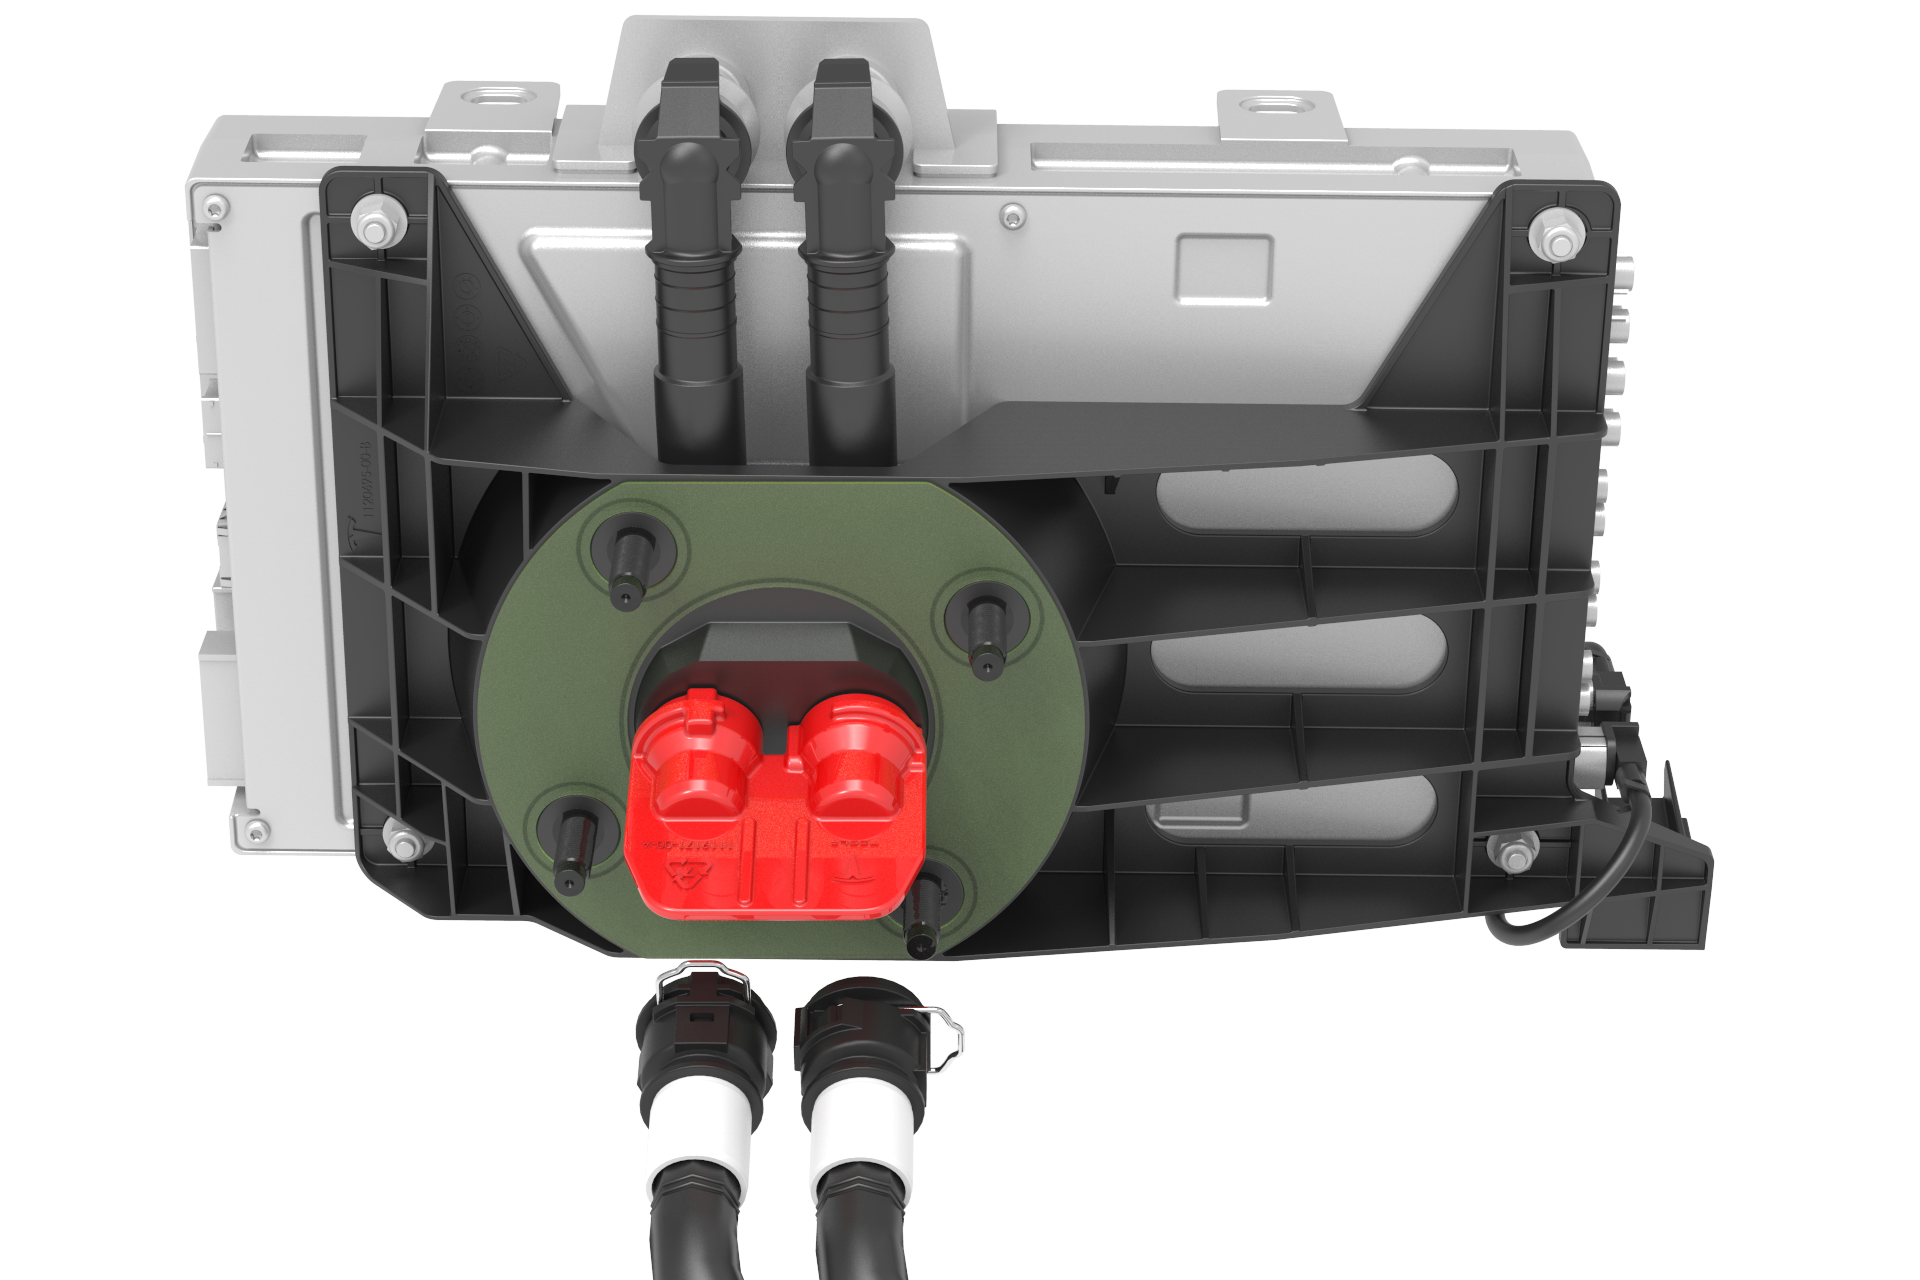
- 1119171-00-APlug,Car Computer Fluid Port
- 1065131-00-A Kit, Battery Coolant Drain & Fill
- 1473522-00-A Kit, Computer Purge Adapters, Model 3
- 1135762-00-AKit, Svc Plug, Cooling Hose, Model 3
SPECIAL TOOLS
Plug,Car Computer Fluid Port (1119171-00-A) |
Kit, Battery Coolant Drain & Fill (1065131-00-A) |
Kit, Computer Purge Adapters, Model 3 (1473522-00-A) |
Kit, Svc Plug, Cooling Hose, Model 3 (1135762-00-A) |
Remove
-
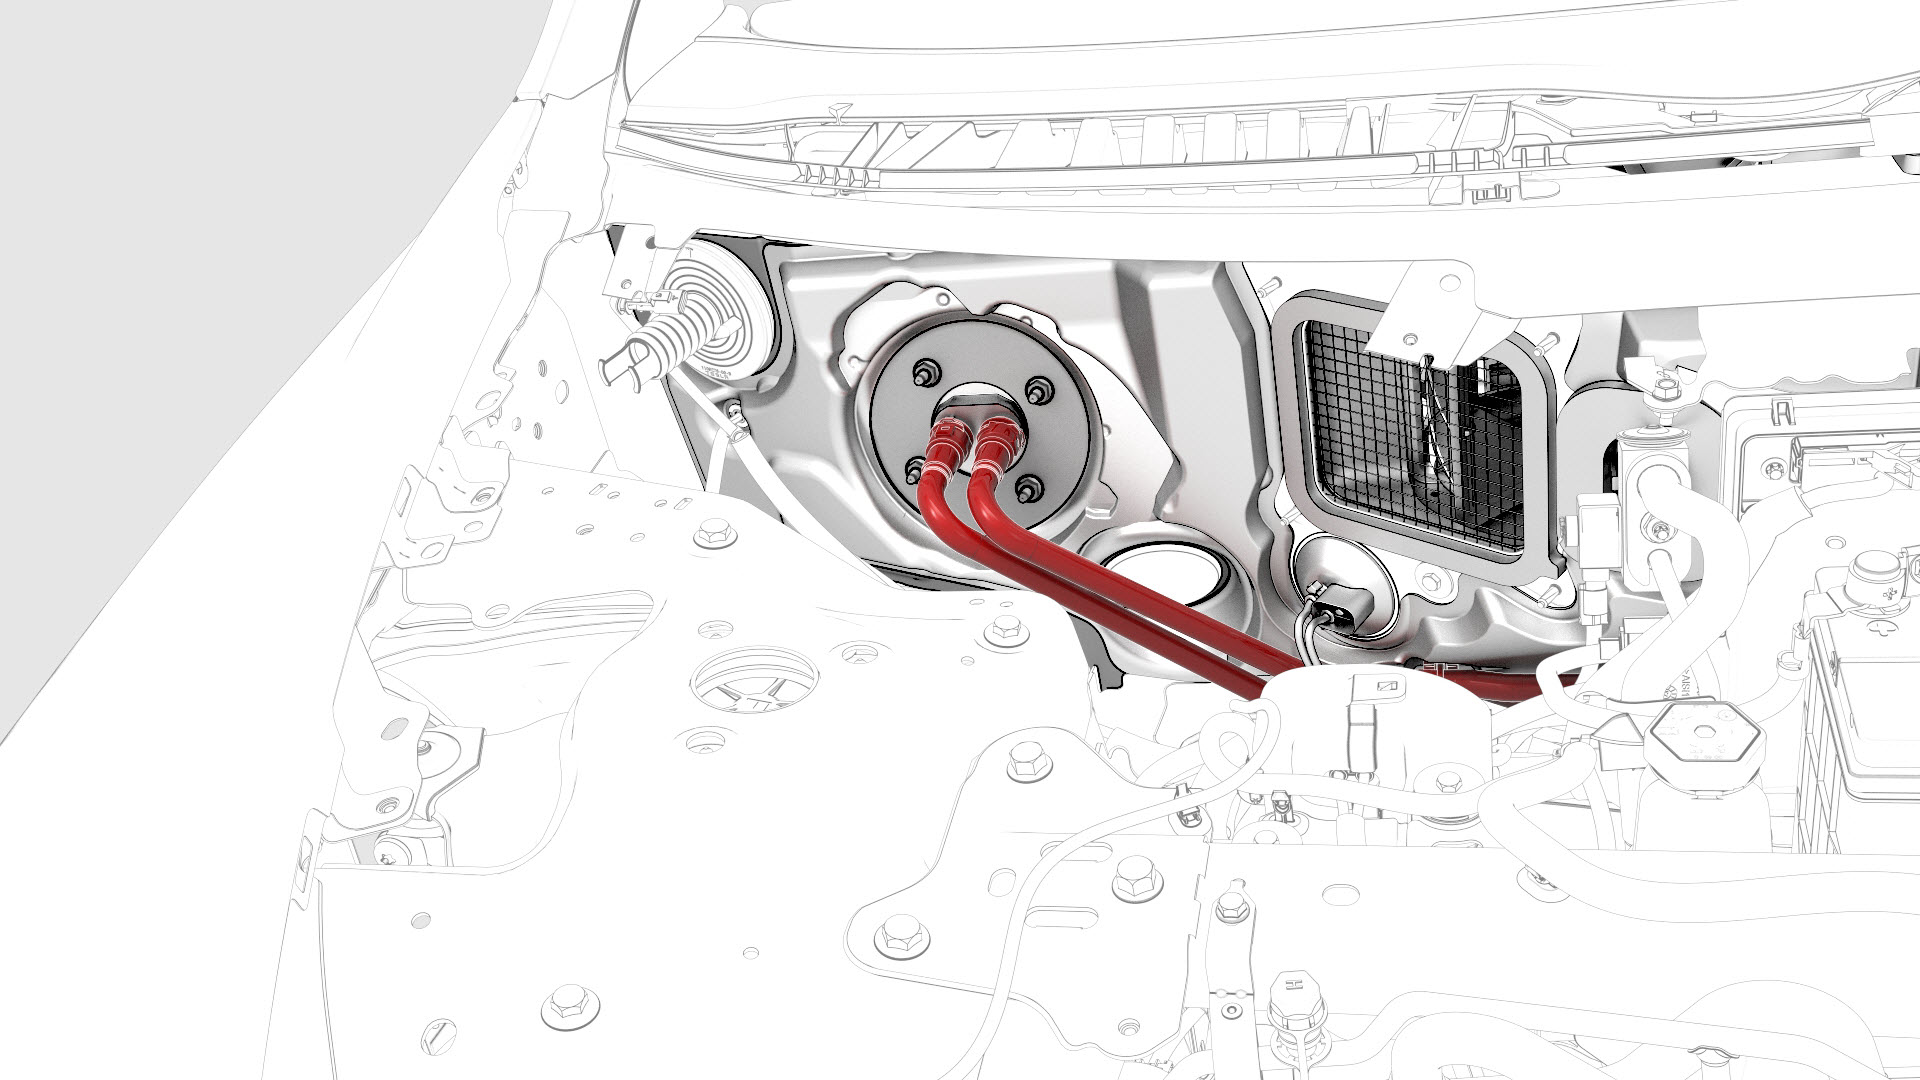
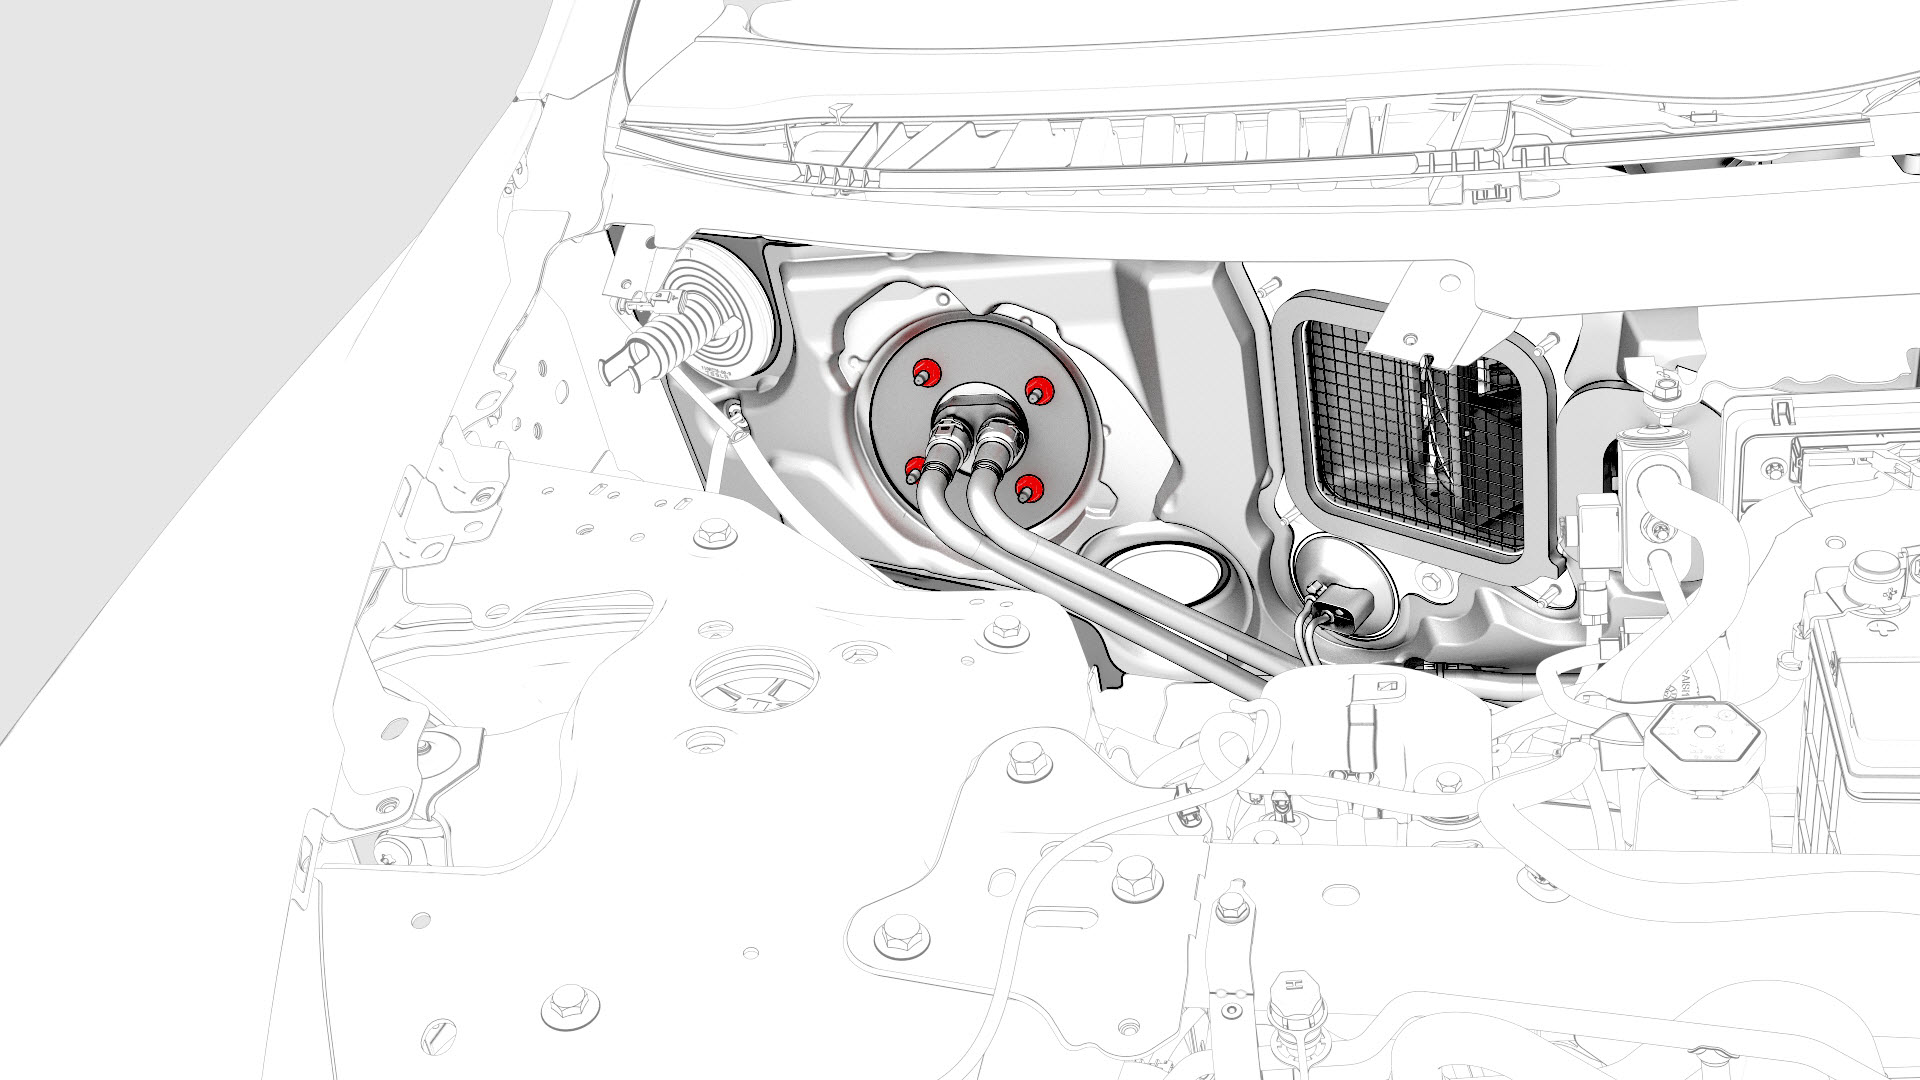
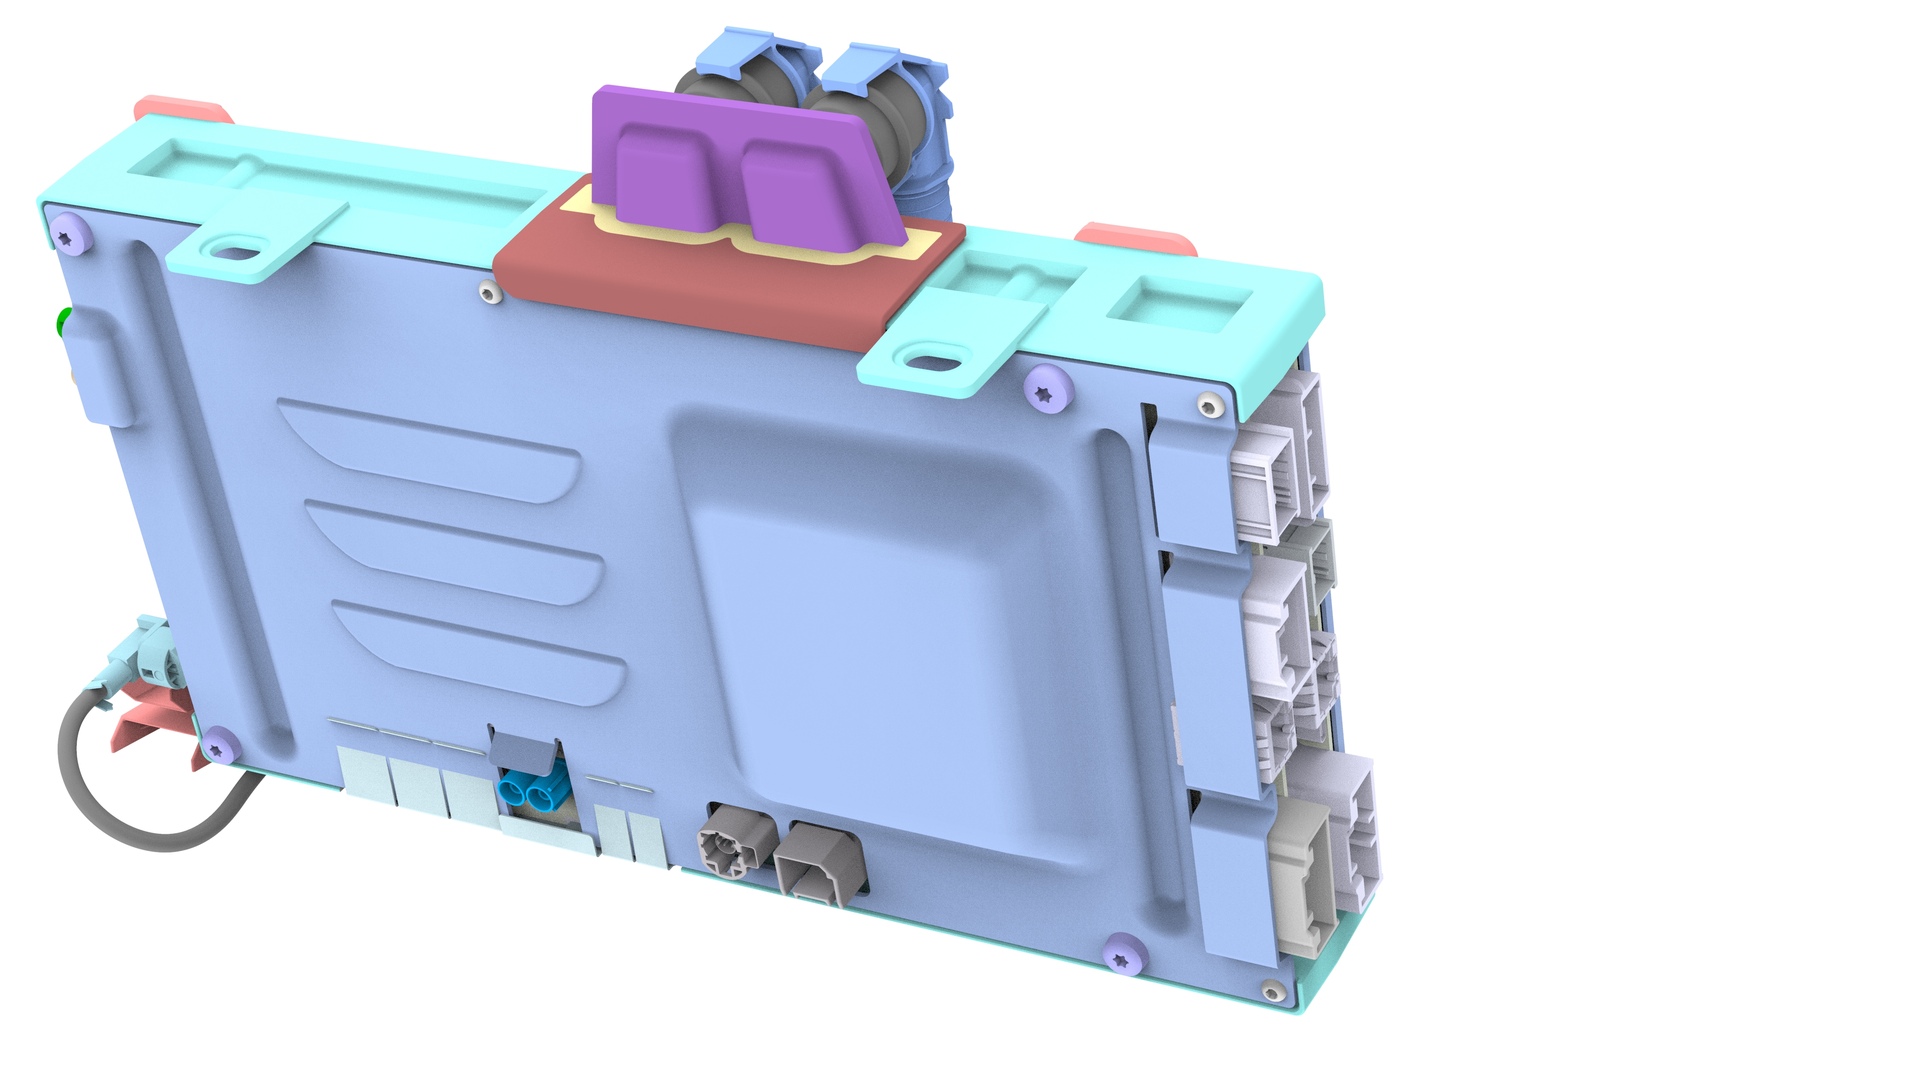
Release the clips on the coolant hoses connected to the car computer, and then disconnect the coolant hoses from the car computer.
-
Install the car computer fluid port plug over the car computer coolant fittings.
-
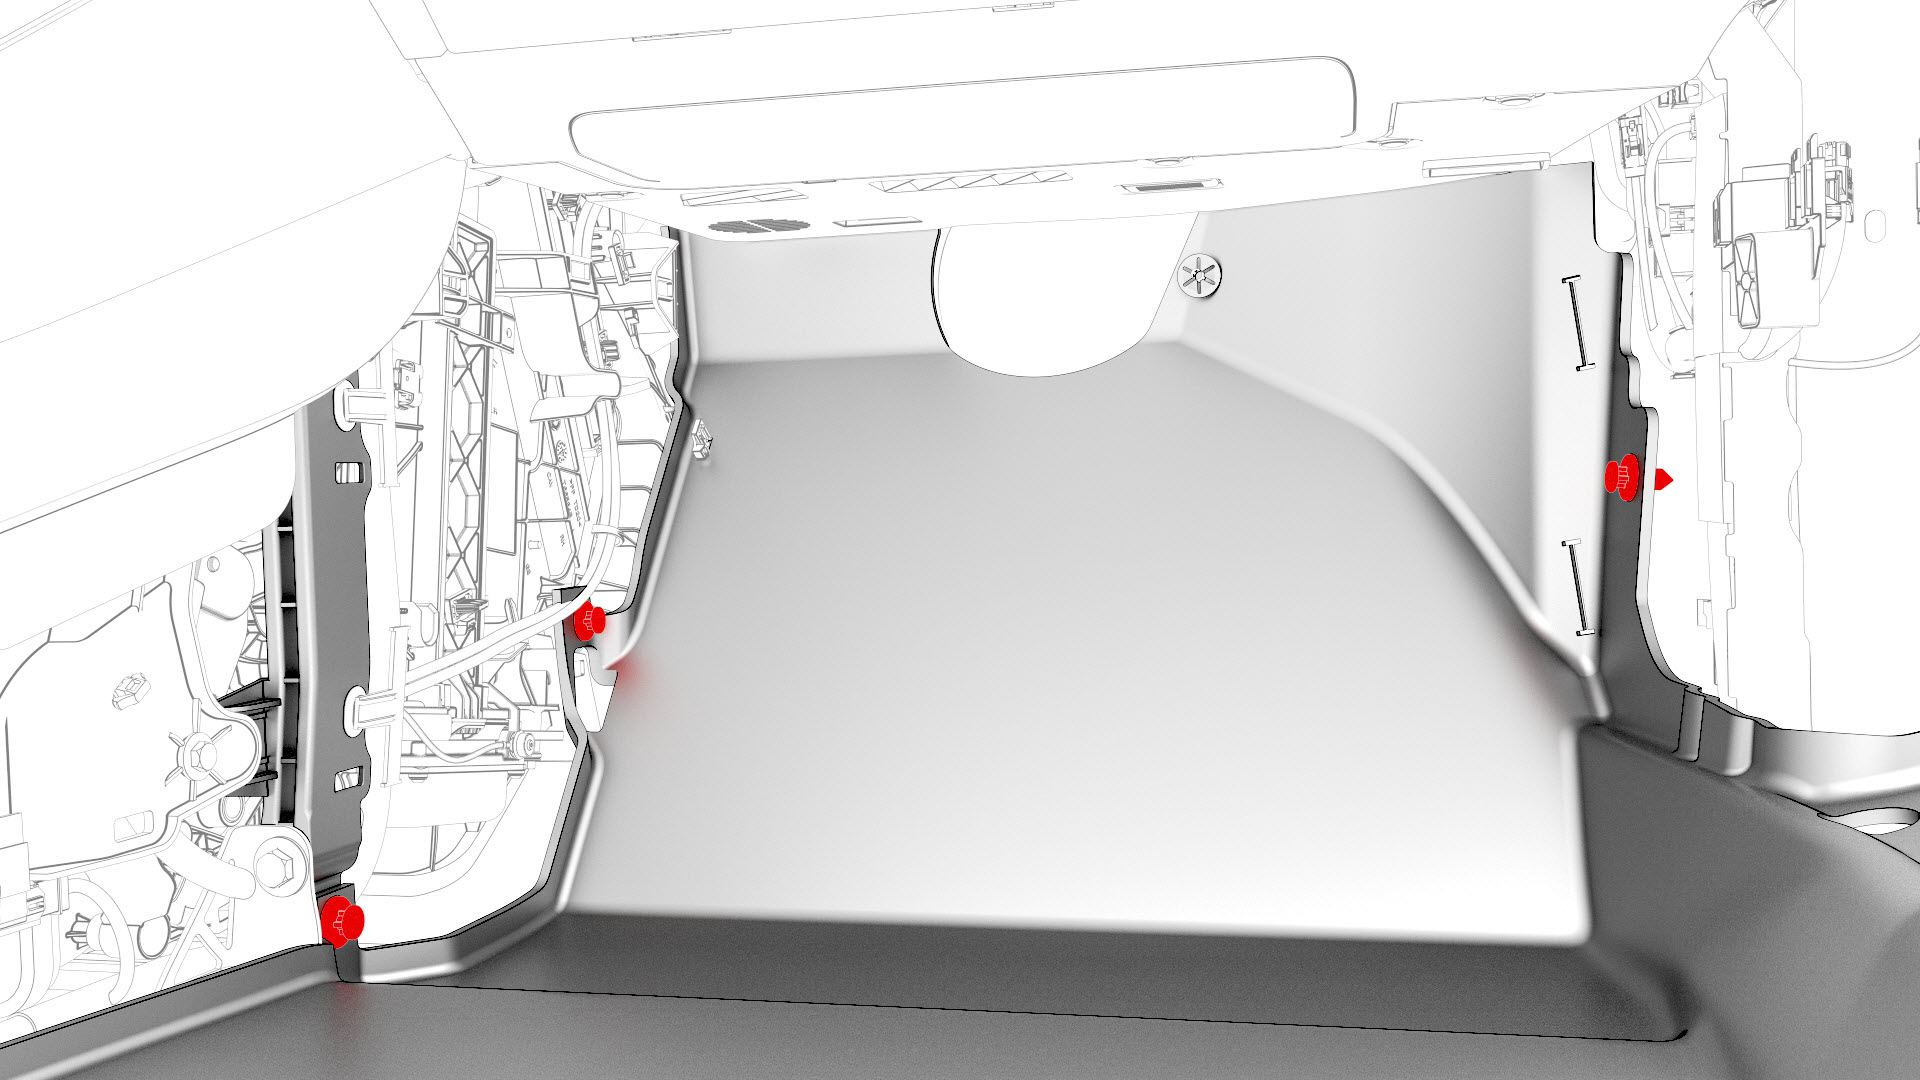
Remove and discard the nuts that attach the car computer to the body.
-
Remove the clips that attach the front RH carpet to the body, and then fold the front RH carpet rearwards.
-
Remove the nuts that attach the RH carpet locator bracket to the body, and then remove the bracket from the vehicle.
 Torque 2.5 Nm
-
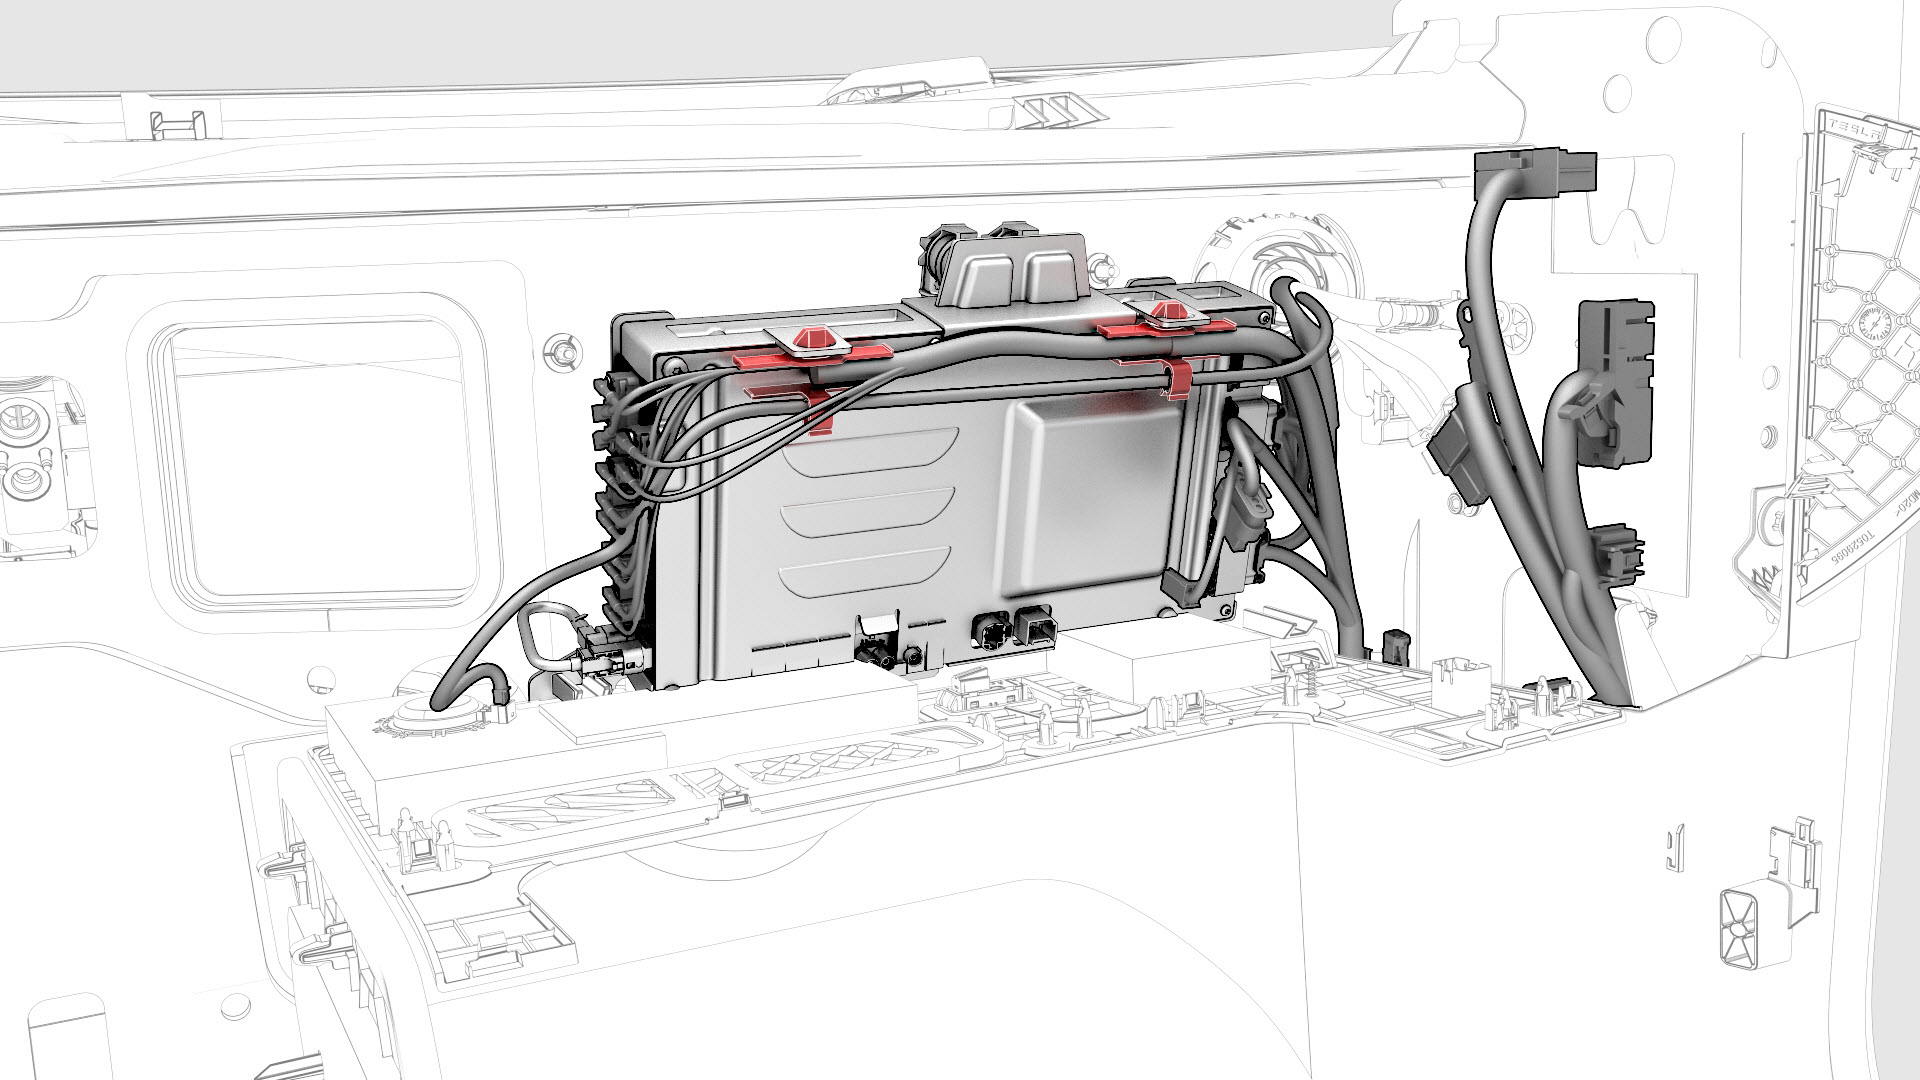
Release the clips that attach the electrical harness to the car computer.
-
Disconnect the electrical harness connectors (x21) from the car computer, and then remove the computer from the vehicle.
 Caution:Avoid spilling coolant on the electrical connectors.Caution:Take care not to damage the passenger airbag harness and connectors during removal.
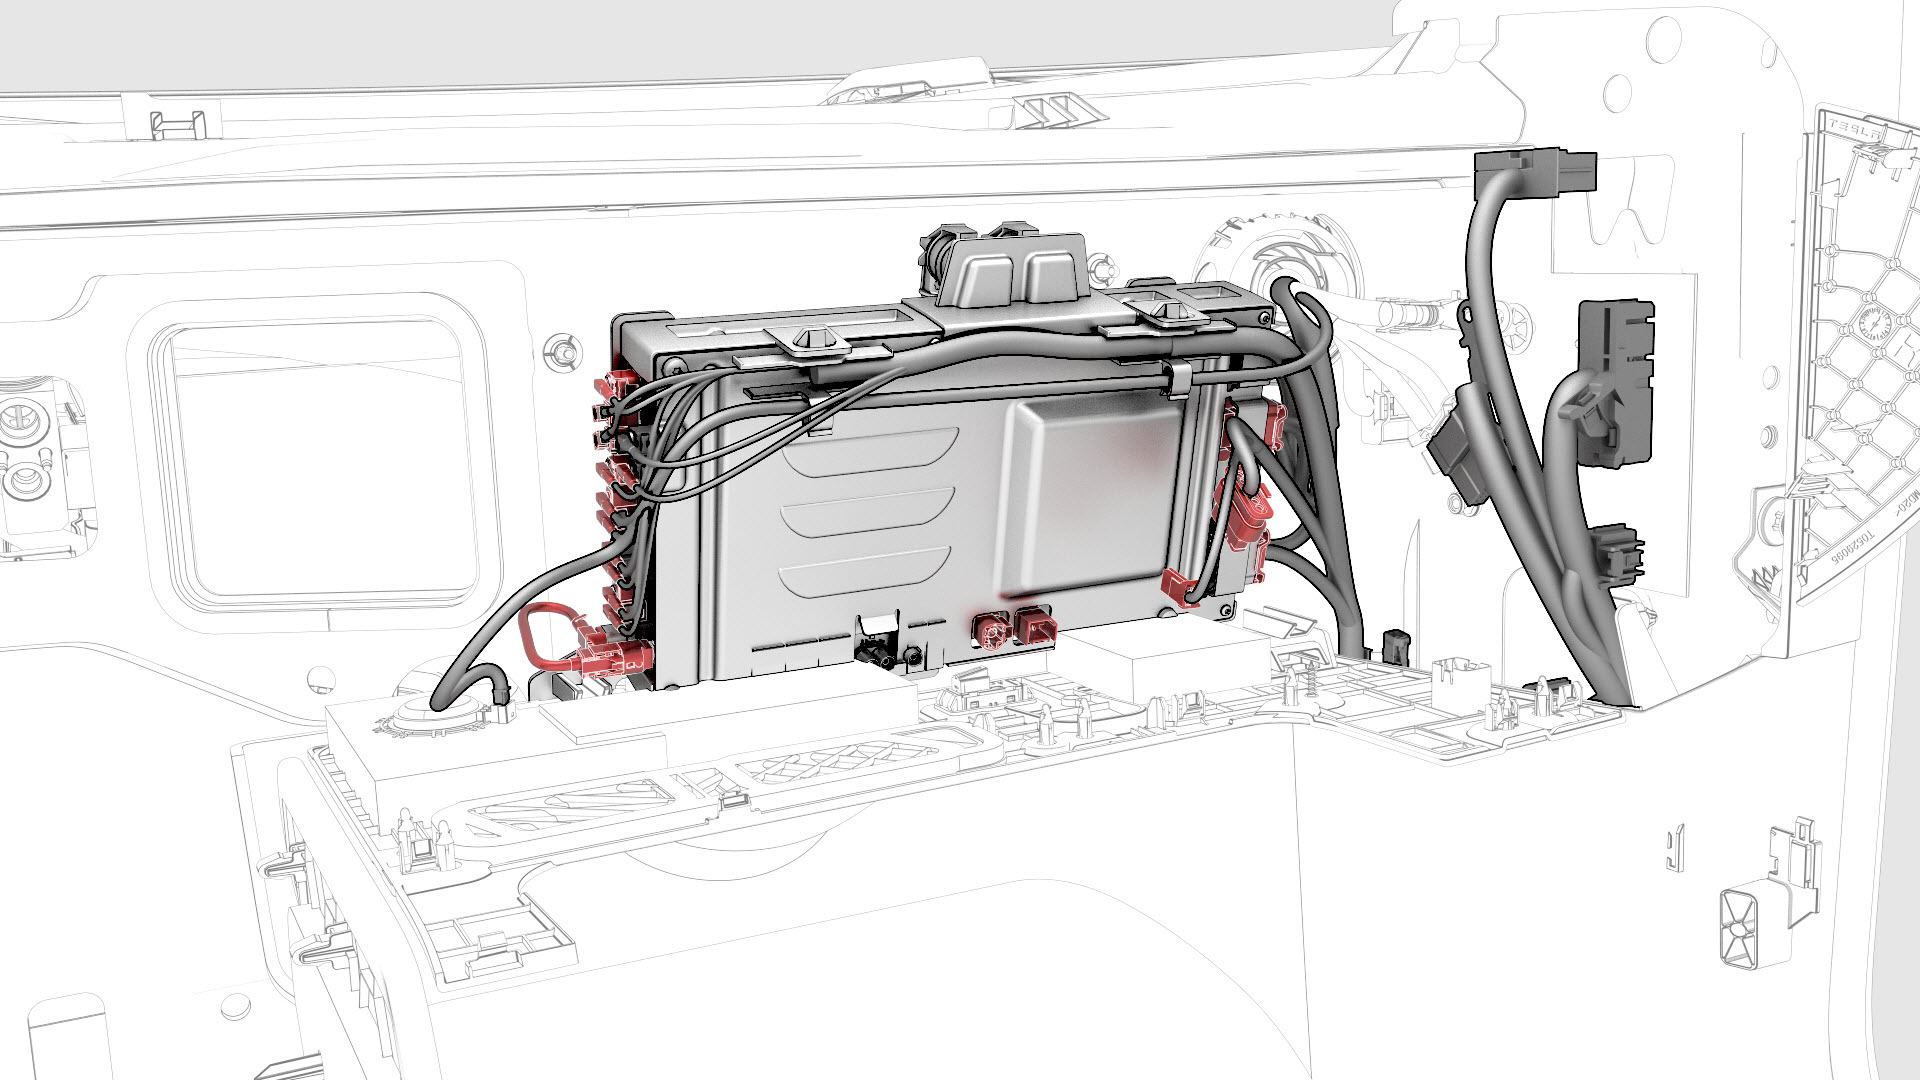
-
If present, release the clips (x4) that attach the car computer shroud to the car computer, and then set the shroud aside.

| 1 | If "Tow Mode" is active, then disable "Tow Mode." | ||
| 2 | If the car computer is being removed because it needs replacement, refer to SI-18-21-001 before you begin for important information. | ||
| 3 | Disconnect 12V power. See 12V Power (Disconnect and Connect). | ||
| 4 | Remove the underhood storage unit. See Underhood Storage Unit (Remove and Replace). | ||
| 5 | Remove the outer HVAC plenum duct. See Duct - HVAC Plenum - Outer (Remove and Replace). | ||
| 6 | Place absorbent material below the car computer coolant hose connections to collect any spilled coolant. | ||
| 7 | Release the clips on the coolant hoses connected to the car computer, and then disconnect the coolant hoses from the car computer. | |
| 8 | Plug the female fittings of the coolant hoses. | ||
| 9 | Connect the computer purge drain adapter to the left car computer coolant fitting, and then fasten the clip. | ||
| 10 | Connect the coolant cart drain hose to the left drain adapter. | ||
| 11 | Connect the computer purge inlet adapter to the right car computer coolant fitting, and then fasten the clip. | ||
| 12 | Connect the coolant cart flush hose to the right drain adapter. | ||
| 13 | Close the valve at the pressure regulator in the coolant cart. | ||
| 14 | Connect supply air to the pressure regulator. | ||
| 15 | Slowly open the valve at the pressure regulator and allow the coolant to drain into the waste container. | ||
| 16 | Start a 1-minute timer. | ||
| 17 | After 1 minute, close the valve at the pressure regulator. | ||
| 18 | Disconnect supply air from the pressure regulator. | ||
| 19 | Disconnect the coolant cart flush hose from the right drain adapter. | ||
| 20 | Release the clip and disconnect the computer purge inlet adapter from the right car computer coolant fitting. | ||
| 21 | Disconnect the coolant cart drain hose from the left drain adapter. | ||
| 22 | Release the clip and disconnect the computer purge drain adapter from the left car computer coolant fitting. | ||
| 23 | Install the car computer fluid port plug over the car computer coolant fittings. | |
| 24 | Remove and discard the nuts that attach the car computer to the body. | |
| 25 | Release the clips that attach the emergency footwell speaker panel to the instrument panel. | ||
| 26 | Disconnect the harness from the emergency footwell speaker connector, and remove the emergency footwell speaker panel from the vehicle. | ||
| 27 | Remove the RH lower A-pillar trim. See Trim - A-Pillar - Lower - LH (Remove and Replace). | ||
| 28 | Remove the RH center console side panel carpet. See Carpet - Side Panel - Center Console - LH (Remove and Replace). | ||
| 29 | Remove the RH footwell duct. See Duct - Footwell - RH (Remove and Replace). | ||
| 30 | Remove the clips that attach the front RH carpet to the body, and then fold the front RH carpet rearwards. | |
| 31 | Remove the nuts that attach the RH carpet locator bracket to the body, and then remove the bracket from the vehicle. Torque 2.5 Nm | |
| 32 | Place absorbent material beneath the car computer to catch any spilled coolant. | ||
| 33 | Put on an antistatic wrist strap, and connect the strap to a body ground point. | ||
| 34 | Move the car computer inwards to allow better access to the clips and electrical connectors of the car computer. | ||
| 35 | Release the clips that attach the electrical harness to the car computer. | |
| 36 | Disconnect the electrical harness connectors (x21) from the car computer, and then remove the computer from the vehicle. Caution: Avoid spilling coolant on the electrical connectors.
Caution: Take care not to damage the passenger airbag harness and connectors during removal.
| |
| 37 | If present, release the clips (x4) that attach the car computer shroud to the car computer, and then set the shroud aside. | |
| 38 | Remove the antistatic wrist strap. | ||
| 39 | If the car computer is defective and to be returned to MRB, make sure that:
|
Install
-
If not already installed, position a car computer shroud on the car computer, and then install the clips (x4) that attach the shroud to the computer.
-
Bring the car computer to where it installs into the vehicle, and then connect the electrical harness connectors (x21) to the car computer.
Caution:Avoid spilling coolant on the electrical connectors.Caution:Take care not to damage the passenger airbag harness and connectors during installation.
-
Fasten the clips that attach the electrical harness to the car computer.
-
Install new nuts (x4) to attach the car computer to the body.Torque 7.1 Nm
-
Install the RH carpet locator bracket to the body, and then install the nuts that attach the RH carpet locator bracket to the body.Torque 2.5 Nm
-
Unfold the front RH carpet forward, and then install the clips that attach the front RH carpet to the body.
-
Remove the car computer fluid port plug from the car computer coolant fittings.
-
Release the clips on the coolant hoses, connect the coolant hoses to the car computer, and then fasten the clips.
| 1 | Put on an antistatic wrist strap, and connect the strap to a body ground point. | ||
| 2 | If not already installed, position a car computer shroud on the car computer, and then install the clips (x4) that attach the shroud to the computer. | |
| 3 | Bring the car computer to where it installs into the vehicle, and then connect the electrical harness connectors (x21) to the car computer. Caution: Avoid spilling coolant on the electrical connectors.
Caution: Take care not to damage the passenger airbag harness and connectors during installation.
| |
| 4 | Fasten the clips that attach the electrical harness to the car computer. | |
| 5 | Move the car computer forward so that the mounting studs pass through the firewall. | ||
| 6 | Remove the antistatic wrist strap. | ||
| 7 | Remove the absorbent material from beneath the car computer. | ||
| 8 | Install new nuts (x4) to attach the car computer to the body. Torque 7.1 Nm | |
| 9 | Install the RH carpet locator bracket to the body, and then install the nuts that attach the RH carpet locator bracket to the body. Torque 2.5 Nm | |
| 10 | Unfold the front RH carpet forward, and then install the clips that attach the front RH carpet to the body. | |
| 11 | Install the RH footwell duct. See Duct - Footwell - RH (Remove and Replace). | ||
| 12 | Install the RH center console side panel carpet. See Carpet - Side Panel - Center Console - LH (Remove and Replace). | ||
| 13 | Install the RH lower A-pillar trim. See Trim - A-Pillar - Lower - LH (Remove and Replace). | ||
| 14 | Bring the emergency footwell speaker panel to the vehicle, and then connect the harness to the emergency footwell speaker connector. | ||
| 15 | Install the emergency footwell speaker panel to the instrument panel, and then fasten the clips that attach the emergency footwell speaker panel to the instrument panel. | ||
| 16 | Remove the car computer fluid port plug from the car computer coolant fittings. | |
| 17 | Remove the plugs from the female fittings of the coolant hoses. | ||
| 18 | Release the clips on the coolant hoses, connect the coolant hoses to the car computer, and then fasten the clips. | |
| 19 | Remove the absorbent material from below the car computer coolant hose connections. | ||
| 20 | Connect 12V power. See 12V Power (Disconnect and Connect). | ||
| 21 | If a new car computer is being installed, refer to SI-18-21-001 for further instruction. | ||
| 22 | Refill the cooling system. See Cooling System (Vacuum Refill). | ||
| 23 | Install the outer HVAC plenum duct. See Duct - HVAC Plenum - Outer (Remove and Replace). | ||
| 24 | Install the underhood storage unit. See Underhood Storage Unit (Remove and Replace). |