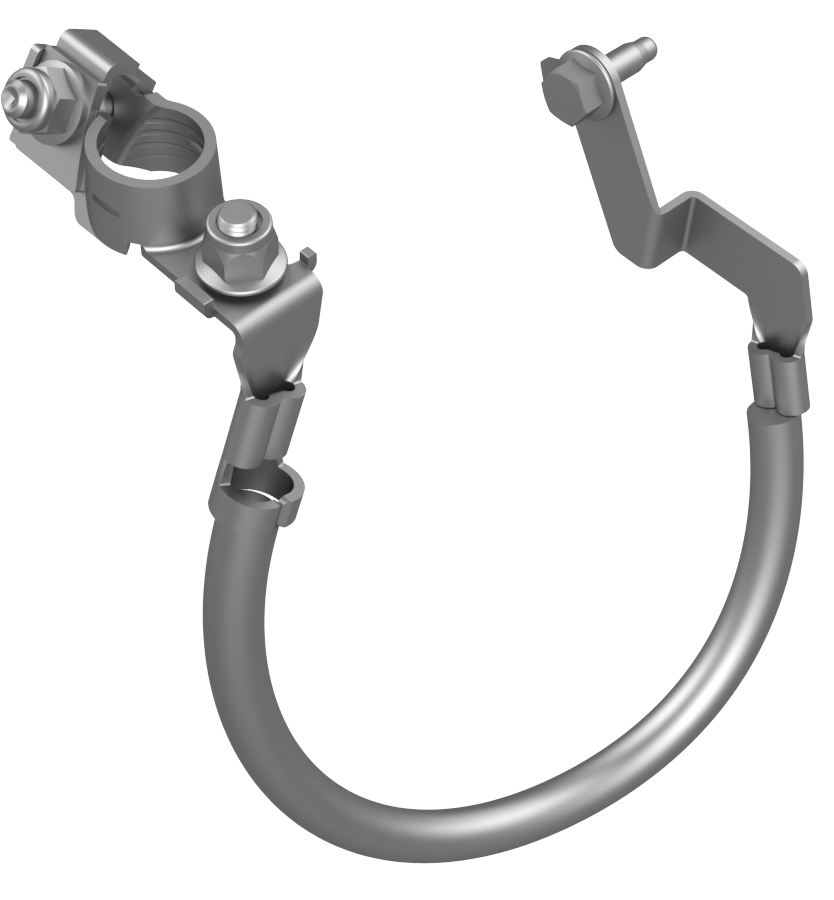
Harness - 12V Battery Ground (Remove and Replace)
Correction code 1710620217106202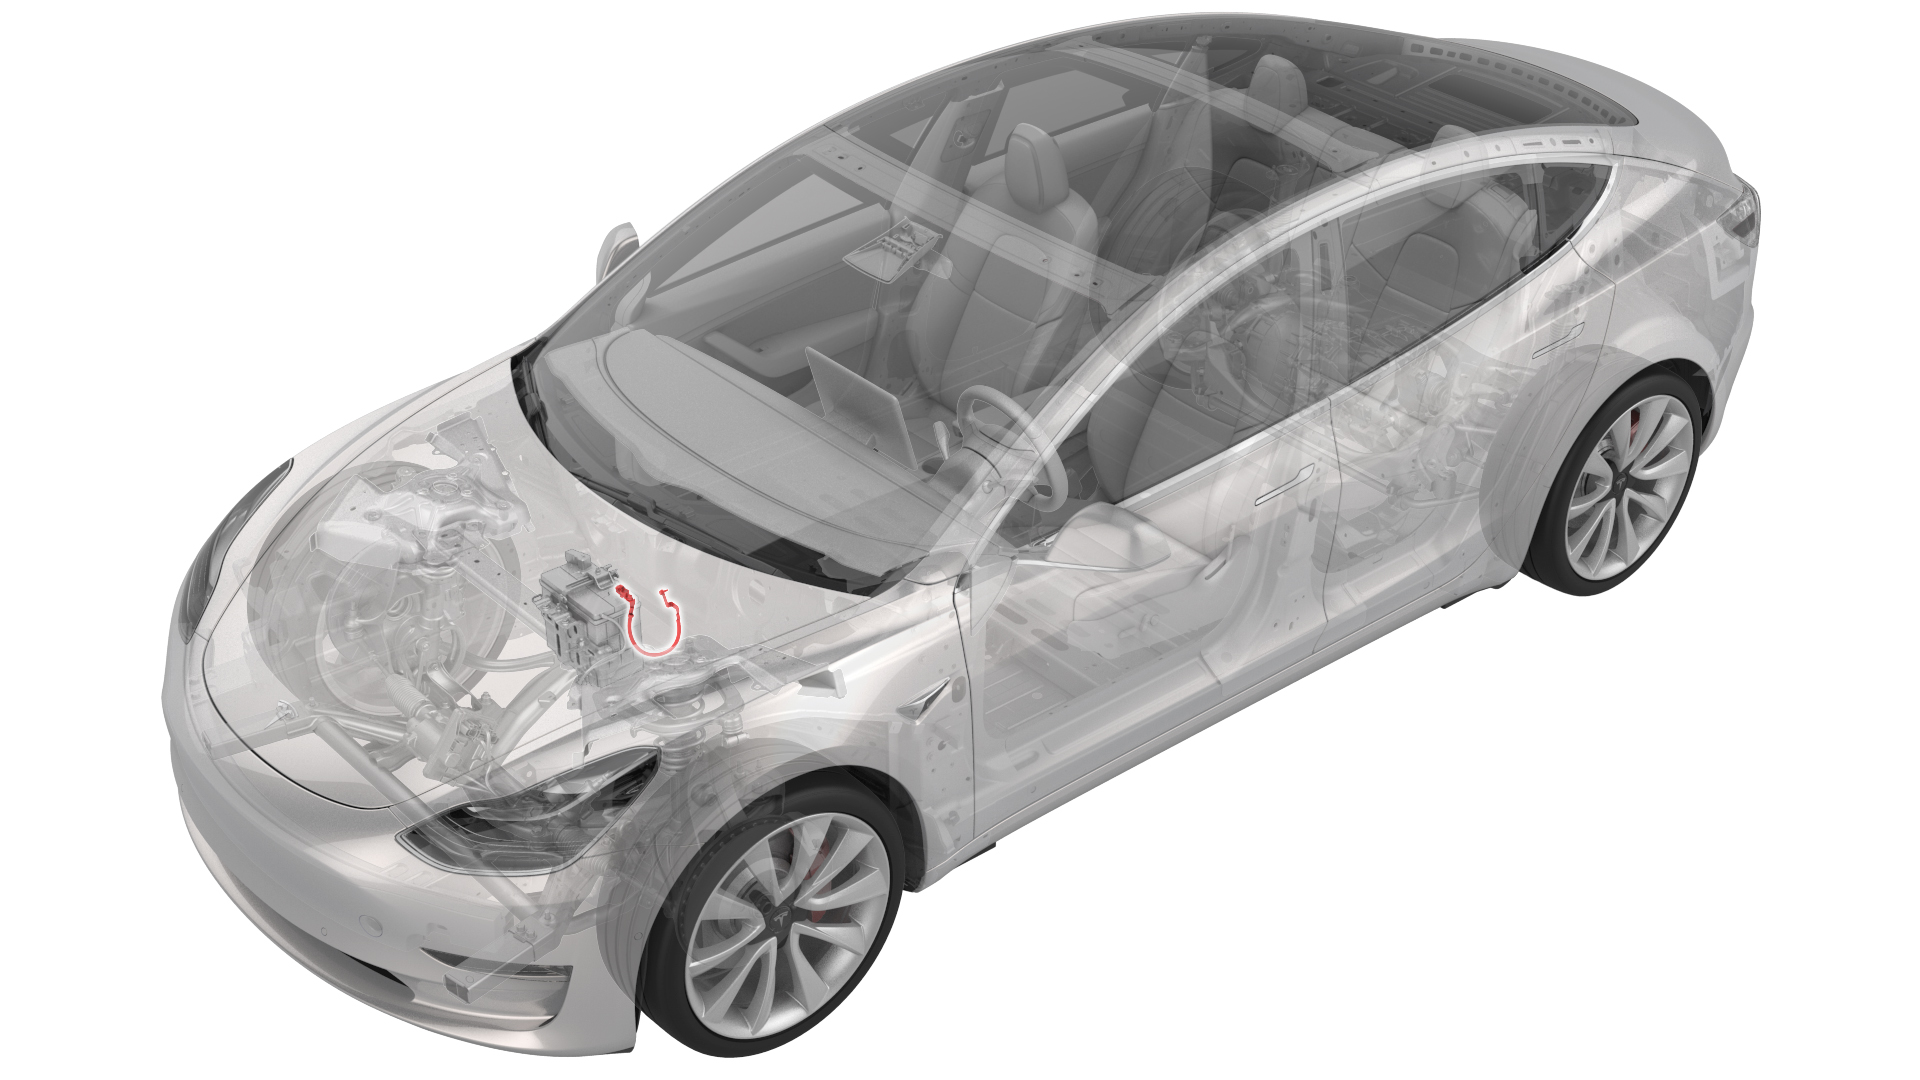
Remove
-
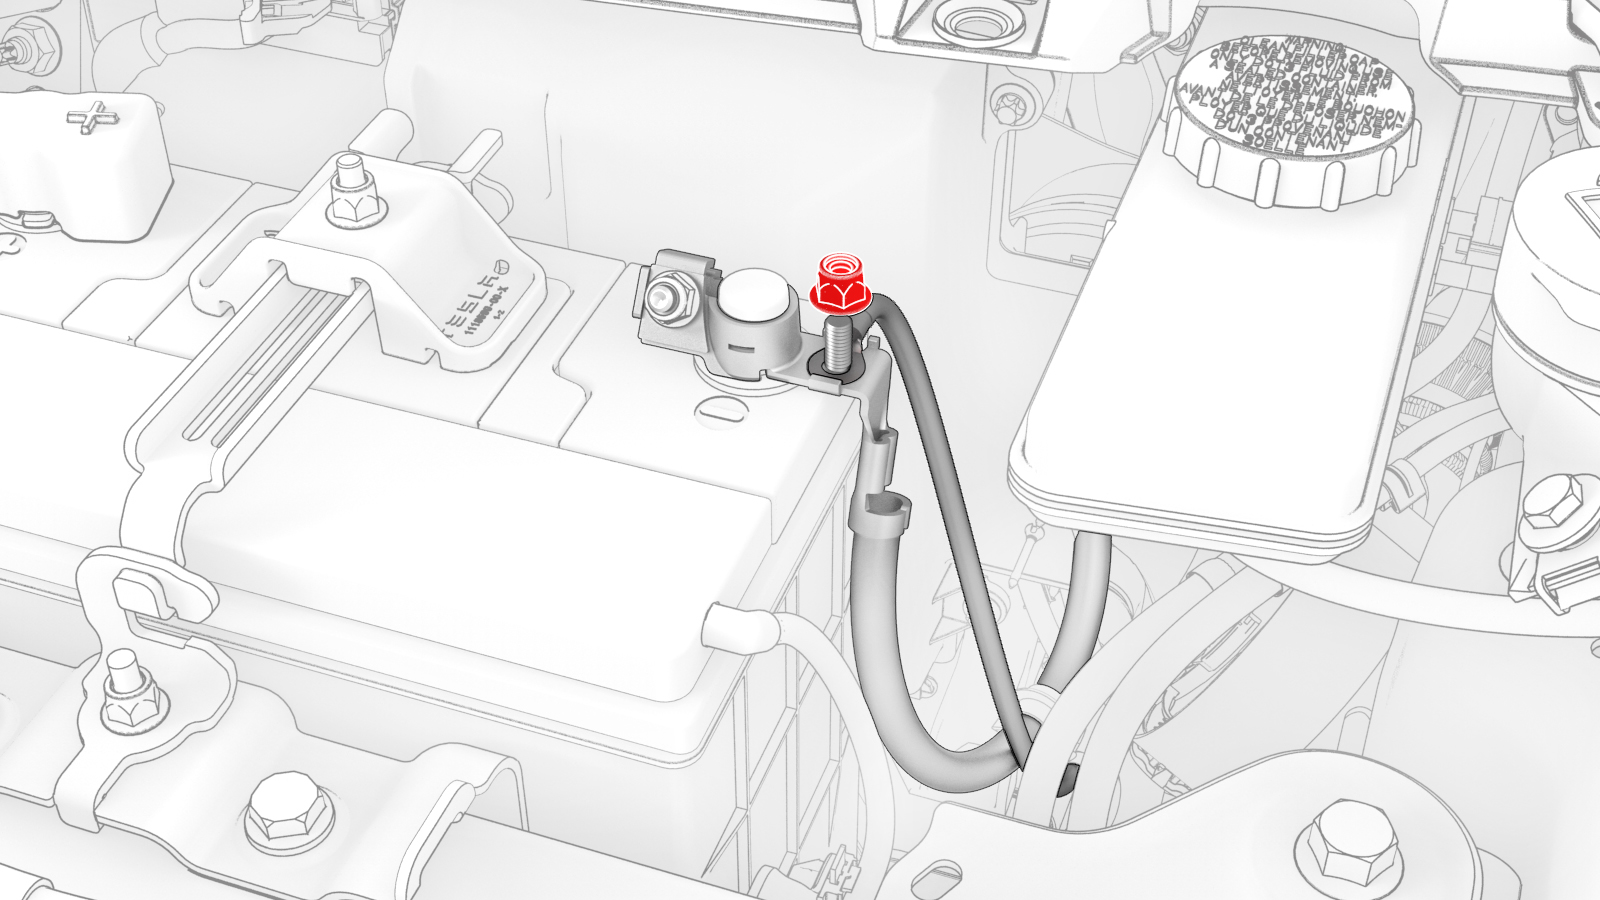
Remove and discard the nut that attaches the front harness ground wire to the 12V battery ground harness, and remove the wire from the harness.
-
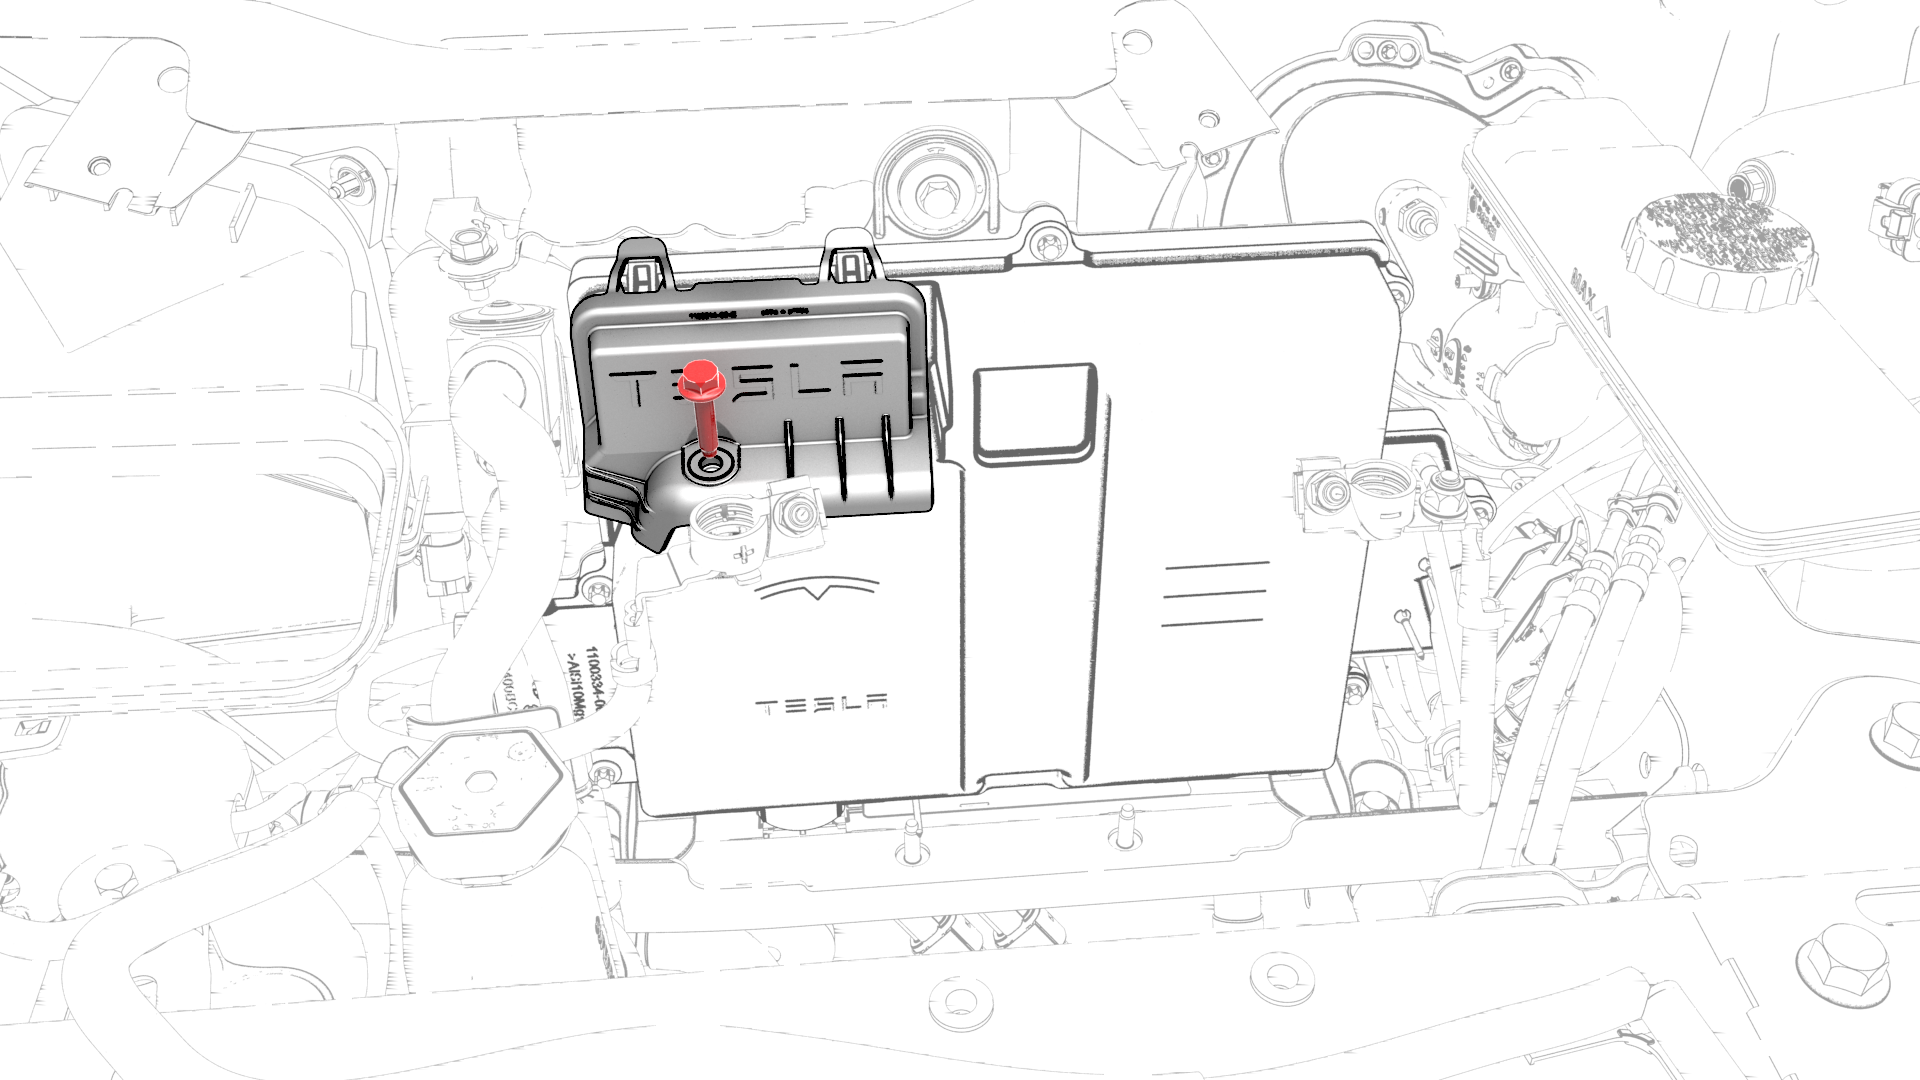
Remove the bolt that attaches the thermal harness cover to the front body controller module, and then remove the cover from the module.
-
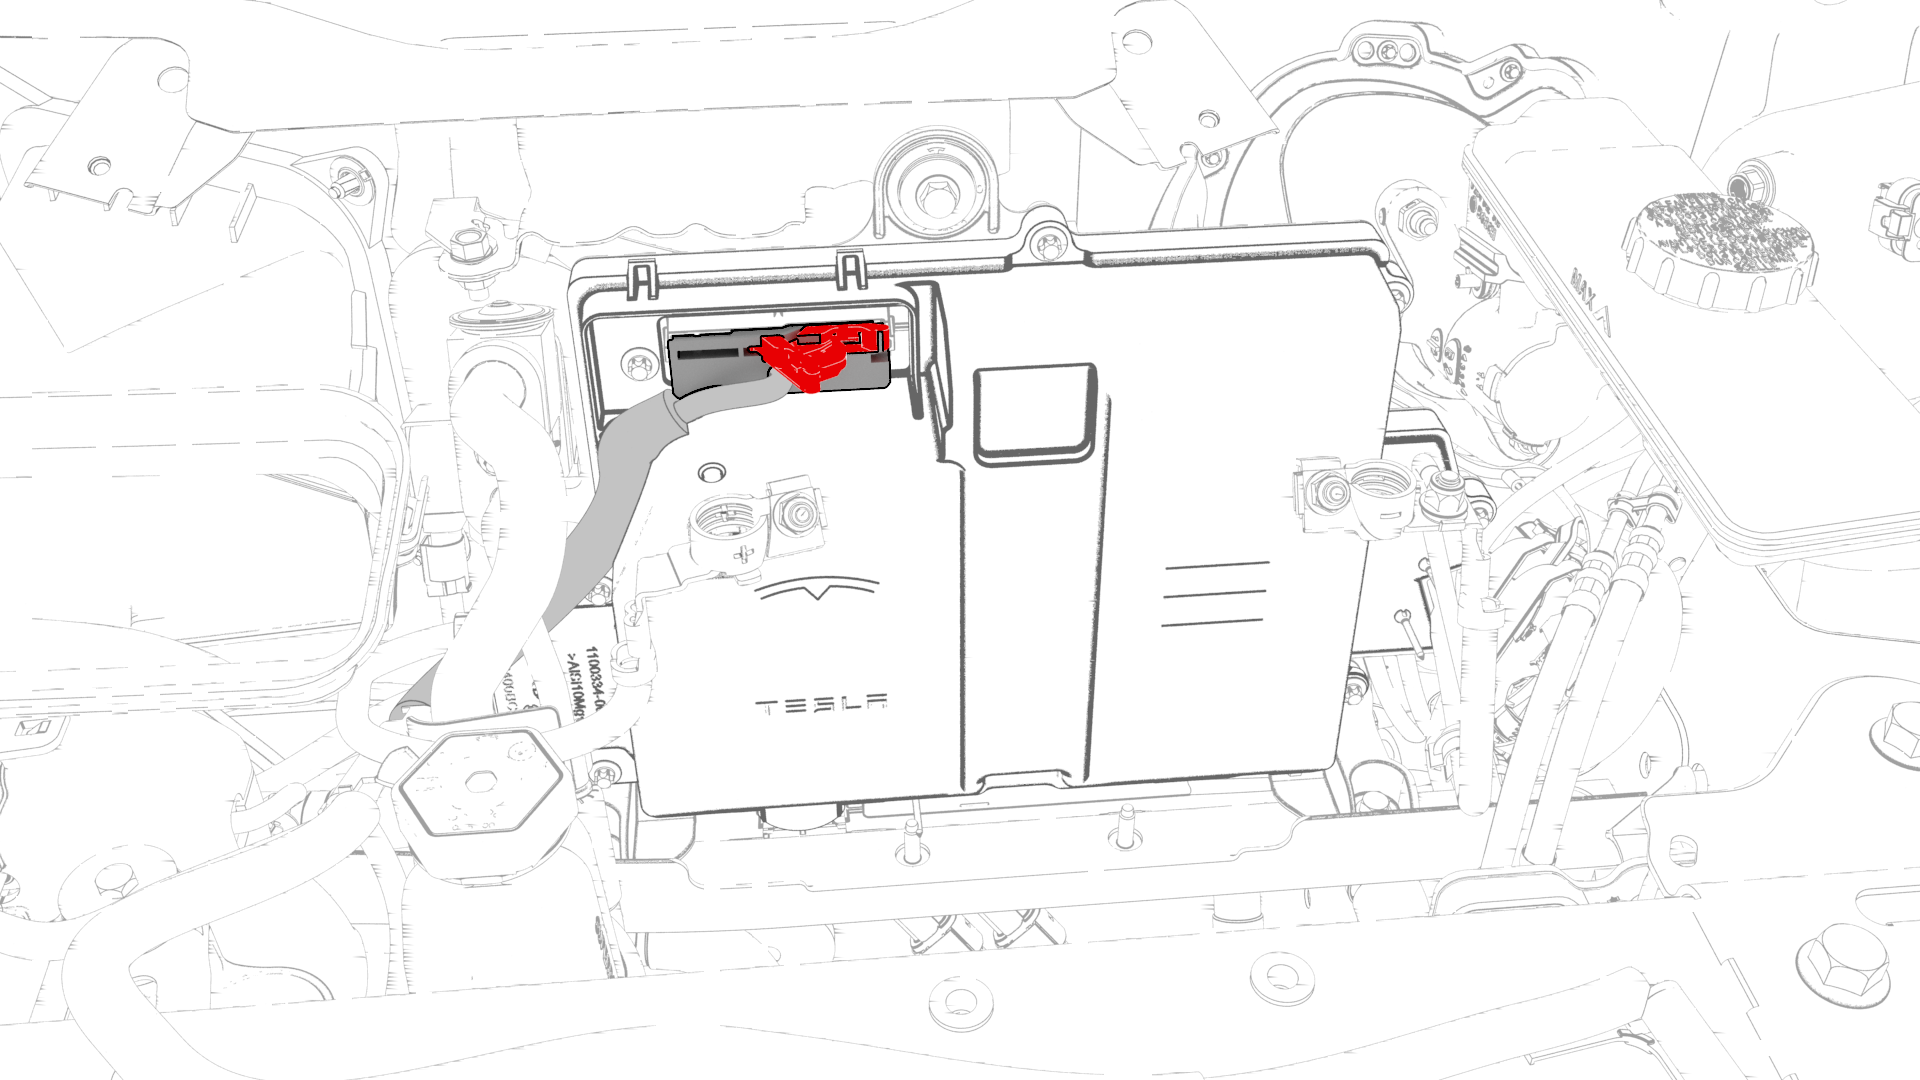
Disconnect the thermal harness from the front body controller module connector.
-
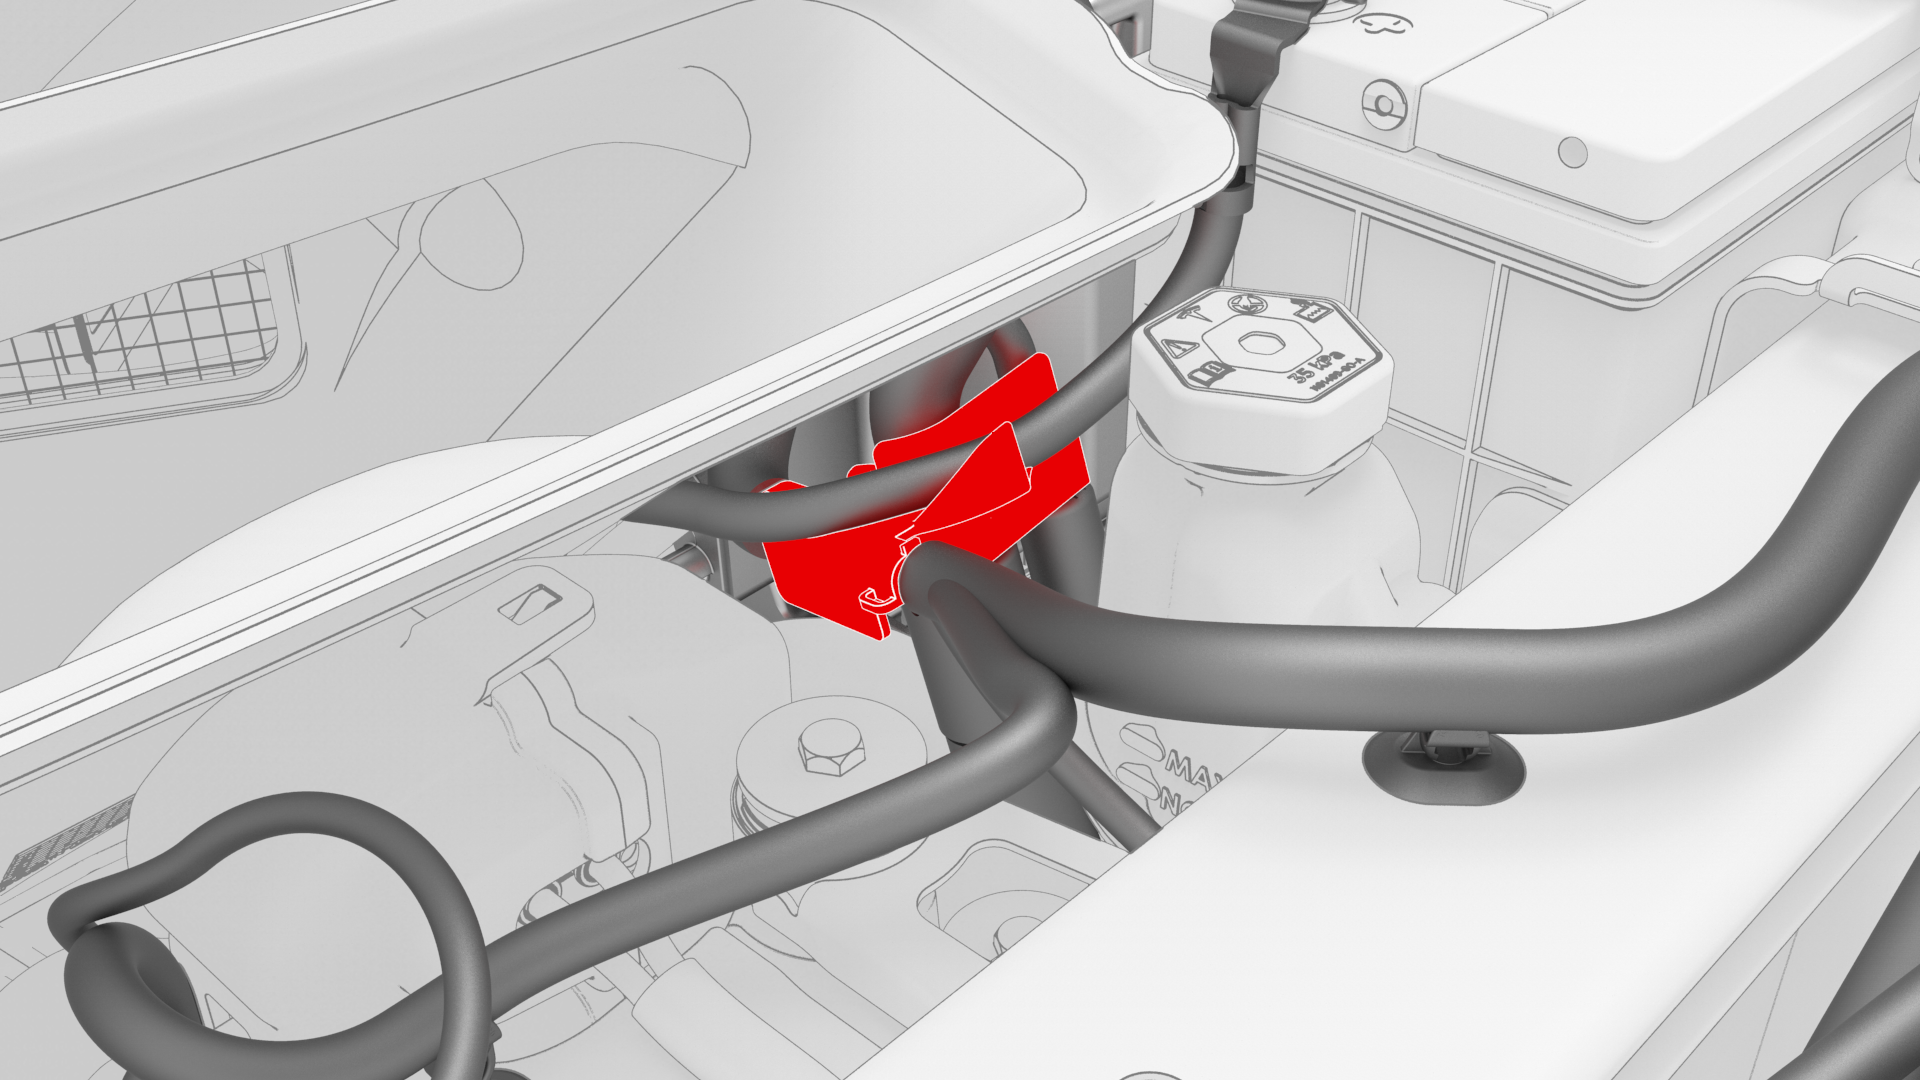
Release the clip that attaches the suction/liquid lines to the body near the TXV, and then move the electrical harness aside to gain access to the front body controller module.
-
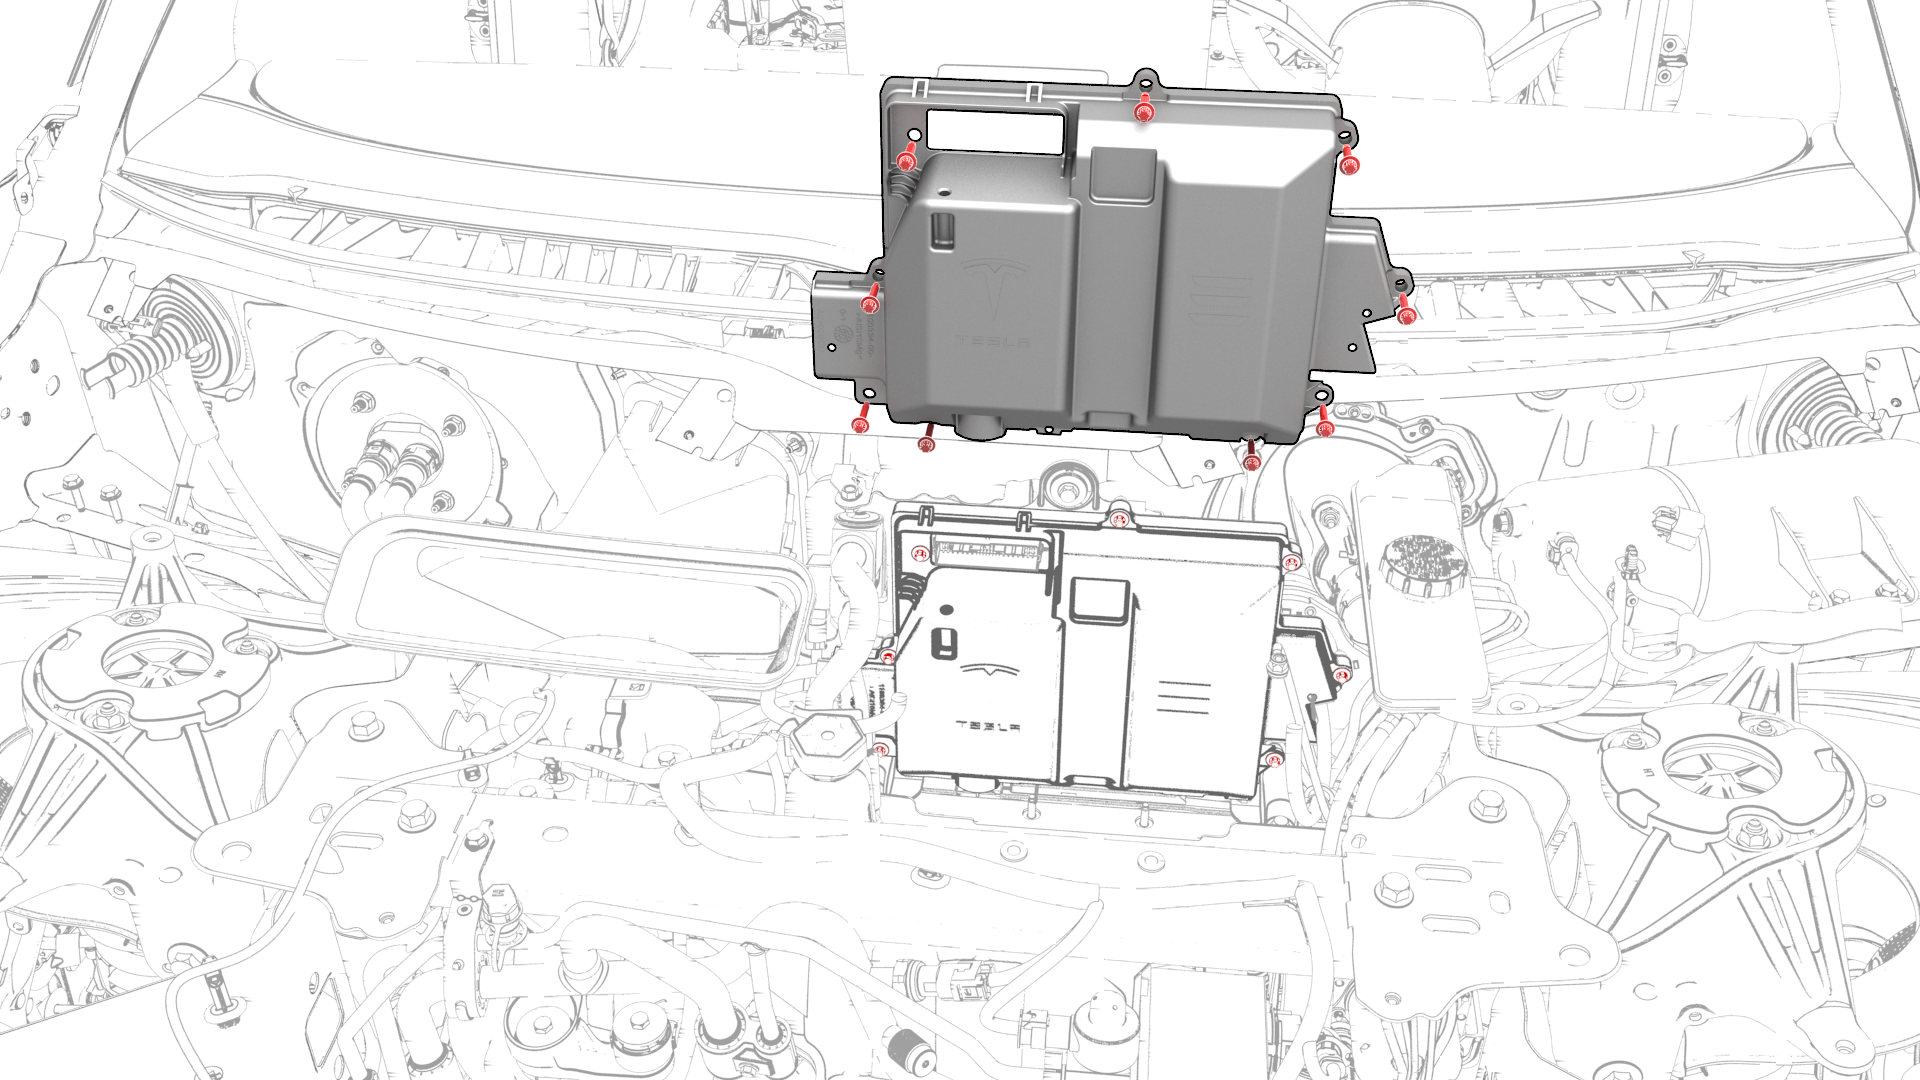
Remove the bolts (x9) that attach the front body controller module cover to the front body controller module, and then remove the cover.
-
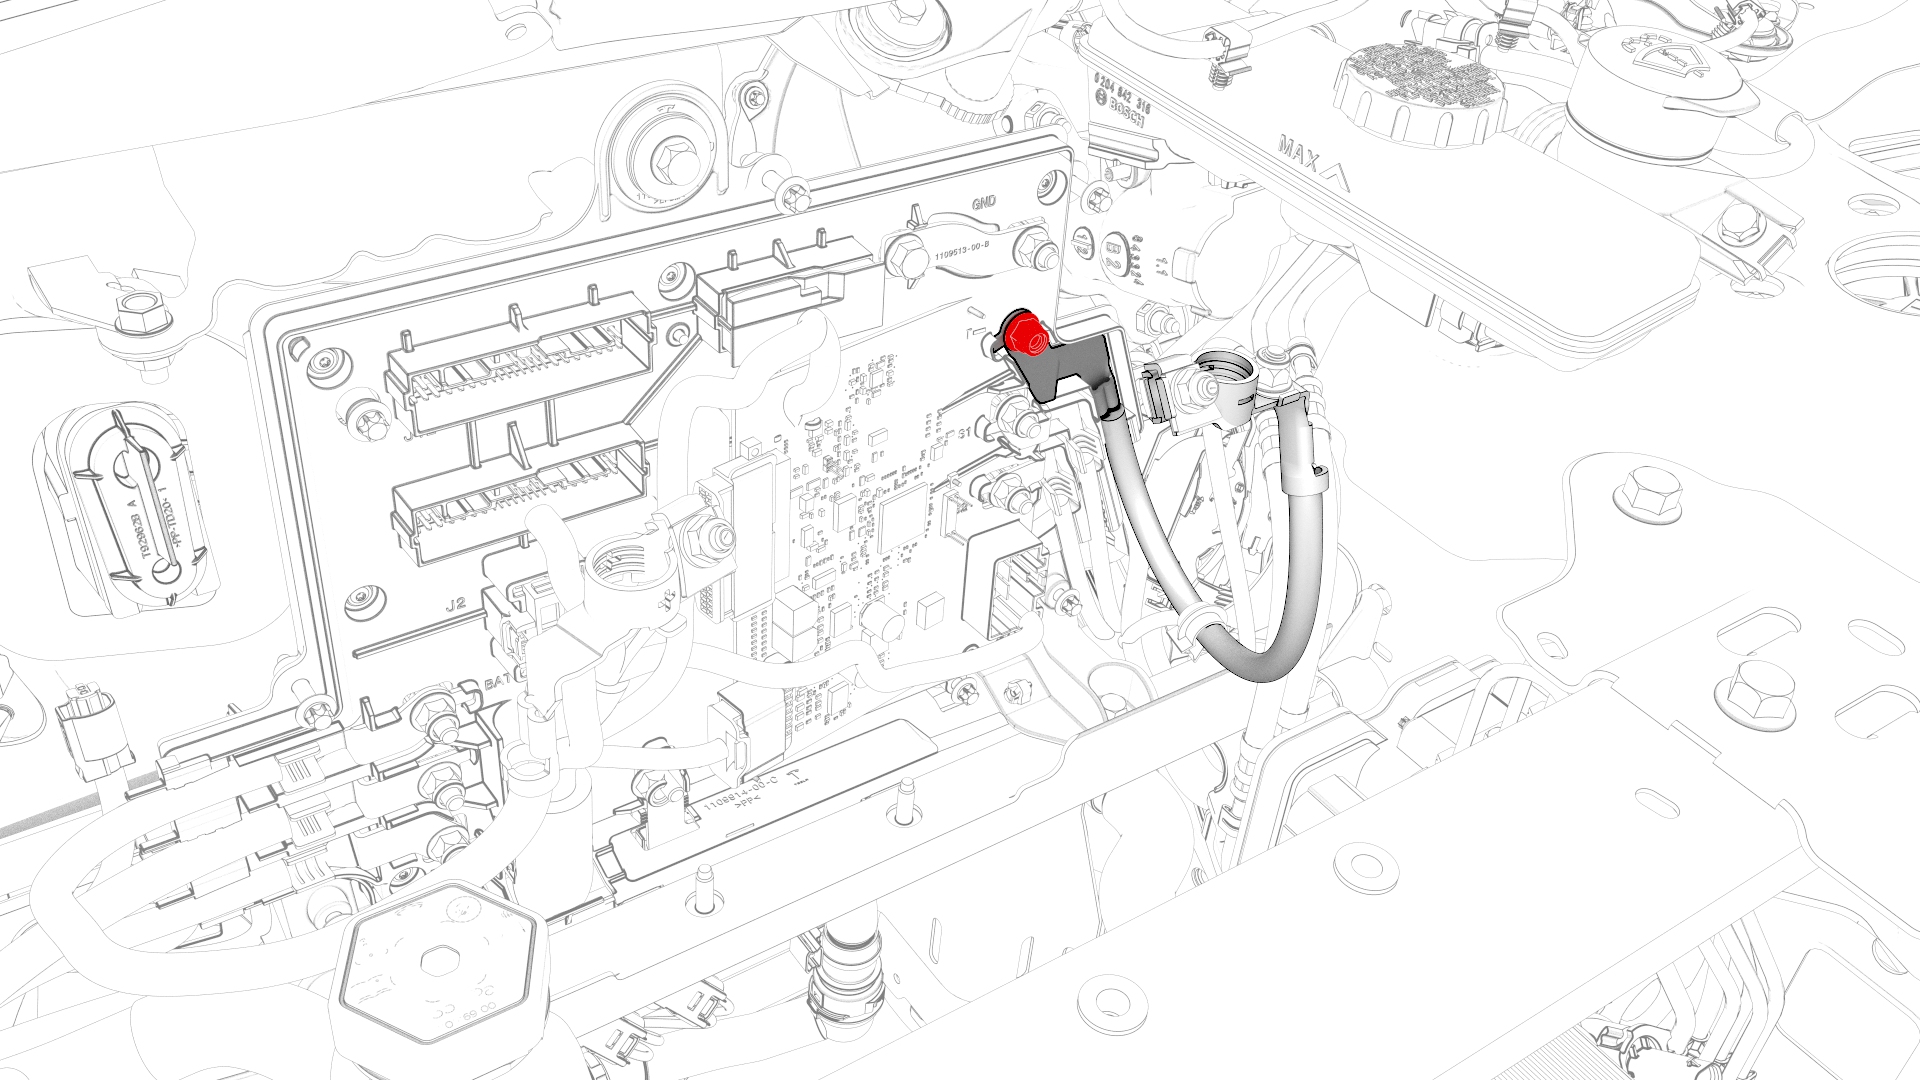
Remove and discard the bolt that attaches the battery ground cable to the front body controller module, and then remove the cable.
| 1 | Remove the cowl screen panel. See Panel - Cowl Screen (Remove and Replace). | ||
| 2 | Remove and discard the nut that attaches the front harness ground wire to the 12V battery ground harness, and remove the wire from the harness. | |
| 3 | Remove the 12V auxiliary battery. See Battery - 12V (Remove and Replace). | ||
| 4 | Remove the 12V battery bracket. See Bracket - 12V Battery (RWD) (Remove and Replace). | ||
| 5 | Remove the bolt that attaches the thermal harness cover to the front body controller module, and then remove the cover from the module. | |
| 6 | Disconnect the thermal harness from the front body controller module connector. | |
| 7 | Release the clip that attaches the suction/liquid lines to the body near the TXV, and then move the electrical harness aside to gain access to the front body controller module. | |
| 8 | Remove the bolts (x9) that attach the front body controller module cover to the front body controller module, and then remove the cover. | |
| 9 | Remove and discard the bolt that attaches the battery ground cable to the front body controller module, and then remove the cable. |
Install
-
Install the battery ground cable to the front body controller module, and then install a new bolt to attach the cable to the module.
 Torque 8.5 Nm
 -
Visually inspect that the ground cables exit the front body controller module neatly in their respective channels, and parallel to each other.
 Caution:Make sure that no cables or wires will be pinched when the front body controller module cover is installed.
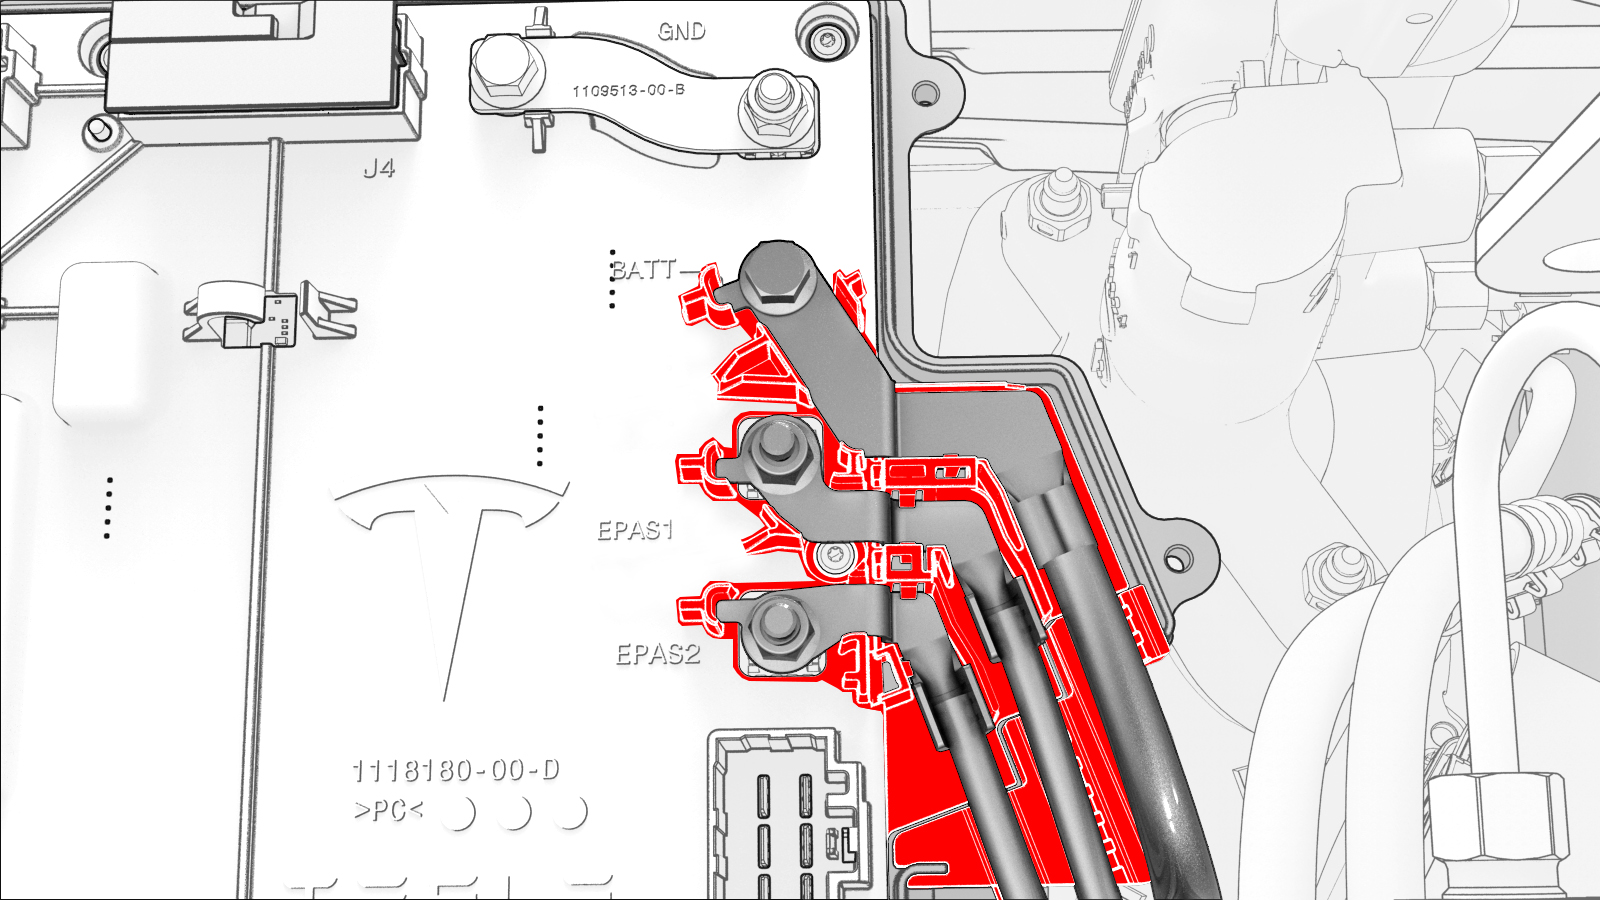
-
Install the front body controller module cover to the front body controller module, and then install the bolts (x9) that attach the cover to the module.
 Torque 6 Nm
 -
Connect the thermal harness to the front body controller module connector.
-
Fasten the clip that attaches the suction/liquid lines to the body near the TXV.
-
Install the thermal harness cover to the front body controller module, and then install the bolt that attaches the cover to the module.
 Torque 6 Nm
 -
Install the front harness ground wire to the 12V battery ground harness, and install a new nut to attach the ground wire to the ground harness.
 Torque 6 Nm
| 1 | Install the battery ground cable to the front body controller module, and then install a new bolt to attach the cable to the module. Torque 8.5 Nm | |
| 2 | Visually inspect that the ground cables exit the front body controller module neatly in their respective channels, and parallel to each other. Caution: Make sure that no cables or wires will be pinched when the front body controller module cover is installed.
| |
| 3 | Install the front body controller module cover to the front body controller module, and then install the bolts (x9) that attach the cover to the module. Torque 6 Nm | |
| 4 | Connect the thermal harness to the front body controller module connector. | |
| 5 | Fasten the clip that attaches the suction/liquid lines to the body near the TXV. | |
| 6 | Install the thermal harness cover to the front body controller module, and then install the bolt that attaches the cover to the module. Torque 6 Nm | |
| 7 | Install the 12V battery bracket. See Bracket - 12V Battery (RWD) (Remove and Replace). | ||
| 8 | Install the 12V auxiliary battery. See Battery - 12V (Remove and Replace). | ||
| 9 | Install the front harness ground wire to the 12V battery ground harness, and install a new nut to attach the ground wire to the ground harness. Torque 6 Nm | |
| 10 | Install the cowl screen panel. See Panel - Cowl Screen (Remove and Replace). |