5-Way Valve (Remove and Replace)
Correction code 1830101118301011
- 1447556-00-AWrench, Diverter Valve, Model 3
SPECIAL TOOLS
Wrench, Diverter Valve, Model 3 (1447556-00-A) |
Remove
-
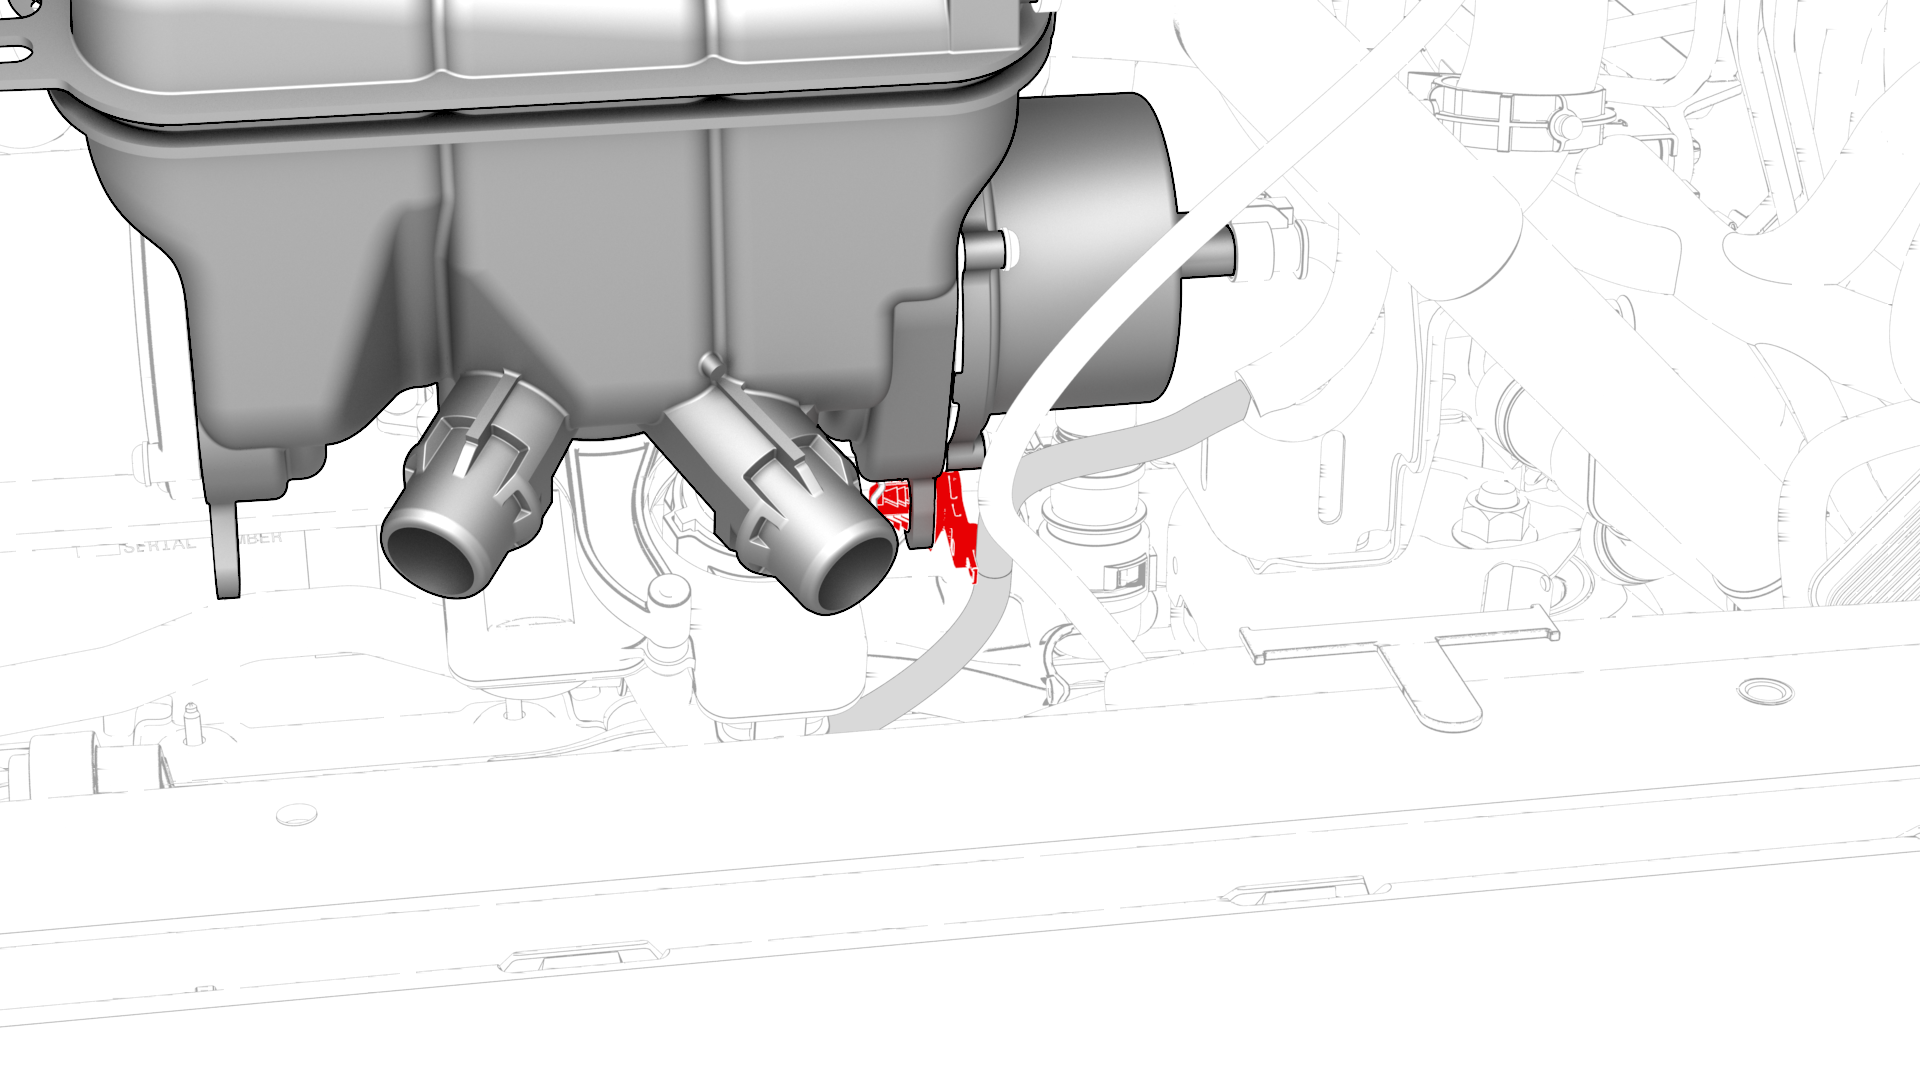
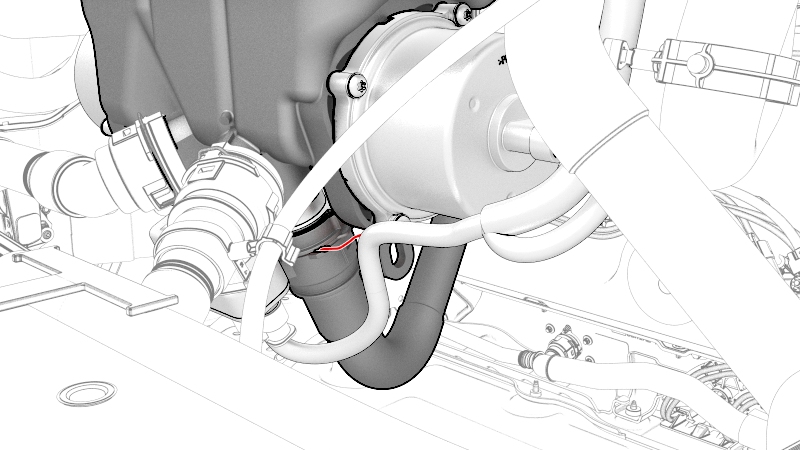
Release the clip that attaches the electrical harness to the lower LH side of the superbottle.
-
Disconnect the powertrain supply hose at the lower LH side of the superbottle, and then plug the female connector.
Note: Allow the coolant to drain from the superbottle.
-
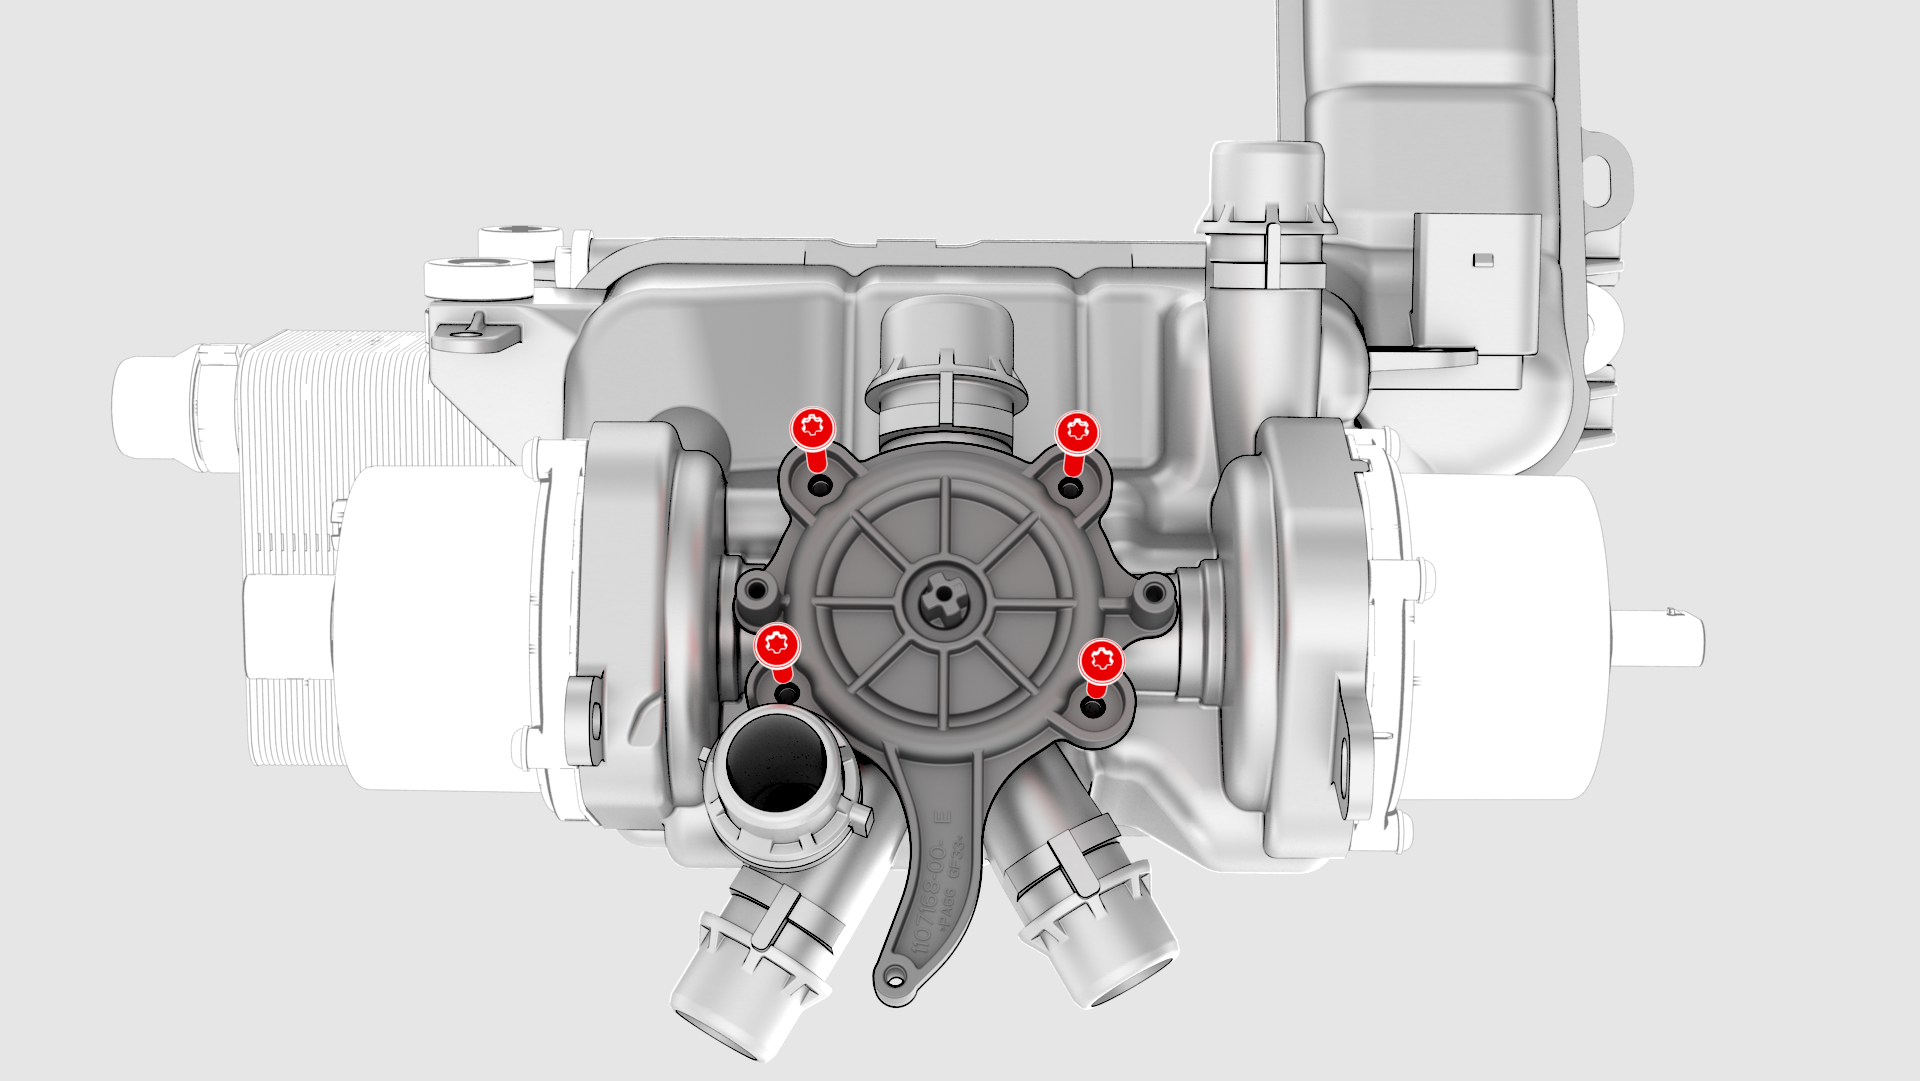
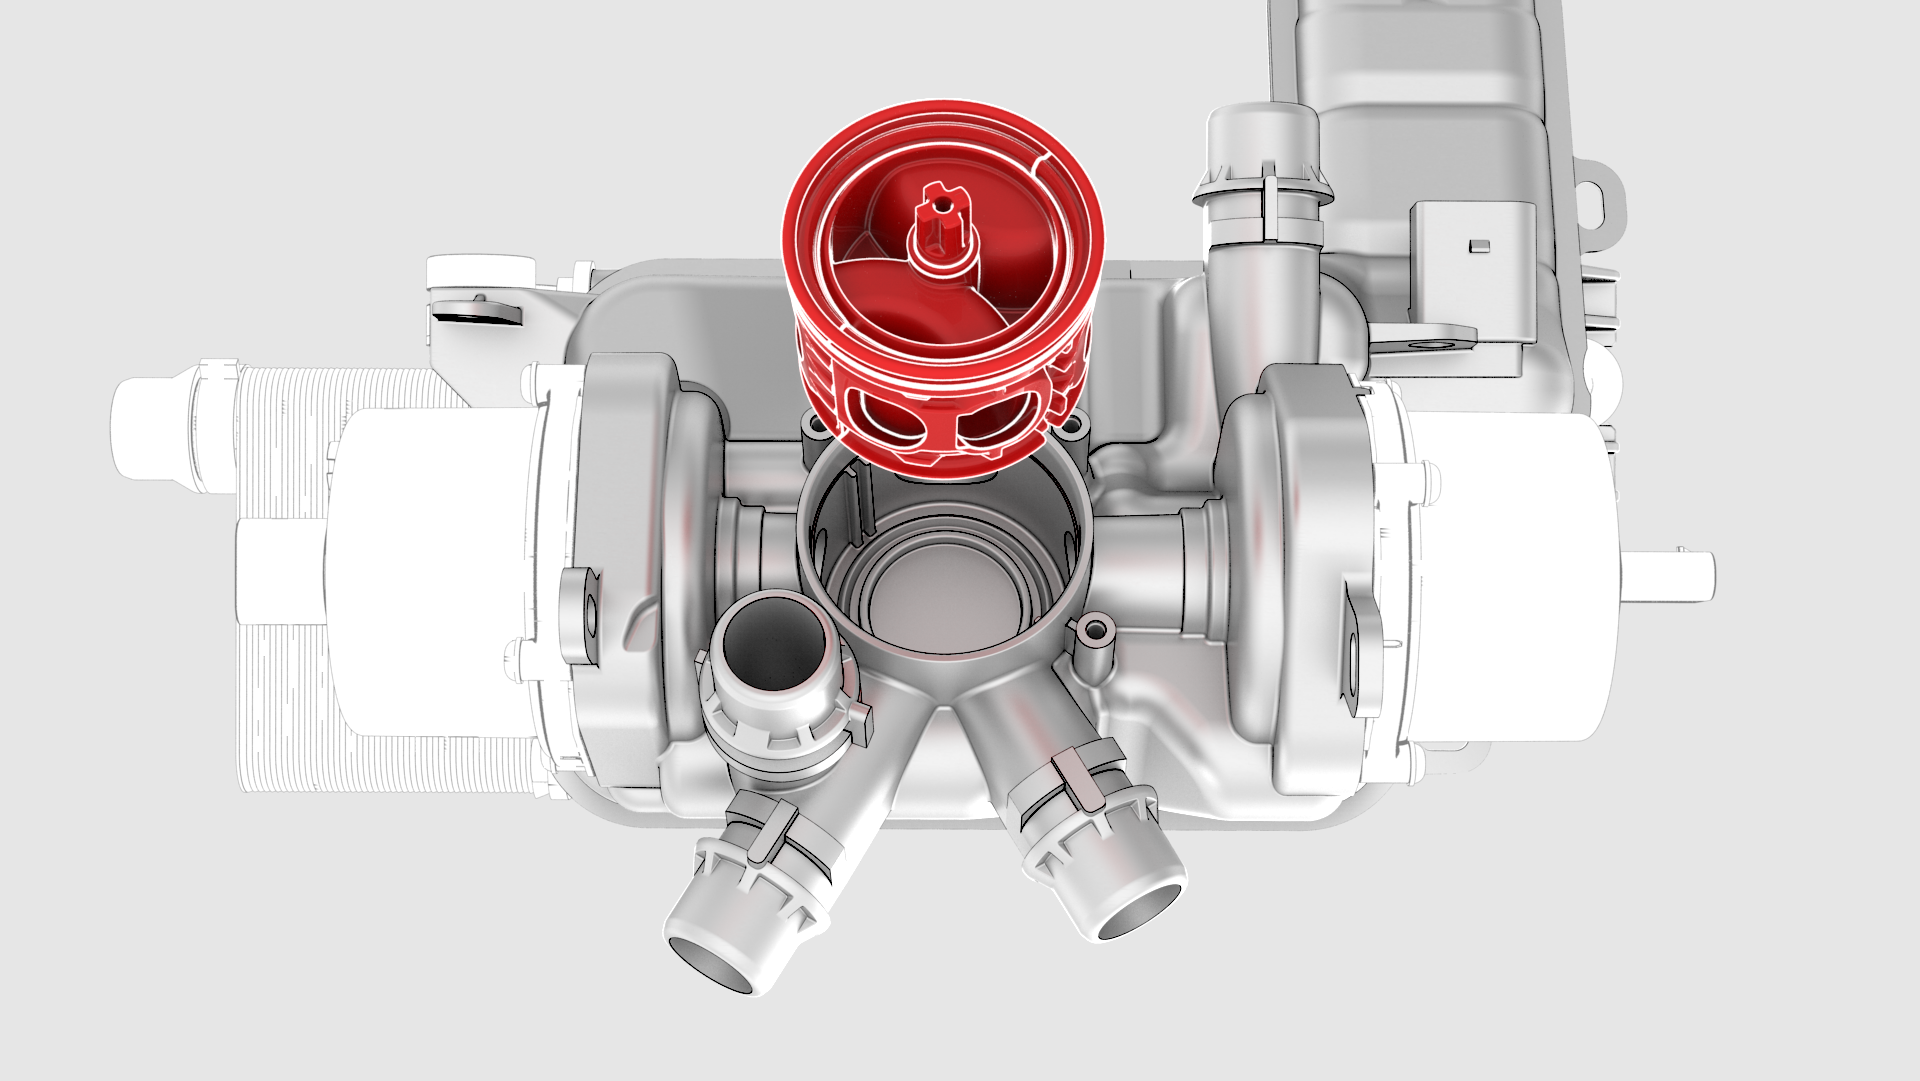
Remove and discard the screws that attach the 5-way valve actuator cover to the superbottle, and then remove the cover from the superbottle.
-
Remove and discard the O-rings from the 5-way valve cover.

-
Remove the stem shell from the superbottle.
| 1 | Remove the 5-way valve actuator. See Actuator - 5-Way Valve (RWD) (Remove and Replace). | ||
| 2 | Release the clip that attaches the electrical harness to the lower LH side of the superbottle. | |
| 3 | Position a coolant drain under the superbottle. | ||
| 4 | Disconnect the powertrain supply hose at the lower LH side of the superbottle, and then plug the female connector. Note: Allow the coolant to drain from the superbottle.
| |
| 5 | Remove and discard the screws that attach the 5-way valve actuator cover to the superbottle, and then remove the cover from the superbottle. | |
| 6 | Remove and discard the O-rings from the 5-way valve cover. | |
| 7 | Remove the stem shell from the superbottle. |
Install
-
Install the new 5-way valve cover onto the superbottle, and then install new screws to attach the cover to the superbottle.
 Torque 3.3 Nm
 -
Install the 5-way valve actuator on the 5-way valve cover, and then install the screws that attach the actuator on the cover.
 Torque 3.3 Nm
| 1 | Install new O-rings onto the 5-way valve cover. Note: Align notches in the o-rings with the ribs in the 5-way valve cover.
|
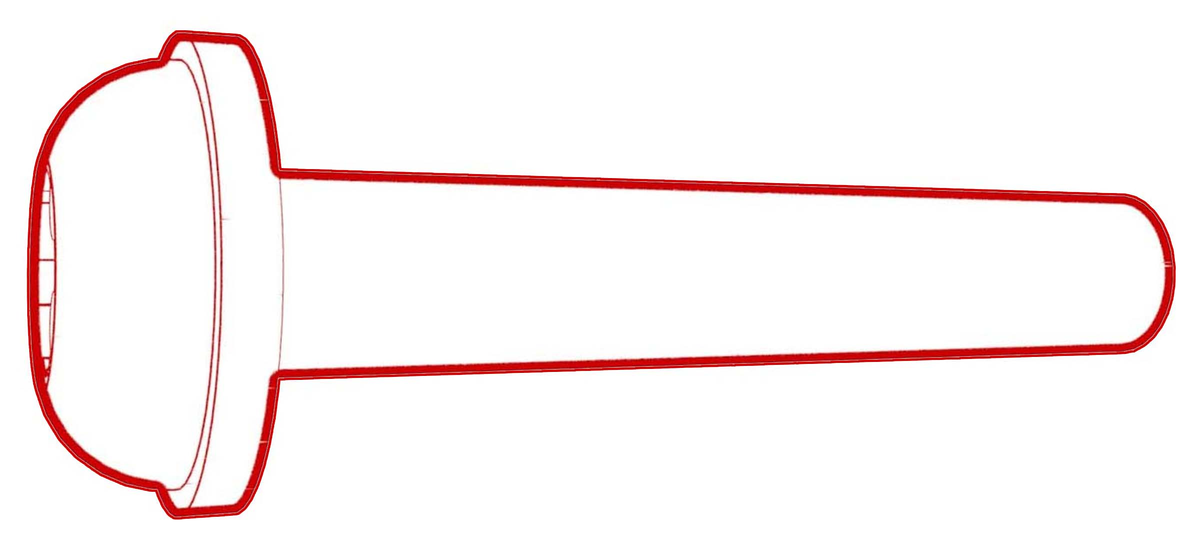
| 2 | Examine the end the of the 5-way valve stem shell shaft. One shaft spline is slightly wider than the others. |
| 3 | Mark the wider spline. |
| 4 | Slide the new stem shell into the superbottle. Note: Align channels in the stem shell with ribs in the superbottle.
|
| 5 | Install the new 5-way valve cover onto the superbottle, and then install new screws to attach the cover to the superbottle. Torque 3.3 Nm |
| 6 | Use the diverter valve wrench to verify that the stem shell shaft turns smoothly and does not bind. |
| 7 | Connect the powertrain supply hose to the superbottle. |
| 8 | Remove the coolant drain from under the superbottle. |
| 9 | Fasten the clip that attaches the electrical harness to the superbottle. |
| 10 | Use the diverter valve wrench to align the 5-way valve stem shell shaft with the 5-way valve actuator for assembly. Note: When properly aligned, the actuator easily slides over the stem shell shaft.
|
| 11 | Install the 5-way valve actuator on the 5-way valve cover, and then install the screws that attach the actuator on the cover. Torque 3.3 Nm |
| 12 | Connect the electrical harness to the 5-way valve actuator connector. |
| 13 | Install the front aero shield. See Panel - Aero Shield - Front (Remove and Replace). |
| 14 | Add coolant to the superbottle, so that the liquid level is approximately 6mm (0.25 in) above the MAX line. |
| 15 | Connect 12V power. See 12V Power (Disconnect and Connect). |
| 16 | Perform a cooling system vacuum refill. See Cooling System (Vacuum Refill). |
| 17 | Connect a laptop with Toolbox to the vehicle. |
| 18 | Using Toolbox, run the 5-way valve actuator self-test, "TEST-SELF_VCFRONT_X_FIVE-WAY-VALVE." Note: This Toolbox routine tests and calibrates the 5-way valve actuator.
|
| 19 | Disconnect the laptop from the vehicle. |