Door Assembly - Charge Port (NA) (Remove and Replace)
Correction code 4401150244011502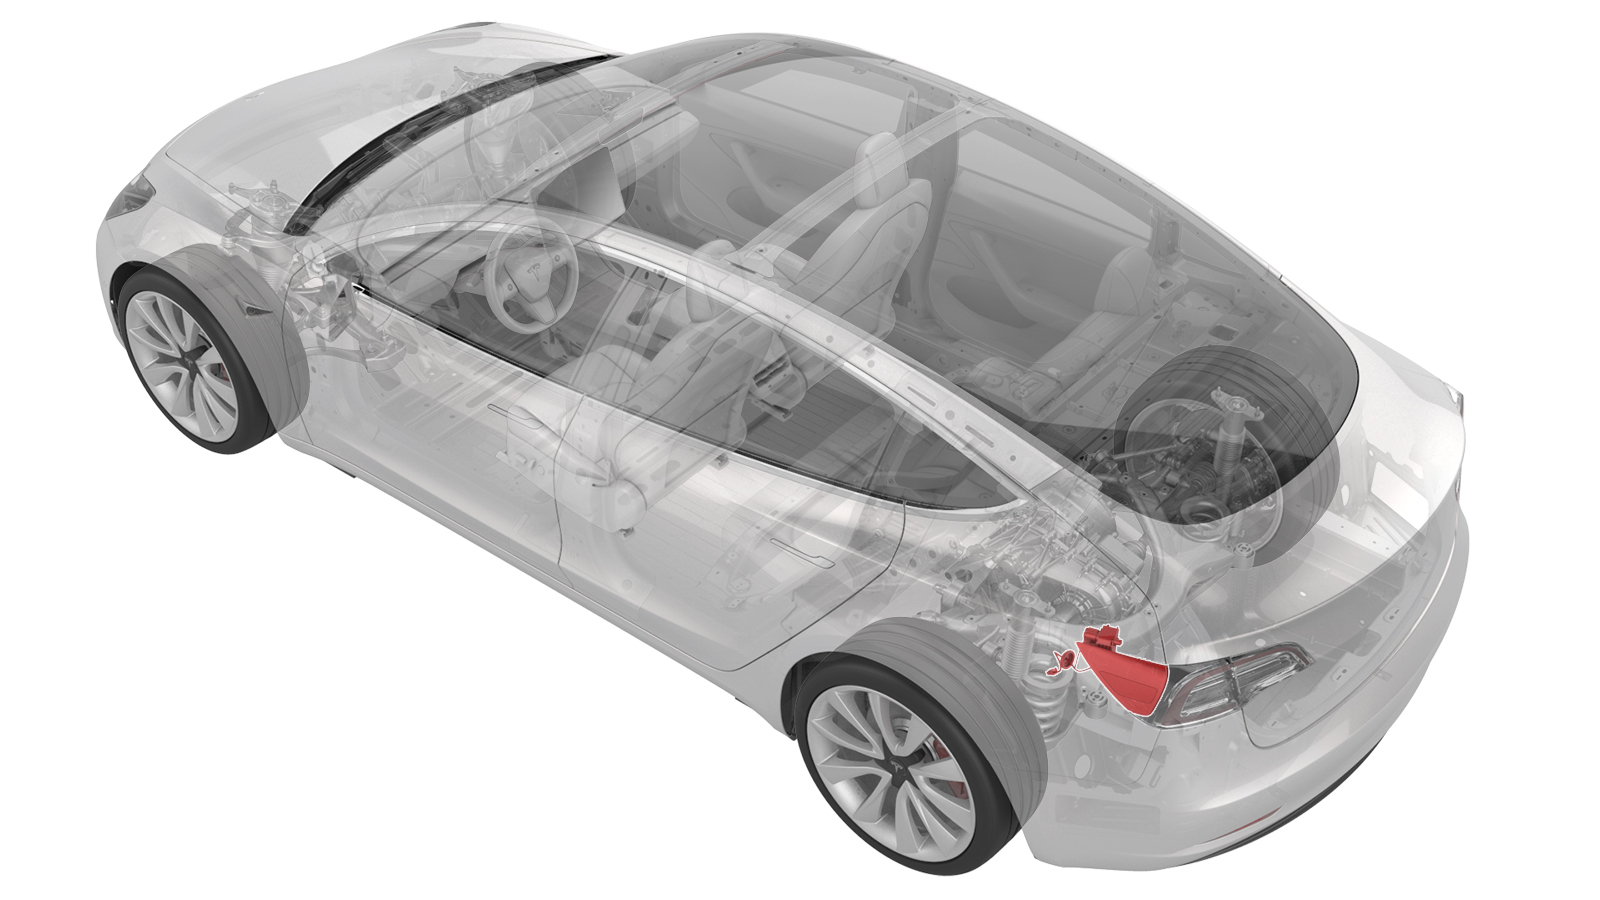
Remove
-
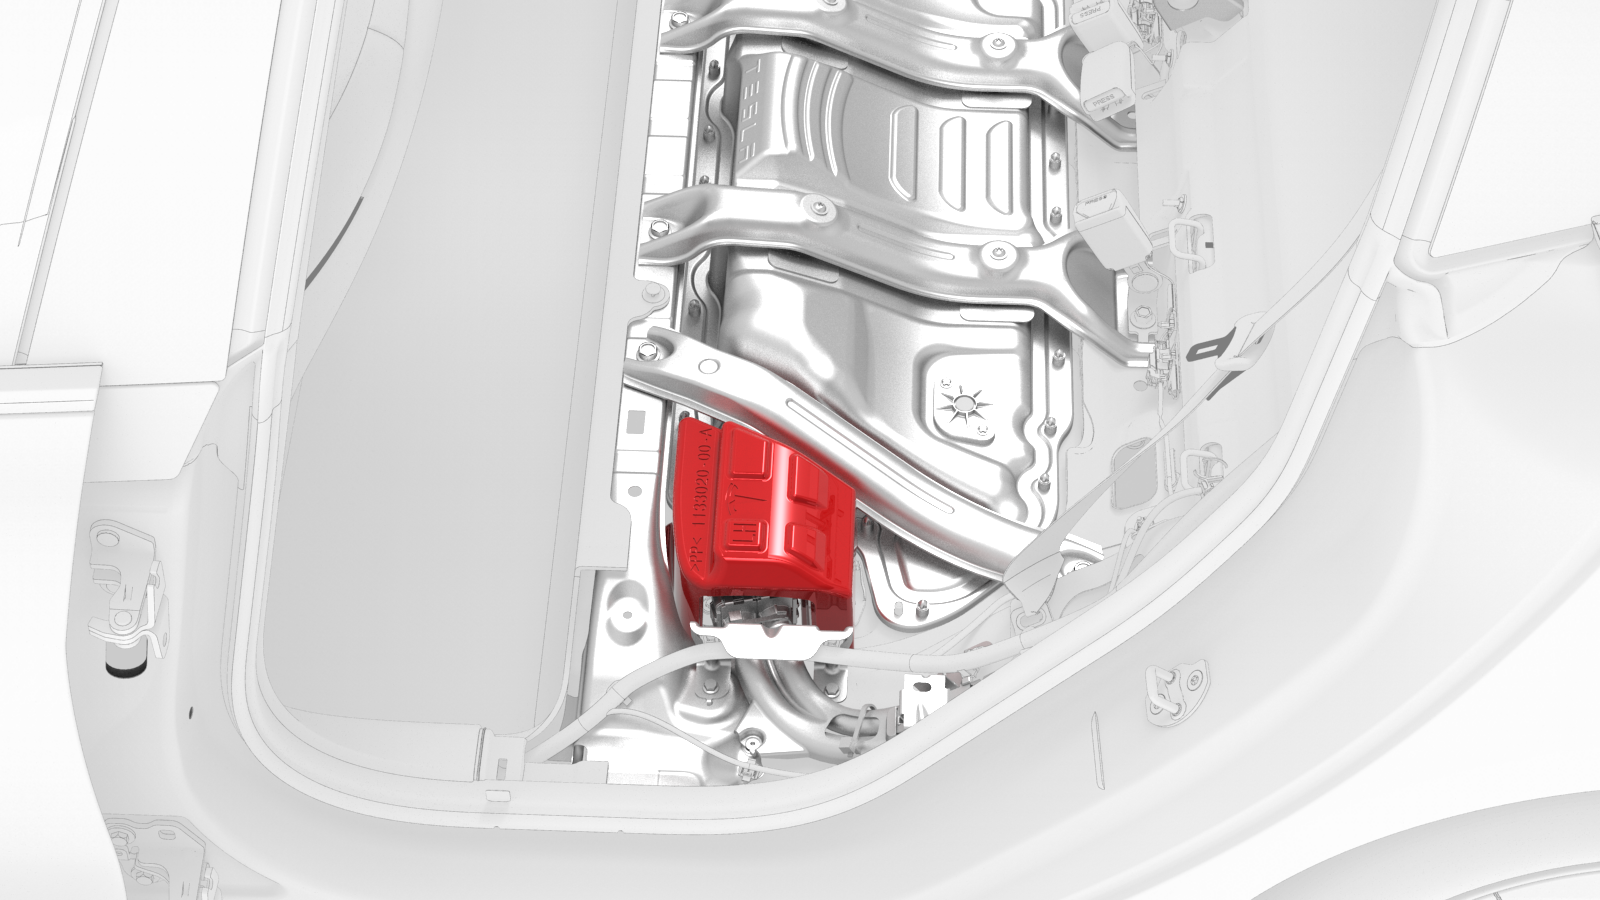
Remove the HV cap that covers the HV harness located on the LH side of the penthouse.
-
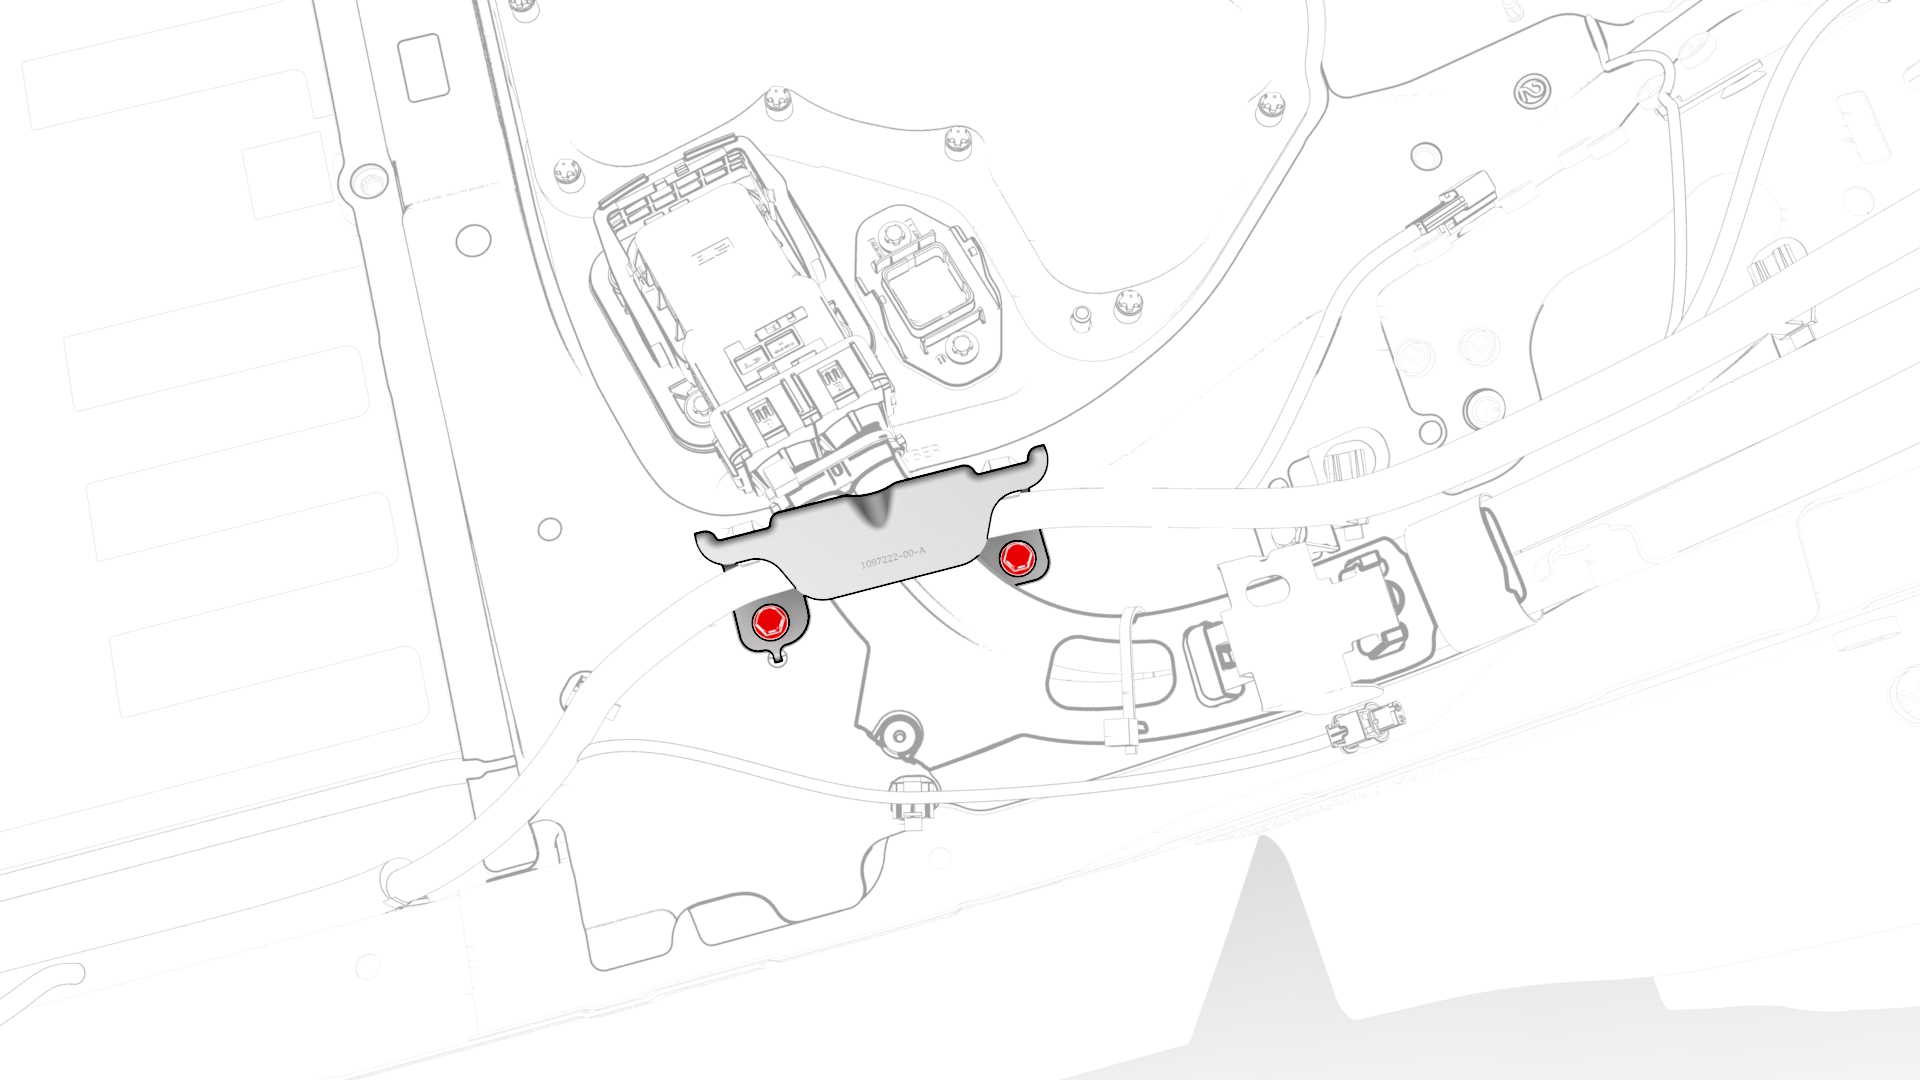
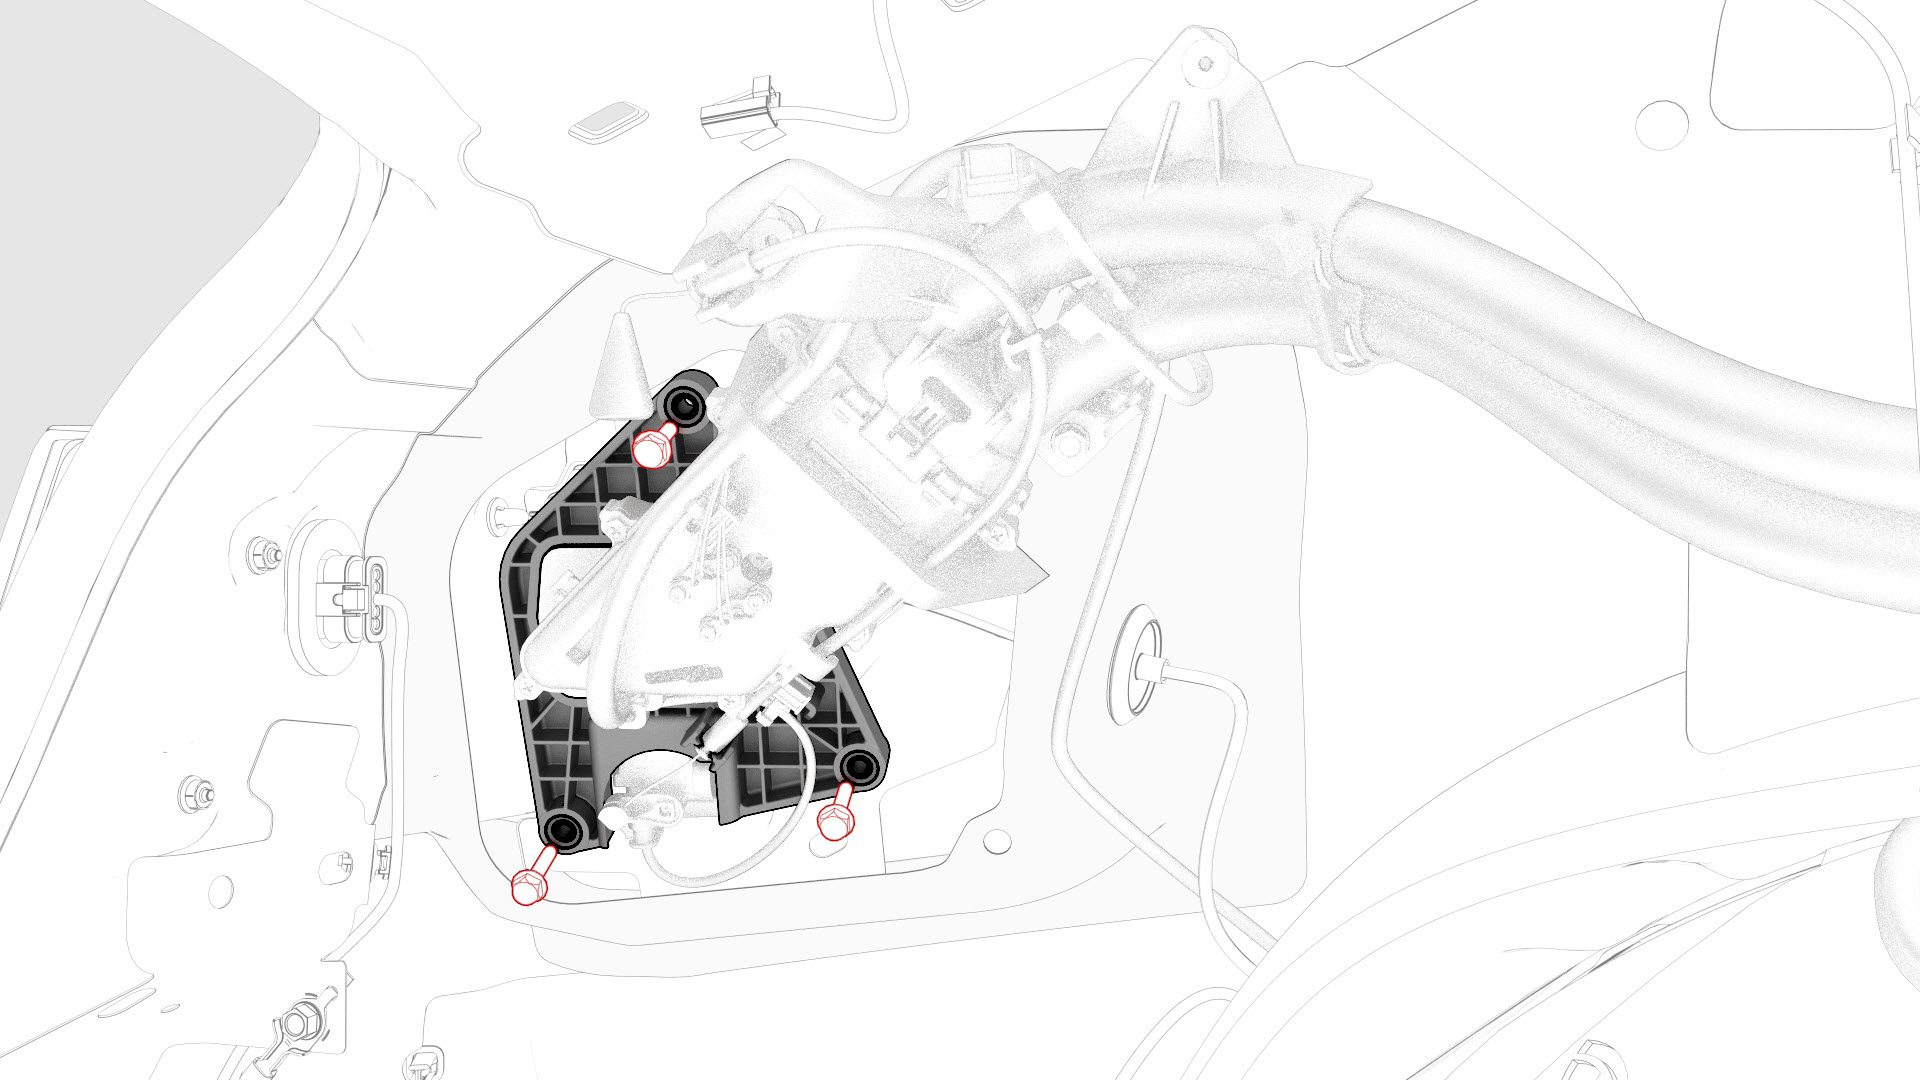
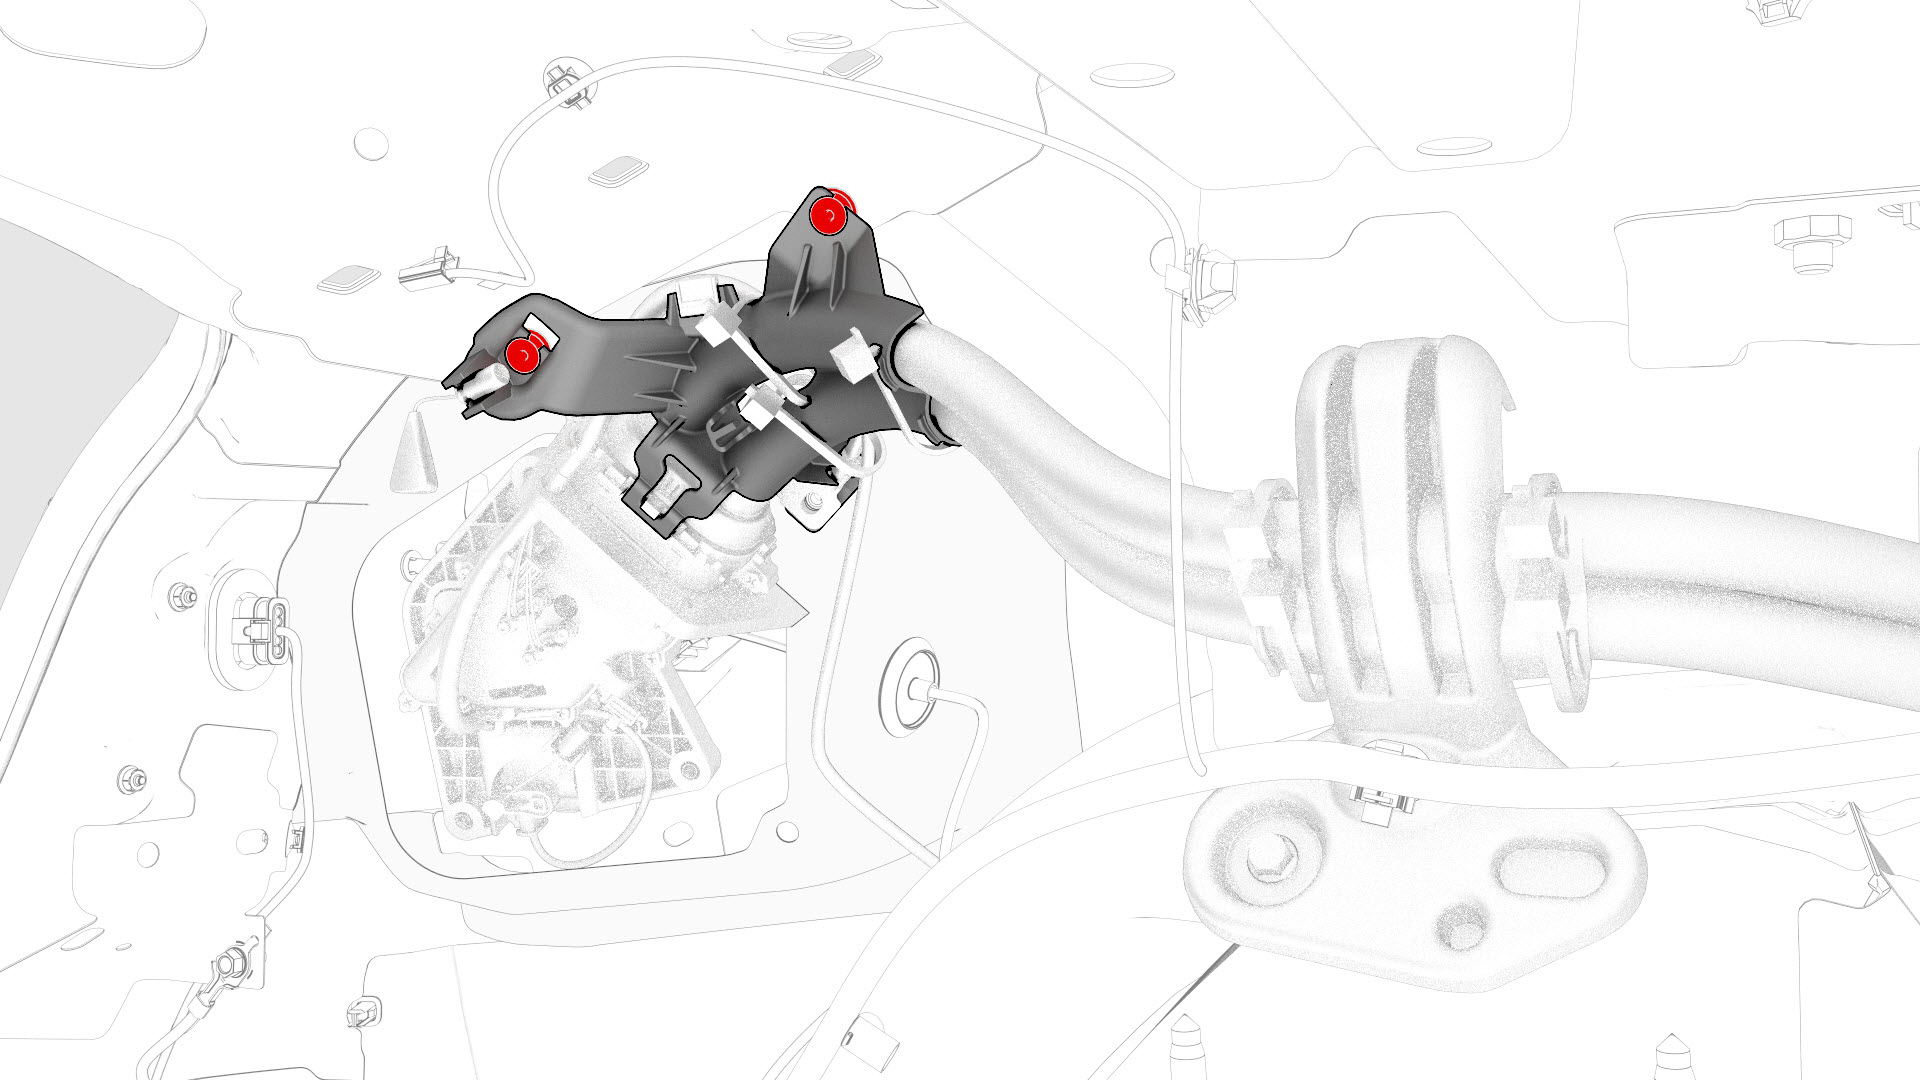
Remove the bolts that attach the charge port to HV battery harness bracket at the penthouse, and then remove the bracket from the vehicle.
-
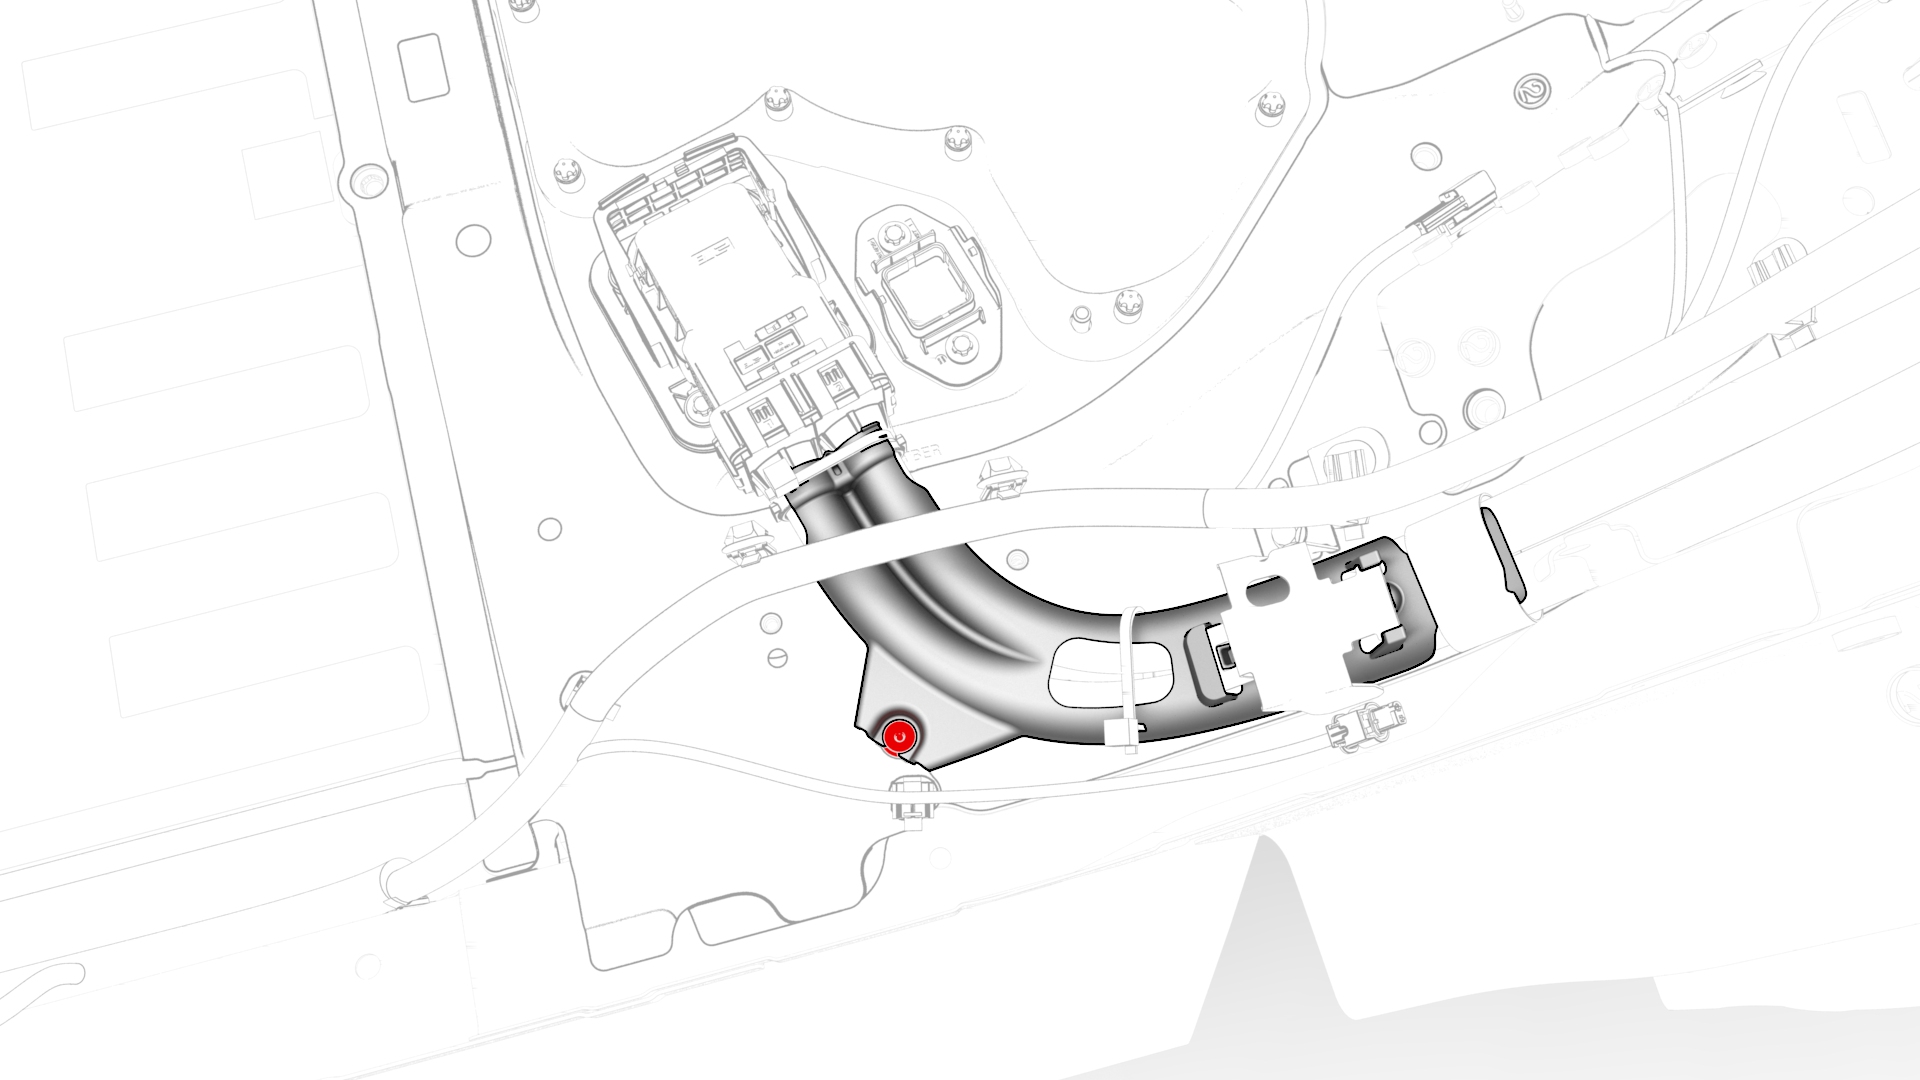
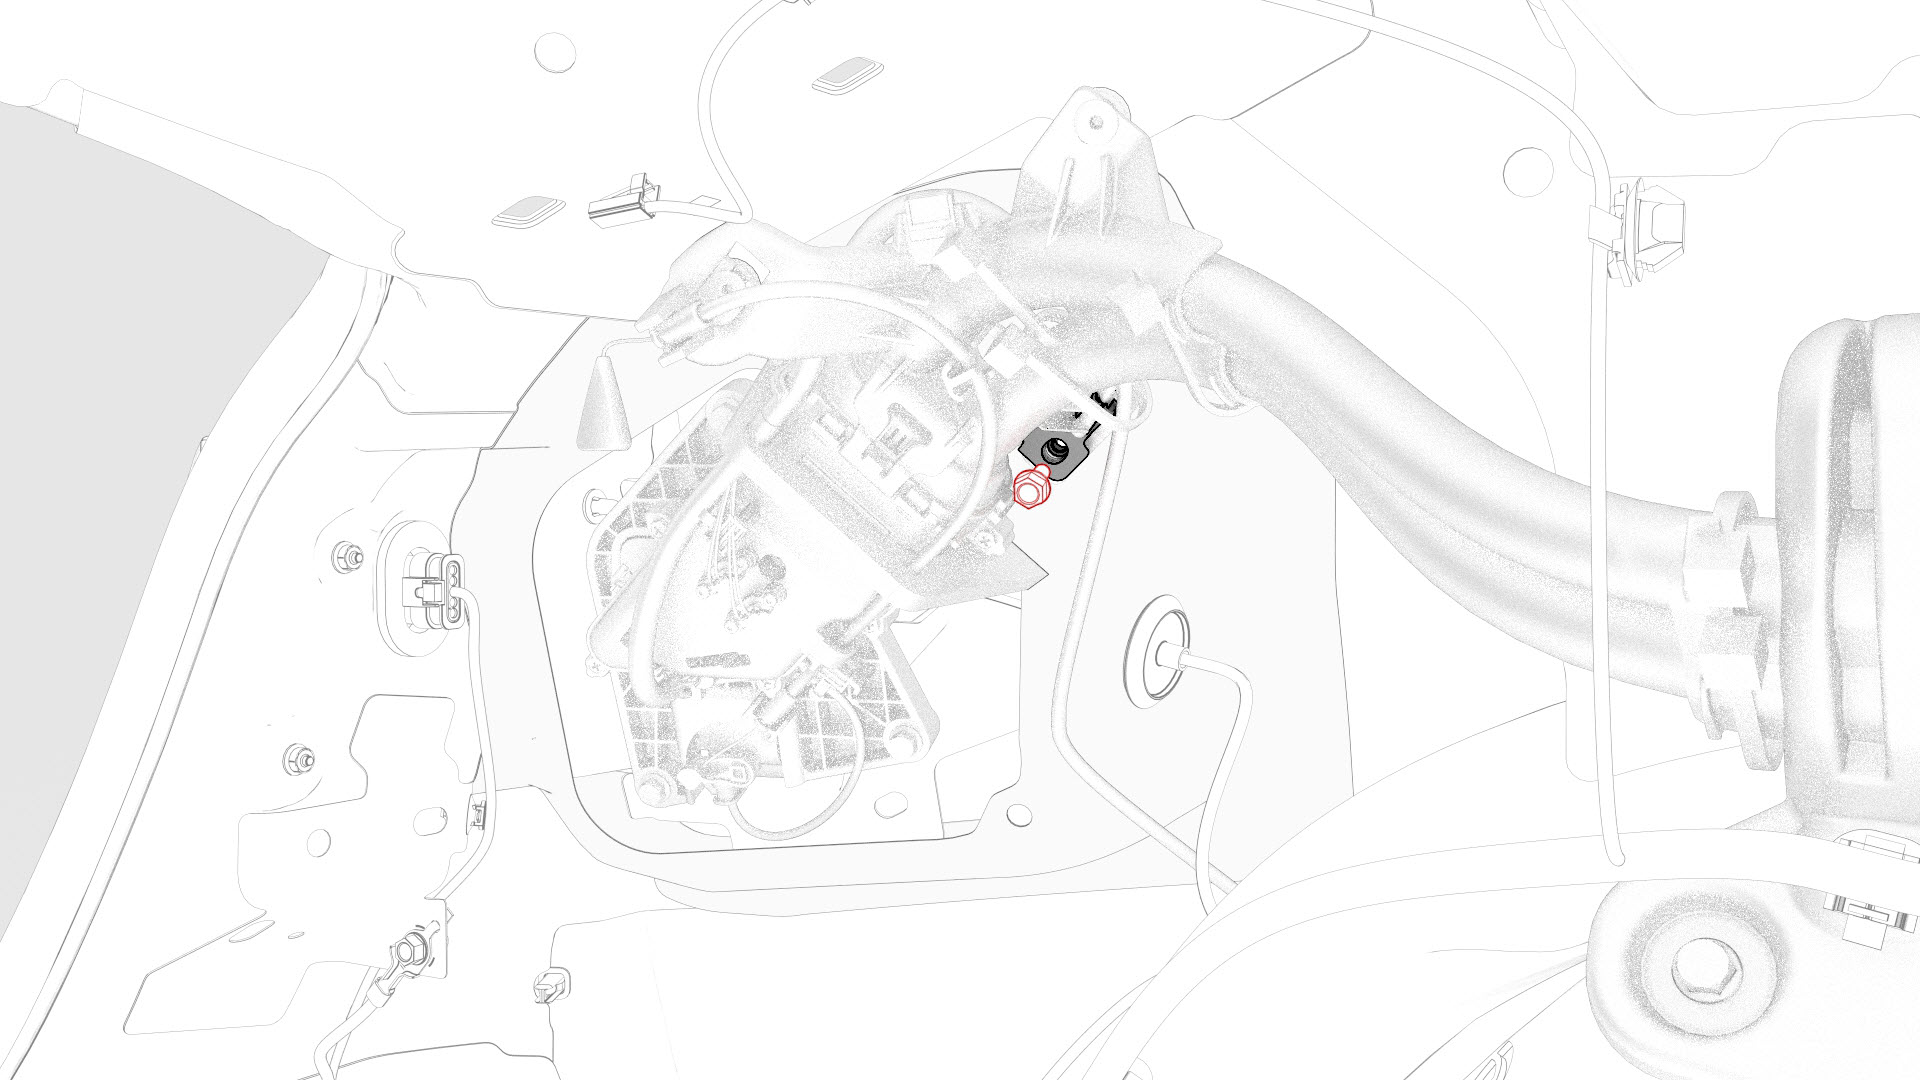
Release the clip that attaches the charge port to HV battery harness to the LH lower C-pillar.
-
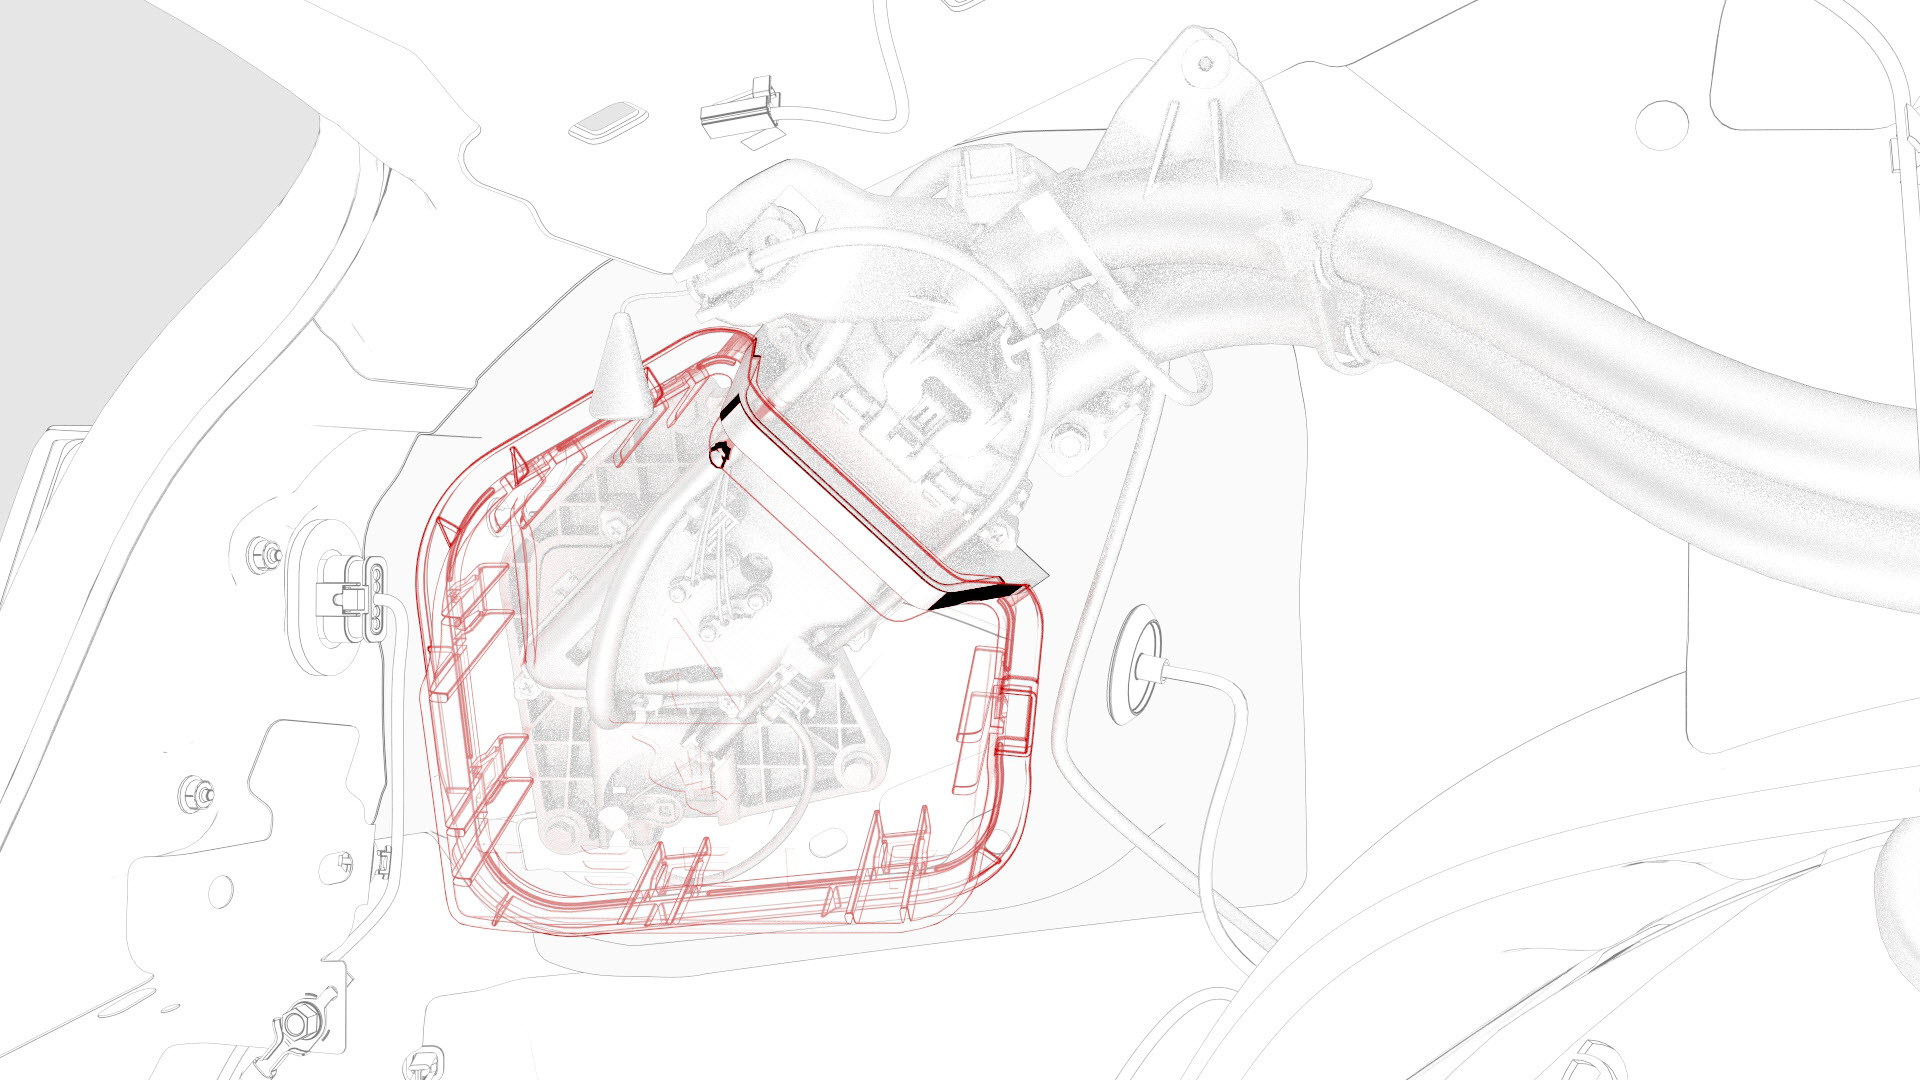
Raise the handle to disconnect the charge port to HV battery harness from the DC input assembly.
-
Remove the LH trunk stop.
-
Release the edge clip that attaches the HV harness to the charge port closeout panel.
-
Disconnect the low voltage electrical connectors from the charge port ECU.
-
Slightly pull on the closeout panel. At the same time, insert a plastic trim tool inwards to start releasing the lower clips, and then pull the closeout panel towards the front of the vehicle while releasing the remaining clips.
-
Remove the bolt that attaches the charge port ground bolt to the body.
-
Remove the bolts that attach the charge port to the body.
-
Remove the bolt that attaches the charge port harness bracket to the body.

-
Release the clips that attach the charge port electrical harness to the body.
-
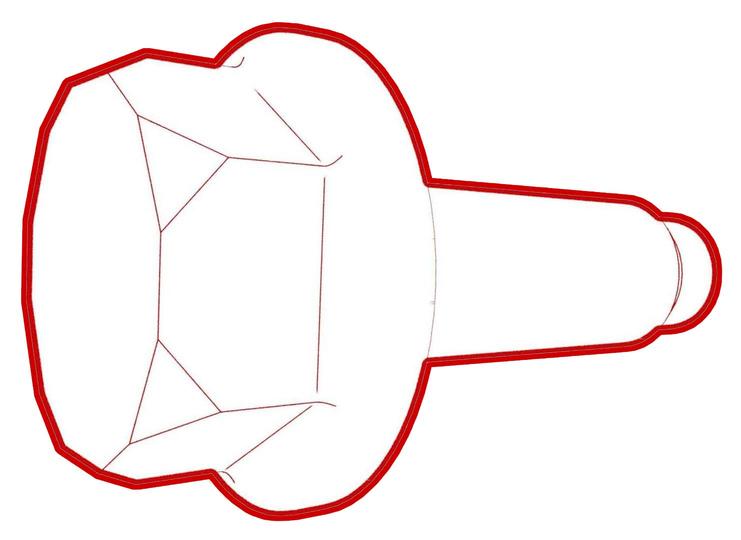
Release the charge port door grommet from the body
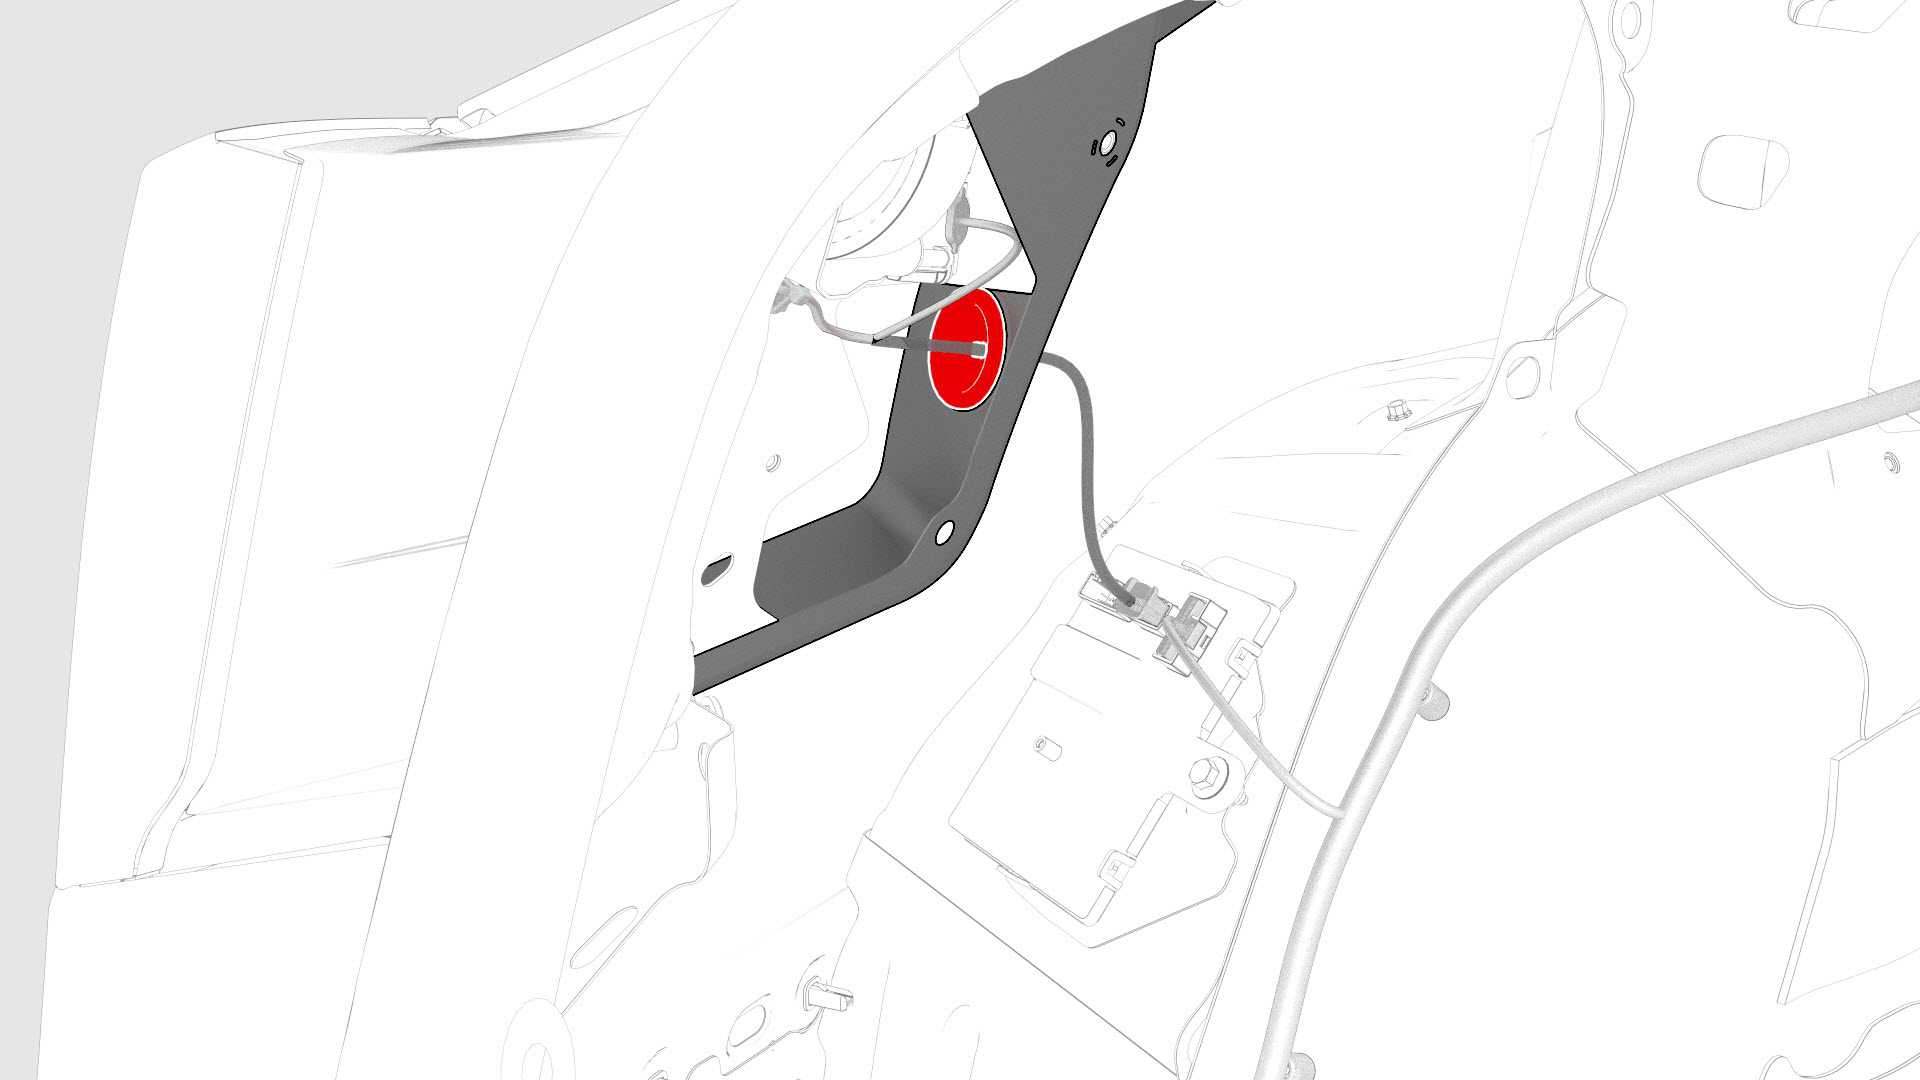
-
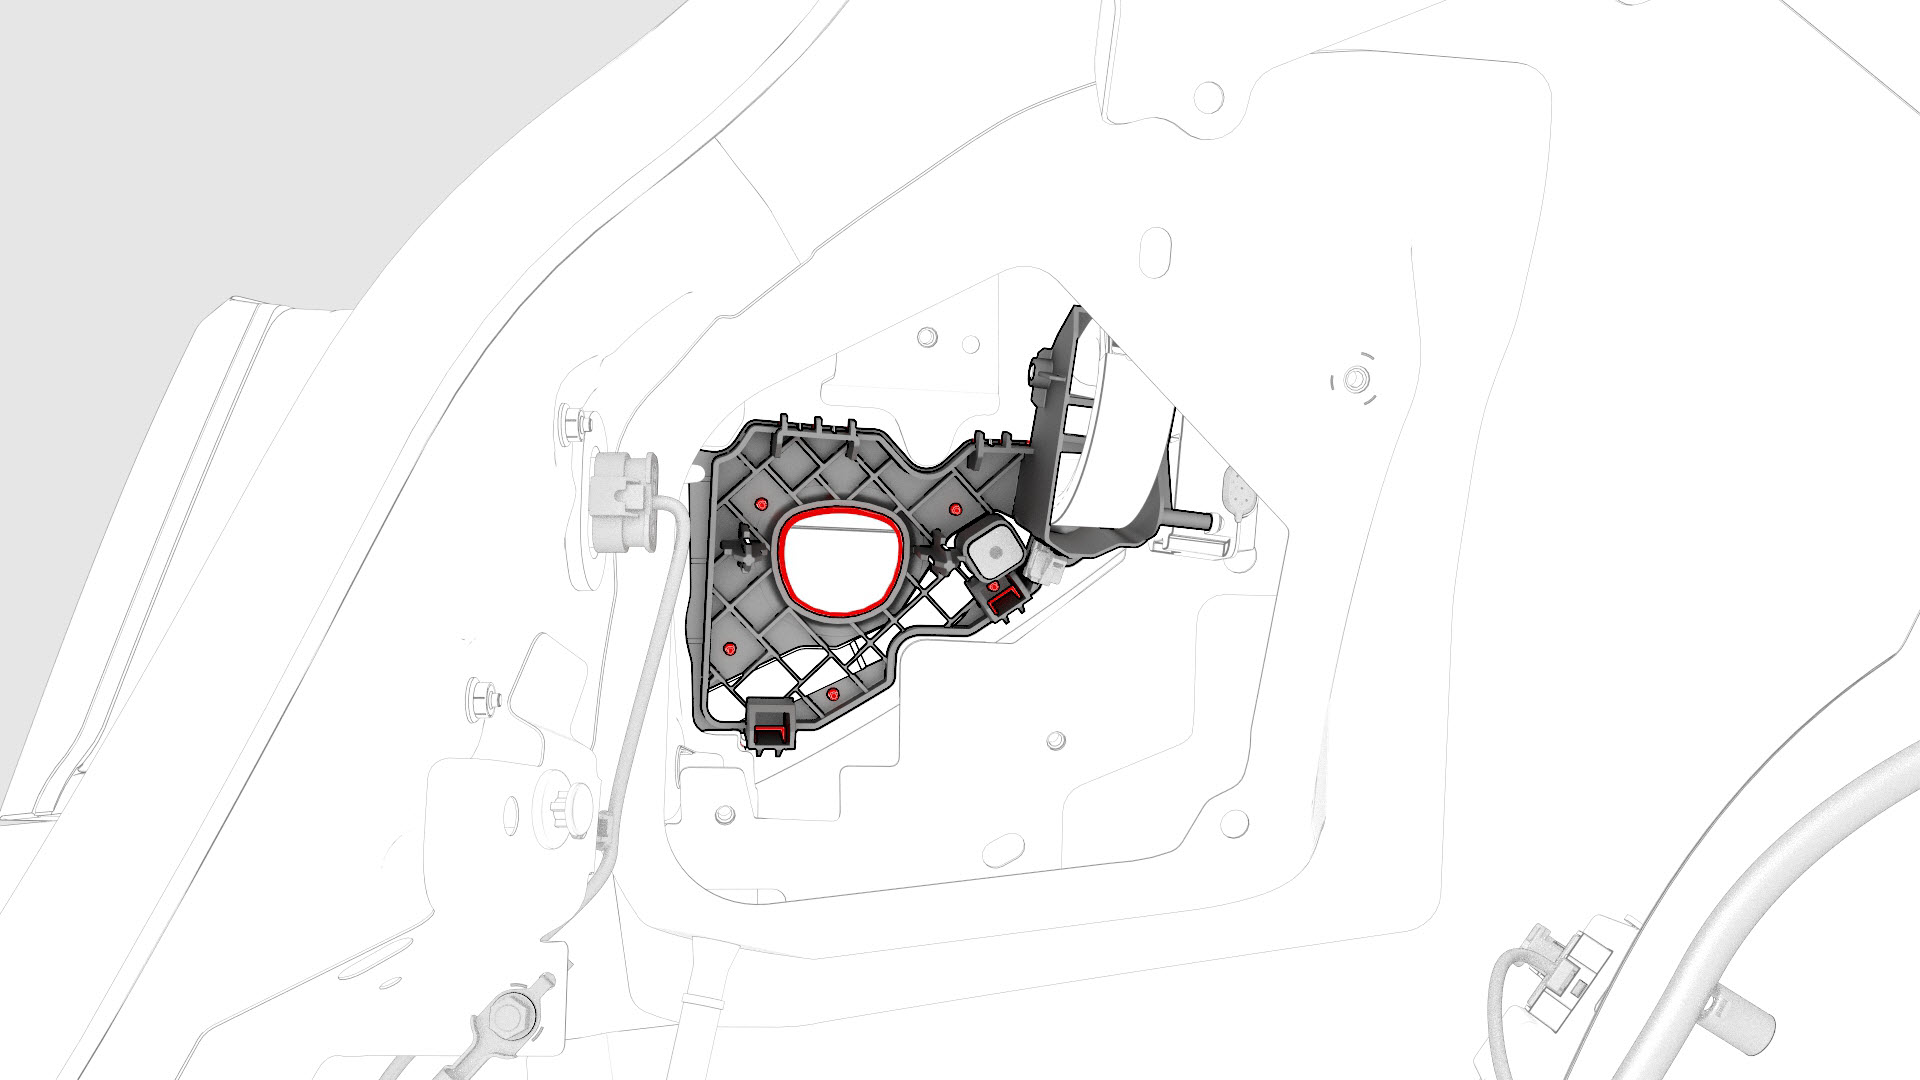
Release the clips that attach the charge port door to the vehicle, and then remove the charge port door.
Note: Release the bottom clips first, push the bottom of the charge port door out, and then down to release the upper tabs. Slide the charge port towards the rear of the vehicle to remove the charge port door.
| 1 | Remove the 2nd row lower seat cushion. See Seat Cushion - Lower - 2nd Row (Remove and Replace). | ||
| 2 | Remove the rear underhood apron. See Underhood Apron - Rear (Remove and Replace). | ||
| 3 | Disconnect 12V power. See 12V Power (Disconnect and Connect). | ||
| 4 | Perform the vehicle electrical isolation procedure. See Vehicle Electrical Isolation Procedure. | ||
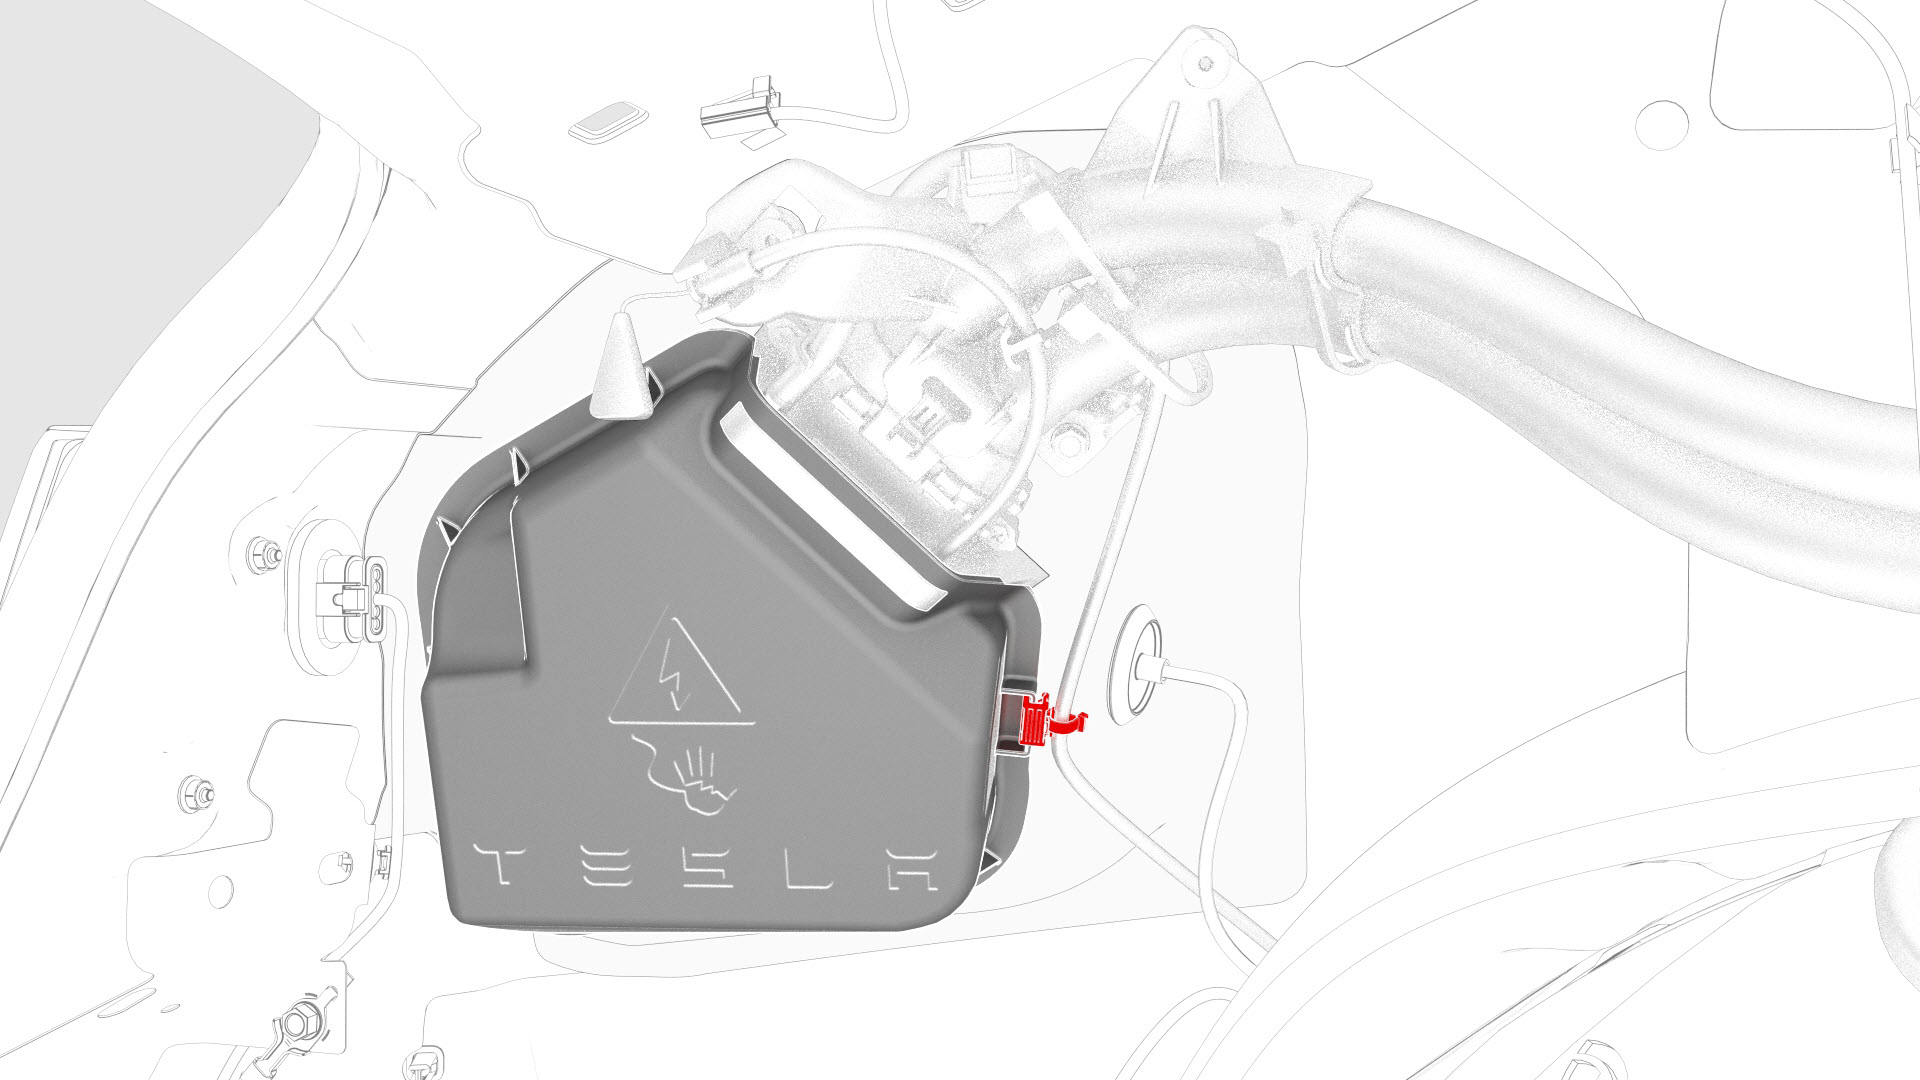
| 5 | Remove the HV cap that covers the HV harness located on the LH side of the penthouse. | |
| 6 | Remove the LH 2nd row seat side bolster. See Bolster - Side - Seat - 2nd Row - LH (Remove and Replace). | ||
| 7 | Remove the LH rear sill panel trim. See Trim - Sill Panel - Rear - LH (Remove and Replace). | ||
| 8 | Remove the LH trunk side trim. See Trim - Side - Trunk - LH (Remove and Replace). | ||
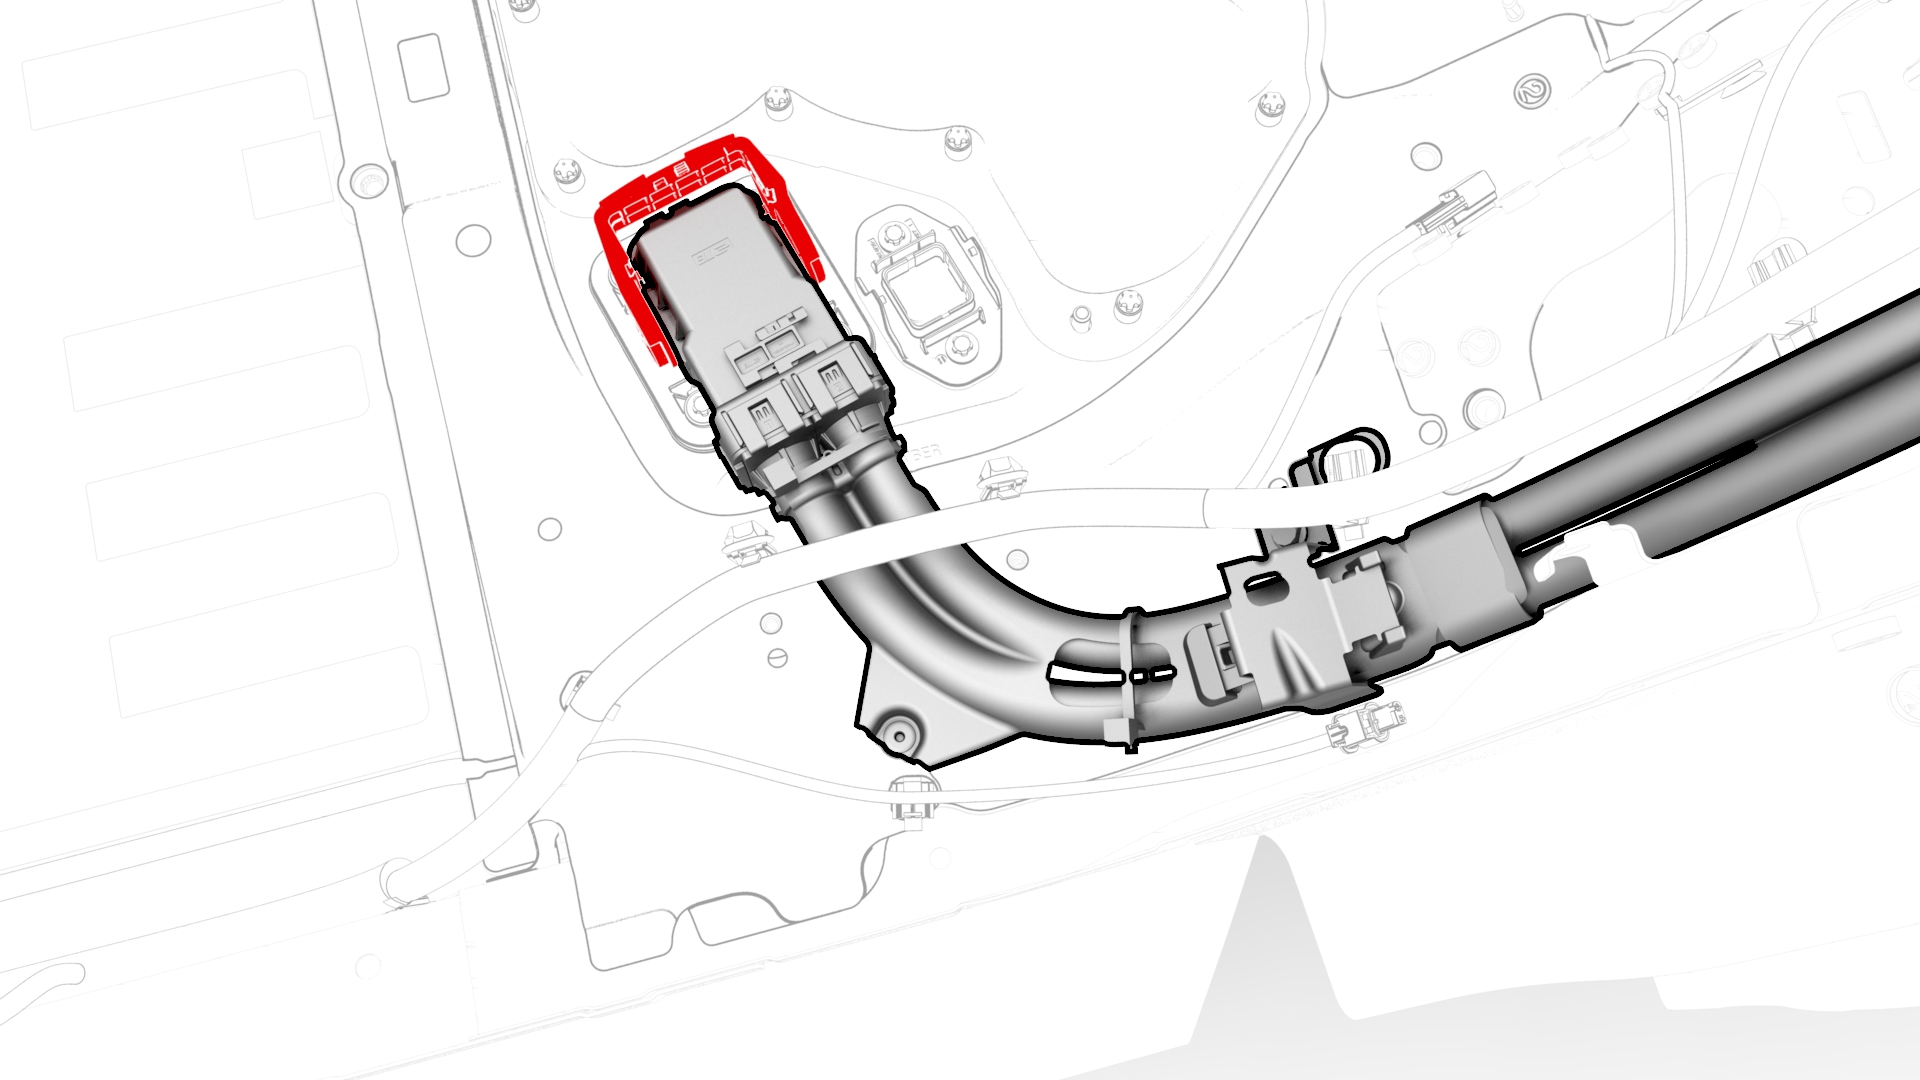
| 9 | Remove the bolts that attach the charge port to HV battery harness bracket at the penthouse, and then remove the bracket from the vehicle. | |
| 10 | Release the clip that attaches the charge port to HV battery harness to the LH lower C-pillar. | |
| 11 | Raise the handle to disconnect the charge port to HV battery harness from the DC input assembly. | |
| 12 | Remove the LH 2nd row seat back. See Seat Back - 2nd Row - LH (Remove and Install). | ||
| 13 | Remove the trunk floor trim. See Trim - Floor - Trunk (Remove and Replace). | ||
| 14 | Remove the trunk sill trim panel. See Trim - Sill - Trunk (Remove and Replace). | ||
| 15 | Remove the trunk garnish. See Garnish - Trunk (Remove and Replace). | ||
| 16 | Remove the LH trunk side trim. See Trim - Side - Trunk - LH (Remove and Replace). | ||
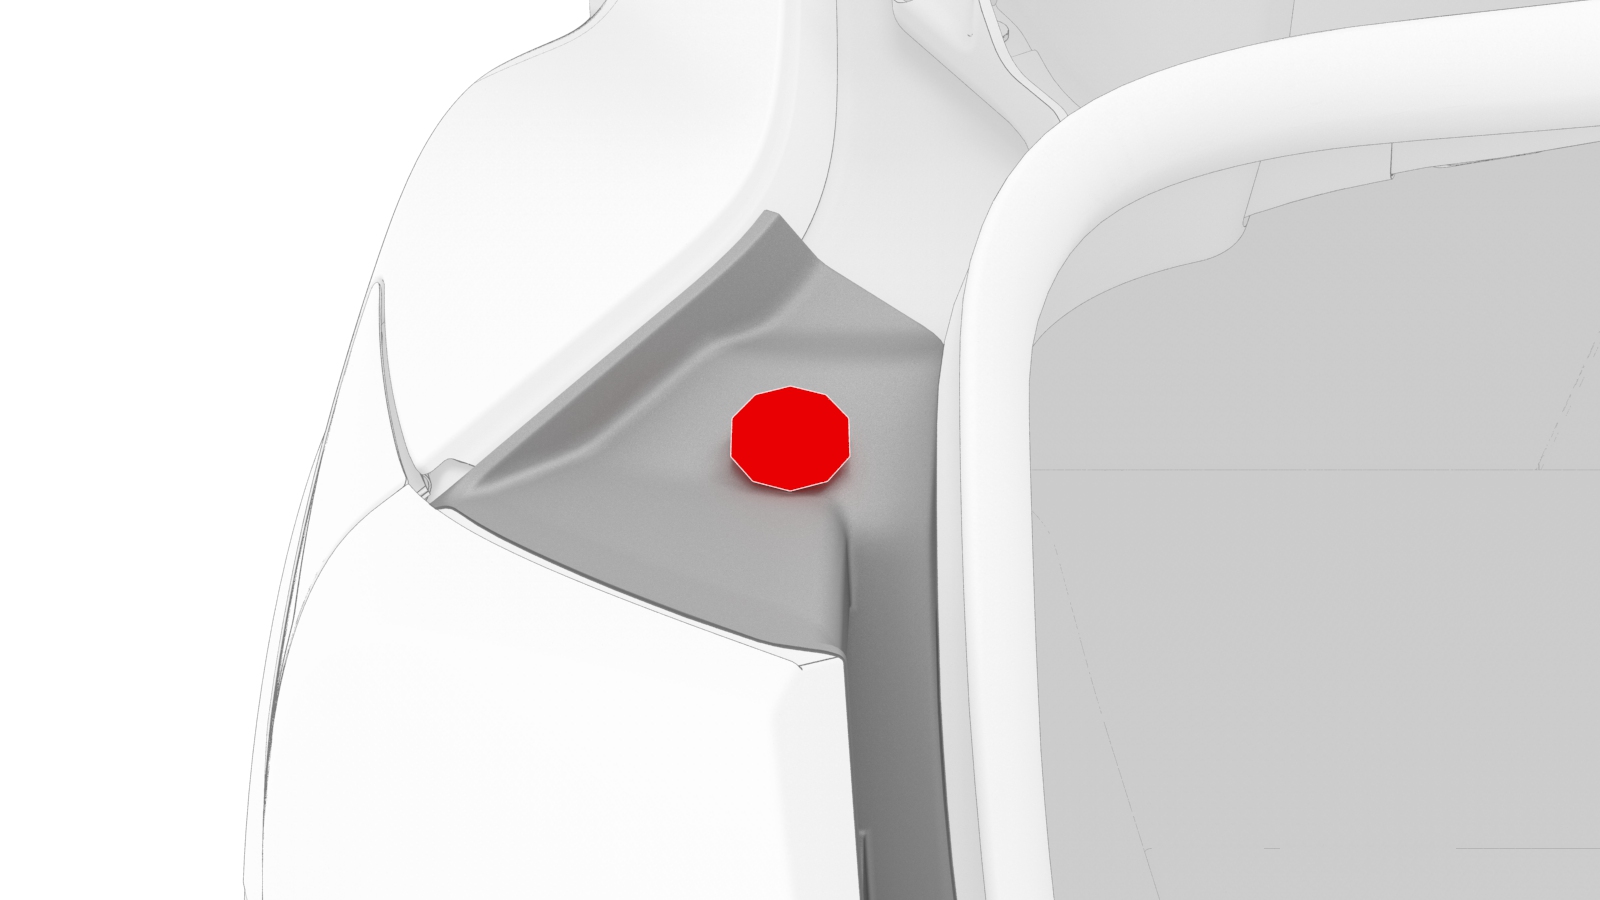
| 17 | Remove the LH trunk stop. | |
| 18 | Remove the LH taillight. See Taillight - LH (Remove and Replace). | ||
| 19 | Apply masking tape around the charge port area. | ||
| 20 | Release the edge clip that attaches the HV harness to the charge port closeout panel. | |
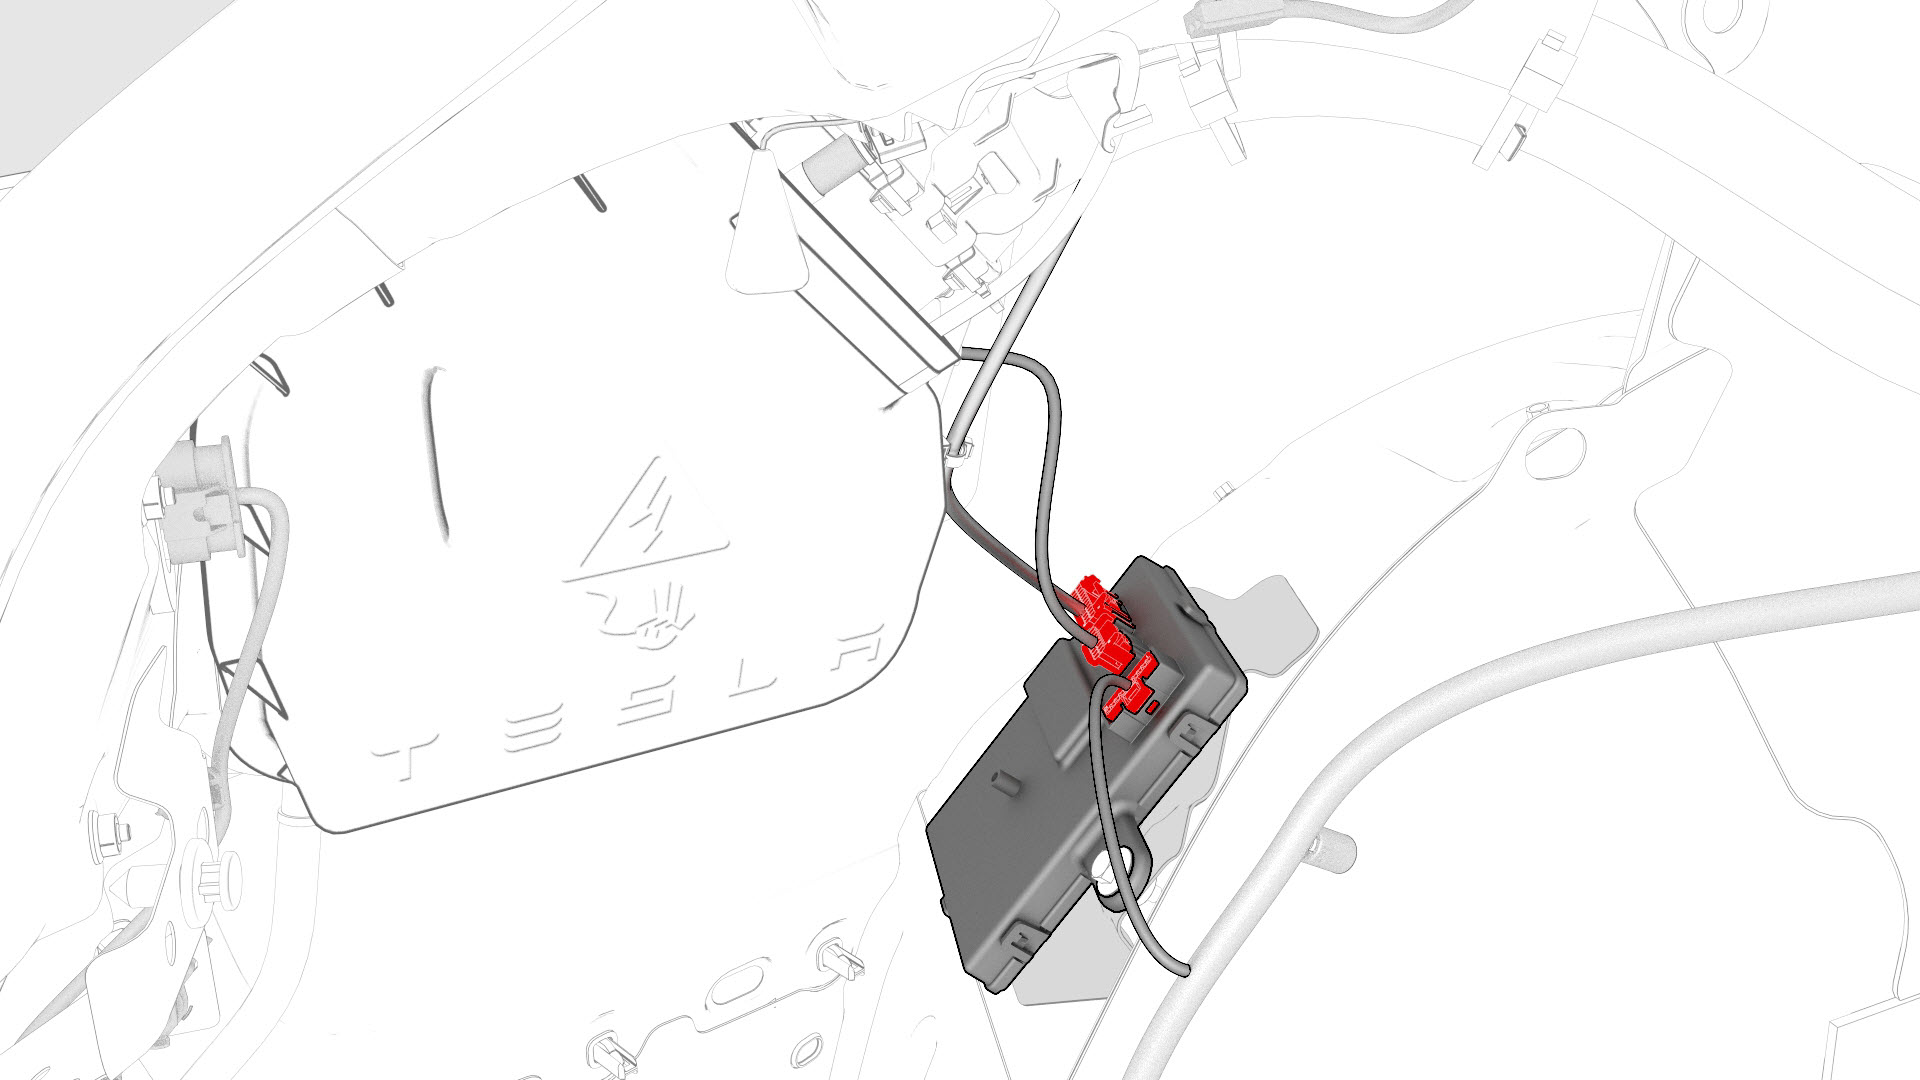
| 21 | Disconnect the low voltage electrical connectors from the charge port ECU. | |
| 22 | Slightly pull on the closeout panel. At the same time, insert a plastic trim tool inwards to start releasing the lower clips, and then pull the closeout panel towards the front of the vehicle while releasing the remaining clips. | |
| 23 | Remove the bolt that attaches the charge port ground bolt to the body. | |
| 24 | Remove the bolts that attach the charge port to the body. | |
| 25 | Remove the bolt that attaches the charge port harness bracket to the body. | |
| 26 | Release the clips that attach the charge port electrical harness to the body. | |
| 27 | Remove the charge port electrical harness, and then set it aside. | ||
| 28 | Release the charge port door grommet from the body | |
| 29 | Release the clips that attach the charge port door to the vehicle, and then remove the charge port door. Note: Release the bottom clips first, push the bottom of the charge port door out, and then down to release the upper tabs. Slide the charge port towards the rear of the vehicle to remove the charge port door.
|
Install
-
Install the charge port door grommet onto the body
-
Install the clips that attach the charge port electrical harness to the body.
-
Install the bolt that attaches the charge port harness bracket to the body.
 Torque 6 Nm
 -
Install the bolts that attach the charge port to the body.
 Torque 6 Nm
 -
Install the bolt that attaches the charge port ground bolt to the body.
 Torque 6 Nm
 -
Install the clips that attach the charge port closeout panel.
-
Connect the low voltage charge port ECU electrical connectors.
-
Install the edge clip that attaches the HV harness to the charge port closeout panel.
-
Install the LH trunk stop.
-
Connect the charge port to HV battery harness from the DC input assembly.
Note: Make sure that the locking tab is secured.
-
Install the clip that attaches the charge port to HV battery harness to the LH lower C-pillar.
-
Install the bolts that attach the charge port to HV battery harness bracket at the penthouse, and attach the electrical harness with clips (x2).
 Torque 10 Nm
 -
Install the HV cap that covers the HV harness located on the LH side of the penthouse.
| 1 | Install the charge port door onto the vehicle, and then attach the charge port door with clips. Note: Position the charge port door, then push the electrical harness through the opening and push up to attach the upper tabs, and then inwards to attach the lower clips.
| ||
| 2 | Install the charge port door grommet onto the body | |
| 3 | Align the charge port with the 2 guide tabs, and then position the charge port in position. | ||
| 4 | Install the clips that attach the charge port electrical harness to the body. | |
| 5 | Install the bolt that attaches the charge port harness bracket to the body. Torque 6 Nm | |
| 6 | Install the bolts that attach the charge port to the body. Torque 6 Nm | |
| 7 | Install the bolt that attaches the charge port ground bolt to the body. Torque 6 Nm | |
| 8 | Install the clips that attach the charge port closeout panel. | |
| 9 | Connect the low voltage charge port ECU electrical connectors. | |
| 10 | Install the edge clip that attaches the HV harness to the charge port closeout panel. | |
| 11 | Remove the masking tape from the charge port door area. | ||
| 12 | Install the LH taillight. See Taillight - LH (Remove and Replace). | ||
| 13 | Install the LH trunk stop. | |
| 14 | Install the LH trunk side trim. See Trim - Side - Trunk - LH (Remove and Replace). | ||
| 15 | Install the trunk garnish. See Garnish - Trunk (Remove and Replace). | ||
| 16 | Install the trunk sill trim panel. See Trim - Sill - Trunk (Remove and Replace). | ||
| 17 | Install the trunk floor trim. See Trim - Floor - Trunk (Remove and Replace). | ||
| 18 | Install the LH 2nd row seat back. See Seat Back - 2nd Row - LH (Remove and Install). | ||
| 19 | Perform the penthouse air leak test. See Penthouse Air Leak Test. | ||
| 20 | Connect the charge port to HV battery harness from the DC input assembly. Note: Make sure that the locking tab is secured.
| |
| 21 | Install the clip that attaches the charge port to HV battery harness to the LH lower C-pillar. | |
| 22 | Install the bolts that attach the charge port to HV battery harness bracket at the penthouse, and attach the electrical harness with clips (x2). Torque 10 Nm | |
| 23 | Install the LH rear sill panel trim. See Trim - Sill Panel - Rear - LH (Remove and Replace). | ||
| 24 | Install the LH 2nd row seat side bolster. See Bolster - Side - Seat - 2nd Row - LH (Remove and Replace). | ||
| 25 | Install the HV cap that covers the HV harness located on the LH side of the penthouse. | |
| 26 | Reconnect 12V power. See 12V Power (Disconnect and Connect). | ||
| 27 | Connect a laptop with Toolbox to the vehicle. | ||
| 28 | In Toolbox, type "CP" in the search tab. Note: Make sure that "Actions" is selected, if not already.
| ||
| 29 | In Toolbox, click the play button next to "TEST-SELF_ CP_X_FUNCTIONAL", and then click "Run". | ||
| 30 | In Toolbox, click the play button next to "TEST-SELF_ CP_X_UHF", and then click "Run". | ||
| 31 | Disconnect the laptop from the vehicle. | ||
| 32 | Install the rear underhood apron. See Underhood Apron - Rear (Remove and Replace). | ||
| 33 | Close the hood and the trunk. | ||
| 34 | Install the 2nd row lower seat cushion. See Seat Cushion - Lower - 2nd Row (Remove and Replace). |