Harness - Thermal Beam (Remove and Replace)
Correction code 1710130217101302
Remove
-
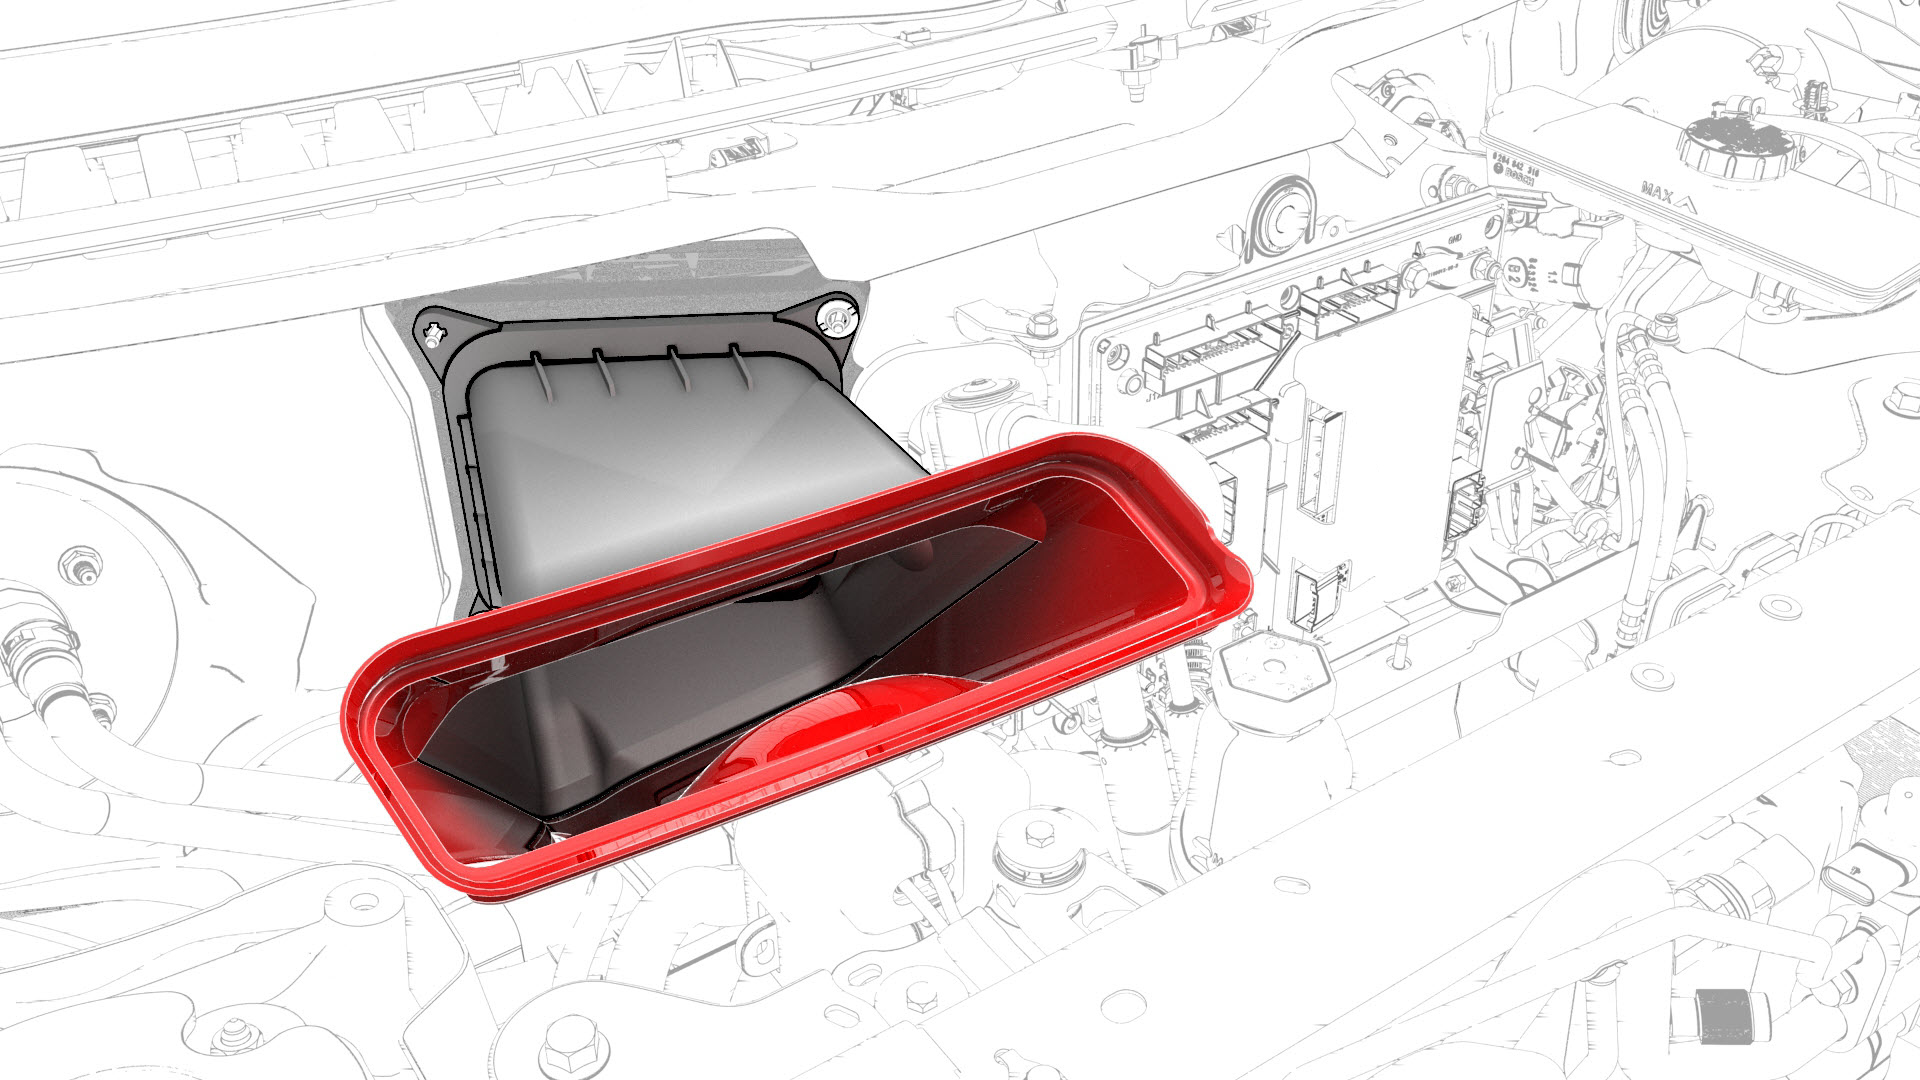
Release the clips that attach the HVAC plenum outer duct to the HVAC plenum inner duct, and then remove the outer duct.
-
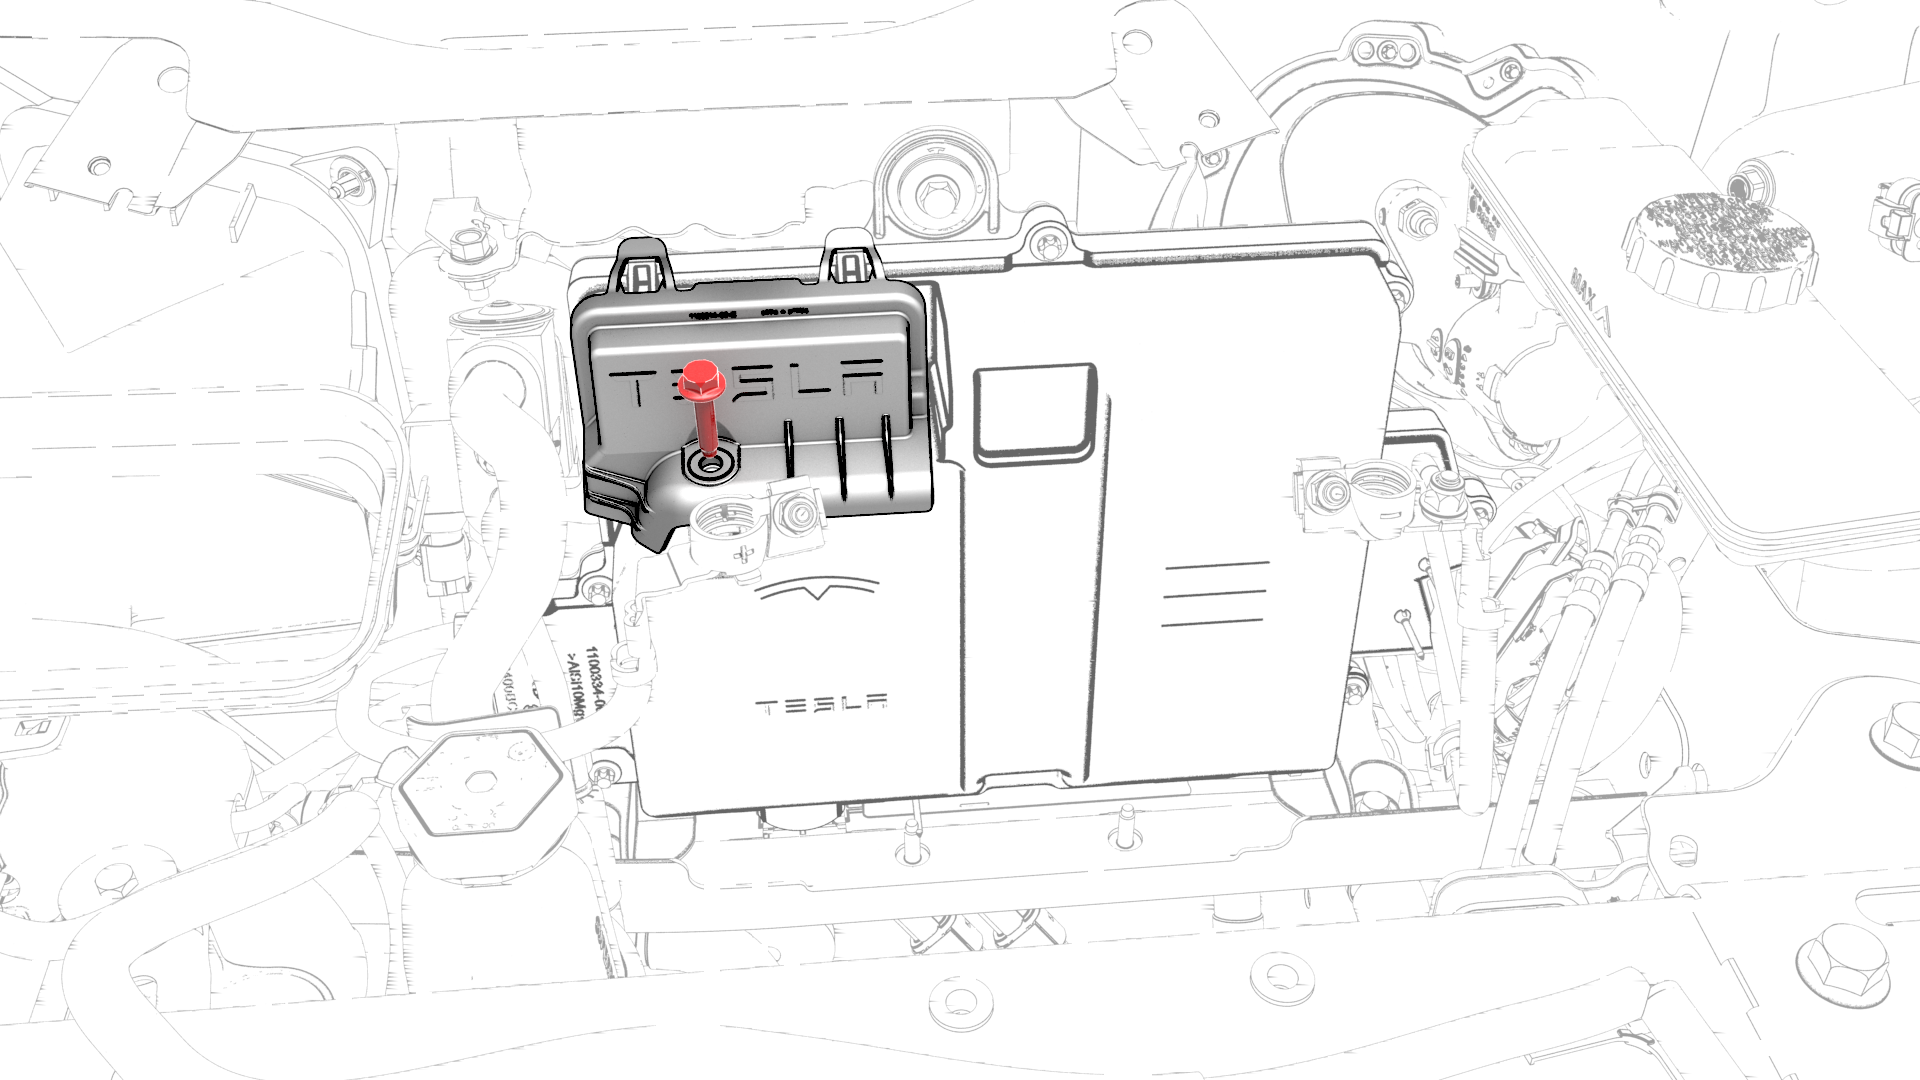
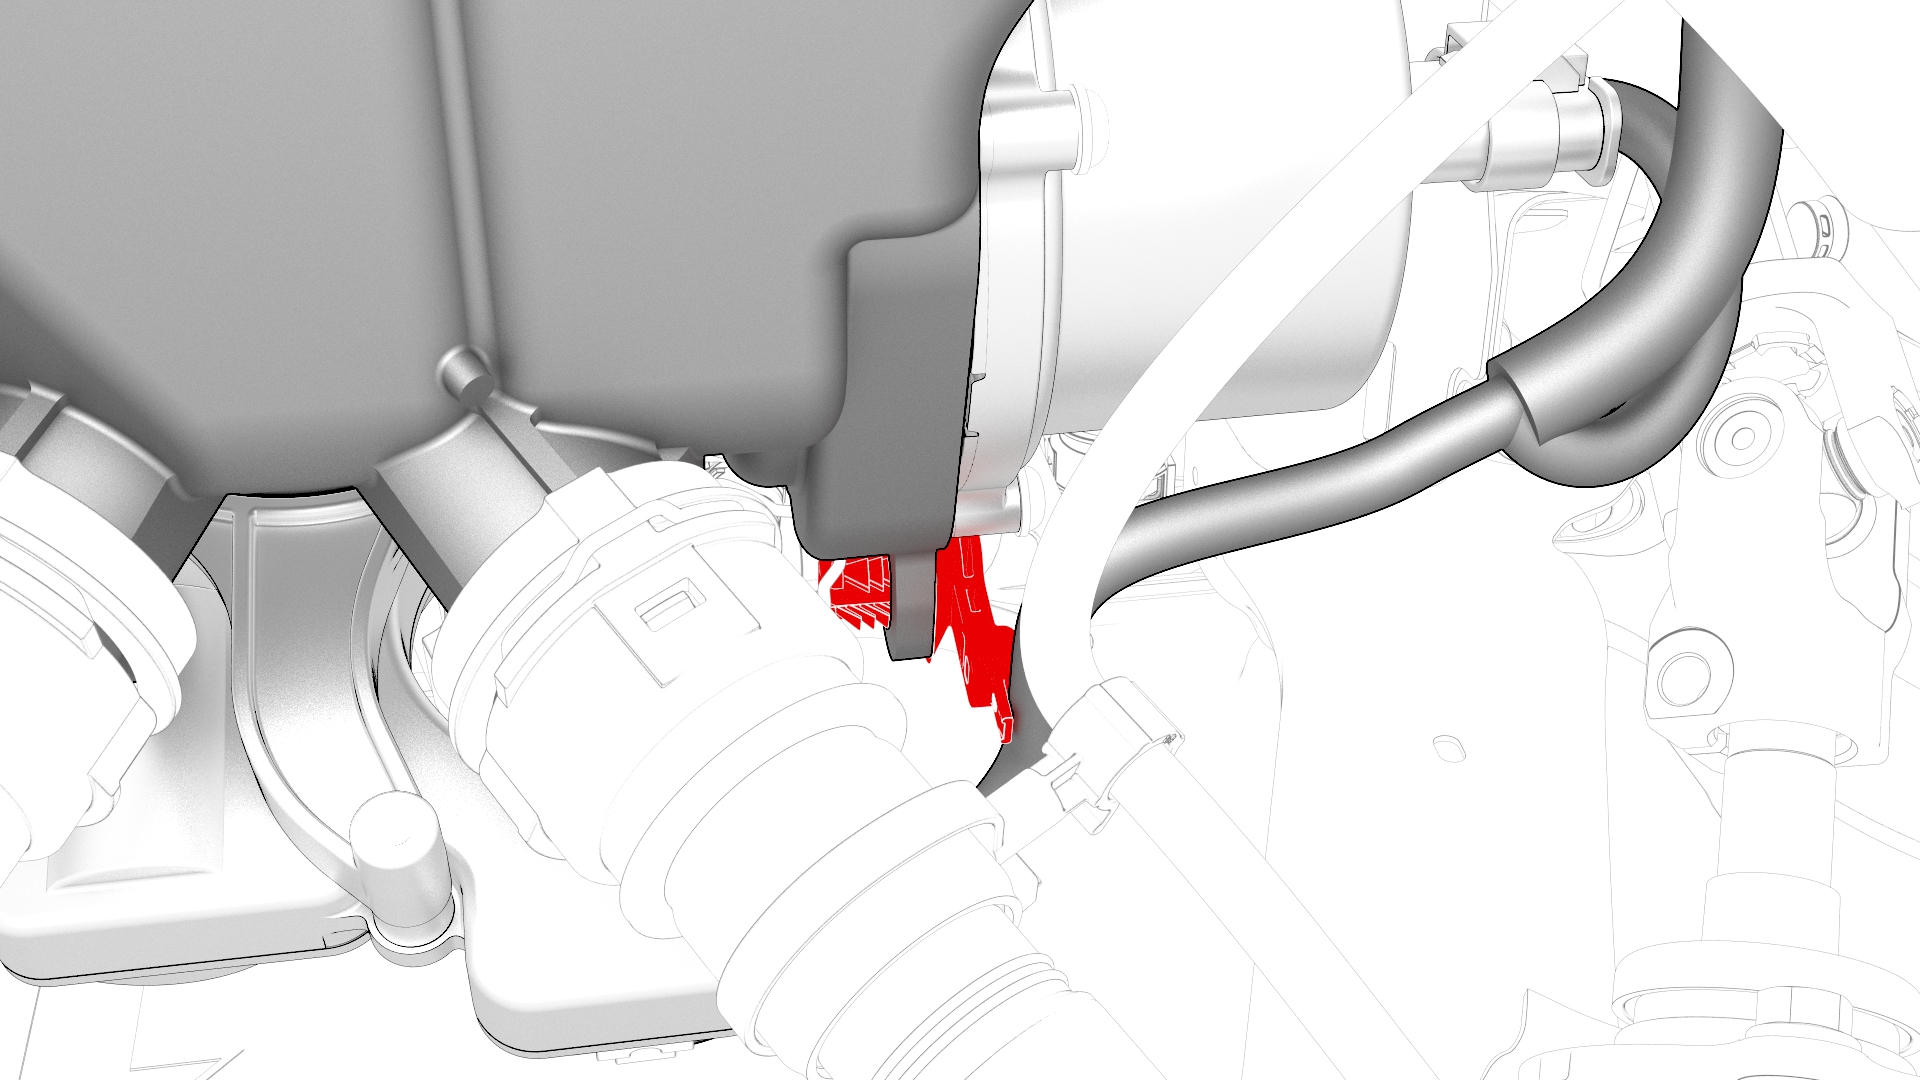
Remove the bolt that attaches the thermal beam electrical harness cover to the front body controller module, and then remove the cover.
-
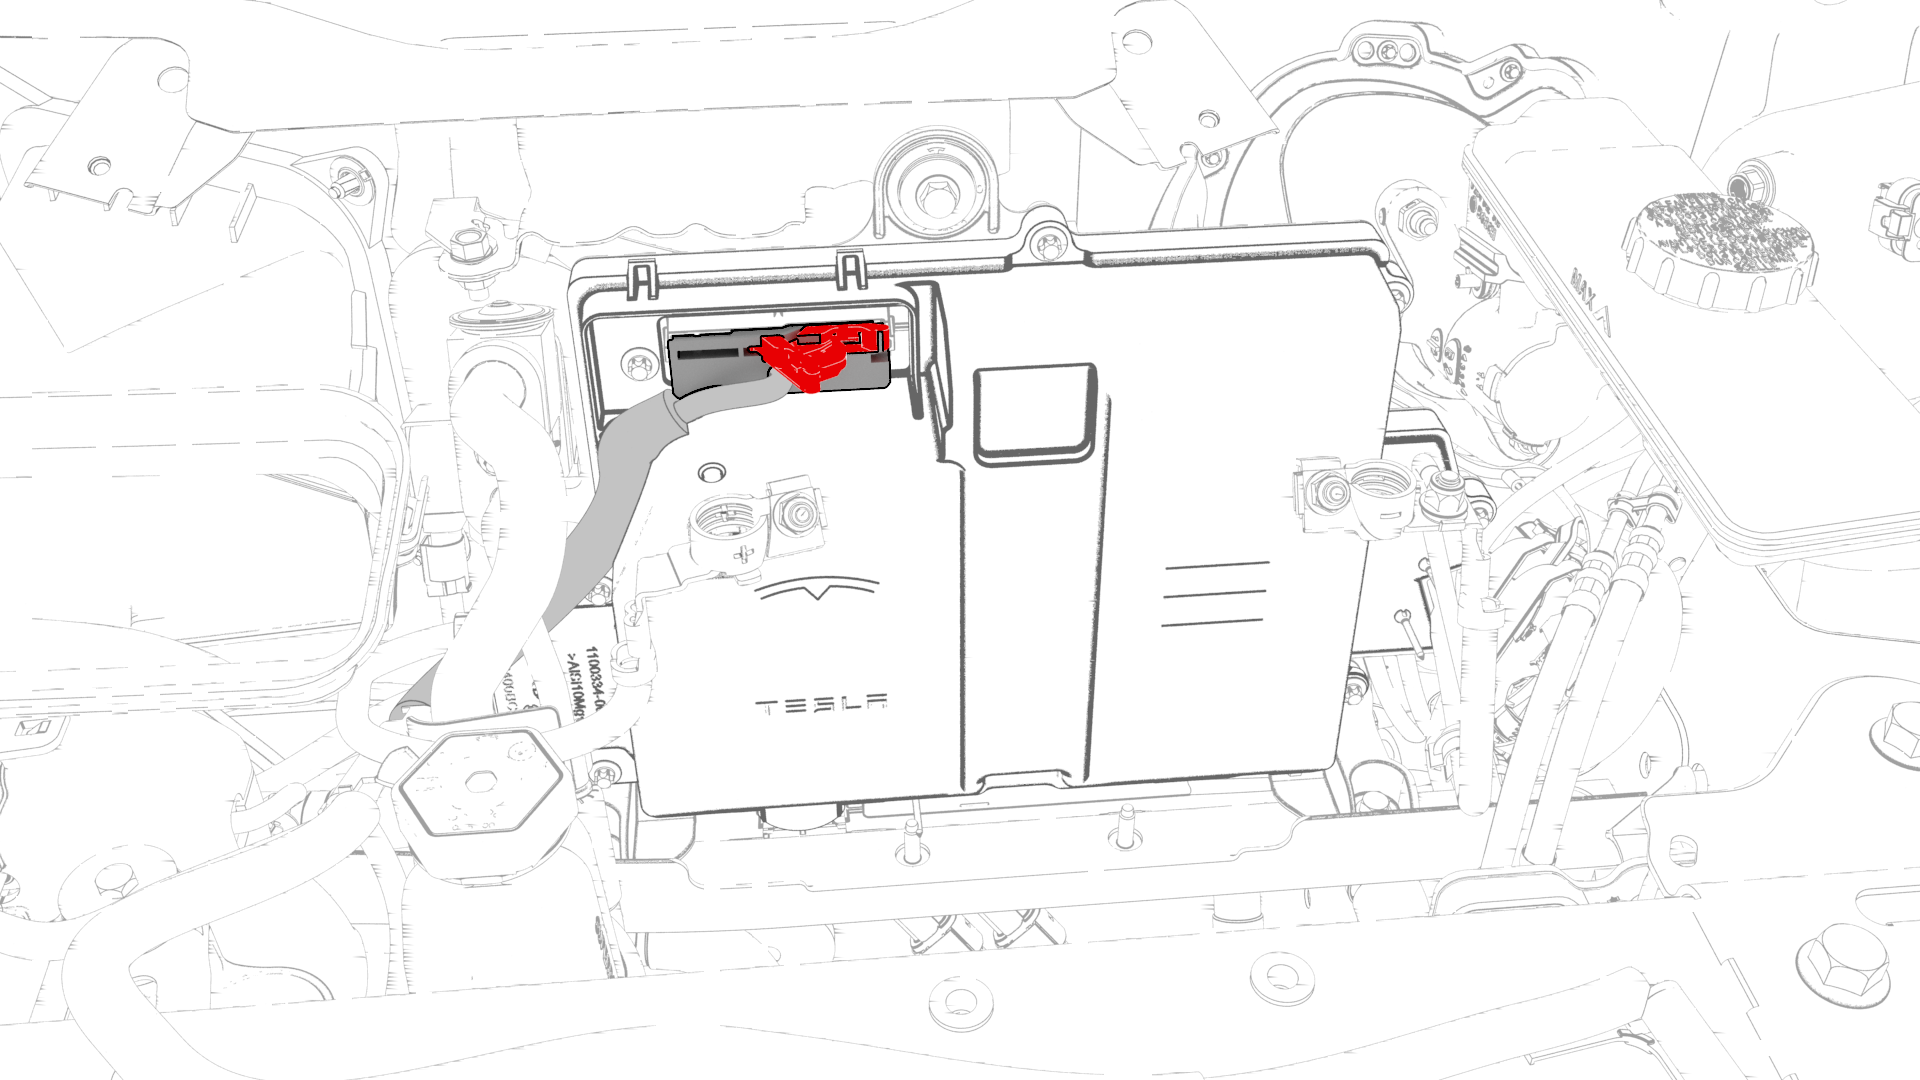
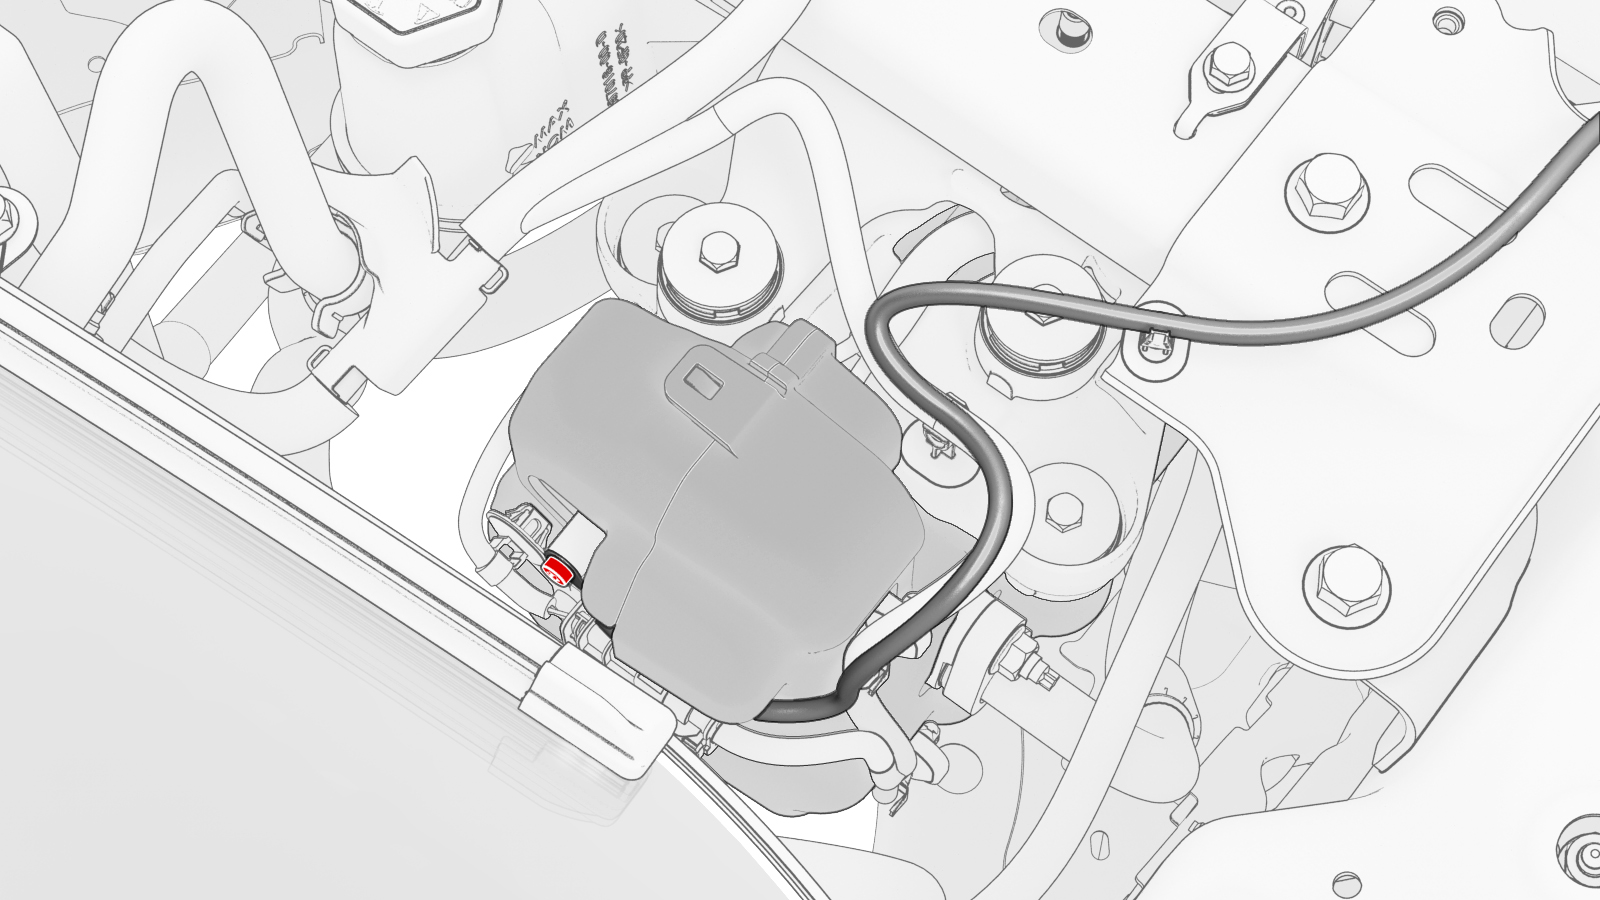
Disconnect the thermal beam electrical harness from the front body controller module connector.
-
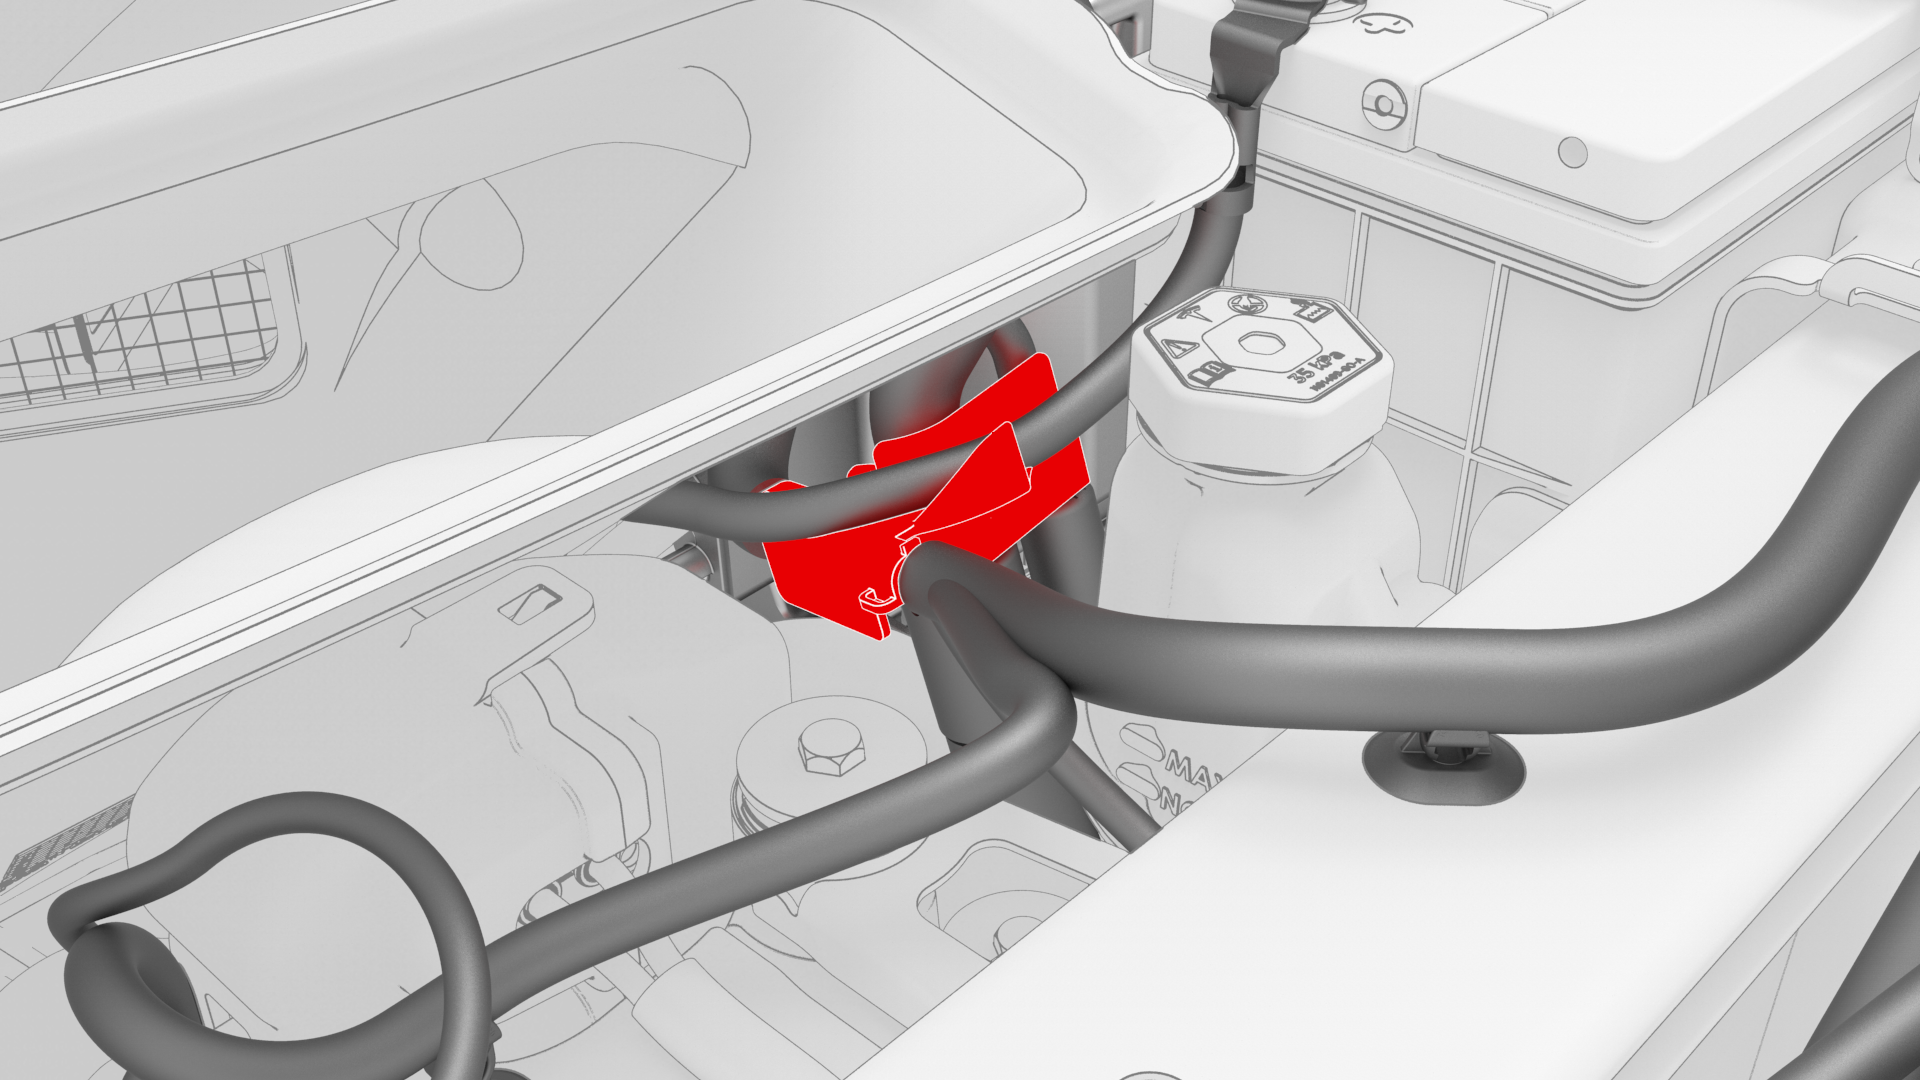
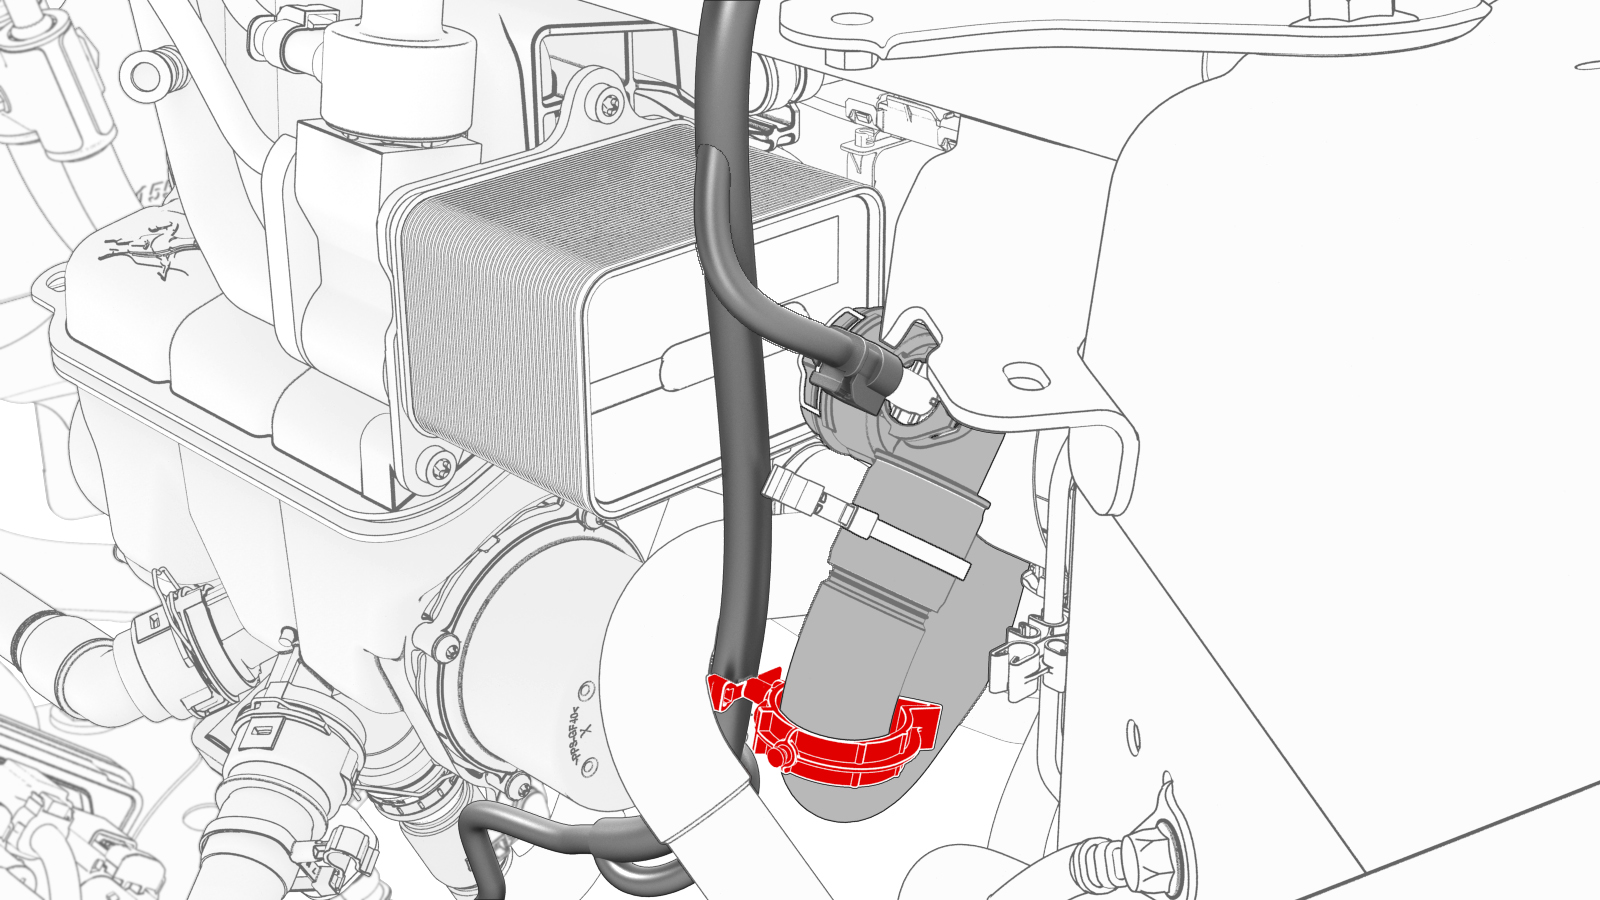
Release the clip that attaches the suction/liquid lines to the body near the TXV.
-
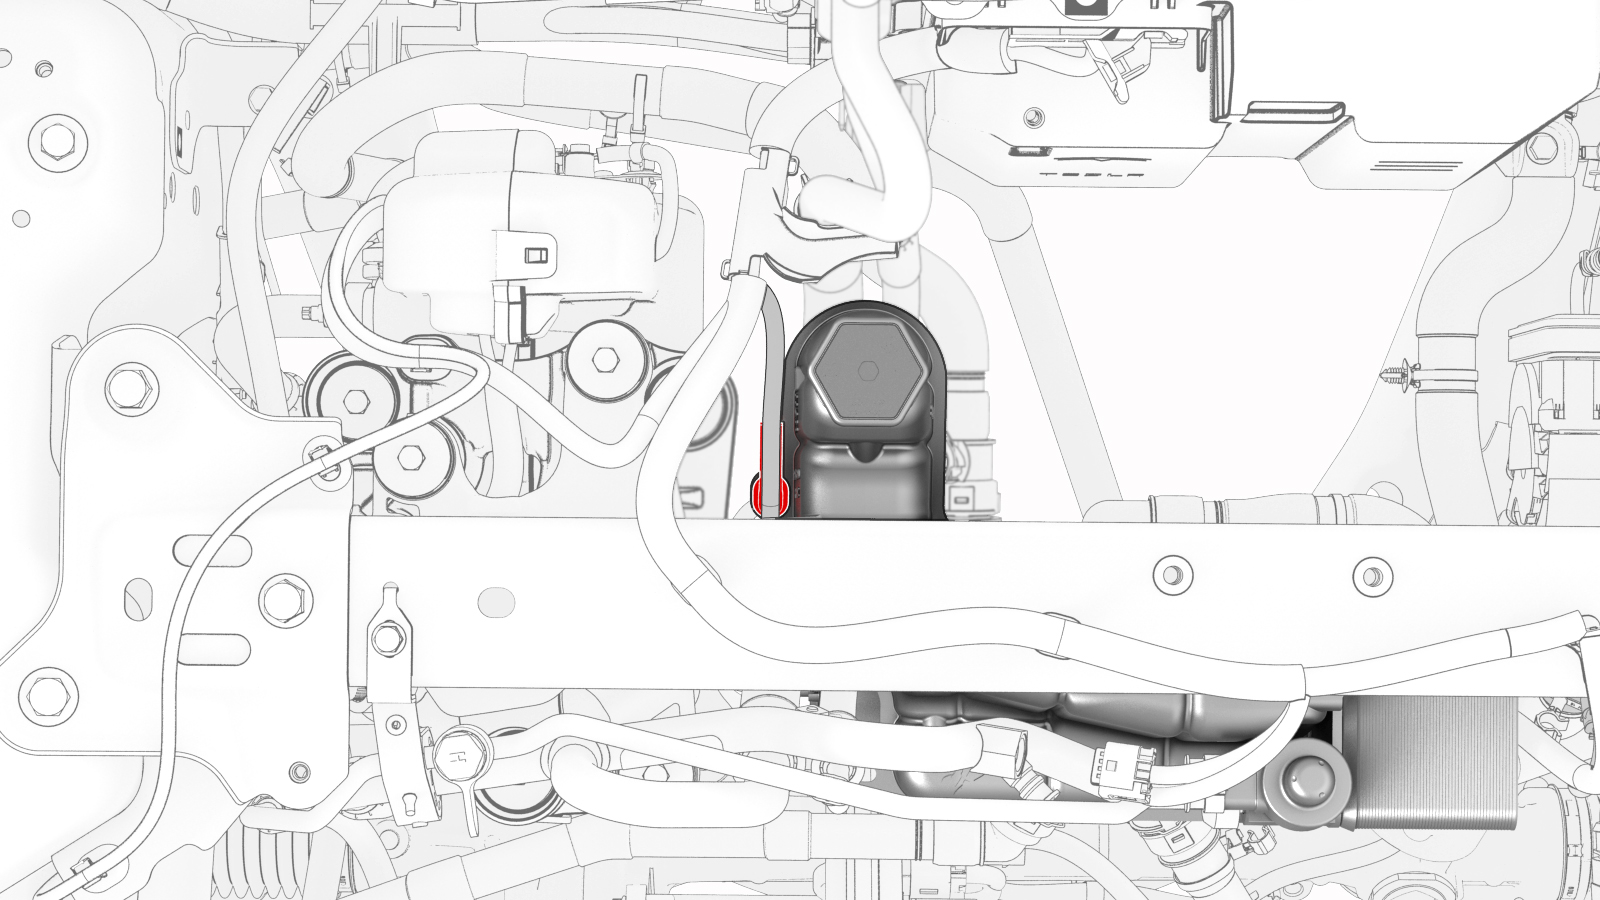
Remove the bolt that attaches the thermal beam electrical harness ground terminal to the compressor.
-
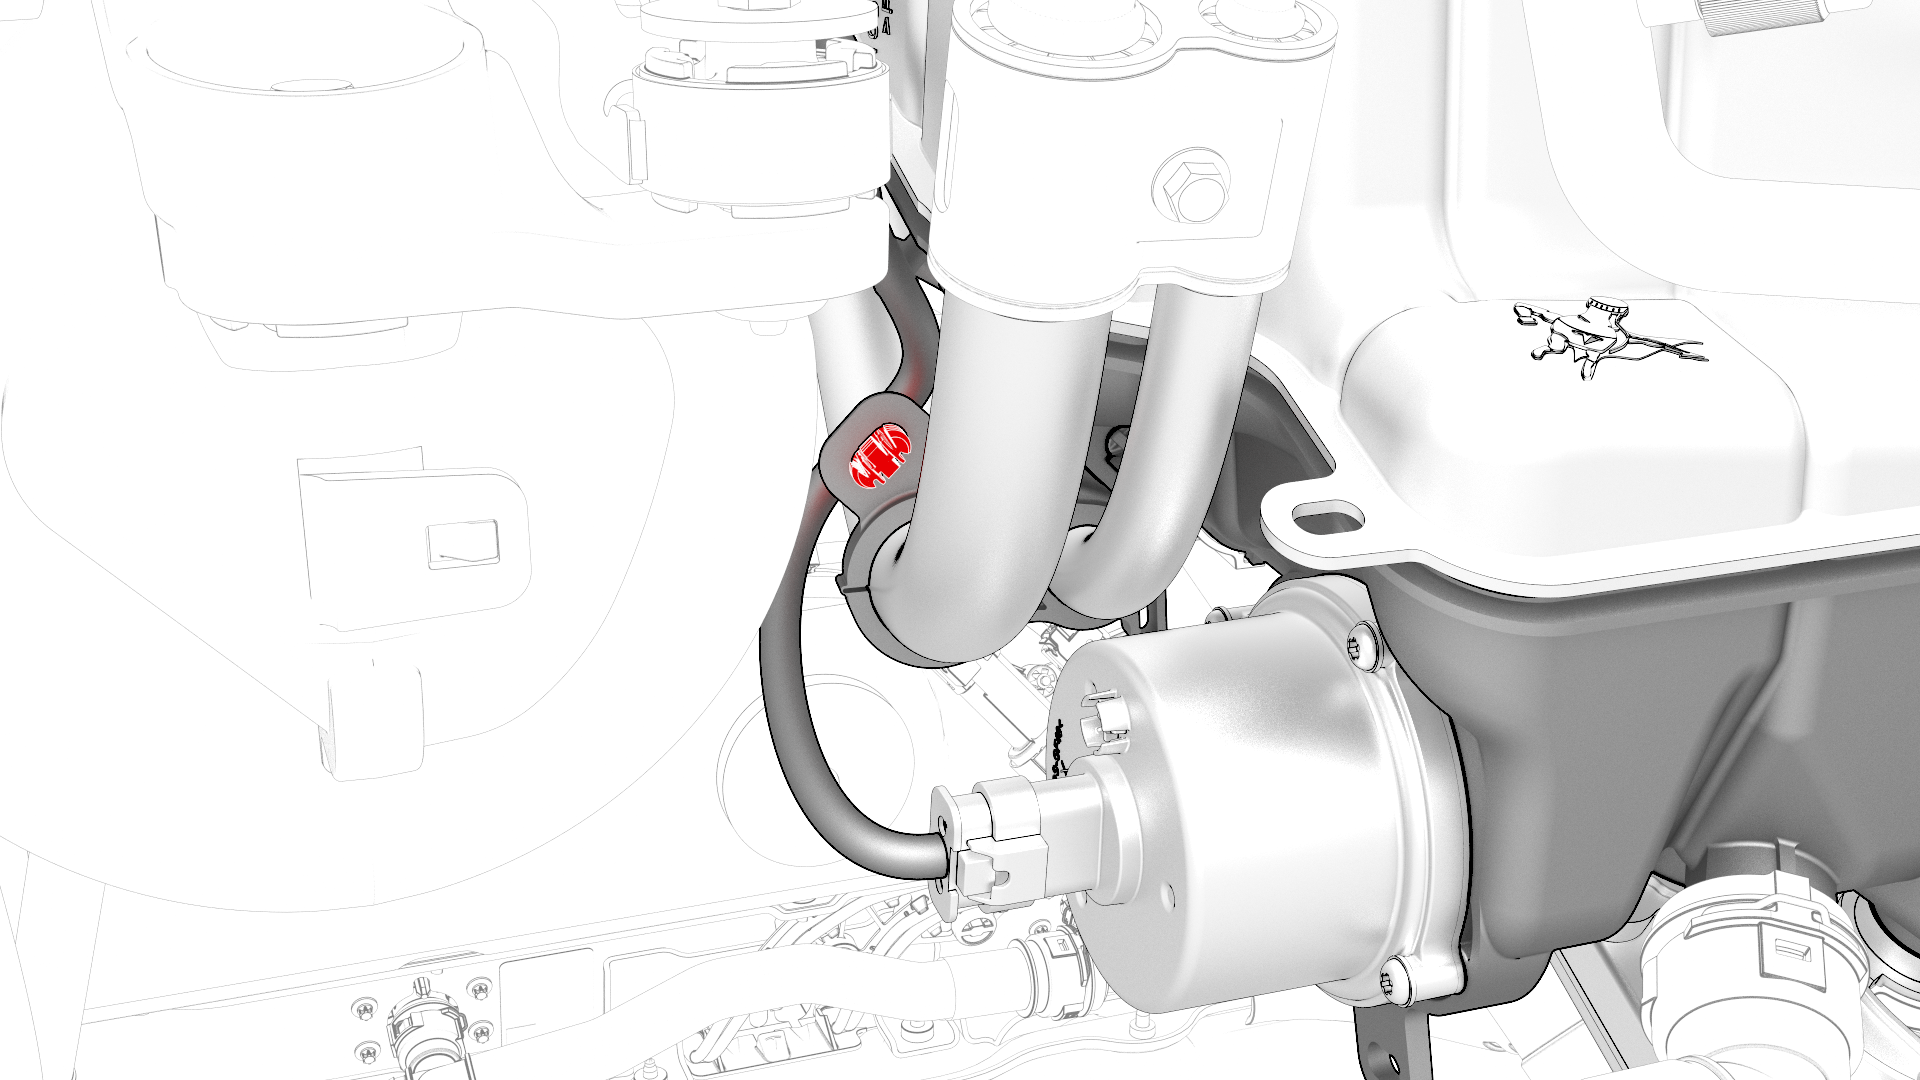
Disconnect the thermal beam electrical harness from the compressor connector.
-
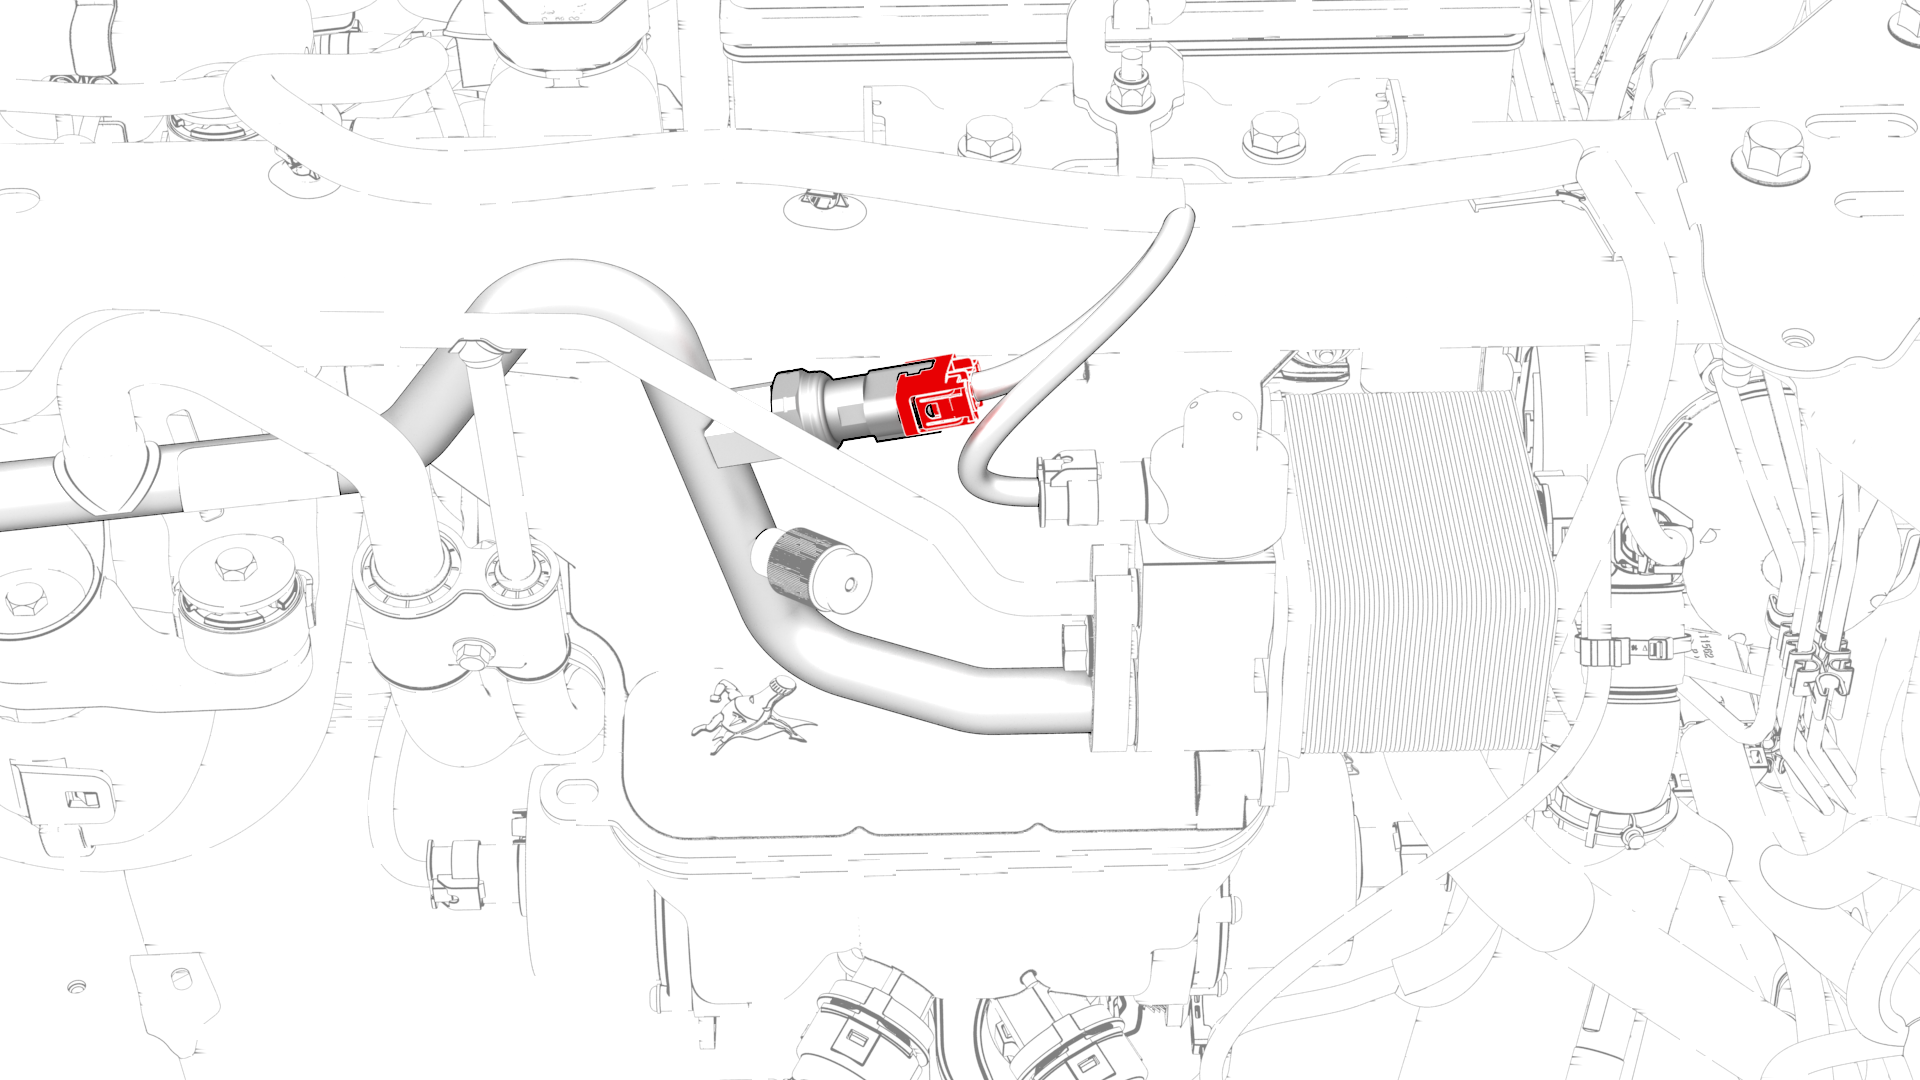
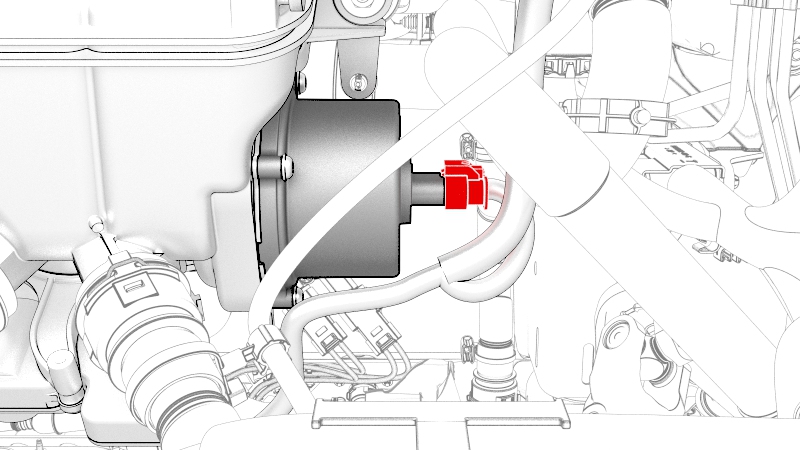
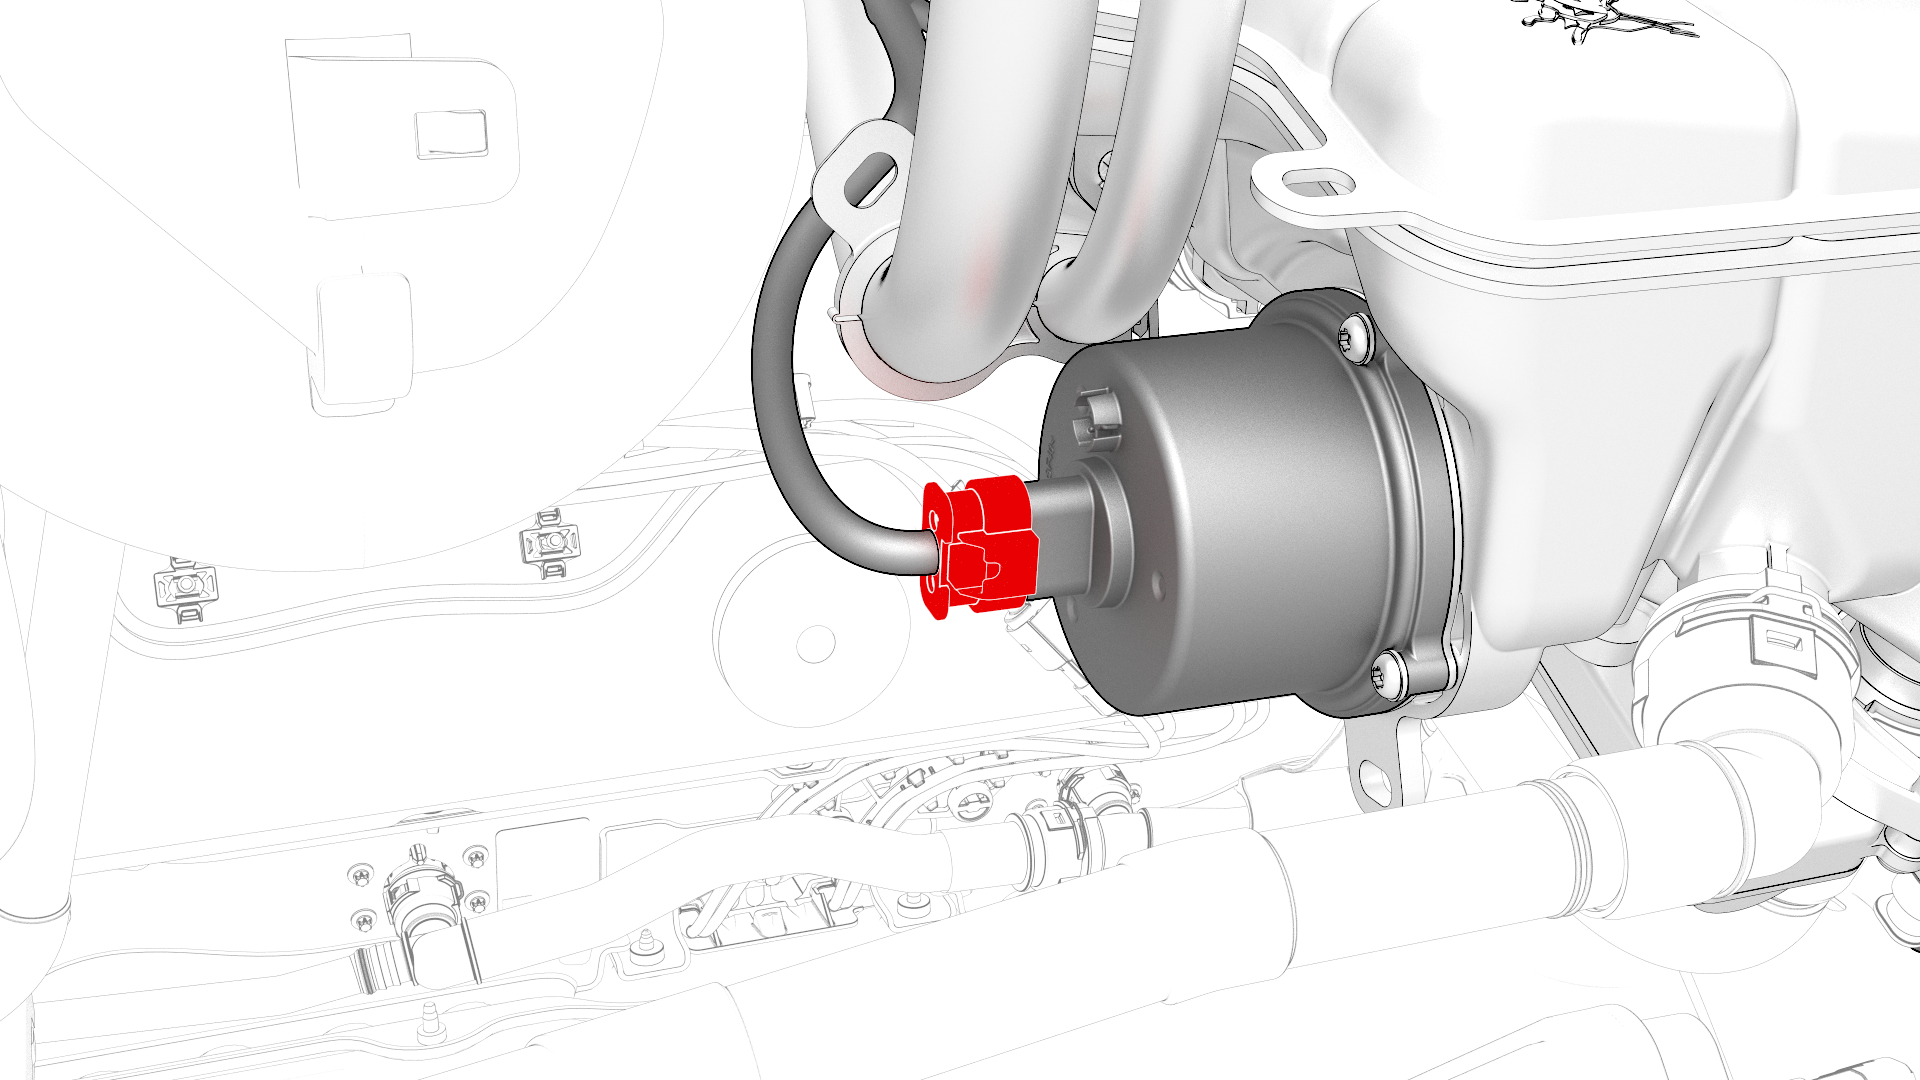
Disconnect the thermal beam electrical harness from the high pressure transducer connector.
-
Release the clips that attach the thermal beam electrical harness to the compressor and compressor bracket.
-
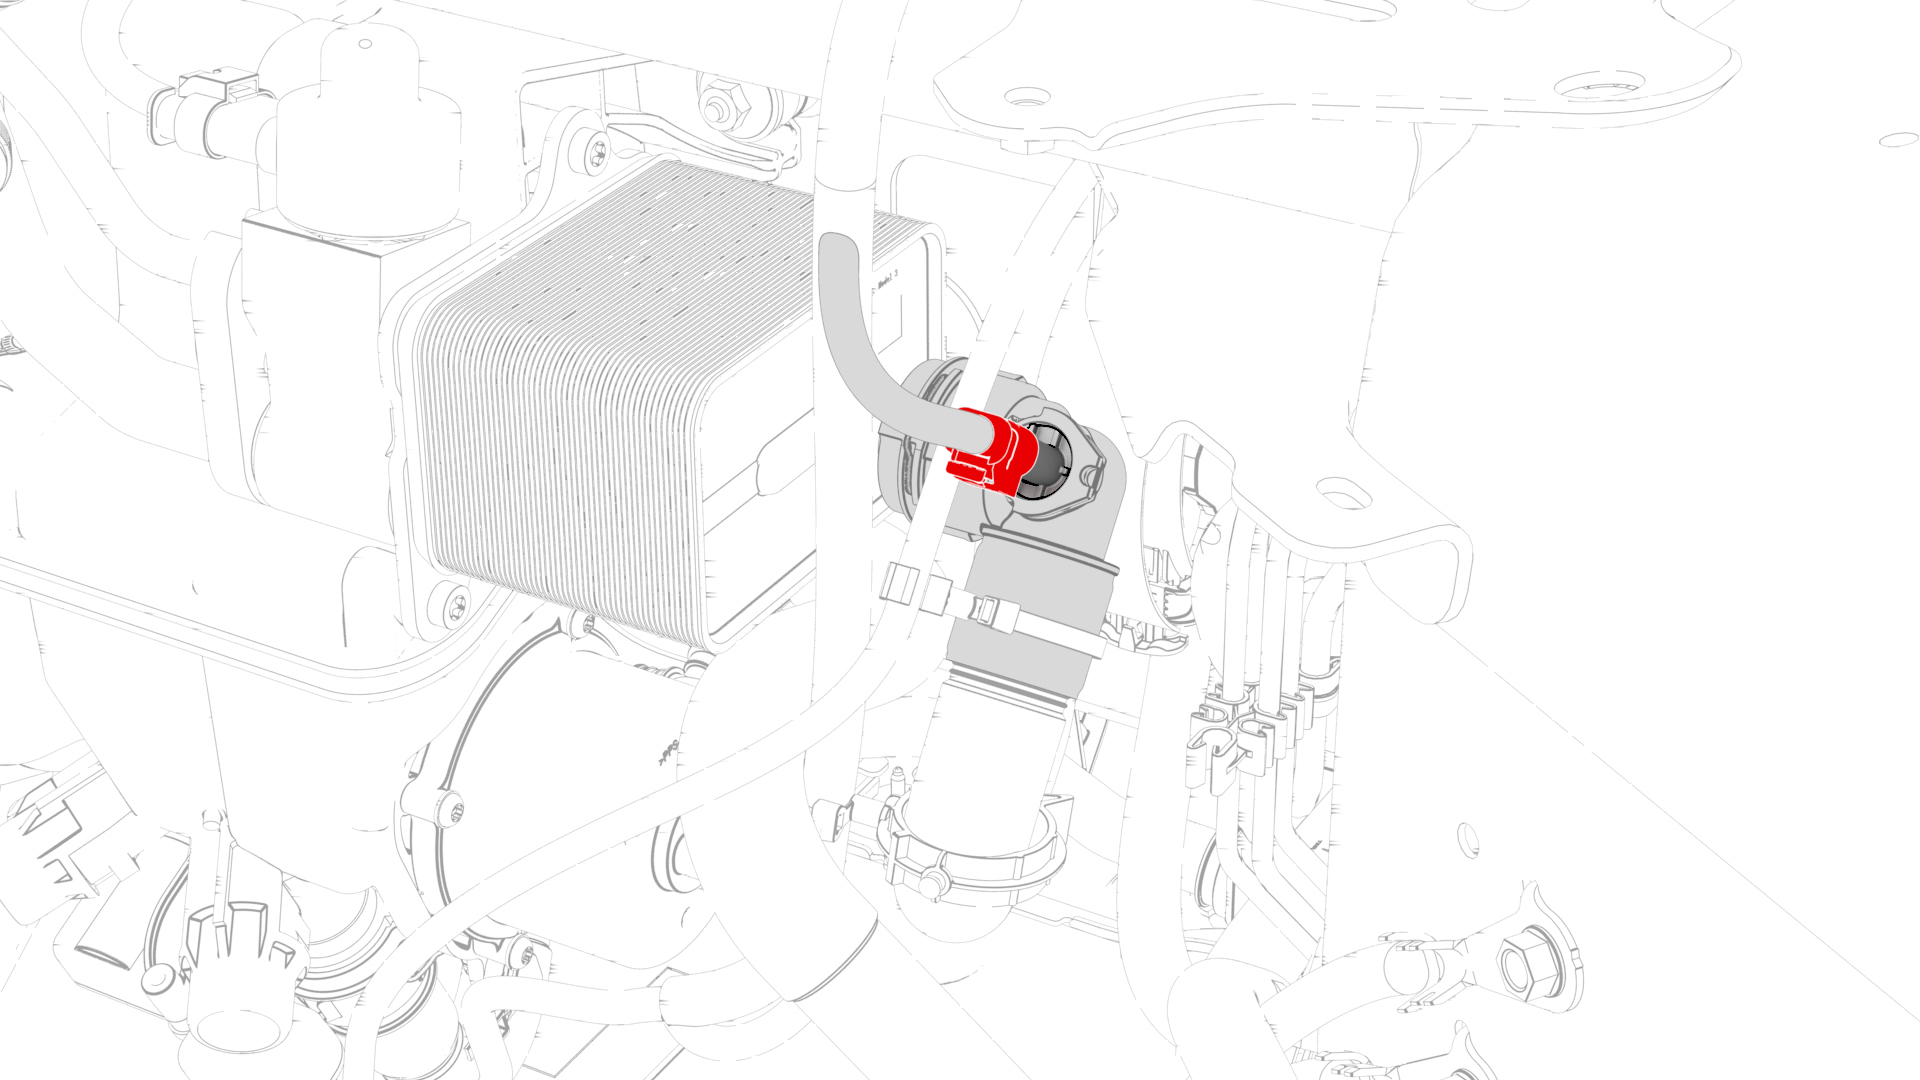
Disconnect the thermal beam electrical harness from the low pressure transducer connector.
-
Disconnect the thermal beam electrical harness from the chiller and EXV assembly connector.

-
Disconnect the thermal beam electrical harness from the coolant temperature sensor connector.
-
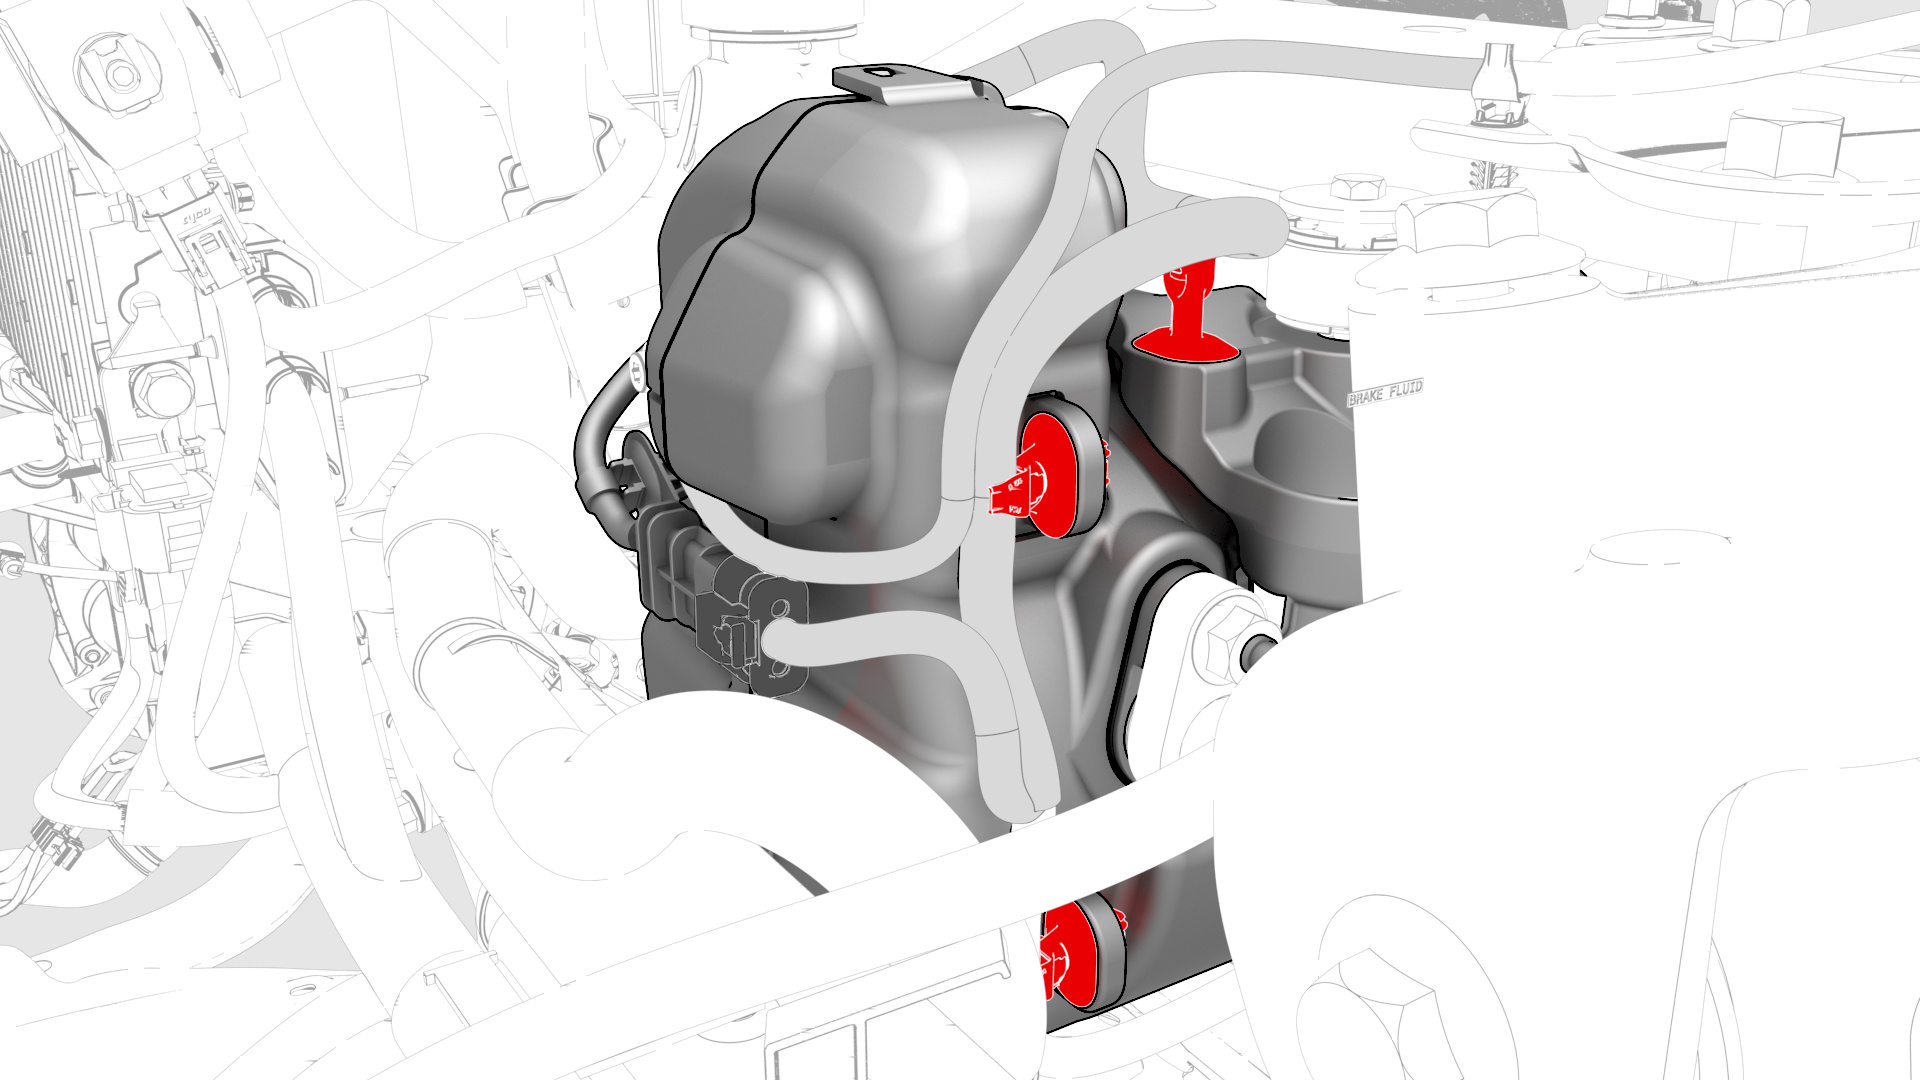
Disconnect the thermal beam electrical harness from the 5-way valve actuator connector.

-
Disconnect the thermal beam electrical harness from the HV battery coolant pump connector.
-
Disconnect the thermal beam electrical harness from the powertrain coolant pump connector.
-
Release the clip that attaches the thermal beam electrical harness to the superbottle.
-
Release the clip that attaches the thermal beam electrical harness to the chiller and EXV assembly hose, and then remove the electrical harness from the hose.
-
Release the clip that attaches the thermal beam electrical harness to the superbottle.
-
Release the clip that attaches the thermal beam electrical harness to the suction/liquid lines.
-
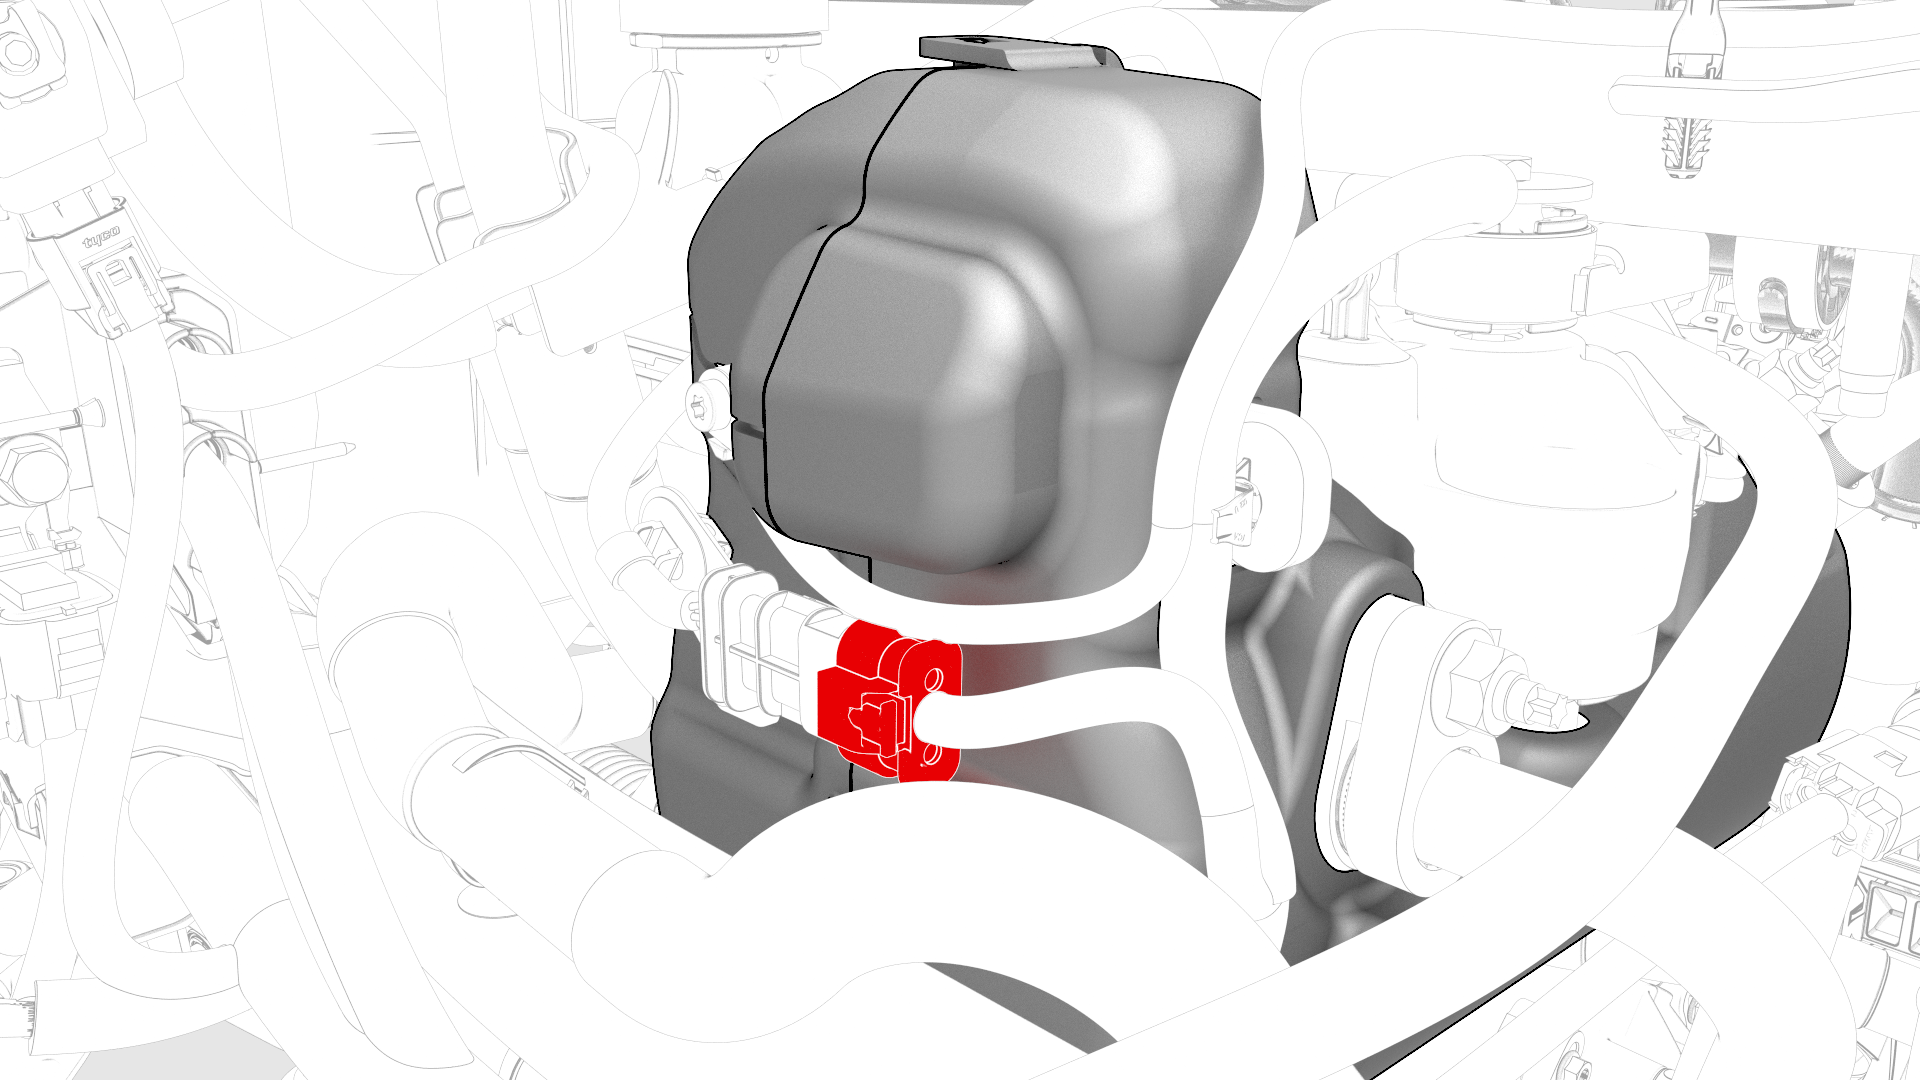
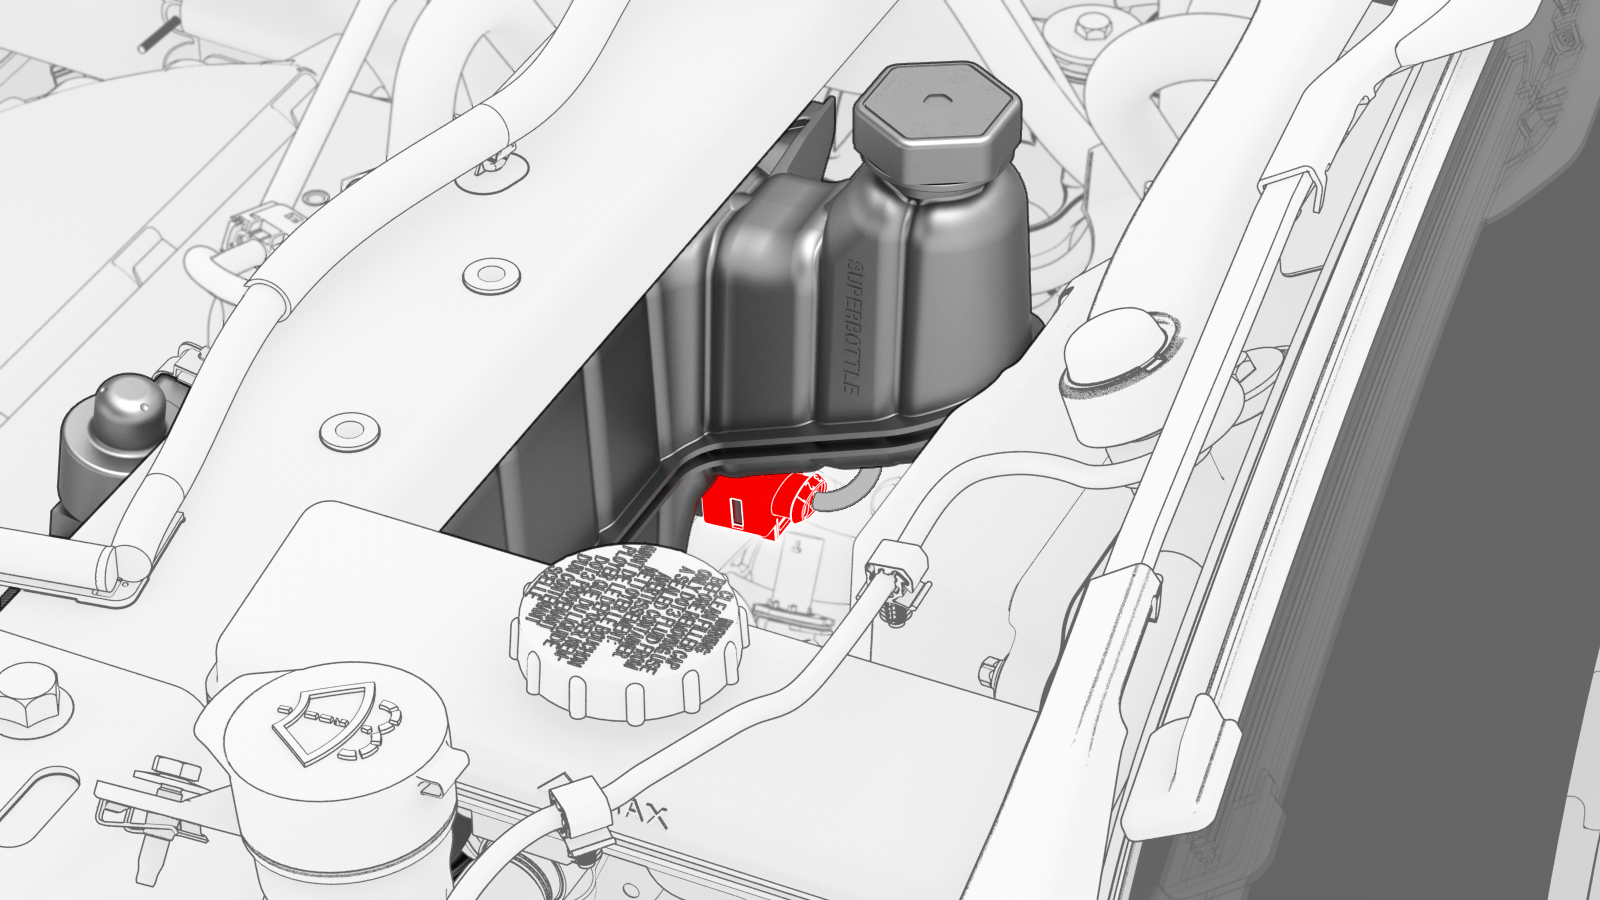
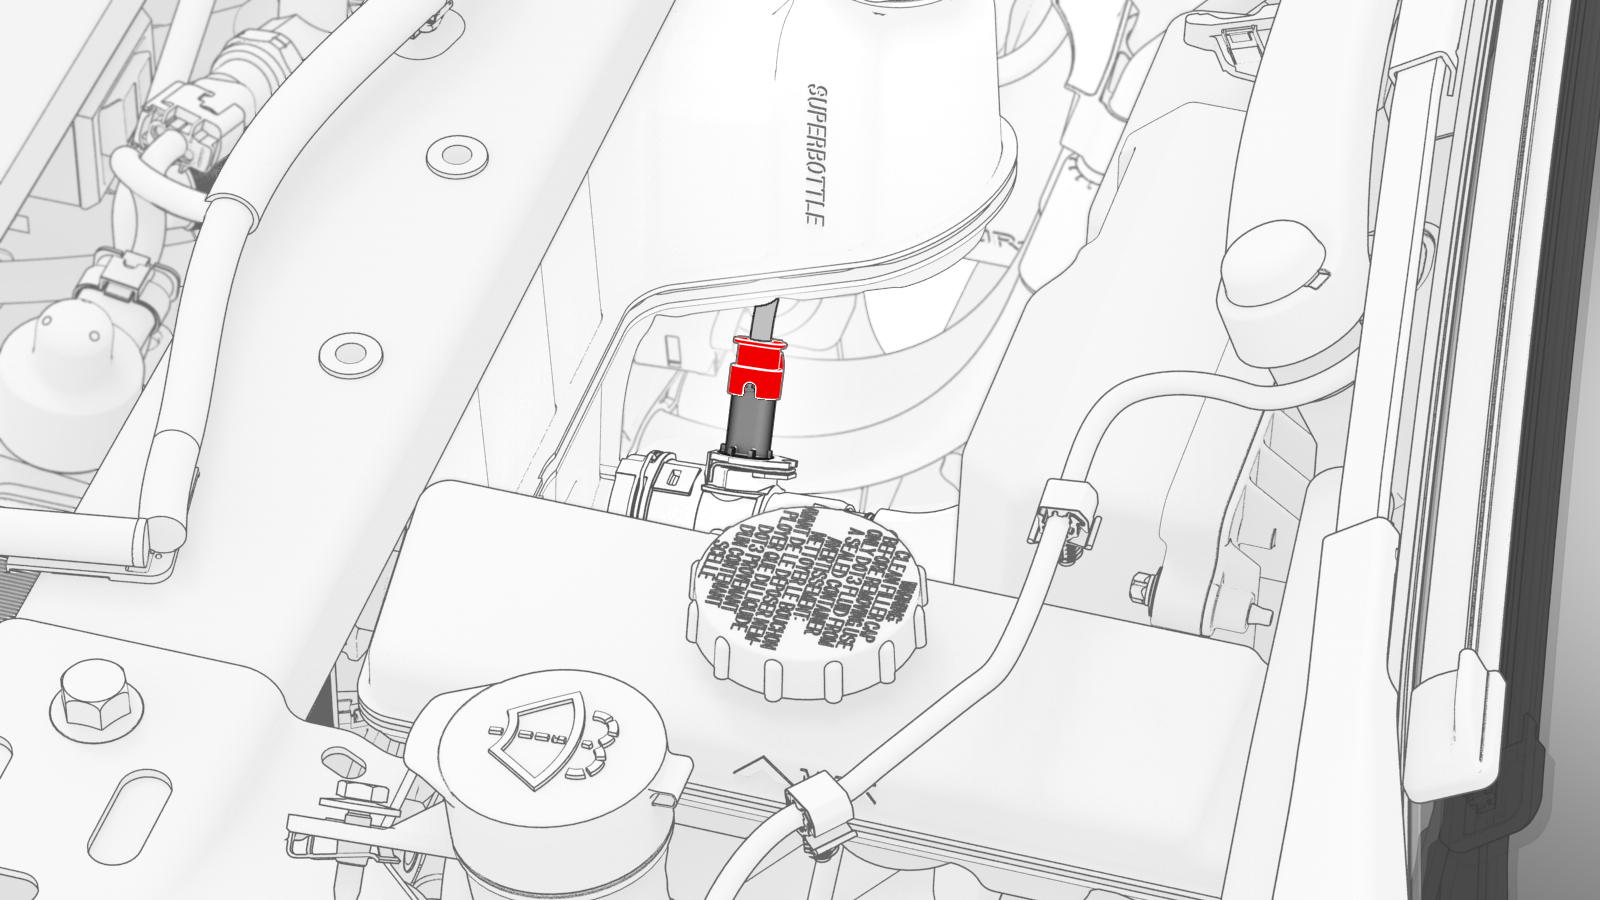
Disconnect the thermal beam electrical harness from the superbottle level sensor connector.
-
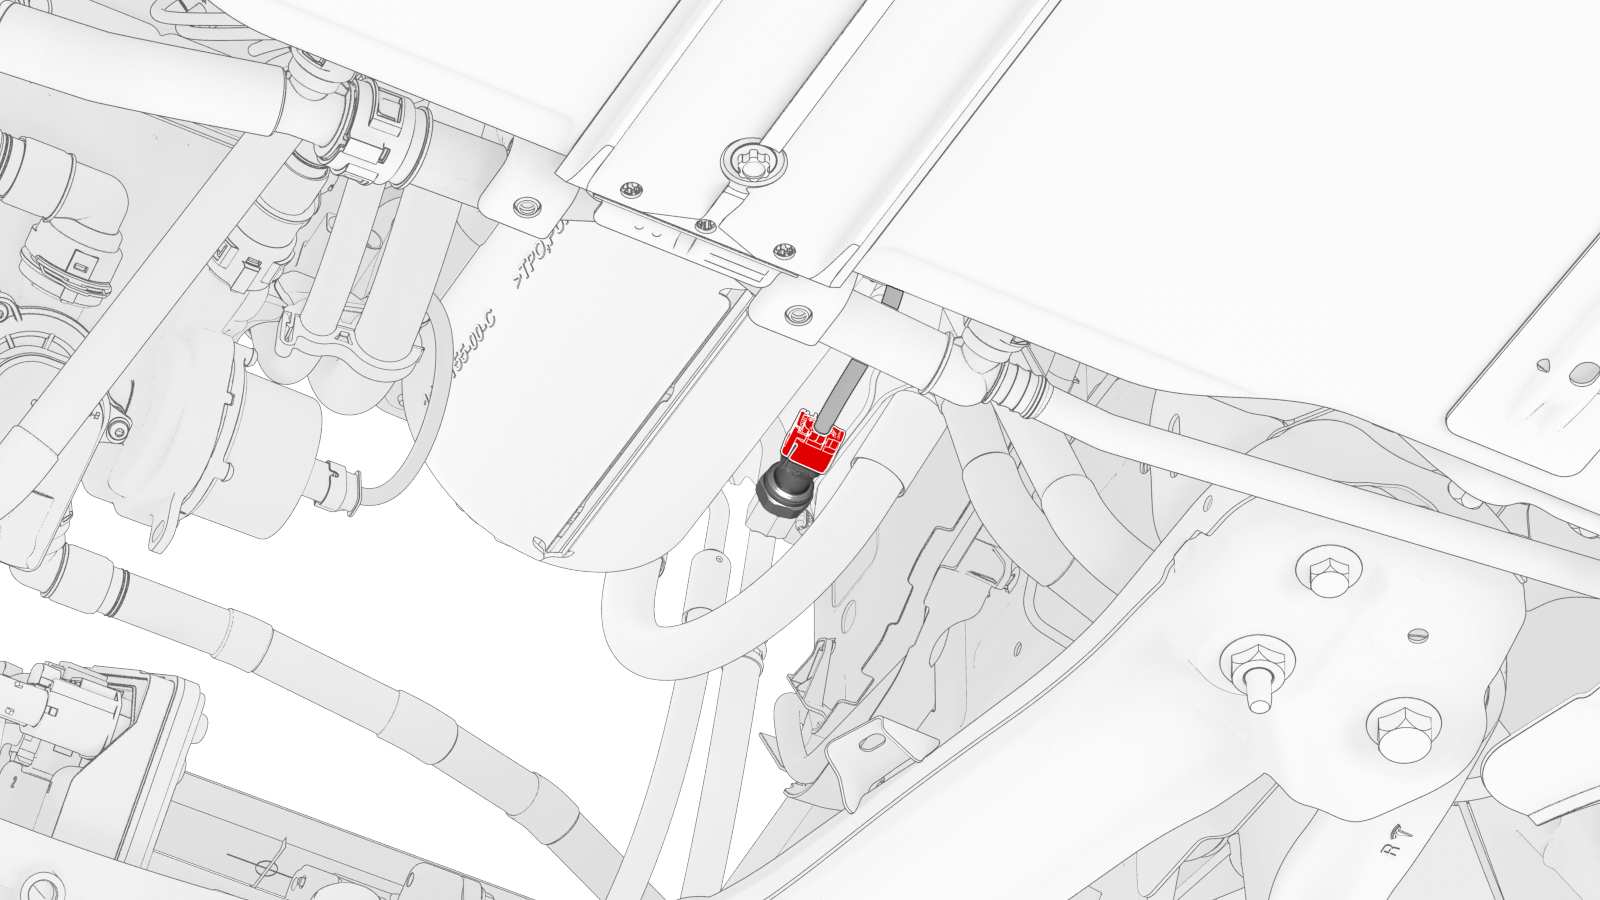
Disconnect the thermal beam electrical harness from the powertrain pump to sill hose coolant temperature sensor connector.
-
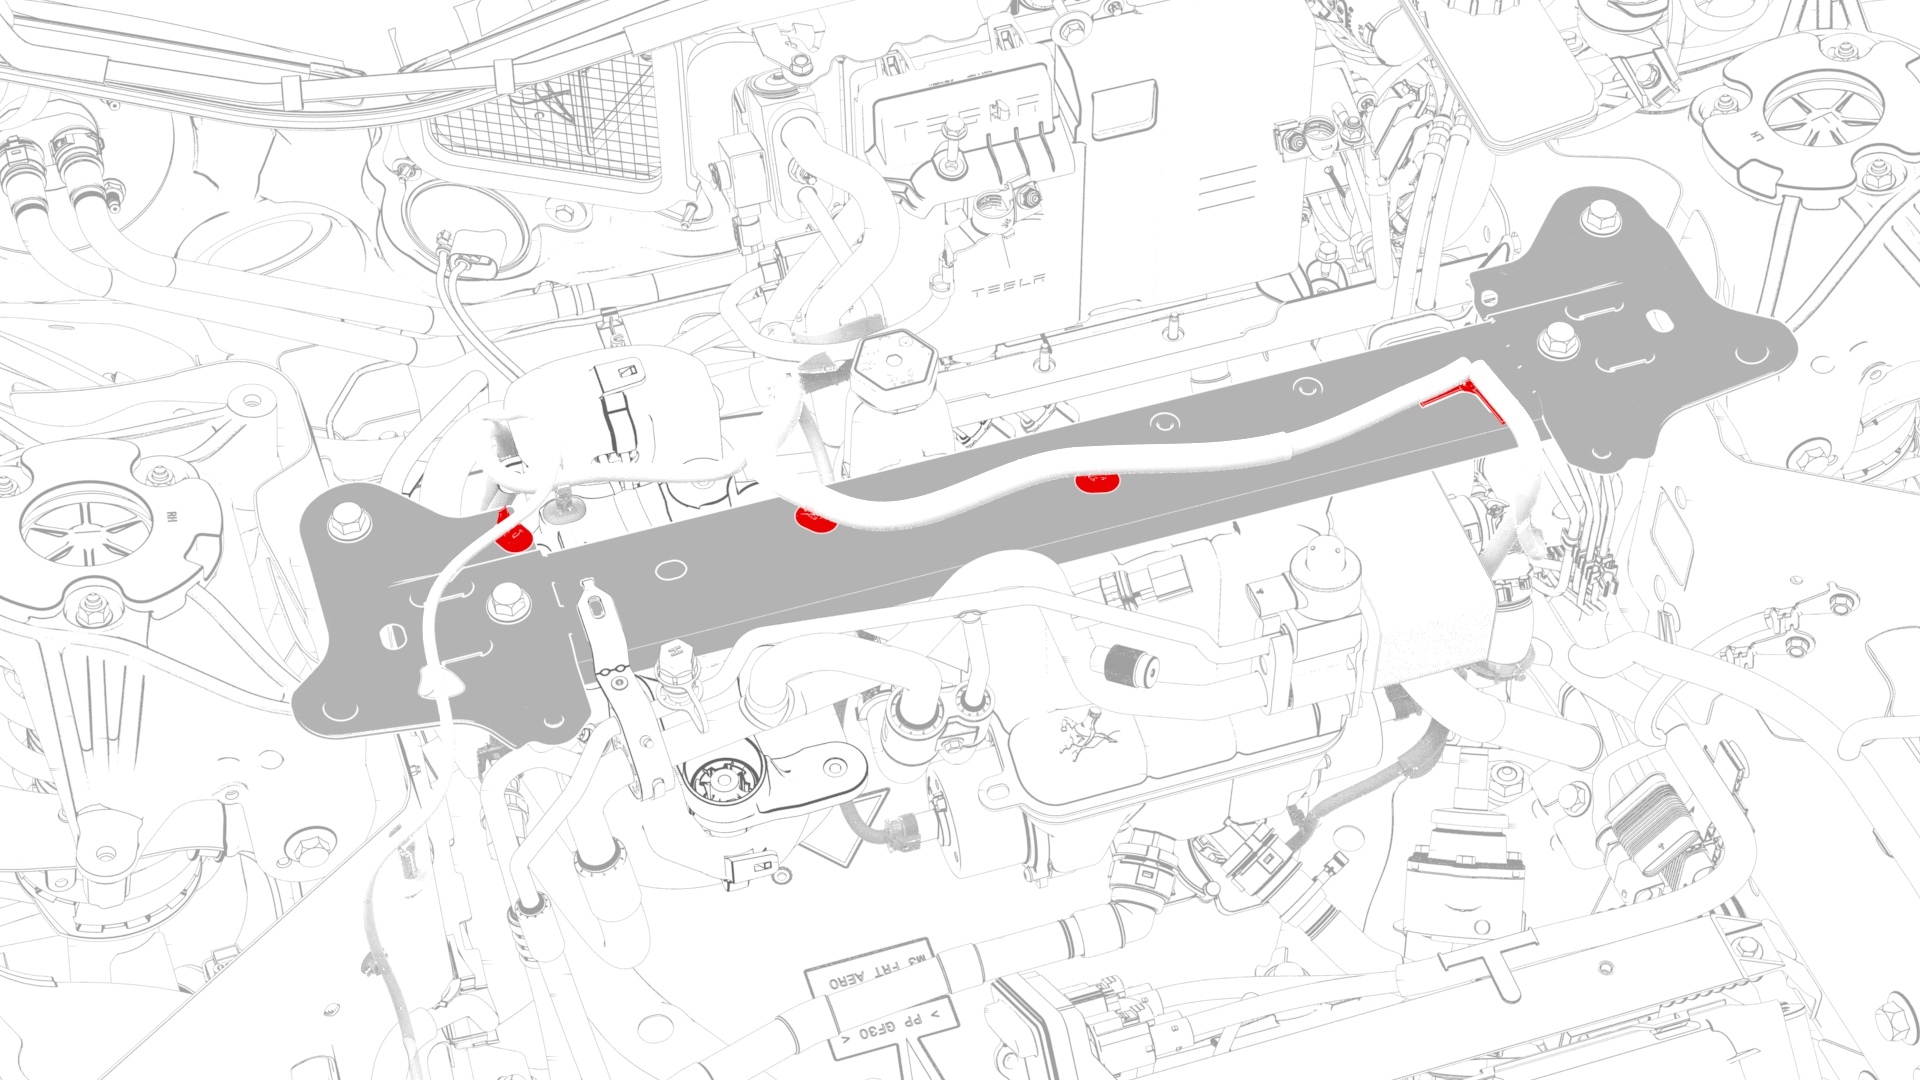
Release the clips that attach the thermal beam electrical harness to the shock tower brace.
| 1 | Remove the underhood storage unit. See Underhood Storage Unit (Remove and Replace). | ||
| 2 | Disconnect 12V power. See 12V Power (Disconnect and Connect). | ||
| 3 | Release the clips that attach the HVAC plenum outer duct to the HVAC plenum inner duct, and then remove the outer duct. | |
| 4 | Remove the bolt that attaches the thermal beam electrical harness cover to the front body controller module, and then remove the cover. | |
| 5 | Disconnect the thermal beam electrical harness from the front body controller module connector. | |
| 6 | Release the clip that attaches the suction/liquid lines to the body near the TXV. | |
| 7 | Remove the bolt that attaches the thermal beam electrical harness ground terminal to the compressor. | |
| 8 | Disconnect the thermal beam electrical harness from the compressor connector. | |
| 9 | Disconnect the thermal beam electrical harness from the high pressure transducer connector. | |
| 10 | Release the clips that attach the thermal beam electrical harness to the compressor and compressor bracket. | |
| 11 | Disconnect the thermal beam electrical harness from the low pressure transducer connector. | |
| 12 | Disconnect the thermal beam electrical harness from the chiller and EXV assembly connector. | |
| 13 | Disconnect the thermal beam electrical harness from the coolant temperature sensor connector. | |
| 14 | Disconnect the thermal beam electrical harness from the 5-way valve actuator connector. | |
| 15 | Disconnect the thermal beam electrical harness from the HV battery coolant pump connector. | |
| 16 | Disconnect the thermal beam electrical harness from the powertrain coolant pump connector. | |
| 17 | Release the clip that attaches the thermal beam electrical harness to the superbottle. | |
| 18 | Release the clip that attaches the thermal beam electrical harness to the chiller and EXV assembly hose, and then remove the electrical harness from the hose. | |
| 19 | Release the clip that attaches the thermal beam electrical harness to the superbottle. | |
| 20 | Release the clip that attaches the thermal beam electrical harness to the suction/liquid lines. | |
| 21 | Disconnect the thermal beam electrical harness from the superbottle level sensor connector. | |
| 22 | Disconnect the thermal beam electrical harness from the powertrain pump to sill hose coolant temperature sensor connector. | |
| 23 | Remove the bolt that attaches the thermal beam electrical harness ground terminal to the RH shear wall. | ||
| 24 | Release the clips that attach the thermal beam electrical harness to the shock tower brace. | |
| 25 | Remove the thermal beam electrical harness from the vehicle |
Install
-
Fasten the clips that attach the thermal beam electrical harness to the shock tower brace.
-
Install the bolt that attaches the thermal beam electrical harness ground terminal to the RH shear wall.
 Torque 10 Nm
 -
Connect the thermal beam electrical harness to the powertrain pump to sill hose coolant temperature sensor connector.
-
Connect the thermal beam electrical harness to the superbottle level sensor connector.
-
Fasten the clip that attaches the thermal beam electrical harness to the suction/liquid lines.
-
Fasten the clip that attaches the thermal beam electrical harness to the superbottle.
-
Install the thermal beam electrical harness to the chiller and EXV assembly hose, and then fasten the clip that attaches the electrical harness to the hose.
-
Fasten the clip that attaches the thermal beam electrical harness to the superbottle.
-
Connect the thermal beam electrical harness to the powertrain coolant pump connector.
-
Connect the thermal beam electrical harness to the HV battery coolant pump connector.
-
Connect the thermal beam electrical harness to the 5-way valve actuator connector.
-
Connect the thermal beam electrical harness to the coolant temperature sensor connector.
-
Connect the thermal beam electrical harness to the chiller and EXV assembly connector.
-
Connect the thermal beam electrical harness to the low pressure transducer connector.
-
Fasten the clips that attach the thermal beam electrical harness to the compressor and compressor bracket.
-
Connect the thermal beam electrical harness to the high pressure transducer connector.
-
Connect the thermal beam electrical harness to the compressor connector.
-
Install the bolt that attaches the thermal beam electrical harness ground terminal to the compressor.
 Torque 6 Nm
 -
Fasten the clip that attaches the suction/liquid lines to the body near the TXV.
-
Connect the thermal beam electrical harness to the front body controller module connector.
-
Install the thermal beam electrical harness cover to the front body controller module, and then install the bolt that attaches the cover to the module.
 Torque 6 Nm
 -
Install the HVAC plenum outer duct to the HVAC plenum inner duct, and then fasten the clips that attach the outer duct to the inner duct.
| 1 | Fasten the clips that attach the thermal beam electrical harness to the shock tower brace. | |
| 2 | Install the bolt that attaches the thermal beam electrical harness ground terminal to the RH shear wall. Torque 10 Nm | ||
| 3 | Connect the thermal beam electrical harness to the powertrain pump to sill hose coolant temperature sensor connector. | |
| 4 | Connect the thermal beam electrical harness to the superbottle level sensor connector. | |
| 5 | Fasten the clip that attaches the thermal beam electrical harness to the suction/liquid lines. | |
| 6 | Fasten the clip that attaches the thermal beam electrical harness to the superbottle. | |
| 7 | Install the thermal beam electrical harness to the chiller and EXV assembly hose, and then fasten the clip that attaches the electrical harness to the hose. | |
| 8 | Fasten the clip that attaches the thermal beam electrical harness to the superbottle. | |
| 9 | Connect the thermal beam electrical harness to the powertrain coolant pump connector. | |
| 10 | Connect the thermal beam electrical harness to the HV battery coolant pump connector. | |
| 11 | Connect the thermal beam electrical harness to the 5-way valve actuator connector. | |
| 12 | Connect the thermal beam electrical harness to the coolant temperature sensor connector. | |
| 13 | Connect the thermal beam electrical harness to the chiller and EXV assembly connector. | |
| 14 | Connect the thermal beam electrical harness to the low pressure transducer connector. | |
| 15 | Fasten the clips that attach the thermal beam electrical harness to the compressor and compressor bracket. | |
| 16 | Connect the thermal beam electrical harness to the high pressure transducer connector. | |
| 17 | Connect the thermal beam electrical harness to the compressor connector. | |
| 18 | Install the bolt that attaches the thermal beam electrical harness ground terminal to the compressor. Torque 6 Nm | |
| 19 | Fasten the clip that attaches the suction/liquid lines to the body near the TXV. | |
| 20 | Connect the thermal beam electrical harness to the front body controller module connector. | |
| 21 | Install the thermal beam electrical harness cover to the front body controller module, and then install the bolt that attaches the cover to the module. Torque 6 Nm | |
| 22 | Install the HVAC plenum outer duct to the HVAC plenum inner duct, and then fasten the clips that attach the outer duct to the inner duct. | |
| 23 | Connect 12V power. See 12V Power (Disconnect and Connect). | ||
| 24 | Install the underhood storage unit. See Underhood Storage Unit (Remove and Replace). |