Door - Rear - LH (Remove and Replace)
Correction code 1010650210106502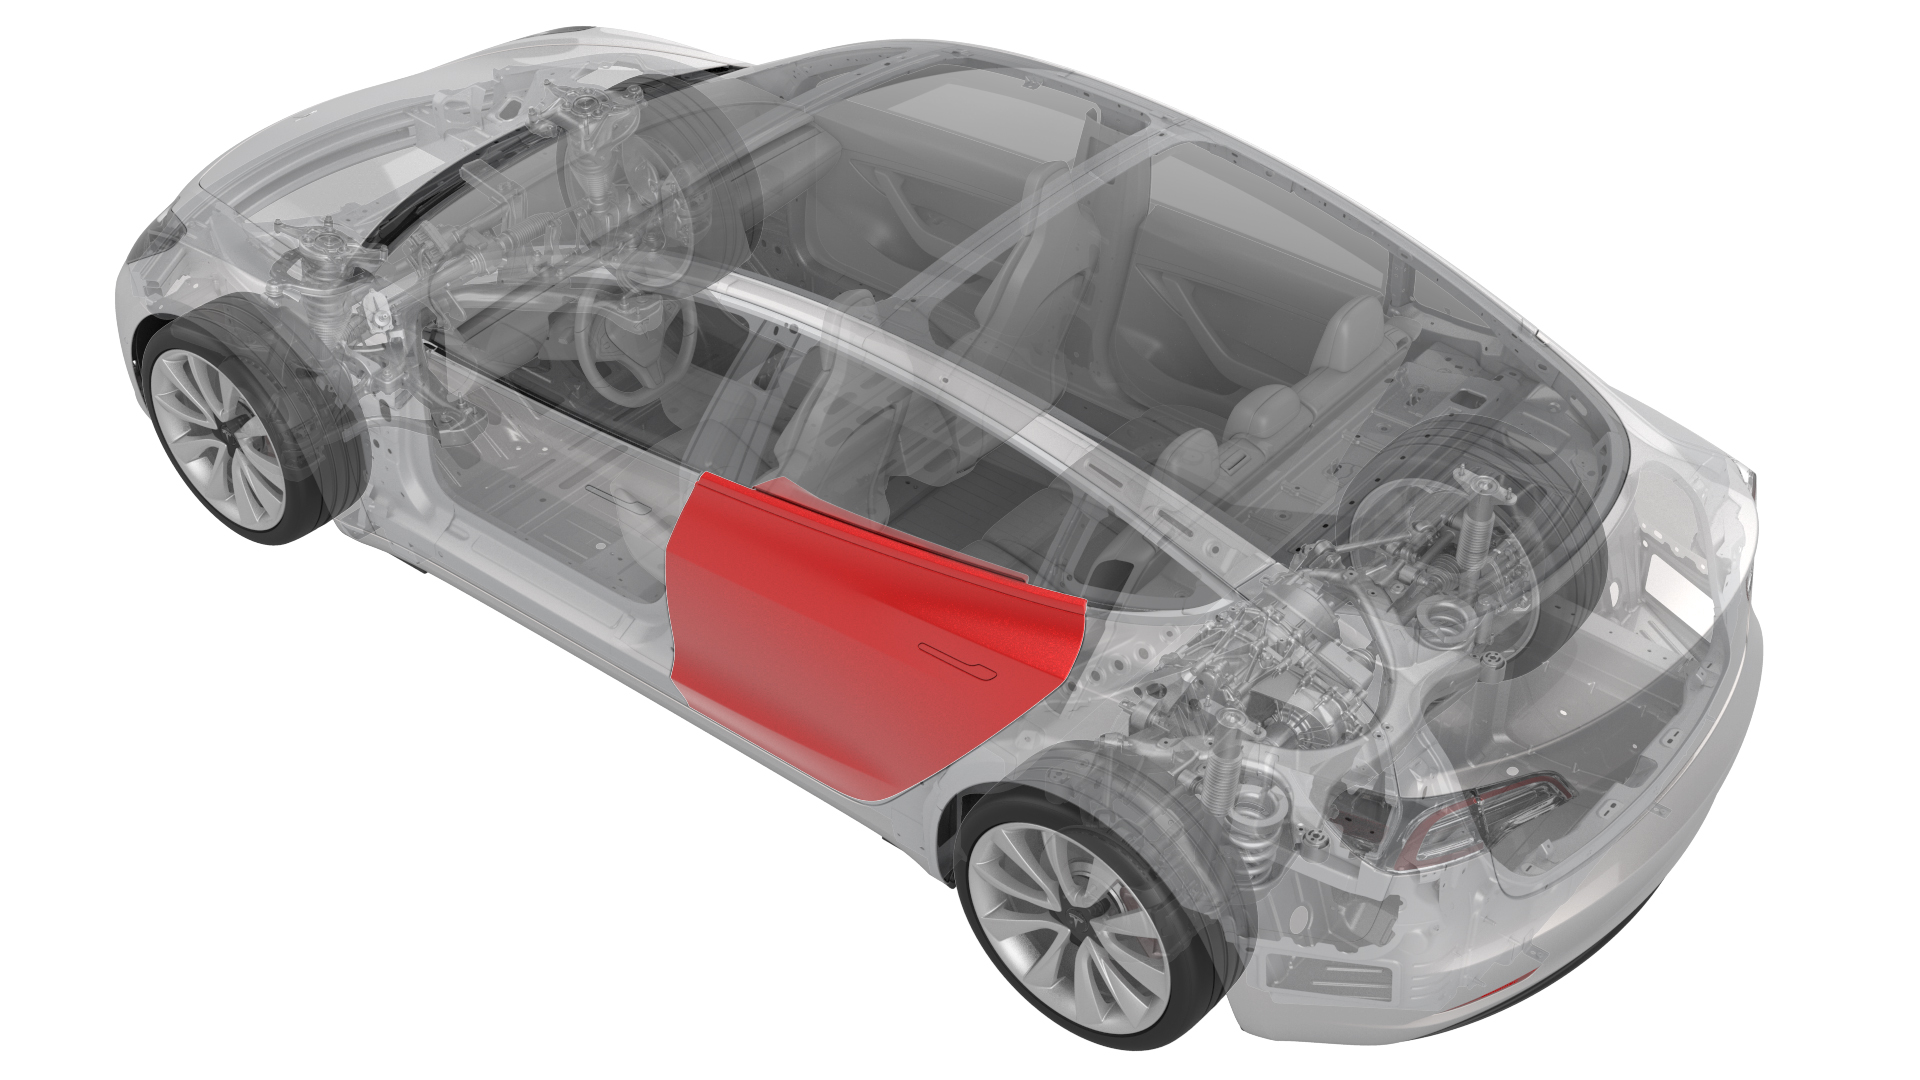
Remove
-
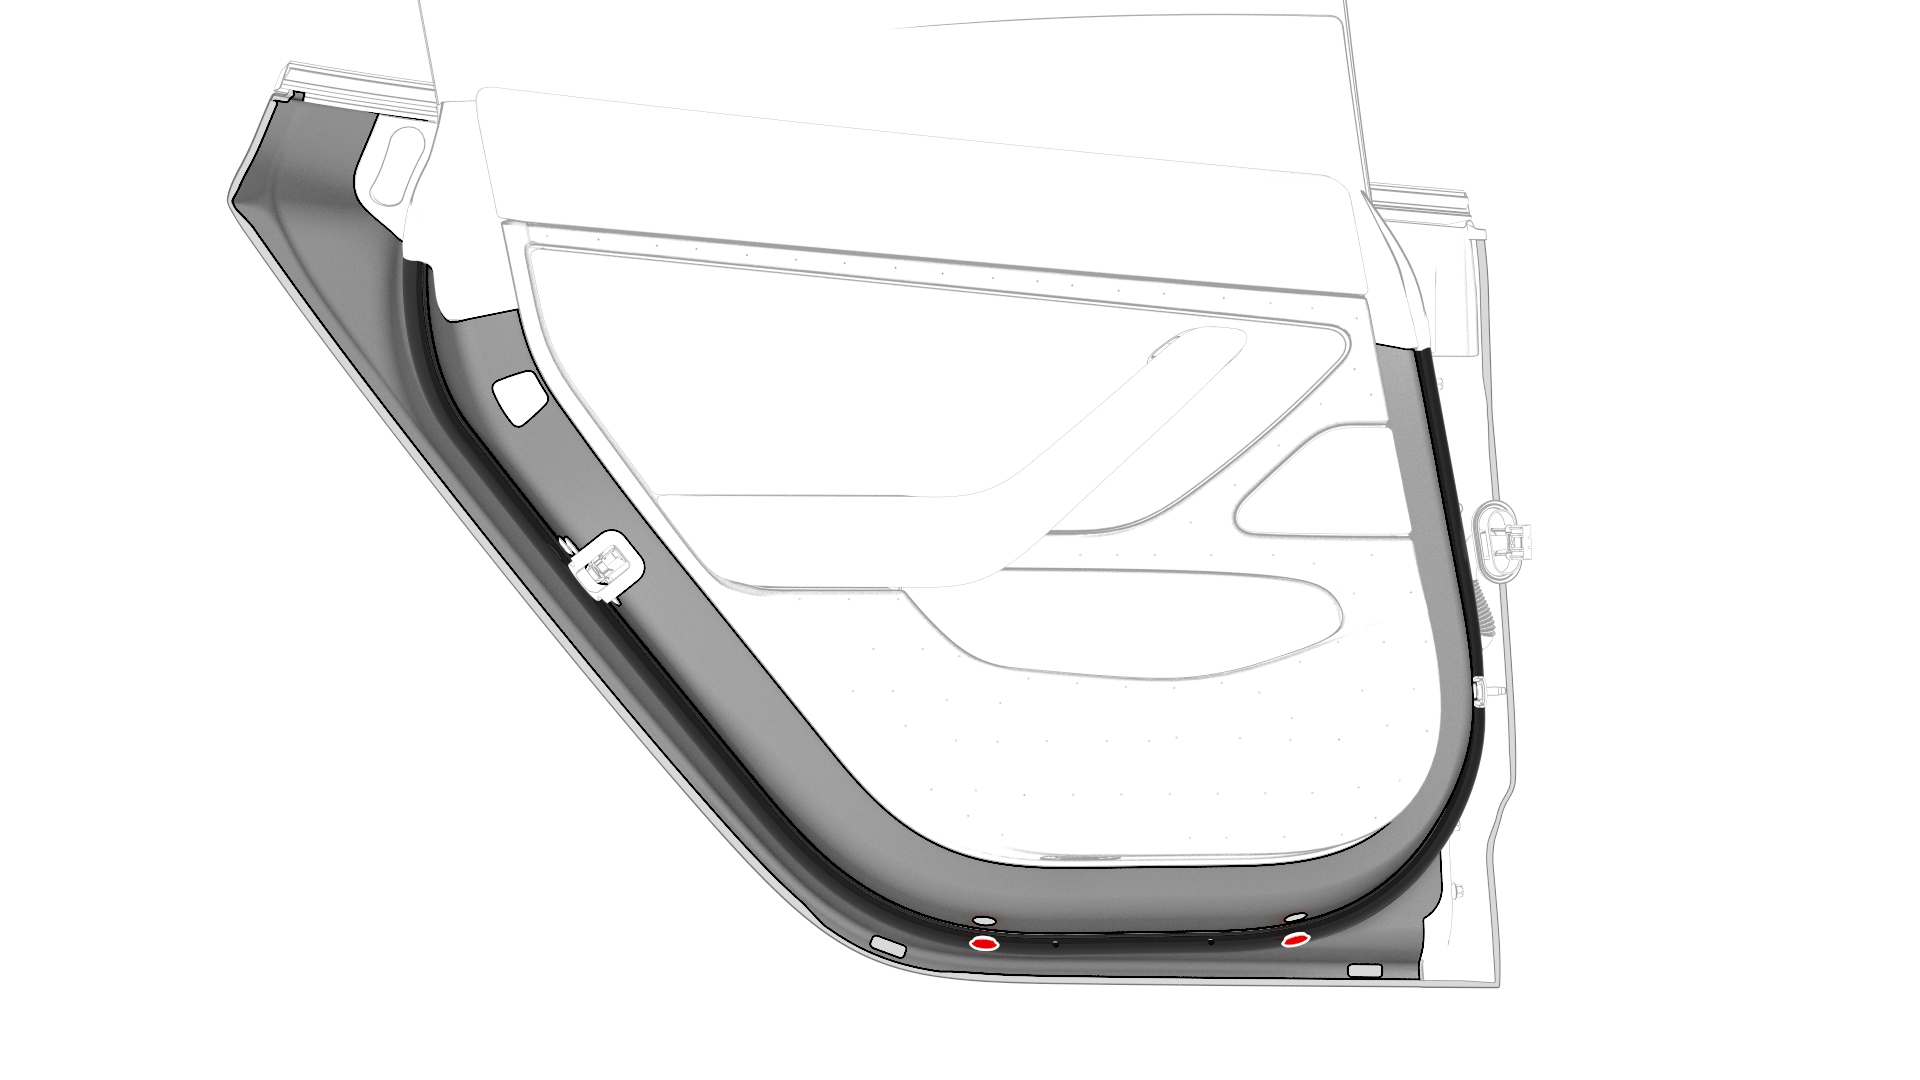
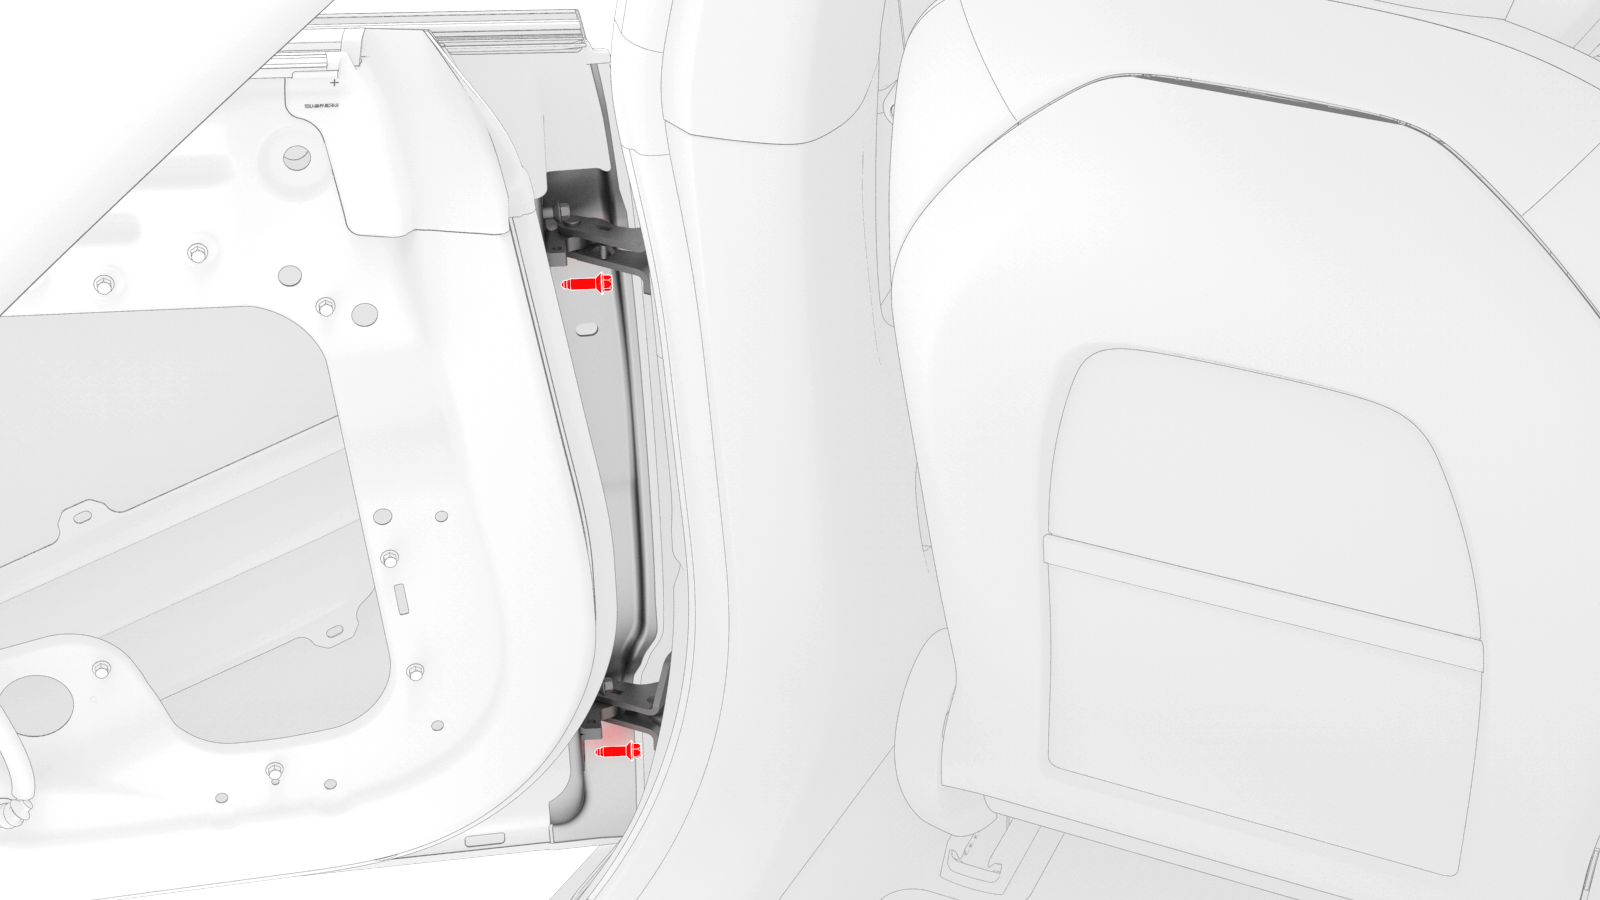
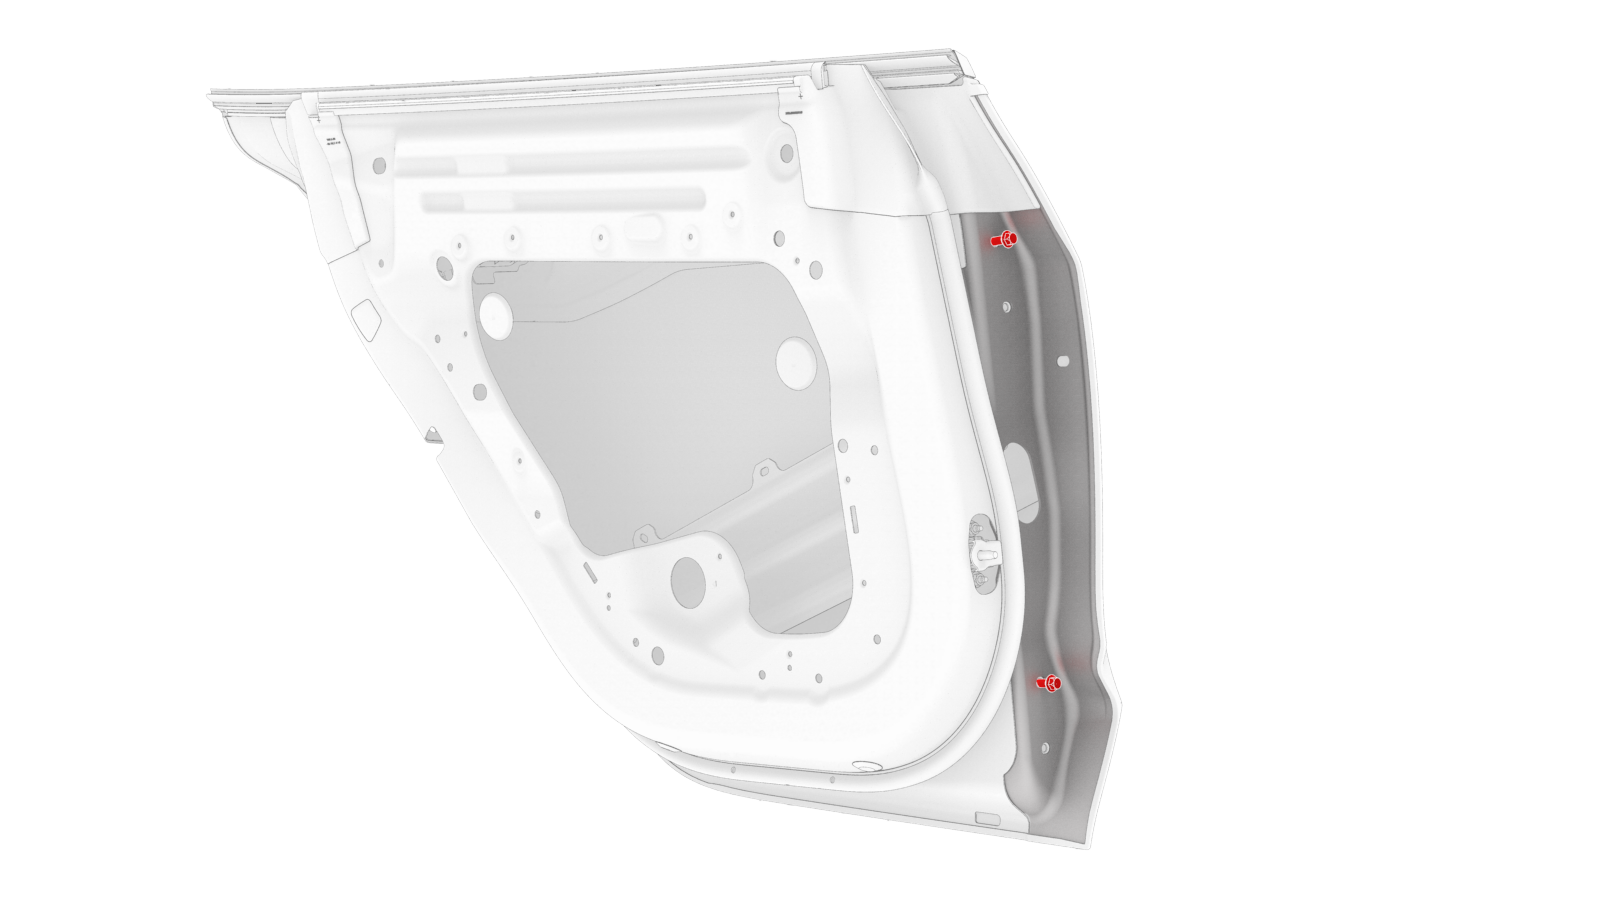
Remove the button plugs from the bottom of the door.
-
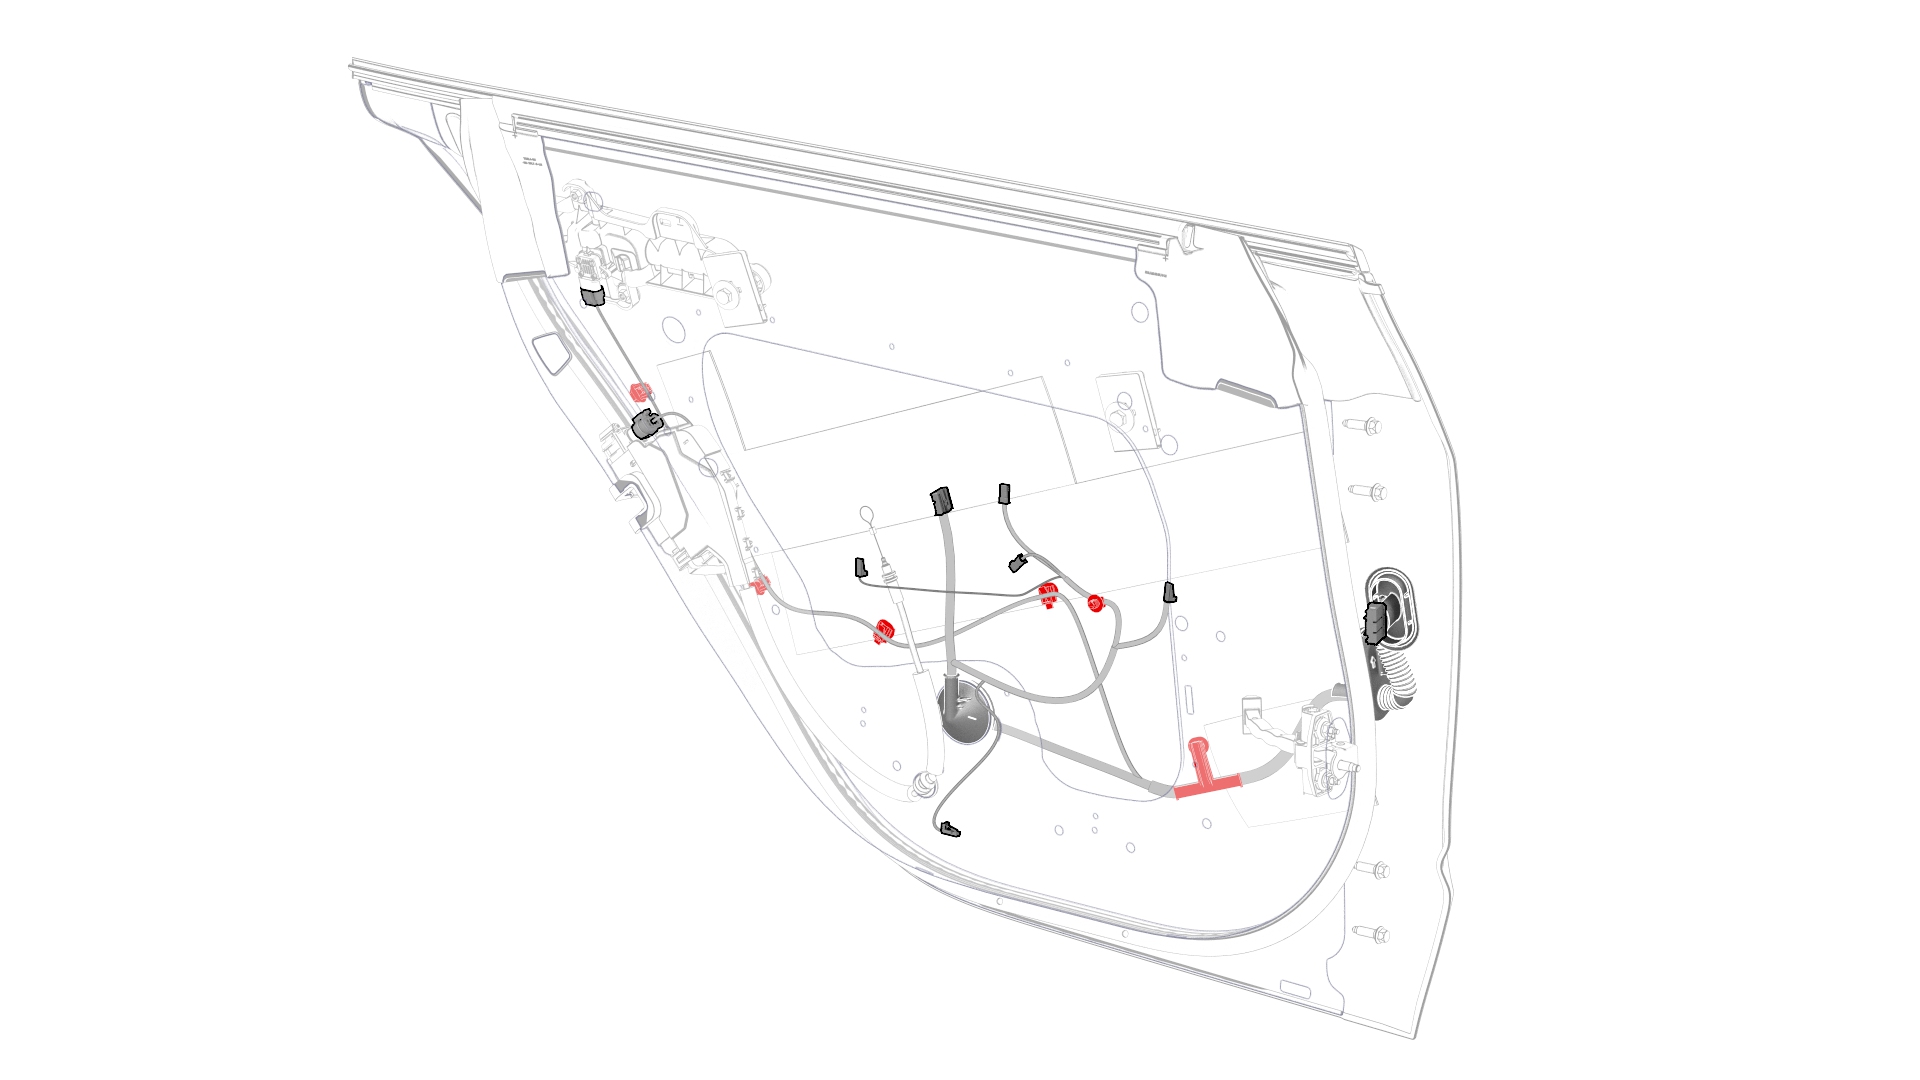
Release the clips (x4) of the rear LH door electrical harness seal at the B-pillar, and pull the wiring harness out of the B-pillar bulkhead.
-
Carefully open the rear LH door, and then close the front LH door.
 Caution:Do not allow the leading edge of the rear LH door to crush the wiring harness or connector against the B-pillar.
 -
Disconnect the rear LH door electrical harness, and then rotate the connector exiting the B-pillar 90 degrees, so as to prevent the connector from falling back into the B-pillar.

-
Release all door electrical harness clips.
-
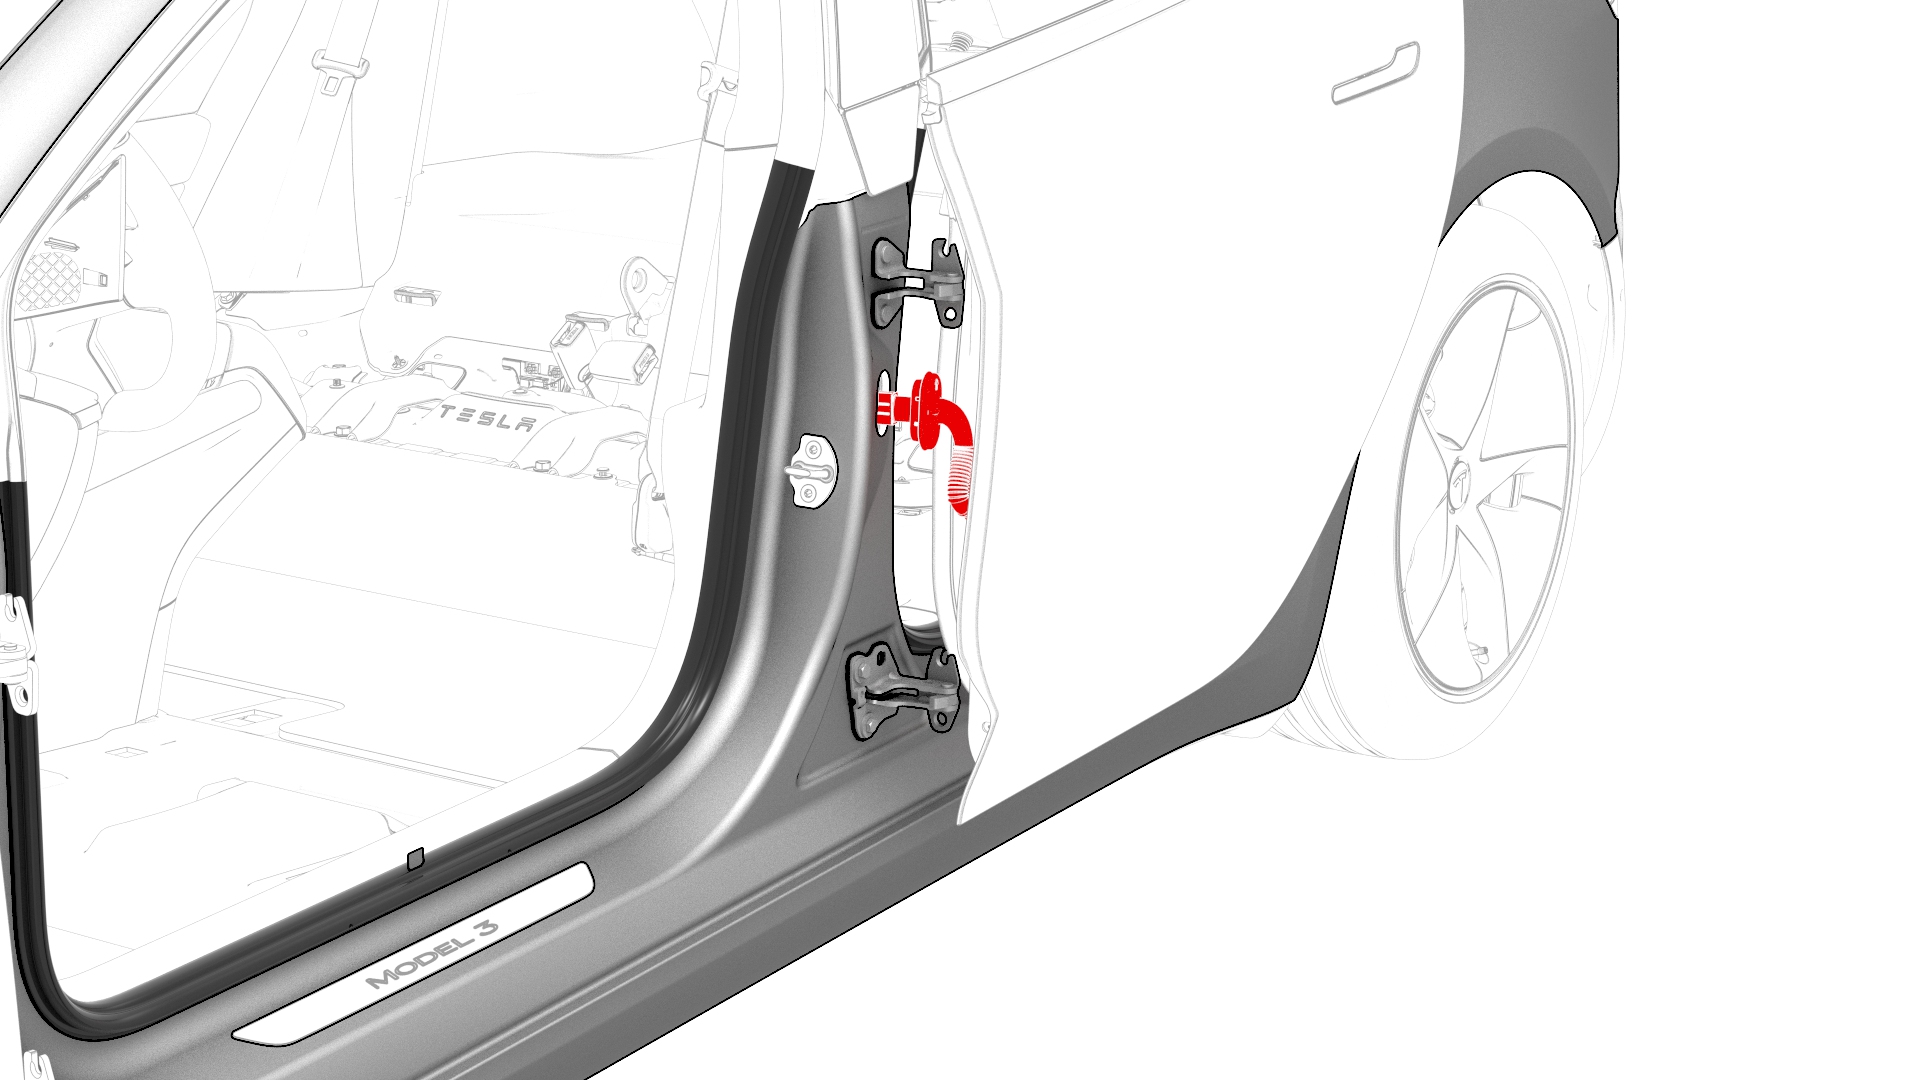
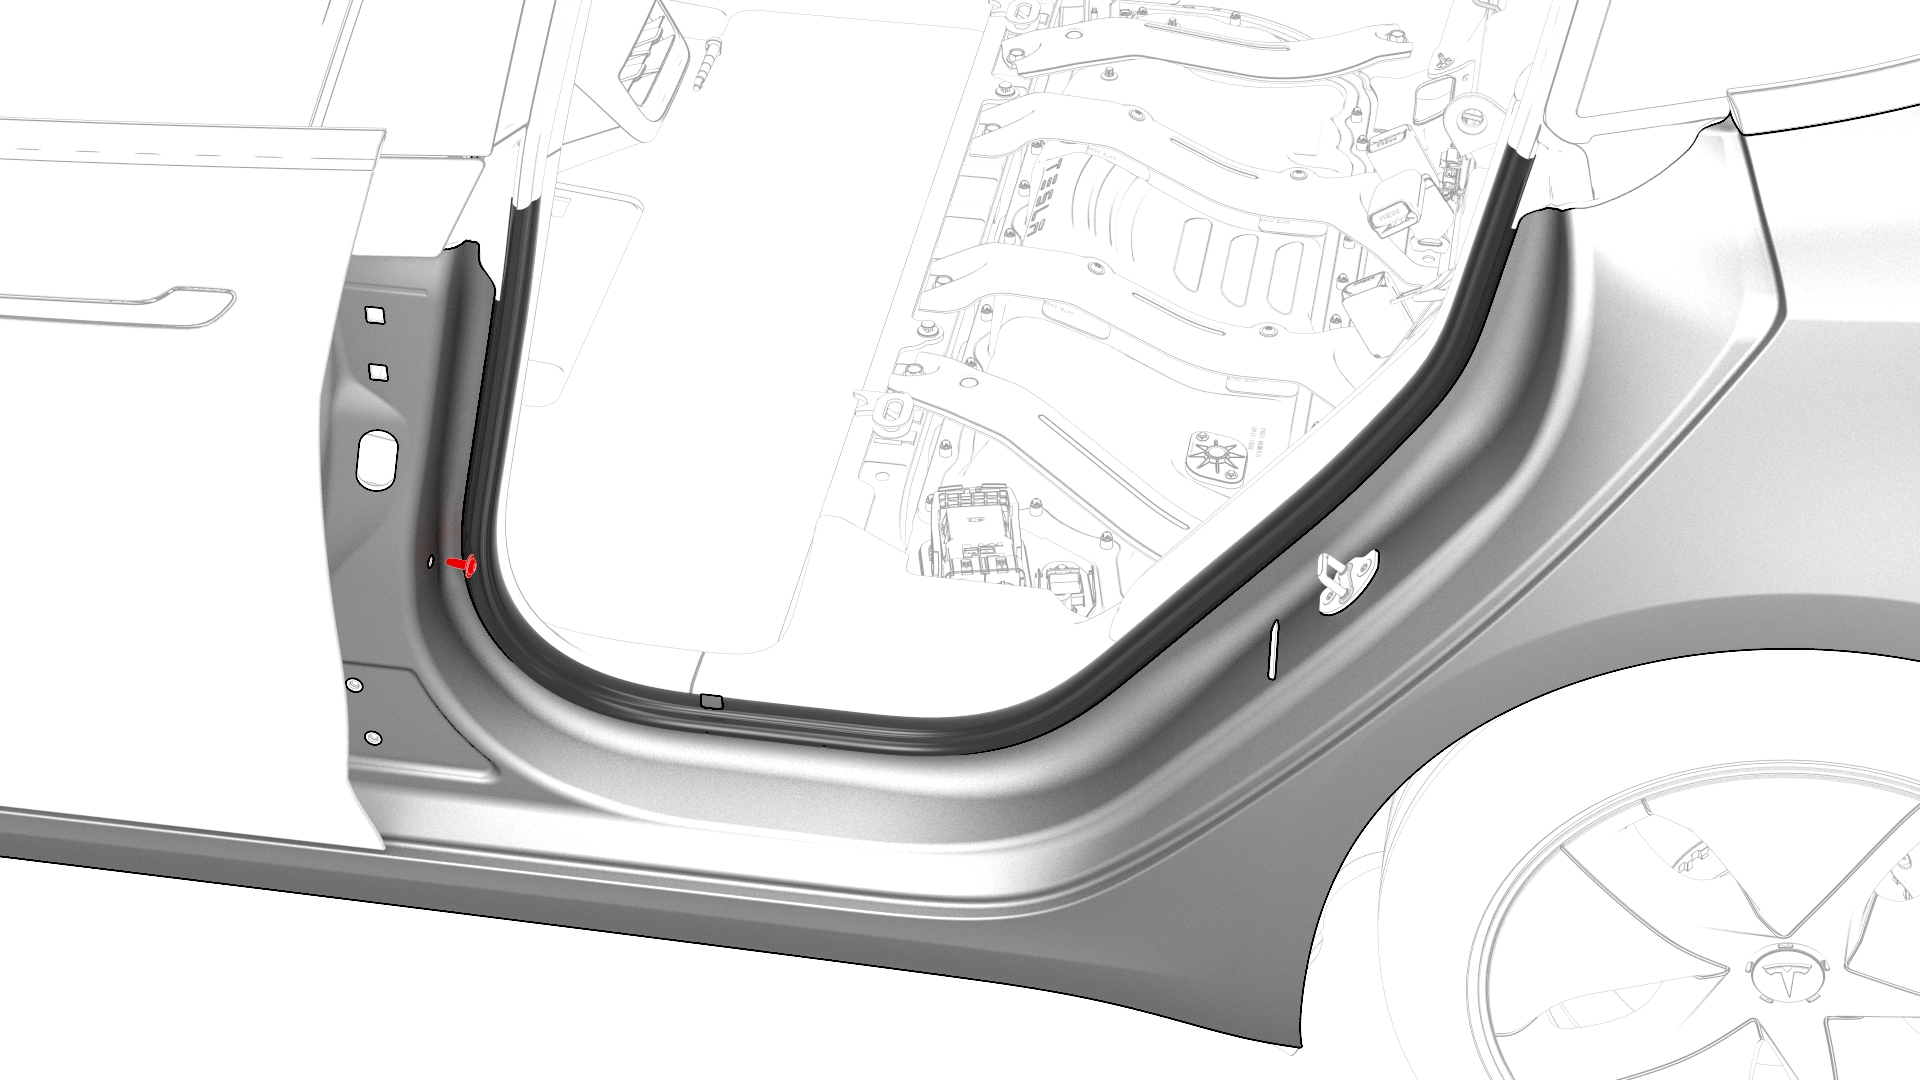
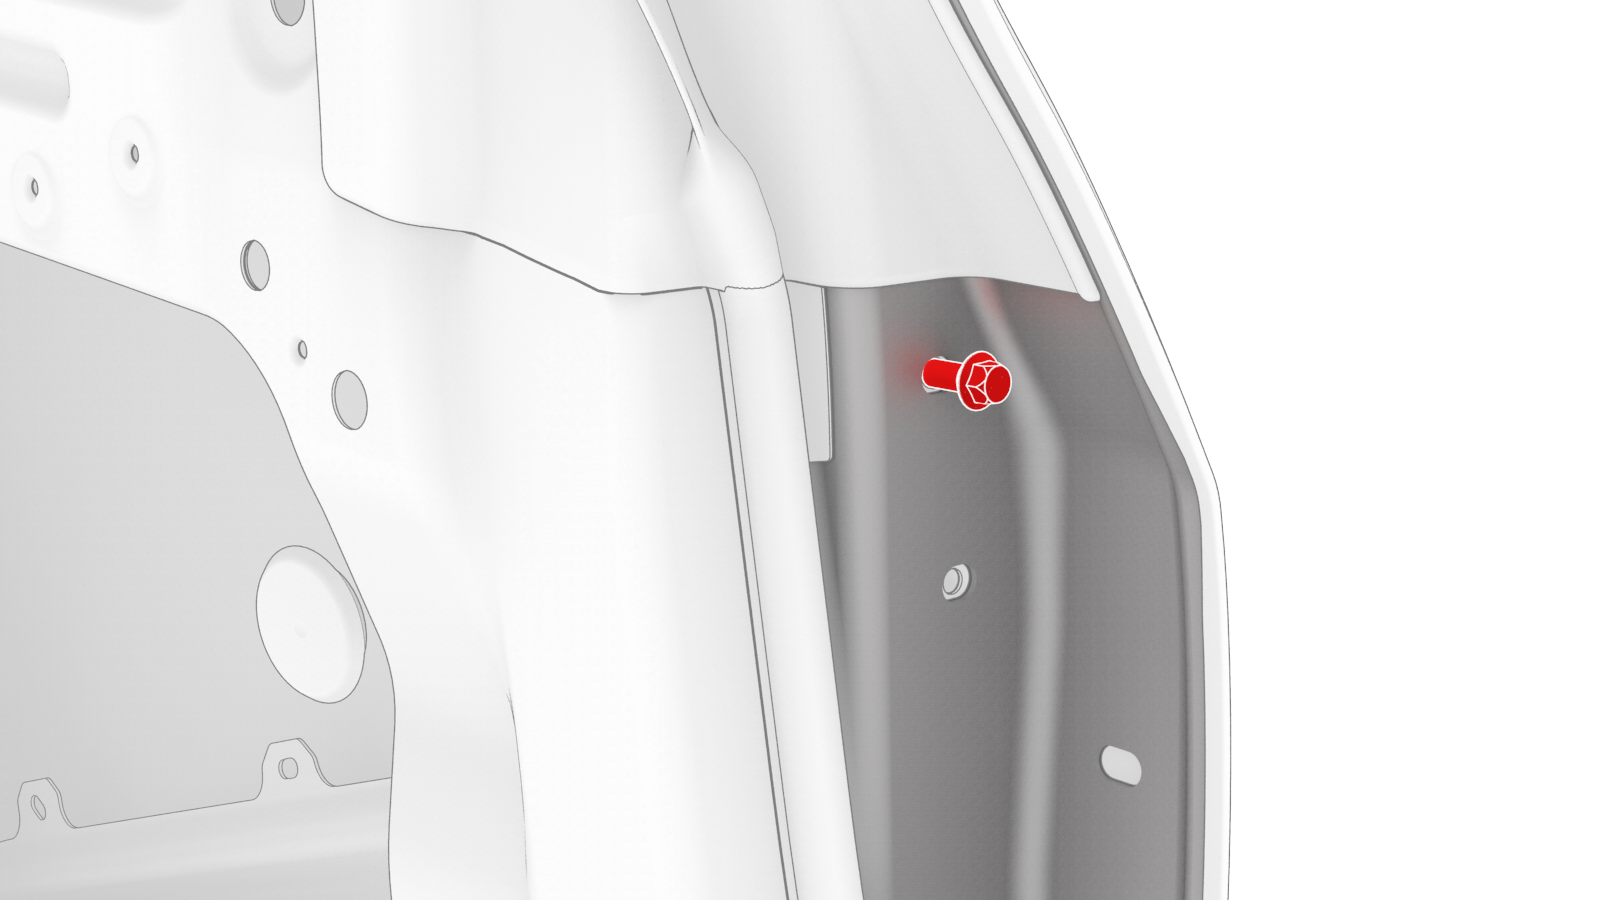
Remove the bolt that attaches the door check to the B-pillar.
 Caution:Unbolting the door check allows the door to swing freely beyond opening limits.
 -
Remove the nuts that attach the door check inside the door, and remove the door check from the door.
 Torque 24 Nm
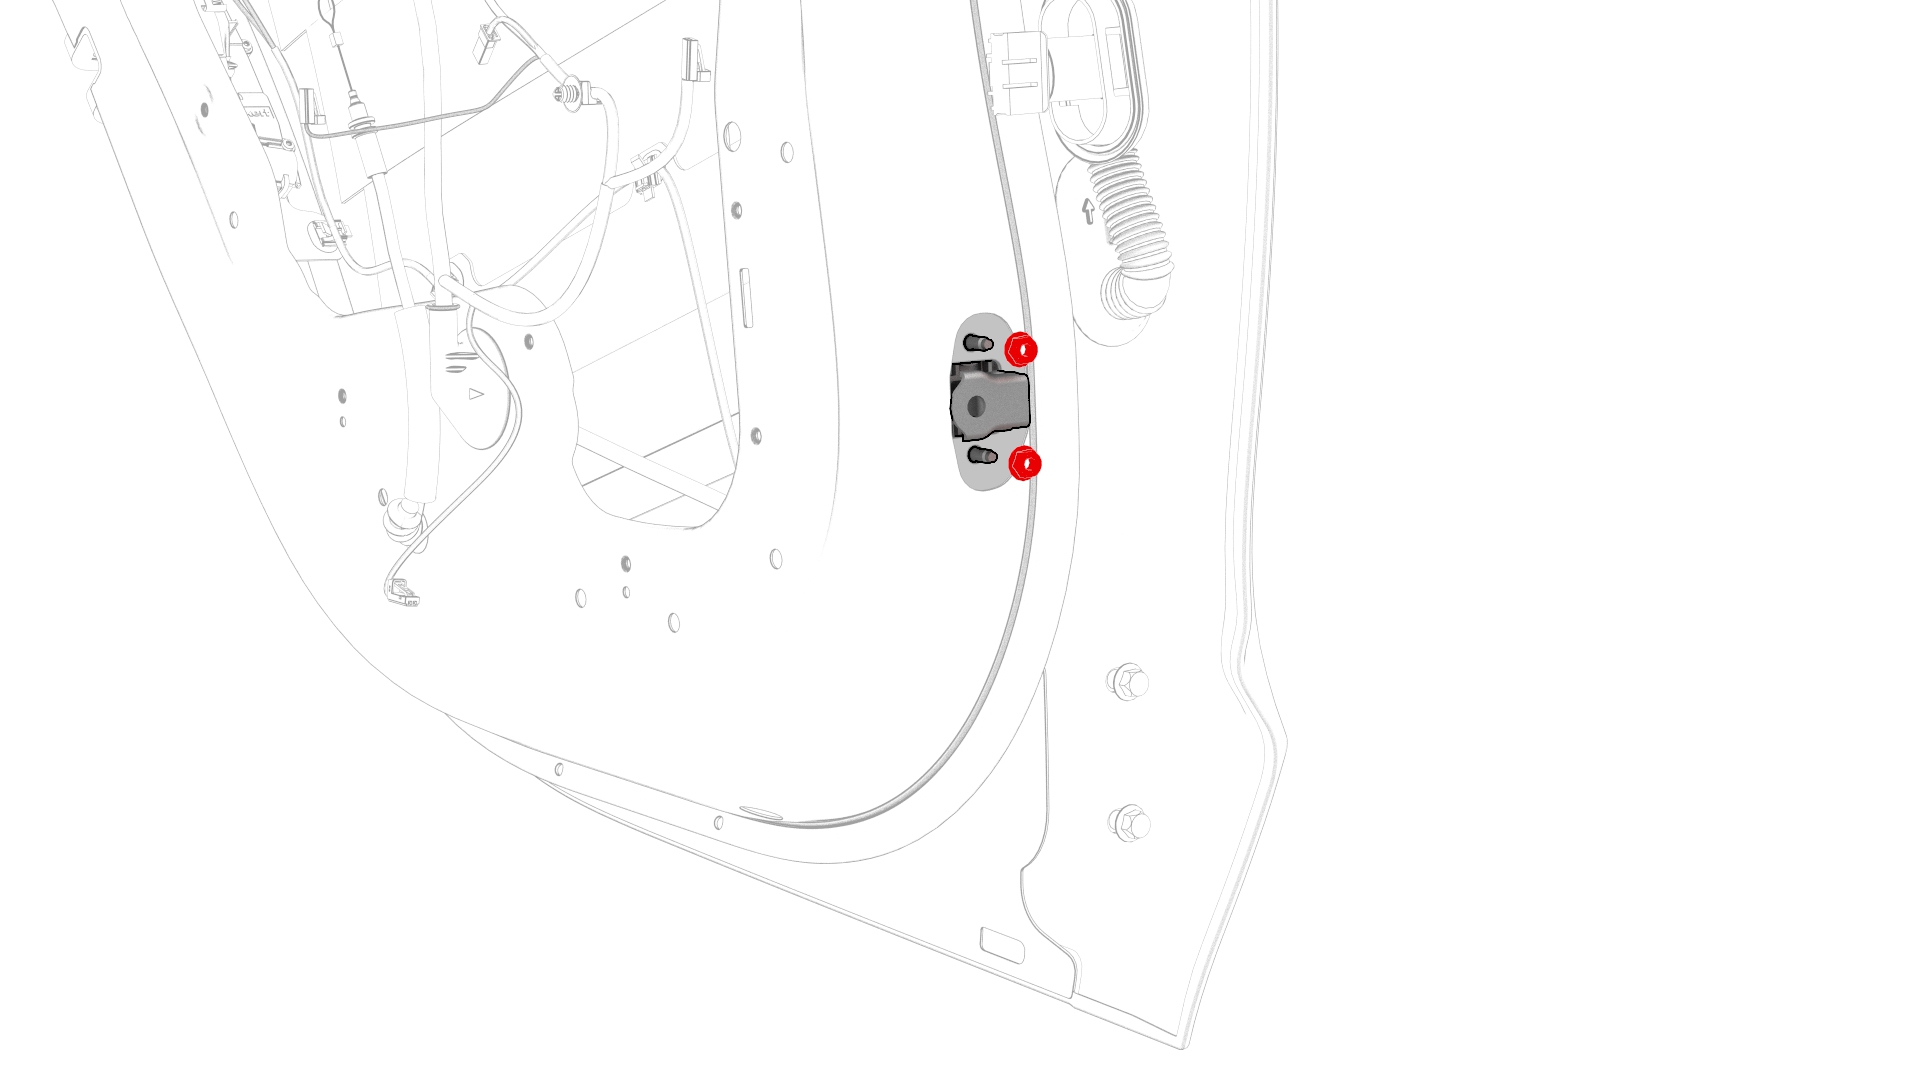
-
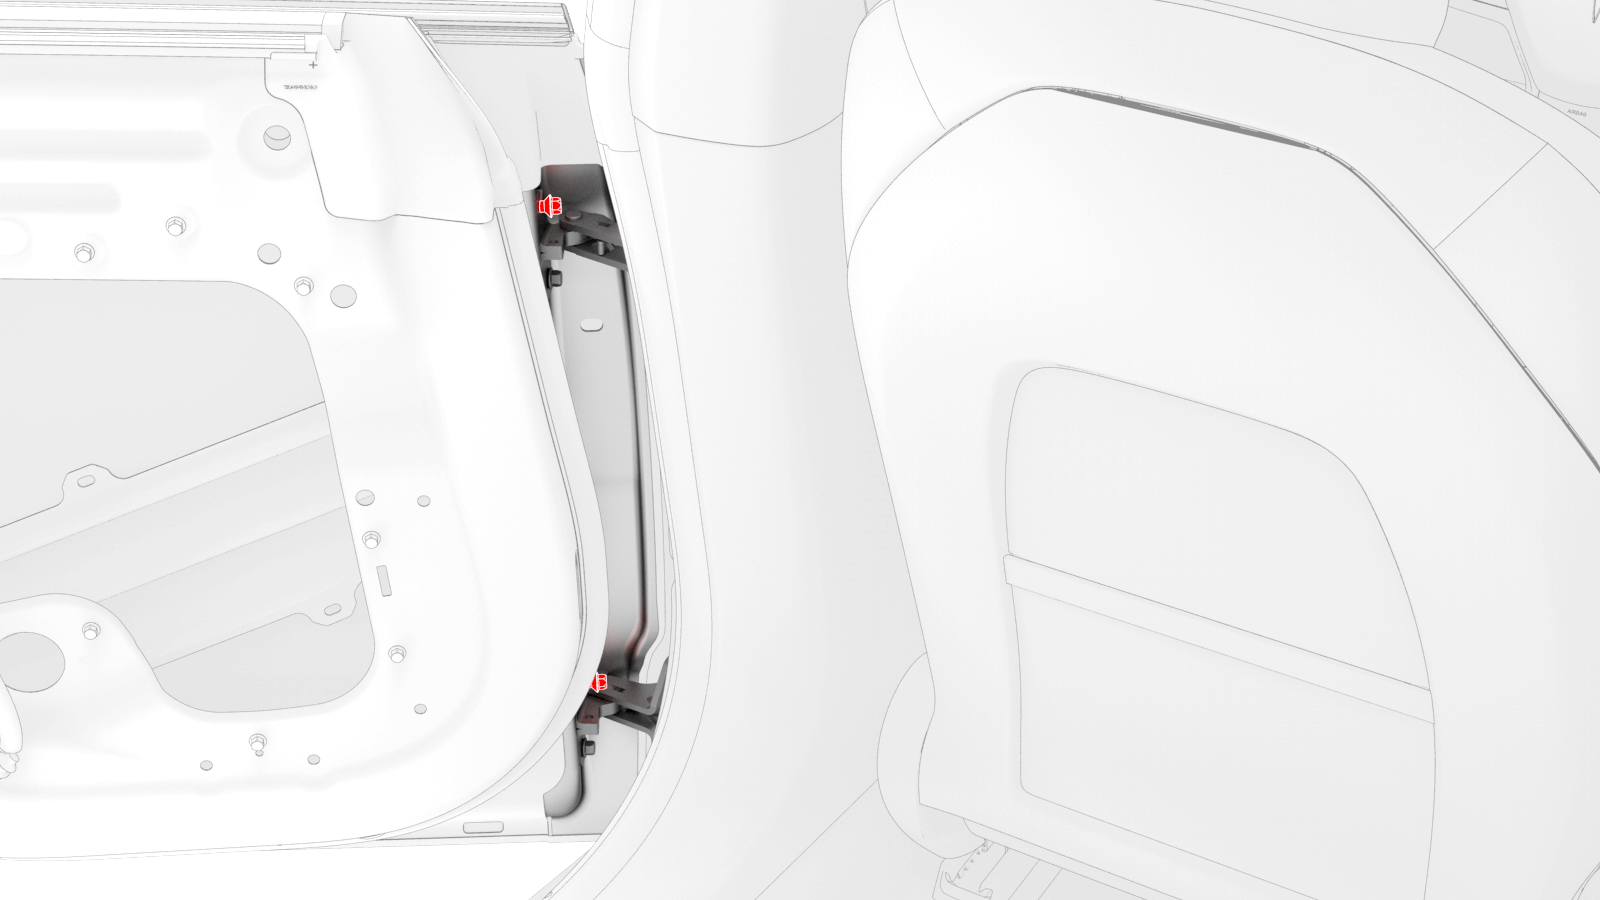
Loosen the upper bolt of each hinge that attaches the rear LH door to the hinge by approximately 5 mm.

-
With assistance, remove the lower bolt of each hinge, and then unhook and lift the door away from the vehicle.
| 1 | Open the rear LH door, pass a shop towel halfway through the striker, and then close the door so that it rests against the shop towel. | ||
| 2 | Remove the rear LH door glass. See Glass - Door - LH - Rear (Remove and Replace). | ||
| 3 | Remove the LH rear door outer belt seal. See Seal - Outer Belt - Rear Door - LH (Remove and Replace). | ||
| 4 | Remove the LH rear window regulator. See Window Motor / Regulator Assembly - Rear - LH (Remove and Replace). | ||
| 5 | Remove the LH rear door latch. See Latch - Door - Rear - LH (Remove and Replace). | ||
| 6 | Remove the LH rear door exterior release handle. See Handle - Exterior Release - Door - Rear - LH (Remove and Replace). | ||
| 7 | Remove the button plugs from the bottom of the door. | |
| 8 | Open the front LH door, and partially close the rear LH door. | ||
| 9 | Release the clips (x4) of the rear LH door electrical harness seal at the B-pillar, and pull the wiring harness out of the B-pillar bulkhead. | |
| 10 | Pull the rear LH door wiring harness connector out of the B-pillar, and then tuck the harness into the cavity at the front of the rear LH door. | ||
| 11 | Carefully open the rear LH door, and then close the front LH door. Caution: Do not allow the leading edge of the rear LH door to crush the wiring harness or connector against the B-pillar.
| ||
| 12 | Disconnect the rear LH door electrical harness, and then rotate the connector exiting the B-pillar 90 degrees, so as to prevent the connector from falling back into the B-pillar. | |
| 13 | Release all door electrical harness clips. | |
| 14 | Push the electrical harness out through the door bulkhead, and remove the electrical harness from the door. | ||
| 15 | Remove the bolt that attaches the door check to the B-pillar. Caution: Unbolting the door check allows the door to swing freely beyond opening limits.
| |
| 16 | Remove the nuts that attach the door check inside the door, and remove the door check from the door. Torque 24 Nm | |
| 17 | Loosen the upper bolt of each hinge that attaches the rear LH door to the hinge by approximately 5 mm. | |
| 18 | With assistance, remove the lower bolt of each hinge, and then unhook and lift the door away from the vehicle. |
Install
-
Make sure that the upper bolt for each door hinge is installed, and the bolt head extends approximately 10 mm from flush.
-
Install the lower bolt of each hinge into the door and hand-tighten all bolts.
-
Tighten the hinge bolts.
 Torque 24 Nm
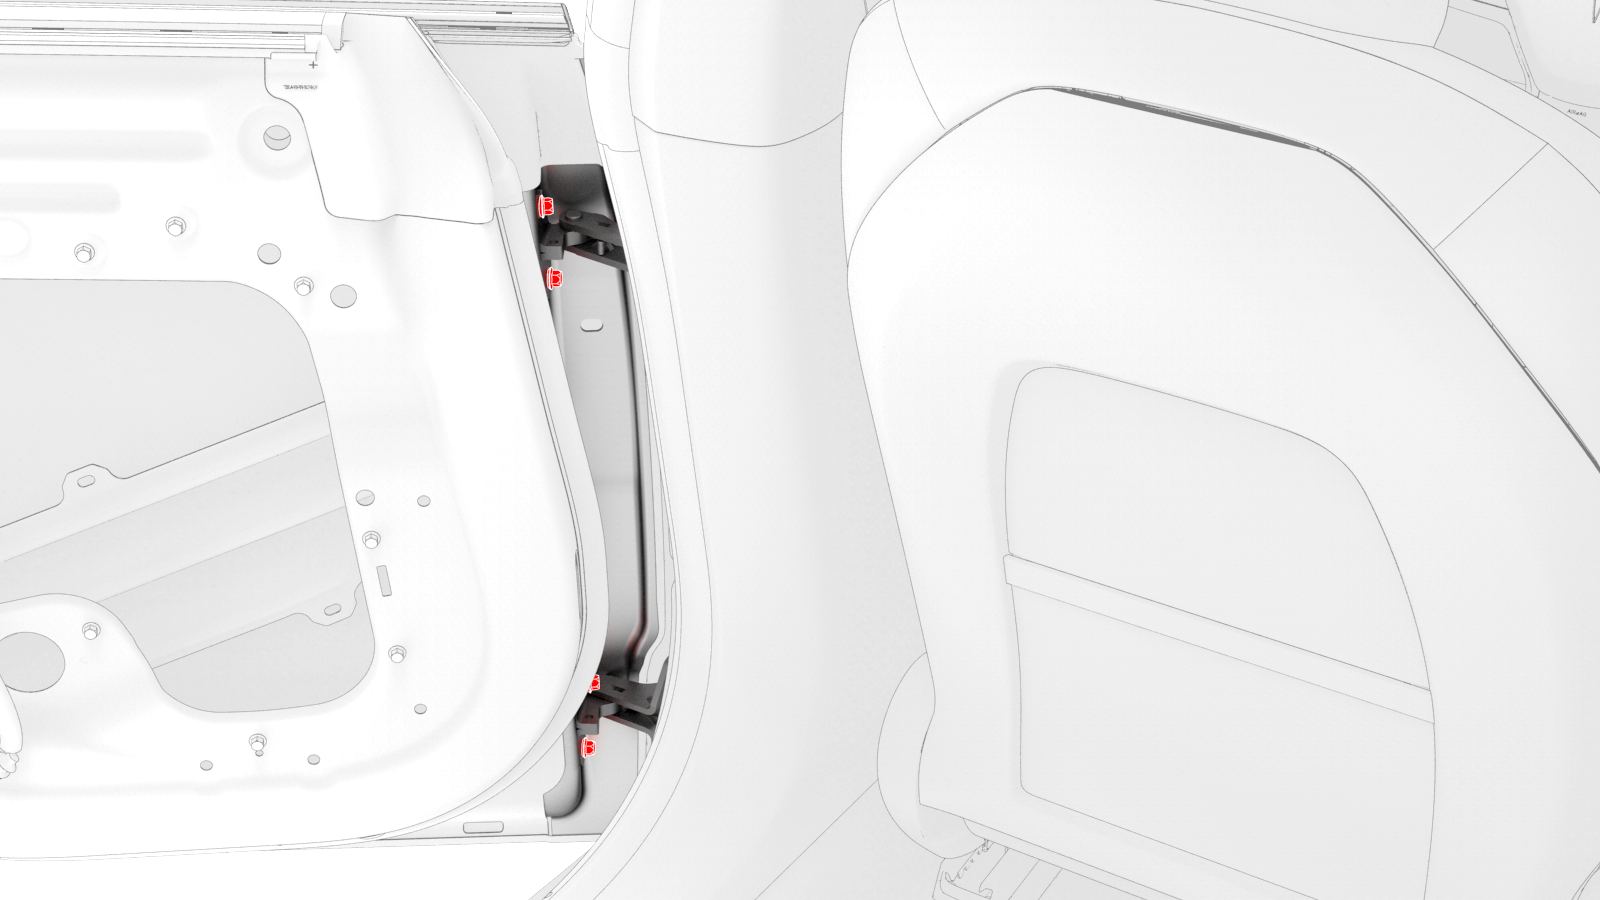
-
Install the door check into the door, and then install the nuts that attach the door check inside the door.Torque 24 Nm
-
Install the bolt that attaches the door check to the B-pillar.
 Torque 24 Nm
 -
Fasten all door electrical harness clips.
-
Connect the rear LH door wiring harness and press the harness against the inside of the rear LH door.
-
Move the rear LH door electrical harness connector into the hole in the B-pillar, press the rear LH door wiring harness seal into the B-pillar, and fasten the clips (x4) that attach the seal to the B-pillar bulkhead.
Note: Make sure that the rear LH door wiring harness seal fits tightly against the B-pillar bulkhead.
-
Install the button plugs to the bottom of the door.
| 1 | Install a new secondary door seal on the replacement door. See Seal - Secondary - Rear Door - LH (Remove and Replace). | ||
| 2 | Make sure that the upper bolt for each door hinge is installed, and the bolt head extends approximately 10 mm from flush. | |
| 3 | With assistance, lower the rear LH door onto the door hinges, and engage the upper bolts into the hinges. | ||
| 4 | Install the lower bolt of each hinge into the door and hand-tighten all bolts. | |
| 5 | Adjust the gap and flush of the door. | ||
| 6 | Tighten the hinge bolts. Torque 24 Nm | |
| 7 | Install the door check into the door, and then install the nuts that attach the door check inside the door. Torque 24 Nm | |
| 8 | Install the bolt that attaches the door check to the B-pillar. Torque 24 Nm | |
| 9 | Push the electrical harness in through the door bulkhead, and install the electrical harness to the door. | ||
| 10 | Fasten all door electrical harness clips. | |
| 11 | Connect the rear LH door wiring harness and press the harness against the inside of the rear LH door. | |
| 12 | Open the front LH door and close the rear LH door. | ||
| 13 | Move the rear LH door electrical harness connector into the hole in the B-pillar, press the rear LH door wiring harness seal into the B-pillar, and fasten the clips (x4) that attach the seal to the B-pillar bulkhead. Note: Make sure that the rear LH door wiring harness seal fits tightly against the B-pillar bulkhead.
| |
| 14 | Open the rear LH door, and then close the front LH door. | ||
| 15 | Install the button plugs to the bottom of the door. | |
| 16 | Install the LH rear door exterior release handle. See Handle - Exterior Release - Door - Rear - LH (Remove and Replace). | ||
| 17 | Install the LH rear door latch. See Latch - Door - Rear - LH (Remove and Replace). | ||
| 18 | Install the LH rear window regulator. See Window Motor / Regulator Assembly - Rear - LH (Remove and Replace). | ||
| 19 | Install the LH rear door outer belt seal. See Seal - Outer Belt - Rear Door - LH (Remove and Replace). | ||
| 20 | Install the rear LH door glass. See Glass - Door - LH - Rear (Remove and Replace). | ||
| 21 | Remove the shop towel from the striker. | ||
| 22 | Adjust the gap and flush at the latch and striker. | ||
| 23 | Use Toolbox to calibrate the RH rear window. See Window Regulator - Rear - LH (Recalibrate). |