Harness - Body - LH (Remove and Replace)
Correction code 1710080217100802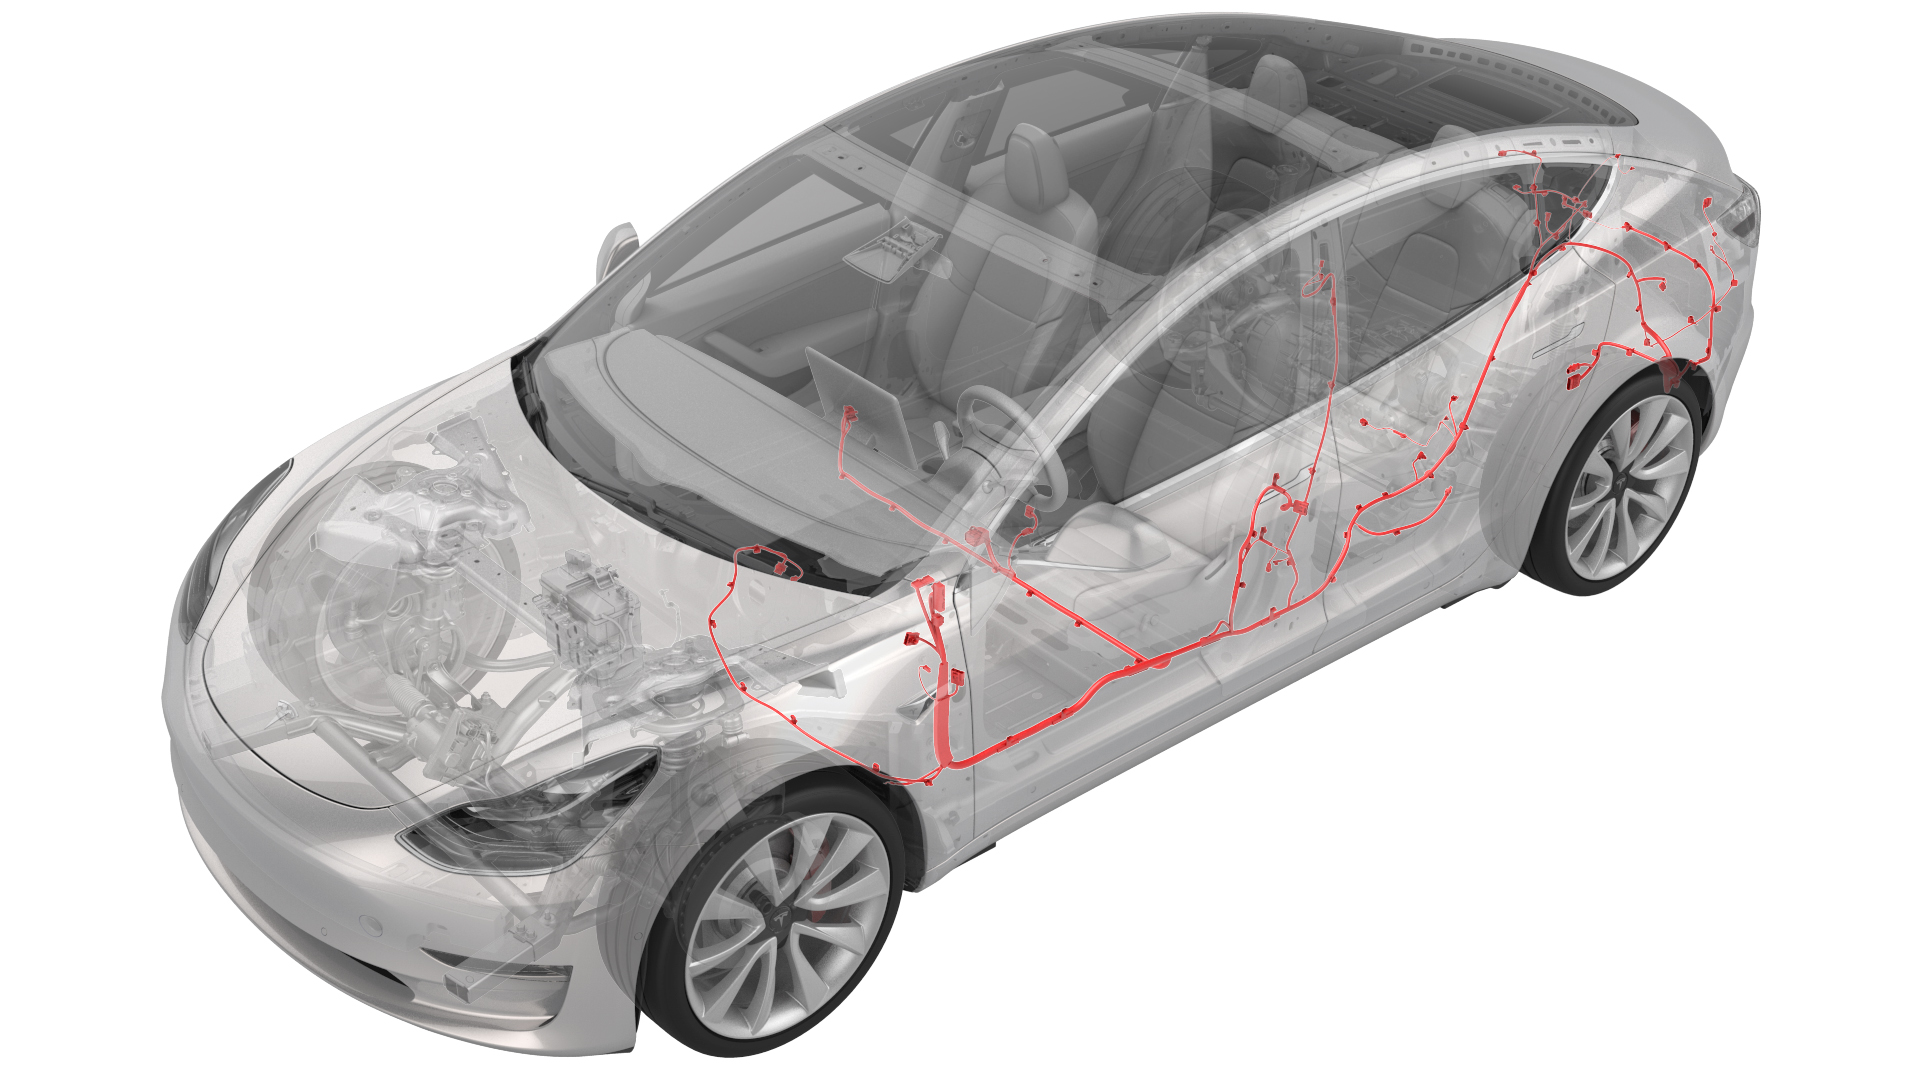
Remove
-
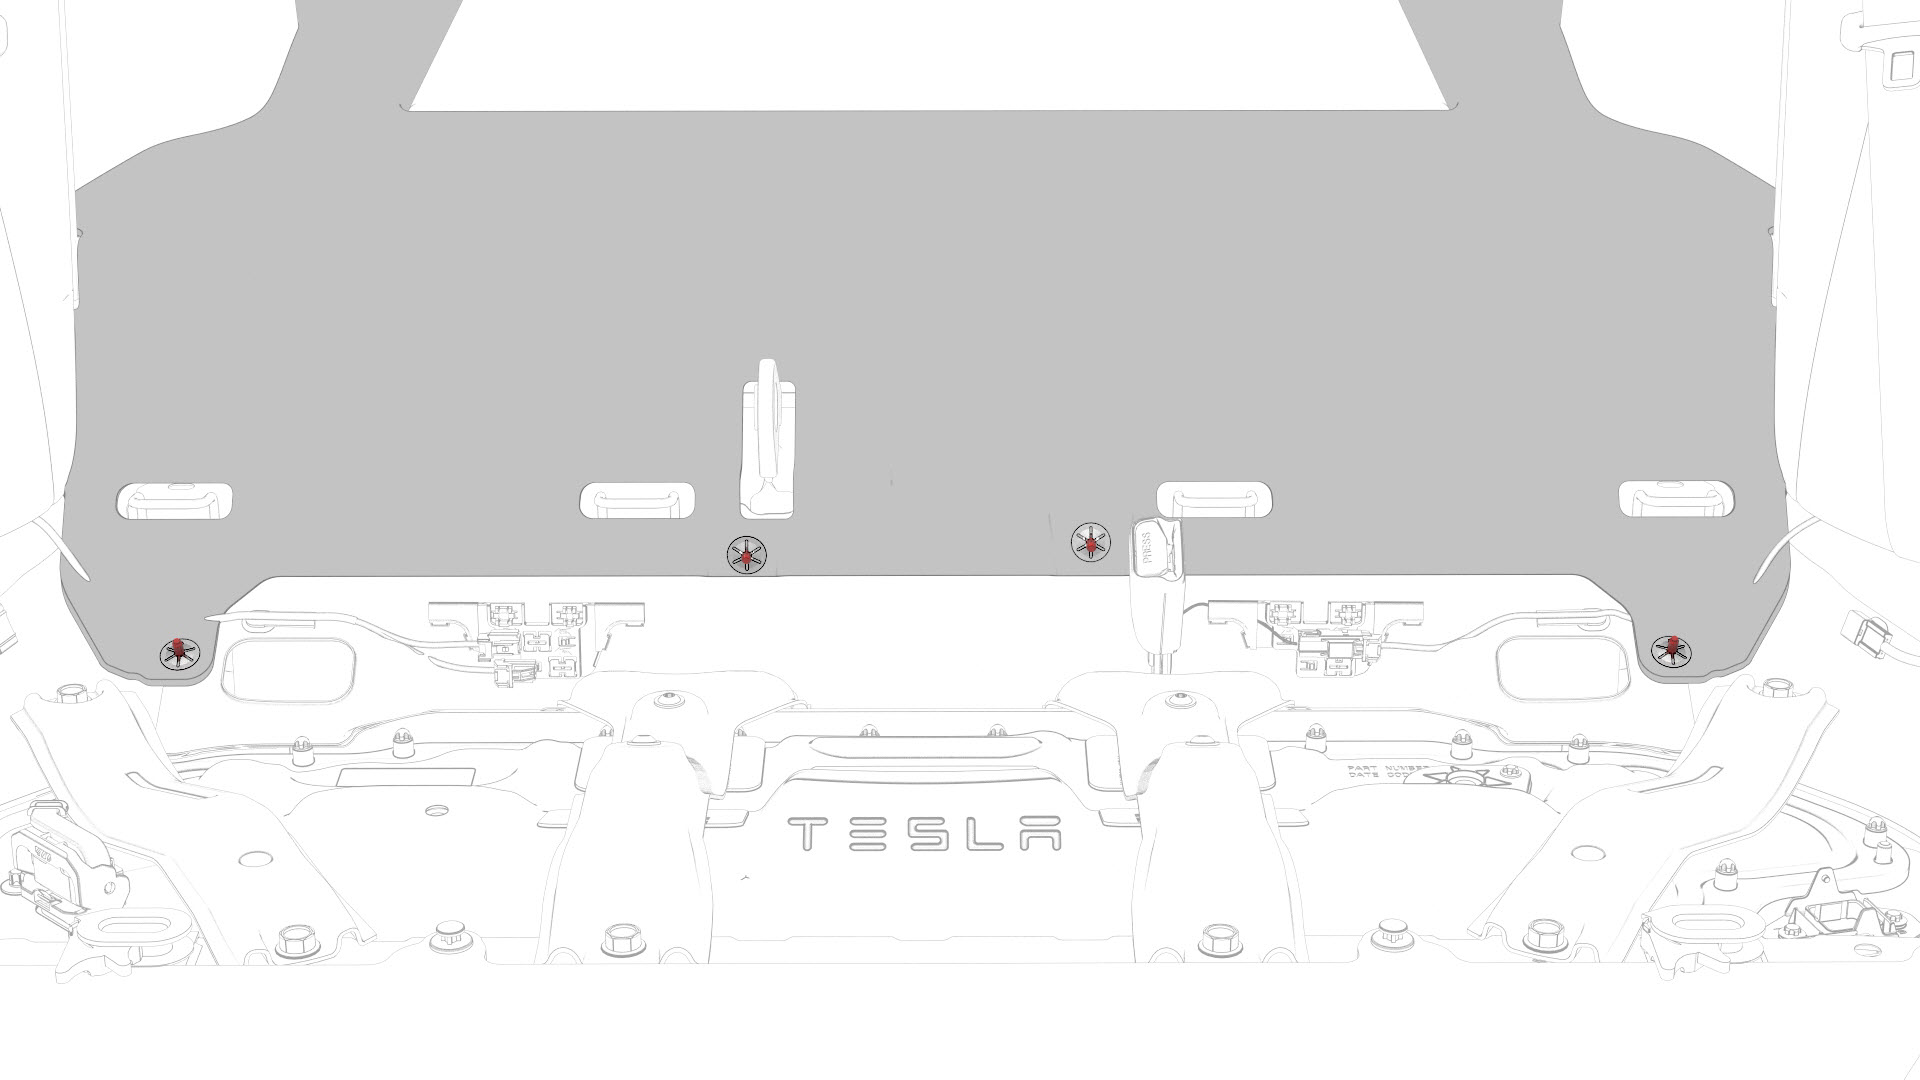
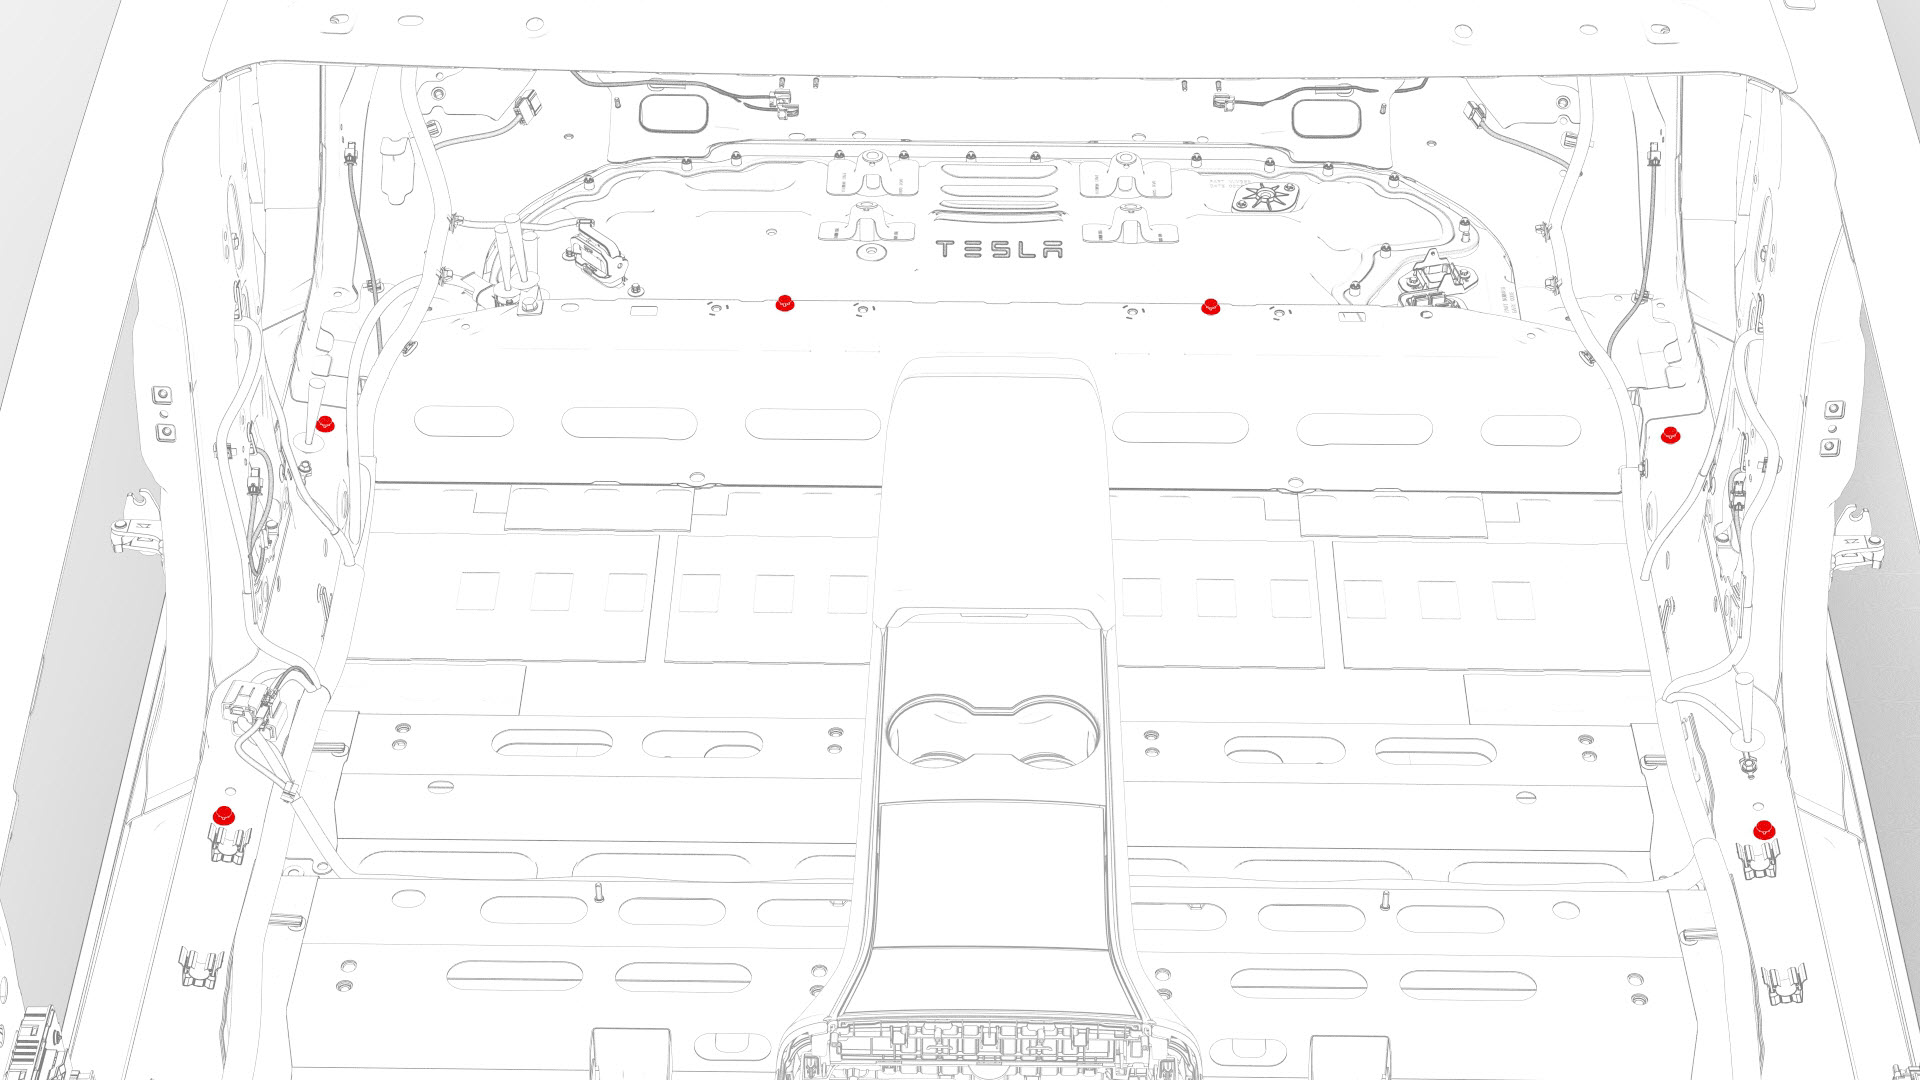
Release the trunk carpet clips from the body studs under the 2nd row seat cushion.
-
Release the clips that attach the trunk carpet to the body, and then remove the trunk carpet from the vehicle.

-
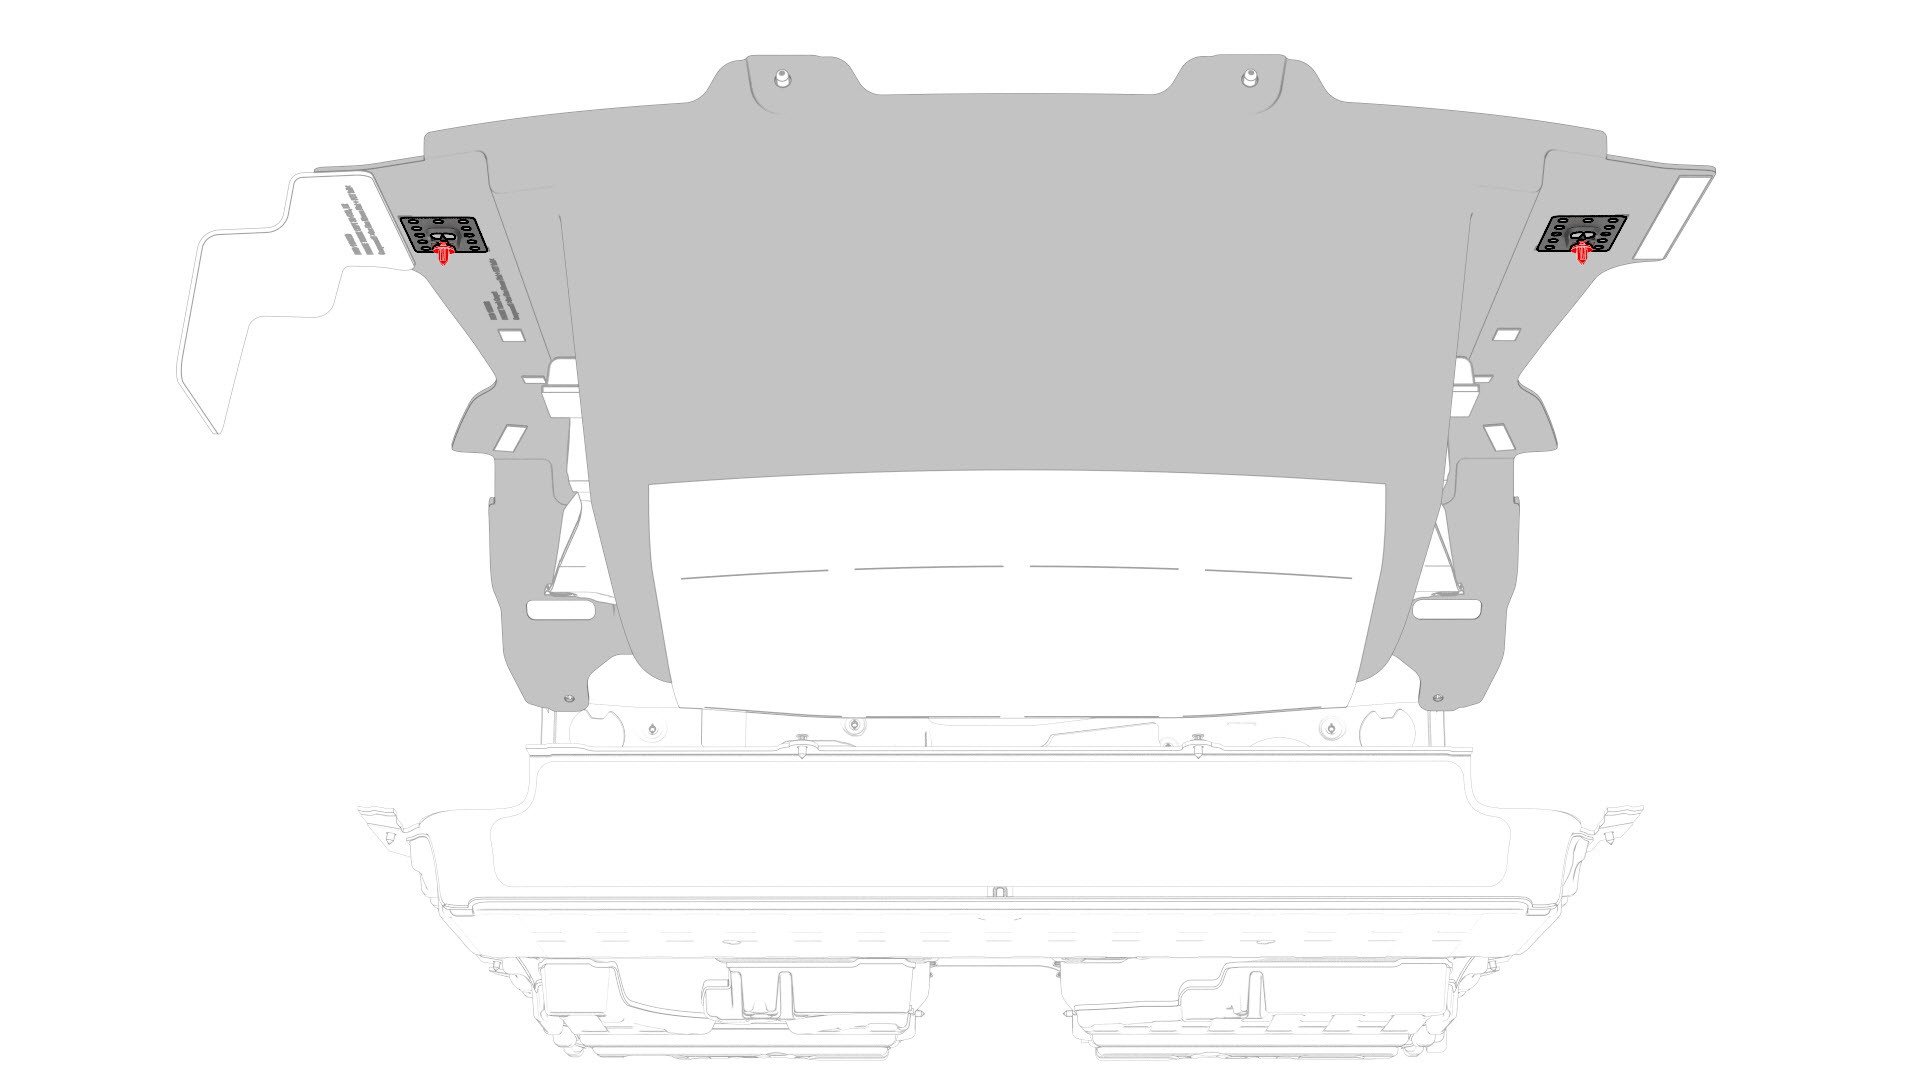
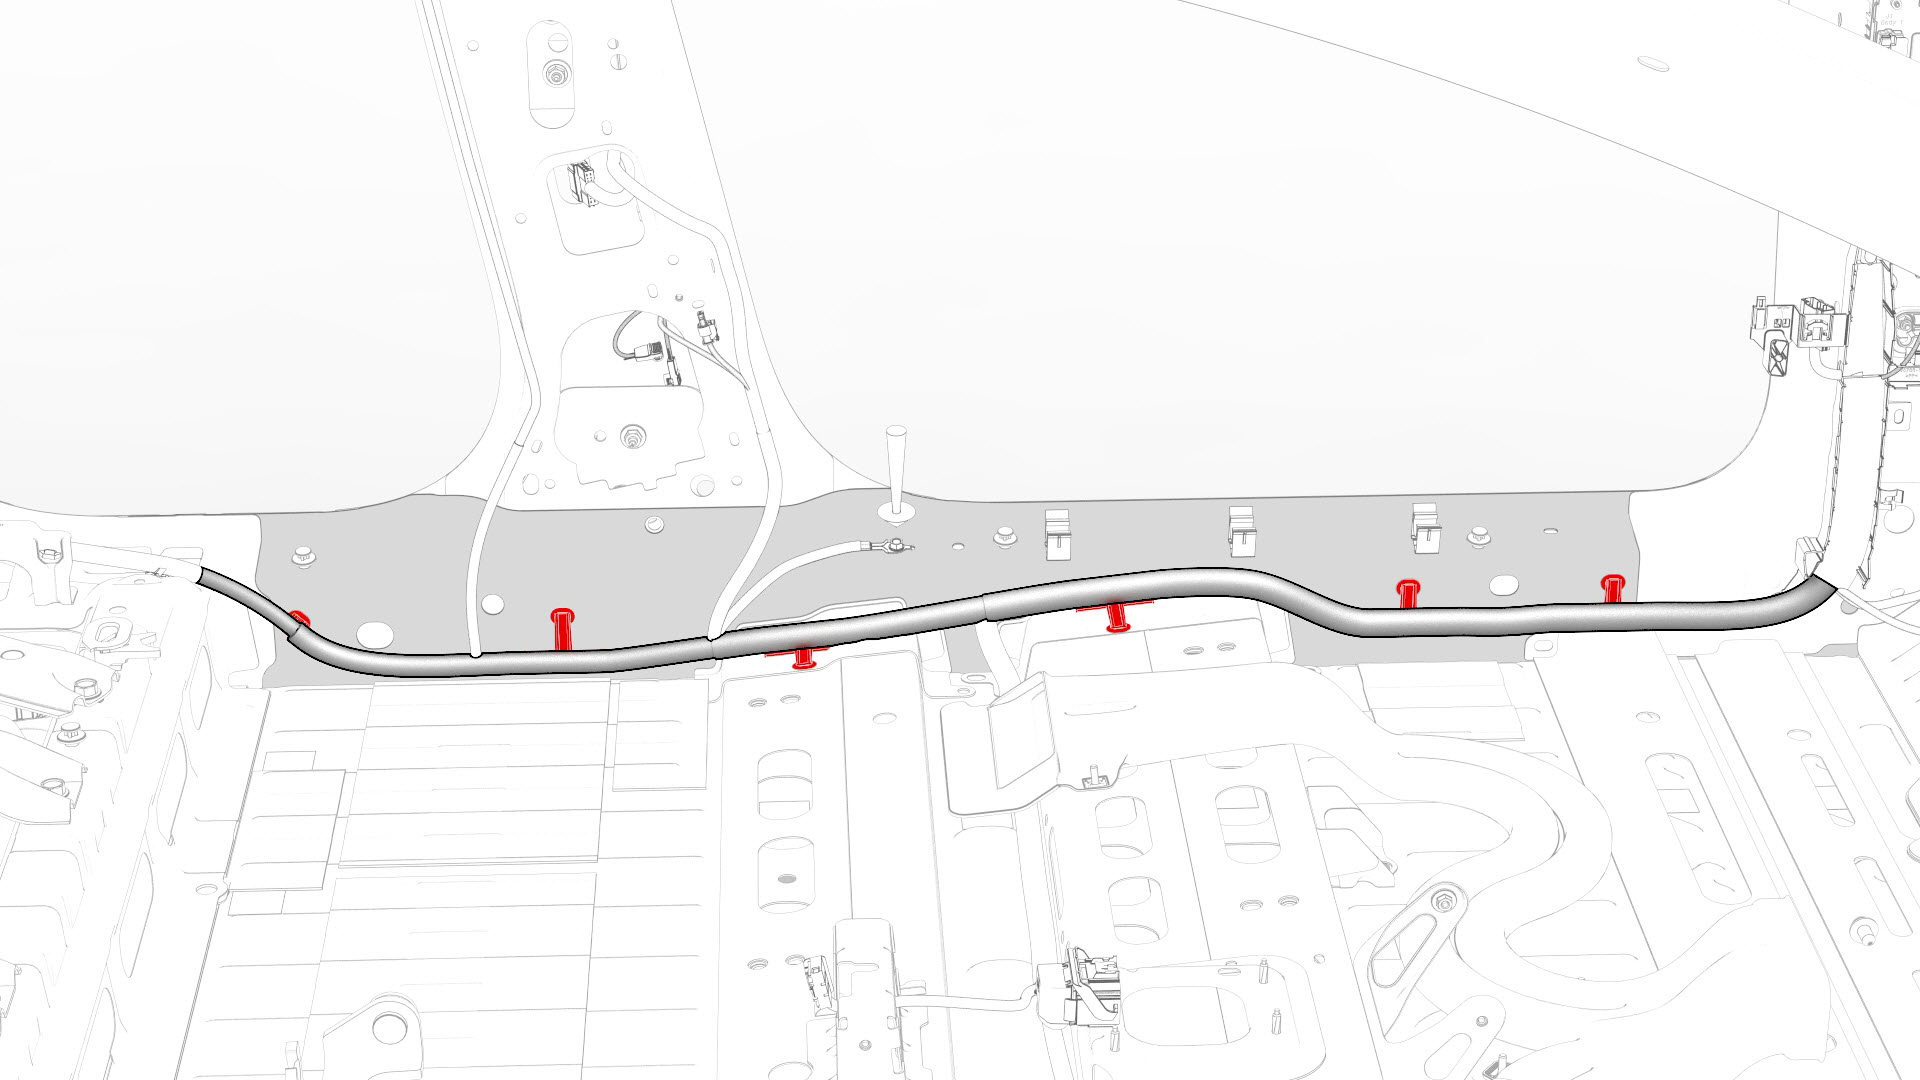
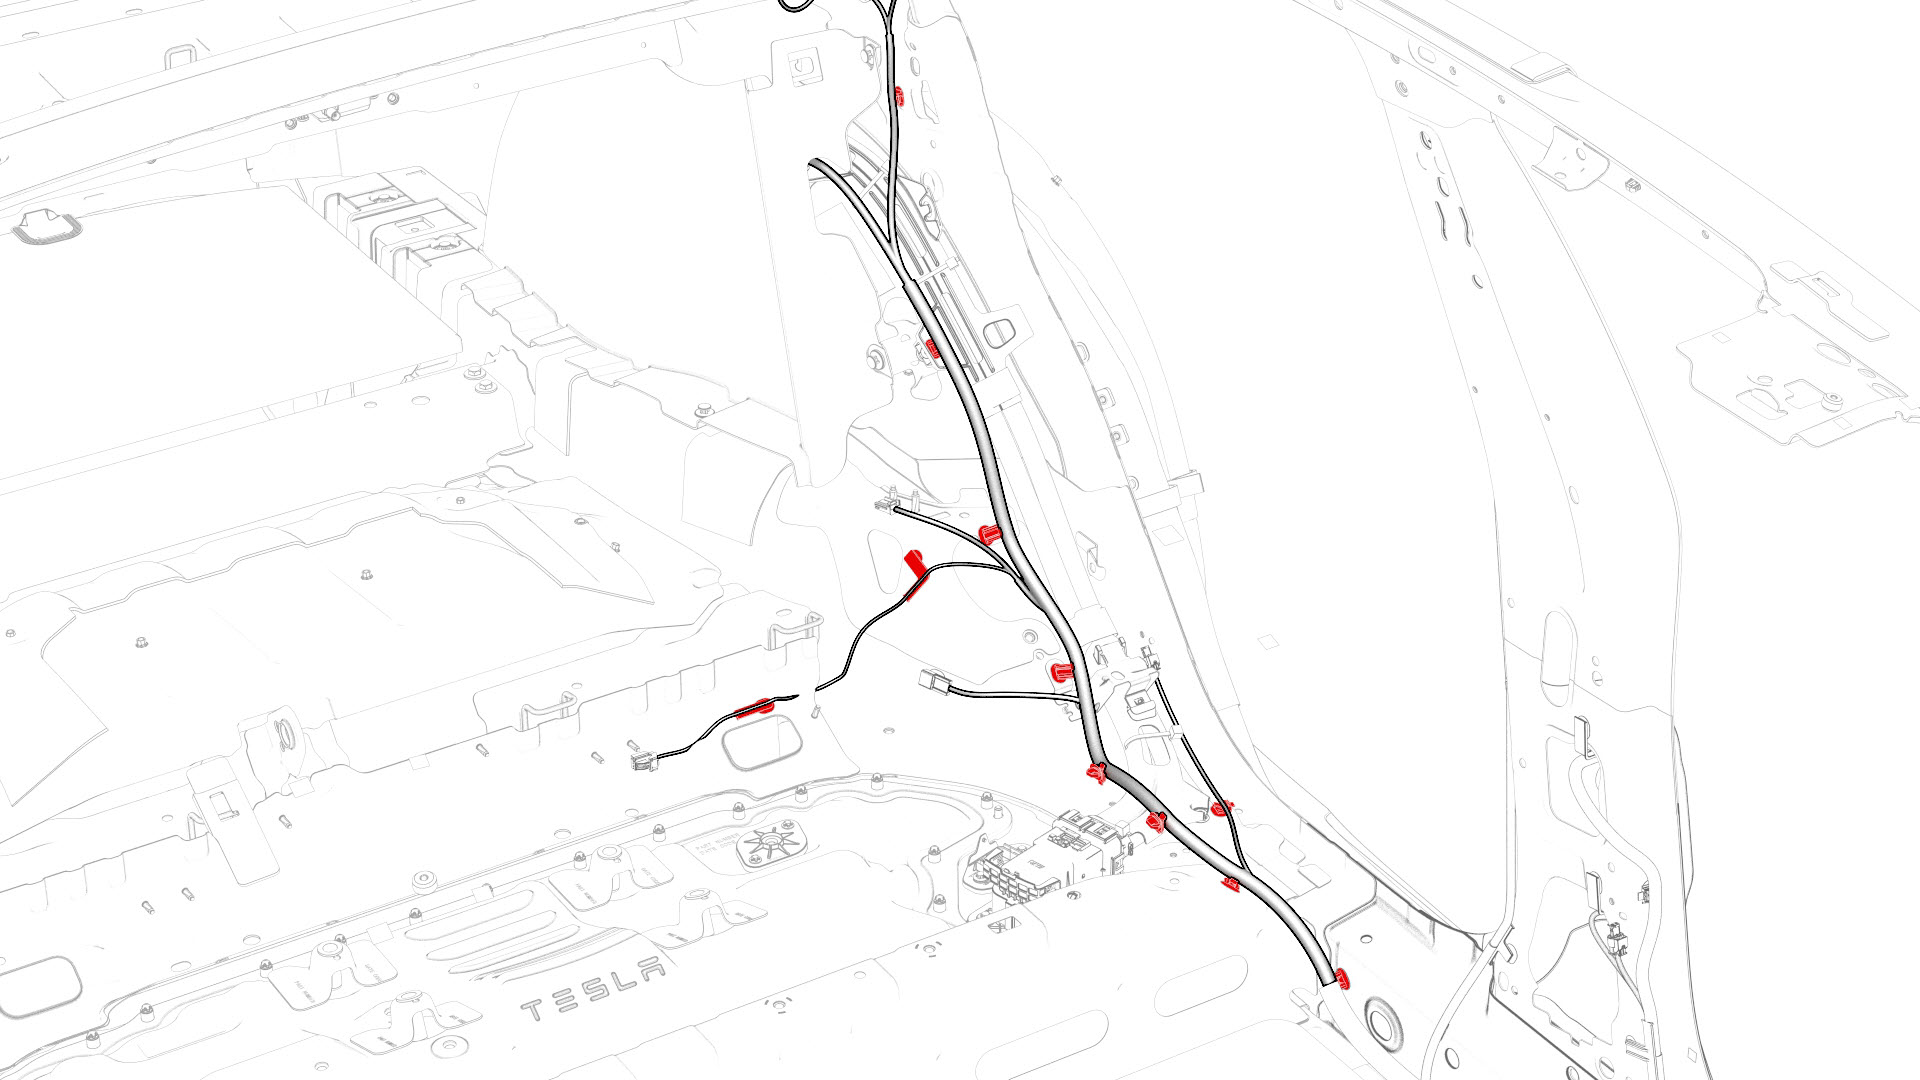
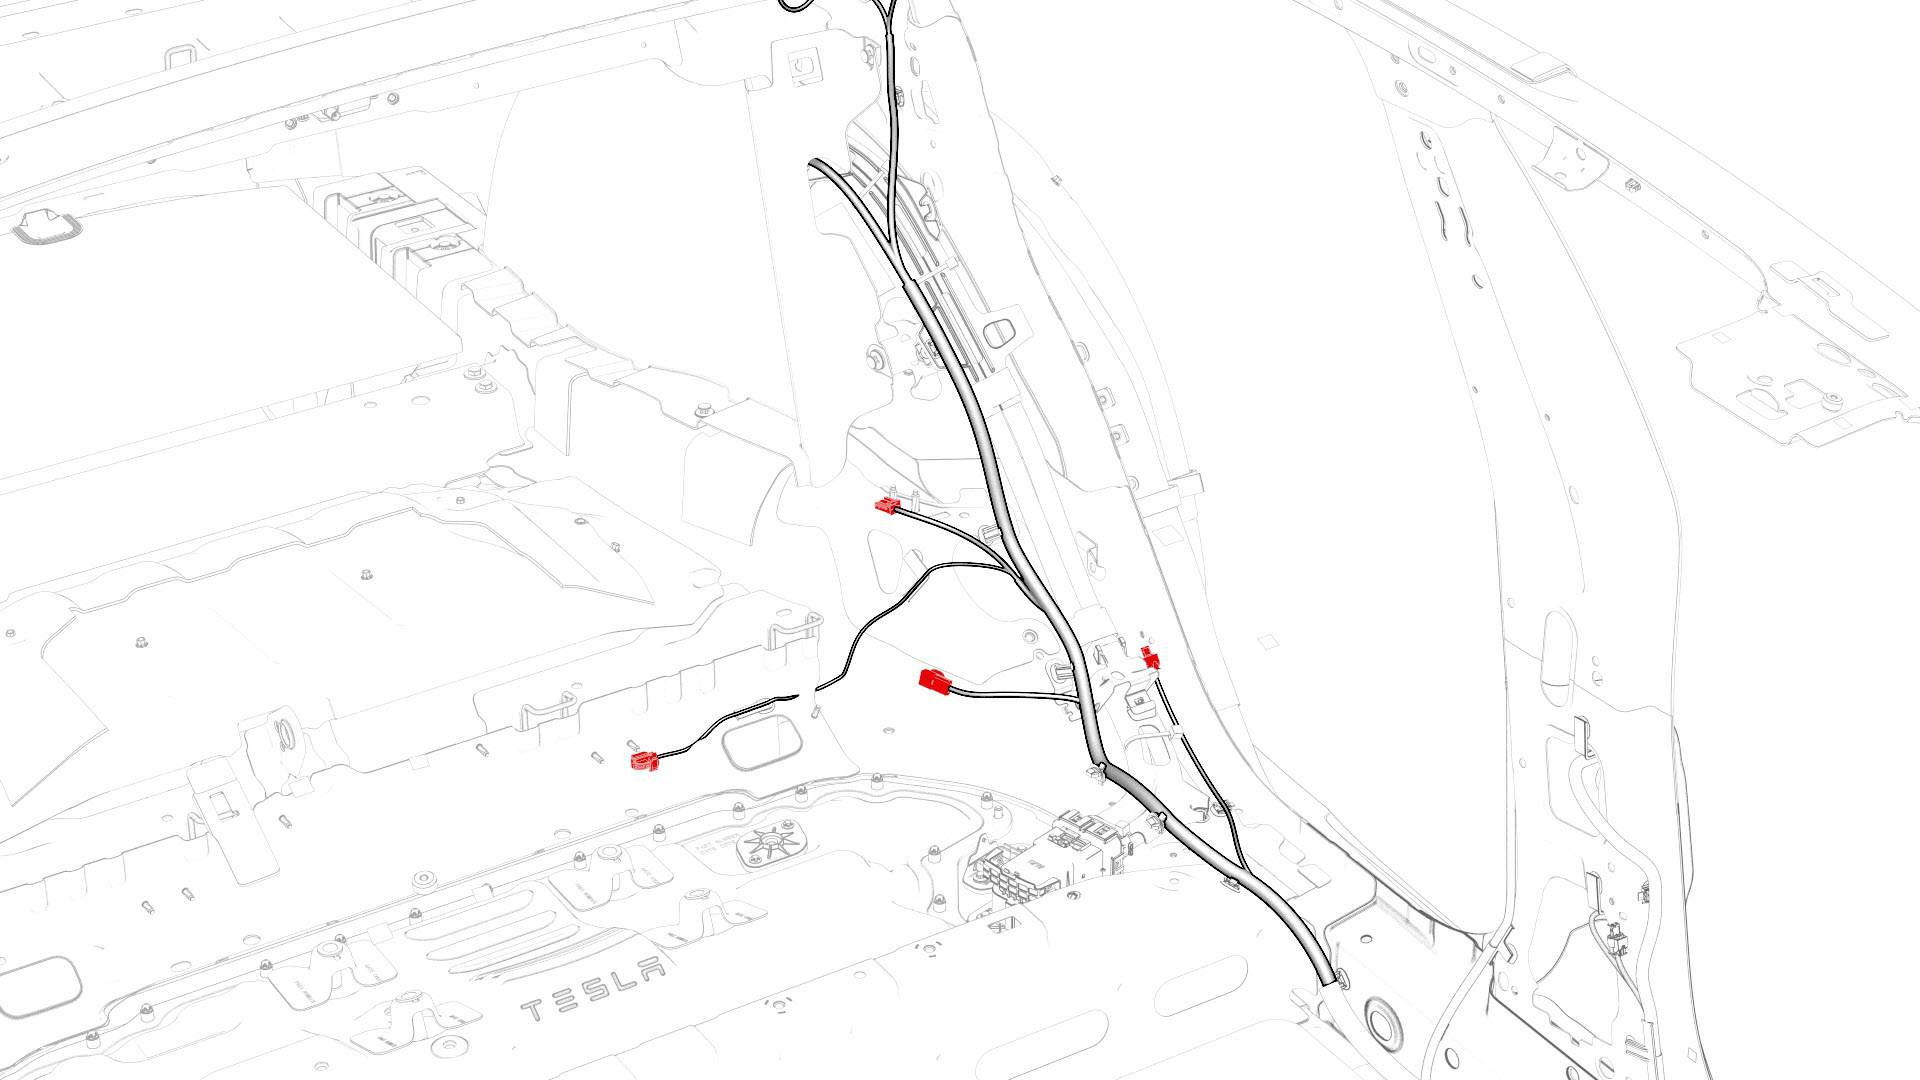
Remove the clips that attach the LH body harness to the body in the rear fascia and rear subframe areas.
-
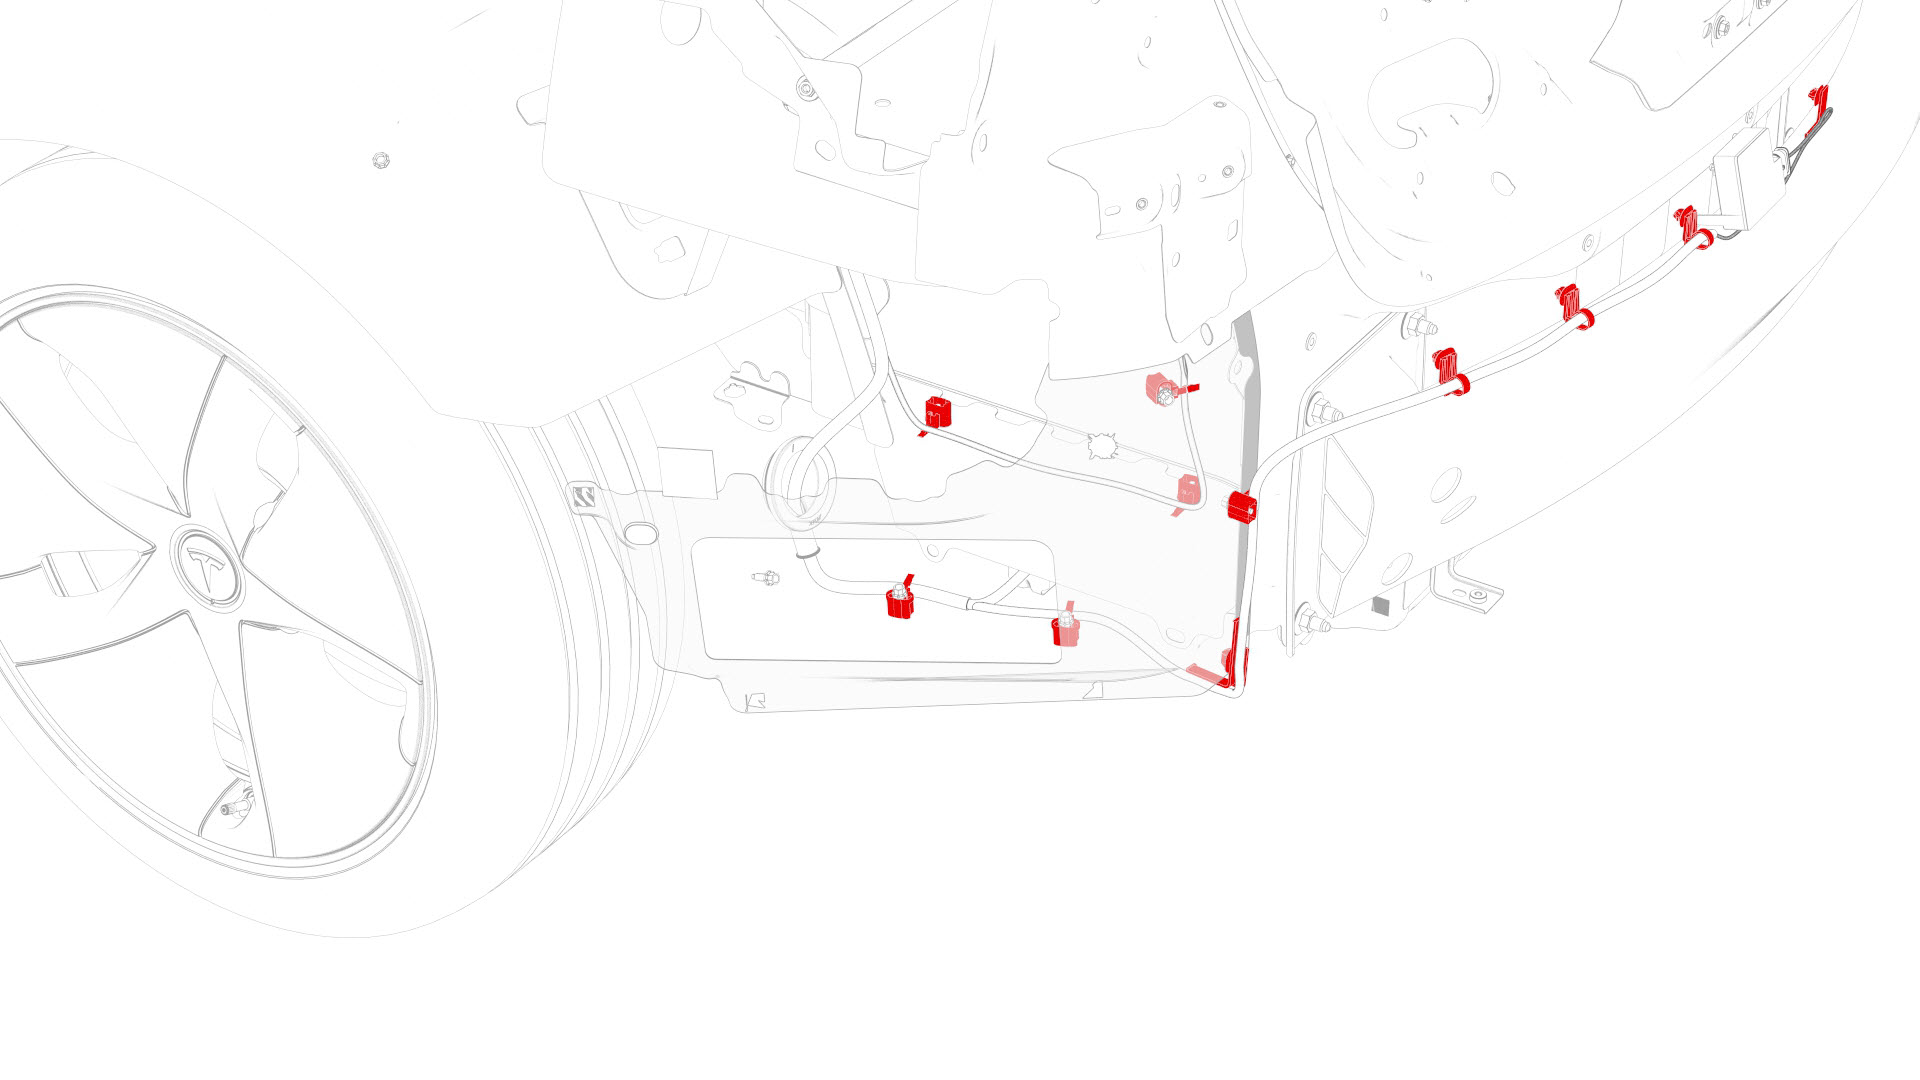
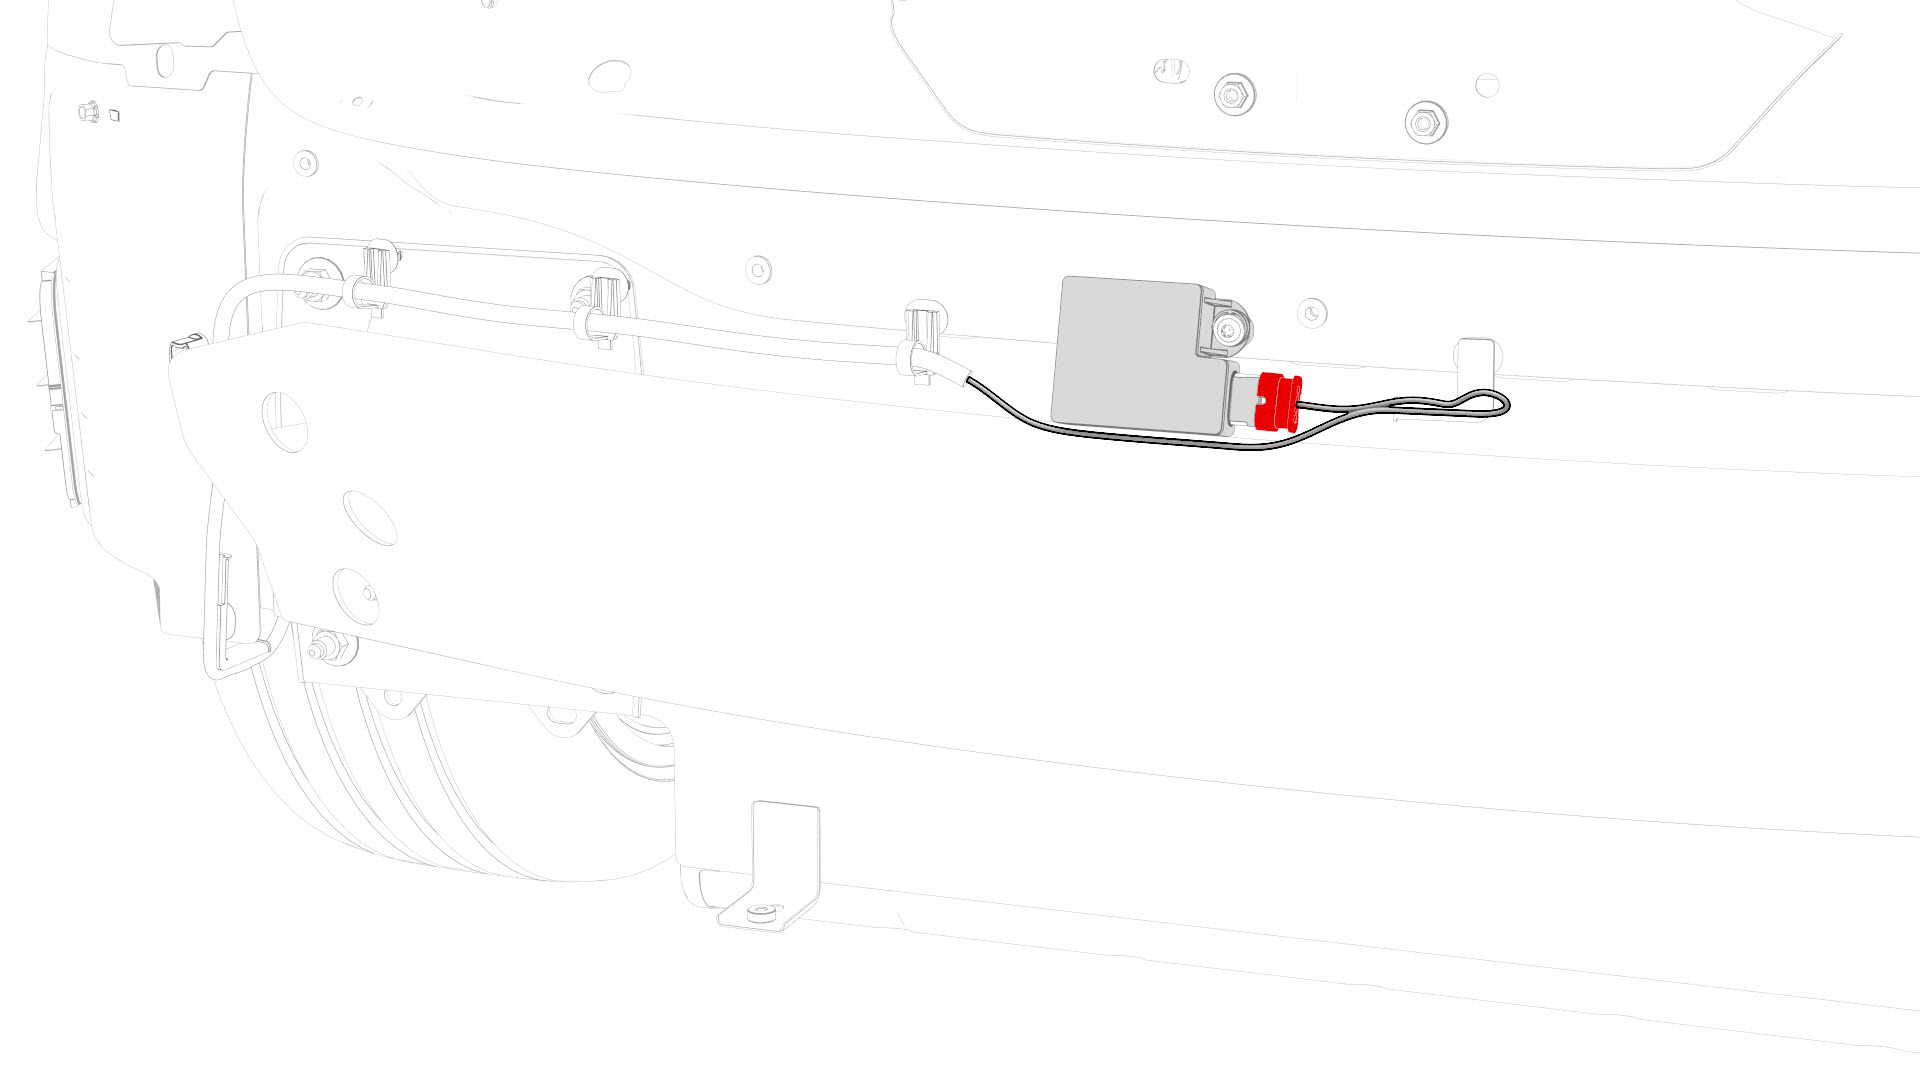
Disconnect the electrical harness from the rear Bluetooth passive entry antenna connector.
-
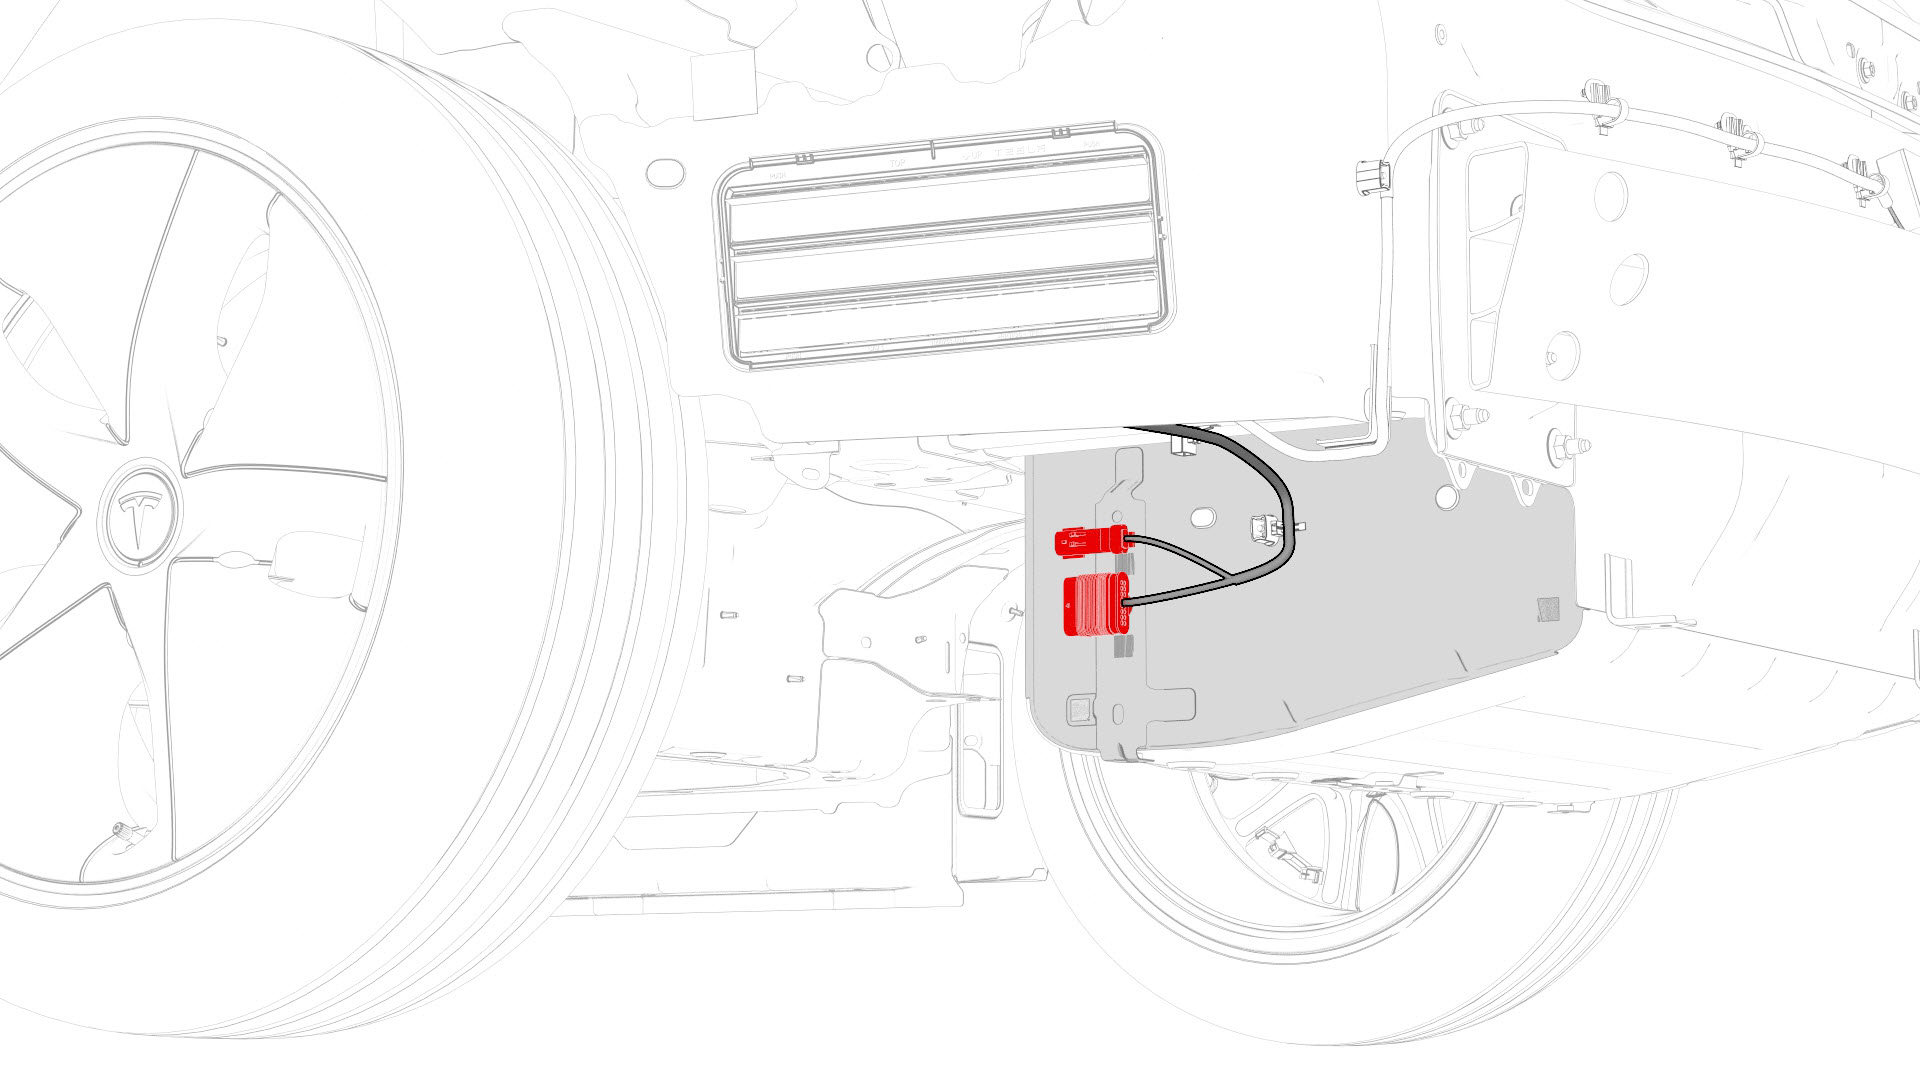
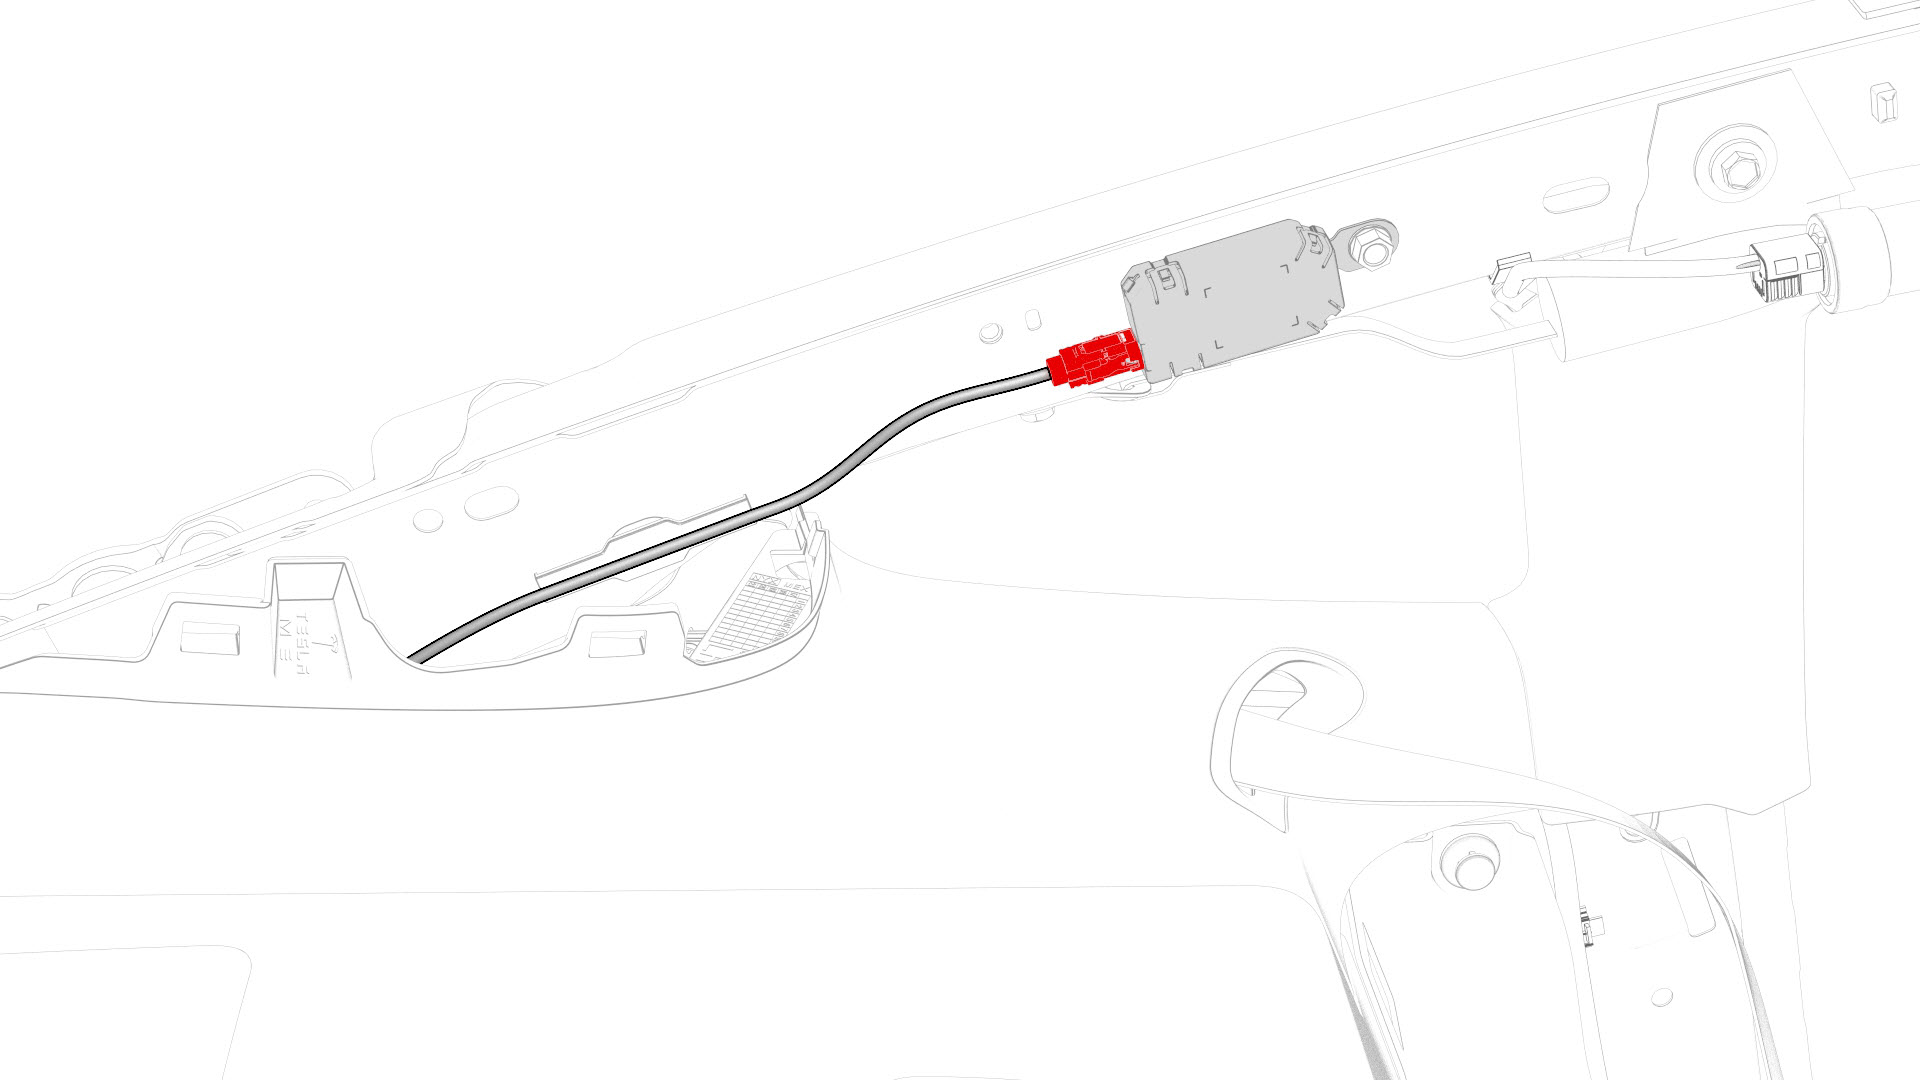
Disconnect the electrical harness from the rear subframe electrical harness connector and the LH electric parking brake connector.
-
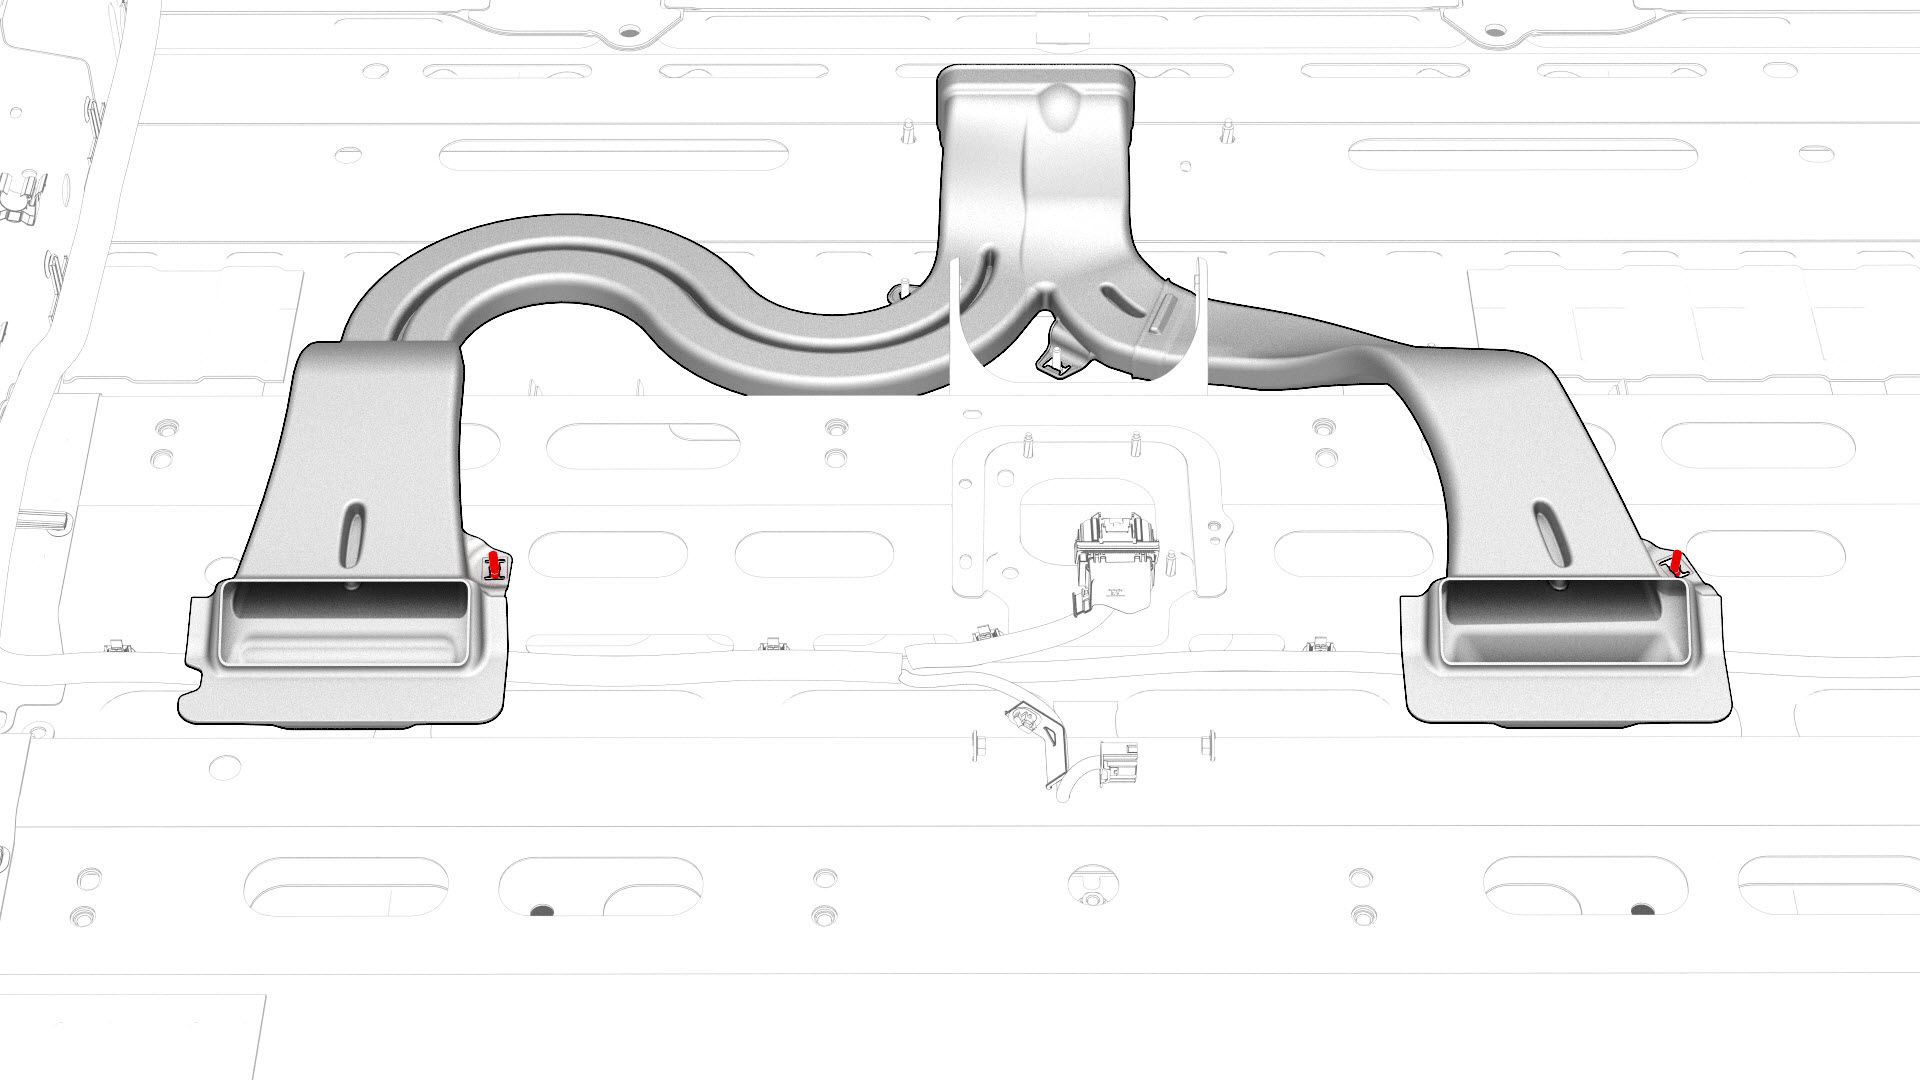
Release the clips that attach the electrical harness to the body, and then push the rear subframe portion of the electrical harness through the LH side trunk bulkhead.
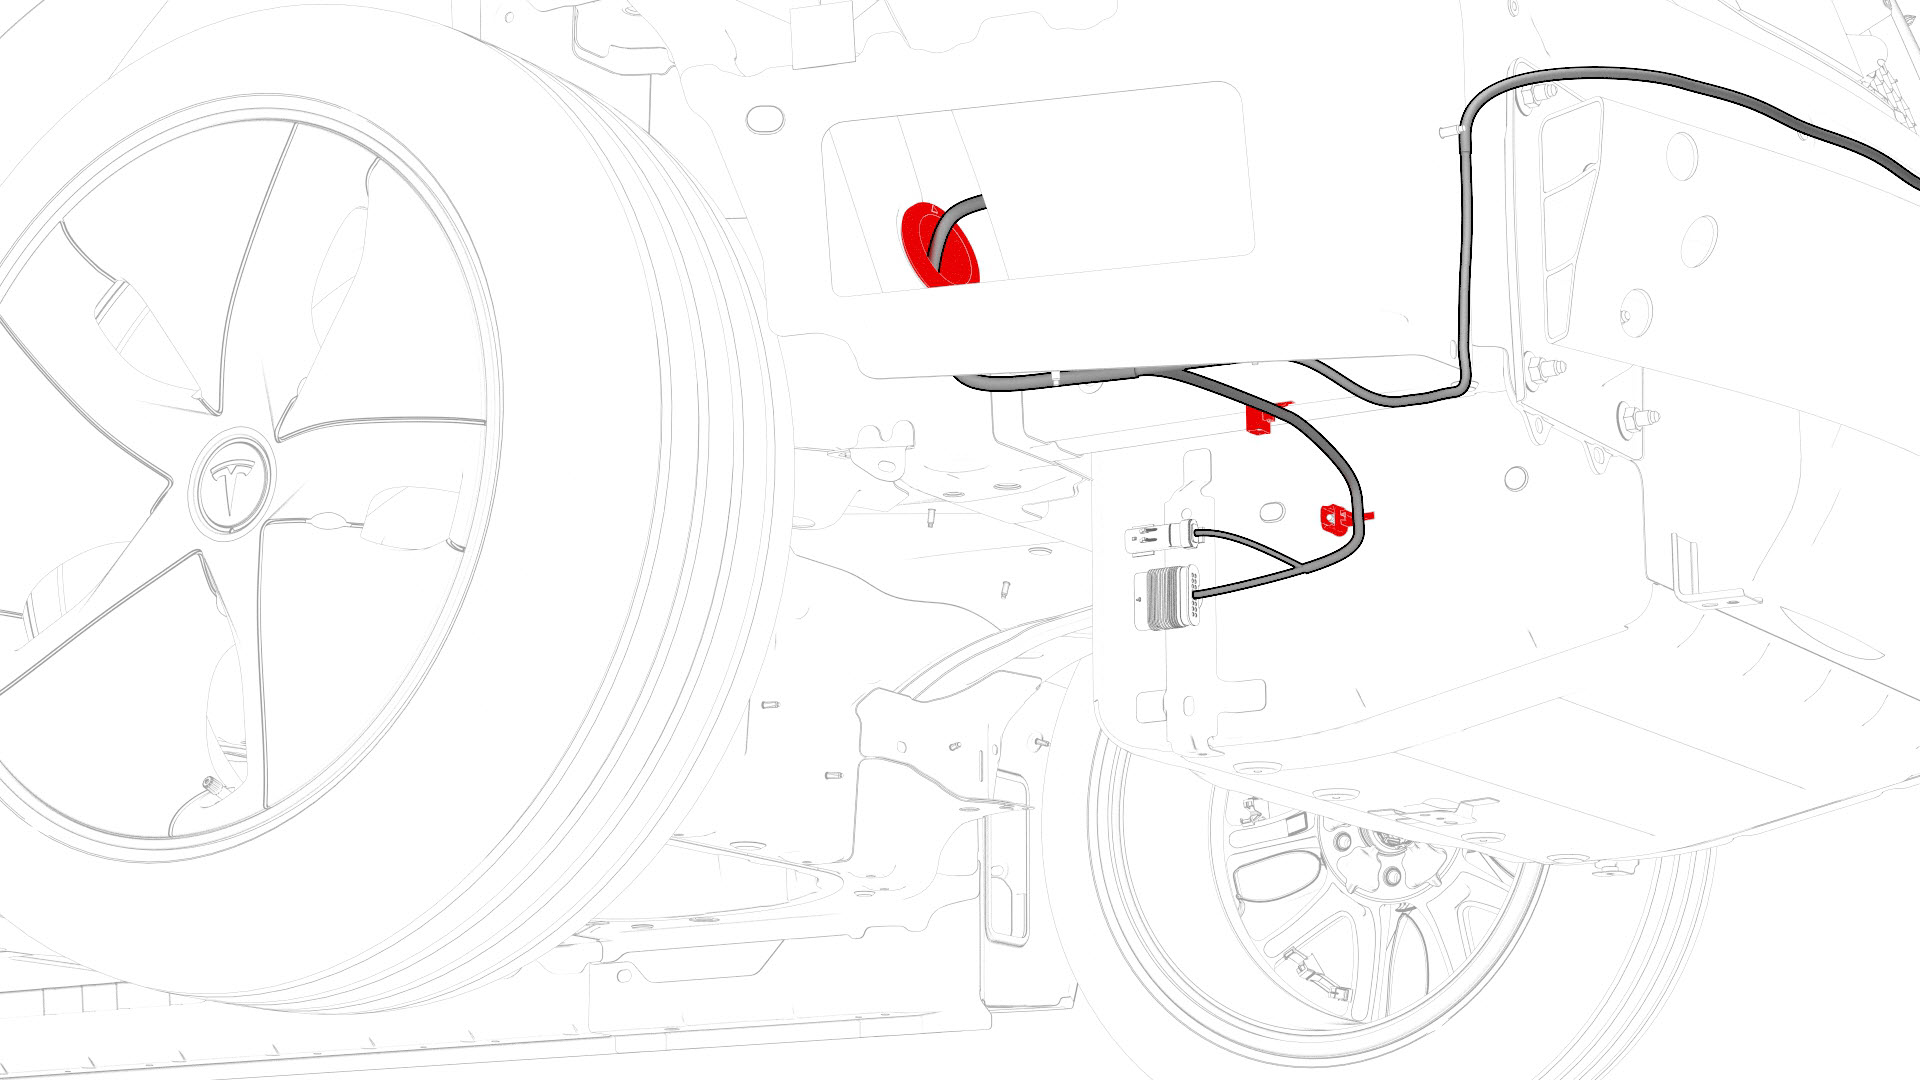 Note: The LH body harness passes through the trunk near the rear section of the rear LH wheel liner area.
 -
With an assistant, remove the vehicle from the lift.
 Caution:The vehicle is safely pushed for only a very short distance and at a very slow speed.
 -
Release the clips that attach the package tray electrical harness to the body in the upper C-pillar area.
-
Disconnect the package tray electrical harness from the RH body harness connector.
-
Release the clip, and then disconnect the package tray speaker electrical harness from the tuner connectors.
-
Release the clip that attaches the package tray electrical harness to the LH C-pillar.
-
Disconnect the electrical harness from the antenna amplifier connector.
-
Release the clips that attach the LH and RH sides of the rear main cabin carpet to the body.
-
Release the clips that attach the front LH main cabin carpet to the body, and then remove the carpet from the vehicle.
-
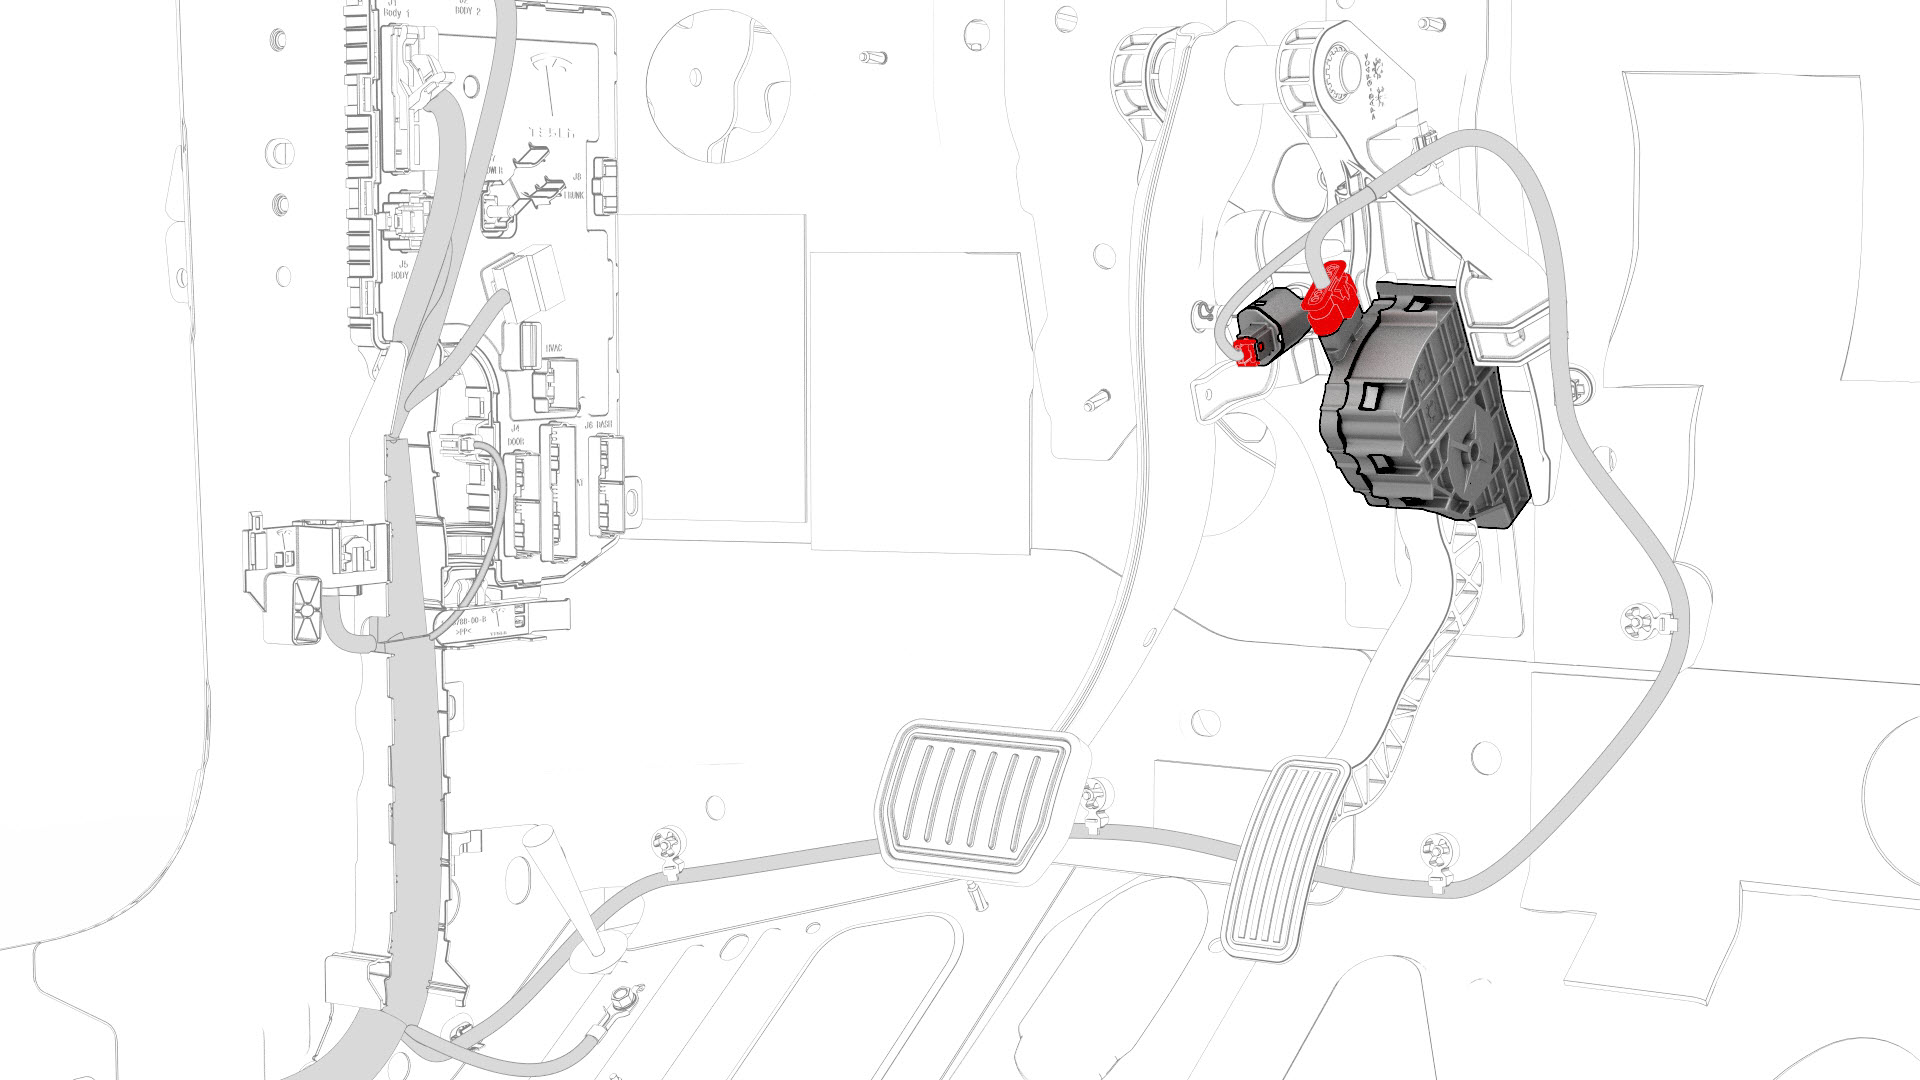
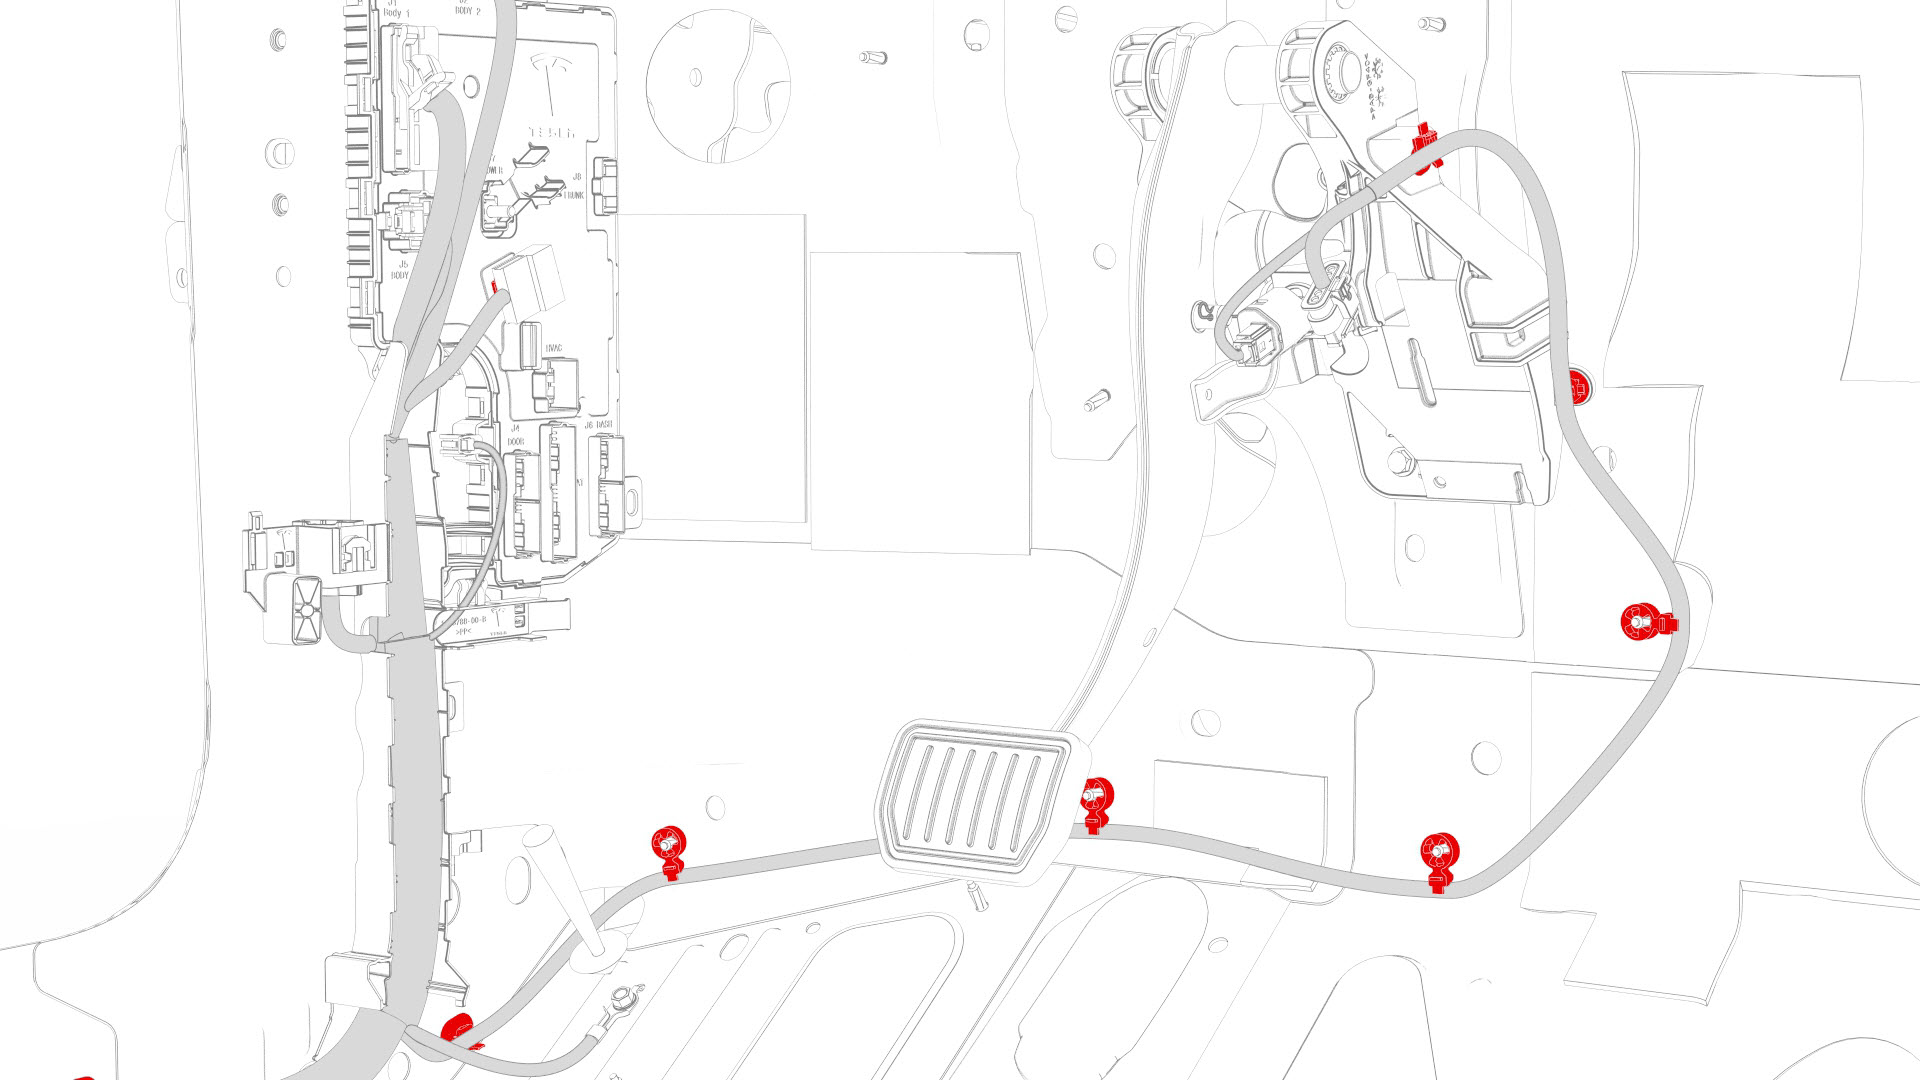
Disconnect the electrical harness from the accelerator and the brake pedal connectors.
-
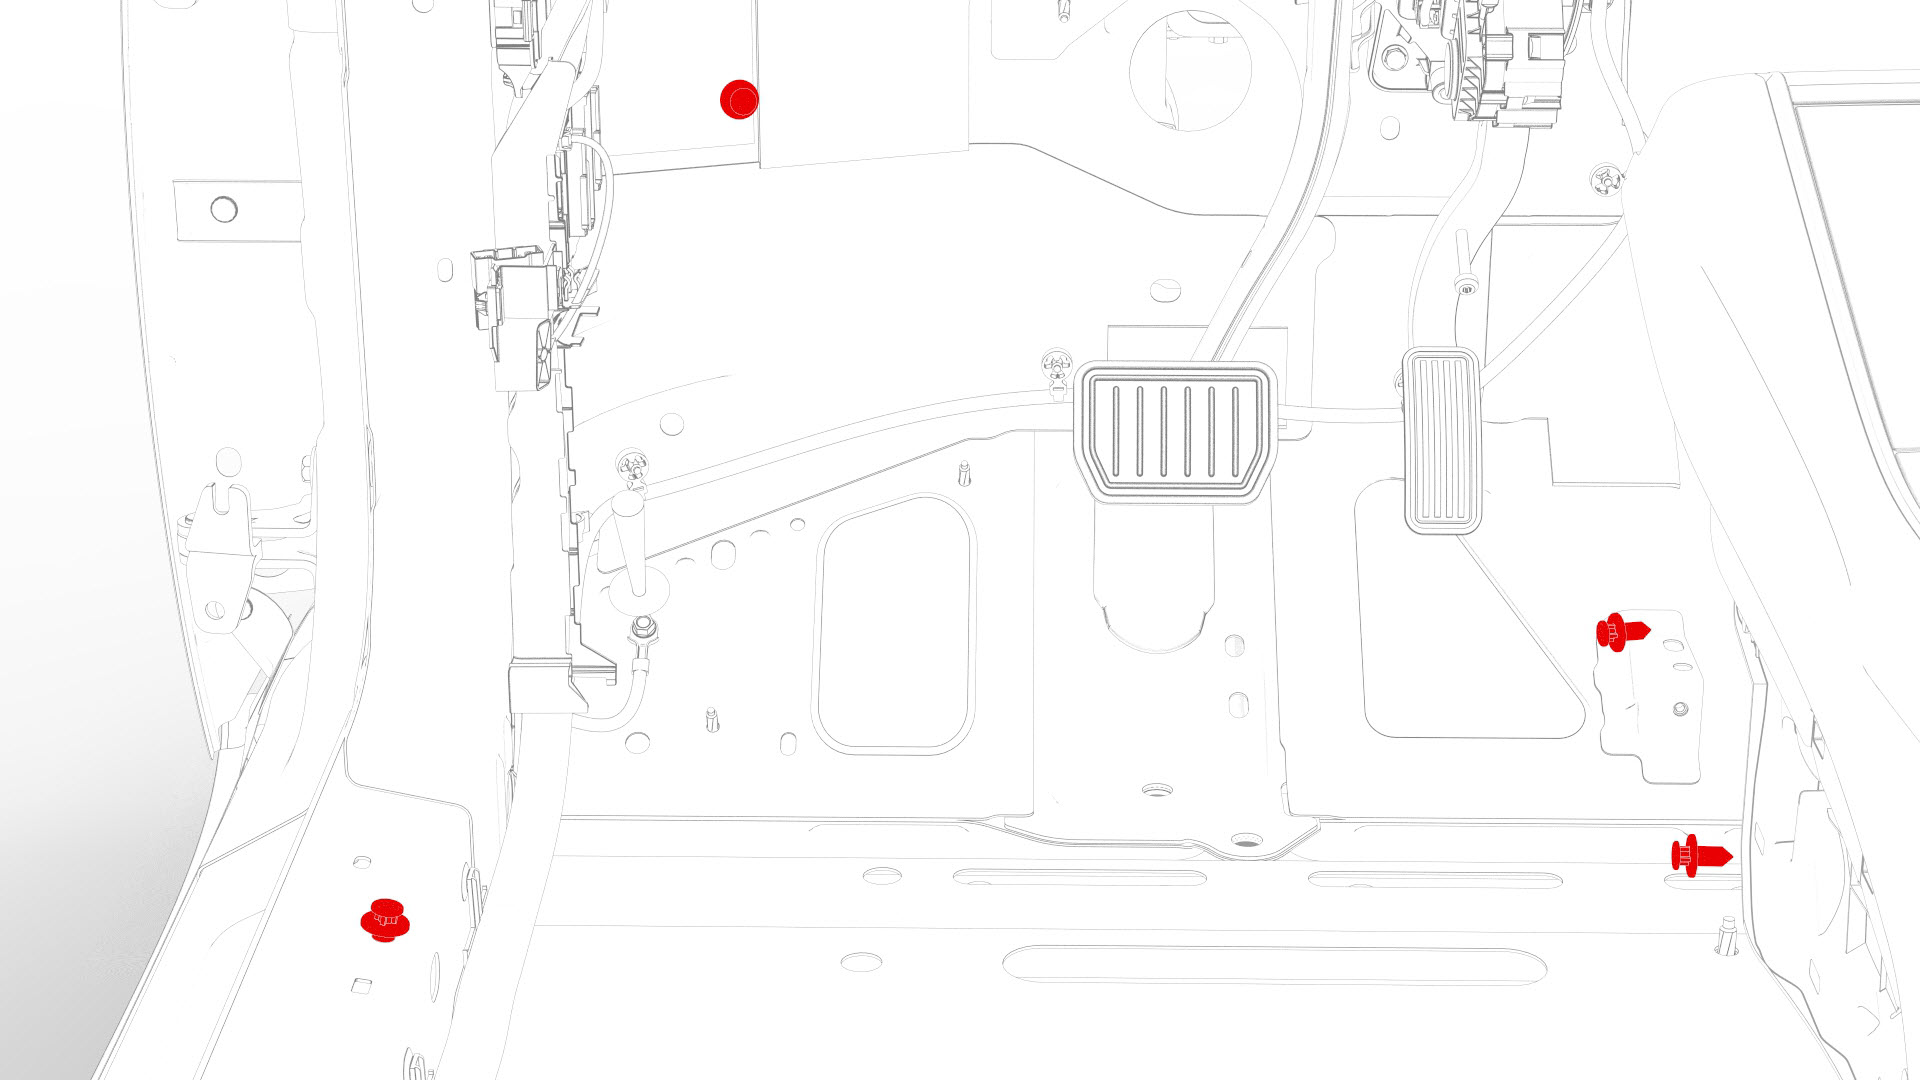
Release the clips that attach the electrical harness to the body under the IP carrier area.
-
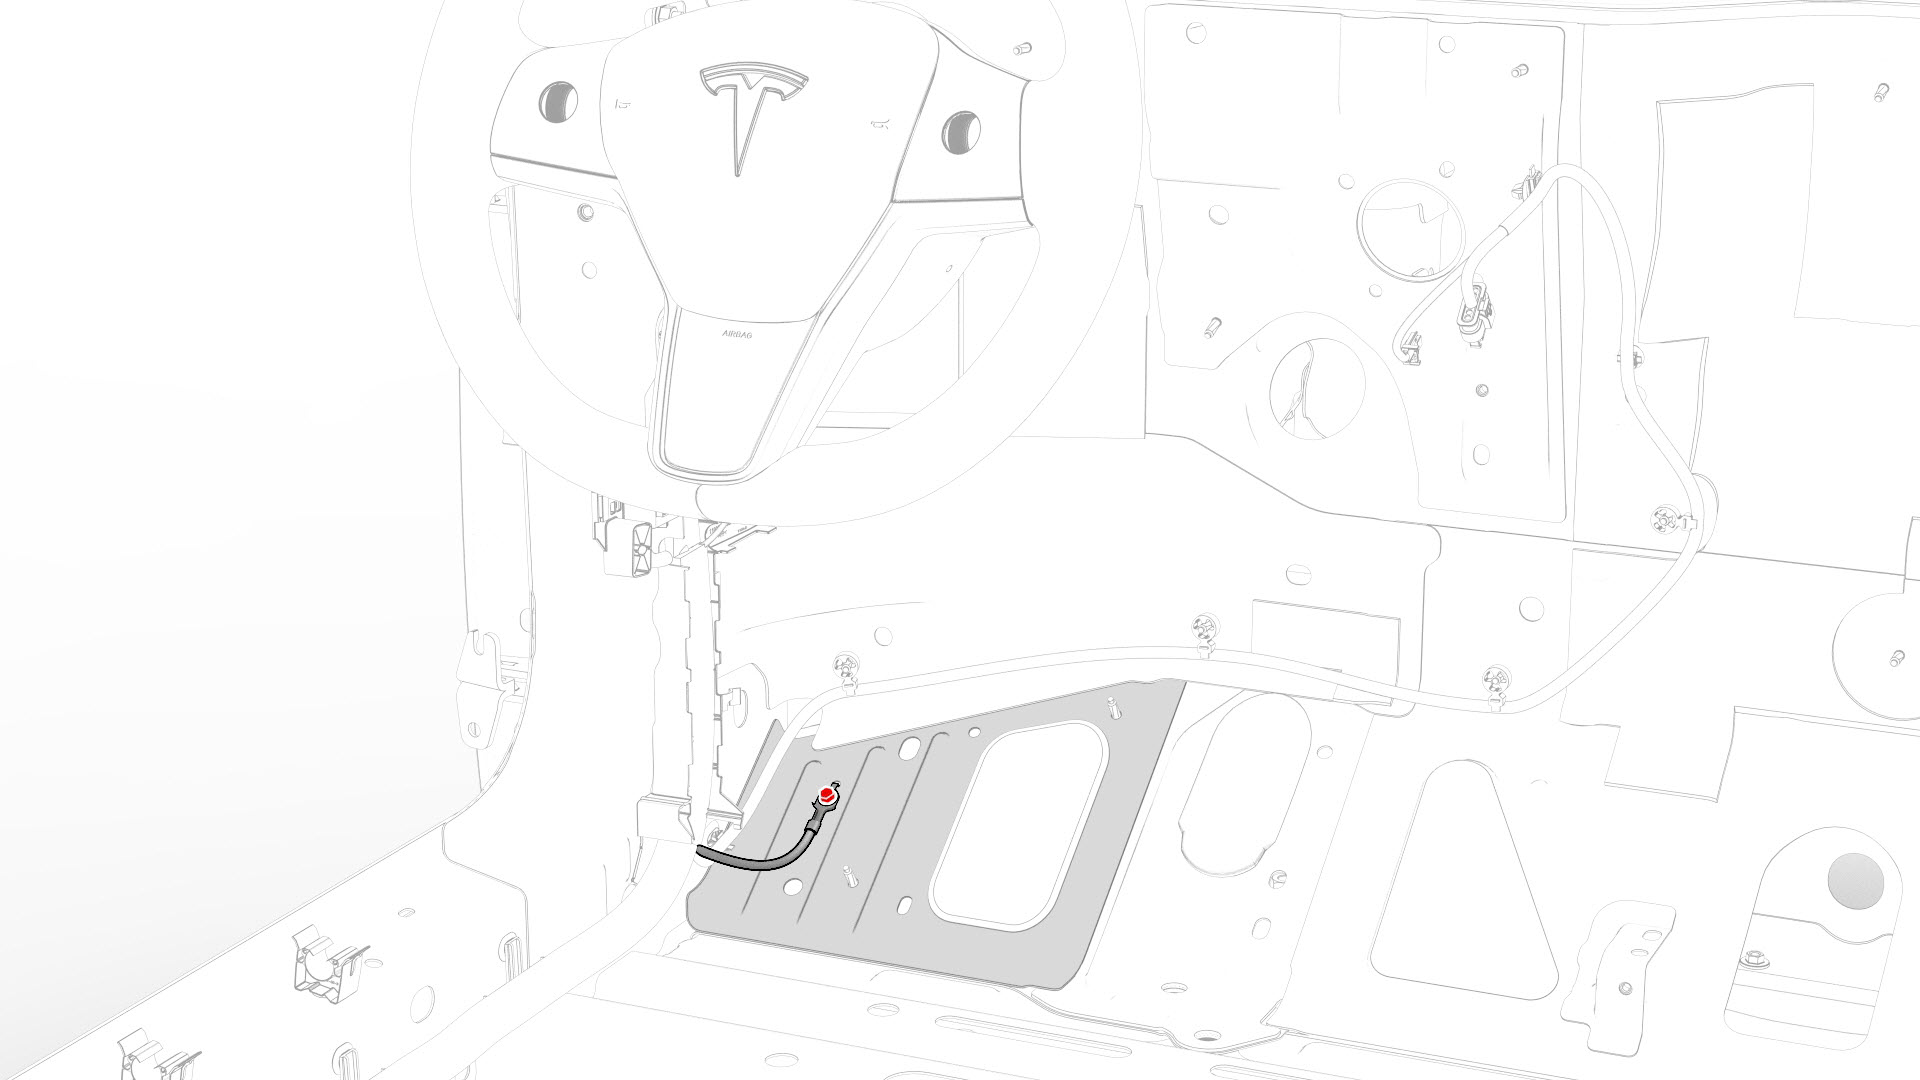
Remove and discard the bolt that attaches the electrical harness ground strap at the driver footwell area.
-
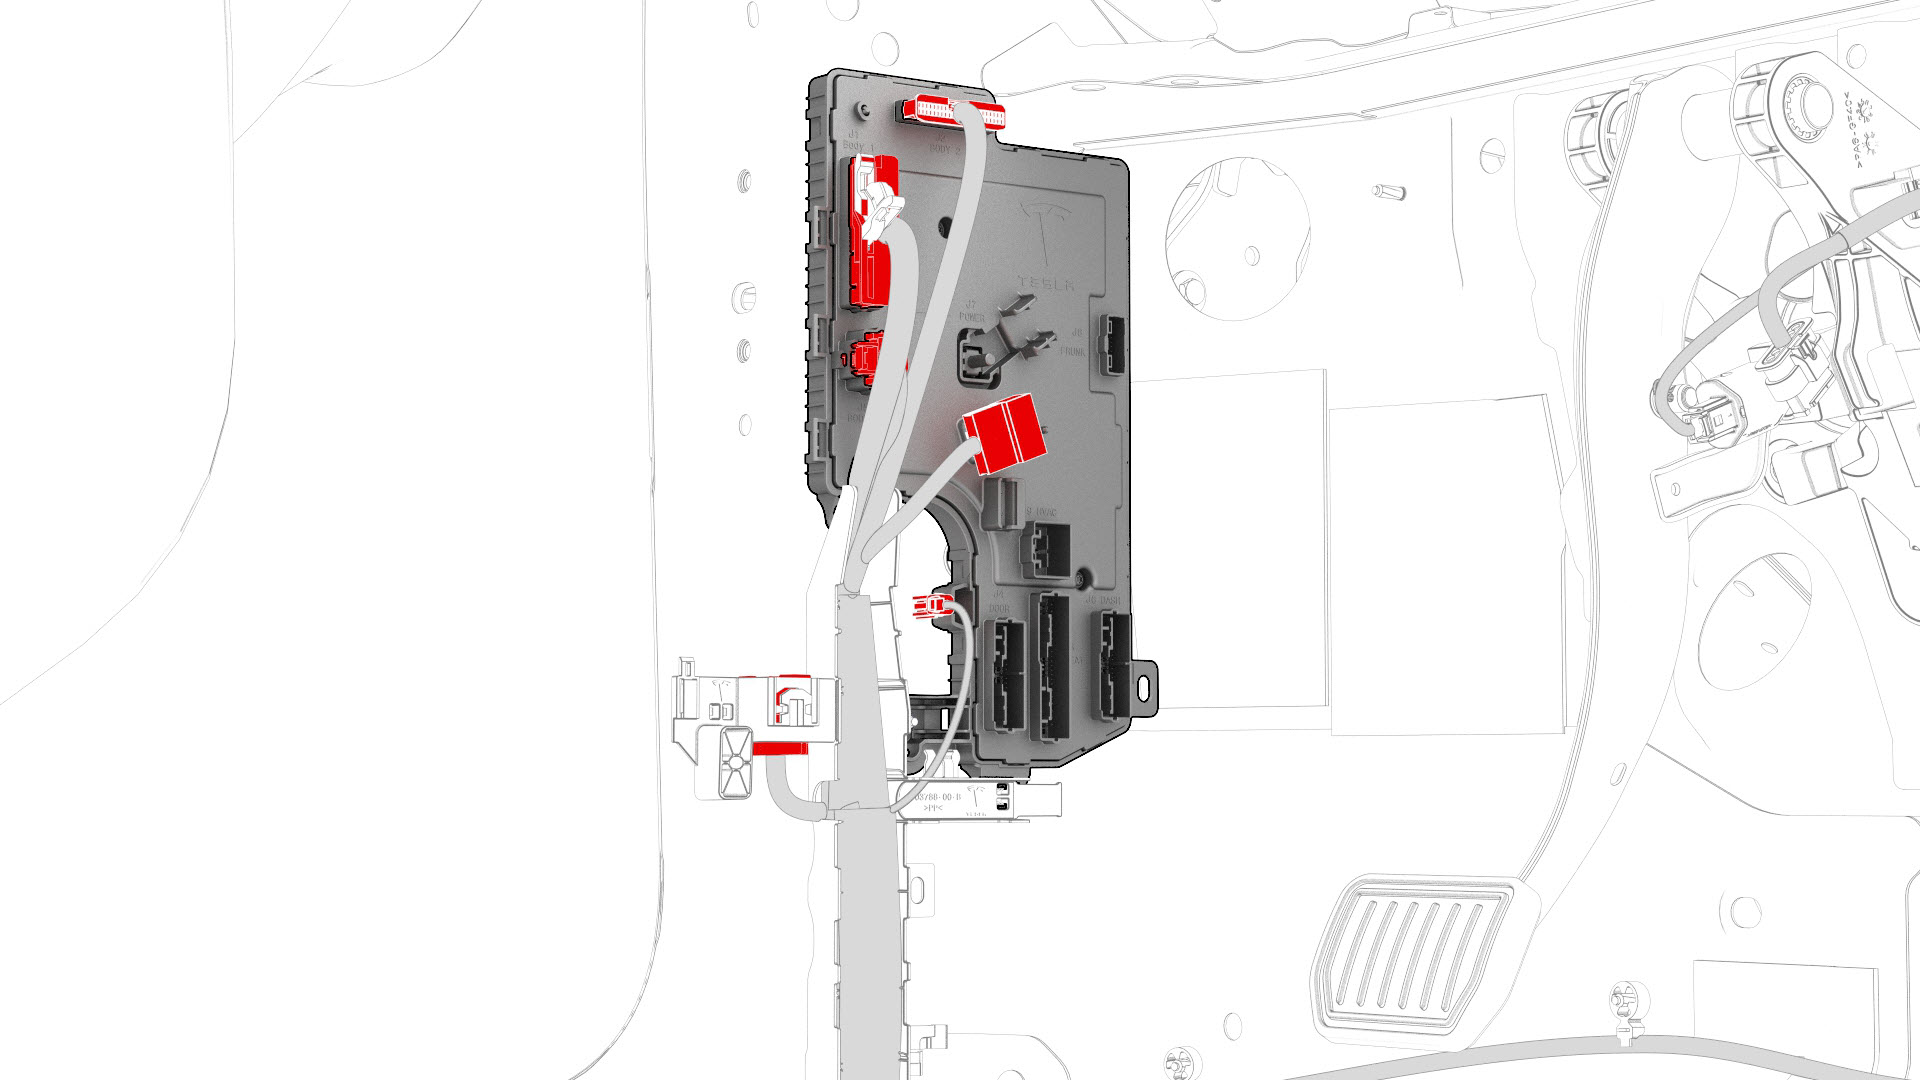
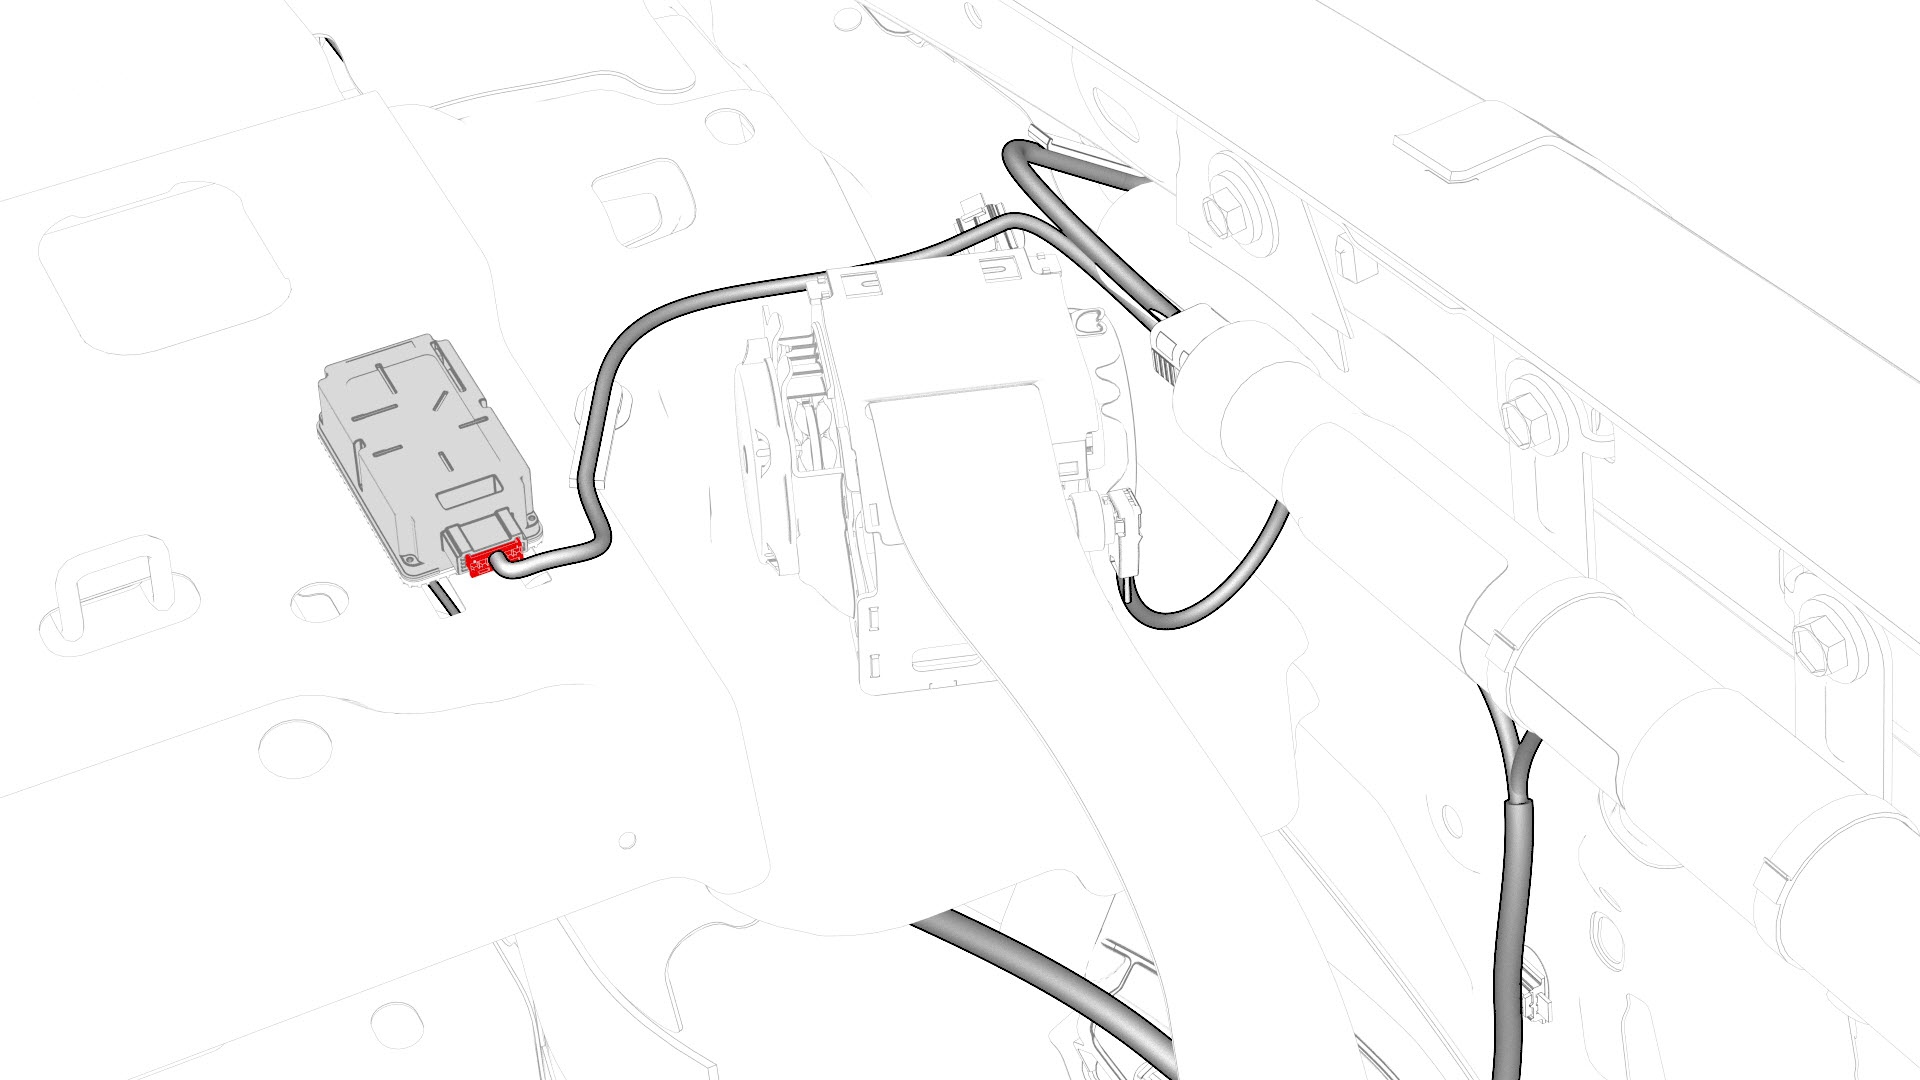
Disconnect the electrical harness from the LH body controller module connectors.
-
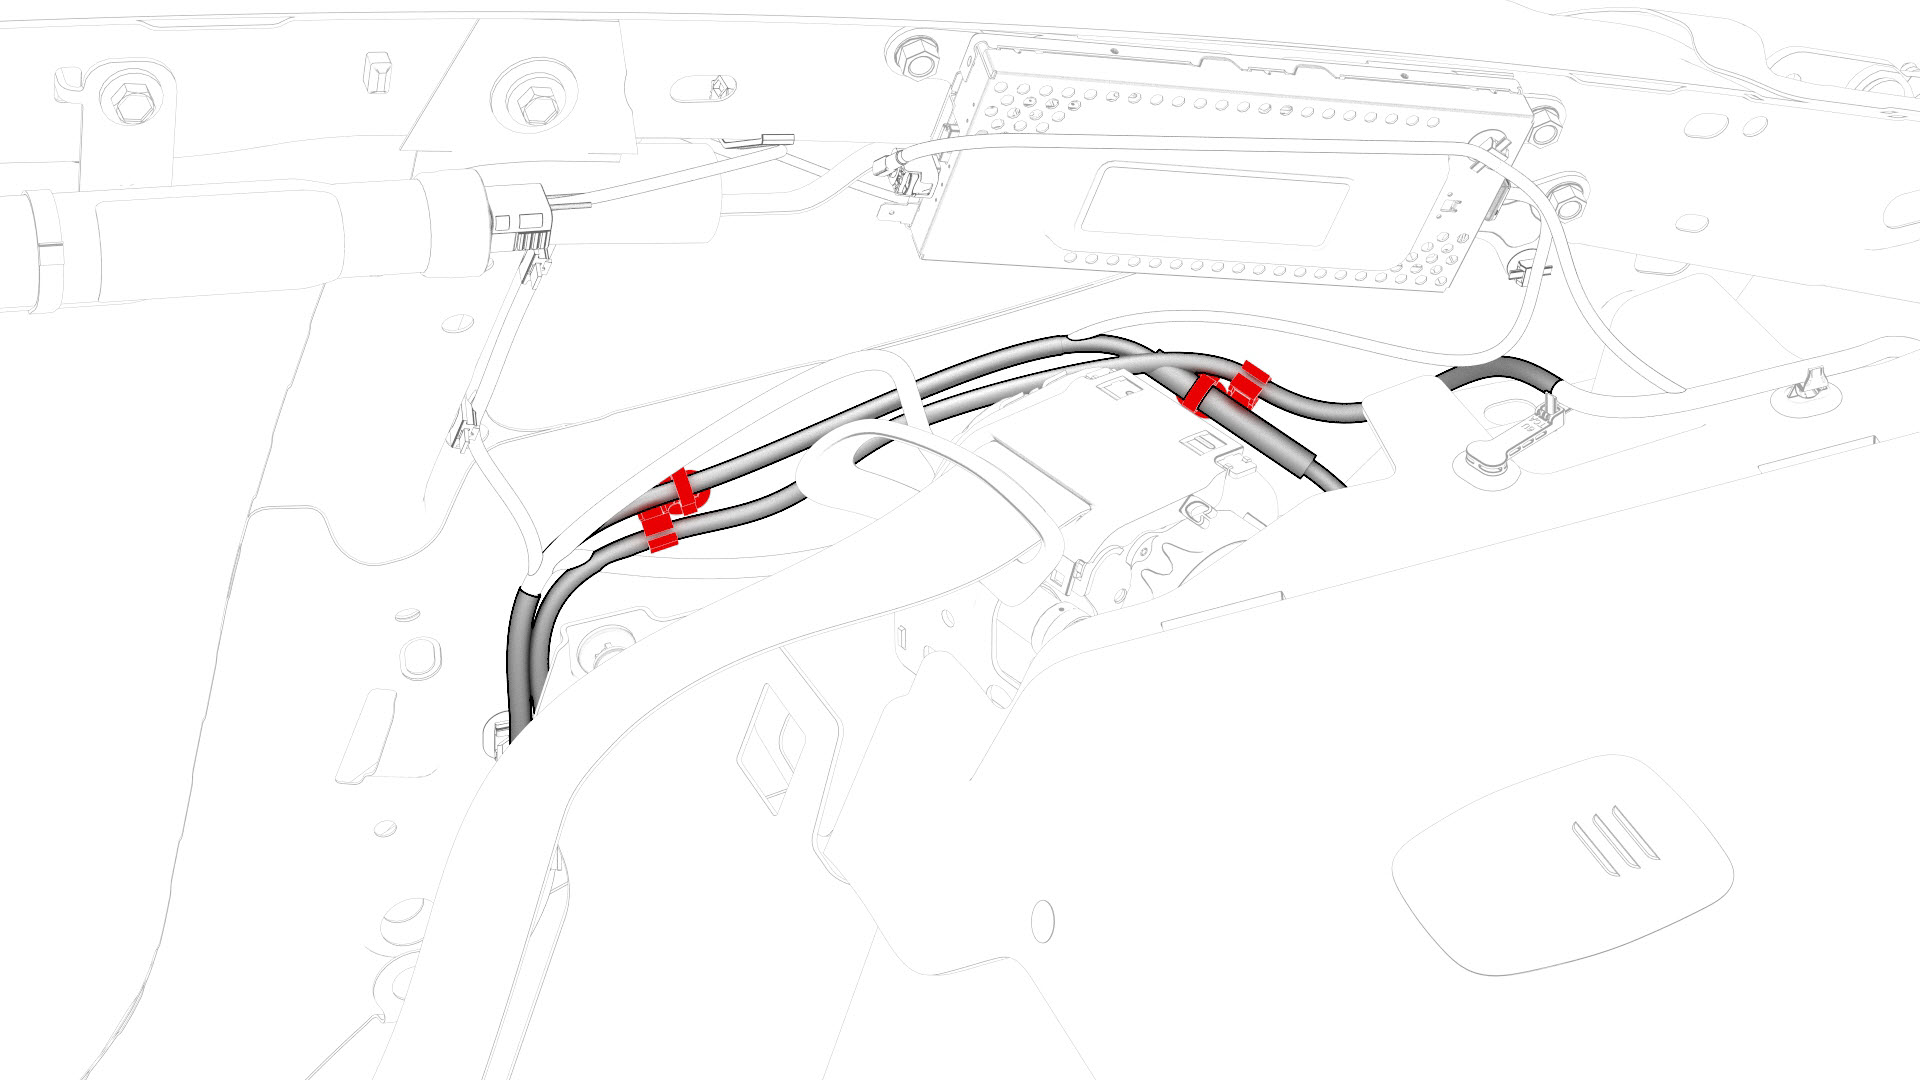
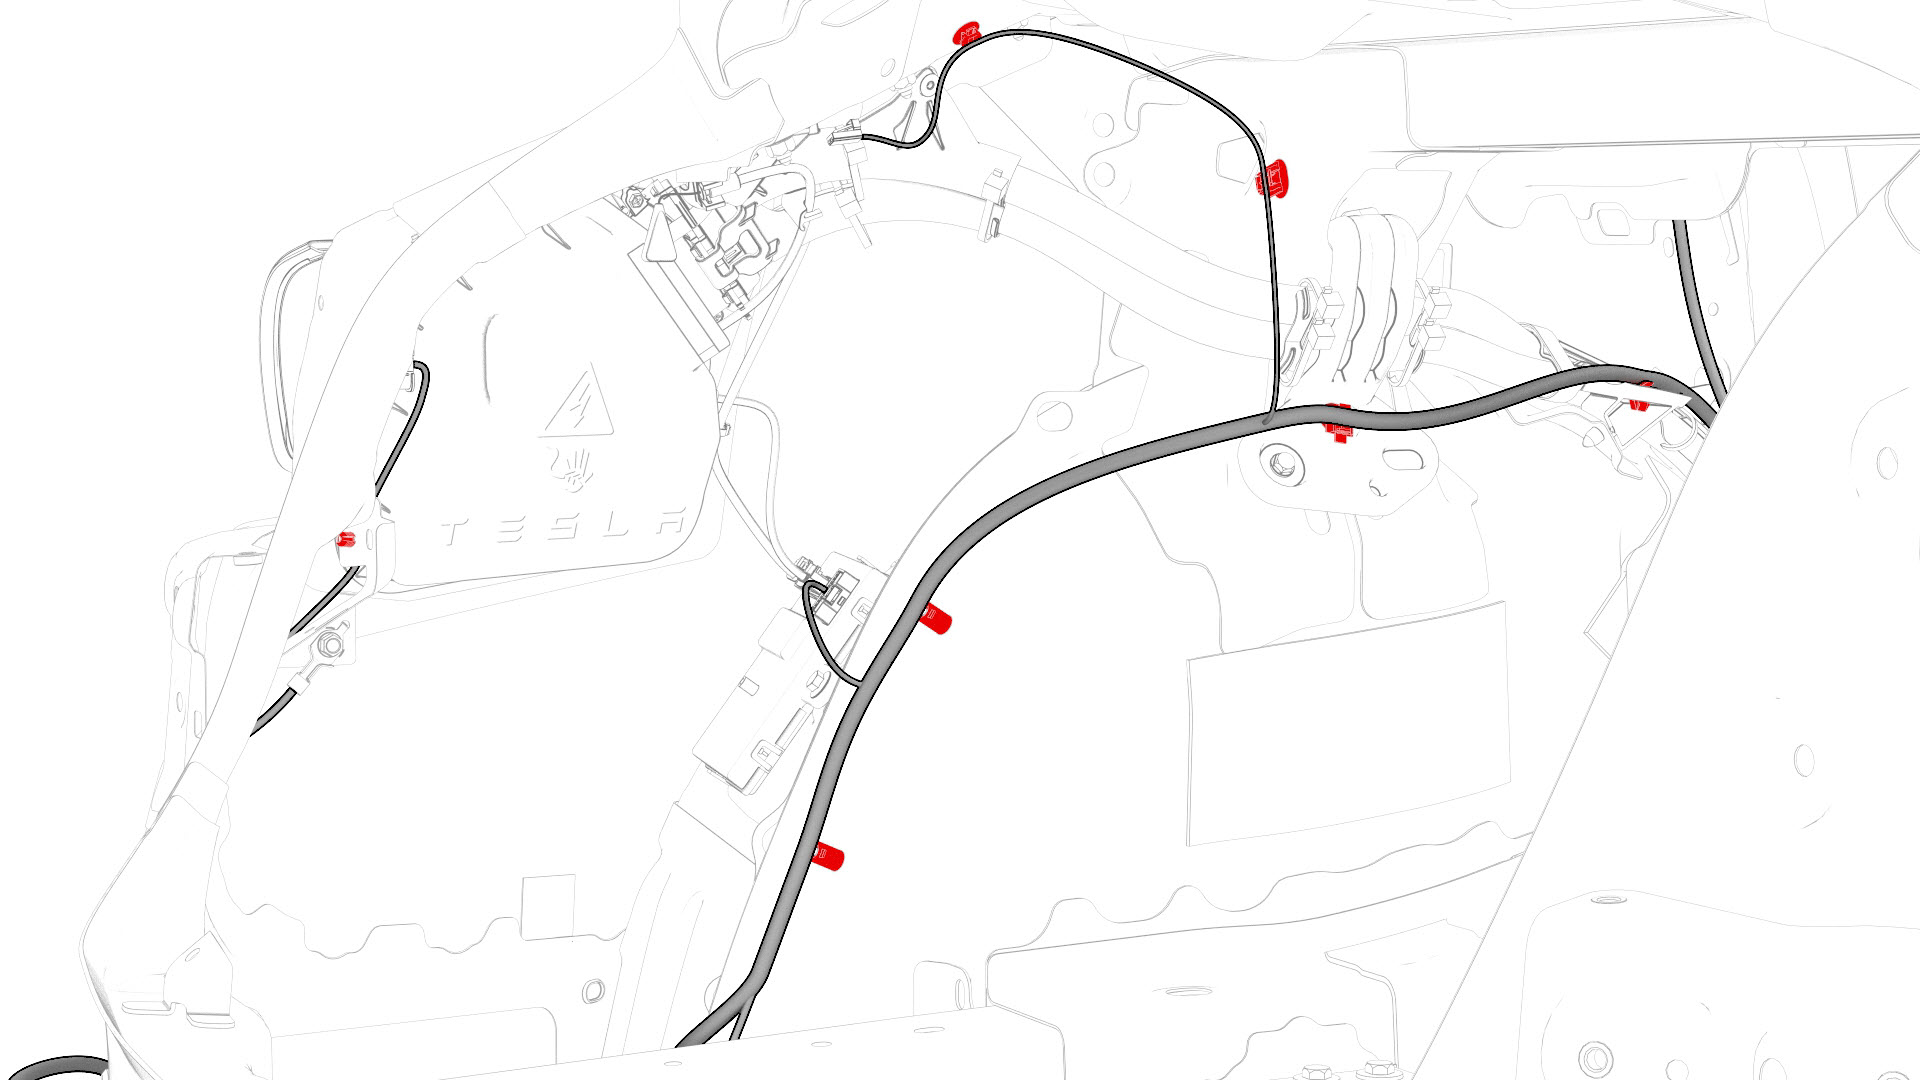
Release the clips that attach the electrical harnessto the body in the LH body controller module area.
-
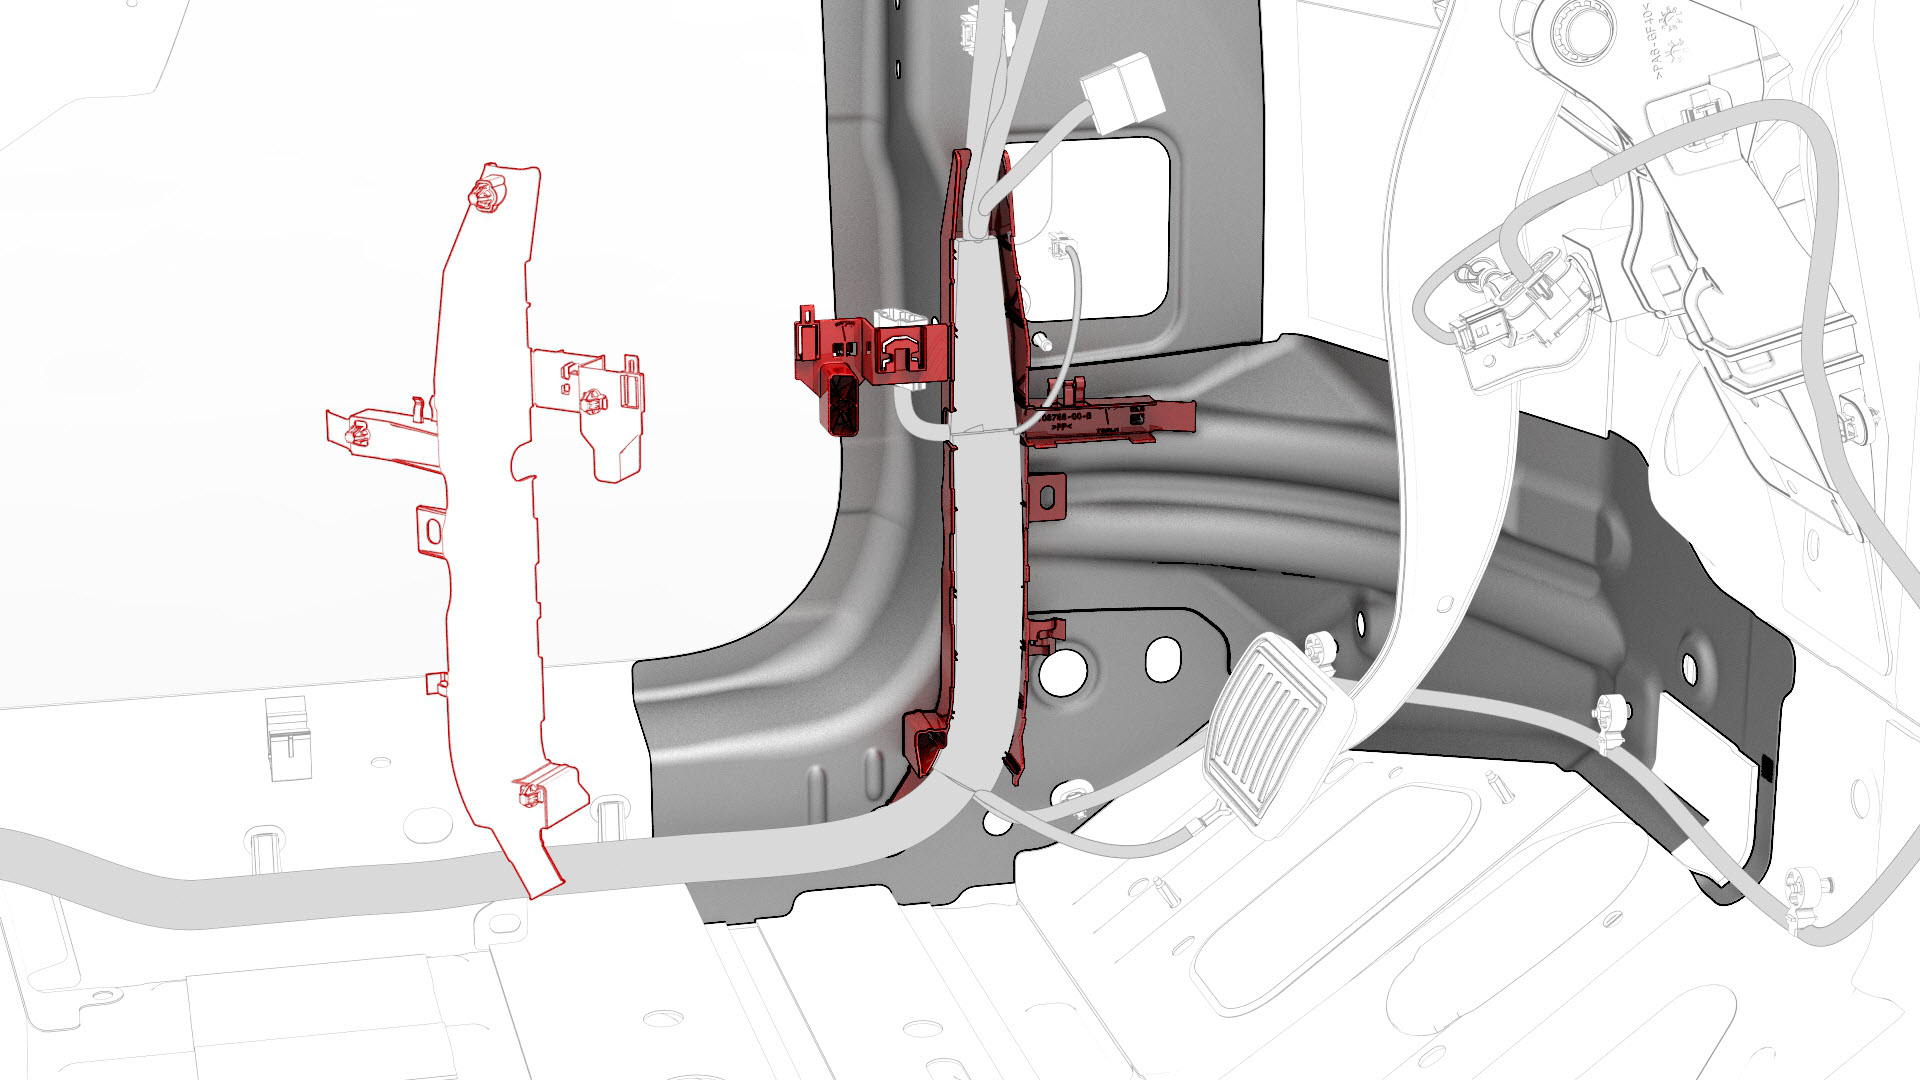
Release the clips that attach the electrical harness to the body in the LH lower B-pillar areas.
-
Lift up the rear portion of the floor duct to release the clips that attach the electrical harness to the body.
-
Release the clips that attach the electrical harness to the body under the front LH seat and RH lower B-pillar areas.
-
Disconnect the electrical harness from the connectors in the RH lower B-pillar area.
-
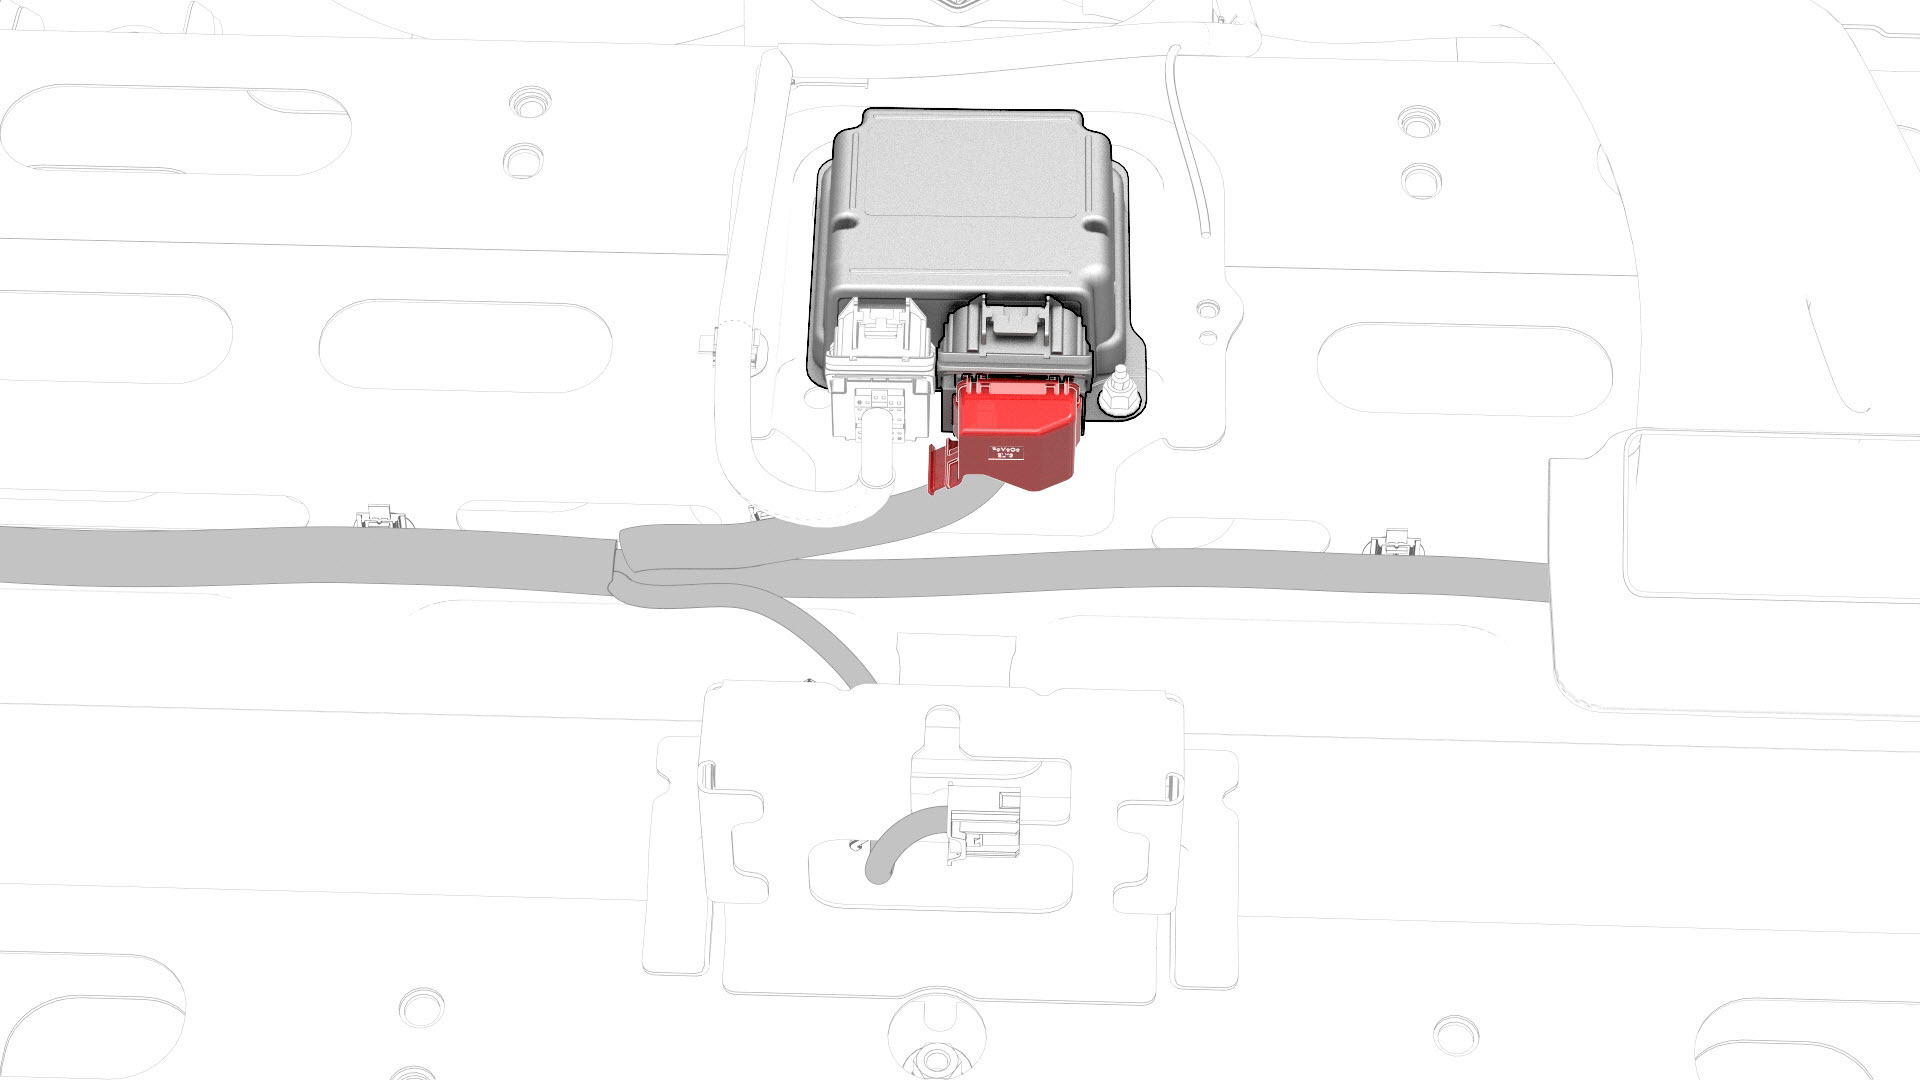
Disconnect the electrical harness from the passive supplemental restraint control module connector.
-
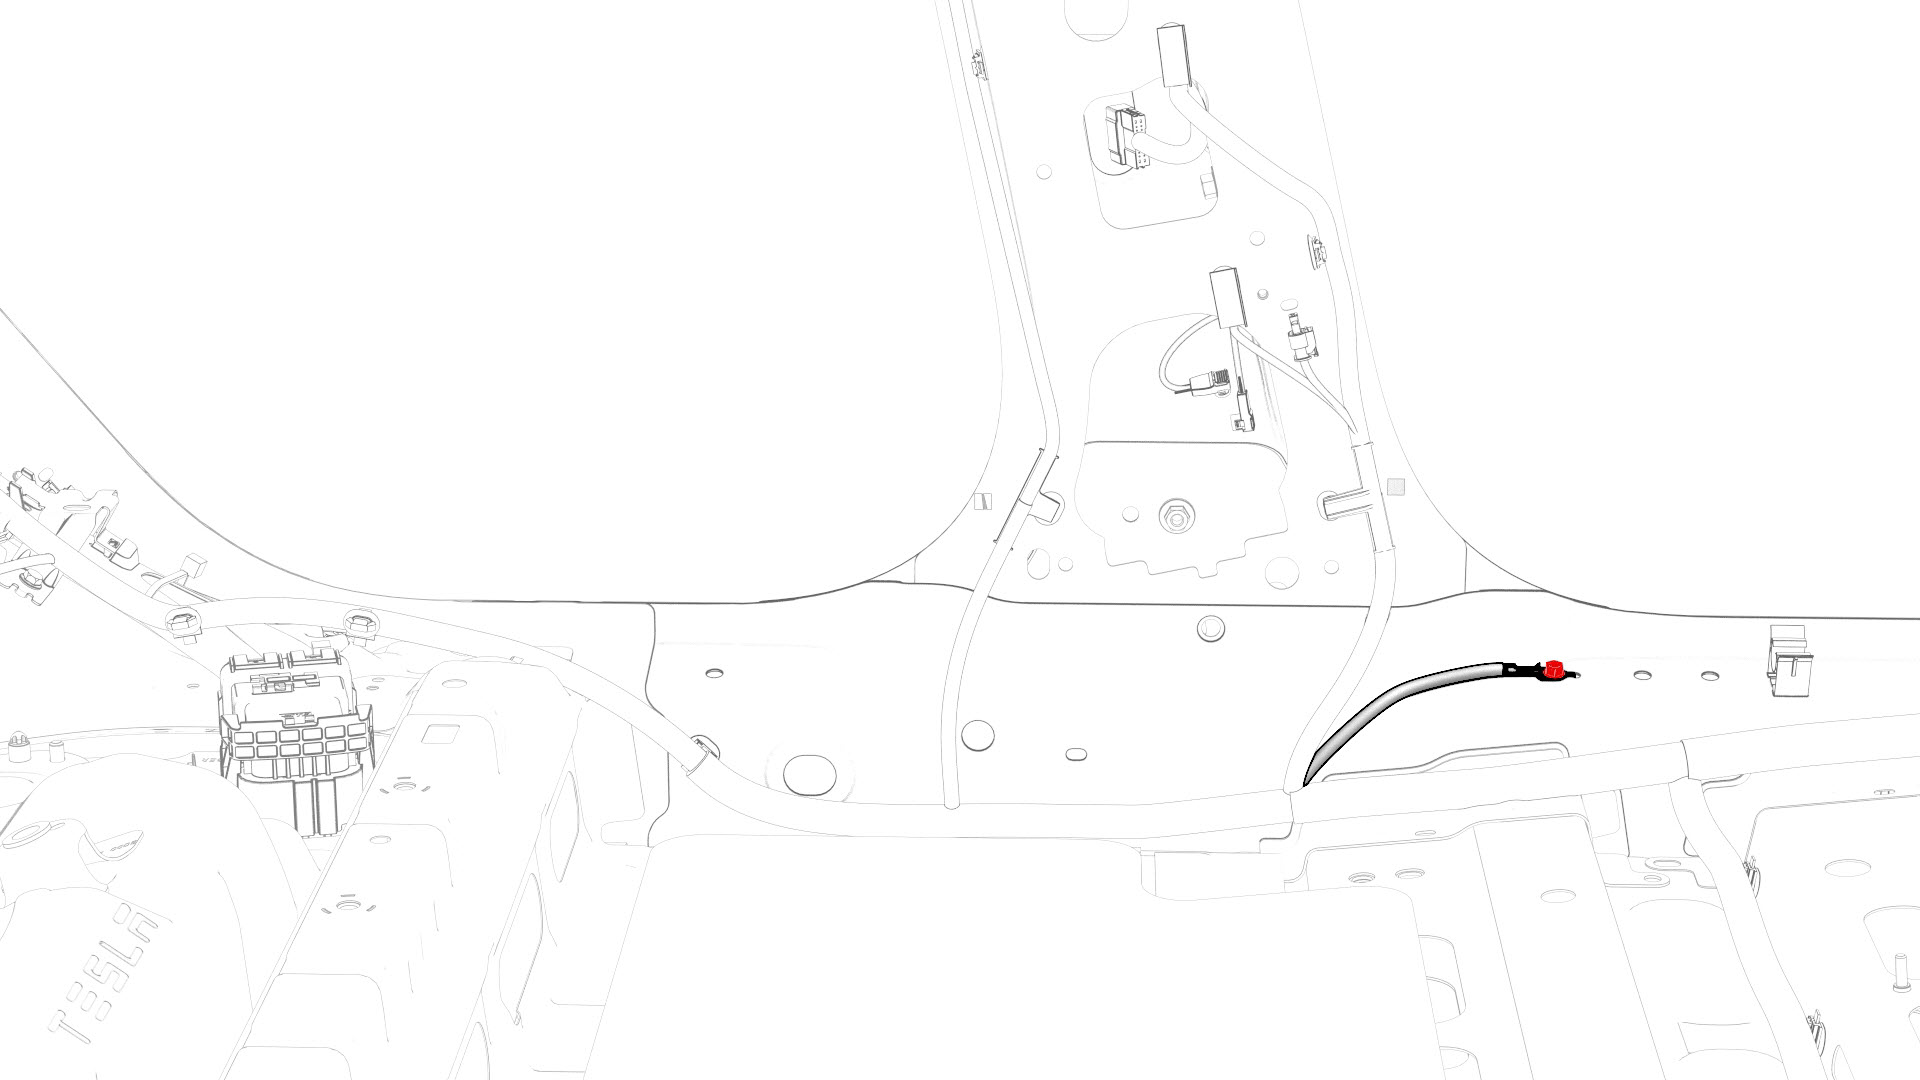
Remove and discard the bolt that attaches the electrical harness ground strap to the body in the LH lower B-pillar area.
-
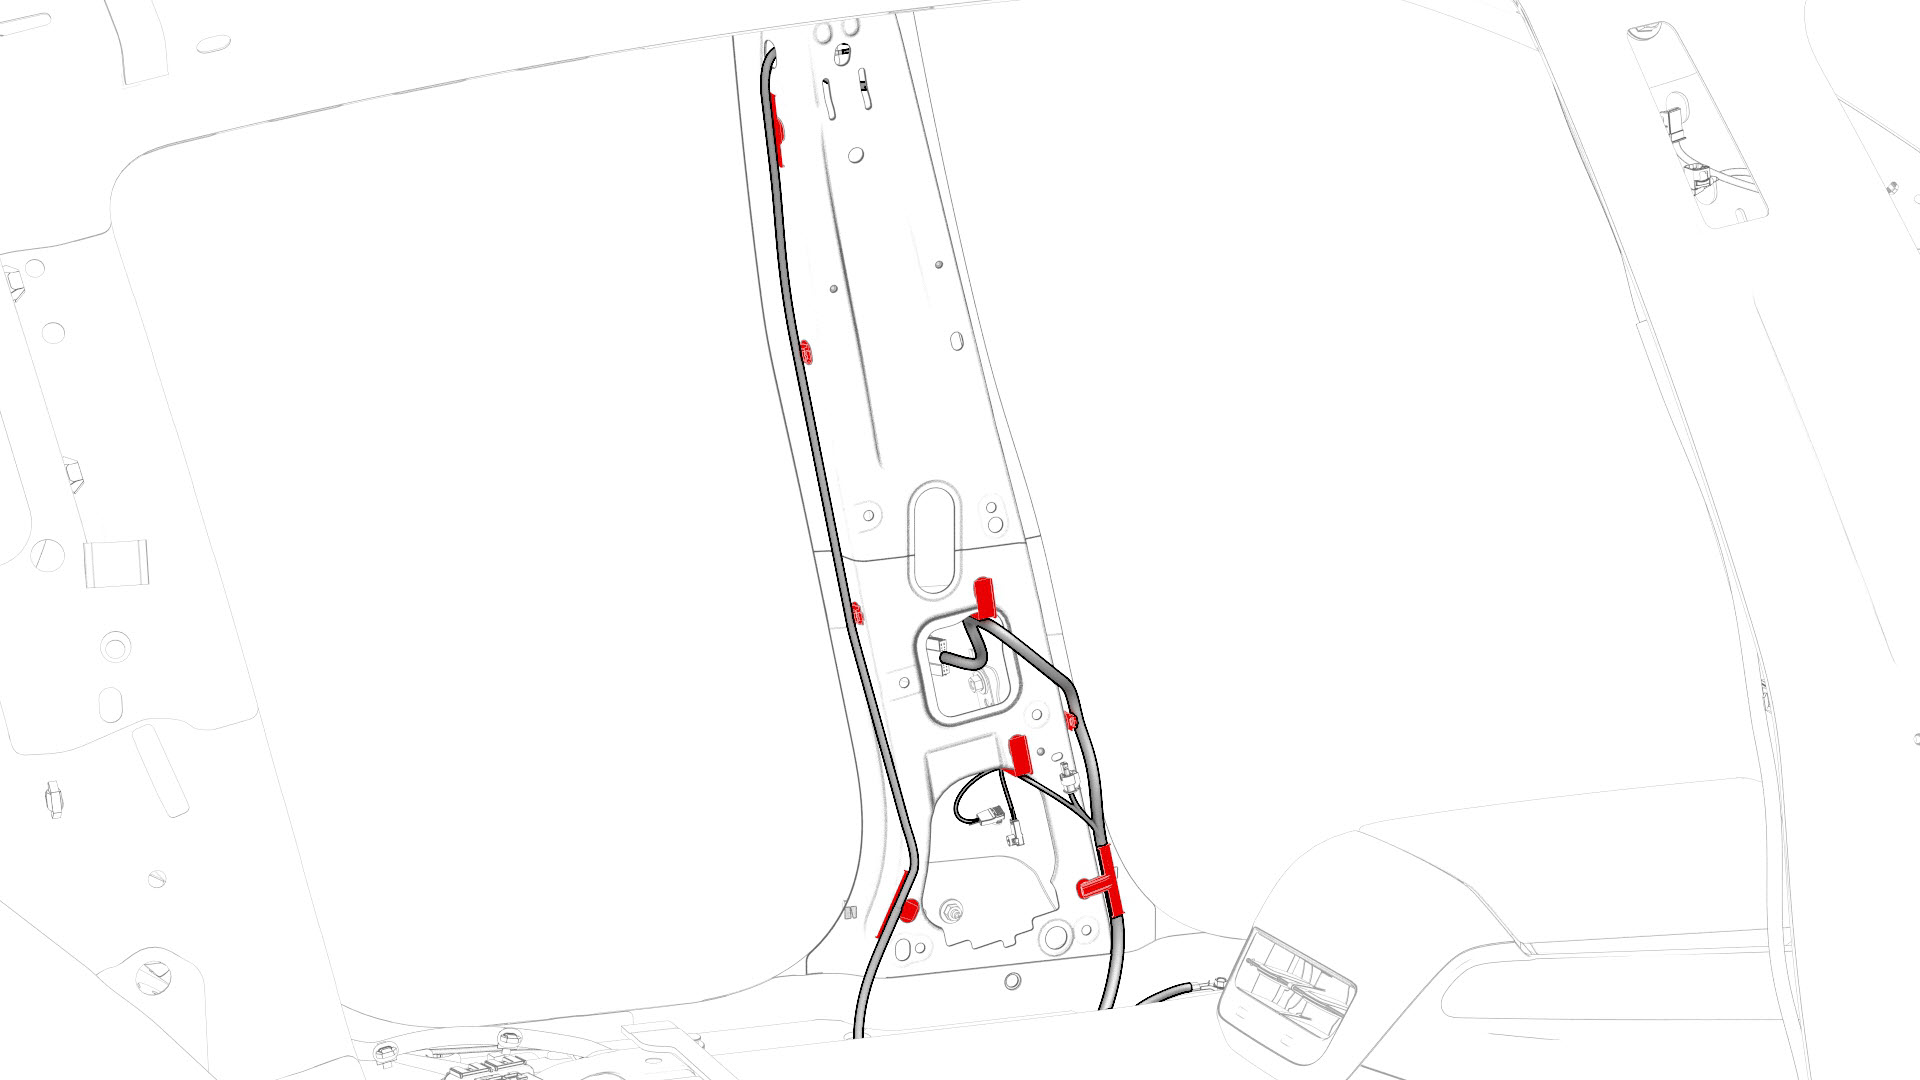
Release the clips that attach the harness to the body in the B-pillar area.
-
Disconnect the electrical harness from the LH door connector and the front LH seat belt connector.
-
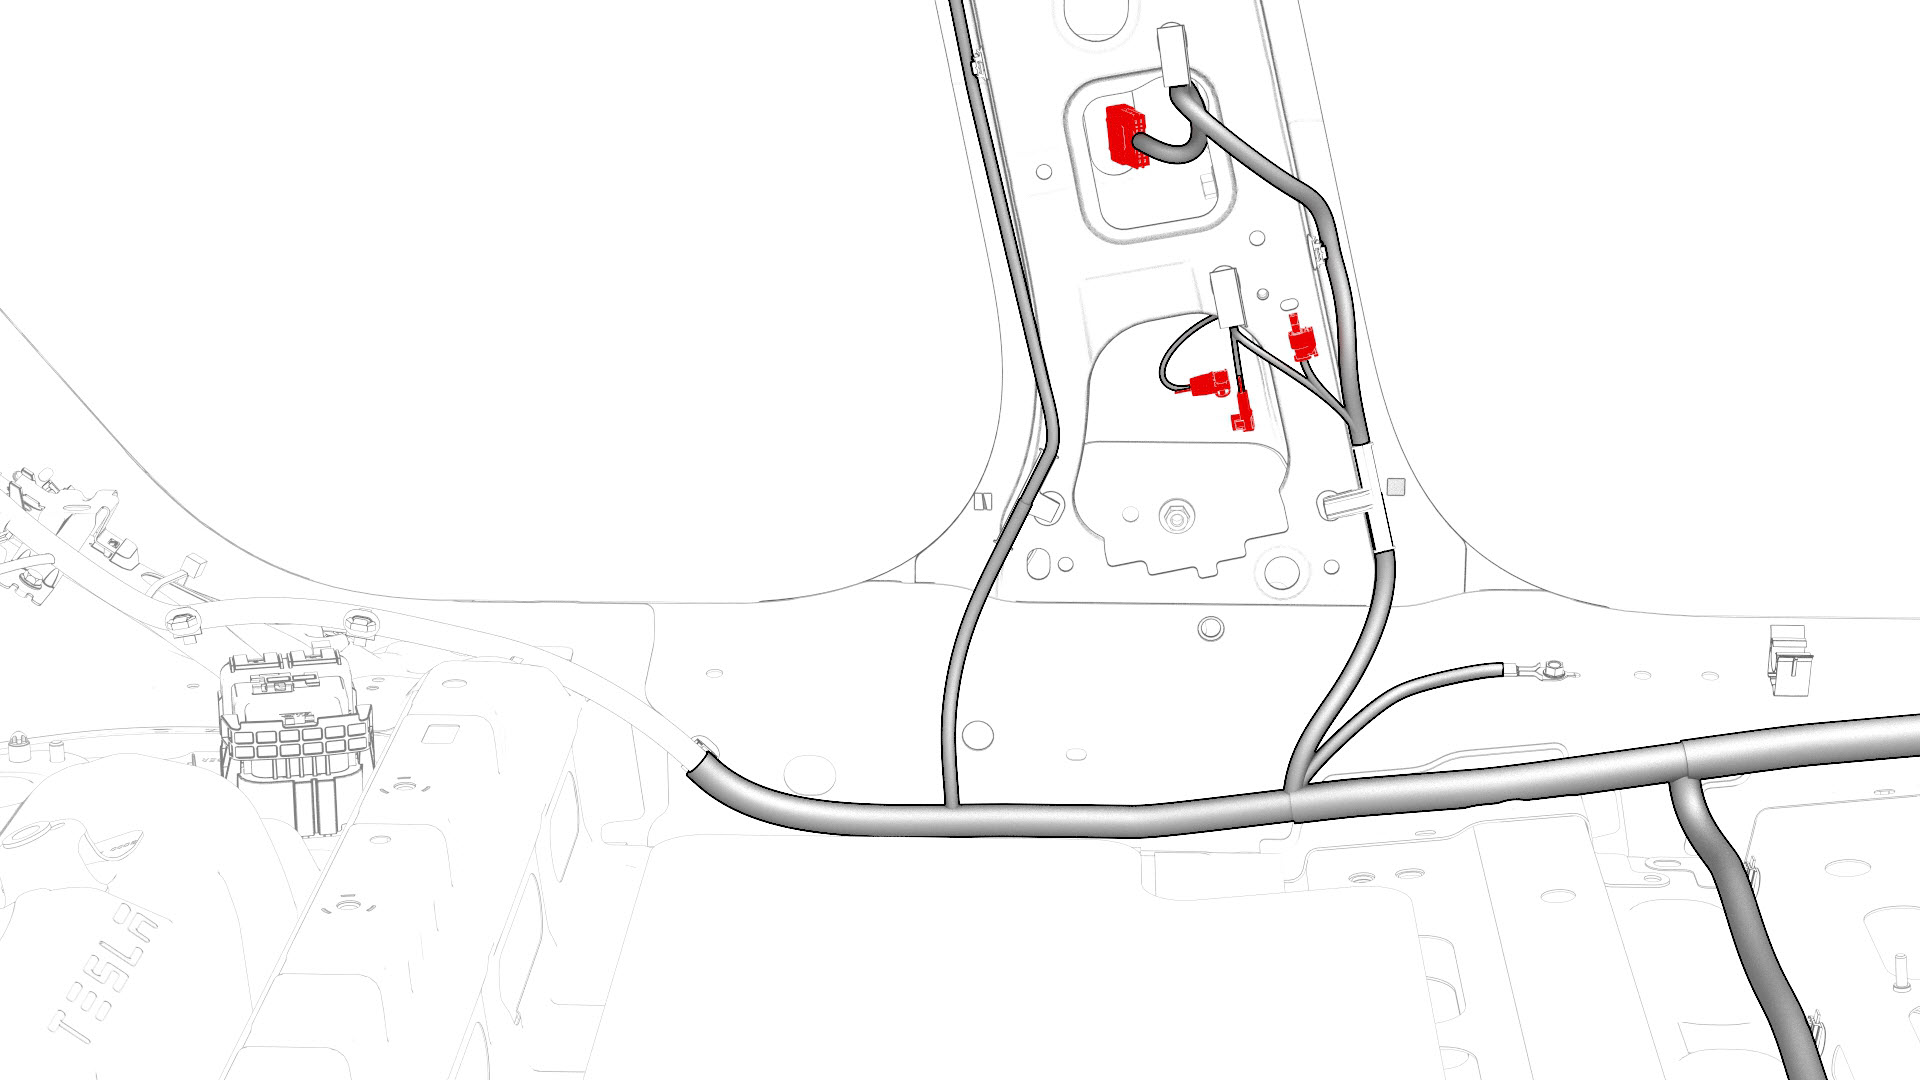
Release the clips that attach the harness to the body in the lower C-pillar area.
-
Disconnect the electrical harness from the connectors in the lower C-pillar area.
-
Release the clips that attach the electrical harness to the body in the LH side curtain airbag and TPMS module areas.
-
Disconnect the electrical harness from the LH side curtain airbag connector.
-
Disconnect the electrical harness from the TPMS module connector.
-
Disconnect the electrical harness from LH rear seat belt connector.

-
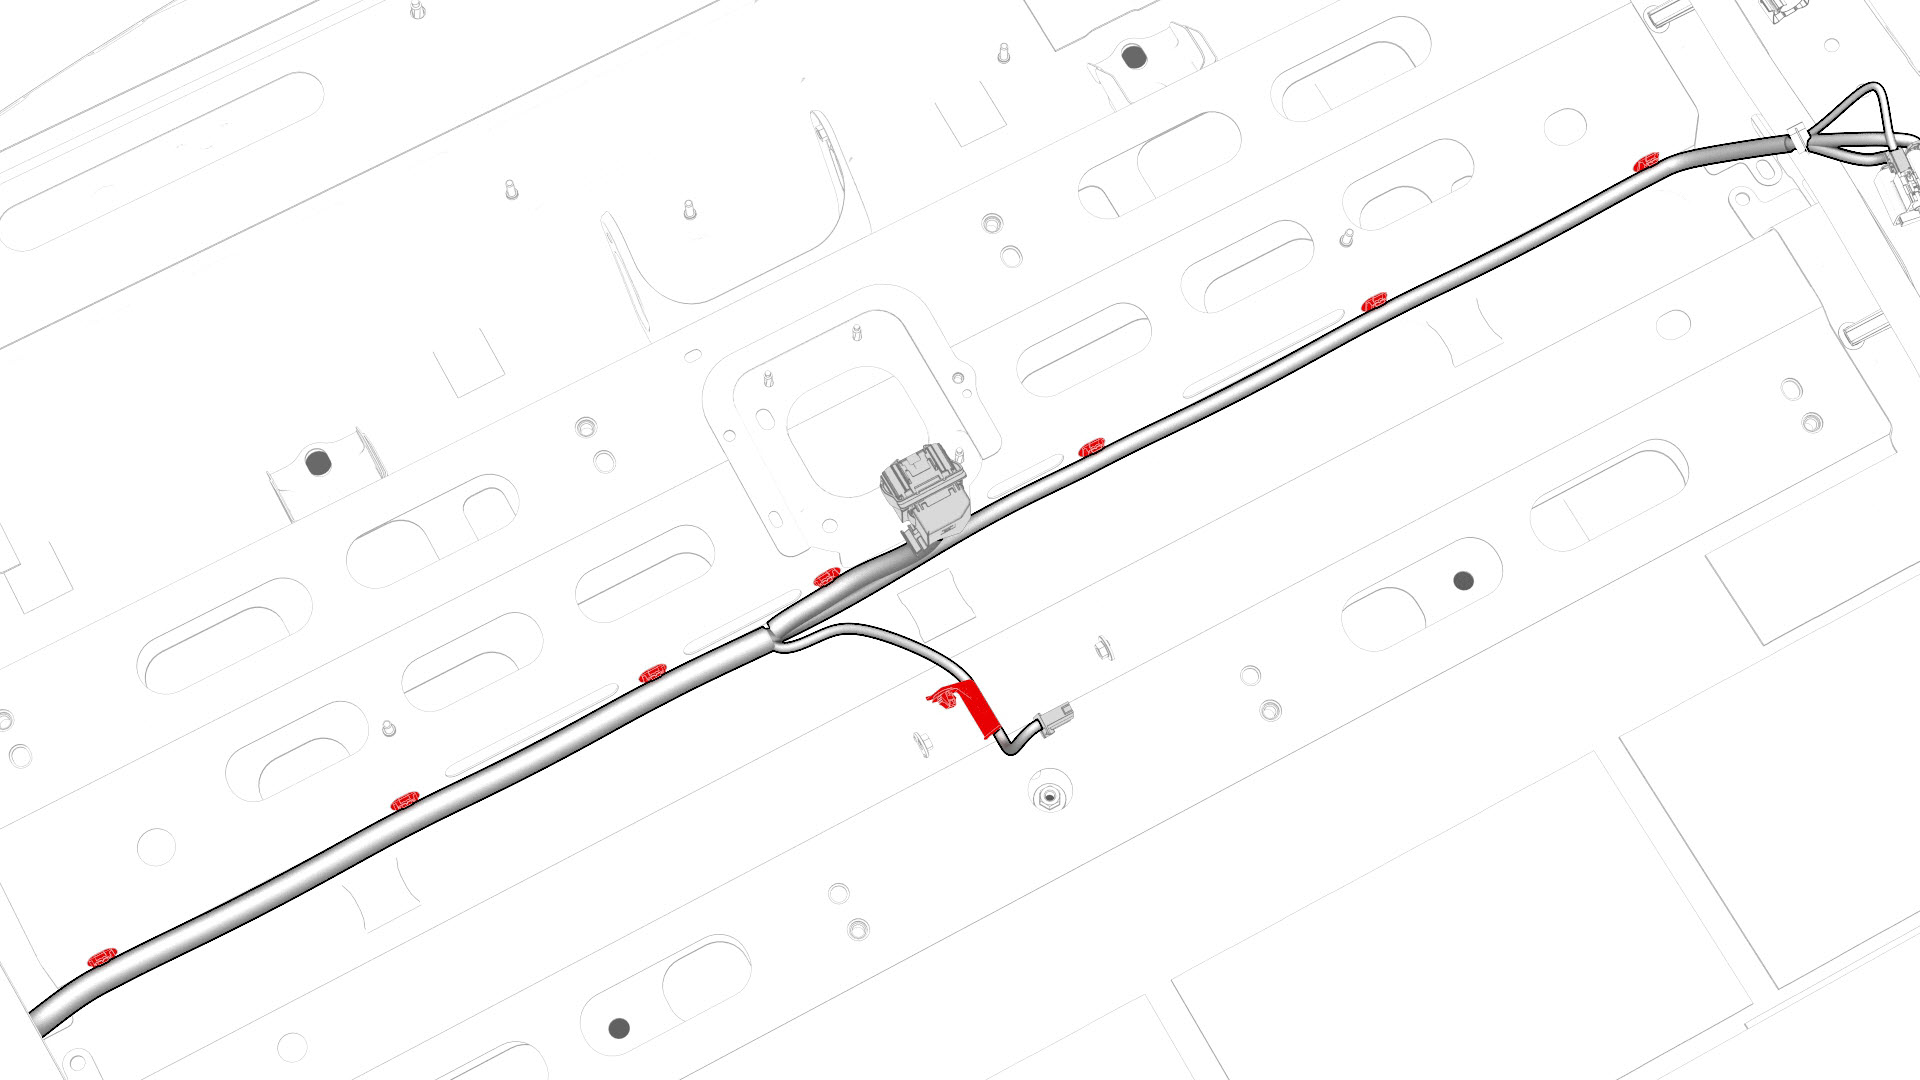
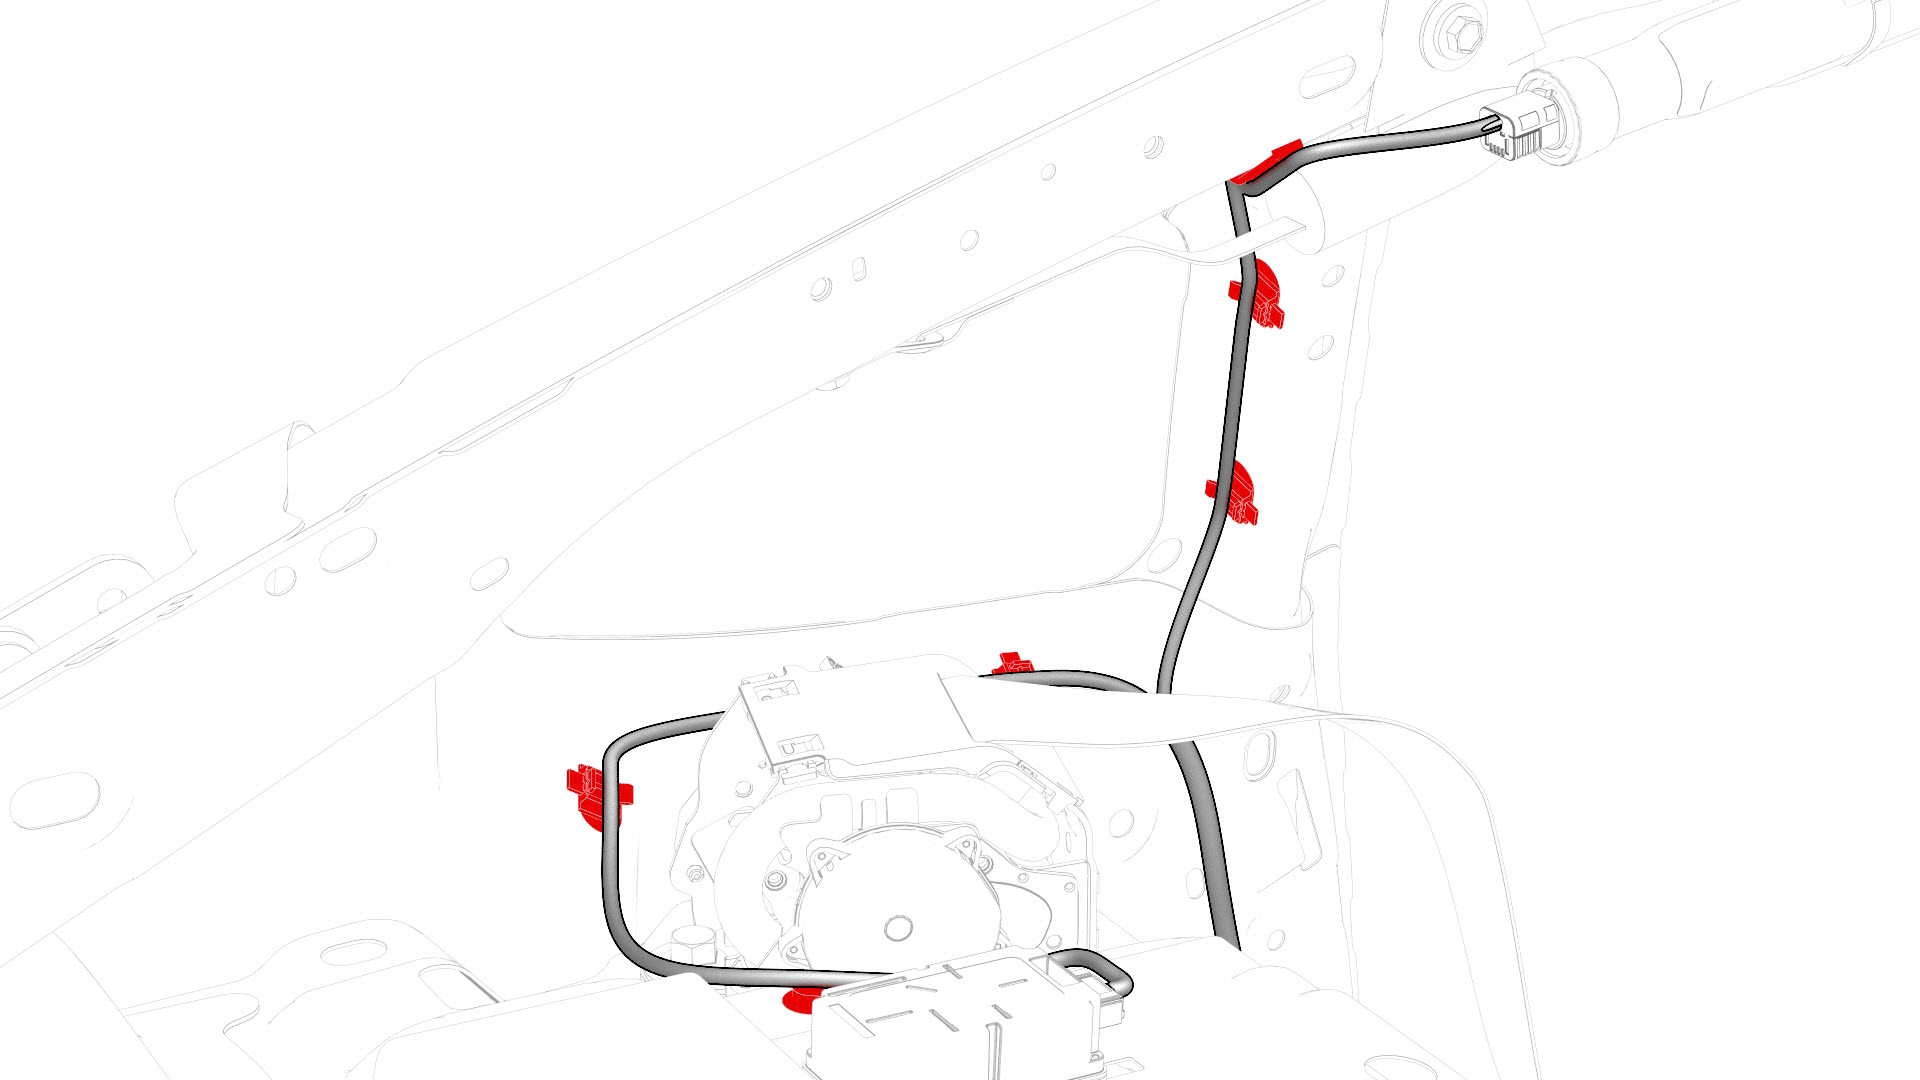
Release the clips that attach the electrical harness to the body in the LH side trunk area.
-
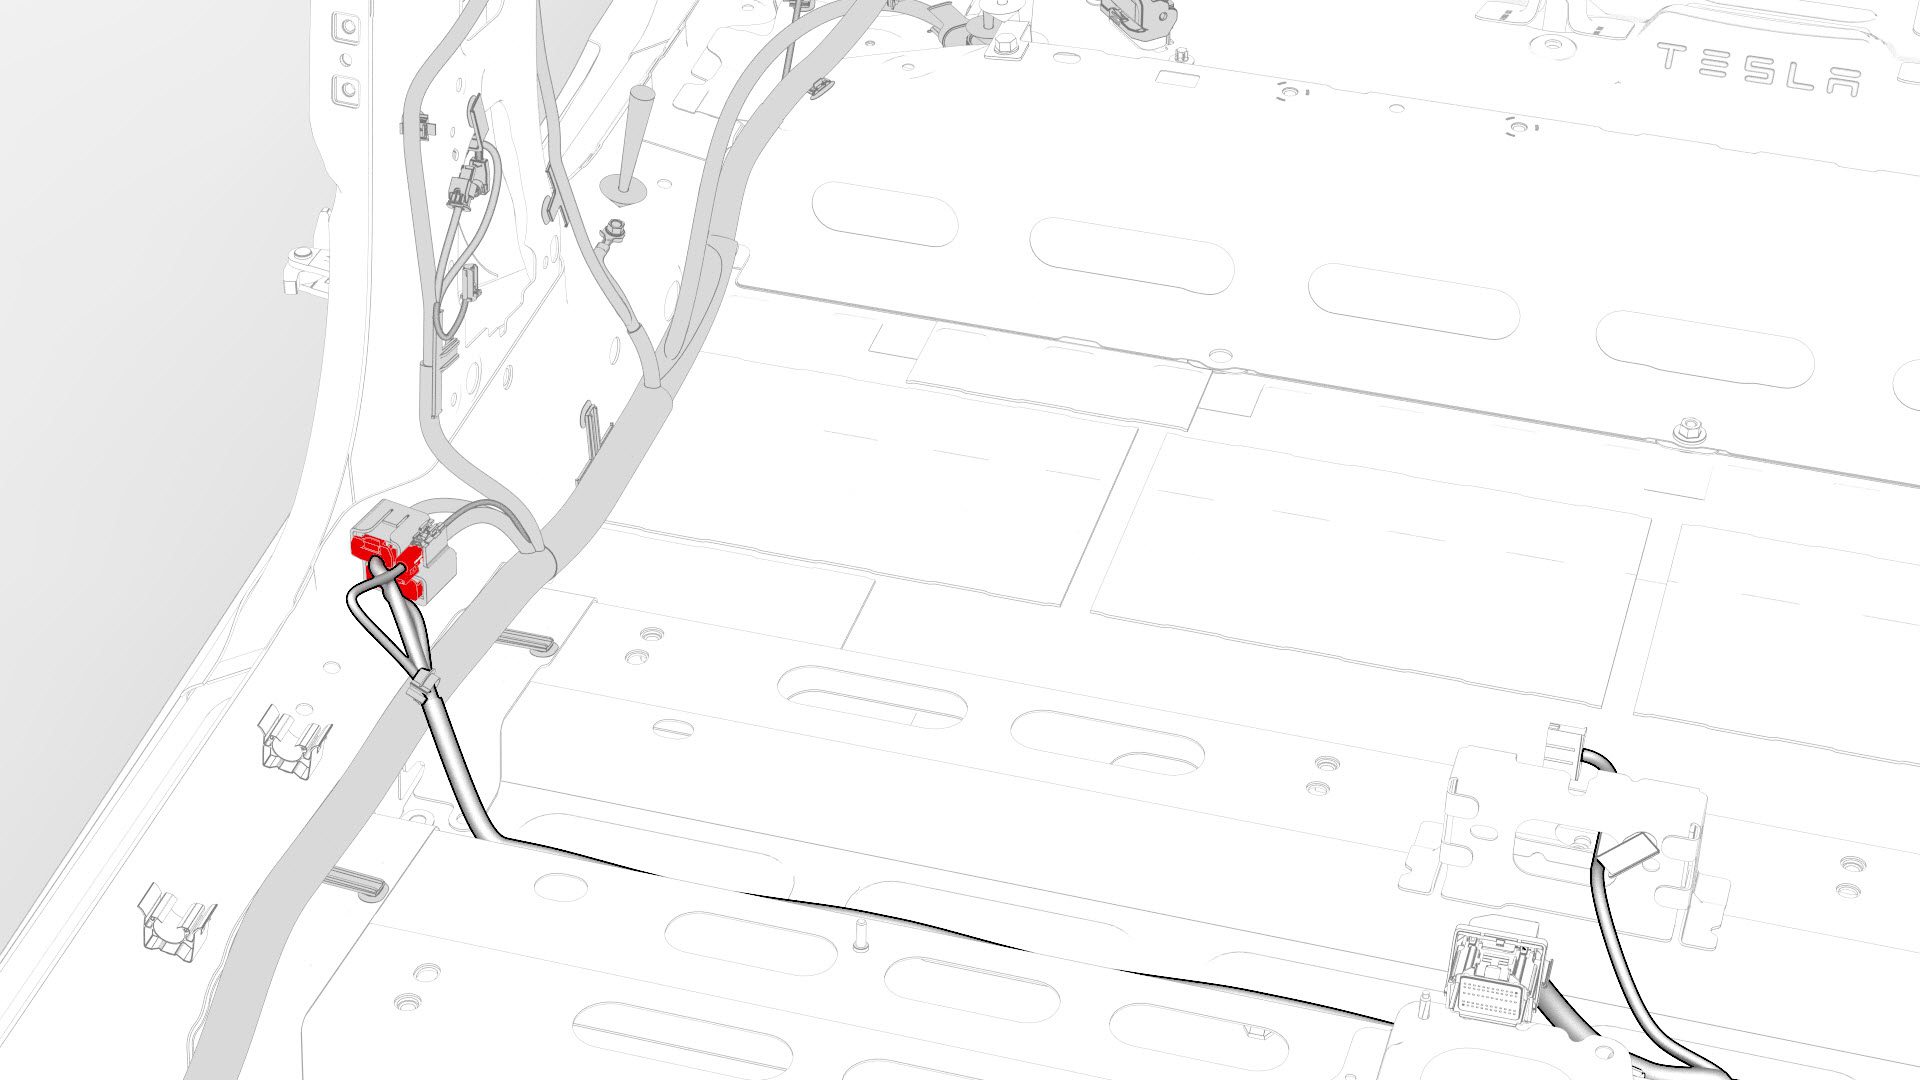
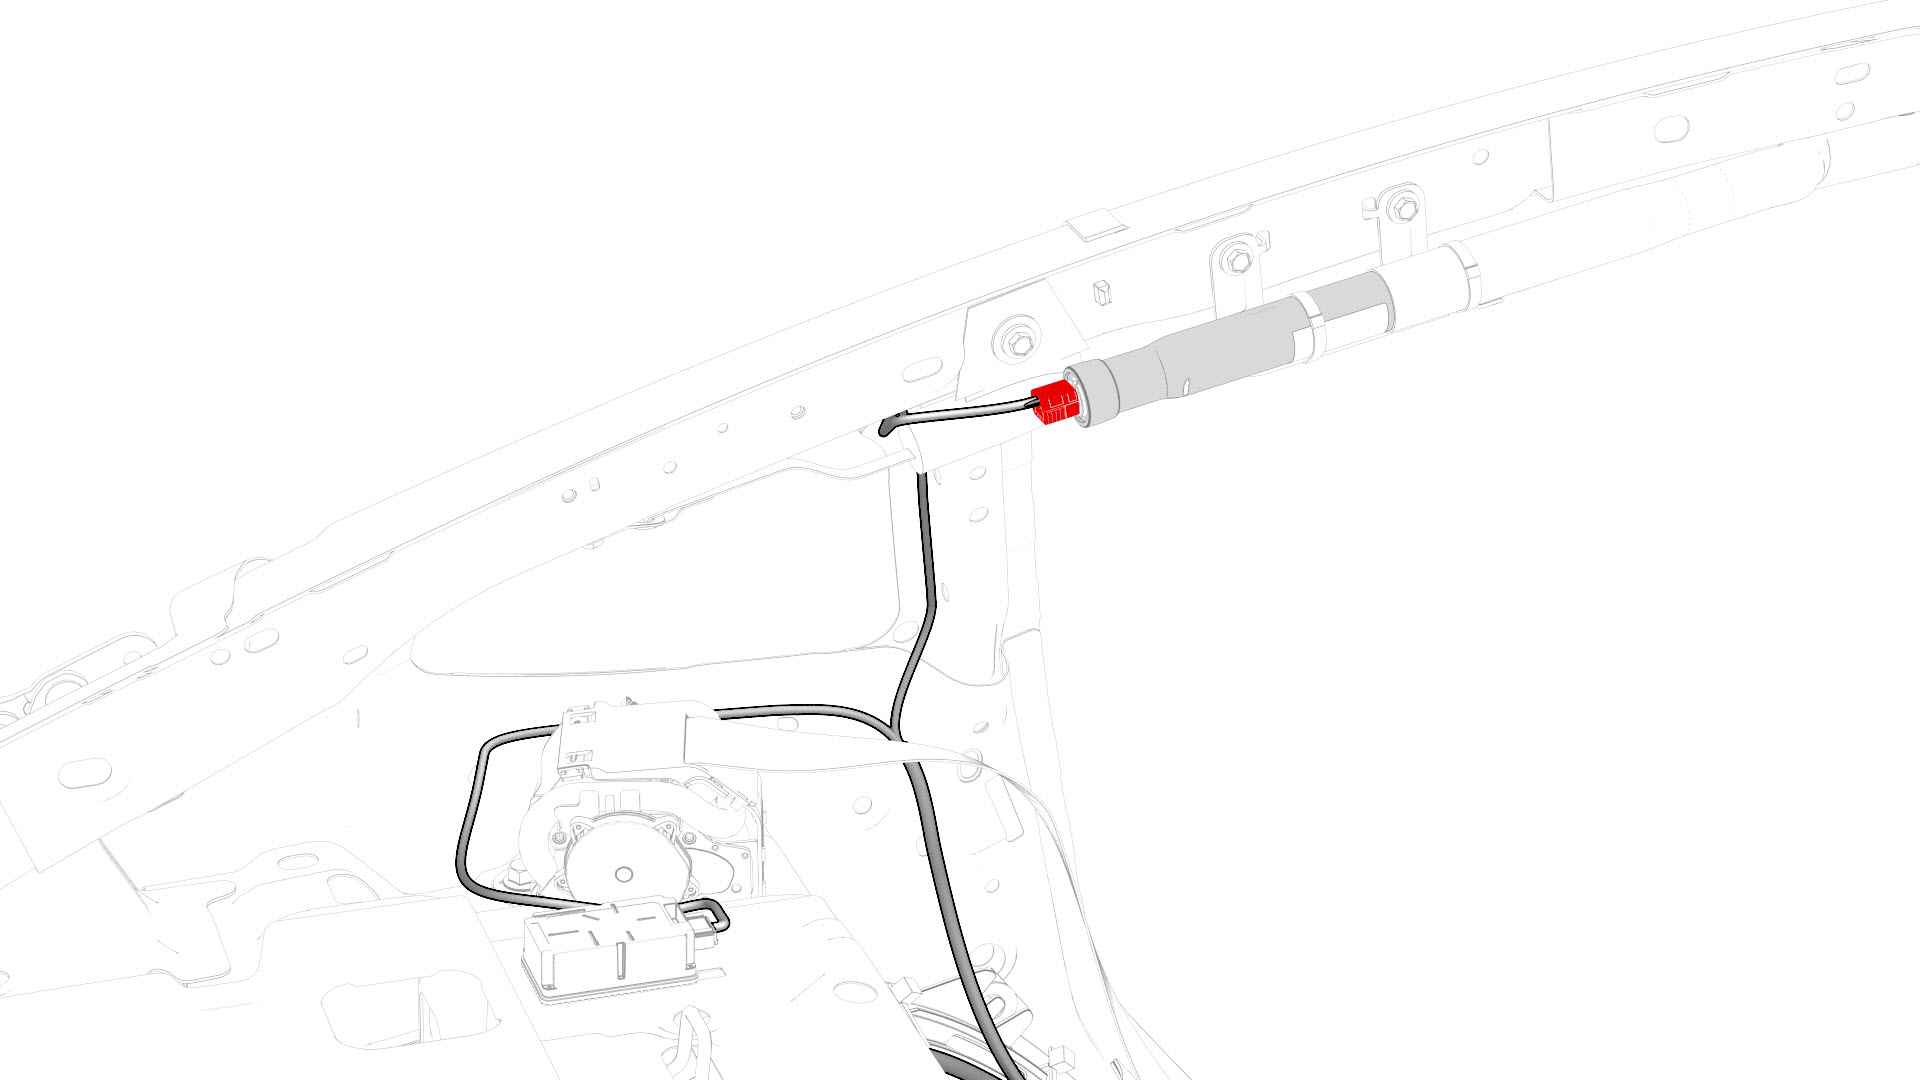
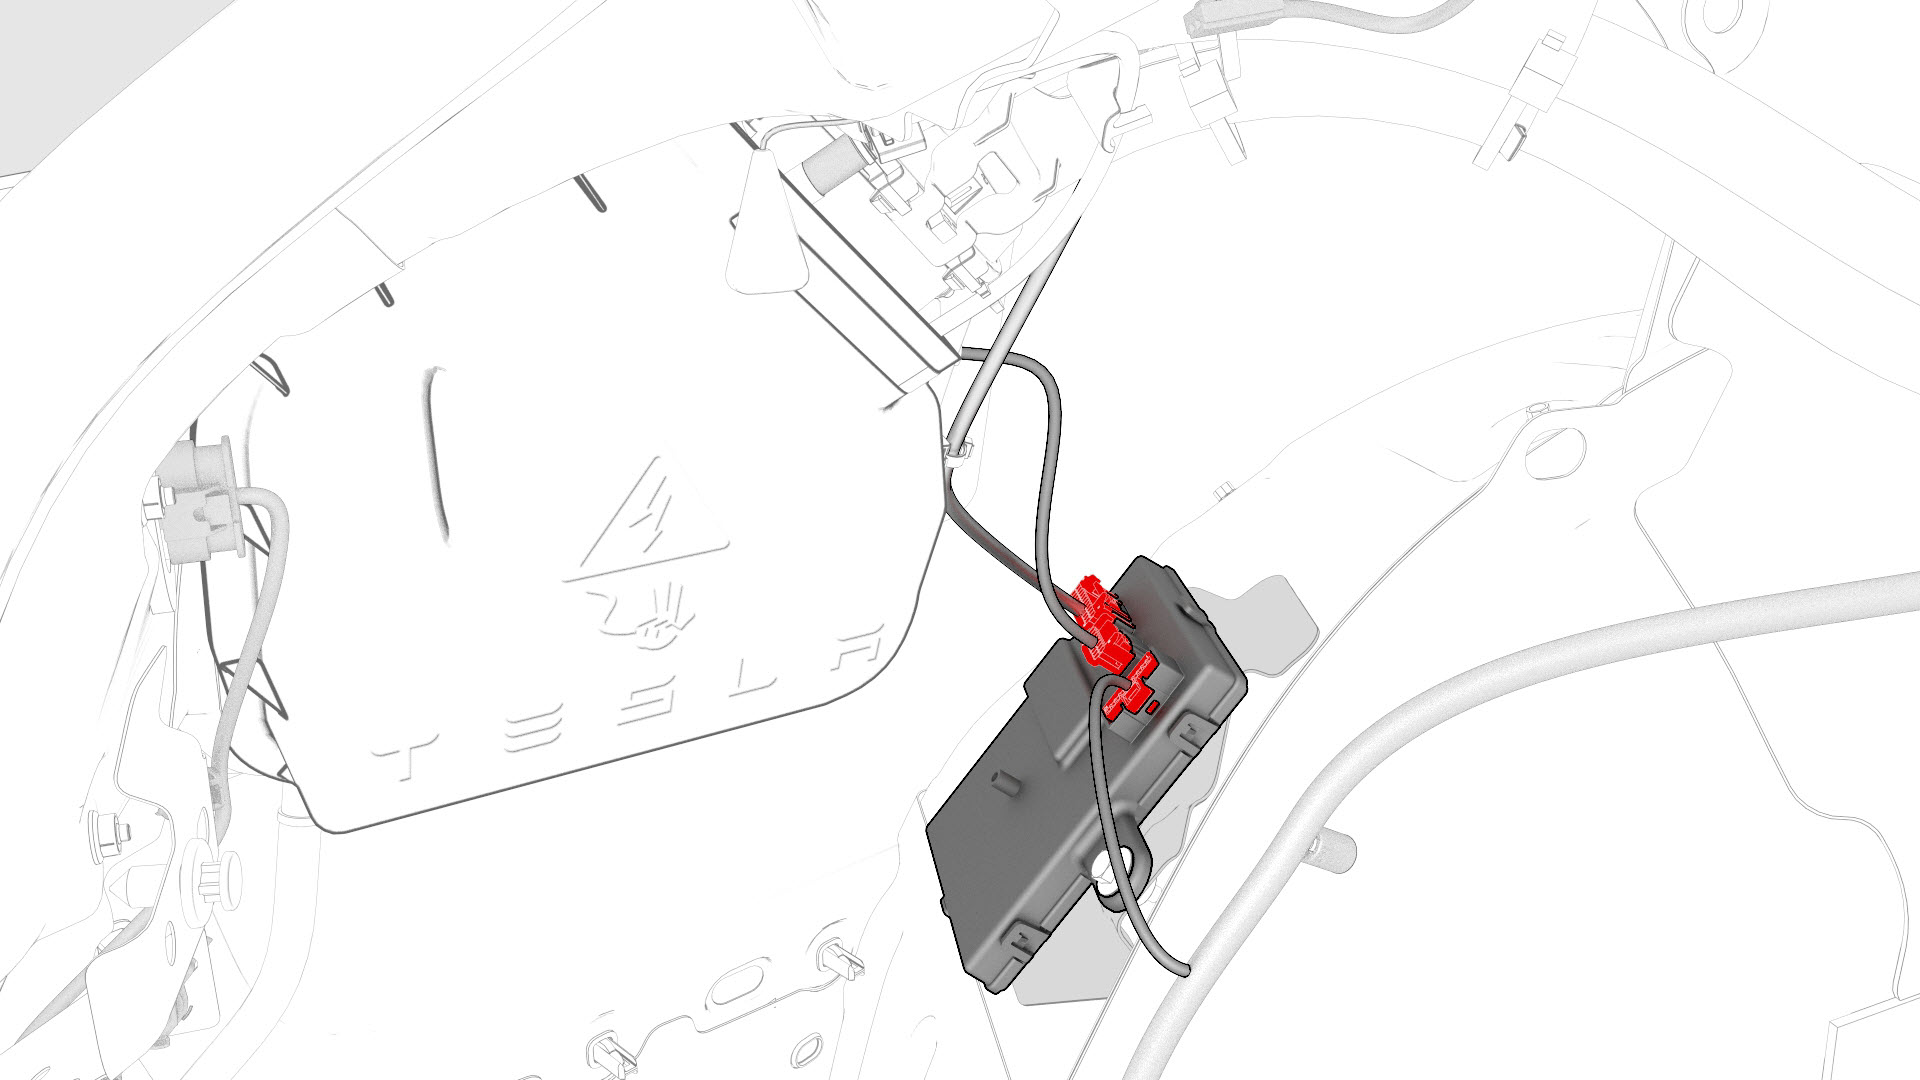
Disconnect the electrical harness from the charge port ECU connectors.
-
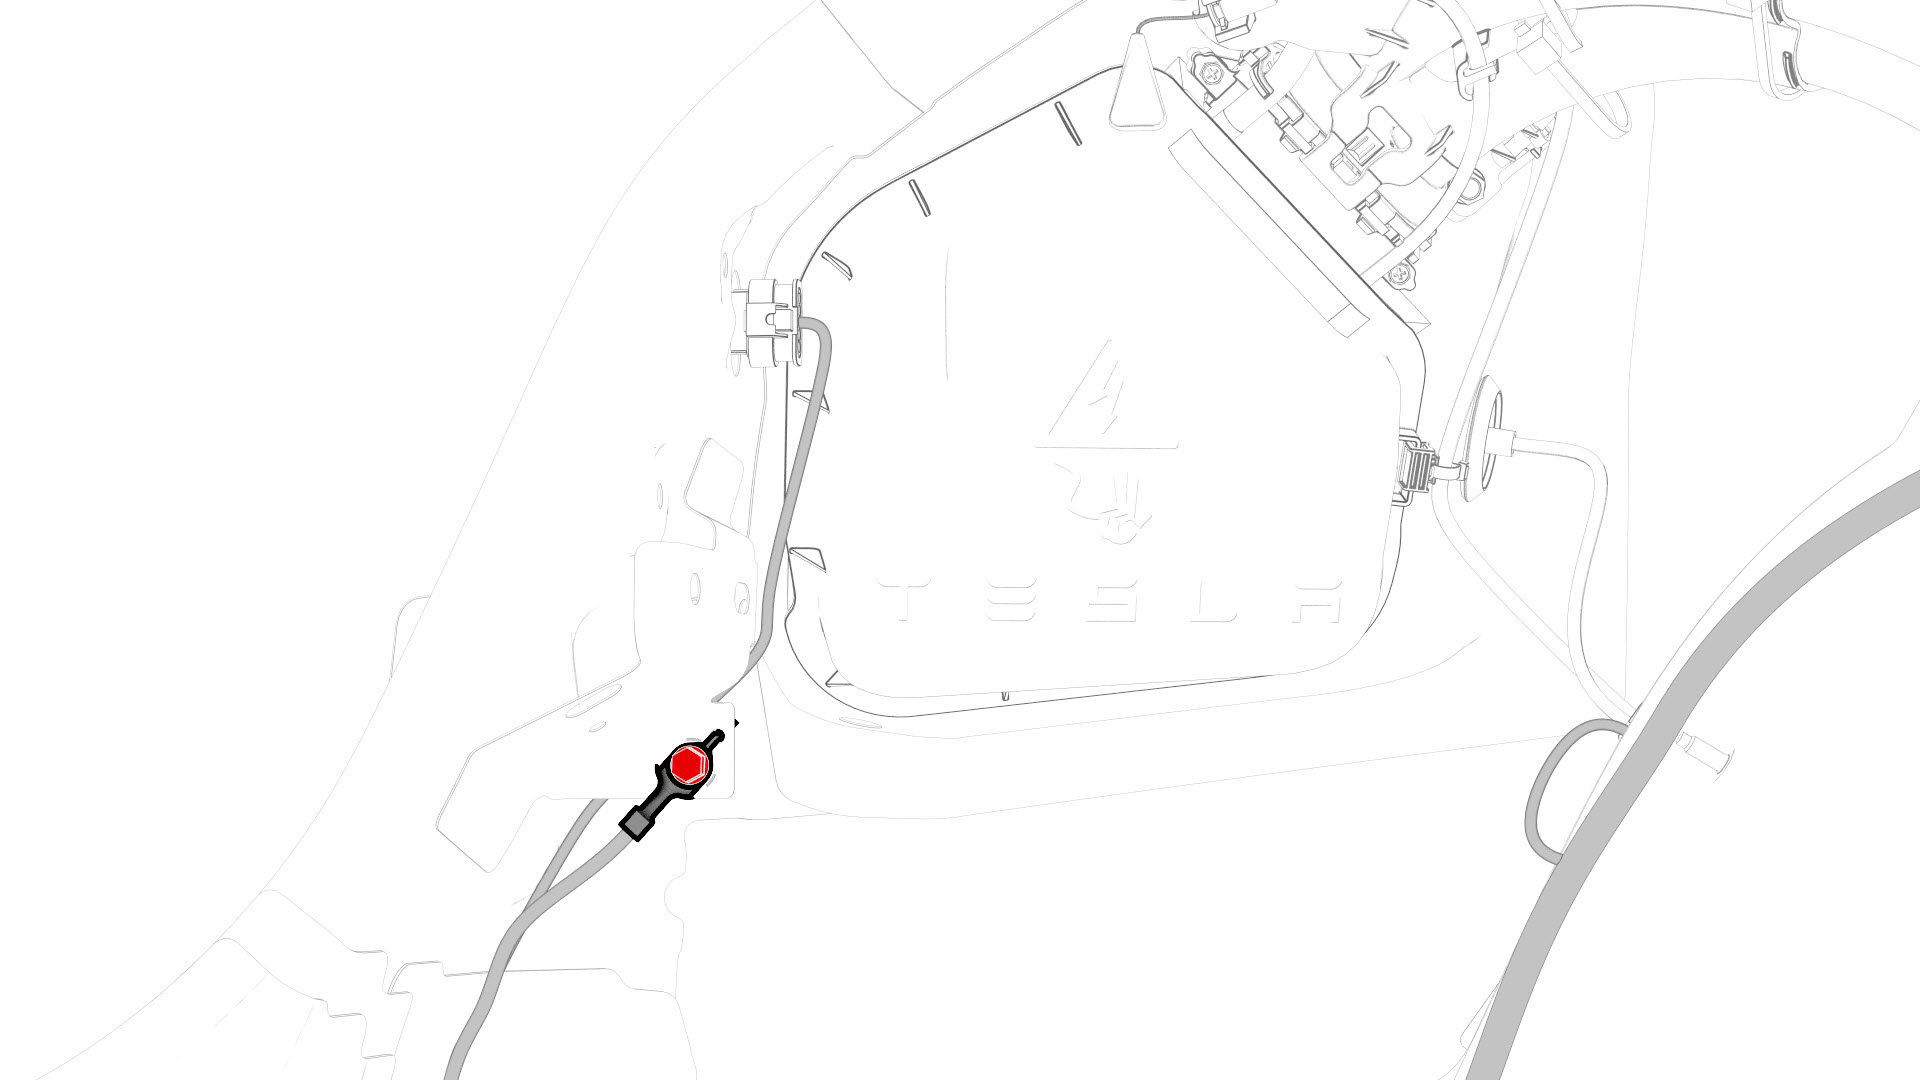
Remove and discard the bolt that attaches the harness ground strap to the body in the charge port area.
| 1 | Remove the sill rear trunk trim. See Trim - Sill - Trunk (Remove and Replace). | ||
| 2 | Remove the 2nd row LH seat back assembly. See Seat Back - 2nd Row - LH (Remove and Install). | ||
| 3 | Remove the 2nd row RH seat back assembly. See Seat Back - 2nd Row - RH (Remove and Install). | ||
| 4 | Release the trunk carpet clips from the body studs under the 2nd row seat cushion. | |
| 5 | Release the clips that attach the trunk carpet to the body, and then remove the trunk carpet from the vehicle. | |
| 6 | Remove the LH side rear trunk trim. See Trim - Side - Trunk - LH (Remove and Replace). | ||
| 7 | Remove the RH side rear trunk trim. See Trim - Side - Trunk - RH (Remove and Replace). | ||
| 8 | Remove the rear fascia assembly. See Fascia - Rear (Remove and Install). | ||
| 9 | Remove the clips that attach the LH body harness to the body in the rear fascia and rear subframe areas. | |
| 10 | Disconnect the electrical harness from the rear Bluetooth passive entry antenna connector. | |
| 11 | Disconnect the electrical harness from the rear subframe electrical harness connector and the LH electric parking brake connector. | |
| 12 | Release the clips that attach the electrical harness to the body, and then push the rear subframe portion of the electrical harness through the LH side trunk bulkhead. Note: The LH body harness passes through the trunk near the rear section of the rear LH wheel liner area.
| |
| 13 | Lower the vehicle. | ||
| 14 | With an assistant, remove the vehicle from the lift. Caution: The vehicle is safely pushed for only a very short distance and at a very slow speed.
| ||
| 15 | Position wheel chocks. | ||
| 16 | Open all doors. | ||
| 17 | Remove the rear underhood apron. See Underhood Apron - Rear (Remove and Replace). | ||
| 18 | Remove the LH instrument panel end cap. See End Cap - Instrument Panel - LH (Remove and Replace). | ||
| 19 | Remove the LH lower A-pillar trim. See Trim - A-Pillar - Lower - LH (Remove and Replace). | ||
| 20 | Remove the LH footwell cover. See Cover - Footwell - Driver (Remove and Replace). | ||
| 21 | Remove the LH footwell duct. See Duct - Footwell - LH (Remove and Replace). | ||
| 22 | Remove the RH instrument panel end cap. See End Cap - Instrument Panel - LH (Remove and Replace) | ||
| 23 | Remove the RH lower A-pillar trim. See Trim - A-Pillar - Lower - LH (Remove and Replace). | ||
| 24 | Remove the RH footwell cover. See Cover - Footwell - Passenger (LHD) (Remove and Replace). | ||
| 25 | Perform the vehicle electrical isolation procedure. See Vehicle Electrical Isolation Procedure. | ||
| 26 | Remove the driver and front passenger seats. See Seat - Driver (Remove and Replace). | ||
| 27 | Remove the center console assembly. See Center Console (Remove and Install). | ||
| 28 | Remove the driver's knee airbag. See Airbag - Knee - Driver (Remove and Replace). | ||
| 29 | Remove the rear LH sill panel trim. See Trim - Sill Panel - Rear - LH (Remove and Replace). | ||
| 30 | Remove the LH upper B-pillar trim. See Trim - B-Pillar - Upper - LH (Remove and Replace). | ||
| 31 | Remove the LH lower B-pillar trim. See Trim - B-Pillar - Lower - LH (Remove and Replace). | ||
| 32 | Remove the LH B-pillar applique. See Applique - B-Pillar - LH (Remove and Replace). | ||
| 33 | Remove the LH side rail trim. See Trim - Side Rail - LH (Remove and Replace). | ||
| 34 | Remove the LH upper C-pillar trim. See Trim - C-Pillar - Upper - LH (Remove and Replace). | ||
| 35 | Remove the RH rear sill trim. See Trim - Sill Panel - Rear - LH (Remove and Replace) | ||
| 36 | Remove the RH upper B-pillar trim. See Trim - B-Pillar - Upper - LH (Remove and Replace). | ||
| 37 | Remove the RH lower B-pillar trim. See Trim - B-Pillar - Lower - LH (Remove and Replace). | ||
| 38 | Remove the RH side rail trim. See Trim - Side Rail - LH (Remove and Replace). | ||
| 39 | Remove the RH upper C-pillar trim. See Trim - C-Pillar - Upper - LH (Remove and Replace). | ||
| 40 | Remove the LH and RH rear C-pillar trim. See Trim - C-Pillar - Rear - LH (Remove and Replace). | ||
| 41 | Release the clips that attach the package tray electrical harness to the body in the upper C-pillar area. | |
| 42 | Disconnect the package tray electrical harness from the RH body harness connector. | |
| 43 | Release the clip, and then disconnect the package tray speaker electrical harness from the tuner connectors. | |
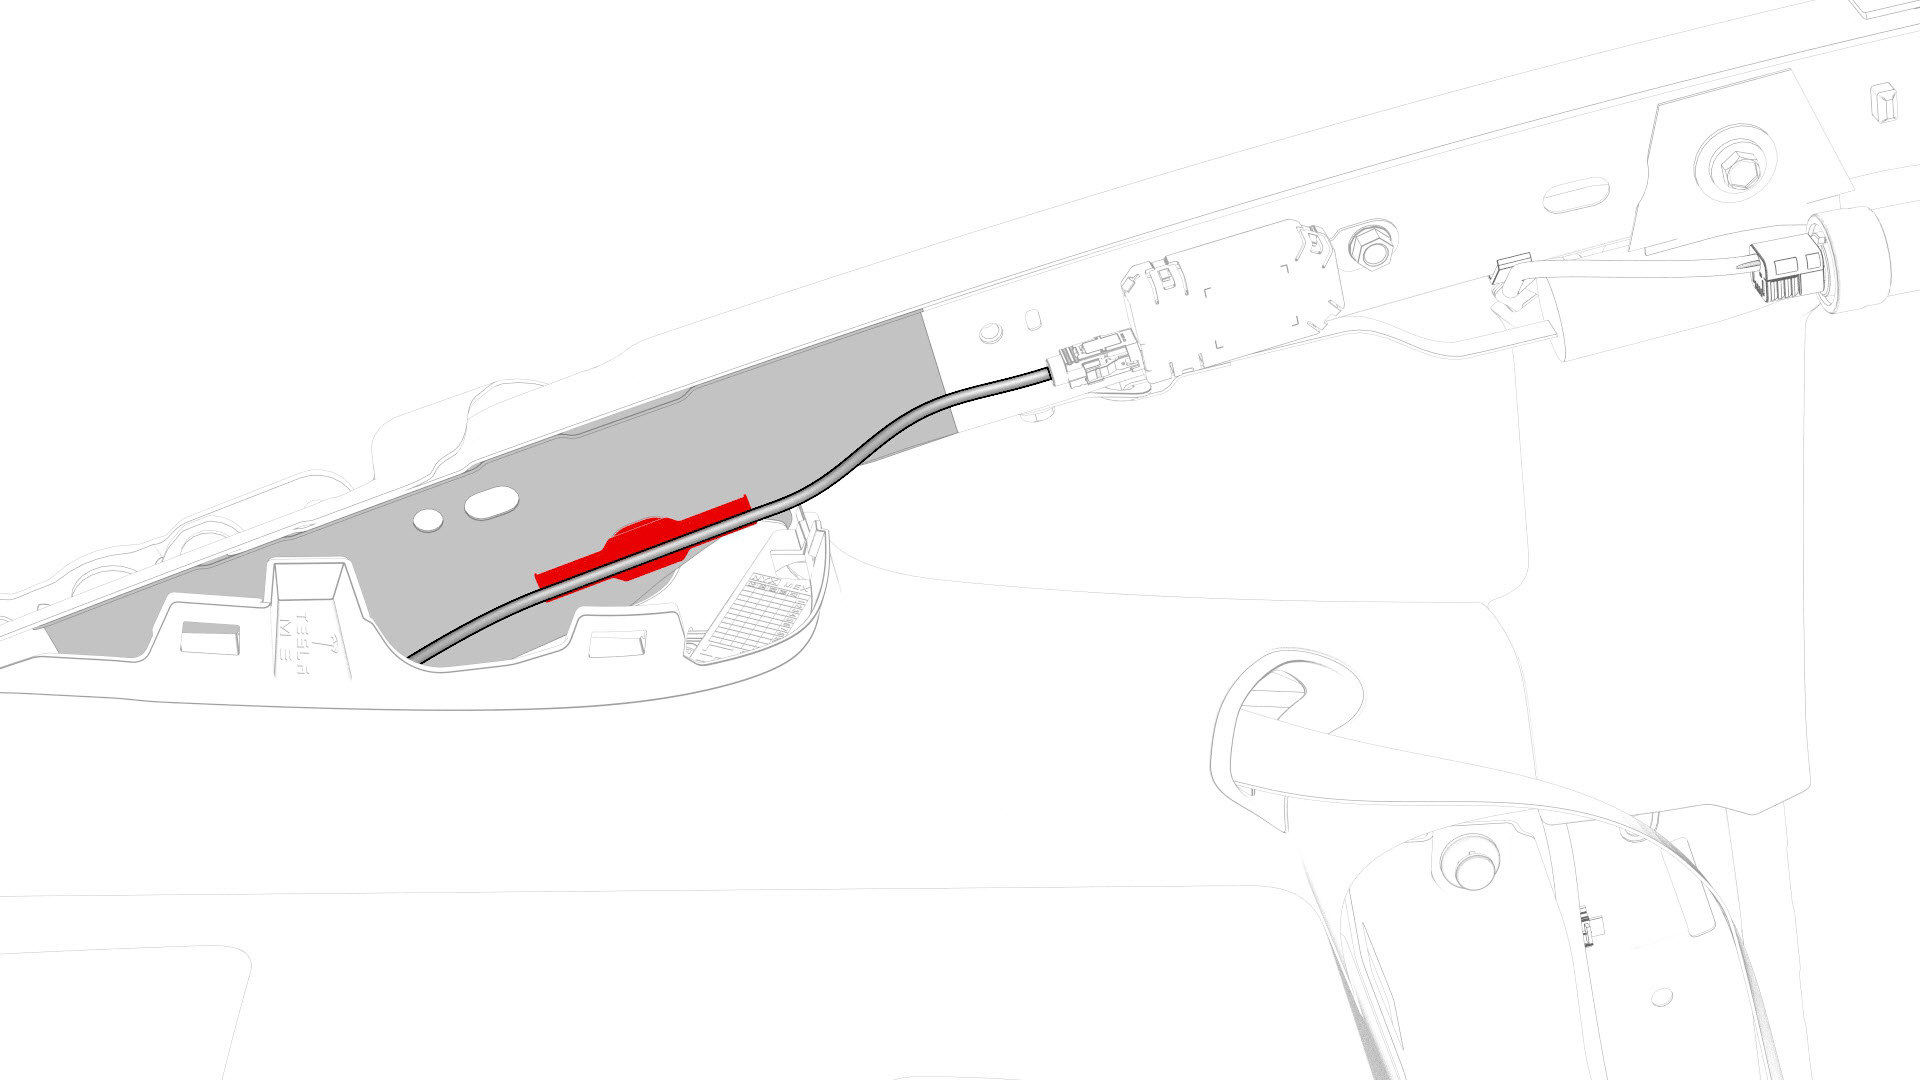
| 44 | Release the clip that attaches the package tray electrical harness to the LH C-pillar. | |
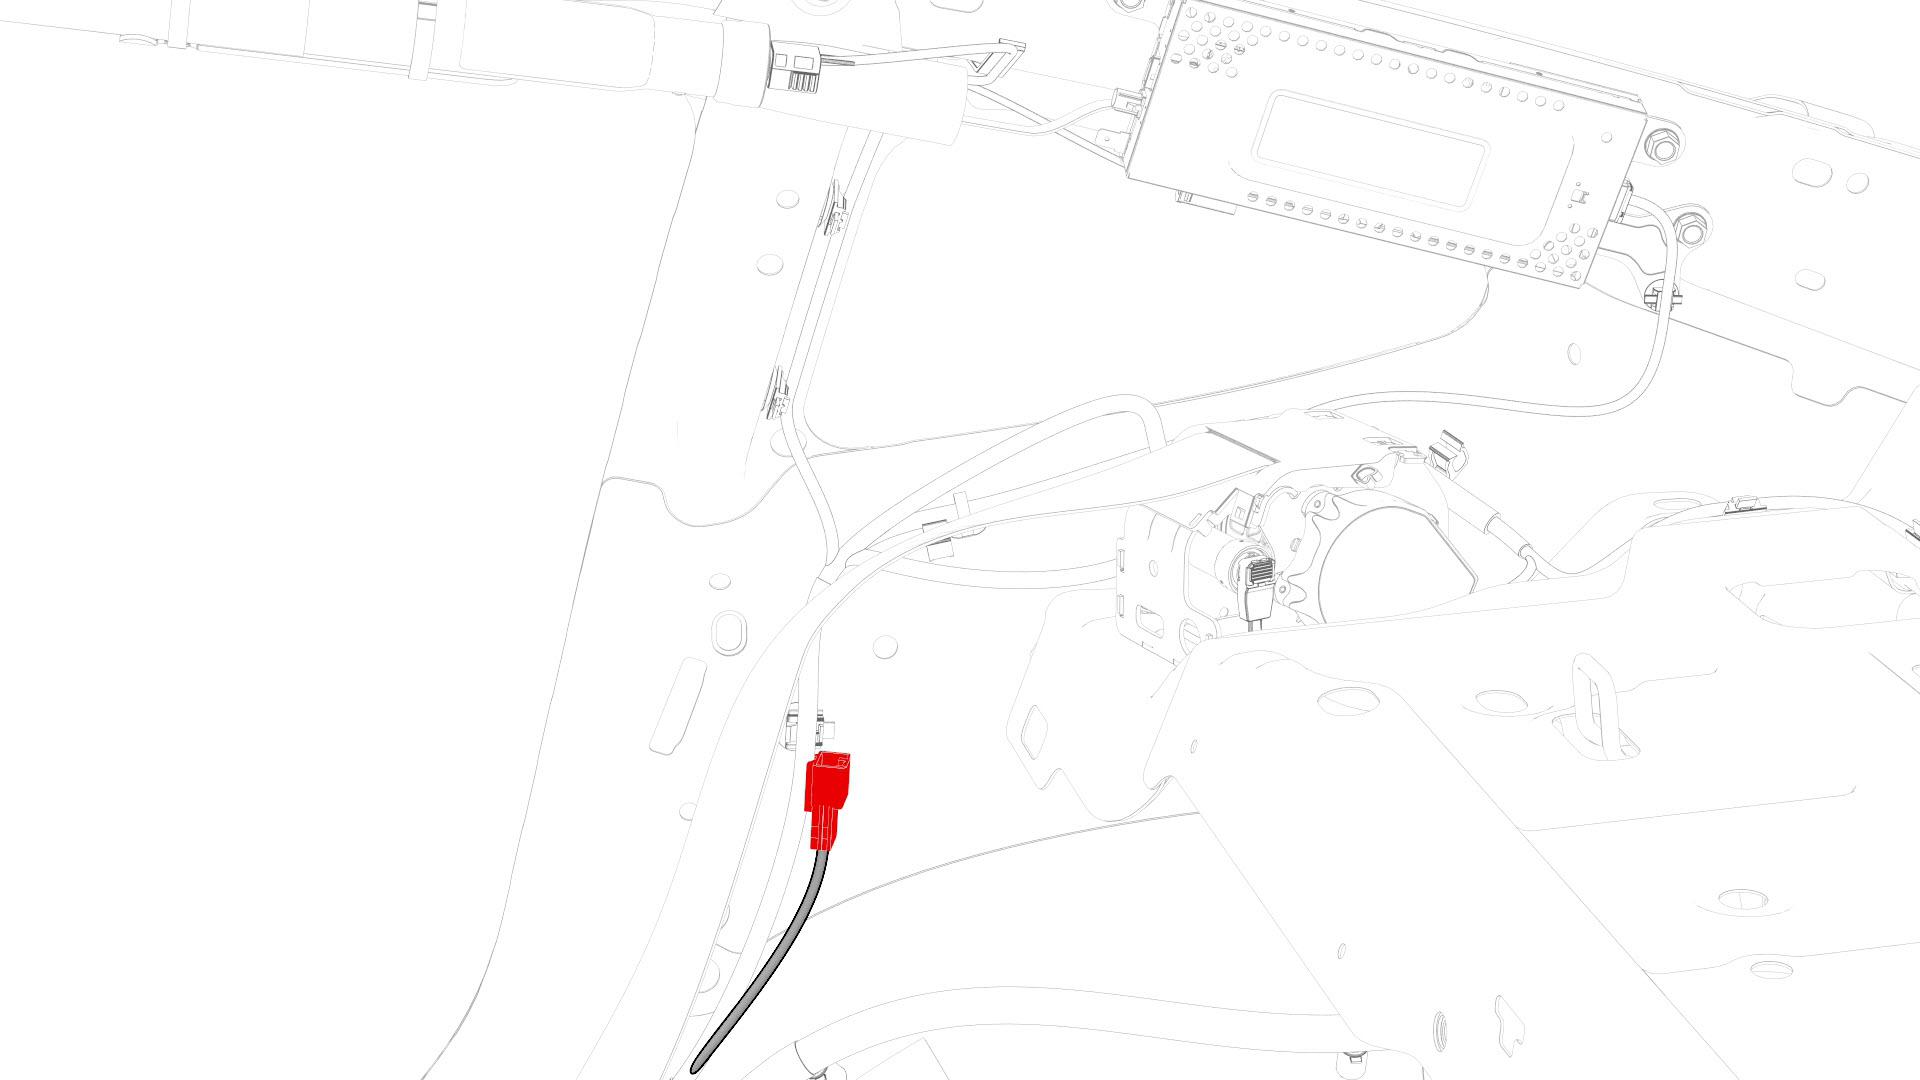
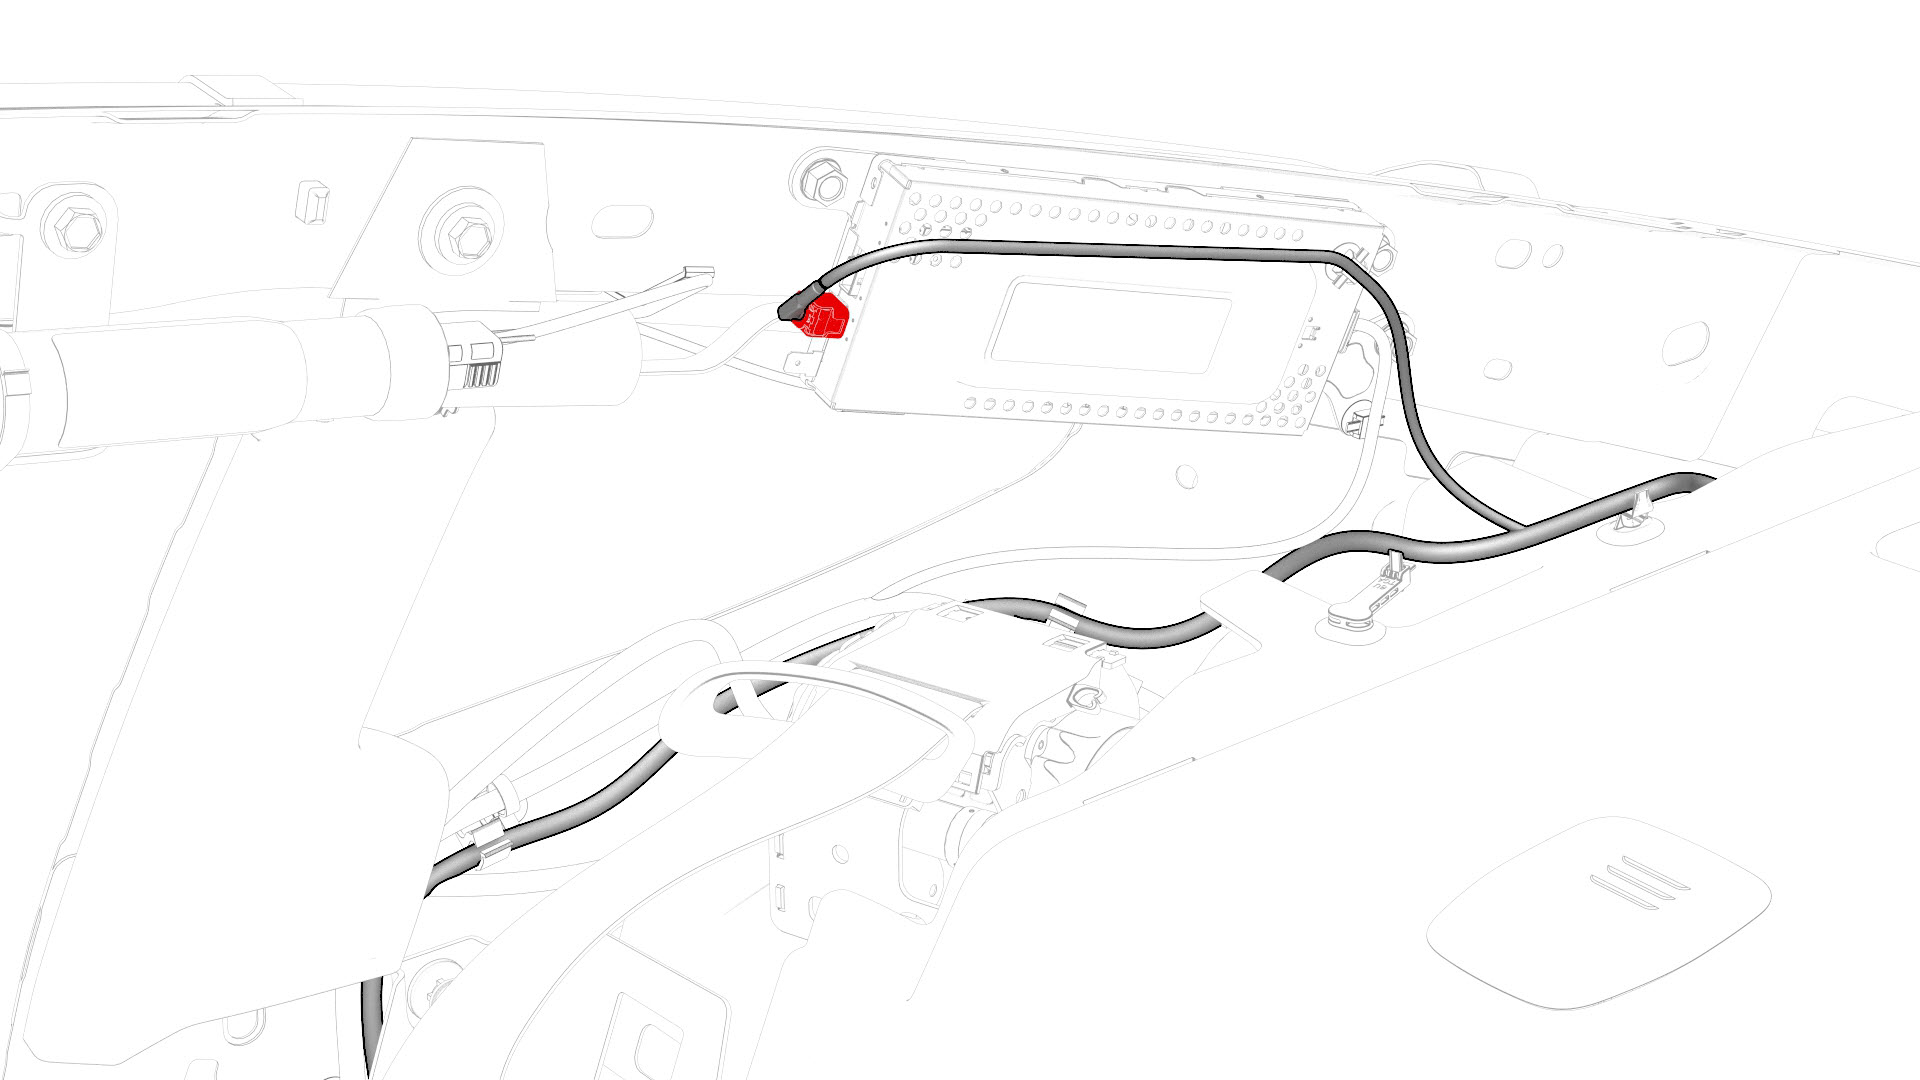
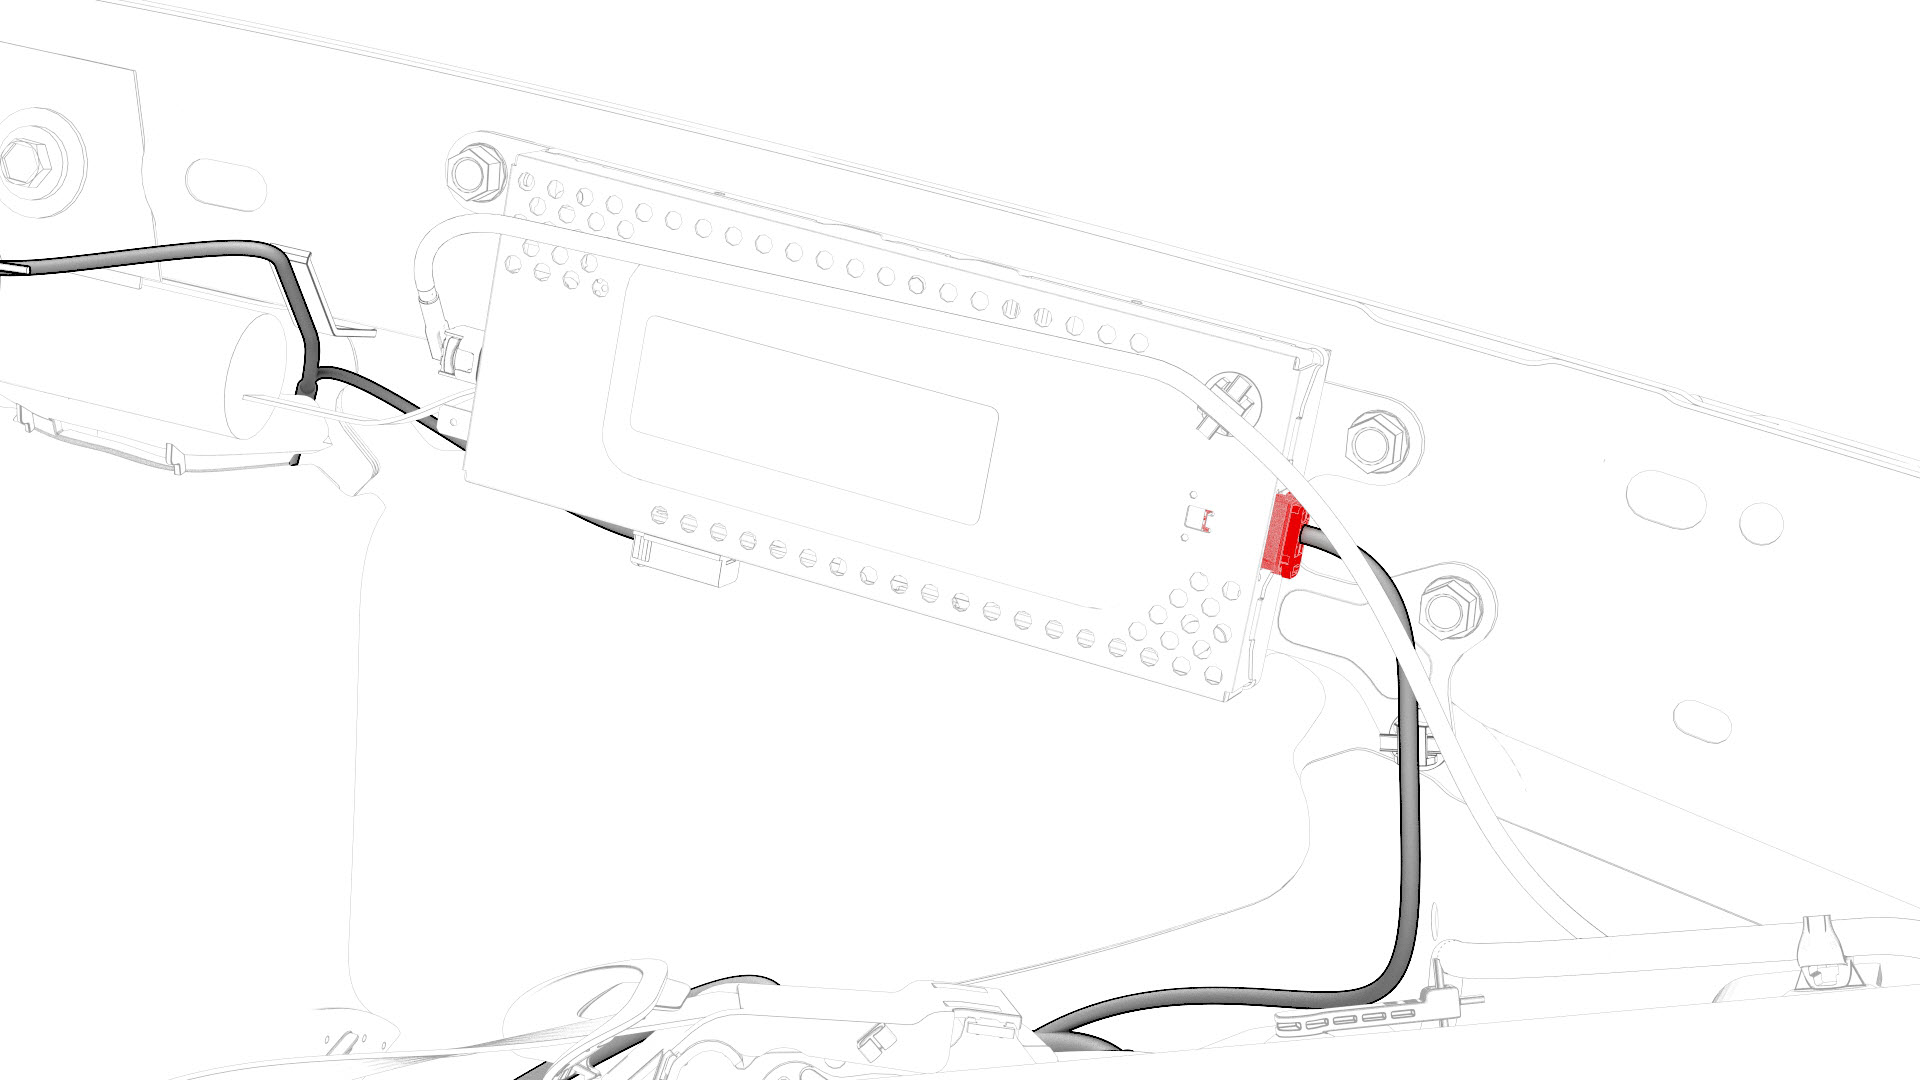
| 45 | Disconnect the electrical harness from the antenna amplifier connector. | |
| 46 | Remove the package tray trim. See Trim - Package Tray (Remove and Install). | ||
| 47 | Release the clips that attach the LH and RH sides of the rear main cabin carpet to the body. | |
| 48 | Release the clips that attach the front LH main cabin carpet to the body, and then remove the carpet from the vehicle. | |
| 49 | Disconnect the electrical harness from the accelerator and the brake pedal connectors. | |
| 50 | Release the clips that attach the electrical harness to the body under the IP carrier area. | |
| 51 | Remove and discard the bolt that attaches the electrical harness ground strap at the driver footwell area. | |
| 52 | Disconnect the electrical harness from the LH body controller module connectors. | |
| 53 | Release the clips that attach the electrical harnessto the body in the LH body controller module area. | |
| 54 | Release the clips that attach the electrical harness to the body in the LH lower B-pillar areas. | |
| 55 | Lift up the rear portion of the floor duct to release the clips that attach the electrical harness to the body. | |
| 56 | Release the clips that attach the electrical harness to the body under the front LH seat and RH lower B-pillar areas. | |
| 57 | Disconnect the electrical harness from the connectors in the RH lower B-pillar area. | |
| 58 | Disconnect the electrical harness from the passive supplemental restraint control module connector. | |
| 59 | Remove and discard the bolt that attaches the electrical harness ground strap to the body in the LH lower B-pillar area. | |
| 60 | Release the clips that attach the harness to the body in the B-pillar area. | |
| 61 | Disconnect the electrical harness from the LH door connector and the front LH seat belt connector. | |
| 62 | Release the clips that attach the harness to the body in the lower C-pillar area. | |
| 63 | Disconnect the electrical harness from the connectors in the lower C-pillar area. | |
| 64 | Release the clips that attach the electrical harness to the body in the LH side curtain airbag and TPMS module areas. | |
| 65 | Disconnect the electrical harness from the LH side curtain airbag connector. | |
| 66 | Disconnect the electrical harness from the TPMS module connector. | |
| 67 | Disconnect the electrical harness from LH rear seat belt connector. | |
| 68 | Release the clips that attach the electrical harness to the body in the LH side trunk area. | |
| 69 | Disconnect the electrical harness from the charge port ECU connectors. | |
| 70 | Remove and discard the bolt that attaches the harness ground strap to the body in the charge port area. | |
| 71 | Remove the LH body harness from the vehicle. |
Install
-
Install a new bolt to attach the electrical harness ground strap to the body in the charge port area.
 Torque 8 Nm
 -
Connect the electrical harness to the charge port ECU connectors.
-
Fasten the clips that attach the electrical harness to the body in the LH side trunk area.
-
Connect the electrical harness to LH rear seat belt connector.
-
Connect the electrical harness to the TPMS module connector.
-
Connect the electrical harness to the LH side curtain airbag connector.
-
Fasten the clips that attach the electrical harness to the body in the LH side curtain airbag and TPMS module areas.
-
Connect the electrical harness to the connectors in the lower C-pillar area.
-
Fasten the clips that attach the harness to the body in the lower C-pillar area.
-
Connect the electrical harness to the LH door connector and the front LH seat belt connector.
-
Fasten the clips that attach the harness to the body in the B-pillar area.
-
Install a new bolt to attach the electrical harness ground strap to the body in the LH lower B-pillar area.Torque 8 Nm
-
Connect the electrical harness to the passive supplemental restraint control module connector.
-
Connect the electrical harness to the connectors in the RH lower B-pillar area.
-
Fasten the clips that attach the electrical harness to the body under the front LH seat and RH lower B-pillar areas.
-
Fasten the clips that attach the electrical harness to the body under the rear portion of the floor duct.
-
Fasten the clips that attach the electrical harness to the body in the LH lower B-pillar areas.
-
Fasten the clips that attach the electrical harness to the body in the LH body controller module area.
-
Connect the electrical harness to the LH body controller module connectors.
-
Install a new bolt to attach the electrical harness ground strap to the body in the driver footwell area.
 Torque 8 Nm
 -
Fasten the clips that attach the electrical harness to the body under the IP carrier area.
-
Connect the electrical harness to the accelerator and the brake pedal connectors.
-
Install the carpet into the vehicle, and then fasten the clips that attach the front LH main cabin carpet to the body.
-
Fasten the clips that attach the LH and RH sides of the rear main cabin carpet to the body.
-
Connect the electrical harness to the antenna amplifier connector.
-
Fasten the clip that attaches the package tray electrical harness to the LH C-pillar.
-
Connect the package tray speaker electrical harness to the tuner connectors, and then fasten the clip.
-
Connect the package tray electrical harness to the RH body harness connector.
-
Fasten the clips that attach the package tray electrical harness to the body in the upper C-pillar area.
-
With an assistant, move the vehicle to the lift.
Caution:The vehicle is safely pushed for only a very short distance and at a very slow speed.
-
Move the rear subframe portion of the electrical harness in through the LH side trunk bulkhead, and then fasten the clips that attach the electrical harness to the body.
Note: The LH body harness passes through the trunk near the rear section of the rear LH wheel liner area.
-
Connect the electrical harness to the rear subframe electrical harness connector and the LH electric parking brake connector.
-
Connect the electrical harness to the rear Bluetooth passive entry antenna connector.
-
Install the clips that attach the LH body harness to the body in the rear fascia and rear subframe areas.
-
Install the trunk carpet into the trunk, and then fasten the clips that attach the trunk carpet to the body.
-
Fasten the trunk carpet clips to the body studs under the 2nd row seat cushion.
| 1 | Install the LH body harness into the vehicle. | ||
| 2 | Install a new bolt to attach the electrical harness ground strap to the body in the charge port area. Torque 8 Nm | |
| 3 | Connect the electrical harness to the charge port ECU connectors. | |
| 4 | Fasten the clips that attach the electrical harness to the body in the LH side trunk area. | |
| 5 | Connect the electrical harness to LH rear seat belt connector. | |
| 6 | Connect the electrical harness to the TPMS module connector. | |
| 7 | Connect the electrical harness to the LH side curtain airbag connector. | |
| 8 | Fasten the clips that attach the electrical harness to the body in the LH side curtain airbag and TPMS module areas. | |
| 9 | Connect the electrical harness to the connectors in the lower C-pillar area. | |
| 10 | Fasten the clips that attach the harness to the body in the lower C-pillar area. | |
| 11 | Connect the electrical harness to the LH door connector and the front LH seat belt connector. | |
| 12 | Fasten the clips that attach the harness to the body in the B-pillar area. | |
| 13 | Install a new bolt to attach the electrical harness ground strap to the body in the LH lower B-pillar area. Torque 8 Nm | |
| 14 | Connect the electrical harness to the passive supplemental restraint control module connector. | |
| 15 | Connect the electrical harness to the connectors in the RH lower B-pillar area. | |
| 16 | Fasten the clips that attach the electrical harness to the body under the front LH seat and RH lower B-pillar areas. | |
| 17 | Fasten the clips that attach the electrical harness to the body under the rear portion of the floor duct. | |
| 18 | Fasten the clips that attach the electrical harness to the body in the LH lower B-pillar areas. | |
| 19 | Fasten the clips that attach the electrical harness to the body in the LH body controller module area. | |
| 20 | Connect the electrical harness to the LH body controller module connectors. | |
| 21 | Install a new bolt to attach the electrical harness ground strap to the body in the driver footwell area. Torque 8 Nm | |
| 22 | Fasten the clips that attach the electrical harness to the body under the IP carrier area. | |
| 23 | Connect the electrical harness to the accelerator and the brake pedal connectors. | |
| 24 | Install the carpet into the vehicle, and then fasten the clips that attach the front LH main cabin carpet to the body. | |
| 25 | Fasten the clips that attach the LH and RH sides of the rear main cabin carpet to the body. | |
| 26 | Install the package tray trim. See Trim - Package Tray (Remove and Install). | ||
| 27 | Connect the electrical harness to the antenna amplifier connector. | |
| 28 | Fasten the clip that attaches the package tray electrical harness to the LH C-pillar. | |
| 29 | Connect the package tray speaker electrical harness to the tuner connectors, and then fasten the clip. | |
| 30 | Connect the package tray electrical harness to the RH body harness connector. | |
| 31 | Fasten the clips that attach the package tray electrical harness to the body in the upper C-pillar area. | |
| 32 | Install the LH and RH rear C-pillar trim. See Trim - C-Pillar - Rear - LH (Remove and Replace). | ||
| 33 | Install the RH upper C-pillar trim. See Trim - C-Pillar - Upper - LH (Remove and Replace). | ||
| 34 | Install the RH side rail trim. See Trim - Side Rail - LH (Remove and Replace). | ||
| 35 | Install the RH lower B-pillar trim. See Trim - B-Pillar - Lower - LH (Remove and Replace). | ||
| 36 | Install the RH upper B-pillar trim. See Trim - B-Pillar - Upper - LH (Remove and Replace). | ||
| 37 | Install the RH rear sill trim. See Trim - Sill Panel - Rear - LH (Remove and Replace) | ||
| 38 | Install the LH upper C-pillar trim. See Trim - C-Pillar - Upper - LH (Remove and Replace). | ||
| 39 | Install the LH side rail trim. See Trim - Side Rail - LH (Remove and Replace). | ||
| 40 | Install the LH B-pillar applique. See Applique - B-Pillar - LH (Remove and Replace). | ||
| 41 | Install the LH lower B-pillar trim. See Trim - B-Pillar - Lower - LH (Remove and Replace). | ||
| 42 | Install the LH upper B-pillar trim. See Trim - B-Pillar - Upper - LH (Remove and Replace). | ||
| 43 | Install the rear LH sill panel trim. See Trim - Sill Panel - Rear - LH (Remove and Replace). | ||
| 44 | Install the driver's knee airbag. See Airbag - Knee - Driver (Remove and Replace). | ||
| 45 | Install the center console assembly. See Center Console (Remove and Install). | ||
| 46 | Install the driver and front passenger seats. See Seat - Driver (Remove and Replace). | ||
| 47 | Install the RH footwell cover. See Cover - Footwell - Passenger (LHD) (Remove and Replace). | ||
| 48 | Install the RH lower A-pillar trim. See Trim - A-Pillar - Lower - LH (Remove and Replace). | ||
| 49 | Install the RH instrument panel end cap. See End Cap - Instrument Panel - LH (Remove and Replace) | ||
| 50 | Install the LH footwell duct. See Duct - Footwell - LH (Remove and Replace). | ||
| 51 | Install the LH footwell cover. See Cover - Footwell - Driver (Remove and Replace). | ||
| 52 | Install the LH lower A-pillar trim. See Trim - A-Pillar - Lower - LH (Remove and Replace). | ||
| 53 | Install the LH instrument panel end cap. See End Cap - Instrument Panel - LH (Remove and Replace). | ||
| 54 | Install the rear underhood apron. See Underhood Apron - Rear (Remove and Replace). | ||
| 55 | Partially close all doors. | ||
| 56 | Remove the wheel chocks. | ||
| 57 | With an assistant, move the vehicle to the lift. Caution: The vehicle is safely pushed for only a very short distance and at a very slow speed.
| ||
| 58 | Raise the vehicle. | ||
| 59 | Move the rear subframe portion of the electrical harness in through the LH side trunk bulkhead, and then fasten the clips that attach the electrical harness to the body. Note: The LH body harness passes through the trunk near the rear section of the rear LH wheel liner area.
| |
| 60 | Connect the electrical harness to the rear subframe electrical harness connector and the LH electric parking brake connector. | |
| 61 | Connect the electrical harness to the rear Bluetooth passive entry antenna connector. | |
| 62 | Install the clips that attach the LH body harness to the body in the rear fascia and rear subframe areas. | |
| 63 | Install the rear fascia assembly. See Fascia - Rear (Remove and Install). | ||
| 64 | Lower the vehicle. | ||
| 65 | Install the LH and RH trunk side trims. See Trim - Side - Trunk - LH (Remove and Replace). | ||
| 66 | Install the trunk carpet into the trunk, and then fasten the clips that attach the trunk carpet to the body. | |
| 67 | Fasten the trunk carpet clips to the body studs under the 2nd row seat cushion. | |
| 68 | Install the 2nd row RH seat back assembly. See Seat Back - 2nd Row - RH (Remove and Install). | ||
| 69 | Install the 2nd row LH seat back assembly. See Seat Back - 2nd Row - LH (Remove and Install). | ||
| 70 | Install the sill rear trunk trim. See Trim - Sill - Trunk (Remove and Replace). | ||
| 71 | Connect 12V power. See 12V Power (Disconnect and Connect). |