Fascia - Rear (Remove and Install)
Correction code 1001300110013001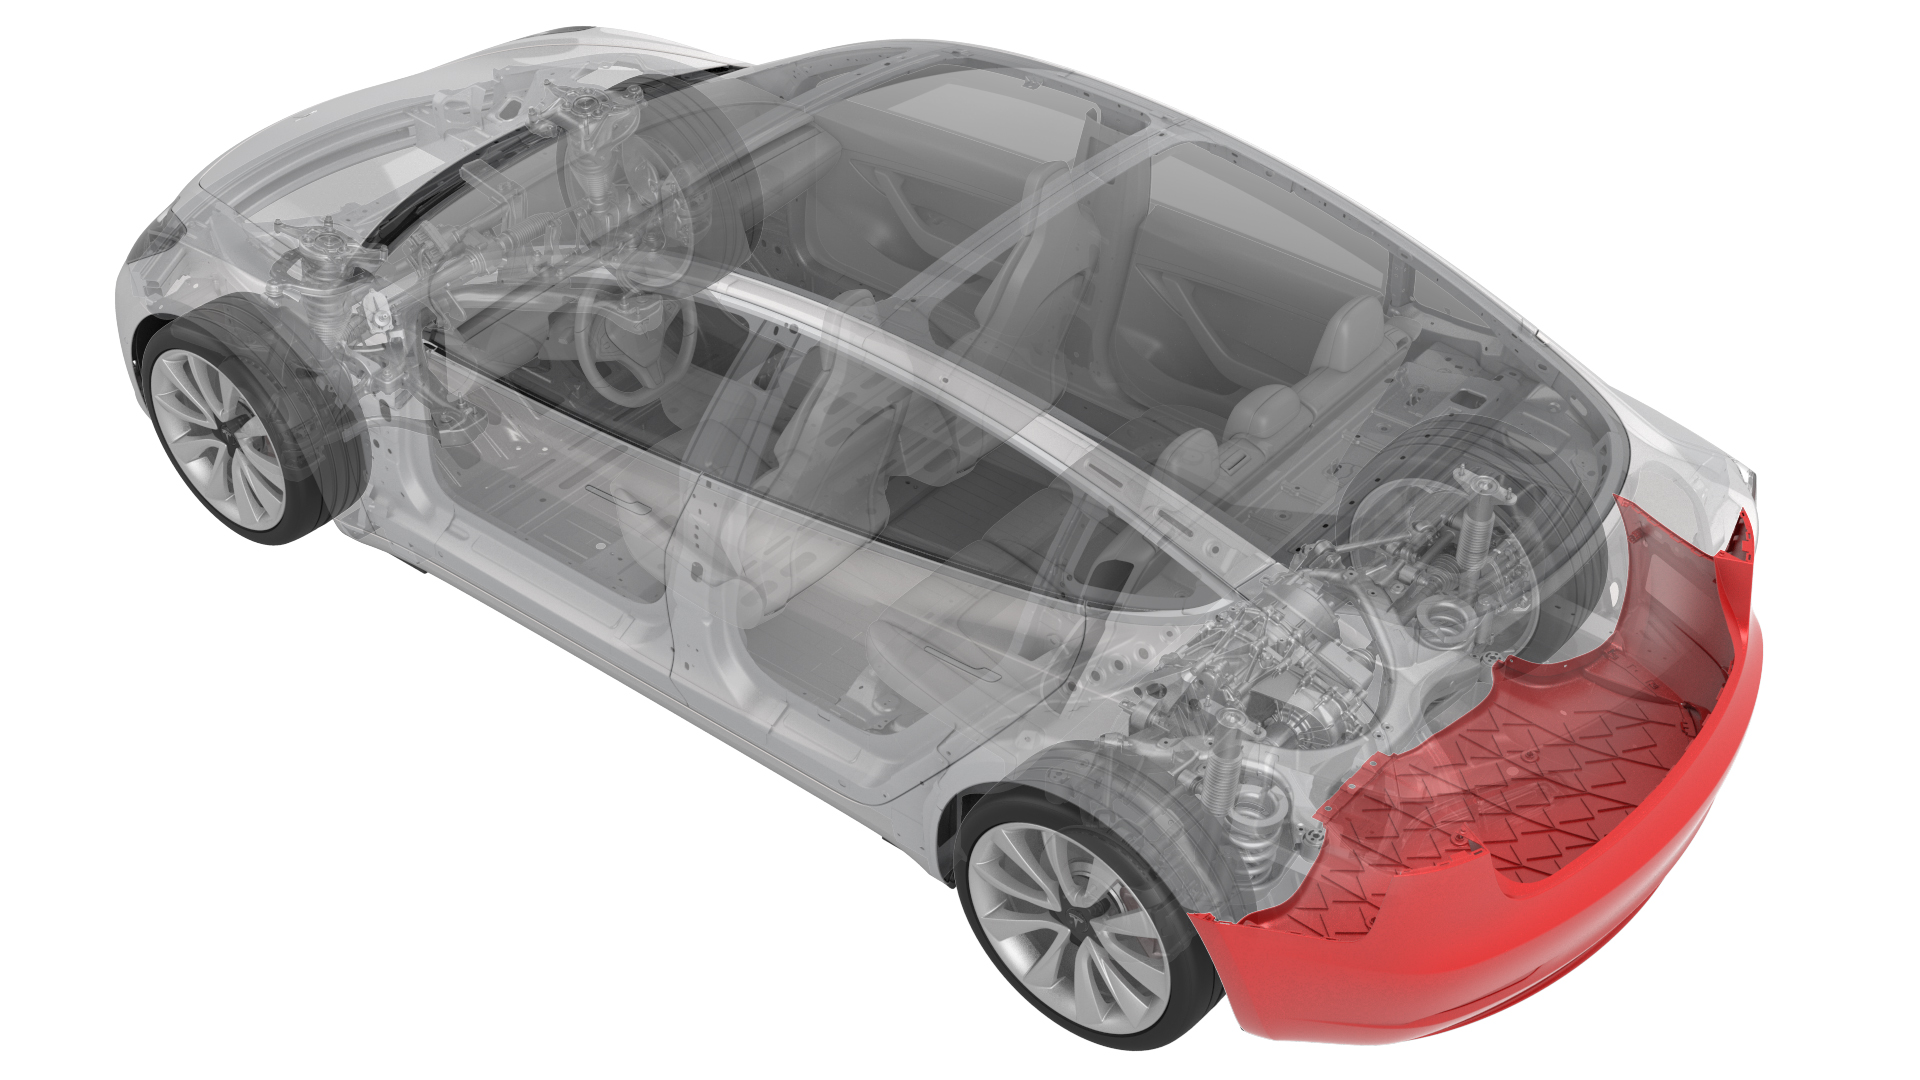
Remove
-
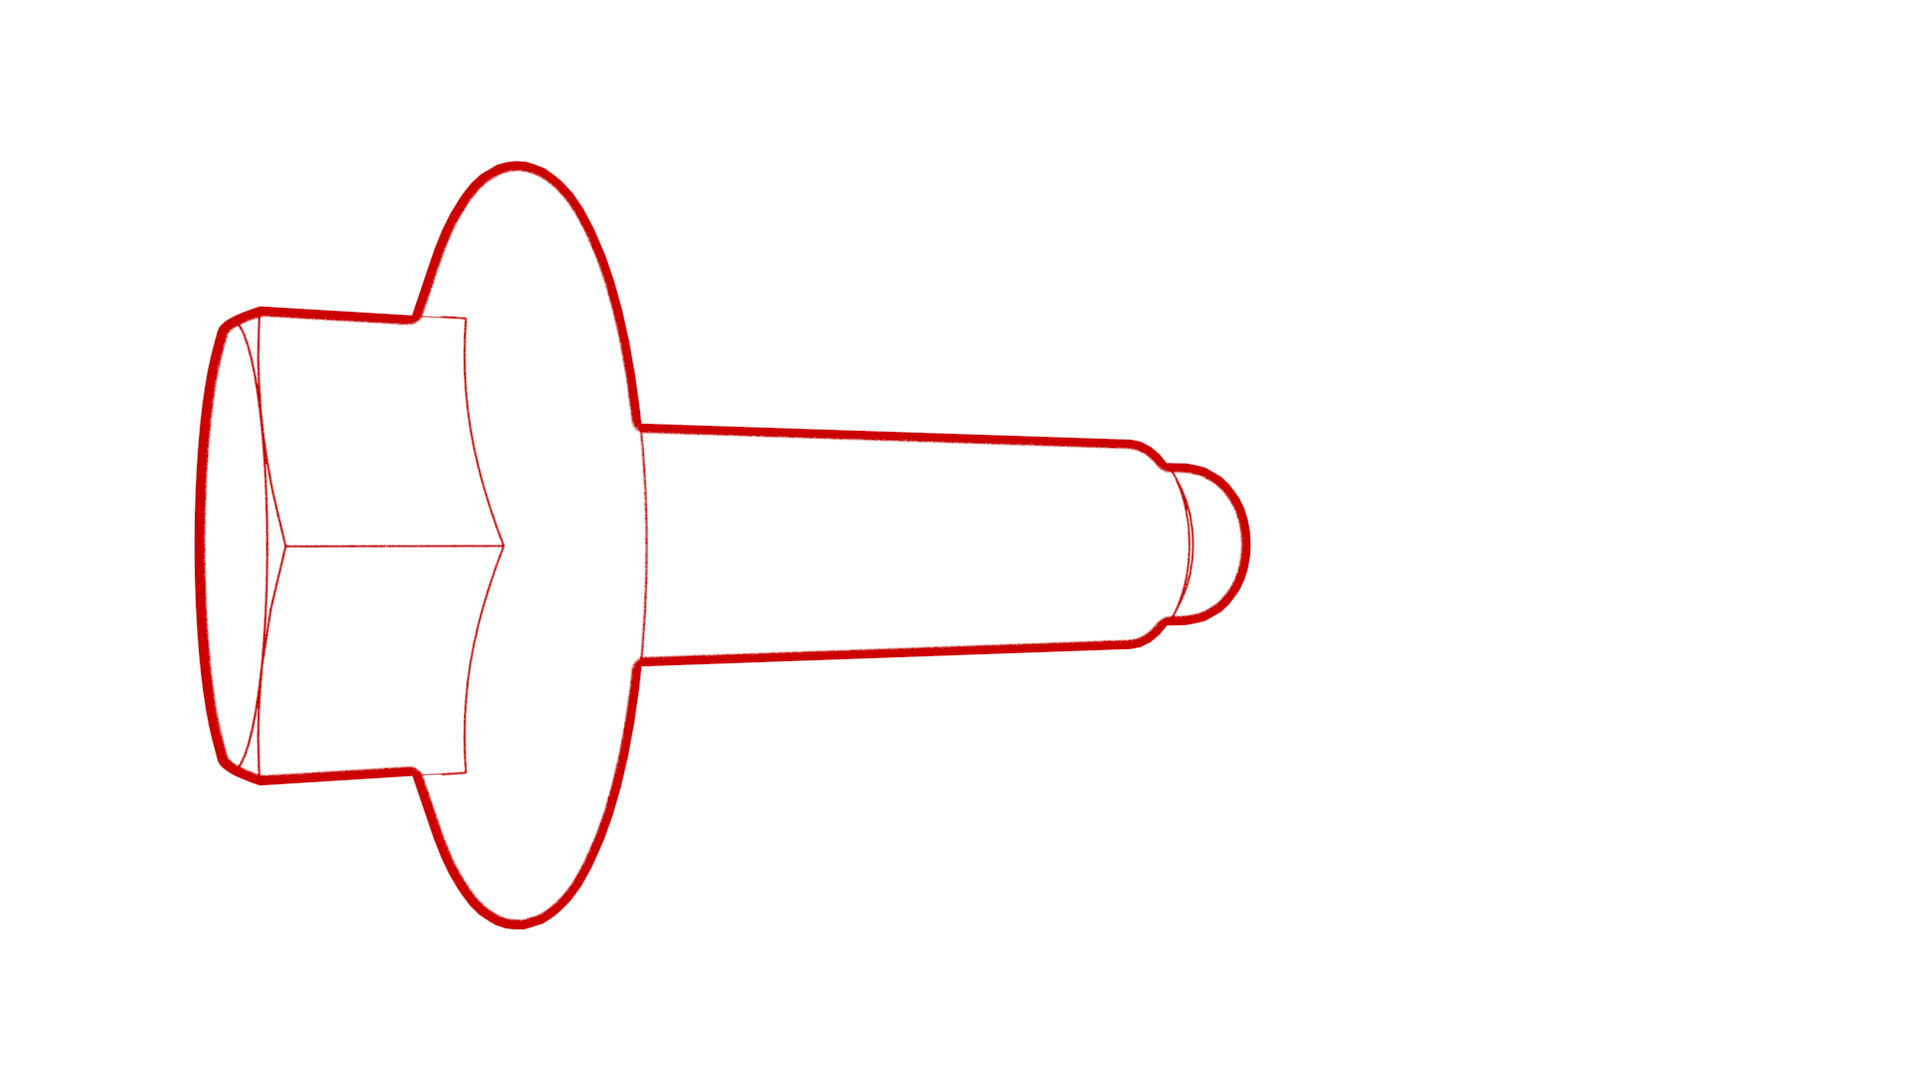
On each side of the vehicle, remove the bolt that attaches the corner of the rear fascia to the body.
 Torque 4 Nm
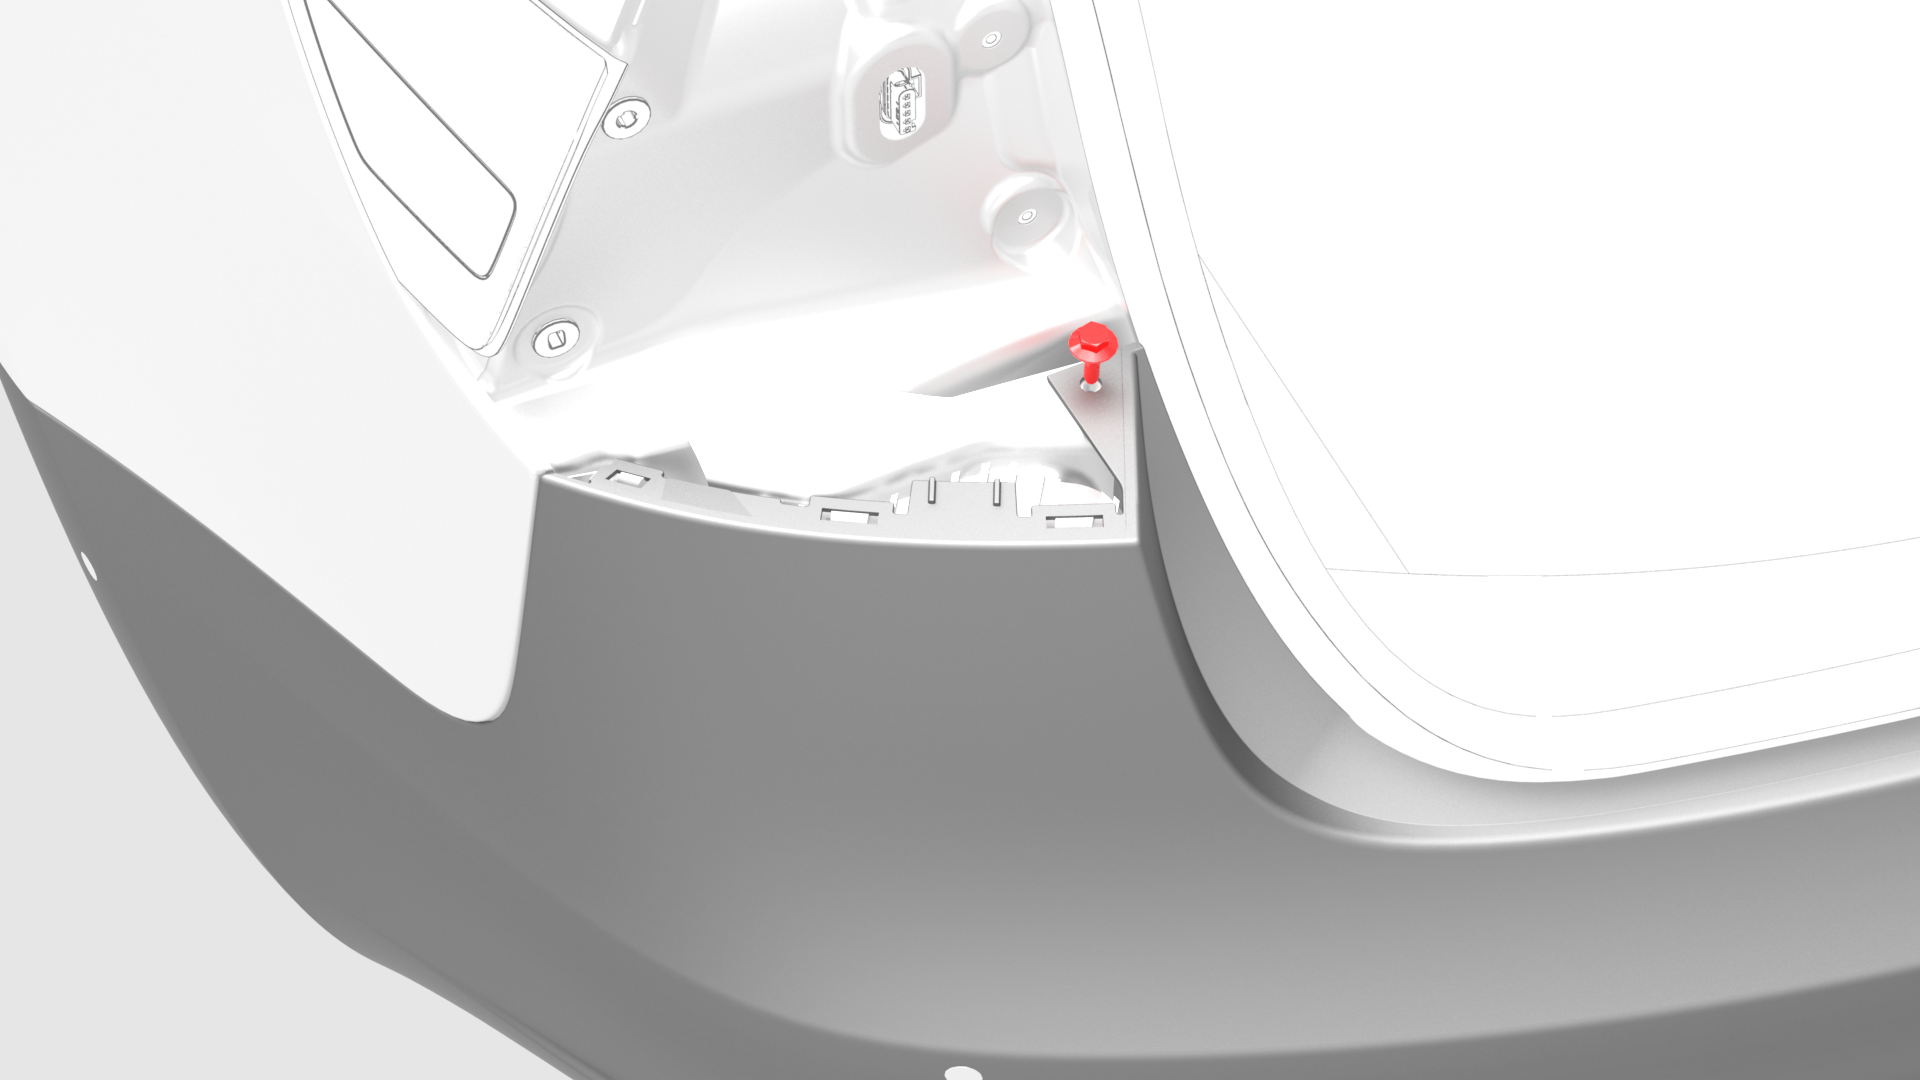
-
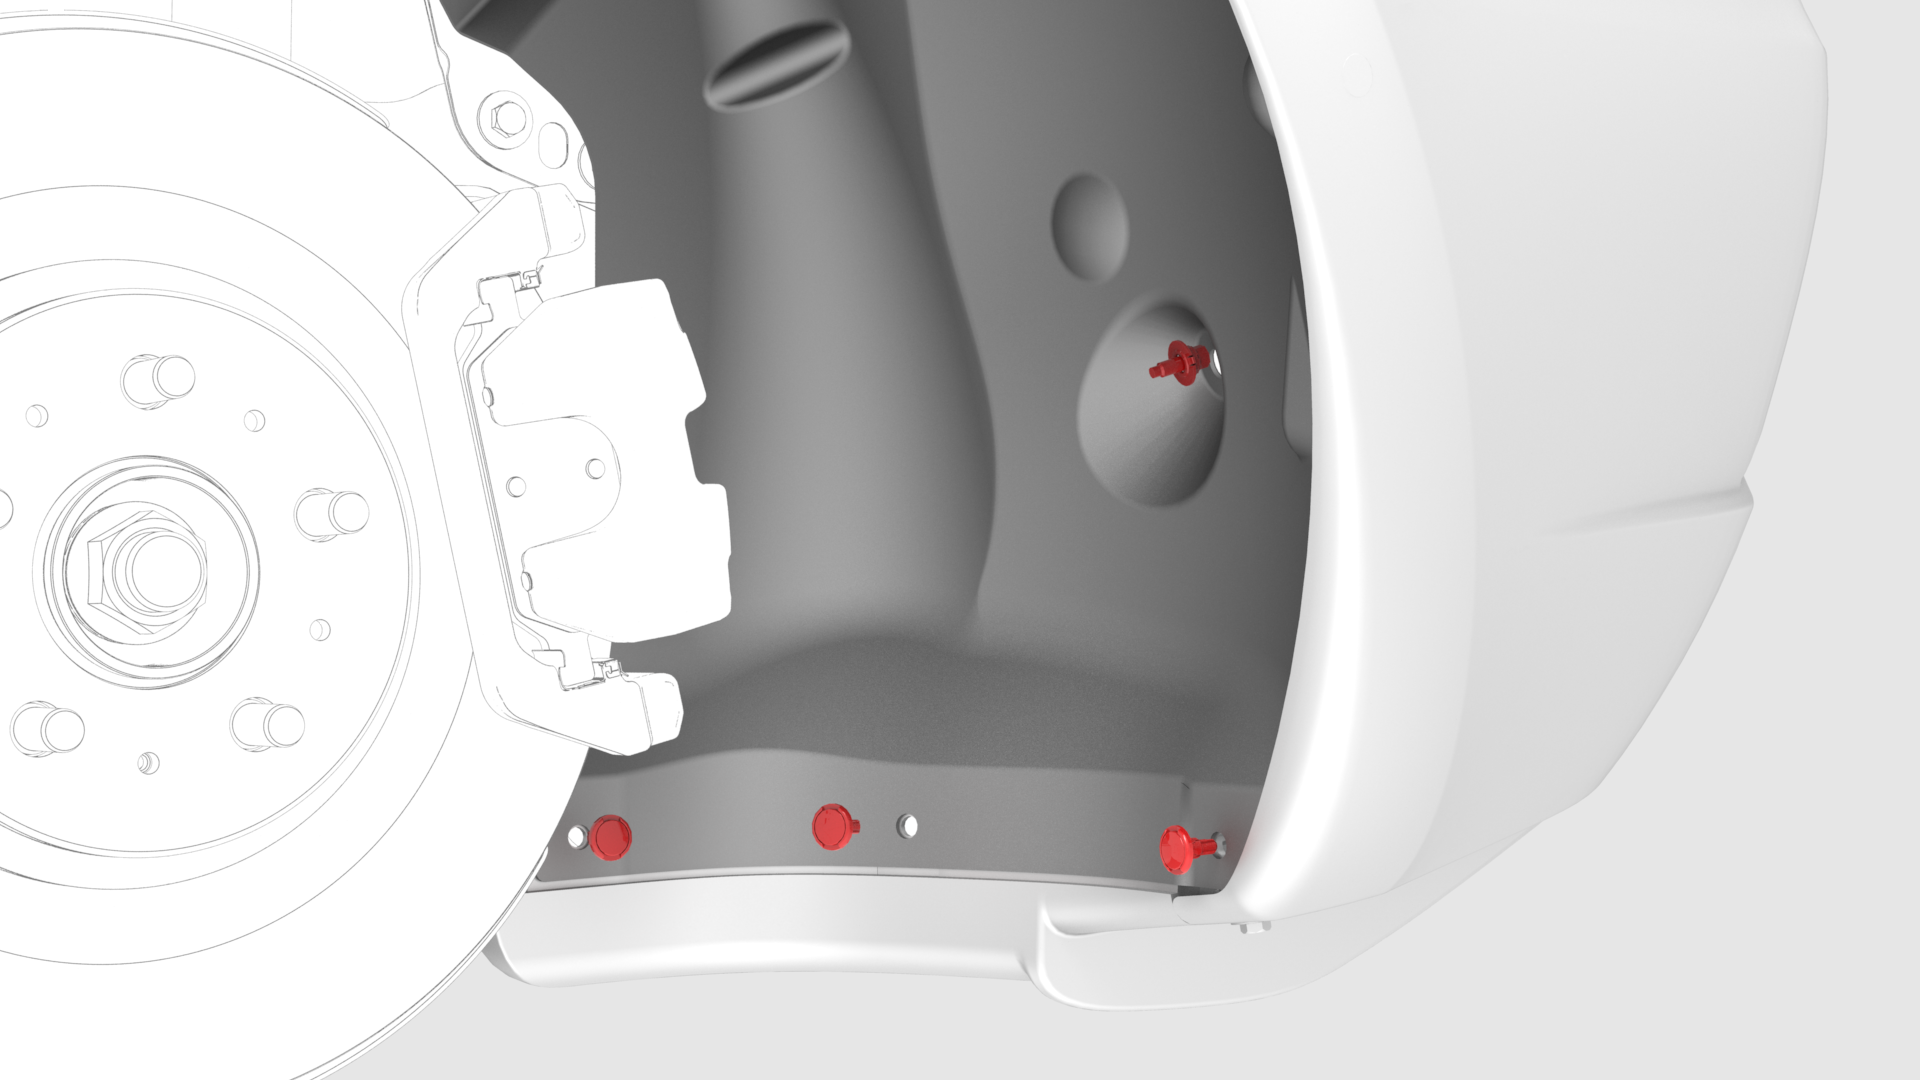
Release the clips and the push nut that attach the rear portion of the LH rear wheel liner to the body.
-
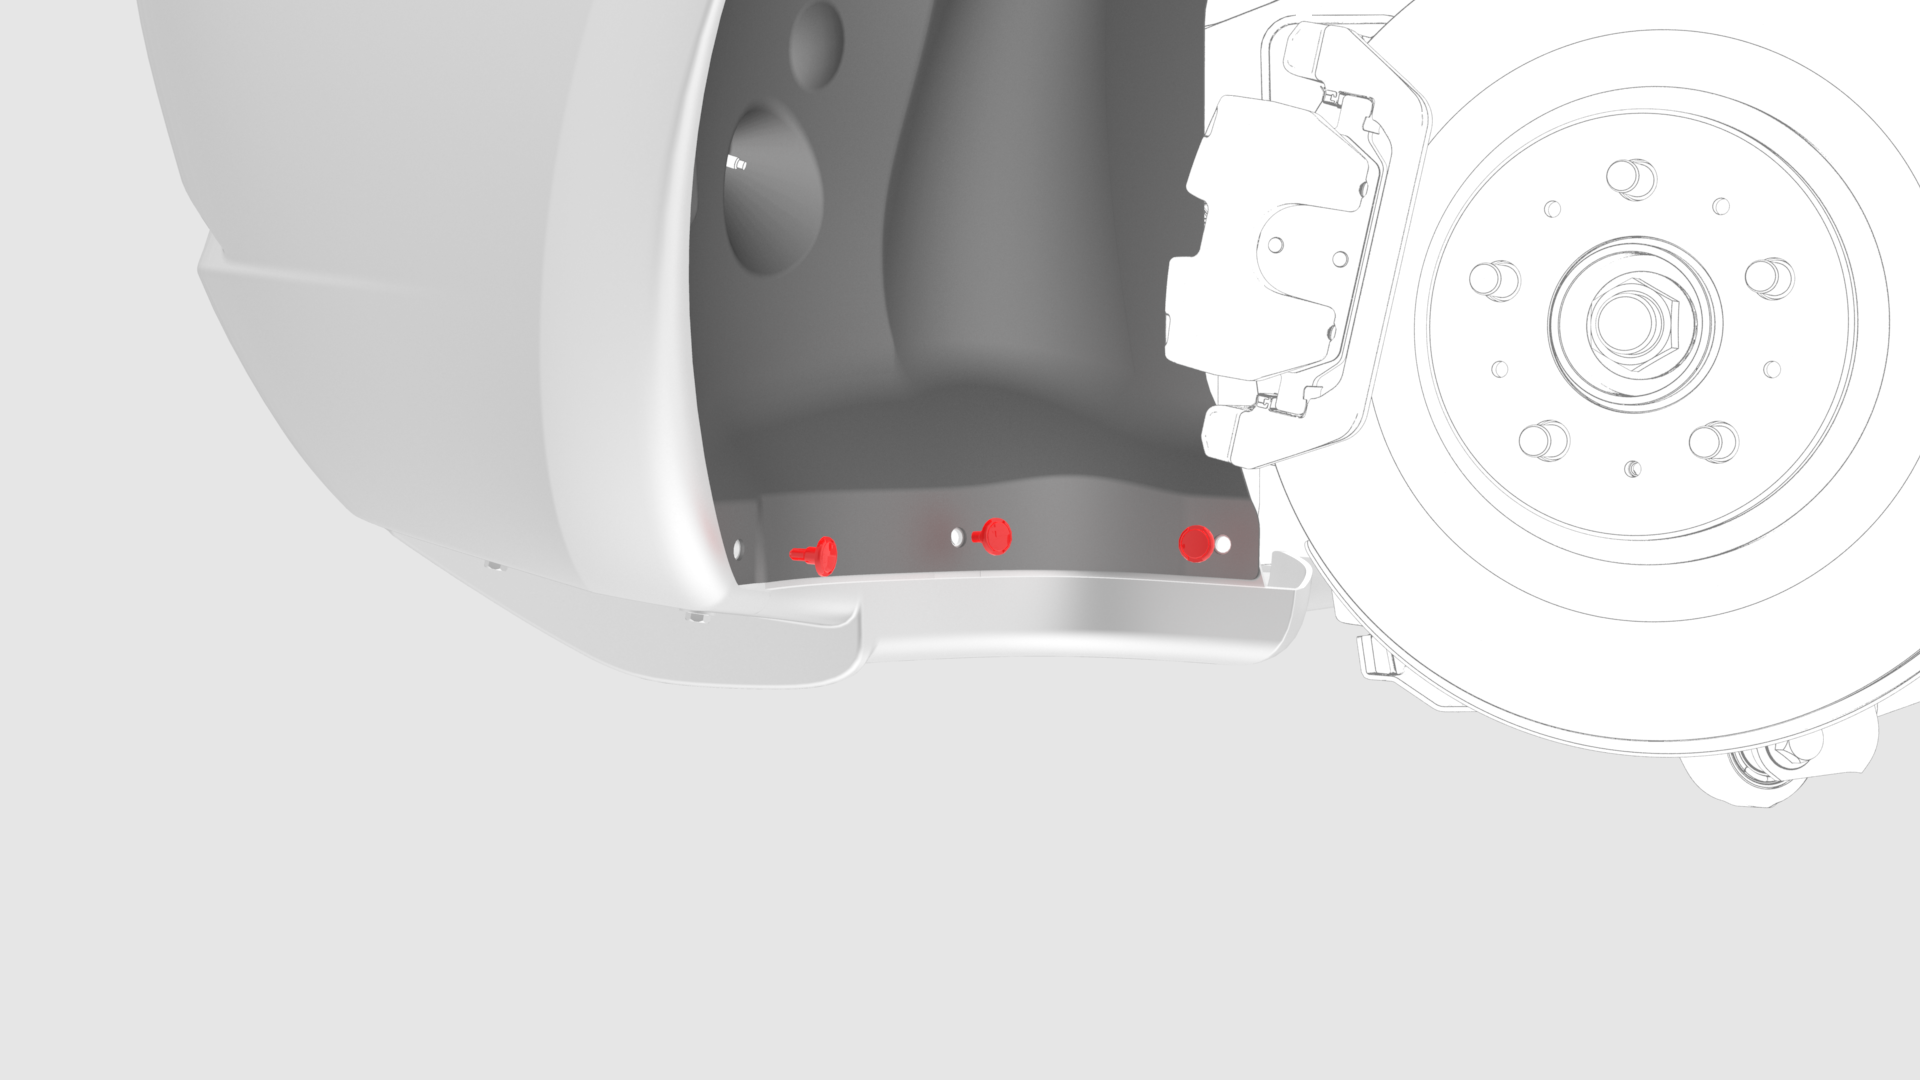
On each side of the vehicle, remove the bolt that attaches the fascia to the rear quarter panel.
 Torque 2 Nm
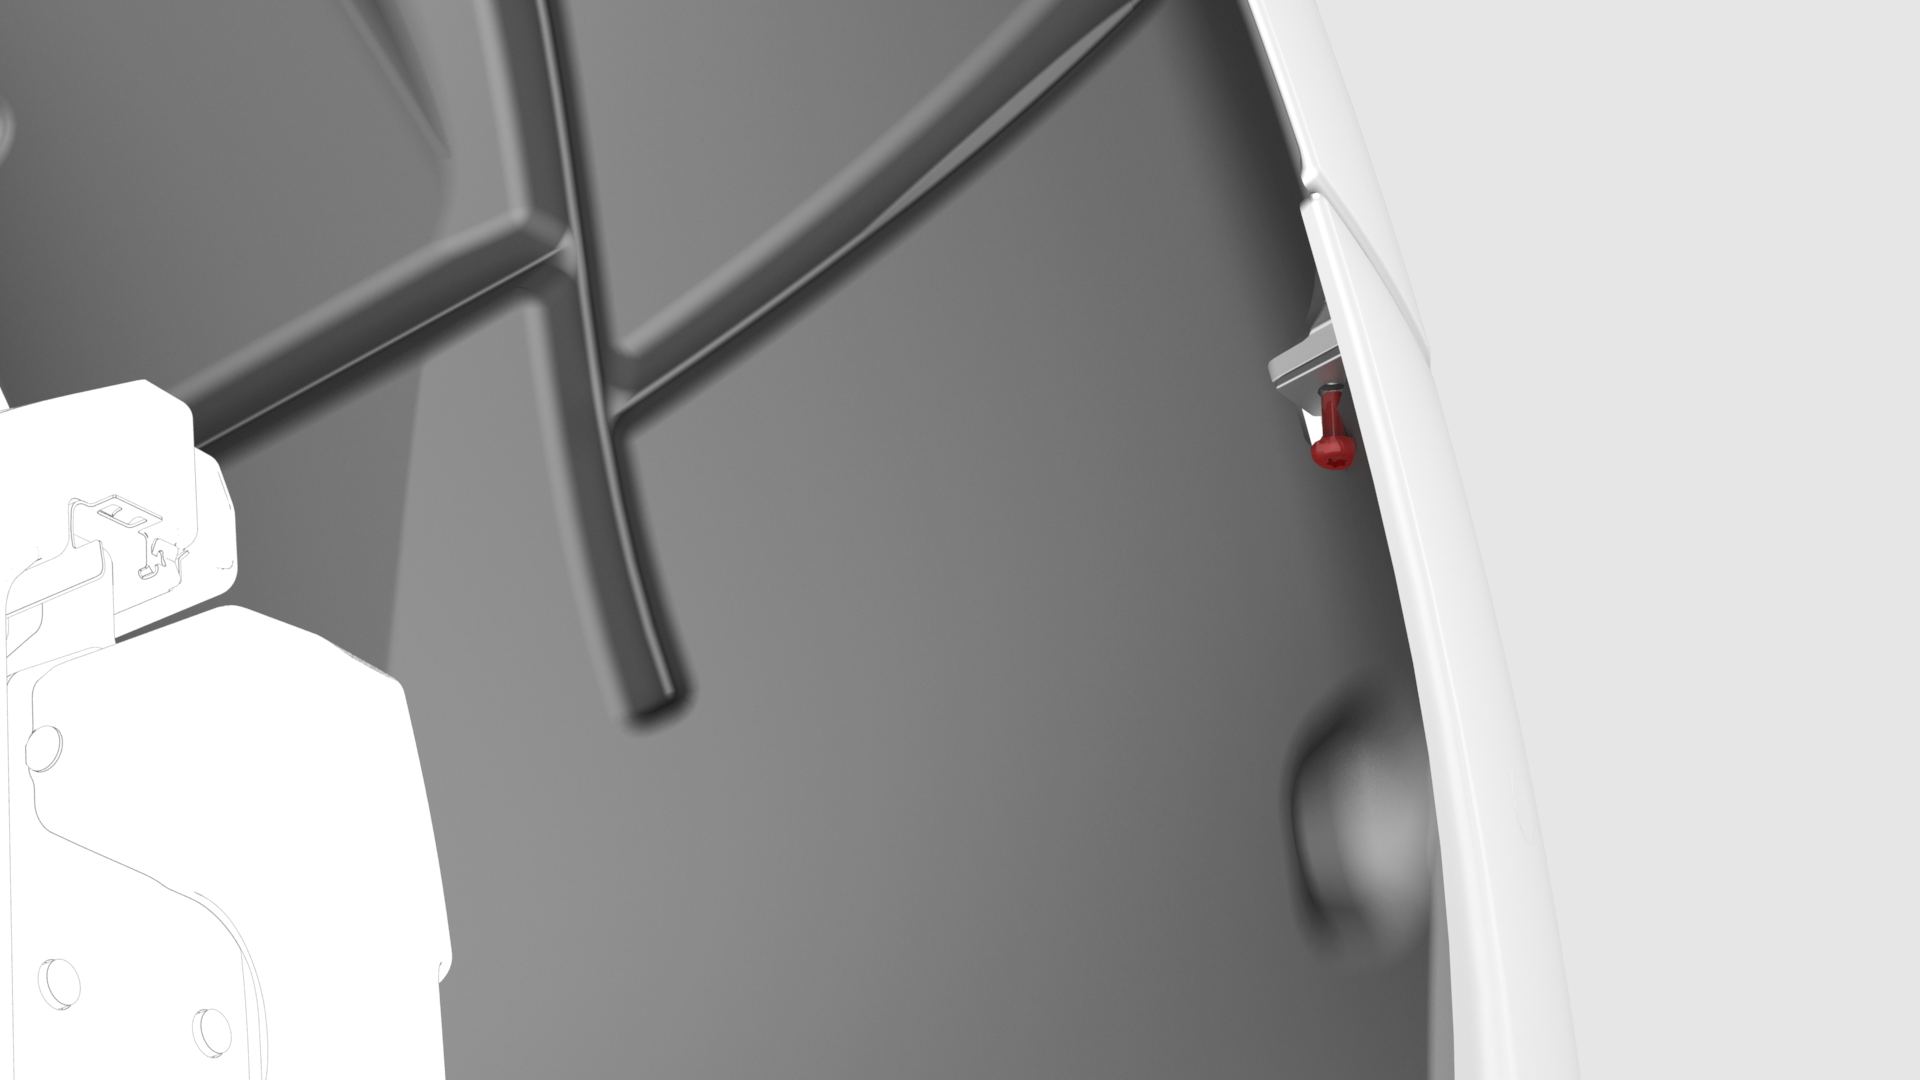
-
Release the clips that attach the rear portion of the RH rear wheel liner to the body.
-
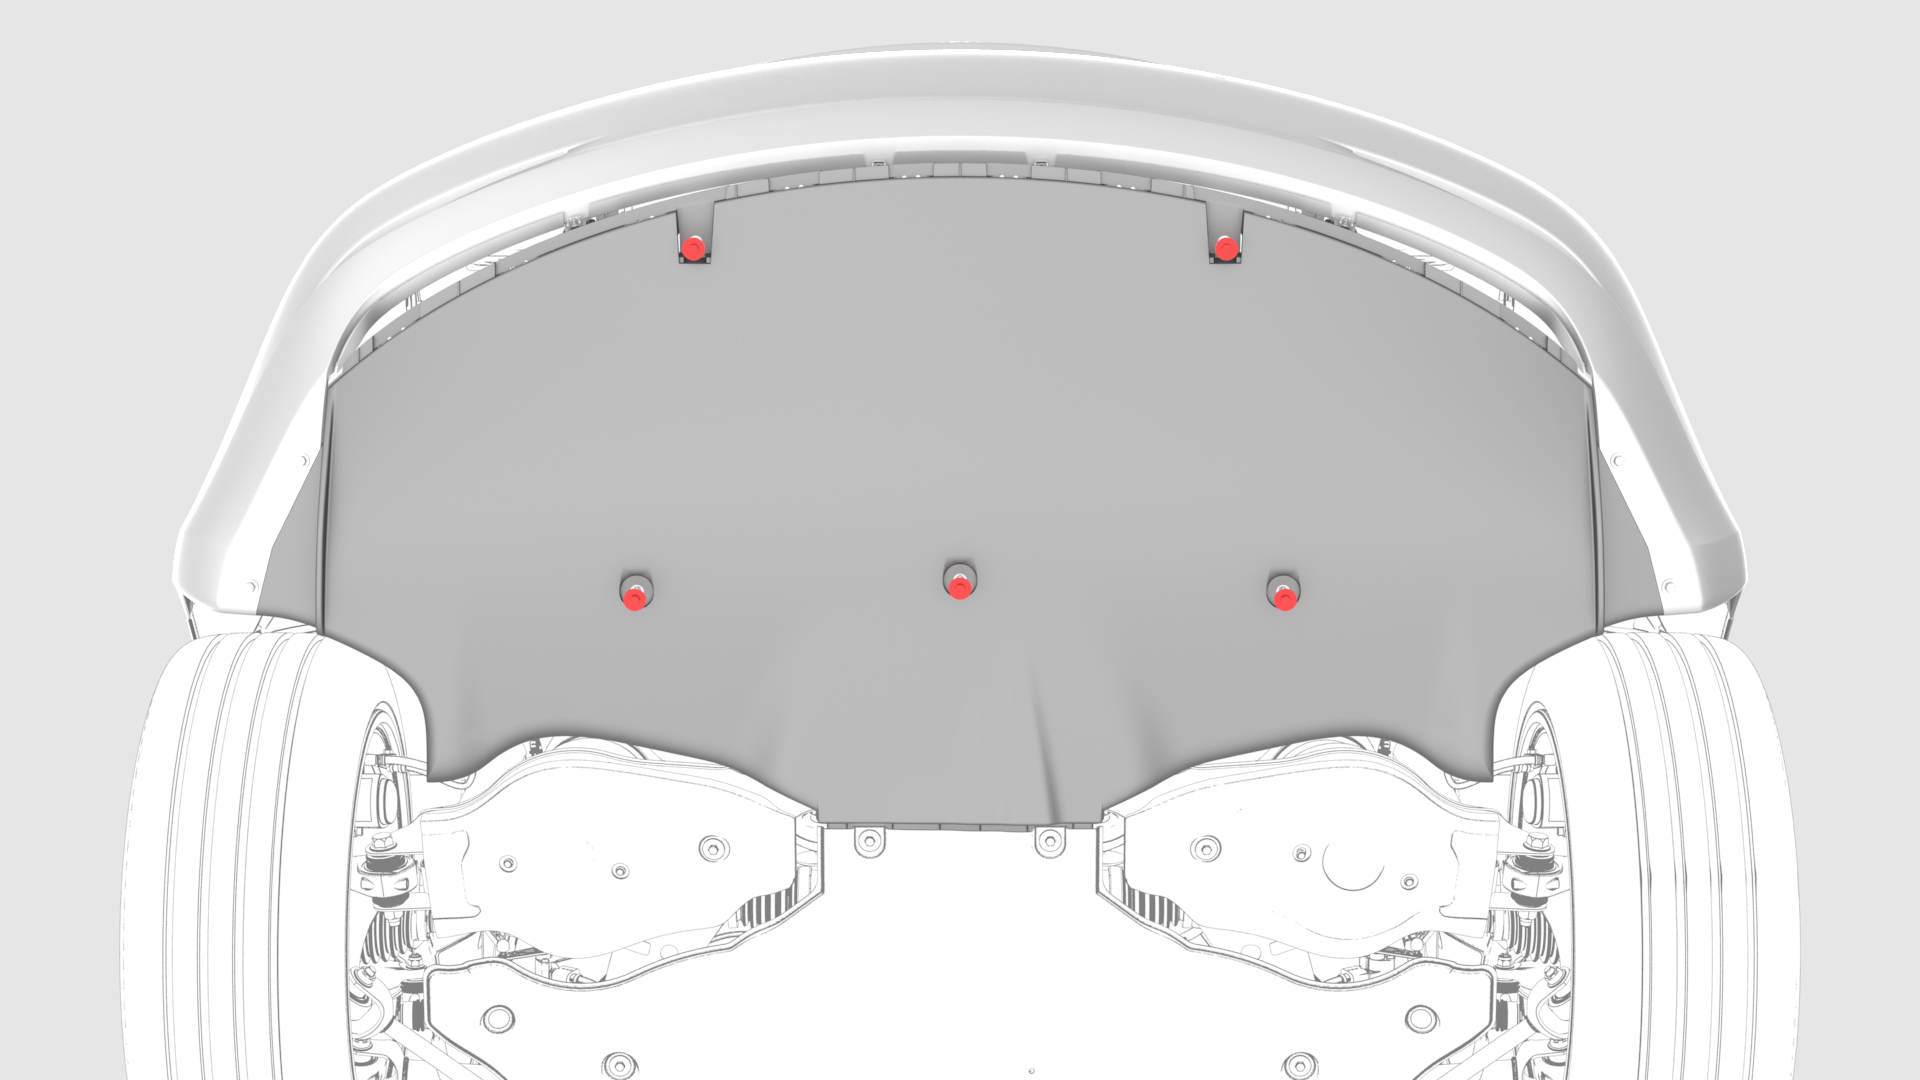
Remove the bolts that attach the rear portion of the mid aero shield panel.
 Torque 5 Nm
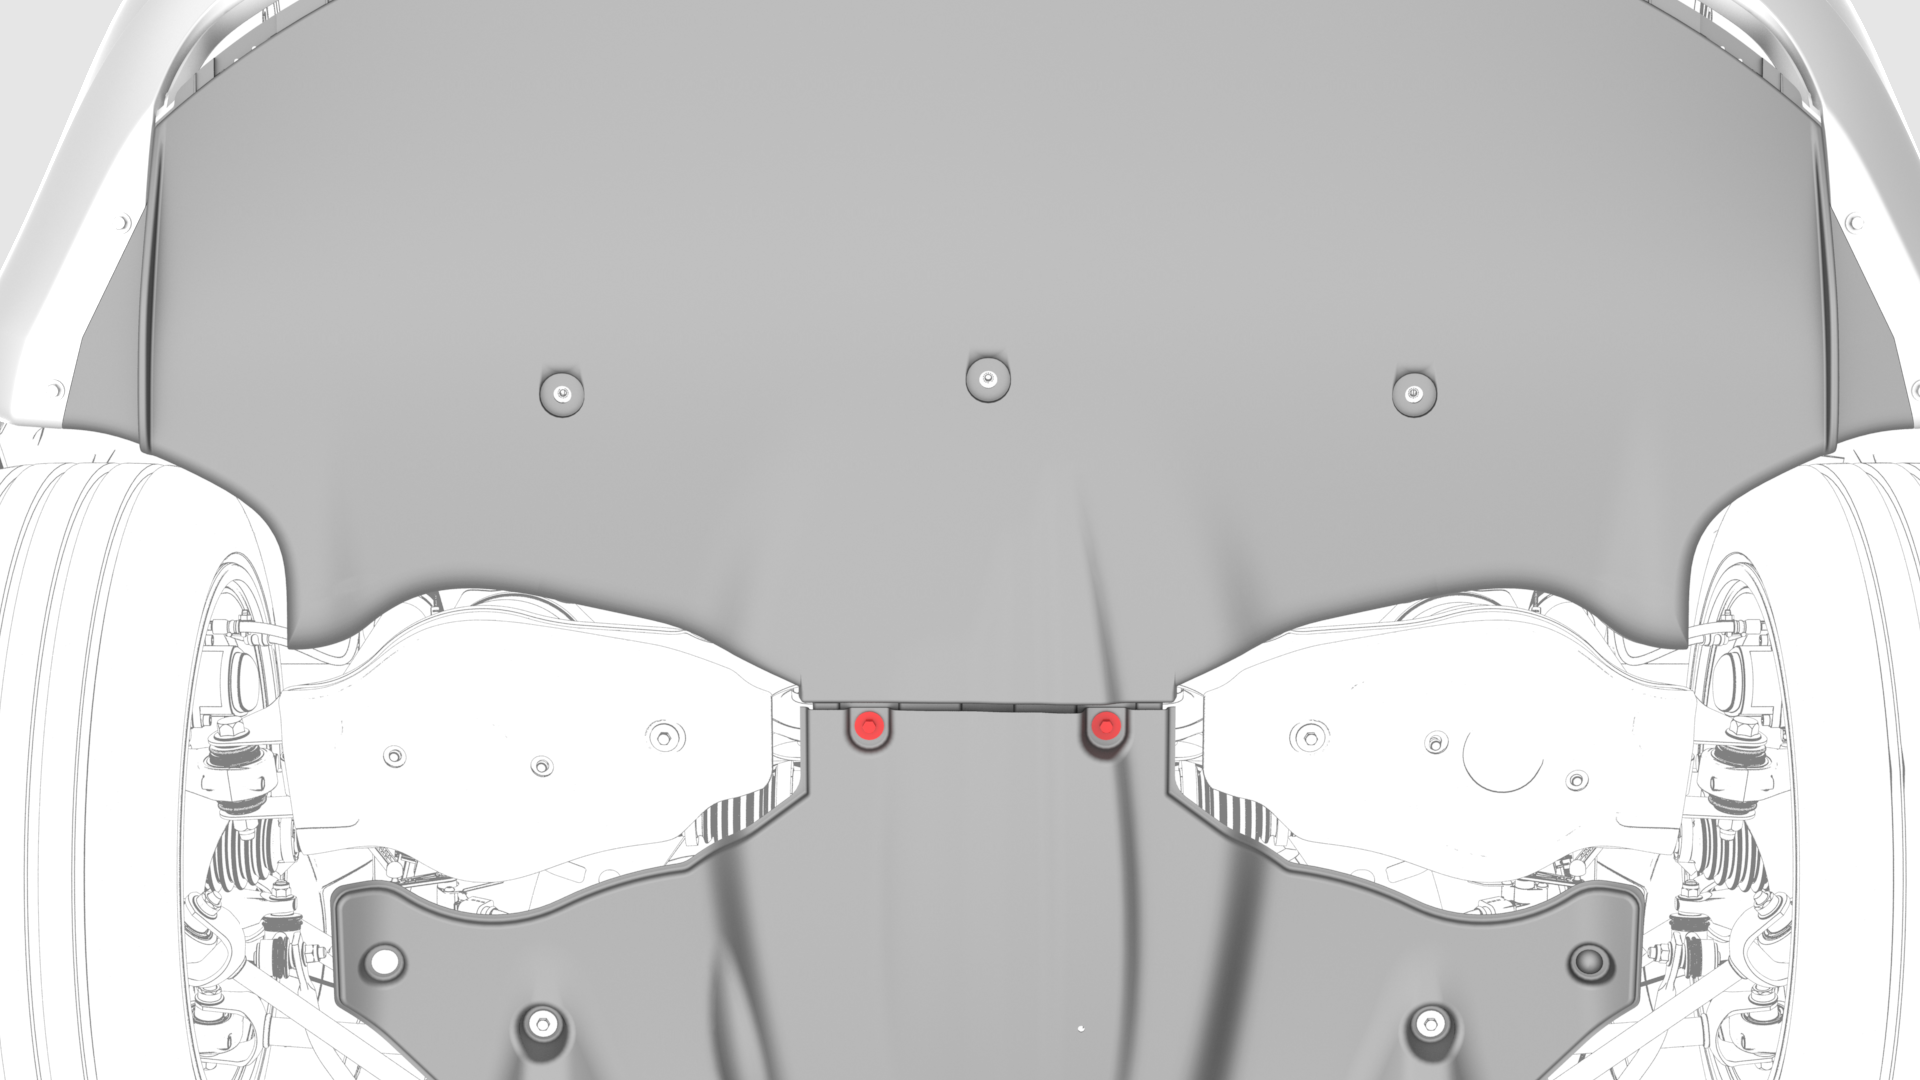
-
Remove the bolts that attach the rear diffuser to the body. Torque 4 Nm
-
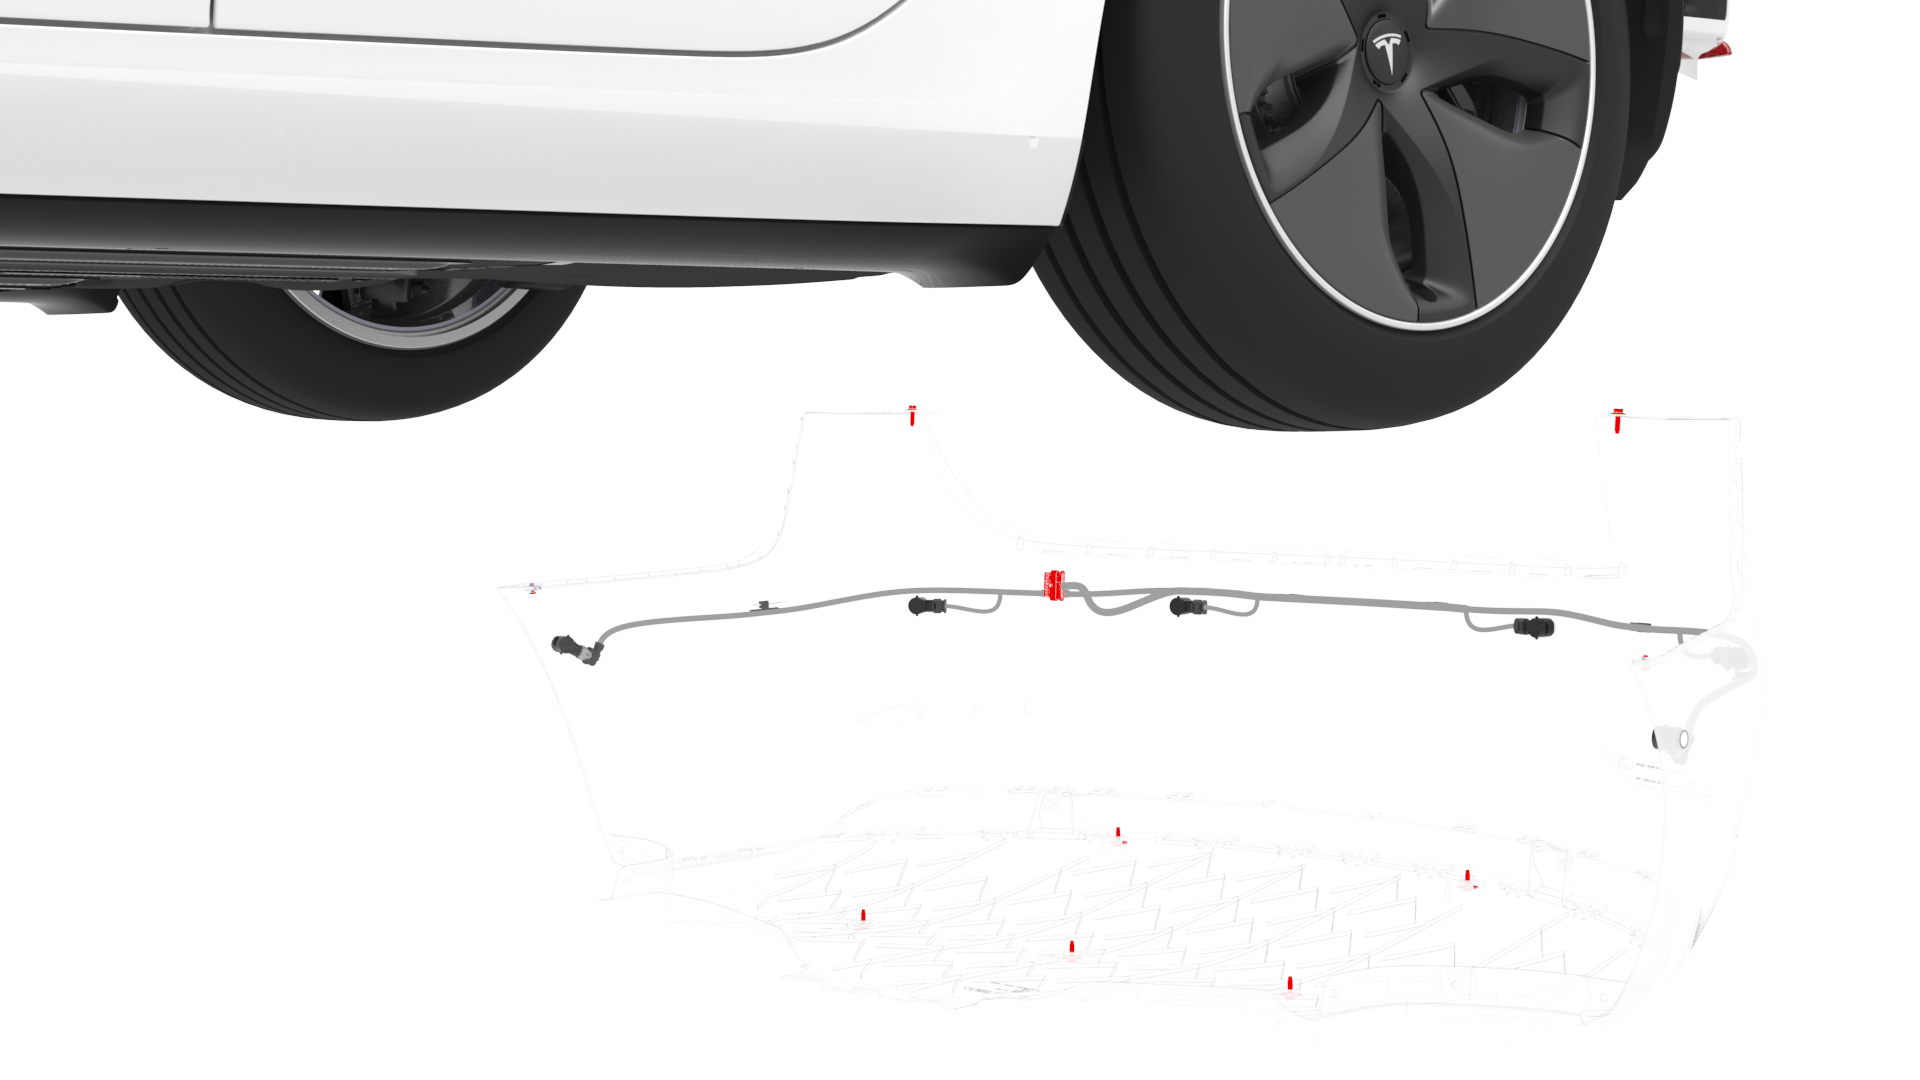
Disconnect the rear fascia electrical harness.
-
With an assistant, remove the rear fascia from the vehicle.
 Caution:Carefully remove the rear fascia from the body so that the corner fastener clips do not damage the rear quarter panel.
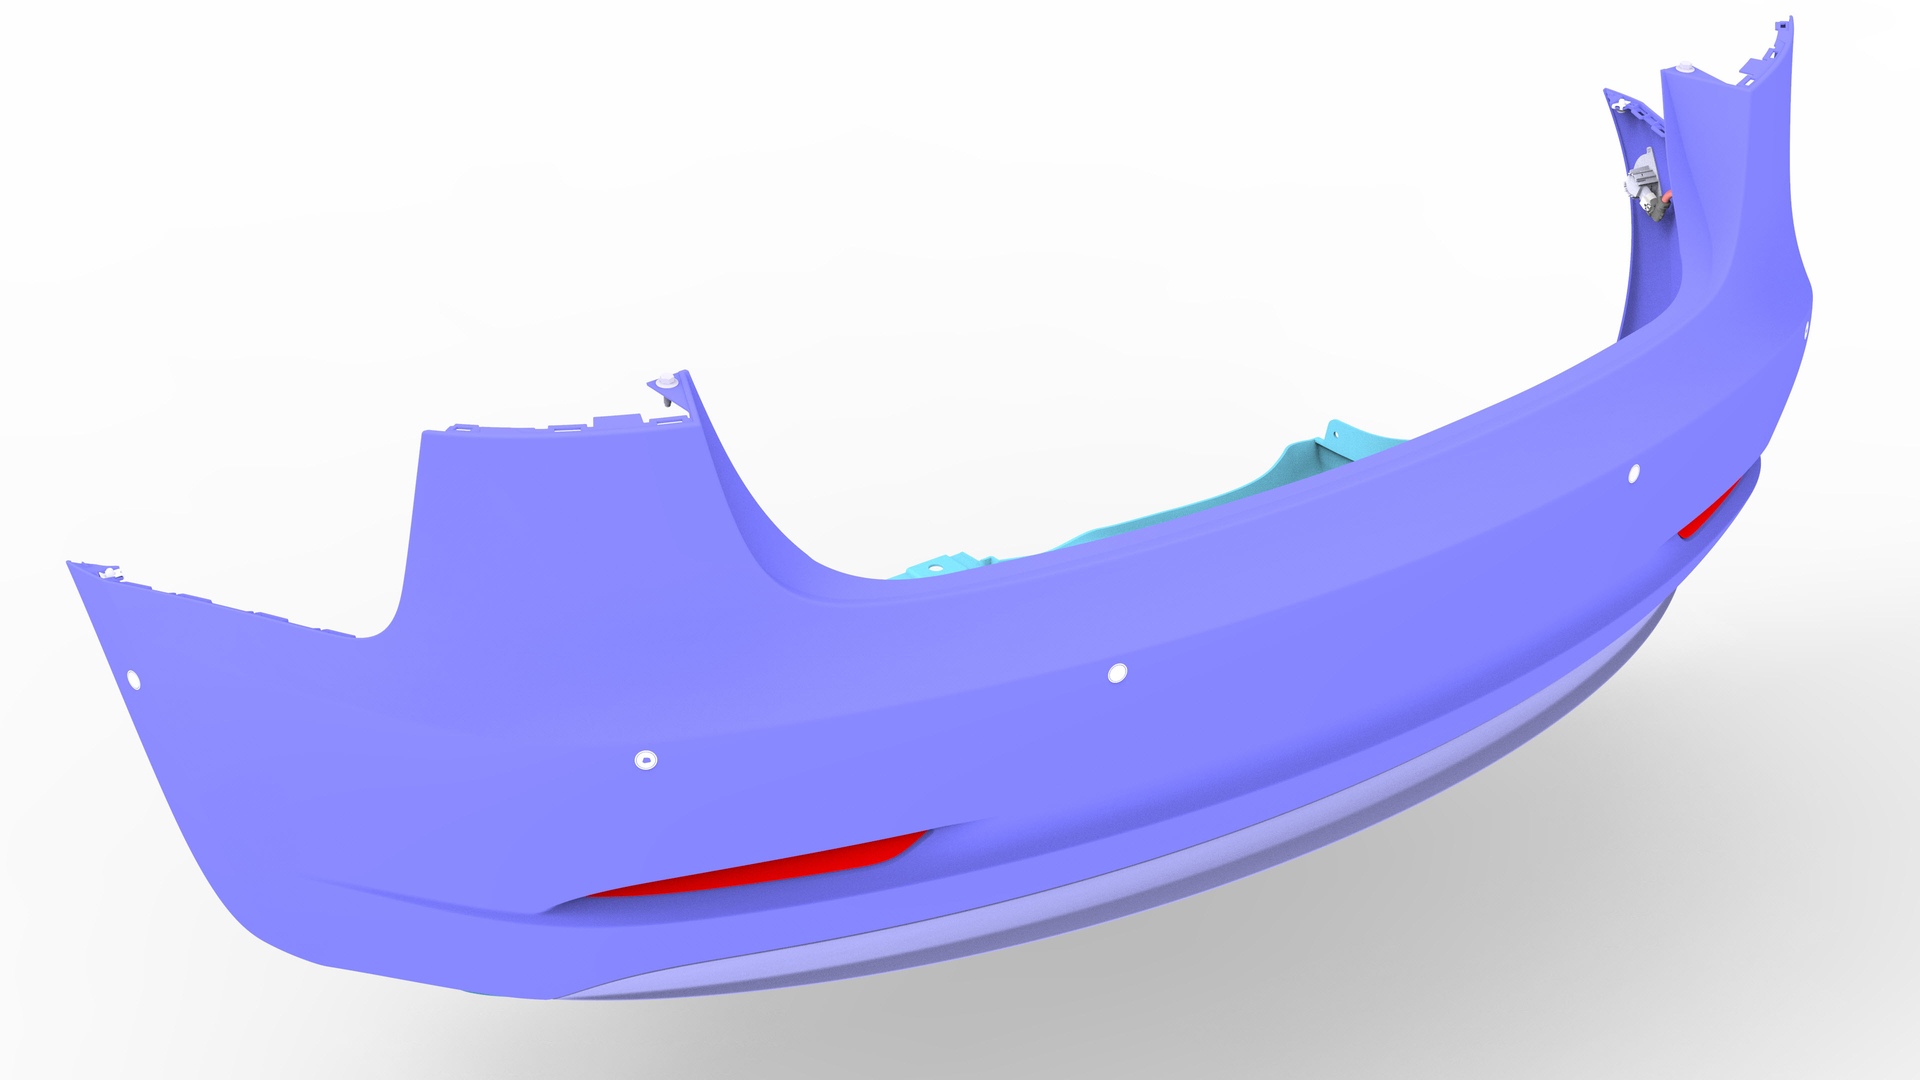
| 1 | Remove the 2nd row lower seat cushion. See Seat Cushion - Lower - 2nd Row (Remove and Replace). | ||
| 2 | Remove the trunk sill trim. See Trim - Sill - Trunk (Remove and Replace). | ||
| 3 | Remove the LH and RH taillights. See Taillight - LH (Remove and Replace). | ||
| 4 | On each side of the vehicle, remove the bolt that attaches the corner of the rear fascia to the body. Torque 4 Nm | |
| 5 | Raise the vehicle partially. | ||
| 6 | Release the clips and the push nut that attach the rear portion of the LH rear wheel liner to the body. | ||
| 7 | On each side of the vehicle, remove the bolt that attaches the fascia to the rear quarter panel. Torque 2 Nm | ||
| 8 | Release the clips that attach the rear portion of the RH rear wheel liner to the body. | ||
| 9 | Raise the vehicle fully. | ||
| 10 | Remove the bolts that attach the rear portion of the mid aero shield panel. Torque 5 Nm | ||
| 11 | Remove the bolts that attach the rear diffuser to the body. Torque 4 Nm | ||
| 12 | Partially lower the vehicle. | ||
| 13 | Disconnect the rear fascia electrical harness. | |
| 14 | With an assistant, remove the rear fascia from the vehicle. Caution: Carefully remove the rear fascia from the body so that the corner fastener clips do not damage the rear quarter panel.
|
Install
Installation procedure is the reverse of removal.