Subframe Assembly - Front (RWD) (Remove and Replace)
Correction code 3001030230010302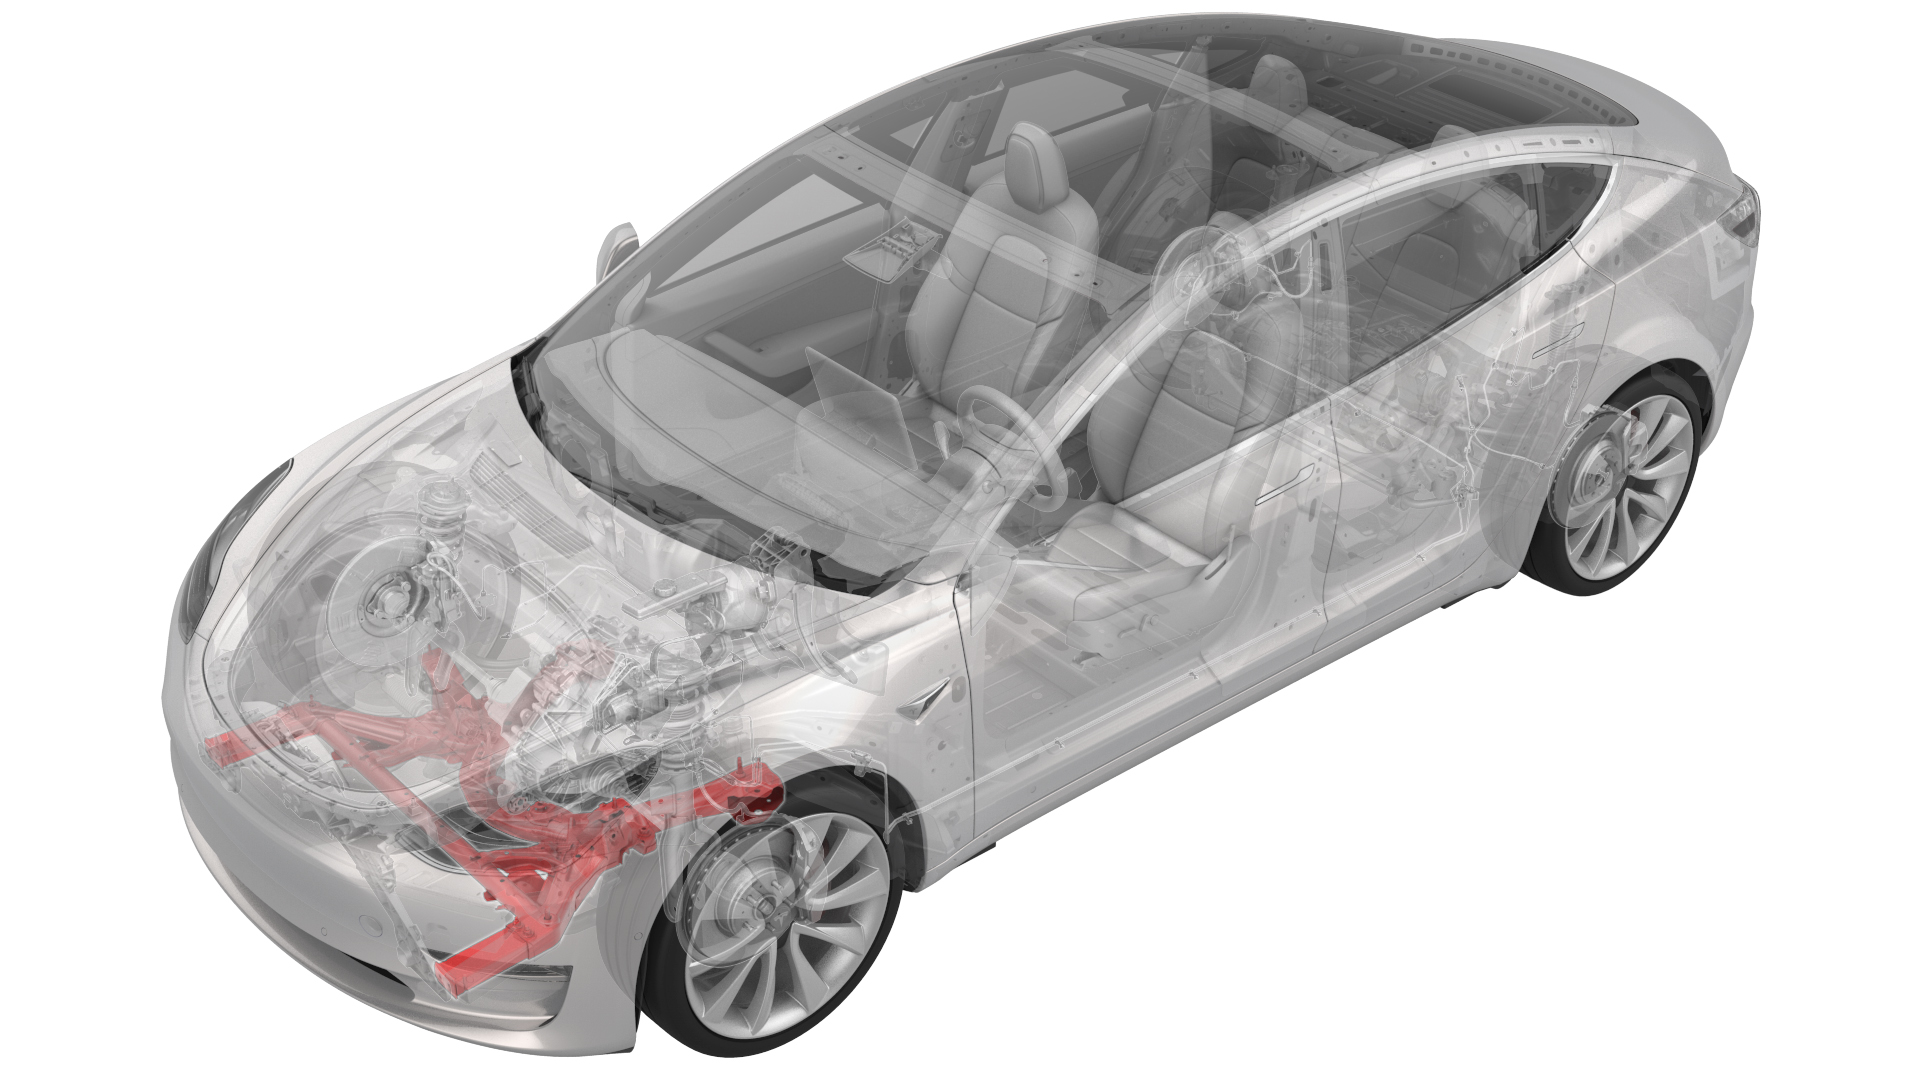

Caution:
Vehicles built before March 25th, 2019 have 1st generation front subframes. Vehicles built on March 25th, 2019 and after have 2nd generation front subframes. When a 1st generation subframe is replaced with a 2nd generation subframe, the 1st generation (discontinued) steering rack, if installed, must be replaced with a 2nd generation (currently available) steering rack. Refer to the Electronic Parts Catalog for the latest information.
Remove
-
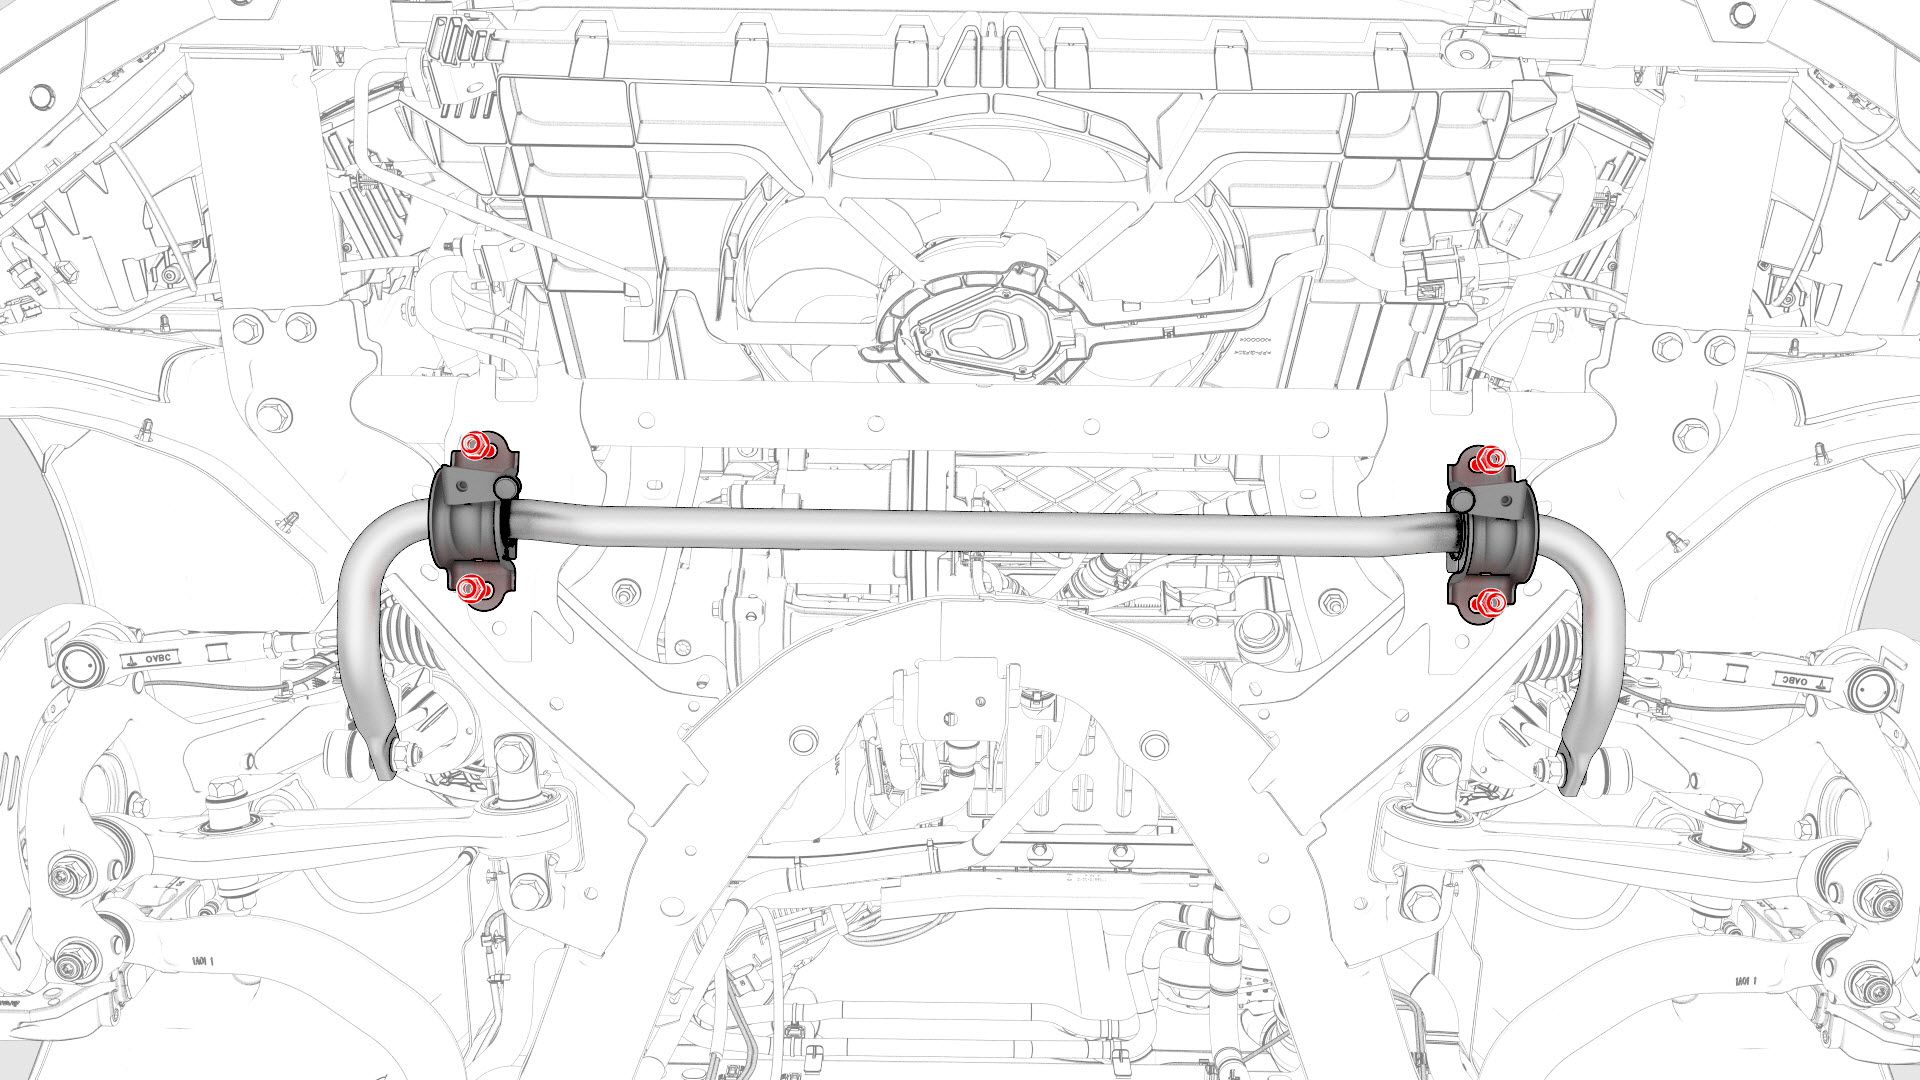
With an assistant, remove and discard the nuts that attach the front stabilizer bar to the front subframe, and then remove the stabilizer bar from the subframe.
-
Remove the bolts and nuts that attach the LH and RH crash can brackets to the front subframe, and remove the brackets from the subframe.
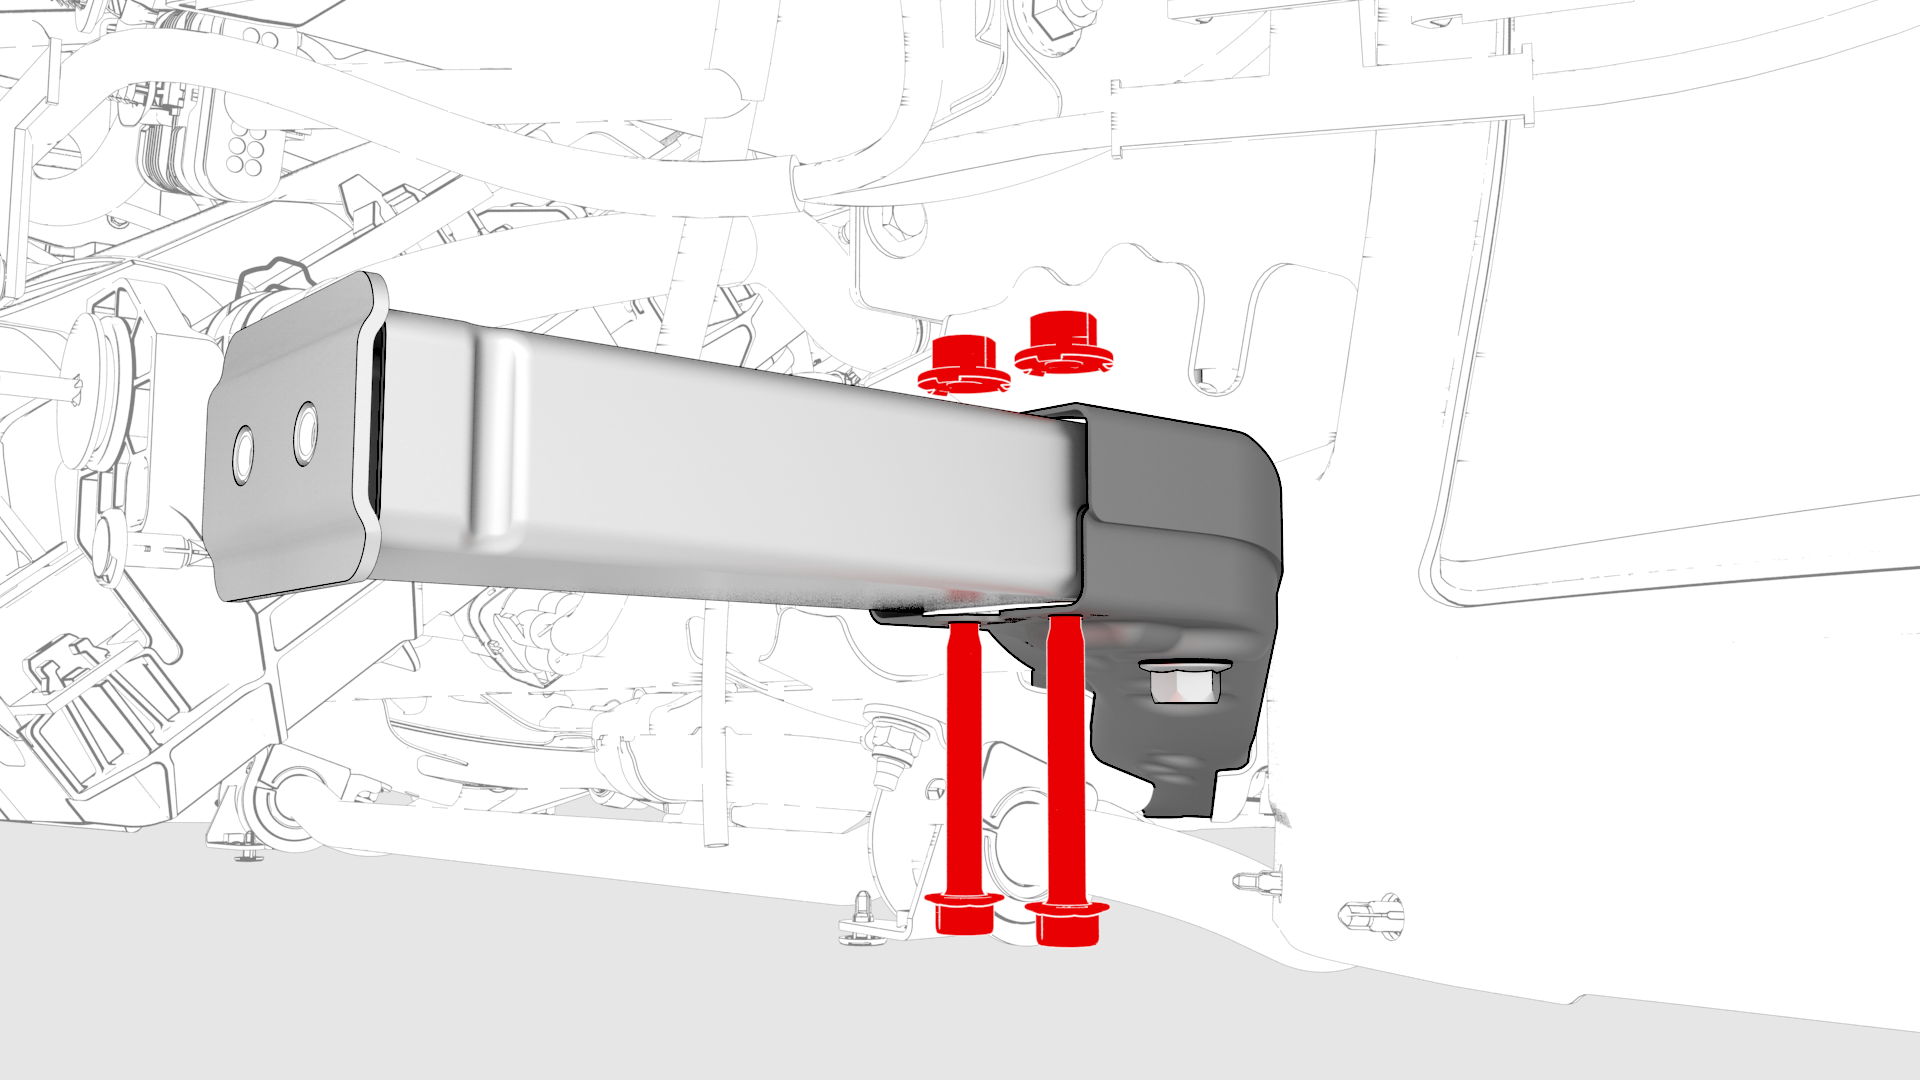 LH Shown, RH similar
 -
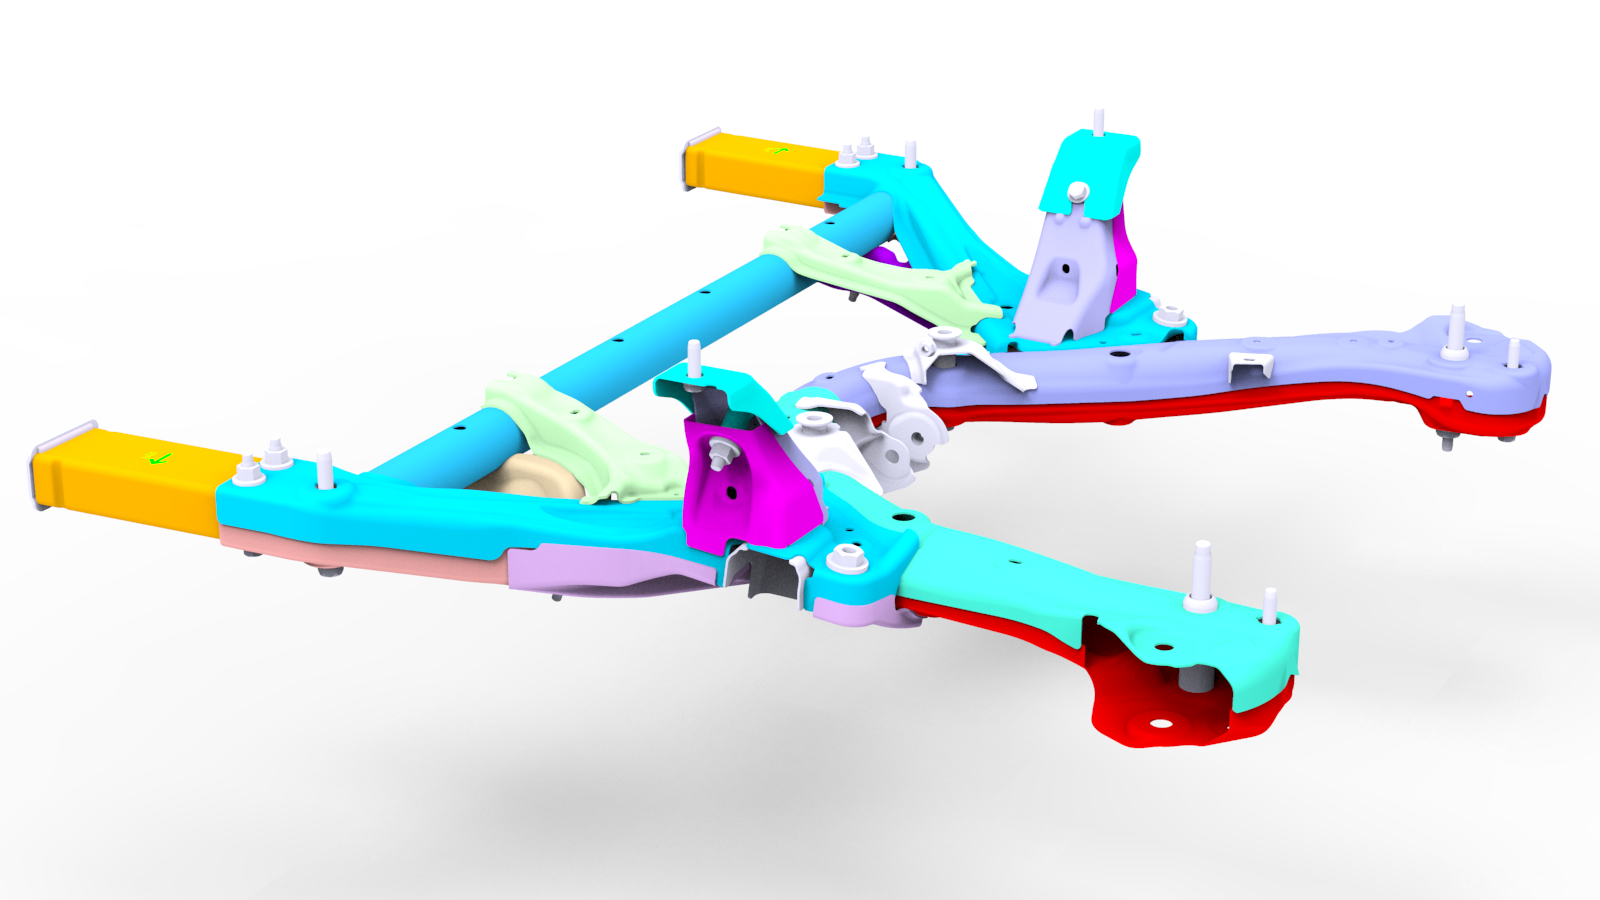
With an assistant, unlatch the front subframe from the subframe lifting tool, and the remove the front subframe from the subframe lifting tool.
| 1 | Remove the front subframe assembly. See Subframe Assembly - Front (RWD) (Remove and Install). | ||
| 2 | Remove the steering rack. See Steering Rack (RWD) (Remove and Replace). | ||
| 3 | With an assistant, remove and discard the nuts that attach the front stabilizer bar to the front subframe, and then remove the stabilizer bar from the subframe. | |
LH Shown, RH similar
| 4 | Remove the bolts and nuts that attach the LH and RH crash can brackets to the front subframe, and remove the brackets from the subframe. | |
| 5 | With an assistant, unlatch the front subframe from the subframe lifting tool, and the remove the front subframe from the subframe lifting tool. |
Install
-
Hand-tighten the bolts that attach the LH and RH crash can brackets to the front subframe.
Note: The tightening of the LH and RH crash can brackets occurs later during the installation of the front subframe assembly (remove and install).
LH Shown, RH similar
-
With an assistant, put the front stabilizer bar onto the front subframe, and then install new nuts to attach the front stabilizer bar to the front subframe.
 Torque 55 Nm
 -
Install the steering rack. See Steering Rack (RWD) (Remove and Replace).
Caution:2nd generation front subframes cannot accommodate 1st generation (discontinued) steering racks. A 2nd generation (currently available) steering rack must be installed.
| 1 | With an assistant, position the new subframe to the subframe lifting tool. Note: Make sure that the 2 guides align.
| ||
LH Shown, RH similar
| 2 | Hand-tighten the bolts that attach the LH and RH crash can brackets to the front subframe. Note: The tightening of the LH and RH crash can brackets occurs later during the installation of the front subframe assembly (remove and install).
| |
| 3 | With an assistant, put the front stabilizer bar onto the front subframe, and then install new nuts to attach the front stabilizer bar to the front subframe. Torque 55 Nm | |
| 4 | Install the steering rack. See Steering Rack (RWD) (Remove and Replace). Caution: 2nd generation front subframes cannot accommodate 1st generation (discontinued) steering racks. A 2nd generation (currently available) steering rack must be installed.
| ||
| 5 | Position the subframe lifting tool and front subframe underneath the vehicle for installation. | ||
| 6 | Install the front subframe assembly into the vehicle. See Subframe Assembly - Front (RWD) (Remove and Install). |