Seat - Driver (Remove and Replace)
Correction code 1304010213040102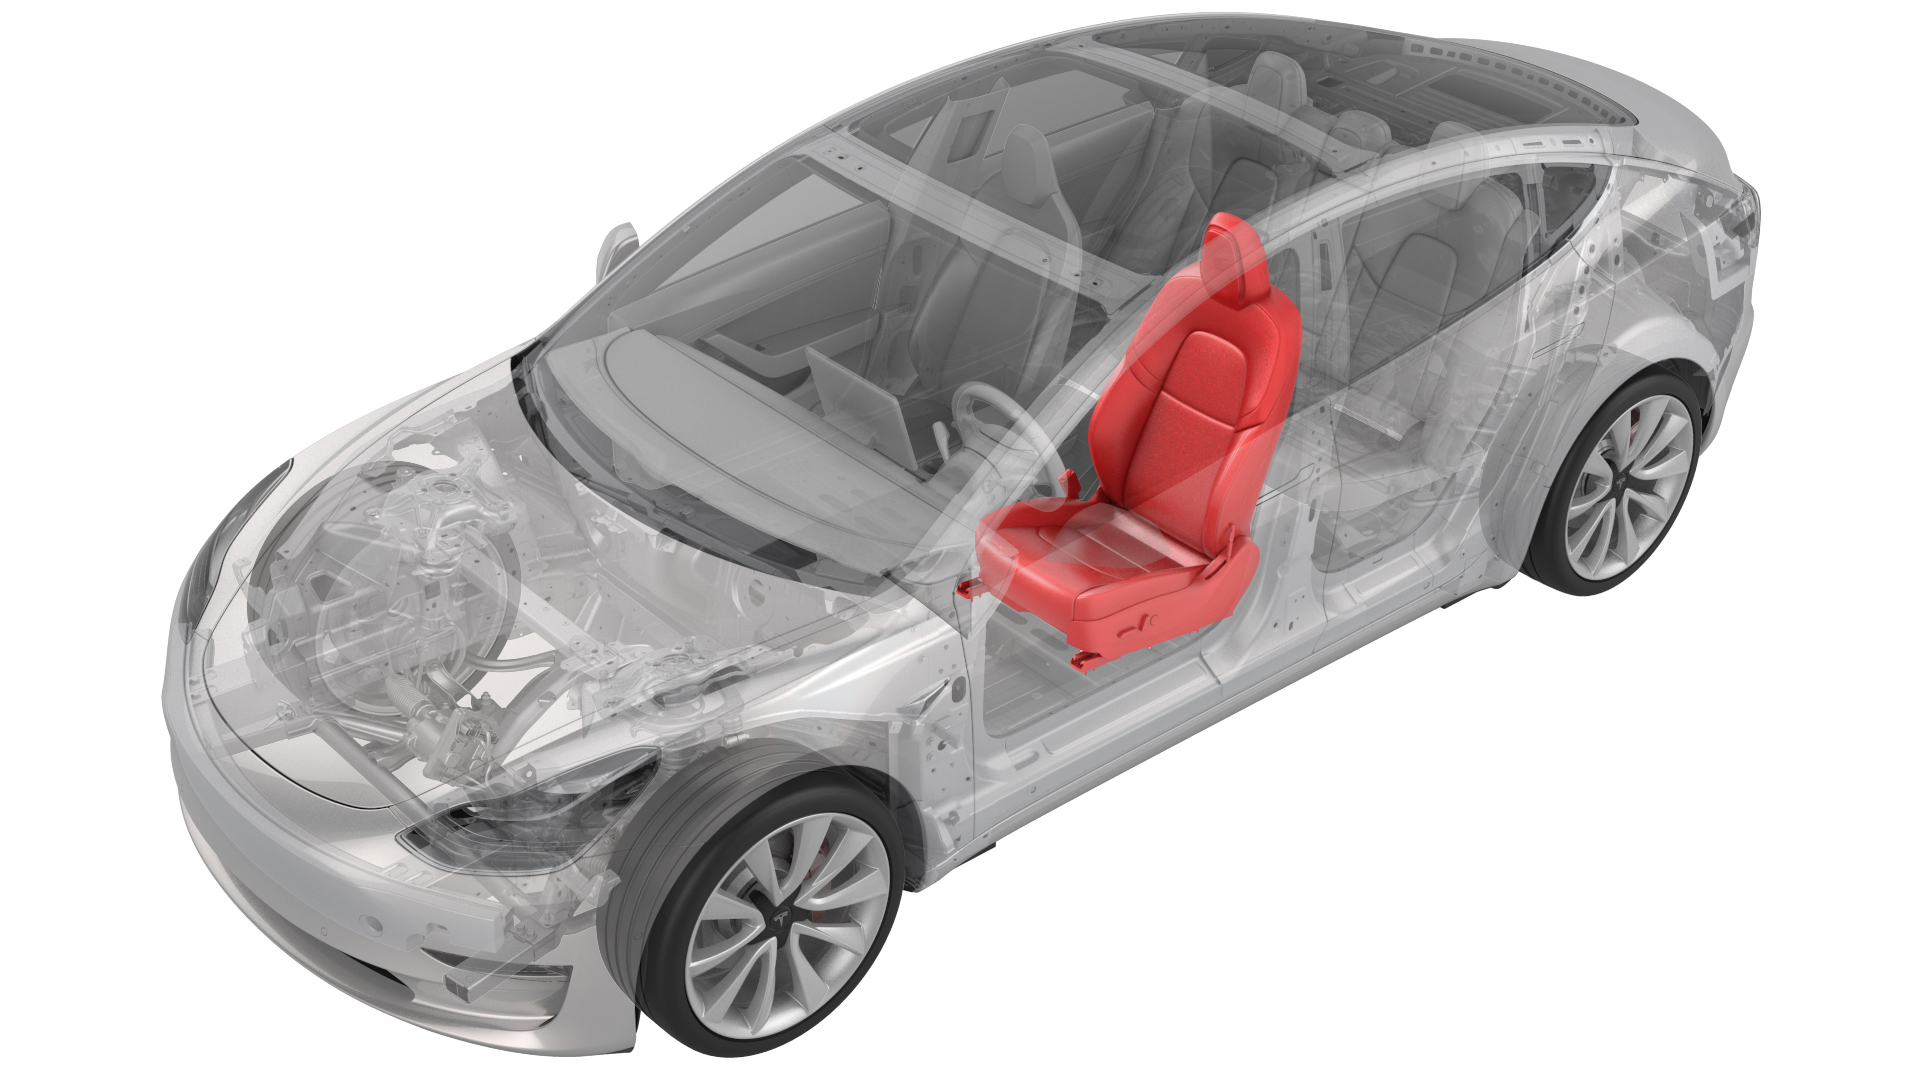
- 1133787-00-AKey, Seat Belt Release, Model 3
- 1082447-07-A Torx Plus T45
SPECIAL TOOLS
Key, Seat Belt Release, Model 3 (1133787-00-A) |
Torx Plus T45 (1082447-07-A) |
Remove
Note: Though the driver seat is described, the procedure is the same for the front passenger seat.
-
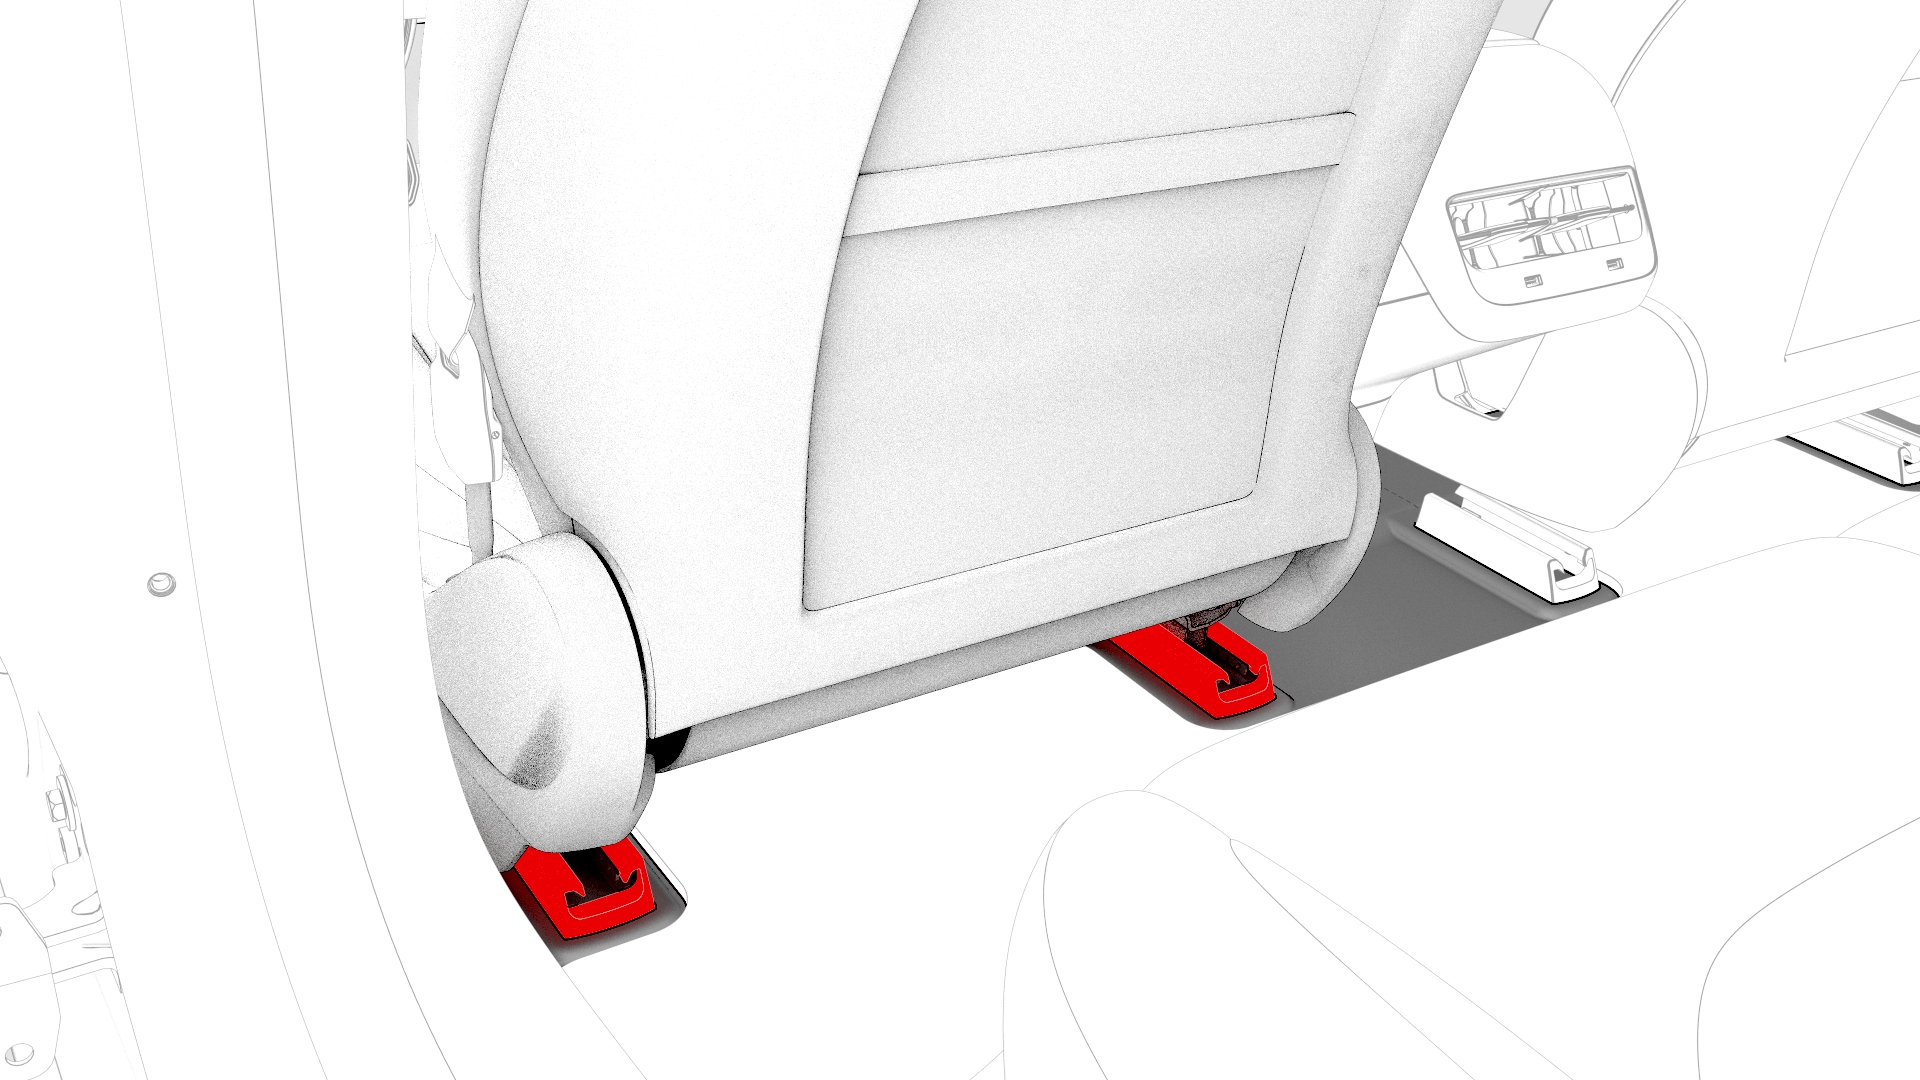
If replacing the seat with a new one, release the clips that attach the driver seat track rear covers, and then remove the track rear covers from the vehicle. Otherwise, skip to 9
-
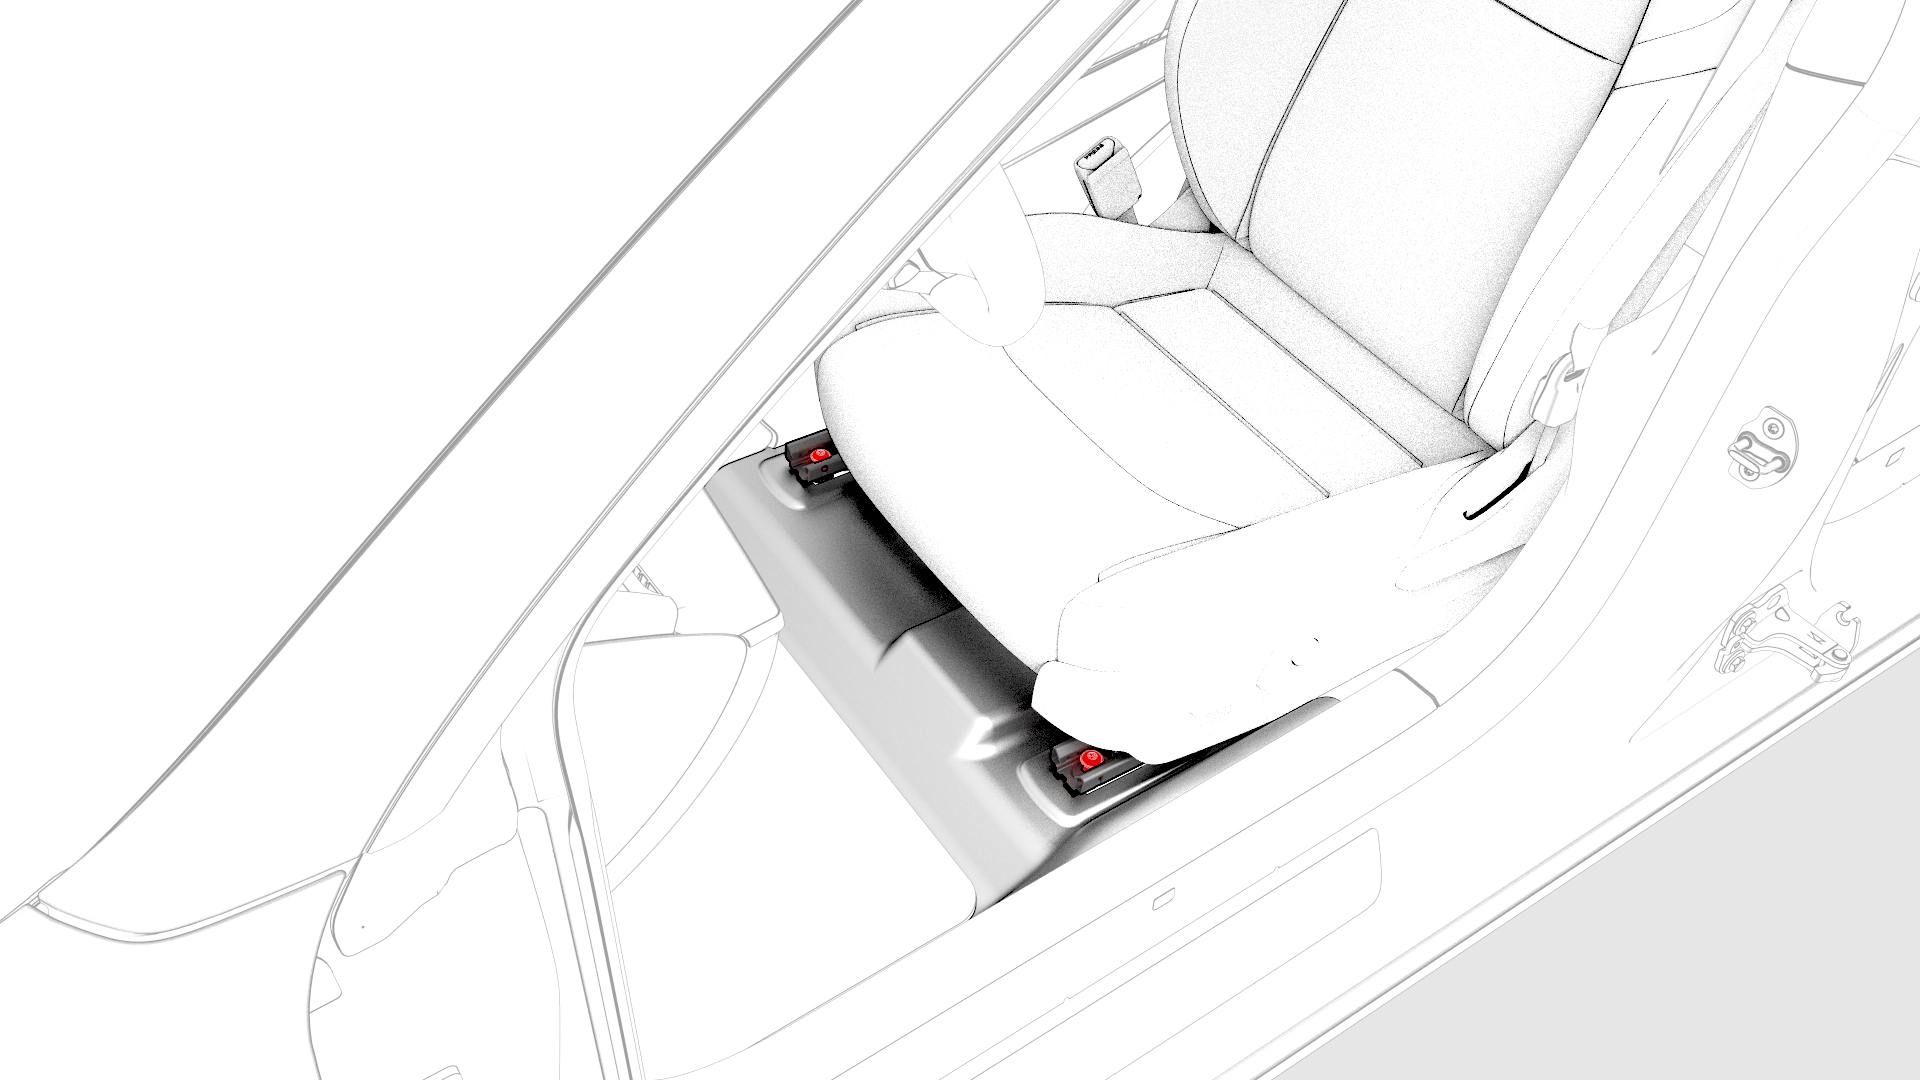
Remove and discard the bolts (x2) that attach the rear of the driver seat to the body.
 Caution:Use only the Torx Plus T45 bit to remove the seat bolts.
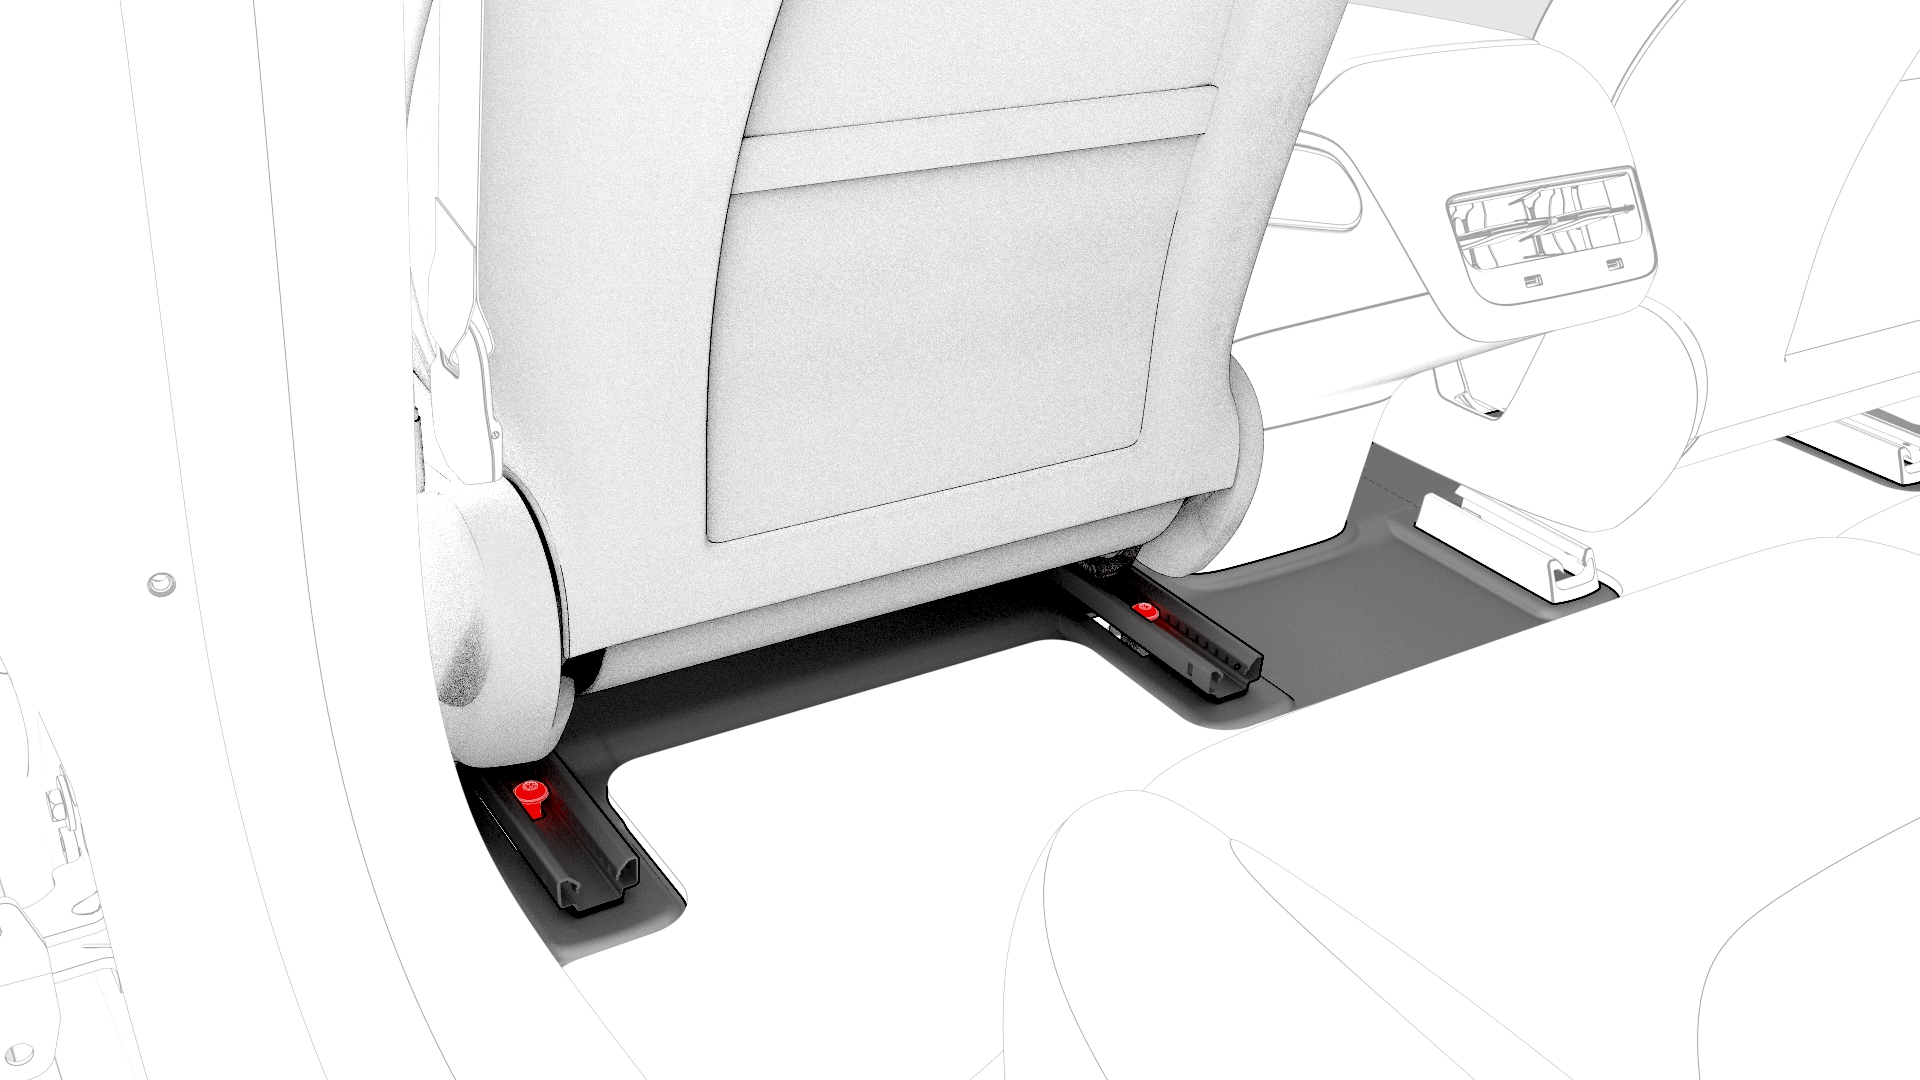
-
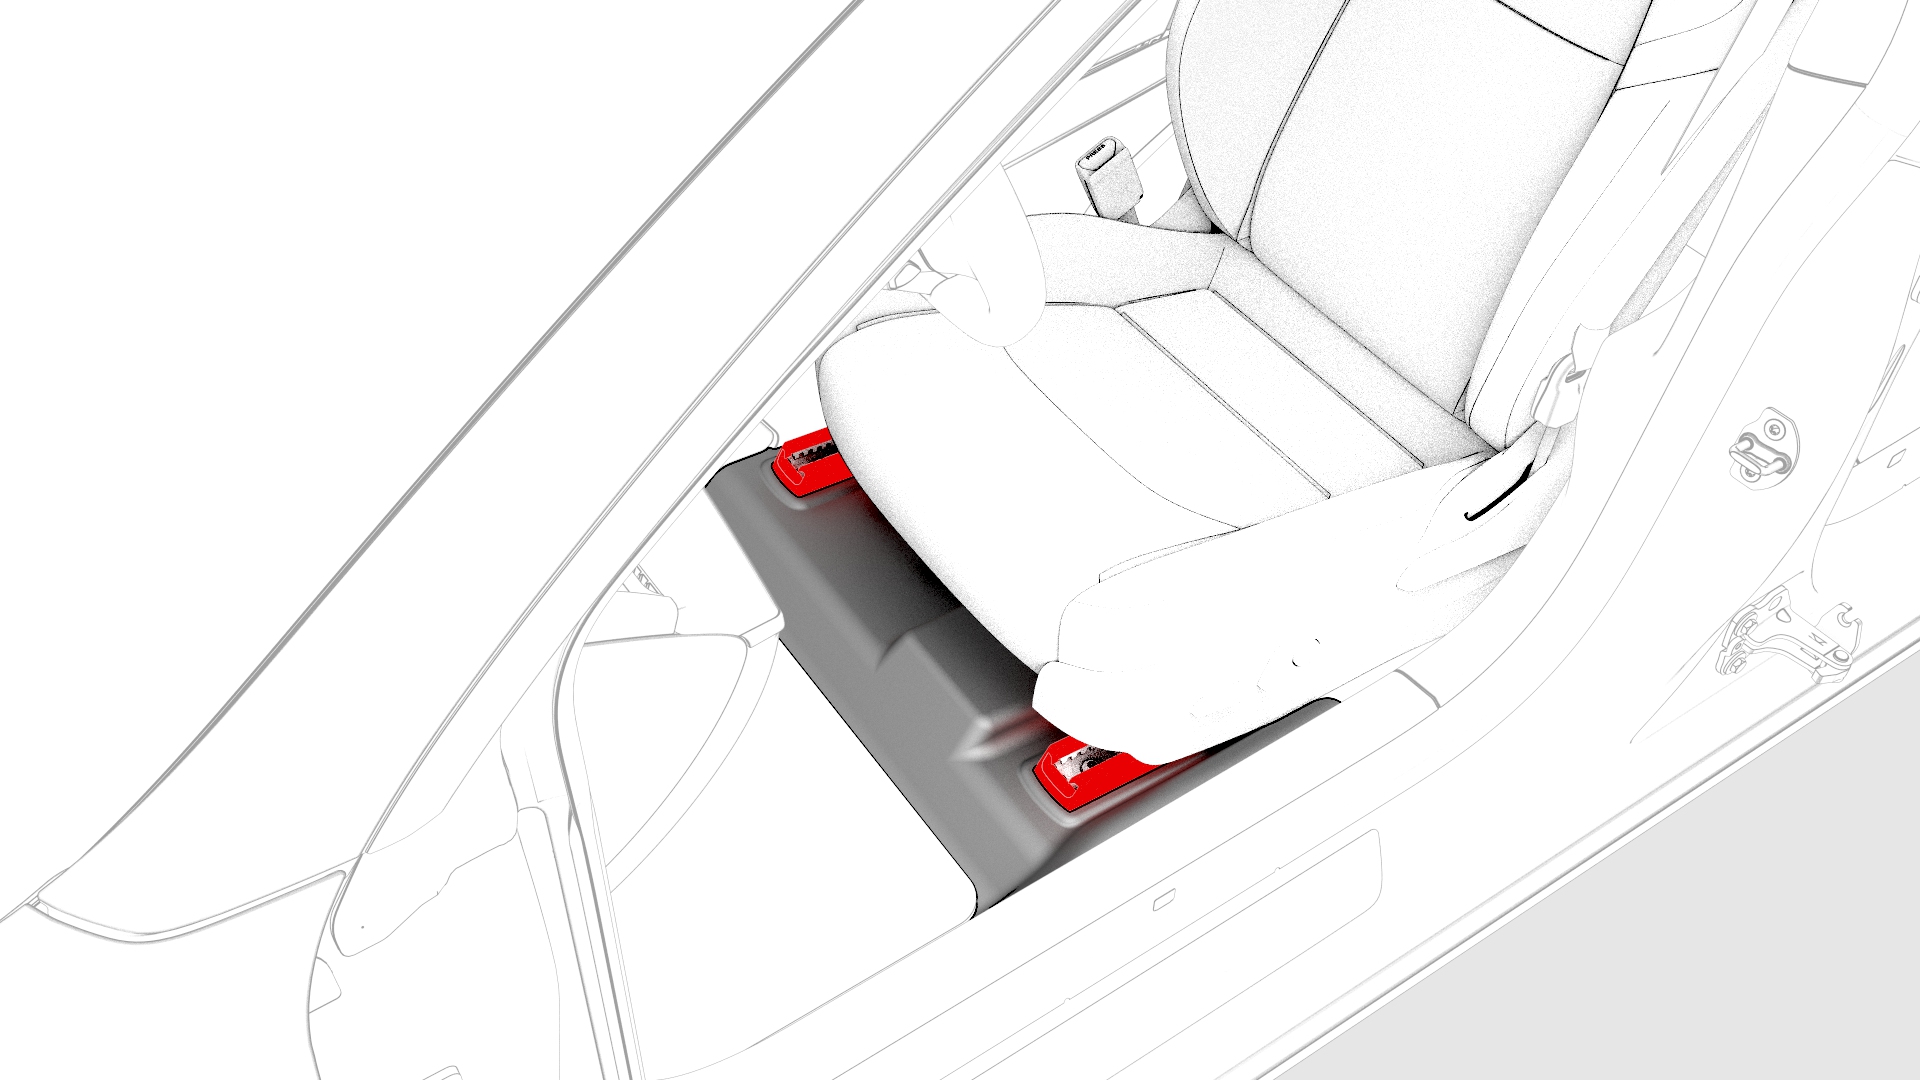
Remove the driver seat track front covers.
-
Remove and discard the bolts (x2) that attach the front of the driver seat to the body.
Caution:Use only the Torx Plus T45 bit to remove the seat bolts.
-
Adjust the seat cushion height to maximum.
Caution:Do not allow the seat headrest to compress the sun visor as it might crack the mirror.
-
Move the seat fully forward.
Caution:Do not allow the seat headrest to compress the sun visor as it might crack the mirror.
-
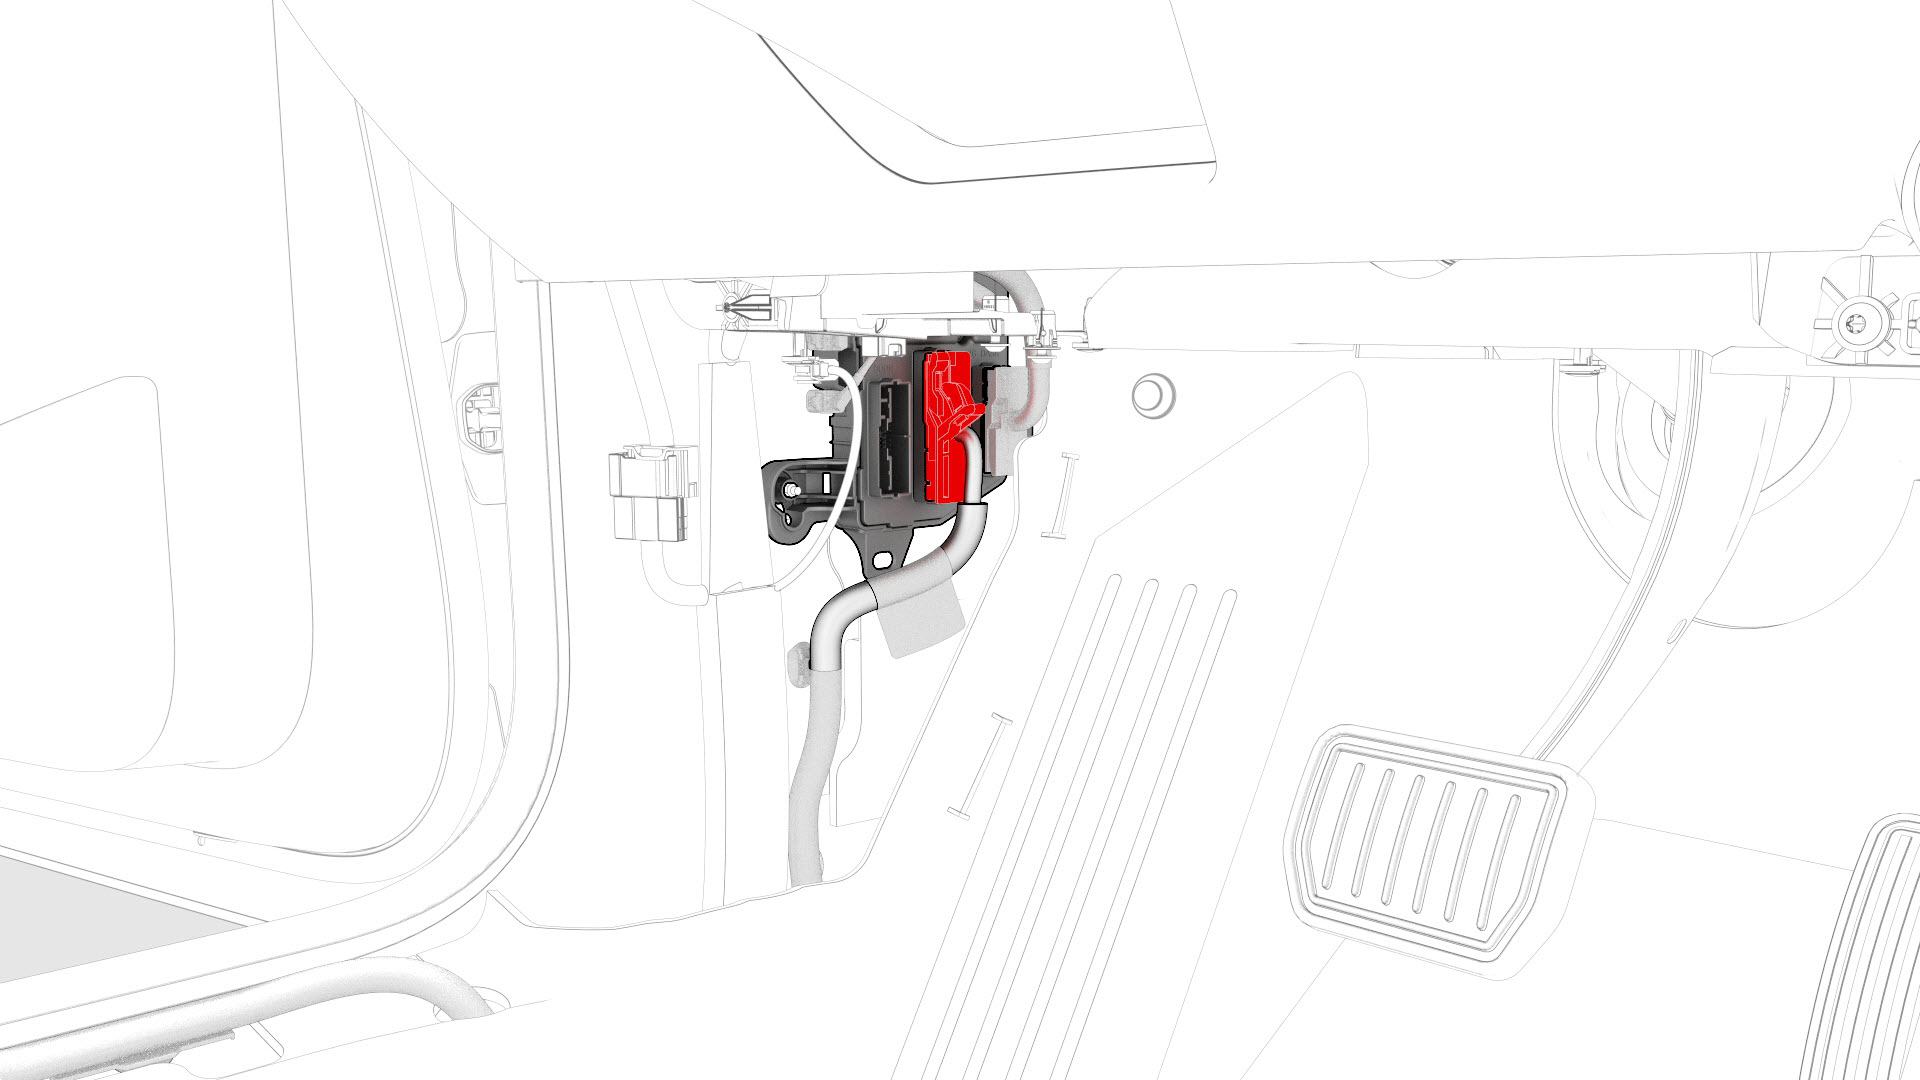
Disconnect the seat electrical harness connector from the LH body controller.
-
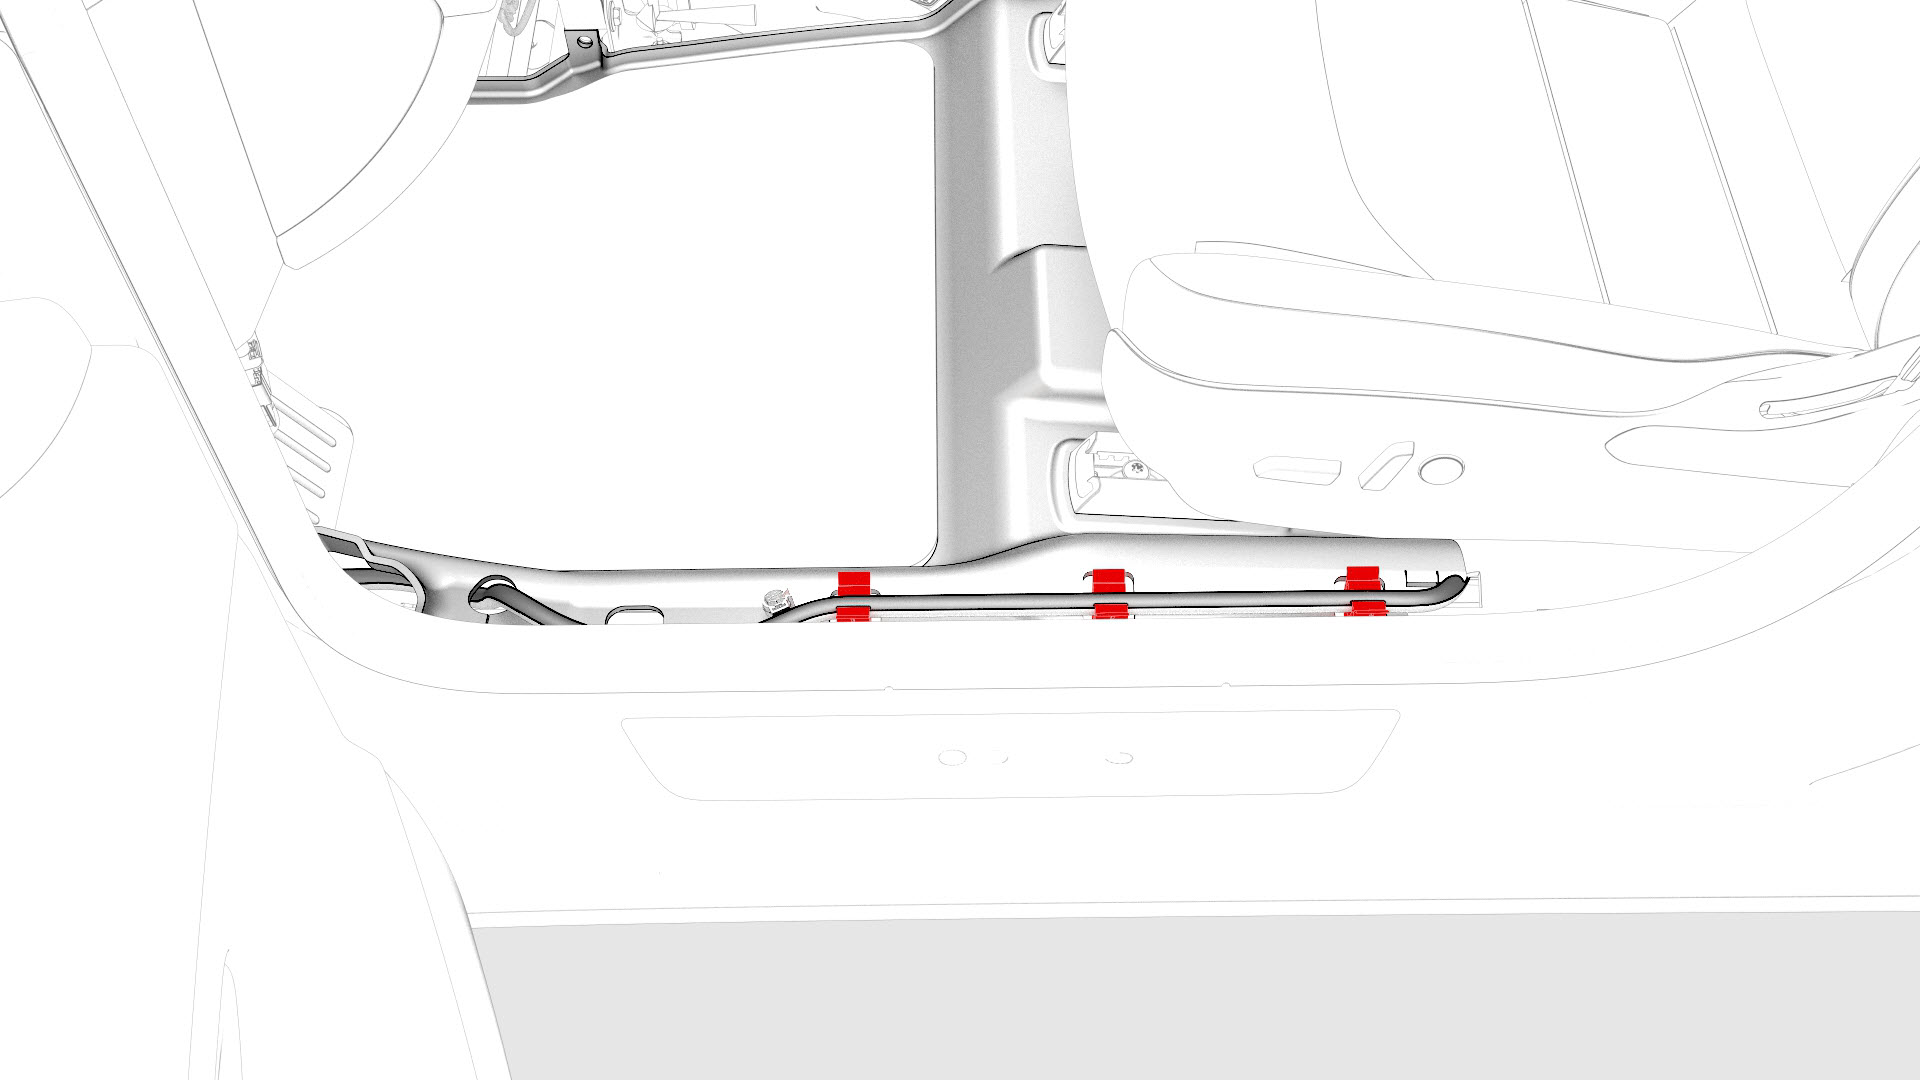
Release the clips that attach the seat electrical harness to the body.
-
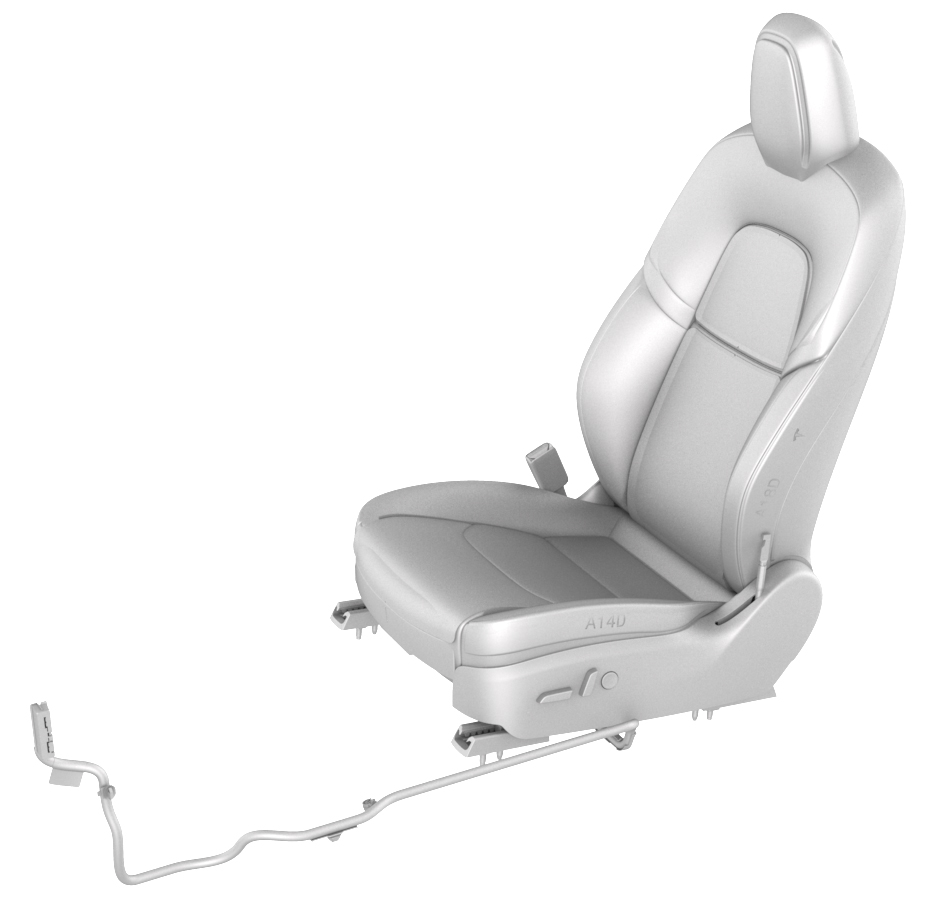
With an assistant, remove the seat from the vehicle.
Note: Lift the seat, tilt the seat back, rotate the cushion toward the door, and remove the seat from the vehicle, cushion first.
 Caution:If discarding the entire seat, Service Centers must remove the seat-mounted airbag and pre-tensioner before discarding the seat. Follow local Environmental Health and Safety (EH&S) best practices to dispose of the airbag and the pre-tensioner (for example, place the airbag and the pre-tensioner into the appropriate hazardous waste receptacles located in the Service Center). Then dispose of the seat. Refer to Service Bulletin SI-19-20-001.
| 1 | Remove the LH lower A-Pillar trim. See Trim - A-Pillar - Lower - LH (Remove and Replace). | ||
| 2 | Insert the seat belt release key into the bottom of the seatbelt pretensioner coupling to release the seatbelt from the pretensioner. | ||
| 3 | If replacing the seat with a new one, release the clips that attach the driver seat track rear covers, and then remove the track rear covers from the vehicle. Otherwise, skip to 9 | |
| 4 | Remove and discard the bolts (x2) that attach the rear of the driver seat to the body. Caution: Use only the Torx Plus T45 bit to remove the seat bolts.
| |
| 5 | Move the seat fully rearward. | ||
| 6 | Remove the driver seat track front covers. | |
| 7 | Remove and discard the bolts (x2) that attach the front of the driver seat to the body. Caution: Use only the Torx Plus T45 bit to remove the seat bolts.
| |
| 8 | Adjust the seat cushion height to maximum. Caution: Do not allow the seat headrest to compress the sun visor as it might crack the mirror.
| ||
| 9 | Move the seat fully forward. Caution: Do not allow the seat headrest to compress the sun visor as it might crack the mirror.
| ||
| 10 | Disconnect 12V power. See 12V Power (Disconnect and Connect). | ||
| 11 | Disconnect the seat electrical harness connector from the LH body controller. | |
| 12 | Release the clips that attach the seat electrical harness to the body. | |
| 13 | With an assistant, remove the seat from the vehicle. Note: Lift the seat, tilt the seat back, rotate the cushion toward the door, and remove the seat from the vehicle, cushion first.
Caution: If discarding the entire seat, Service Centers must remove the seat-mounted airbag and pre-tensioner before discarding the seat. Follow local Environmental Health and Safety (EH&S) best practices to dispose of the airbag and the pre-tensioner (for example, place the airbag and the pre-tensioner into the appropriate hazardous waste receptacles located in the Service Center). Then dispose of the seat. Refer to Service Bulletin SI-19-20-001.
|
Install
Note: Though the driver seat is described, the procedure is the same for the front passenger seat.
-
Fasten the clips that attach the seat electrical harness to the body.
-
Connect the seat electrical harness connector to the LH body controller.
Caution:Remove all debris from the seat electrical harness connector, firmly press the connector into the body controller, and then engage the connector lock.
-
Install new bolts (x2) to attach the front of the driver seat to the body.
 Torque 33.5 NmCaution:Use only the Torx Plus T45 bit to torque the seat bolts.
 -
Install the driver seat track front covers.
-
Install new bolts (x2) to attach the rear of the driver seat to the body.Torque 33.5 NmCaution:Use only the Torx Plus T45 bit to torque the seat bolts.
-
Install the driver seat track rear covers.
| 1 | With an assistant, install the seat into the vehicle. Note: Lift the seat sideways with the headrest toward the door opening and the seat cushion toward the rear of the vehicle. Move the headrest in through the door and follow with the seat cushion. Rotate the seat so that the cushion points up, set the seat down onto the carpet, and then rotate the seat back up to vertical.
| ||
| 2 | Fasten the clips that attach the seat electrical harness to the body. | |
| 3 | Connect the seat electrical harness connector to the LH body controller. Caution: Remove all debris from the seat electrical harness connector, firmly press the connector into the body controller, and then engage the connector lock.
| |
| 4 | Connect 12V power. See 12V Power (Disconnect and Connect). | ||
| 5 | Move the seat fully rearward. | ||
| 6 | Install new bolts (x2) to attach the front of the driver seat to the body. Torque 33.5 Nm Caution: Use only the Torx Plus T45 bit to torque the seat bolts.
| |
| 7 | Install the driver seat track front covers. | |
| 8 | Move the seat fully forward. | ||
| 9 | Install new bolts (x2) to attach the rear of the driver seat to the body. Torque 33.5 Nm Caution: Use only the Torx Plus T45 bit to torque the seat bolts.
| |
| 10 | Install the driver seat track rear covers. | |
| 11 | Install the seatbelt into the seatbelt pretensioner coupling. Note: After reinstalling the seatbelt pretensioner into the seatbelt pretensioner coupling, perform a pull test to make sure that the seatbelt and pretensioner are securely engaged.
| ||
| 12 | Install the LH lower A-Pillar trim. See Trim - A-Pillar - Lower - LH (Remove and Replace). | ||
| 13 | Connect a laptop with Toolbox to the vehicle. | ||
| 14 | If a new seat was installed, use Toolbox to update the vehicle firmware. | ||
| 15 | Use Toolbox to perform a seat self test:
| ||
| 16 | Use Toolbox to calibrate the seat.
| ||
| 17 | Disconnect the laptop from the vehicle. |