Harness - Drive Unit - Front (Remove and Replace)
Correction code 1710120217101202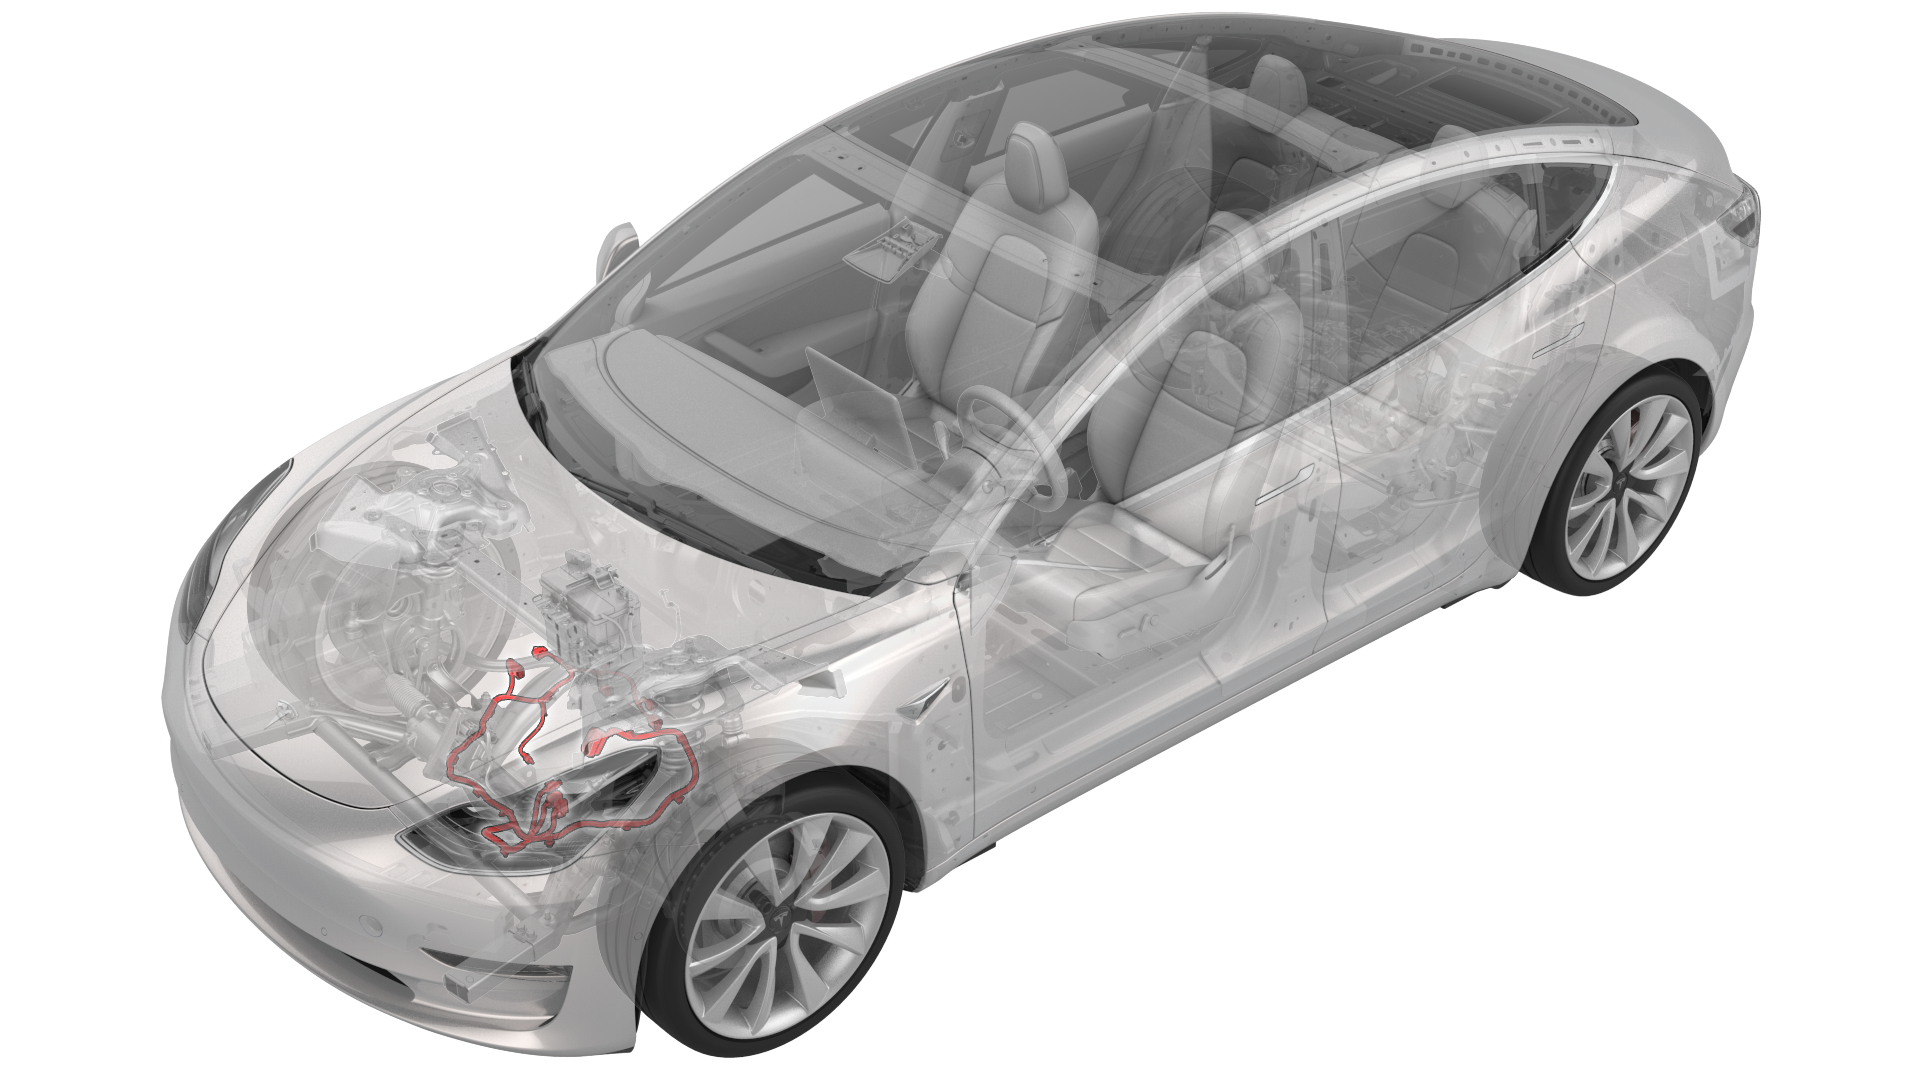
Remove
-
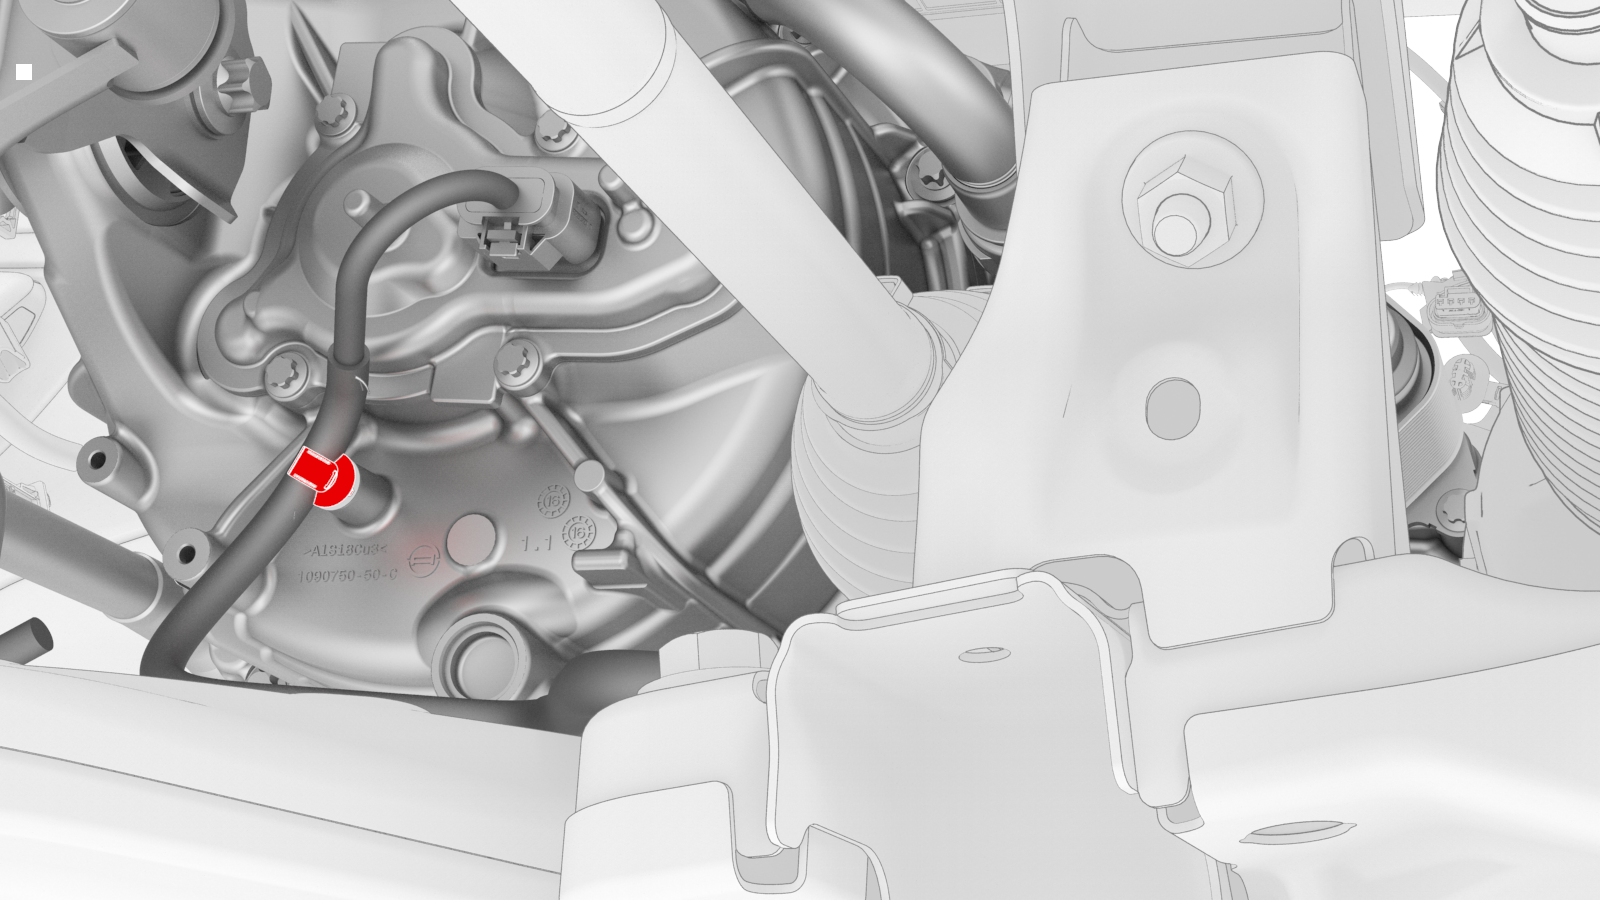
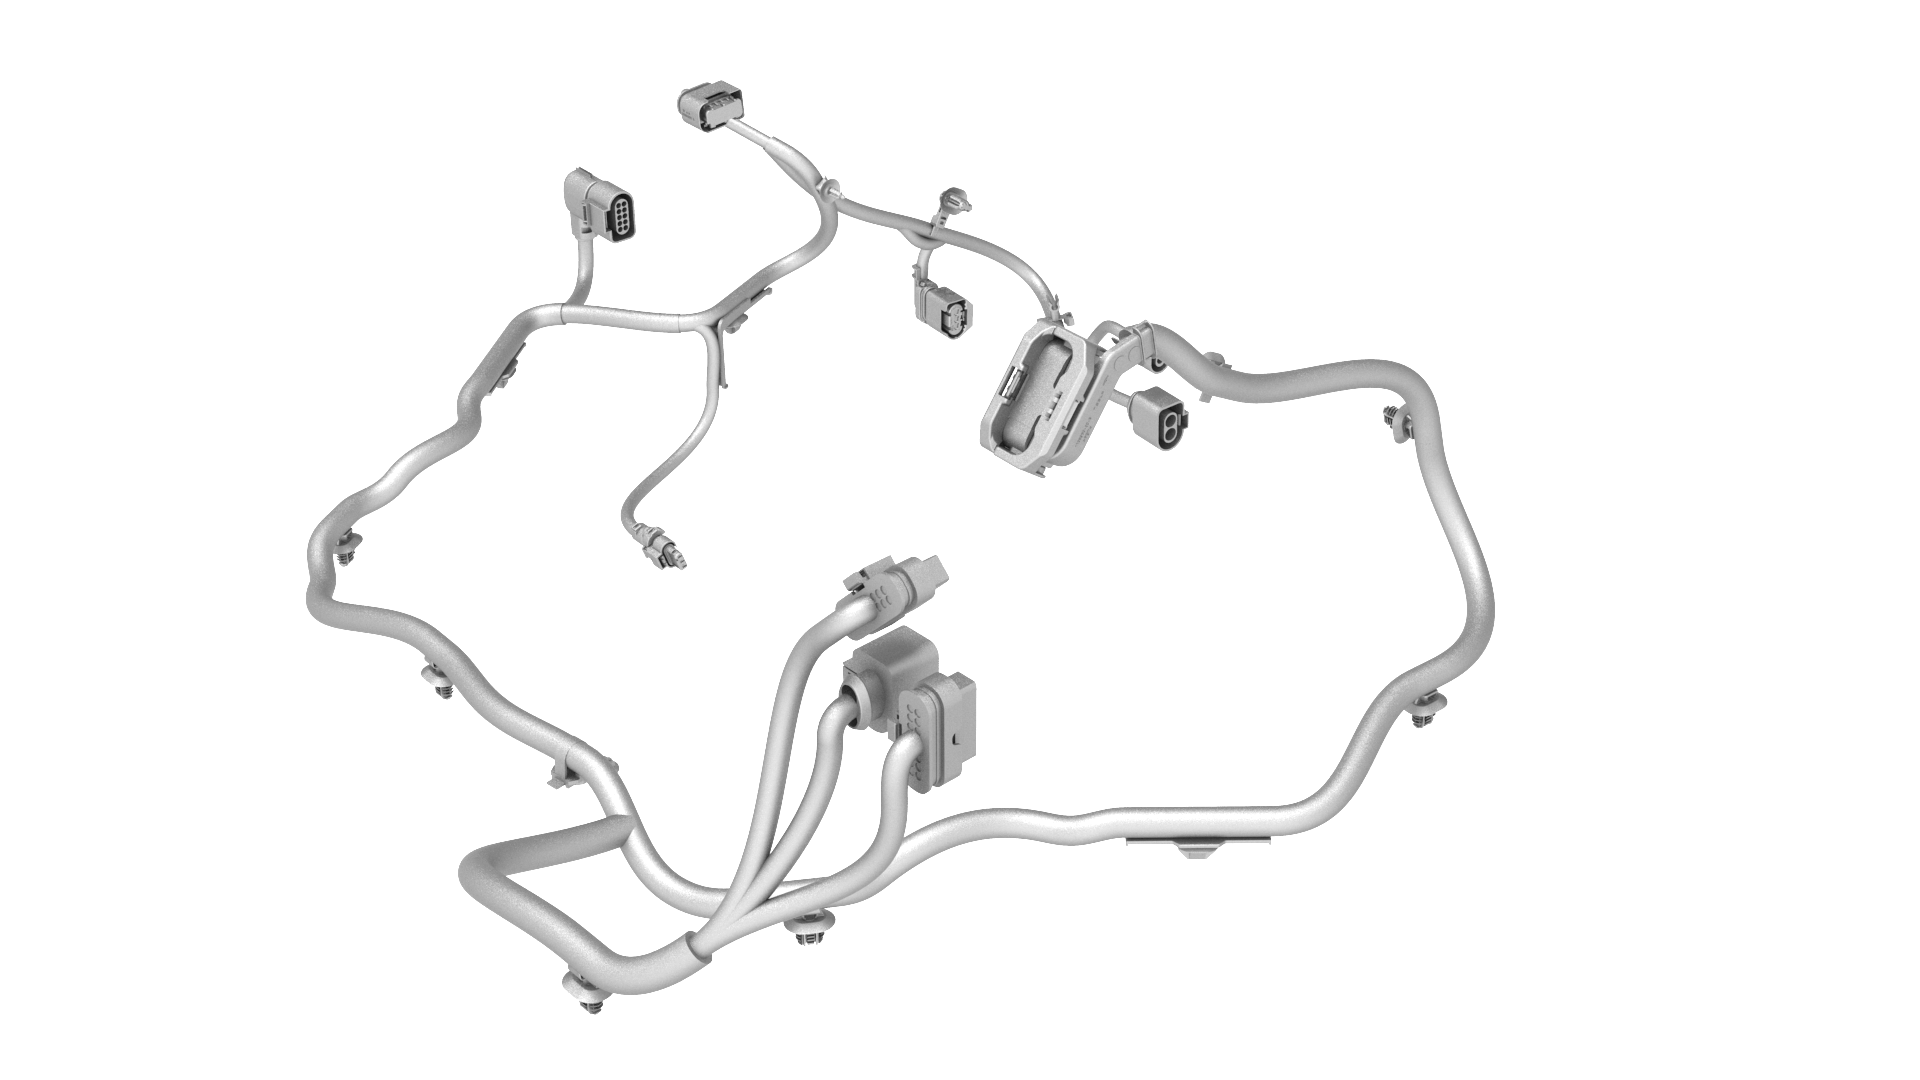
Release the grey locking tab, and then press on the tab to disconnect the front drive unit logic connector near the LH side of the front subframe.
-
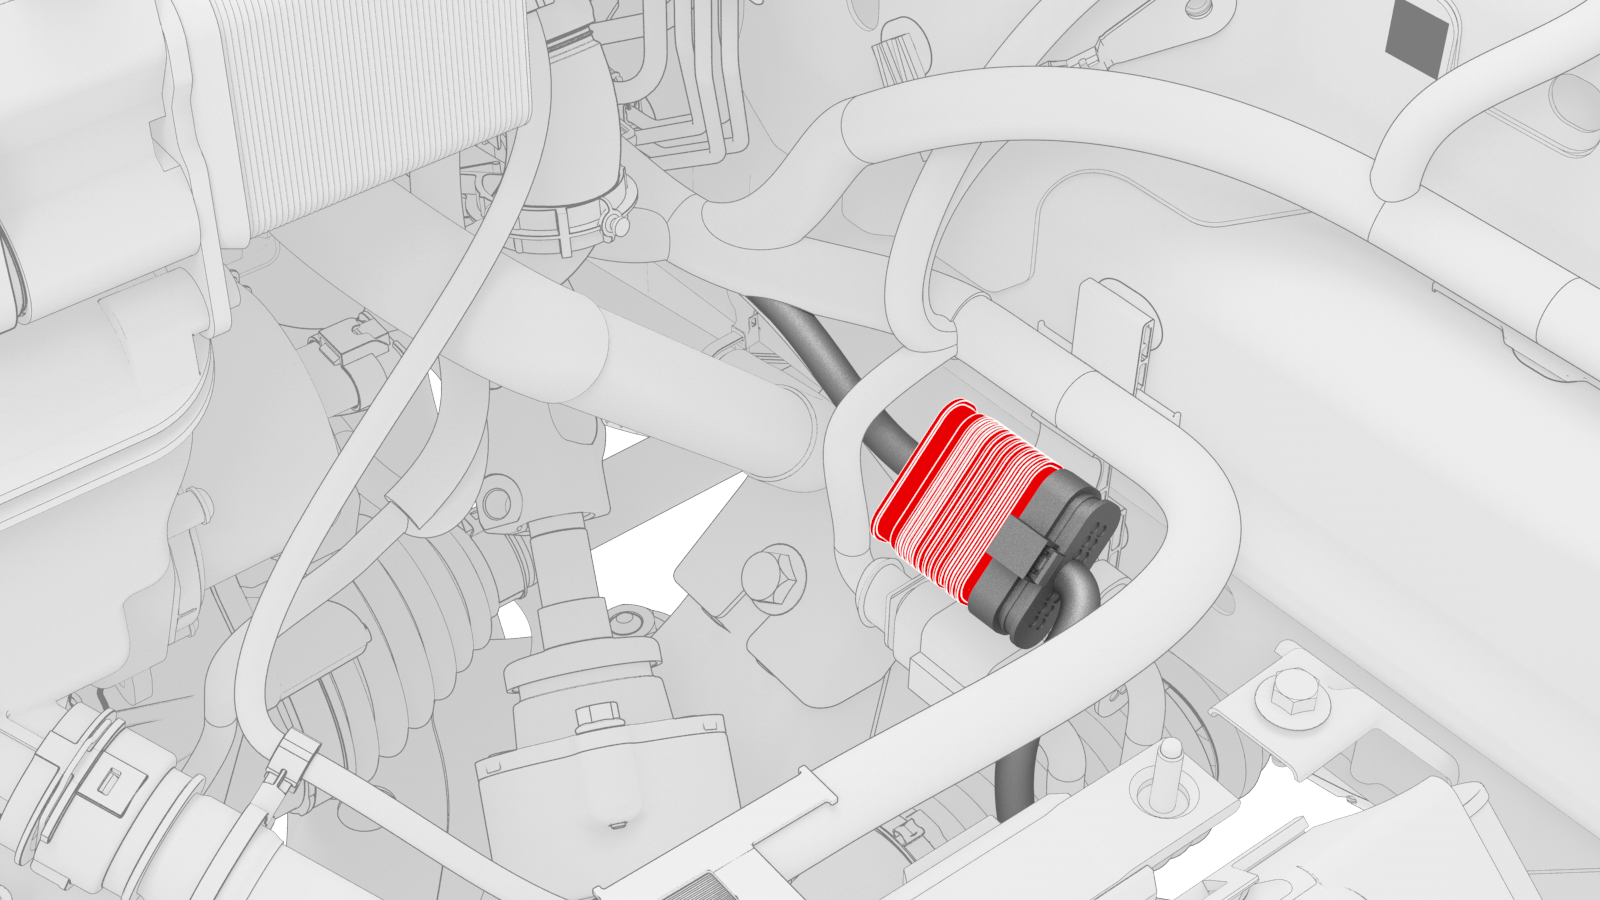
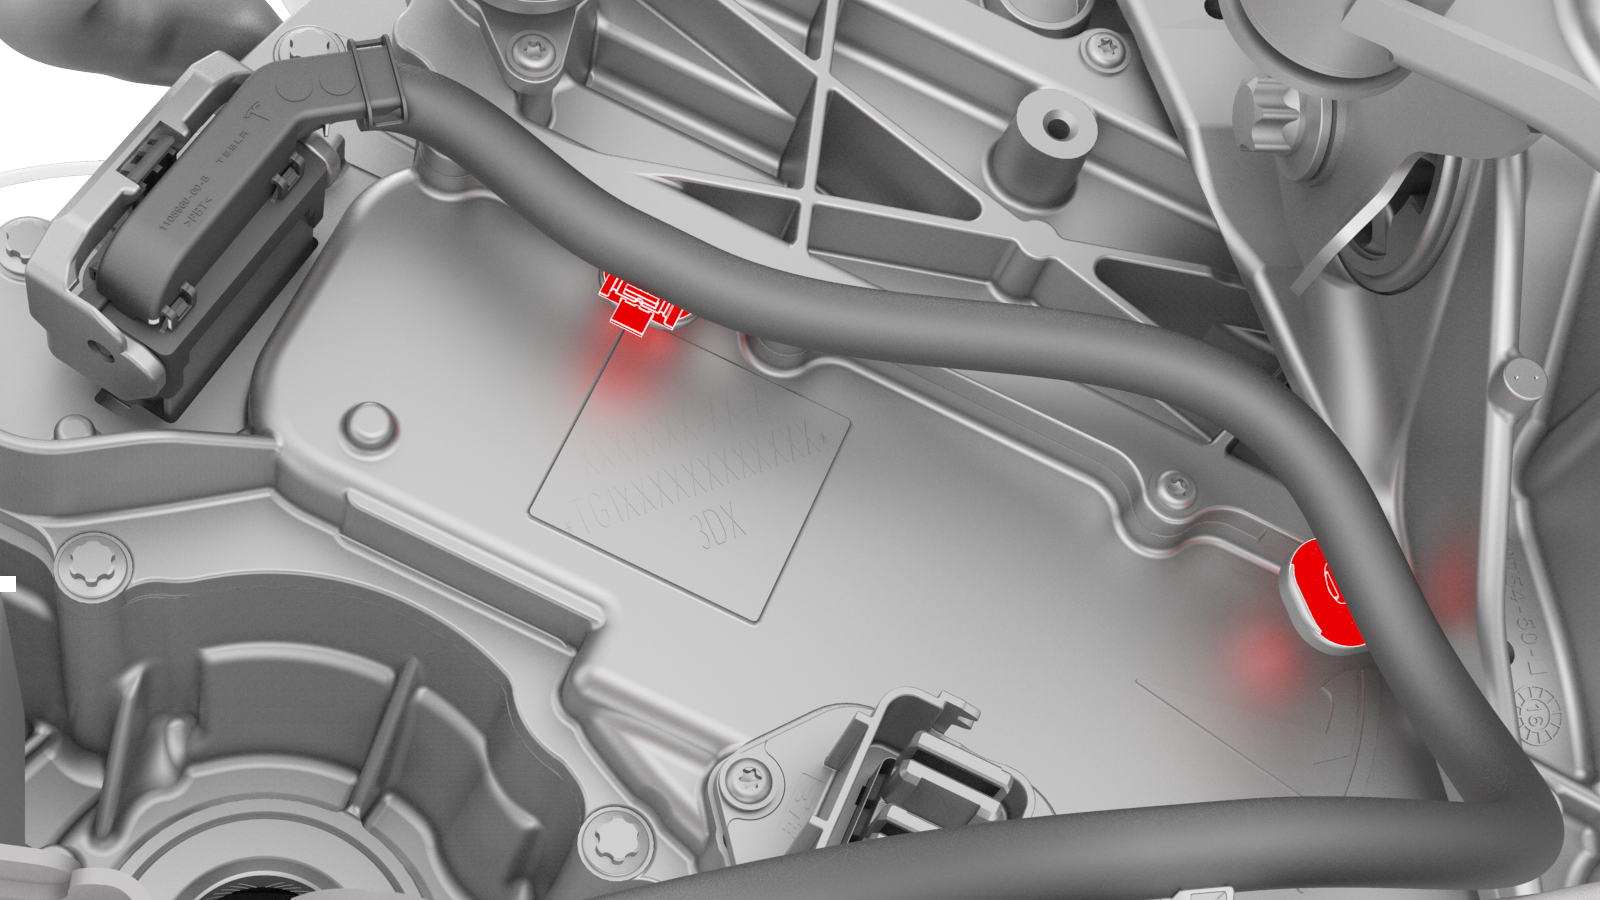
Release the locking tab, and then push the handle downward to disconnect the front drive unit inverter logic connector.
-
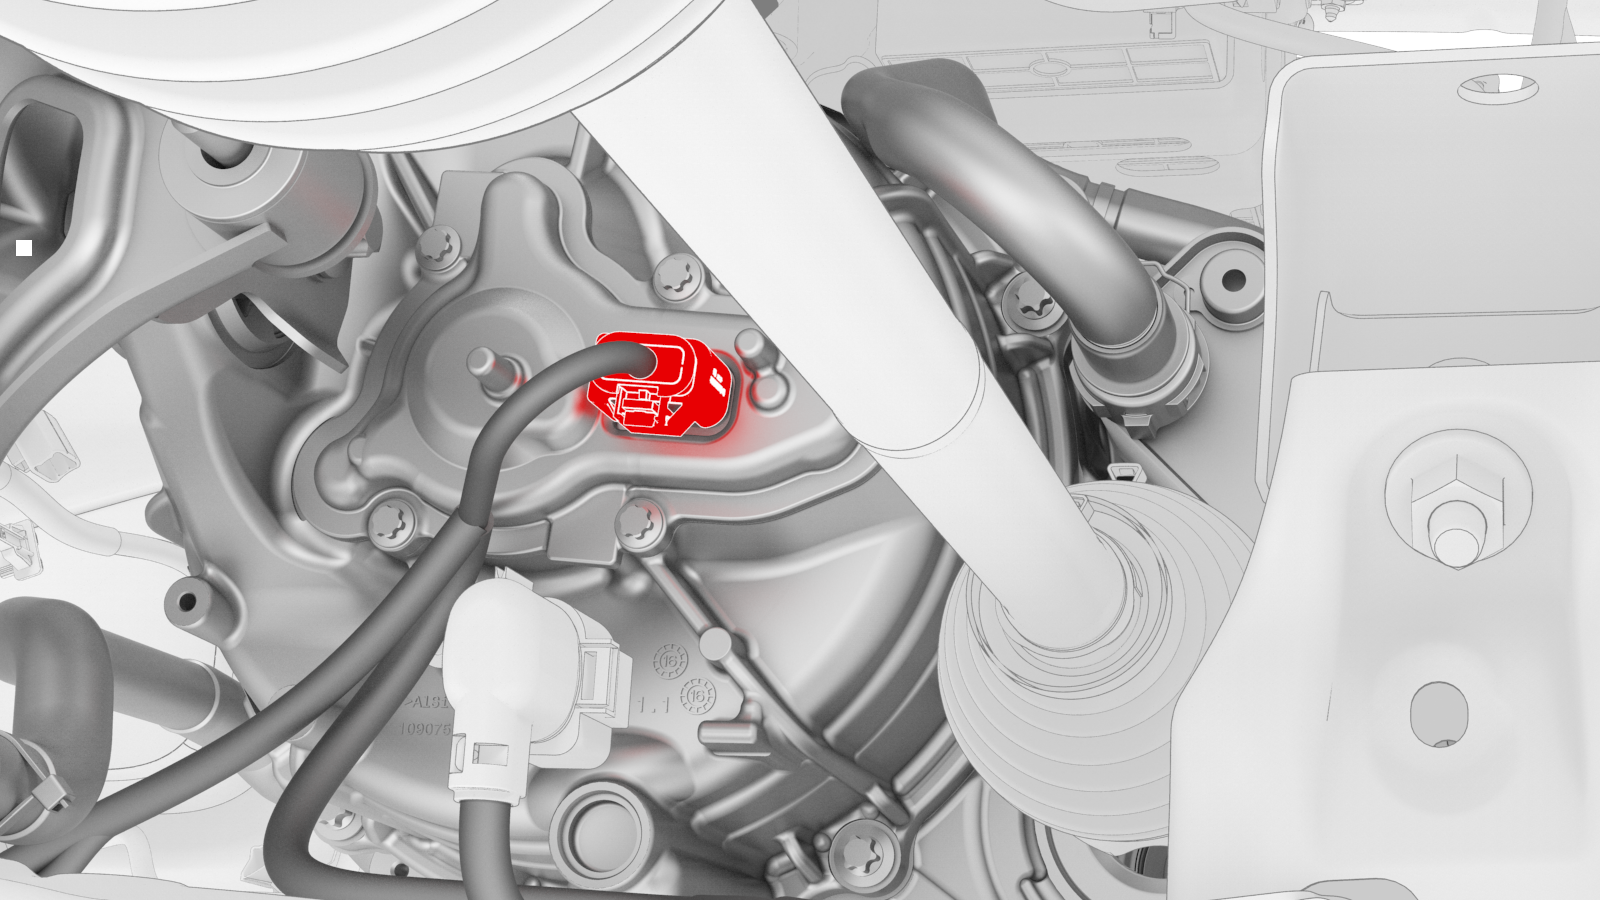
Release the red locking tab, and then press down on the tab to disconnect the resolver logic connector.
-
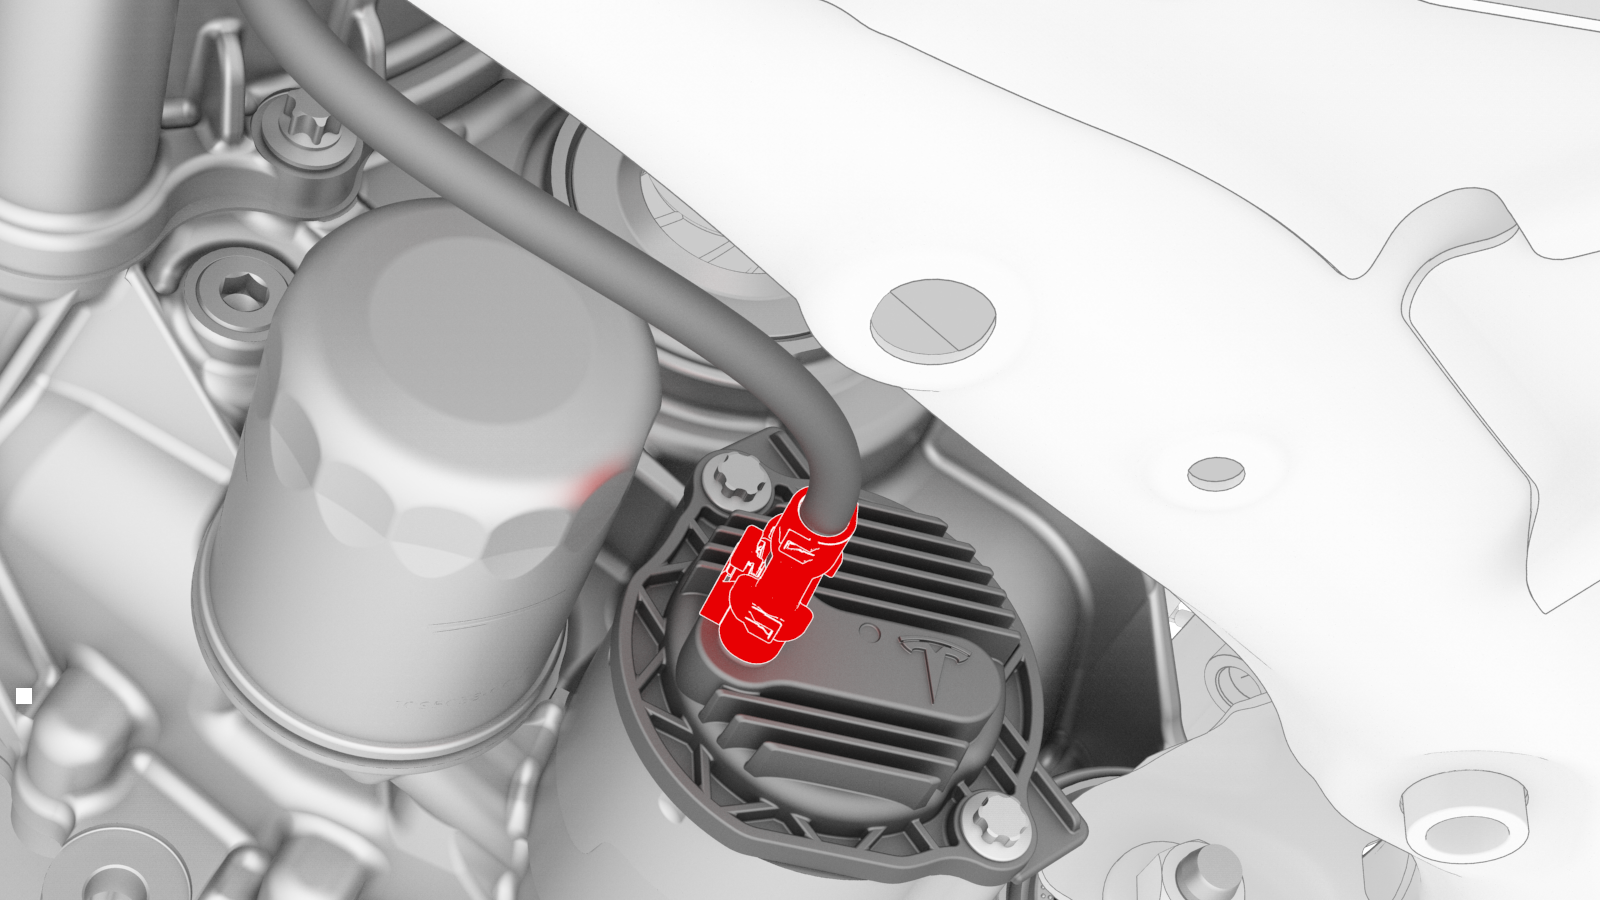
Release the grey locking tab, and then press down on the tab to disconnect the oil pump connector.
-
Release the clip that attaches the front drive unit harness to the front drive unit motor.
-
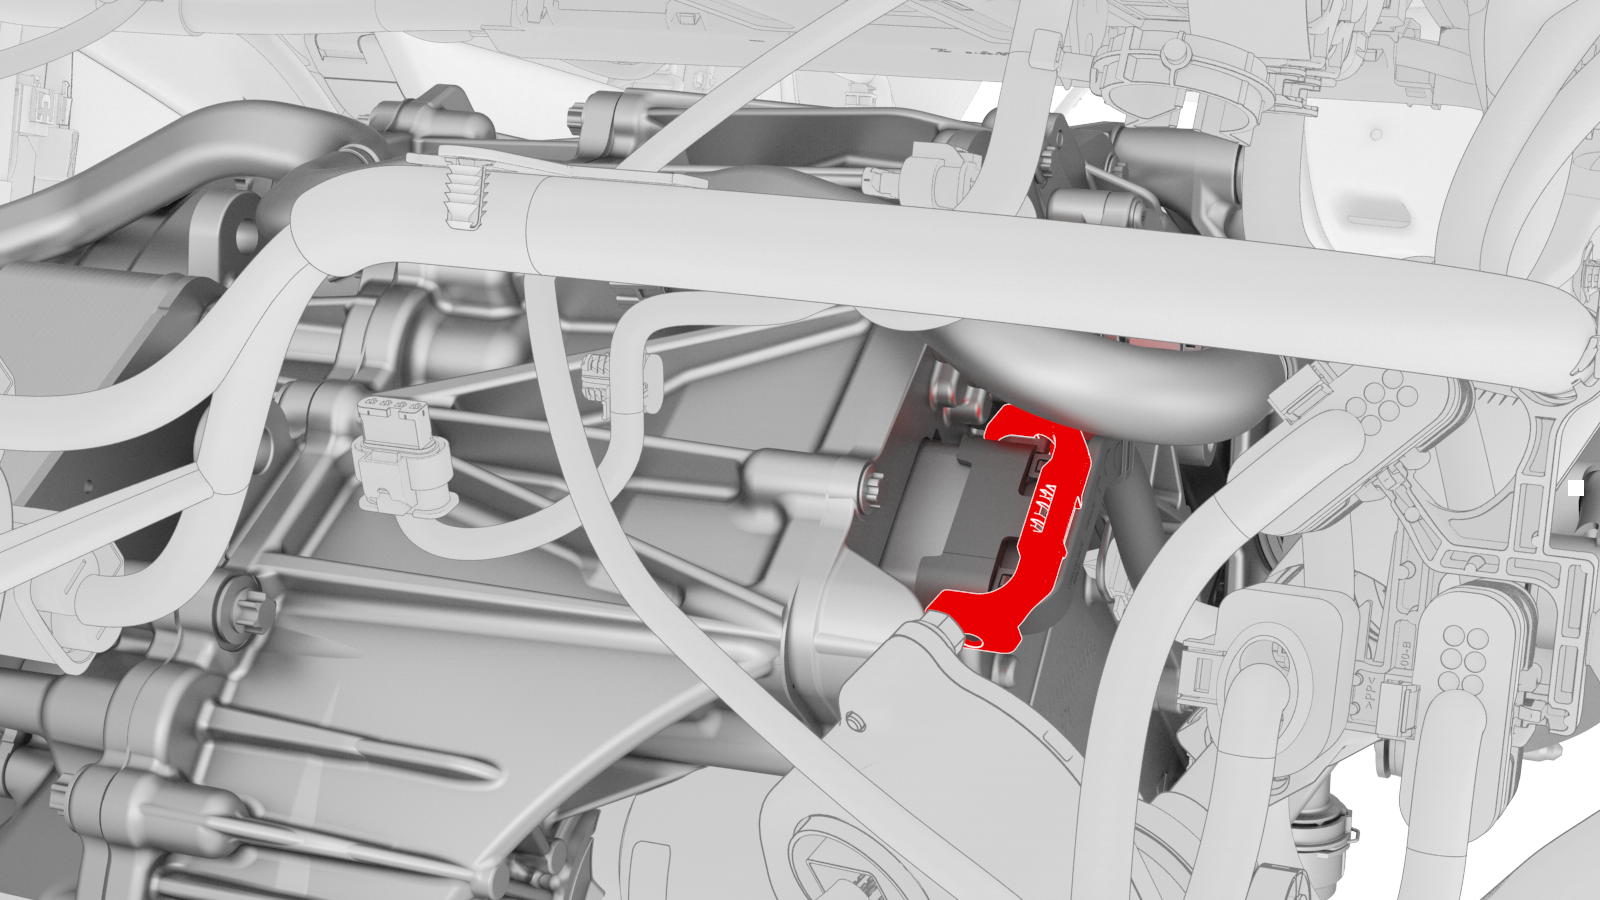
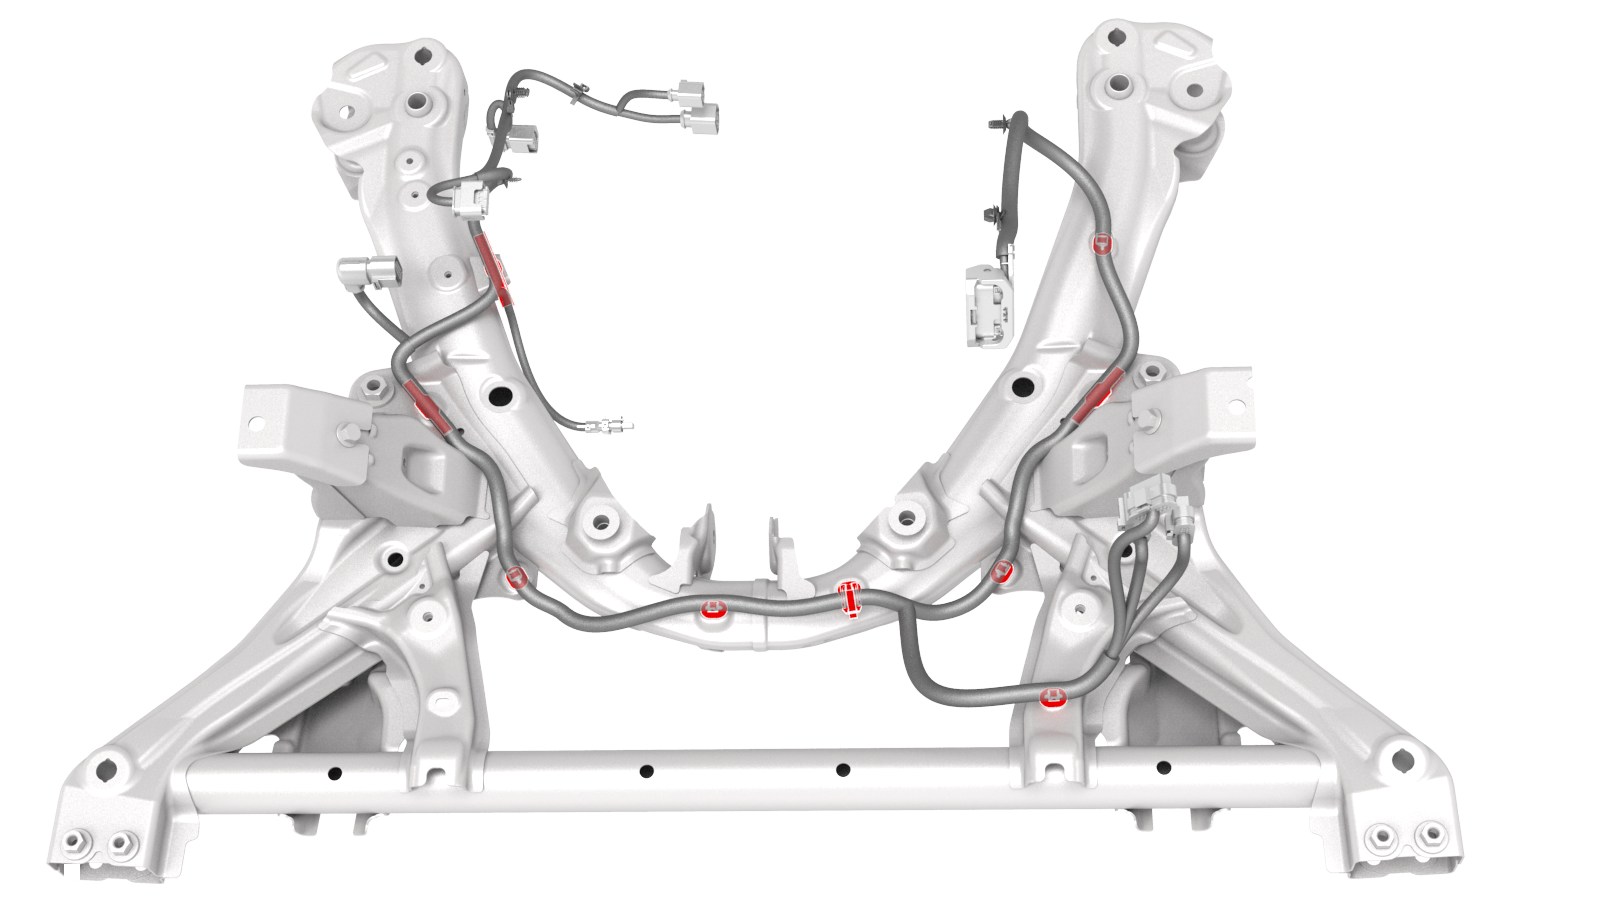
Release the clips that attach the front drive unit harness to the front subframe.
 Other assemblies hidden for clarity
 -
Release the clips that attach the front drive unit harness to the inverter.
-
Remove the front drive unit harness from the front subframe.
| 1 | Partially raise the vehicle to a comfortable working height. See Raise Vehicle - 2 Post Lift. | ||
| 2 | Remove the 2nd row lower seat cushion. See Seat Cushion - Lower - 2nd Row (Remove and Replace). | ||
| 3 | Remove the rear underhood apron. See Underhood Apron - Rear (Remove and Replace). | ||
| 4 | Disconnect 12V power. See 12V Power (Disconnect and Connect). | ||
| 5 | Fullly raise the vehicle. | ||
| 6 | Remove the front aero shield panel. See Panel - Aero Shield - Front (Remove and Replace). | ||
| 7 | Release the grey locking tab, and then press on the tab to disconnect the front drive unit logic connector near the LH side of the front subframe. | |
| 8 | Release the locking tab, and then push the handle downward to disconnect the front drive unit inverter logic connector. | |
| 9 | Release the red locking tab, and then press down on the tab to disconnect the resolver logic connector. | |
| 10 | Release the grey locking tab, and then press down on the tab to disconnect the oil pump connector. | |
| 11 | Release the clip that attaches the front drive unit harness to the front drive unit motor. | |
Other assemblies hidden for clarity
| 12 | Release the clips that attach the front drive unit harness to the front subframe. | |
| 13 | Release the clips that attach the front drive unit harness to the inverter. | |
| 14 | Remove the front drive unit harness from the front subframe. |
Install
Installation procedure is the reverse of removal, except for the following:

Caution:
Perform a push-pull test on the front drive unit harness connectors to verify that the connectors are fully attached.