Drive Unit - Rear (Remove and Replace)
Correction code 4001100240011002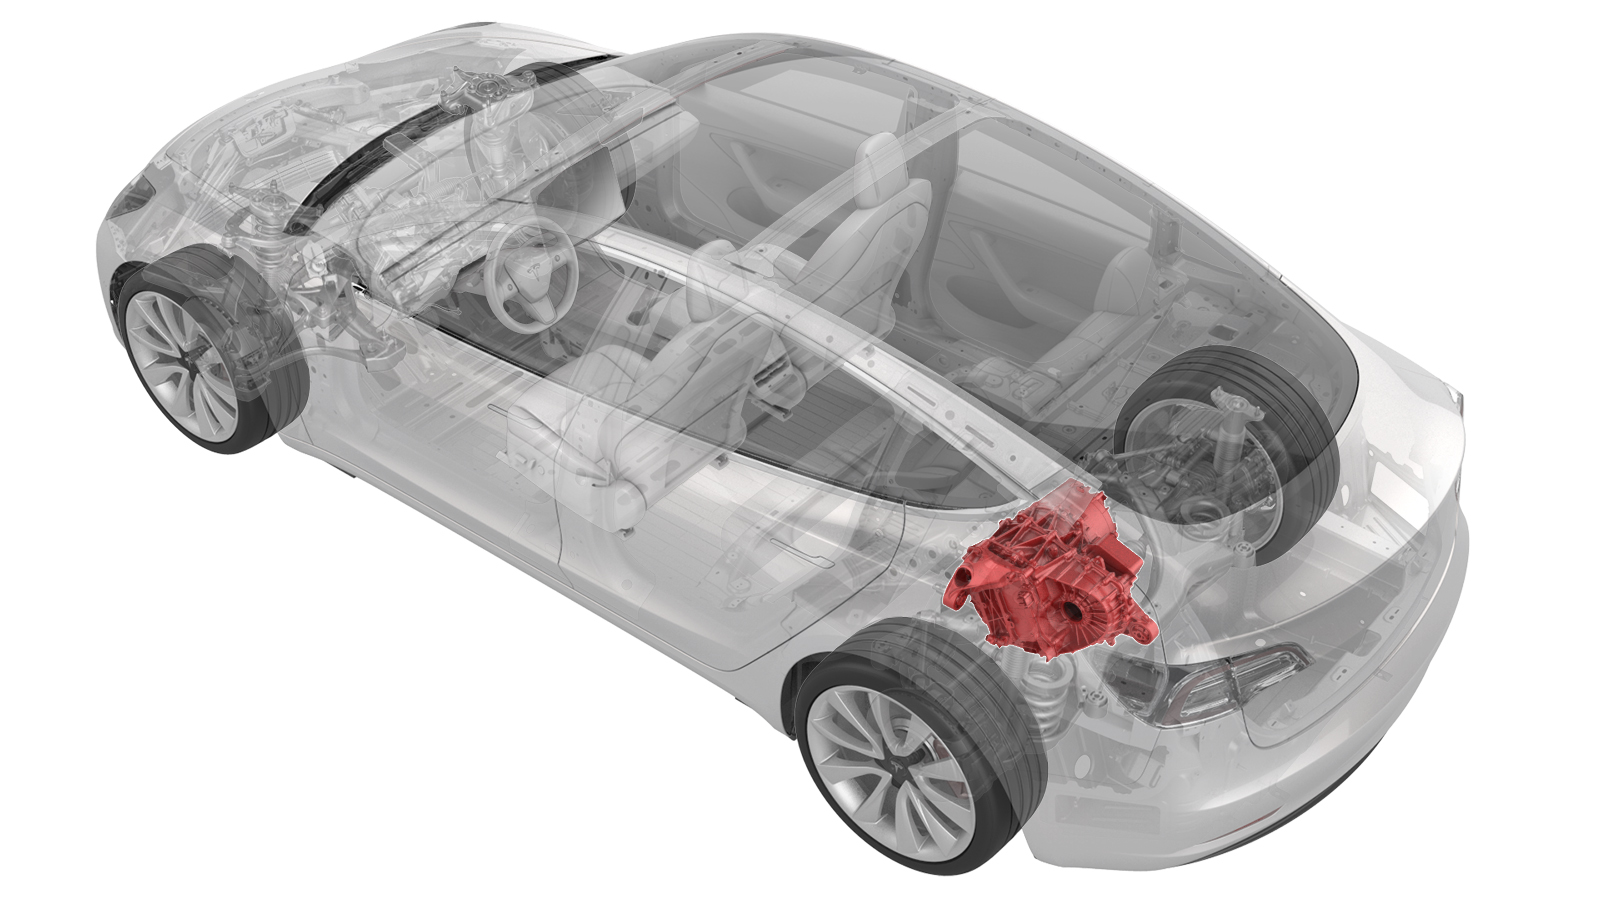
Remove
-
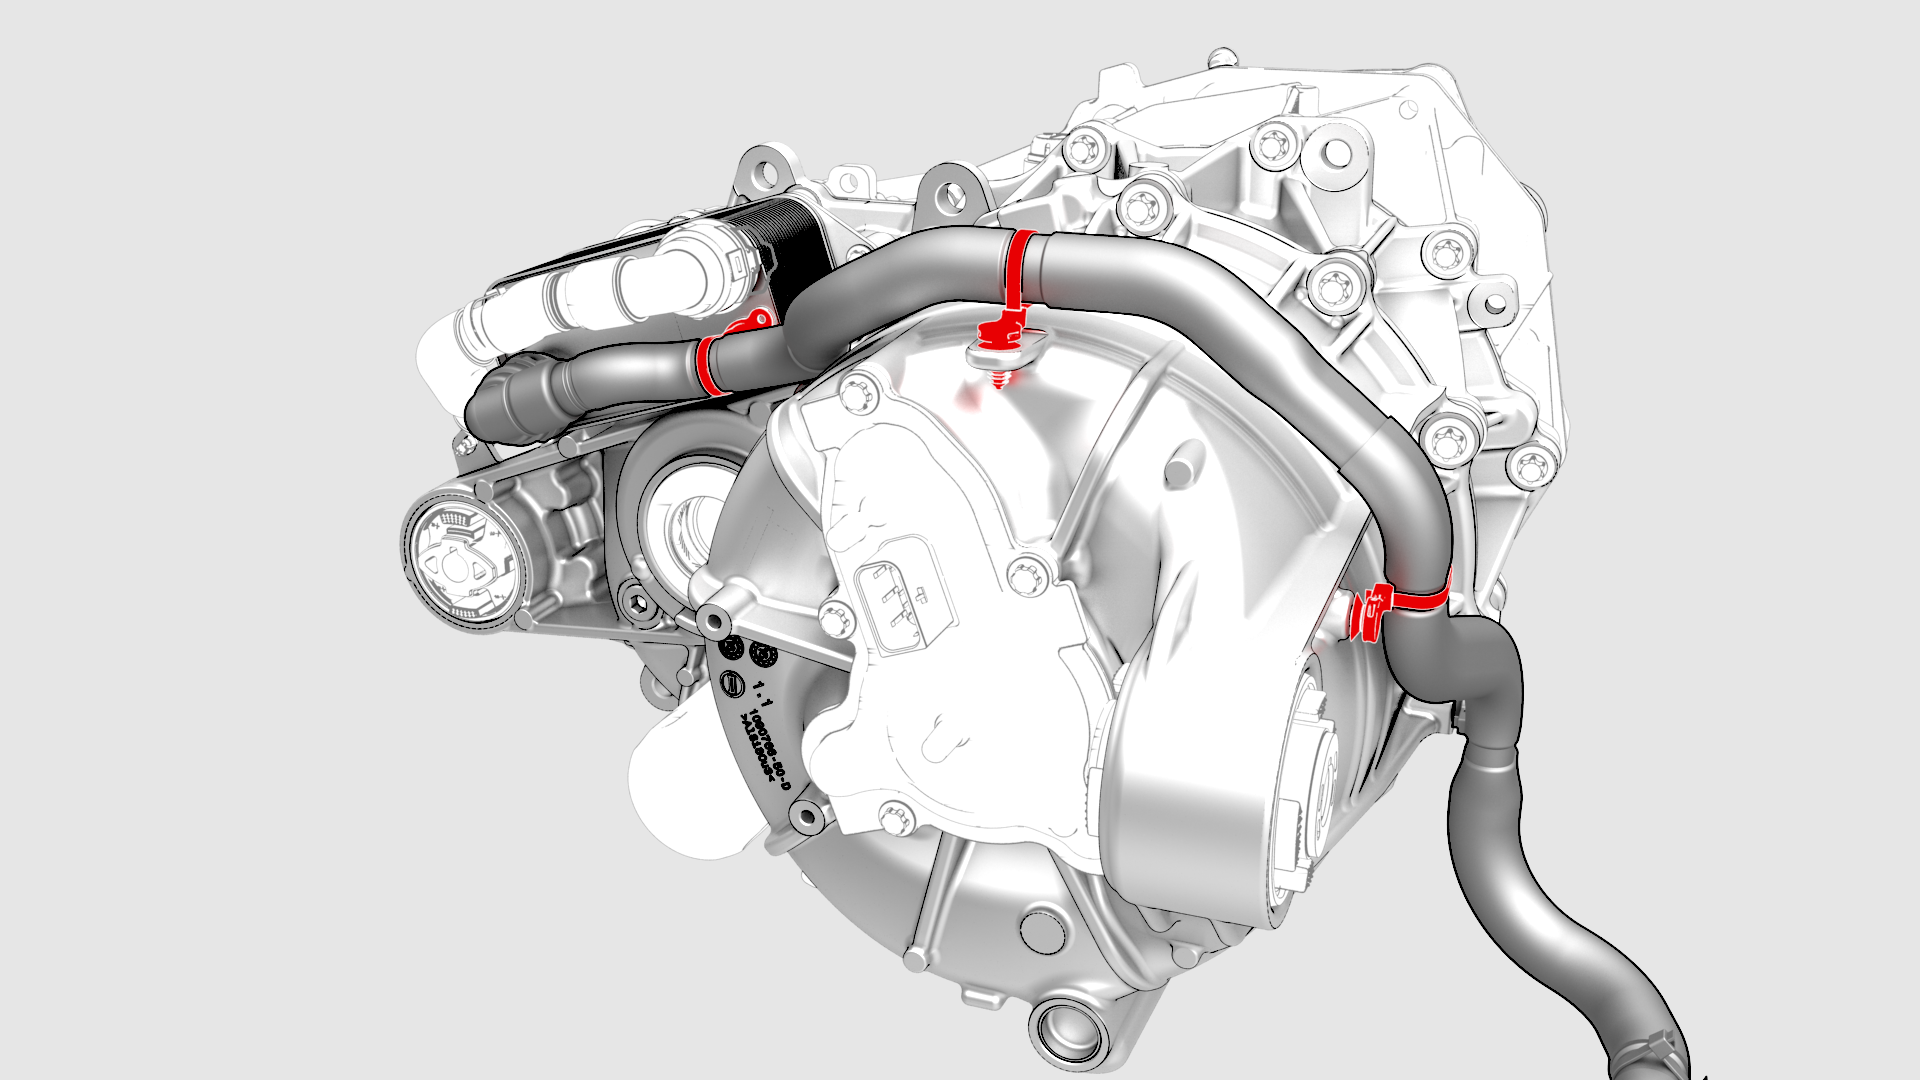
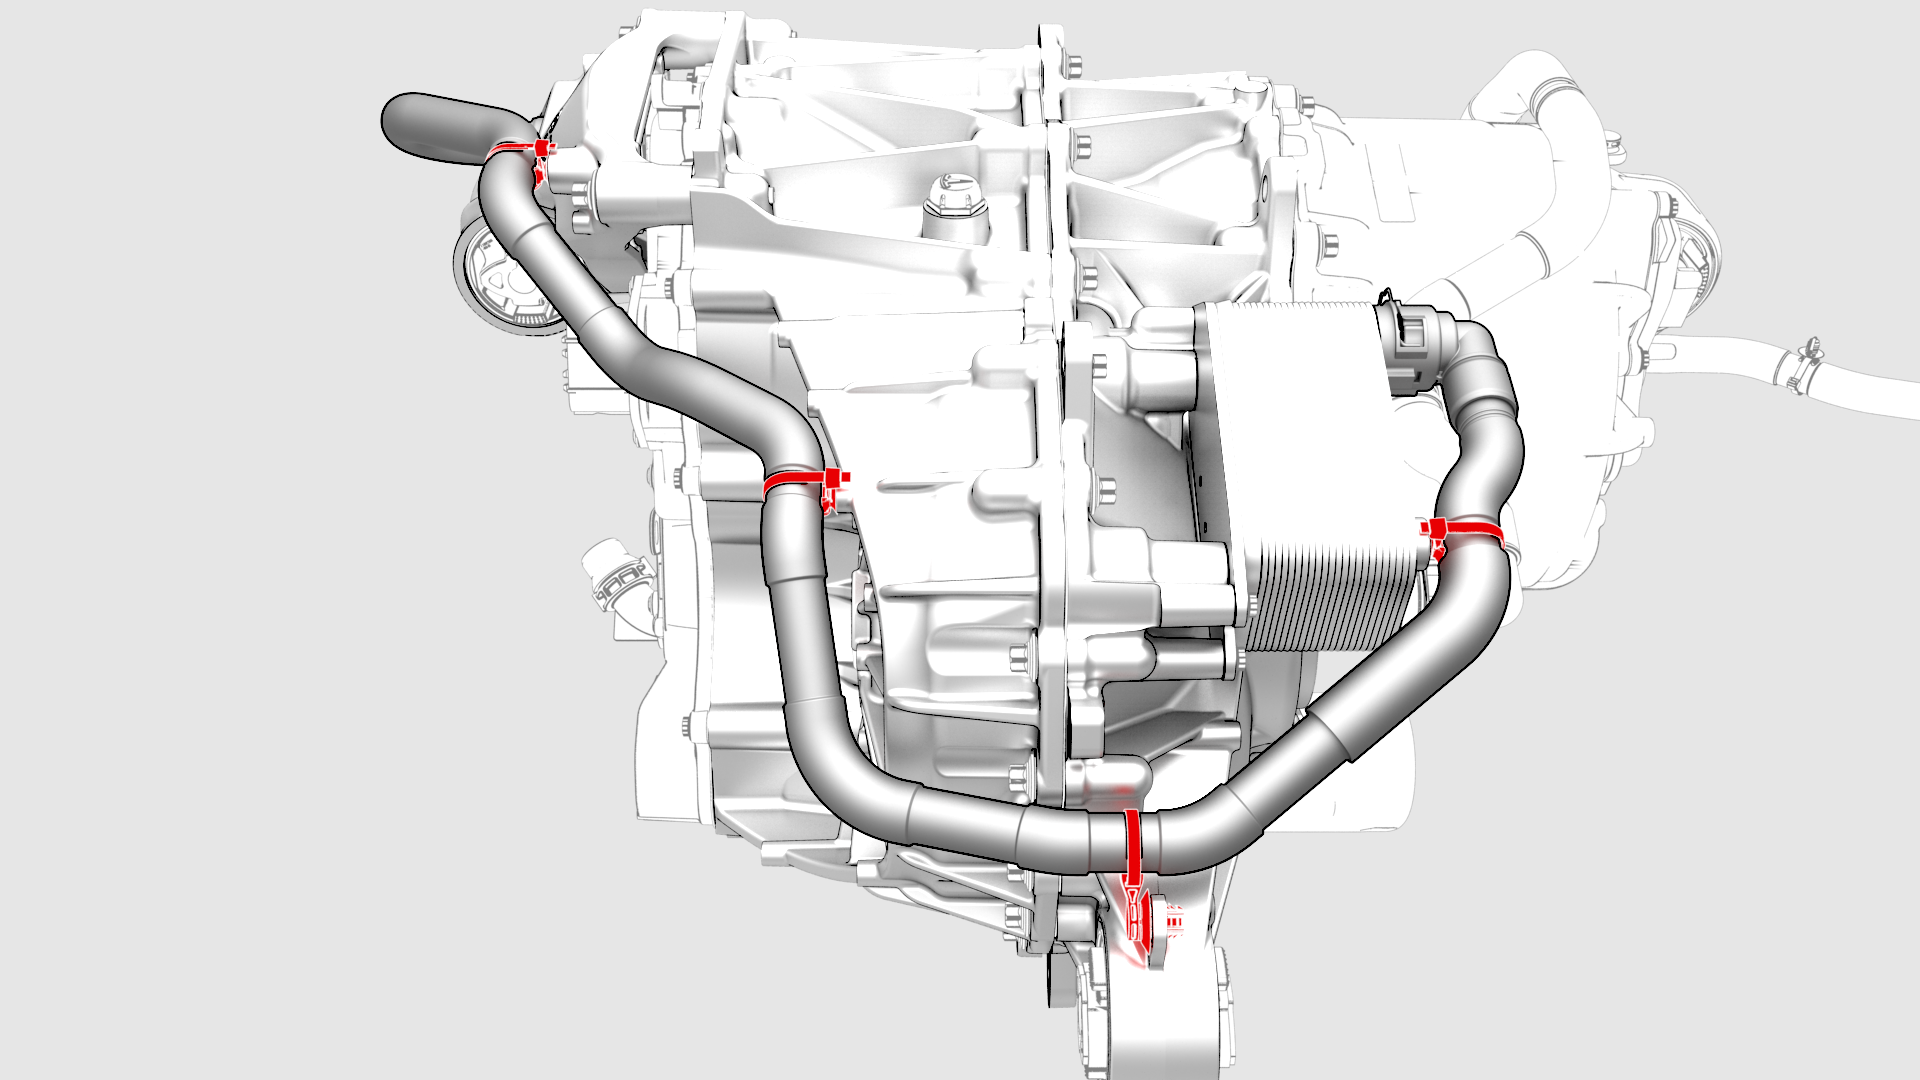
Release the clips that attach the coolant outlet hose to the rear drive unit.
-
Release the spring clip that attach the coolant outlet hose from the cooler, and then remove the hose from the rear drive unit.
-
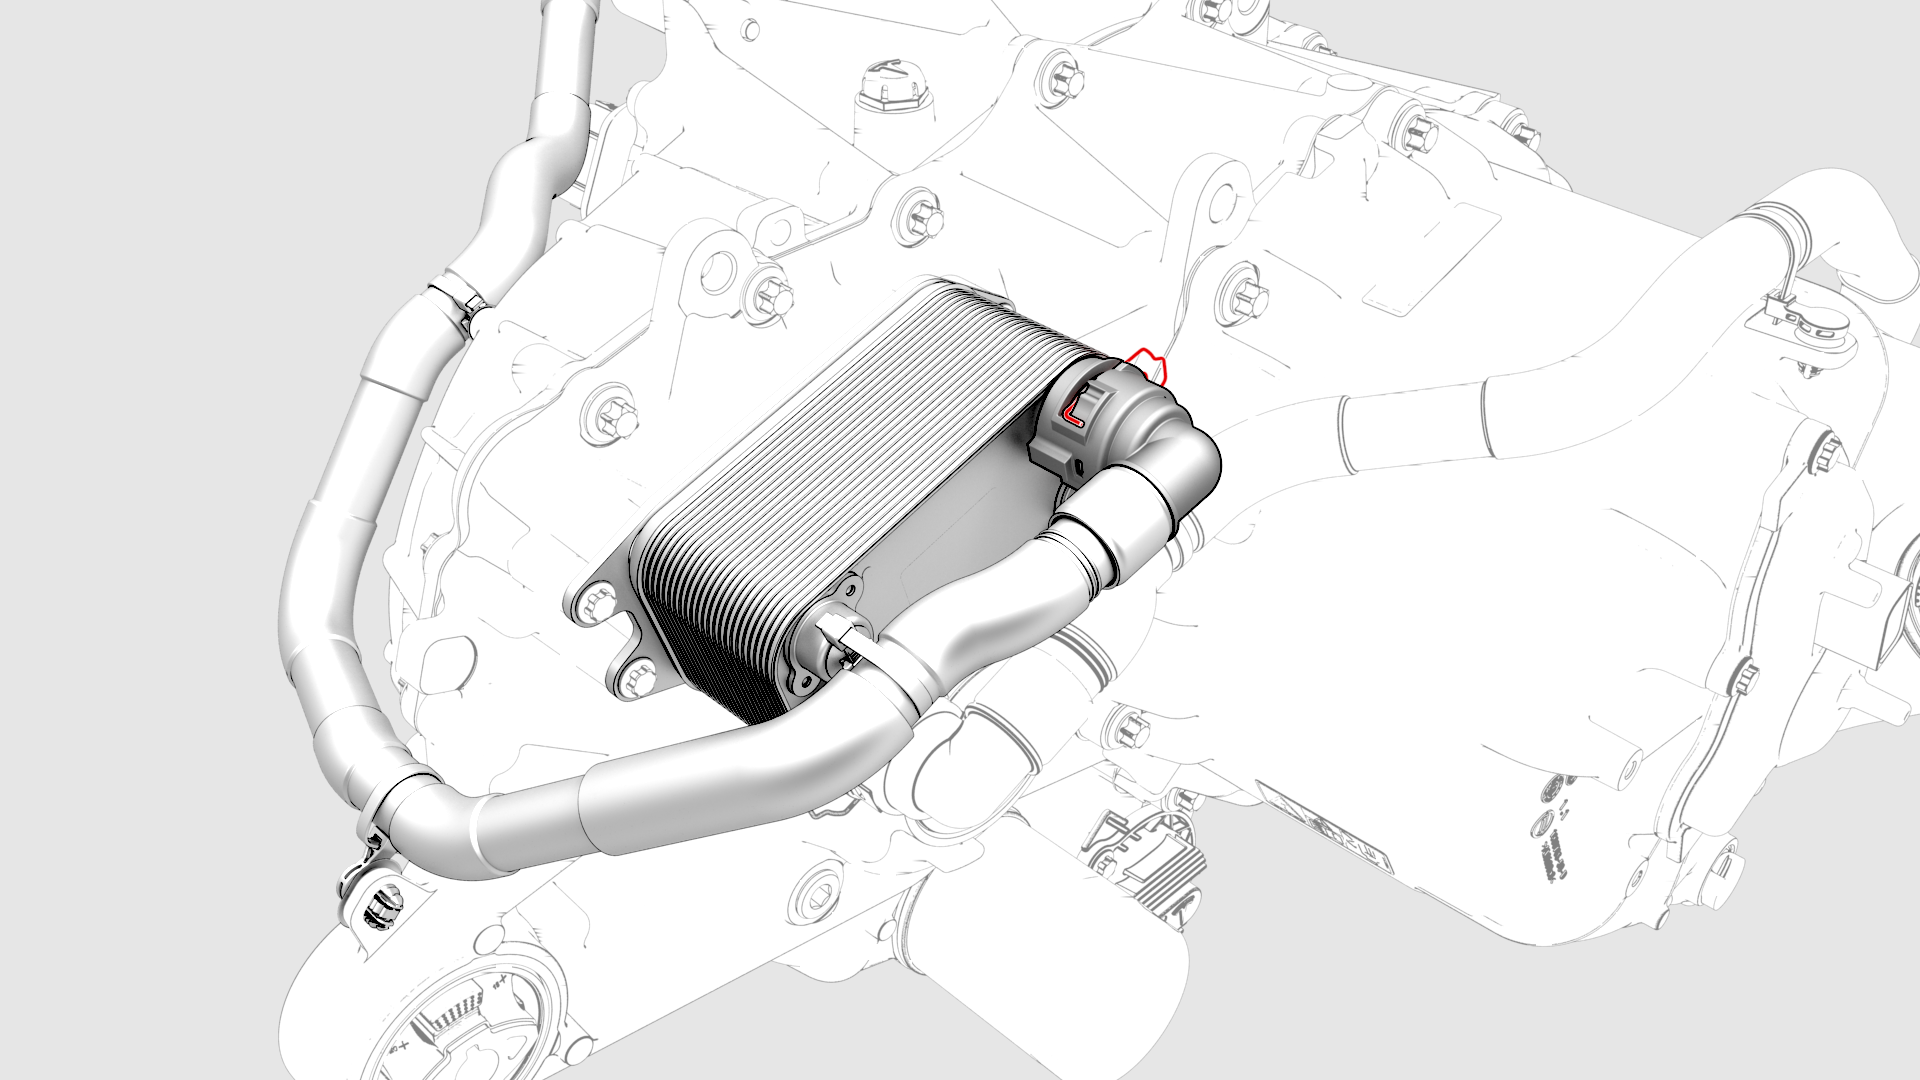
Release the clip that attaches the inverter-to-cooler hose to the cooler, and then remove the hoses from the cooler.
-
Release the clips that attach the inverter-to-cooler hose to the rear drive unit.
-
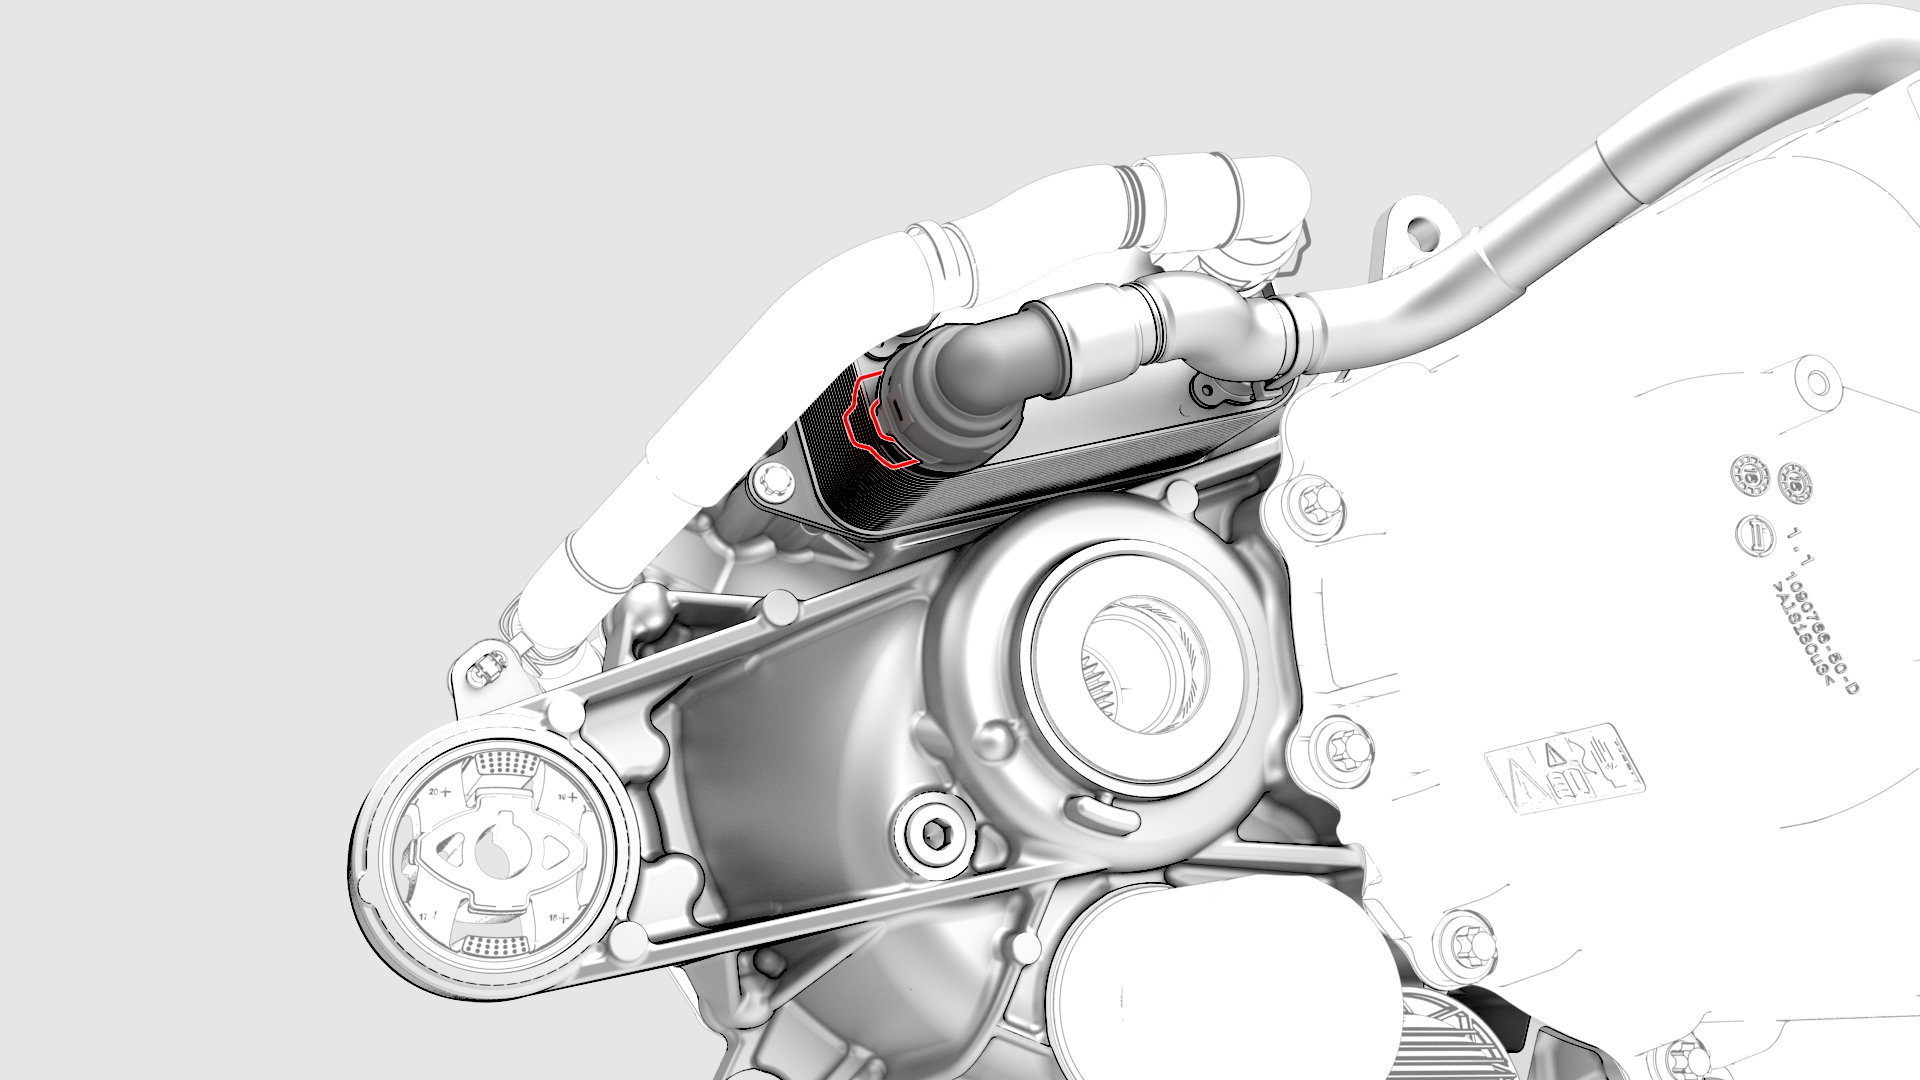
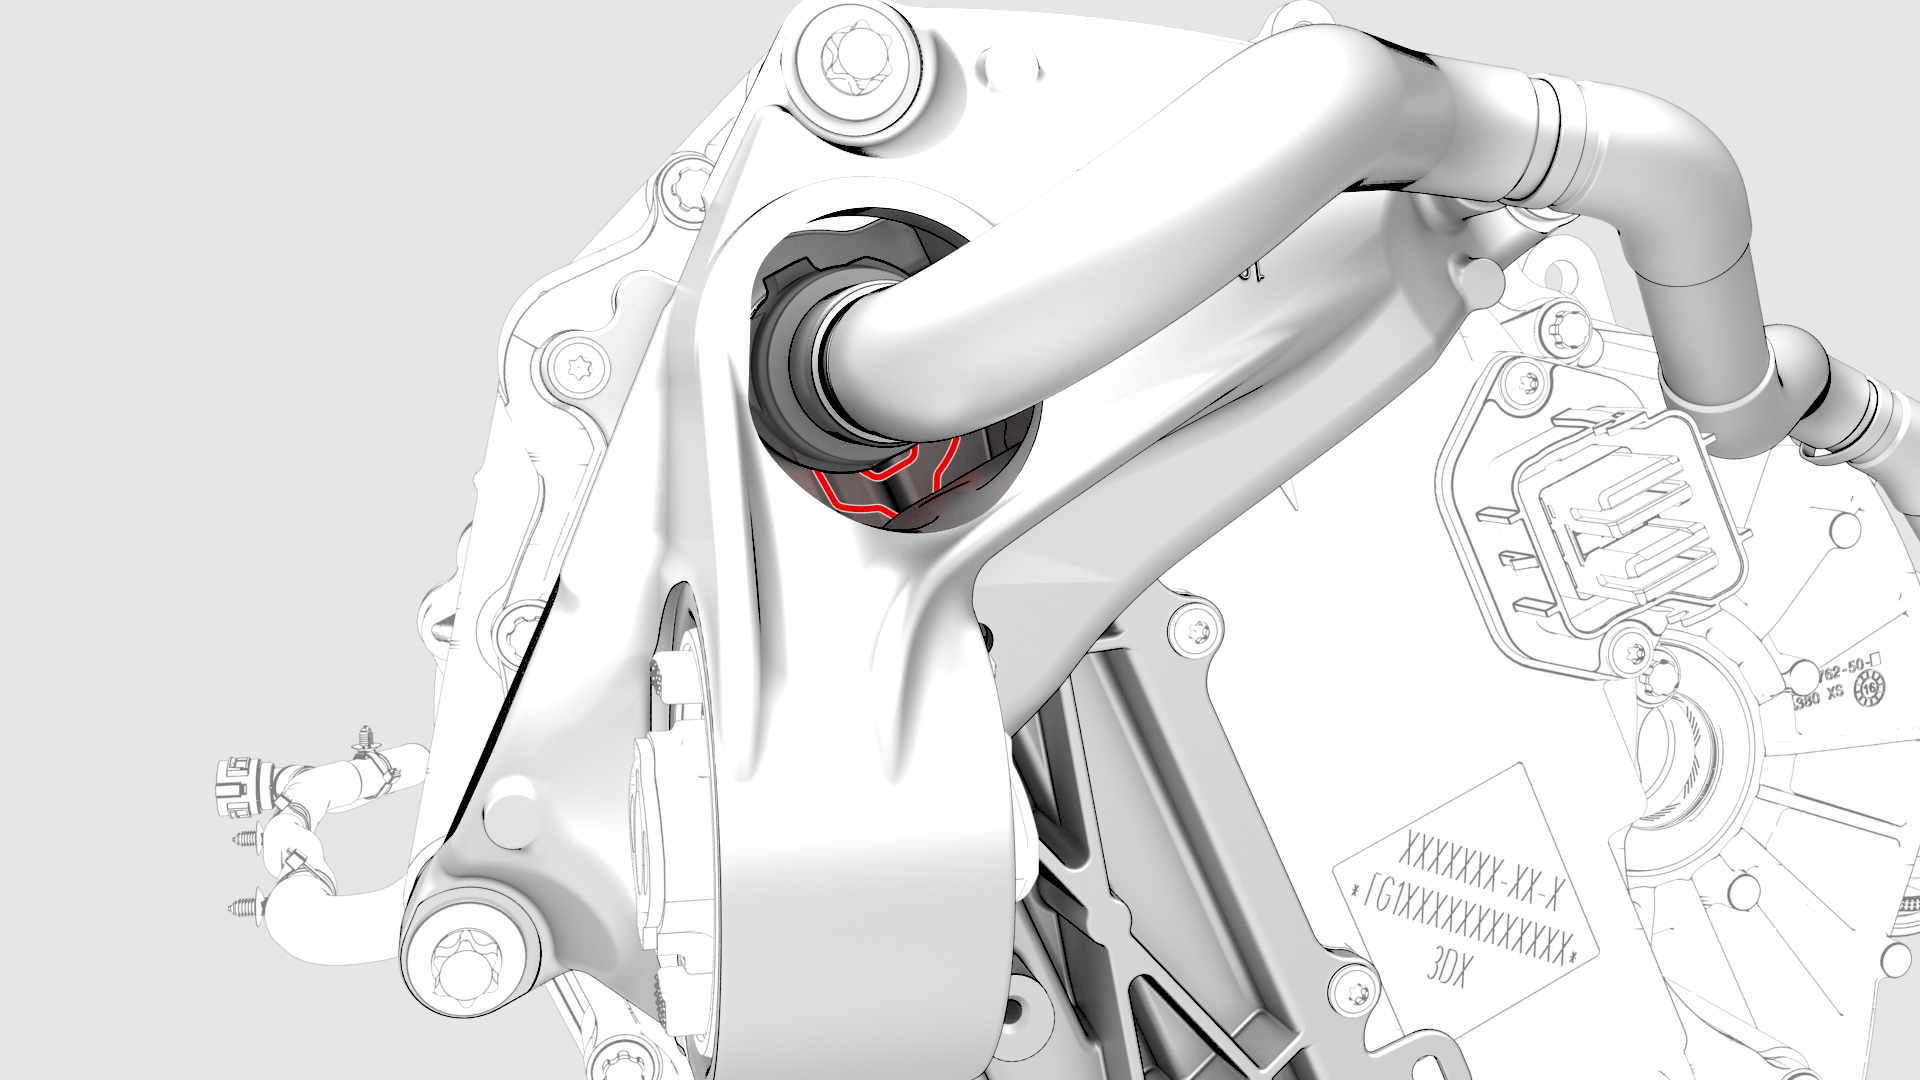
Release the clip that attach the inverter-to-cooler hose to the inverter, and then remove the hose.
| 1 | Remove the rear drive unit from the subframe assembly. See Drive Unit - Rear (Remove and Install). | ||
| 2 | Release the clips that attach the coolant outlet hose to the rear drive unit. | |
| 3 | Release the spring clip that attach the coolant outlet hose from the cooler, and then remove the hose from the rear drive unit. | |
| 4 | Release the clip that attaches the inverter-to-cooler hose to the cooler, and then remove the hoses from the cooler. | |
| 5 | Release the clips that attach the inverter-to-cooler hose to the rear drive unit. | |
| 6 | Release the clip that attach the inverter-to-cooler hose to the inverter, and then remove the hose. |
Install
-
Install the inverter-to-cooler hose to the inverter, and then attach the hose with a spring clip.
 Caution:Perform a push-pull test to verify that the hose is fully seated.
 -
Install the clips that attach the inverter-to-coolant hose to the rear drive unit.
-
Install the inverter-to-cooler hose to the cooler, and then attach the hose with spring clip.
Caution:Perform a push-pull test to verify that the hose is fully seated.
-
Install the coolant outlet hose to the cooler, and then attach the hose with spring clip.
Caution:Perform a push-pull test to verify that the hose is fully seated.
-
Attach the clips that hold the coolant outlet hose to the rear drive unit.
| 1 | Install the inverter-to-cooler hose to the inverter, and then attach the hose with a spring clip. Caution: Perform a push-pull test to verify that the hose is fully seated.
| |
| 2 | Install the clips that attach the inverter-to-coolant hose to the rear drive unit. | |
| 3 | Install the inverter-to-cooler hose to the cooler, and then attach the hose with spring clip. Caution: Perform a push-pull test to verify that the hose is fully seated.
| |
| 4 | Install the coolant outlet hose to the cooler, and then attach the hose with spring clip. Caution: Perform a push-pull test to verify that the hose is fully seated.
| |
| 5 | Attach the clips that hold the coolant outlet hose to the rear drive unit. | |
| 6 | Install the rear drive unit. See Drive Unit - Rear (Remove and Install). Note: New rear drive units come prefilled with gearbox fluid. Clean up any leaks during installation and top off the gearbox fluid as necessary.
| ||
| 7 | Install the rear subframe assembly. See Subframe Assembly - Rear (Remove and Install).
|