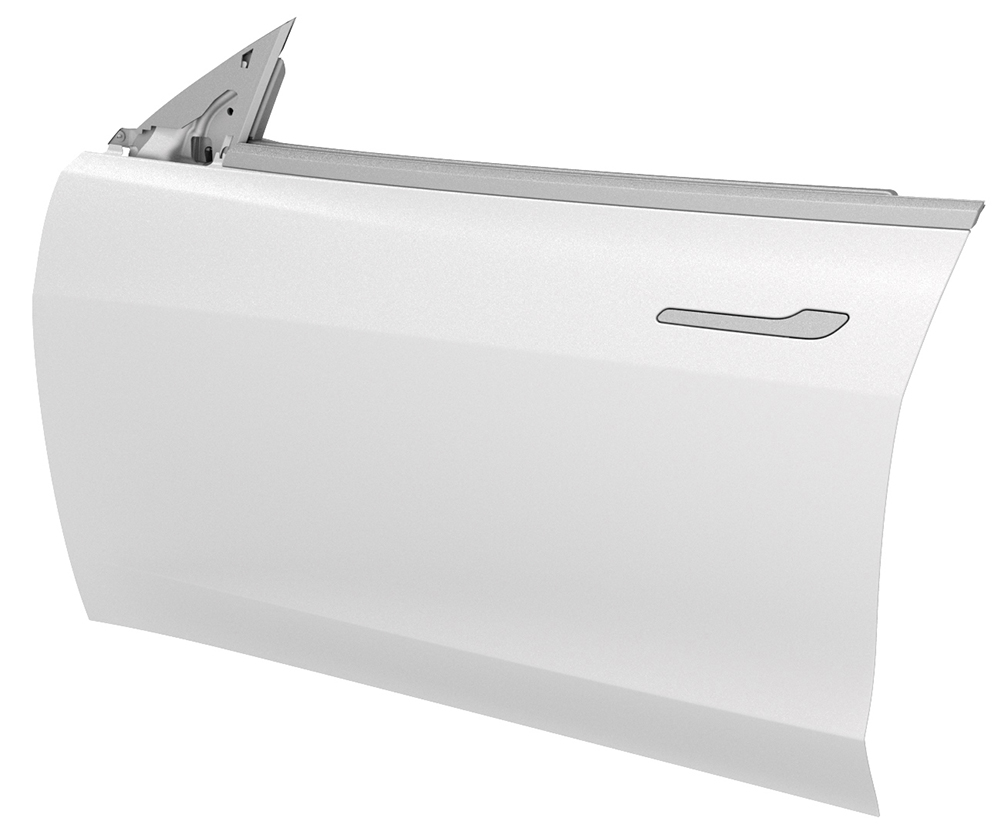
Door - Front - LH (Remove and Install)
Correction code 1010600110106001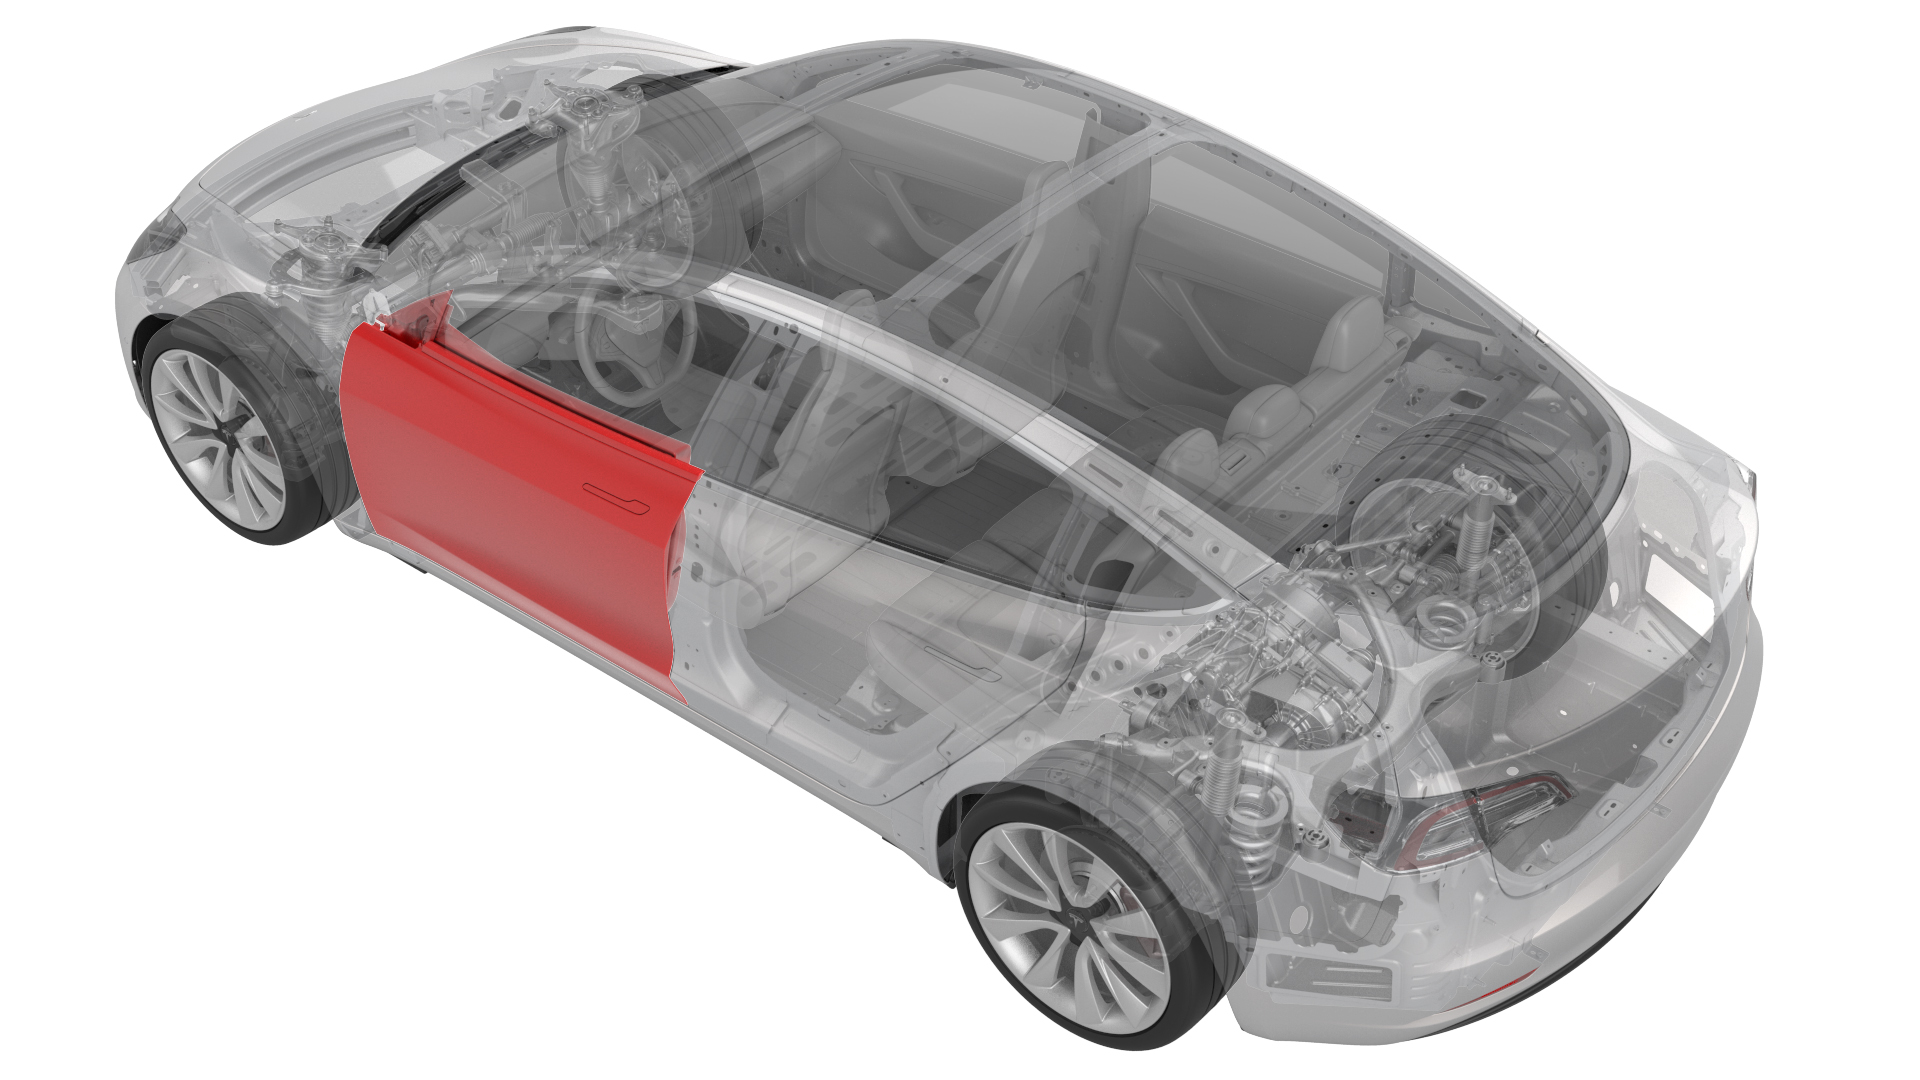
from-rc
Note:
This procedure was formulated using a release candidate or production model. Follow safety requirements and use extreme caution when working on or near high-voltage systems and components.
Provide corrections and feedback to servicemanualfeedback@tesla.com.
Remove
-
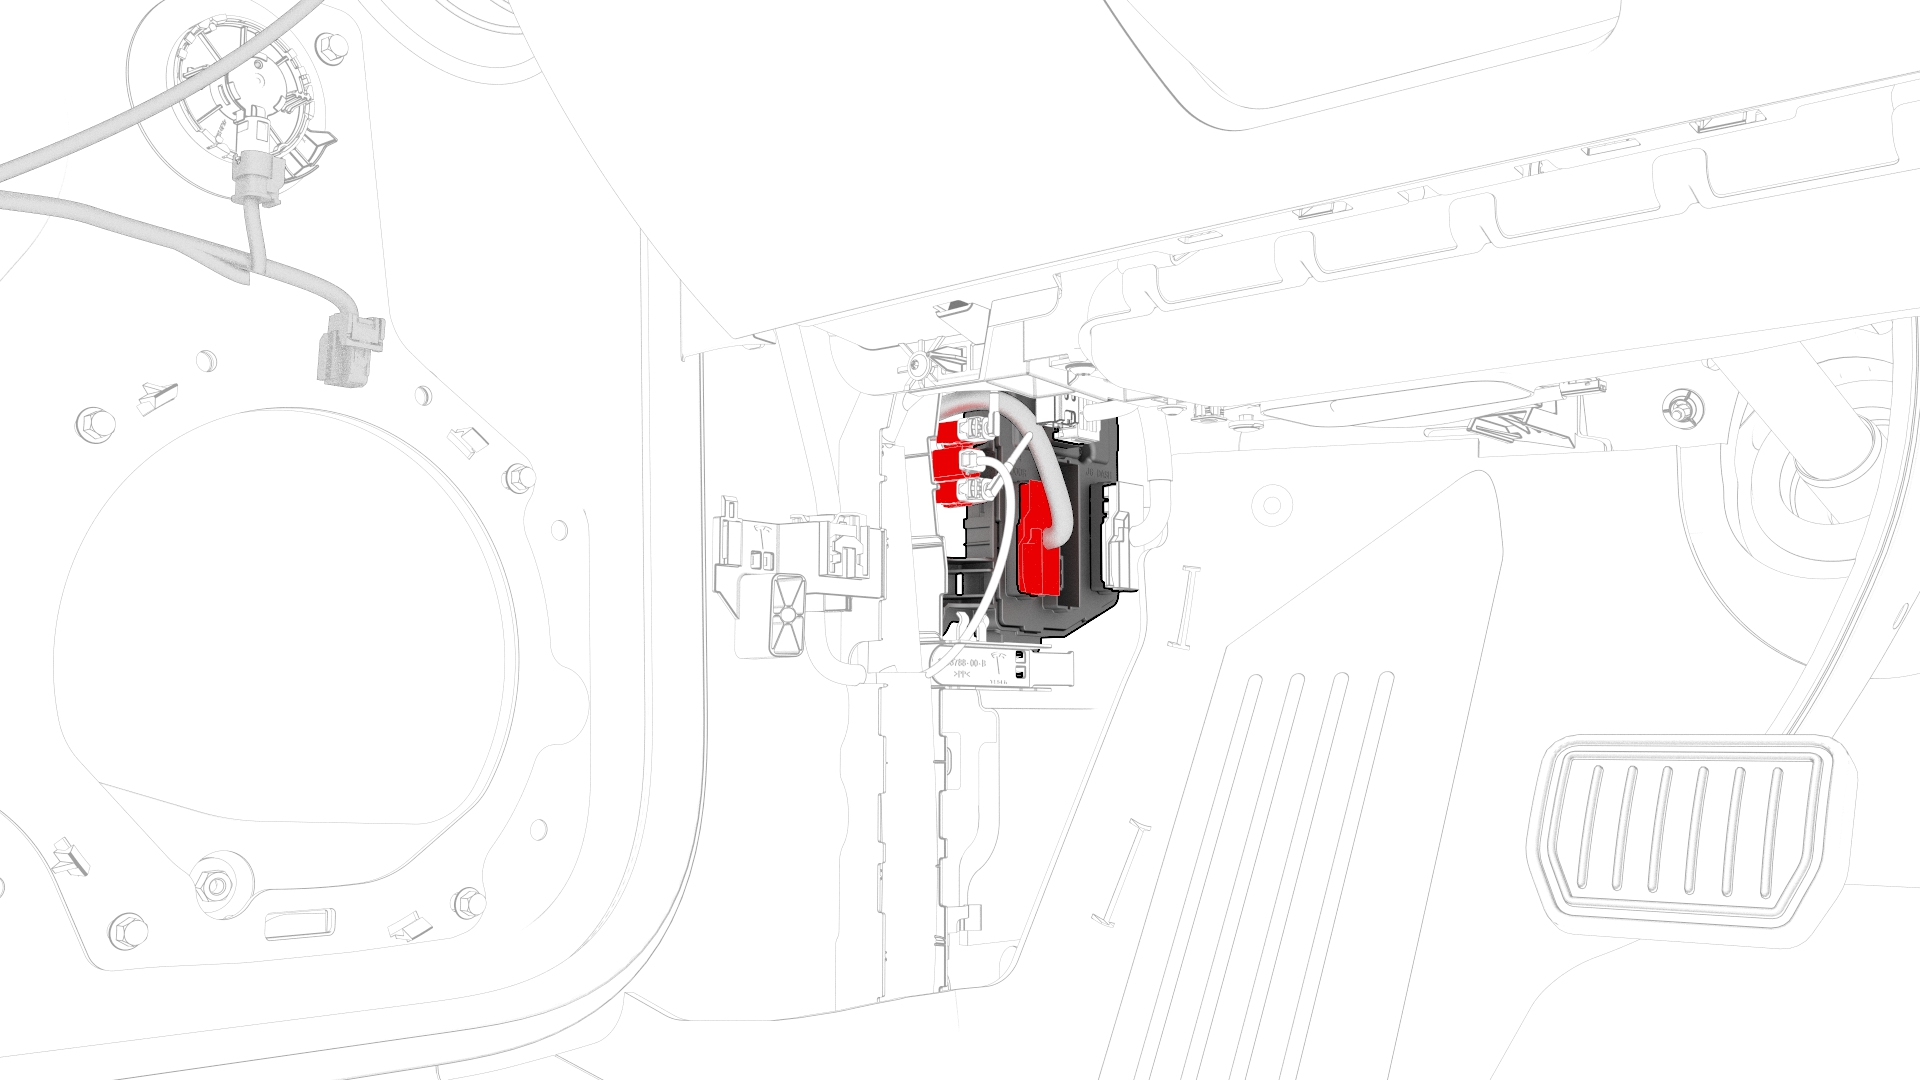
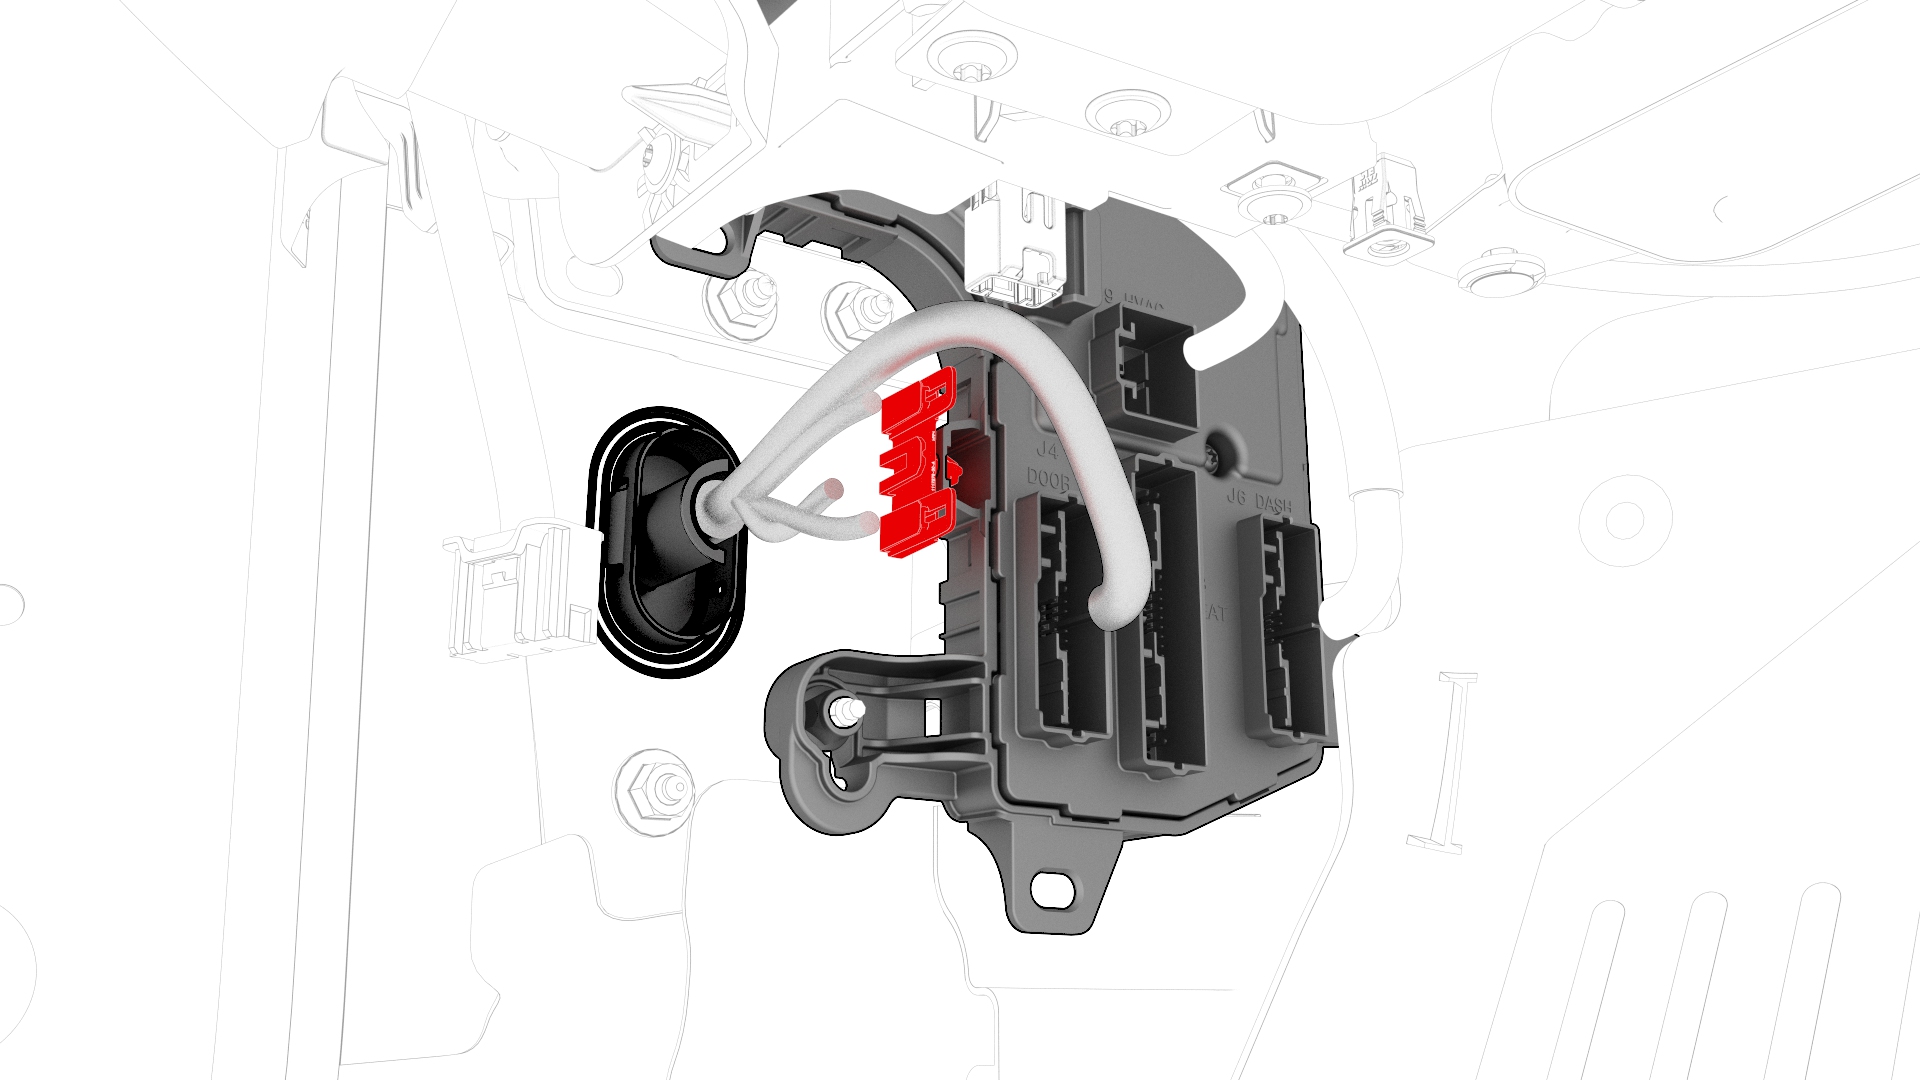
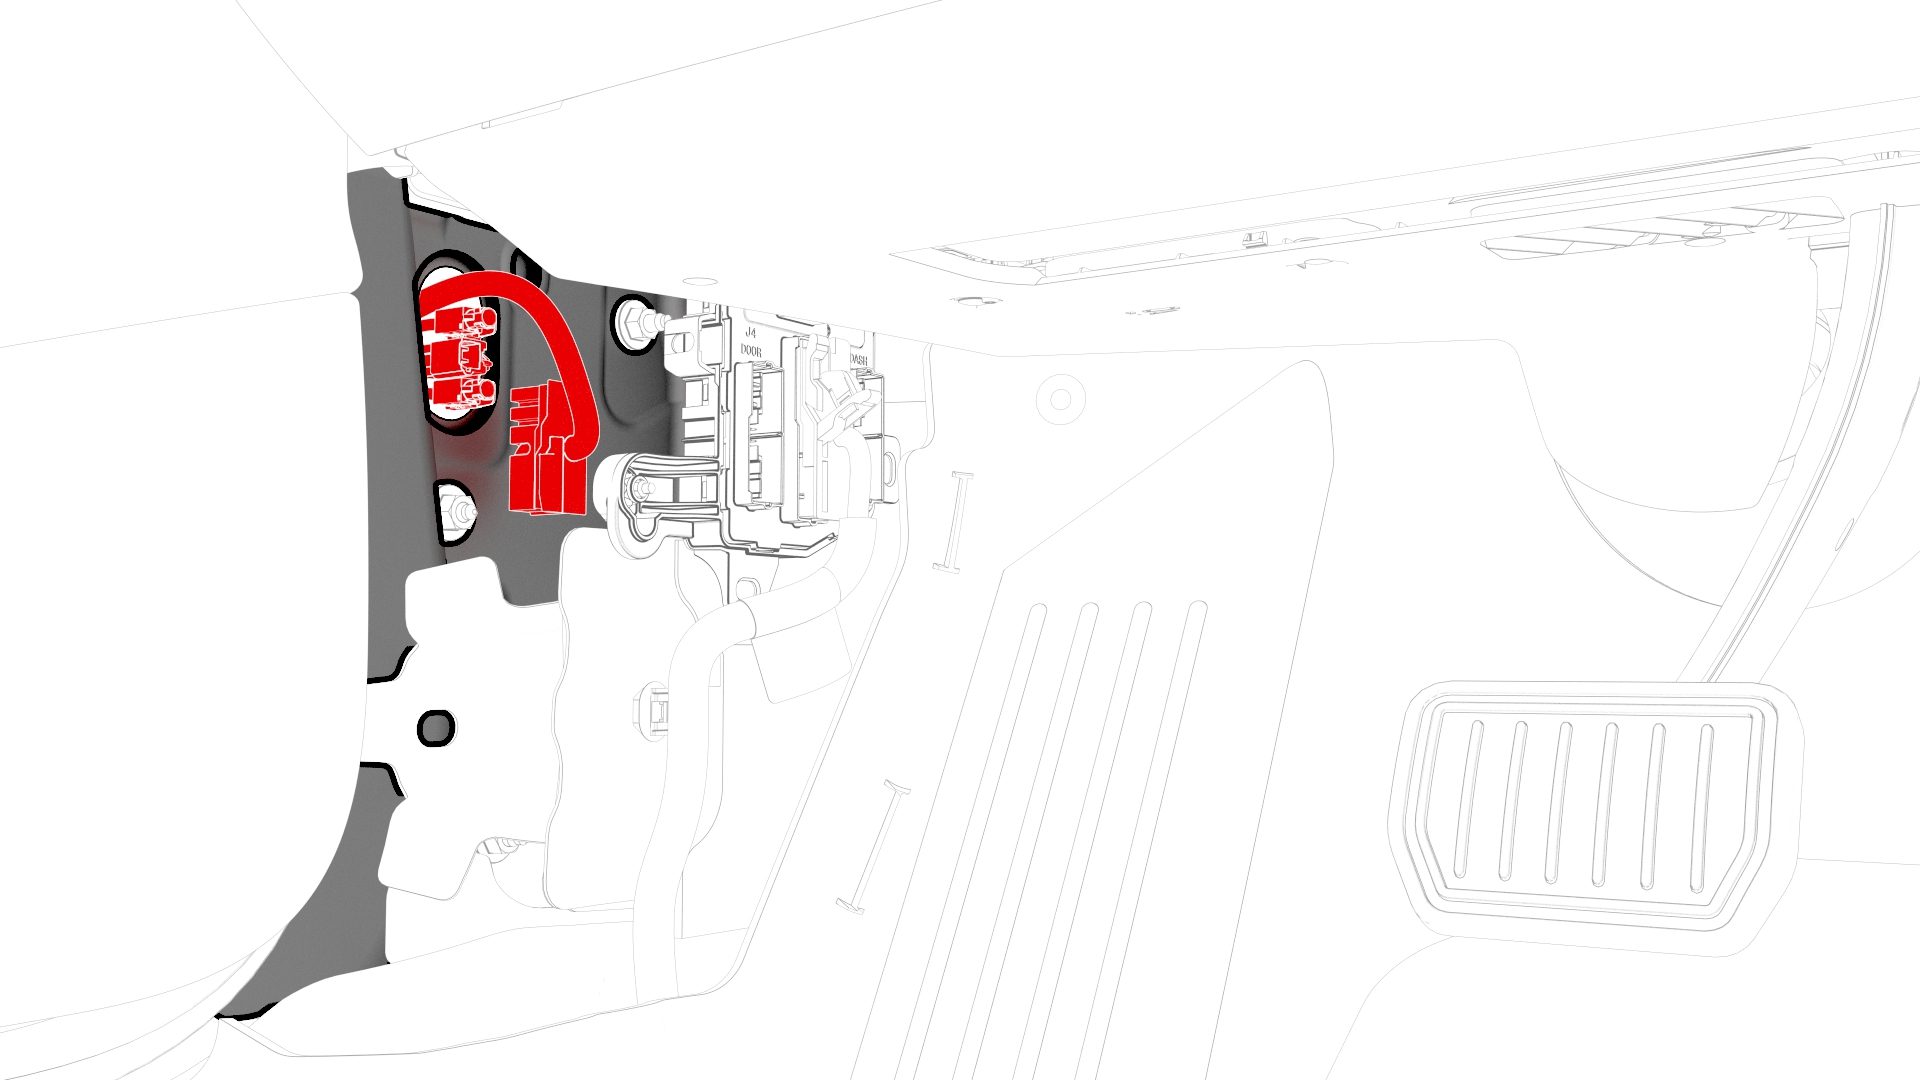
Disconnect the LH front door electrical connectors from the LH body controller module.
-
Release the electrical harness clip from the LH body controller module.
-
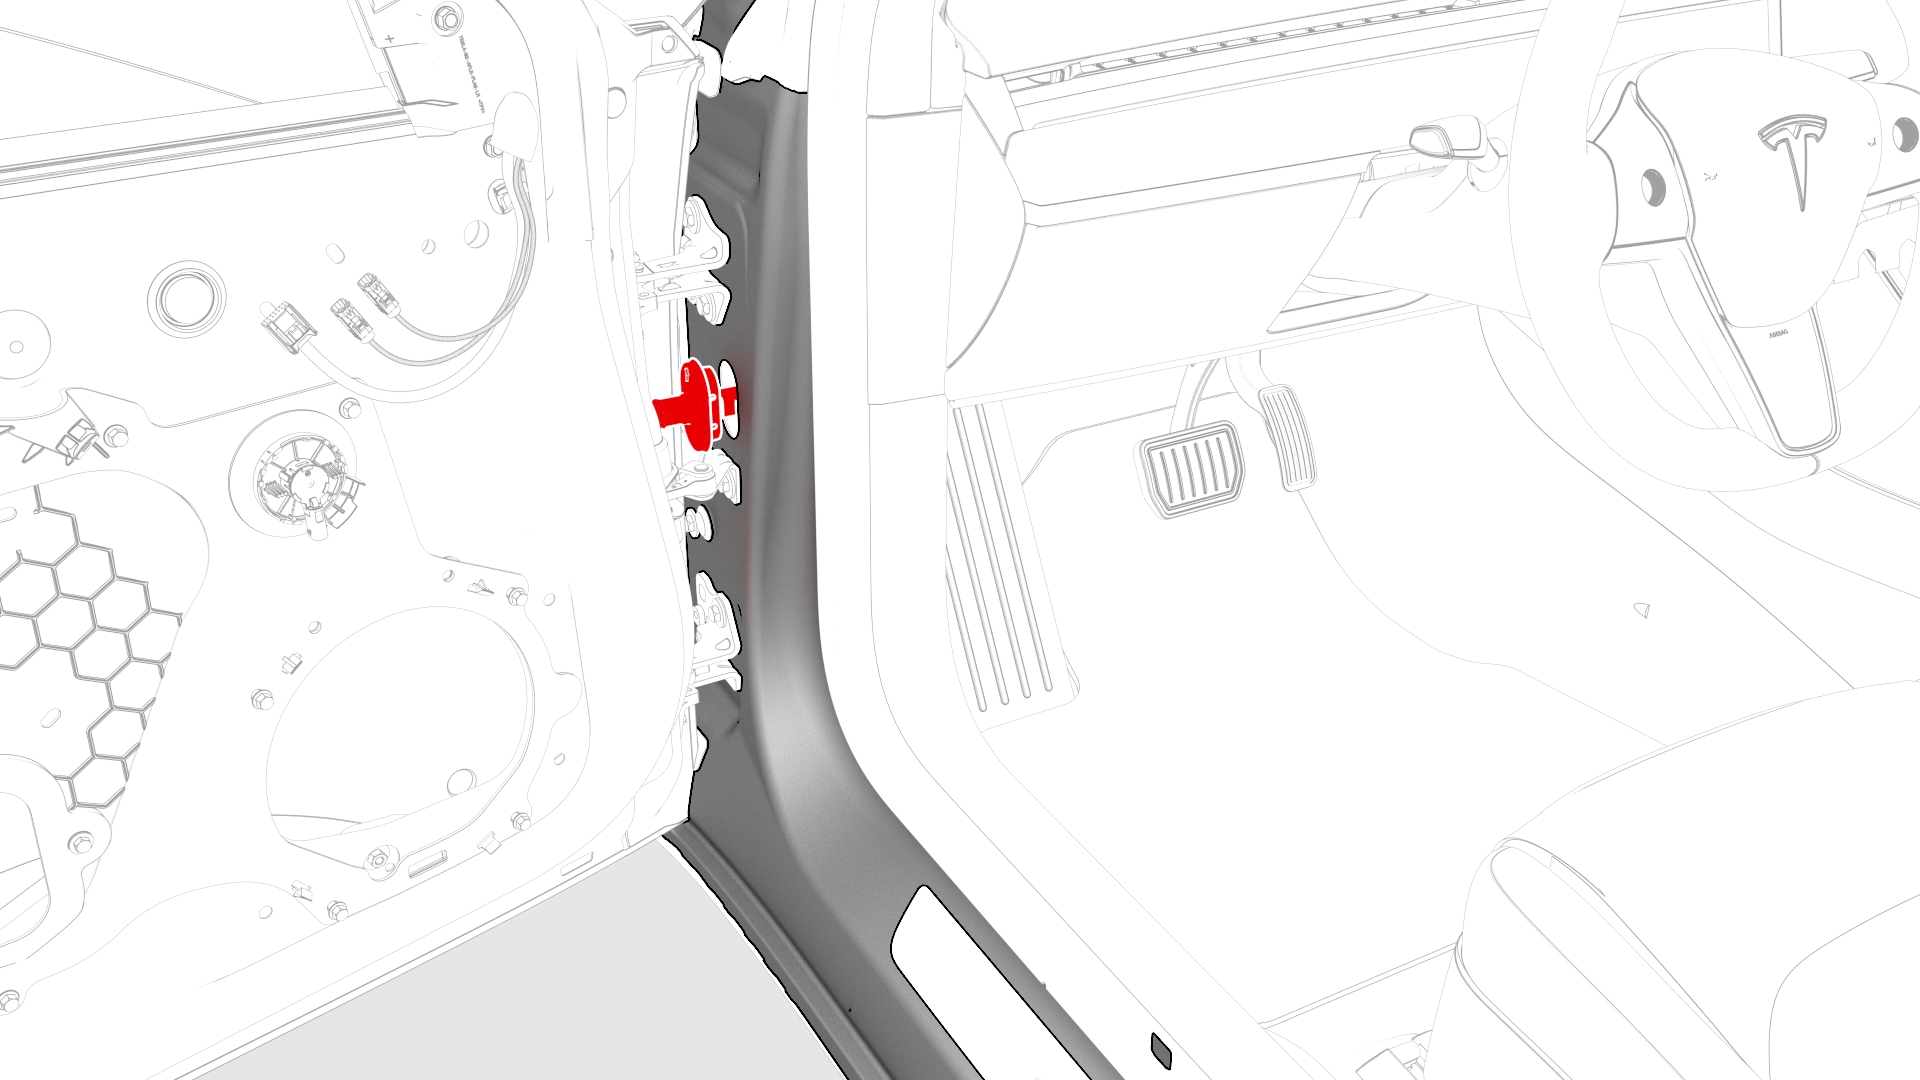
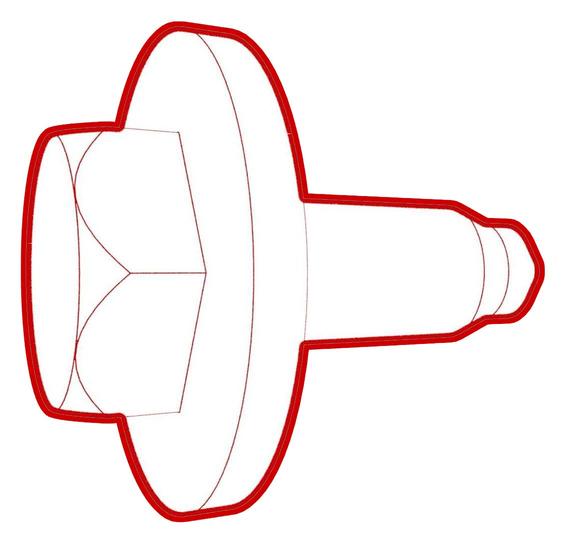
Release the grommet, and then push the LH door electrical harness through the A-pillar bulkhead.
-
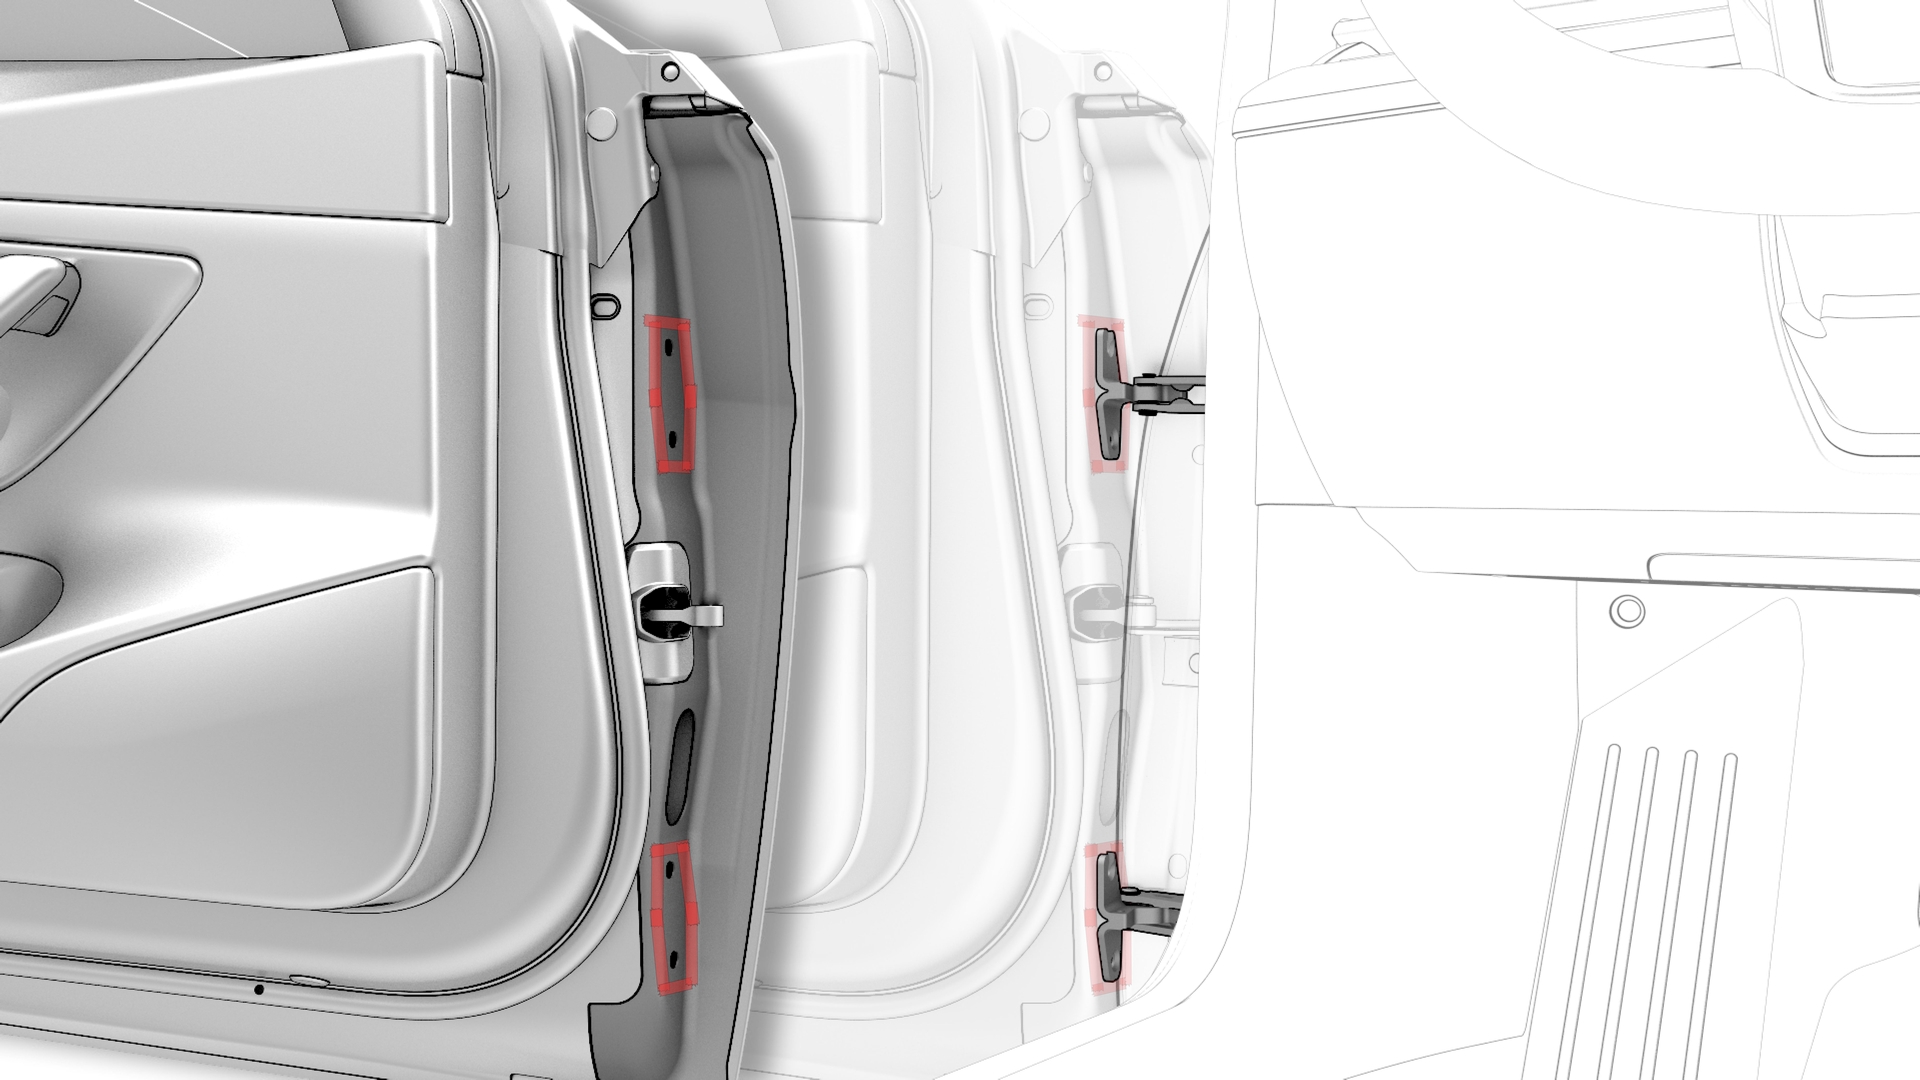
Remove the bolt that attaches the LH front door check strap to the A-pillar.
 Torque 24 Nm
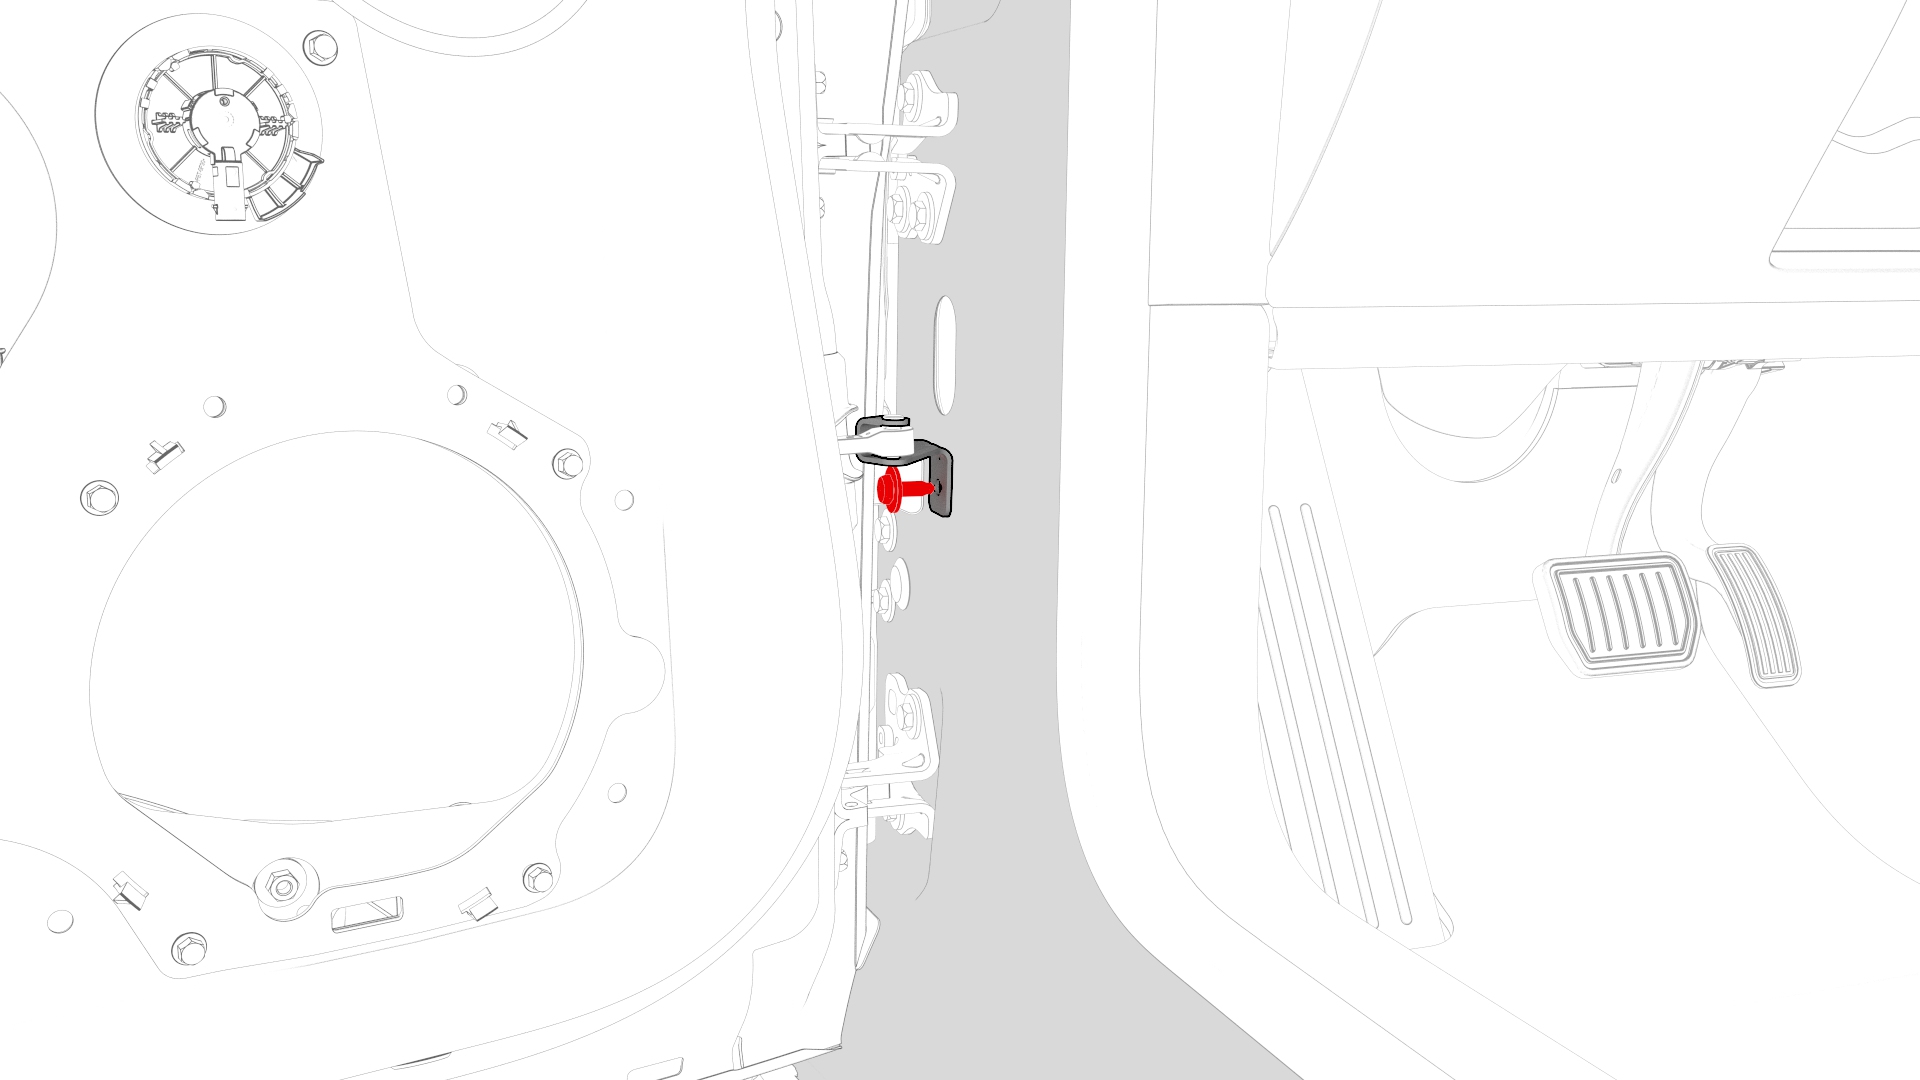
 Caution:Unbolting the door check allows the door to swing freely beyond opening limits.
 -
Use tape to mark the mounting locations of the door hinges on the LH front door.
-
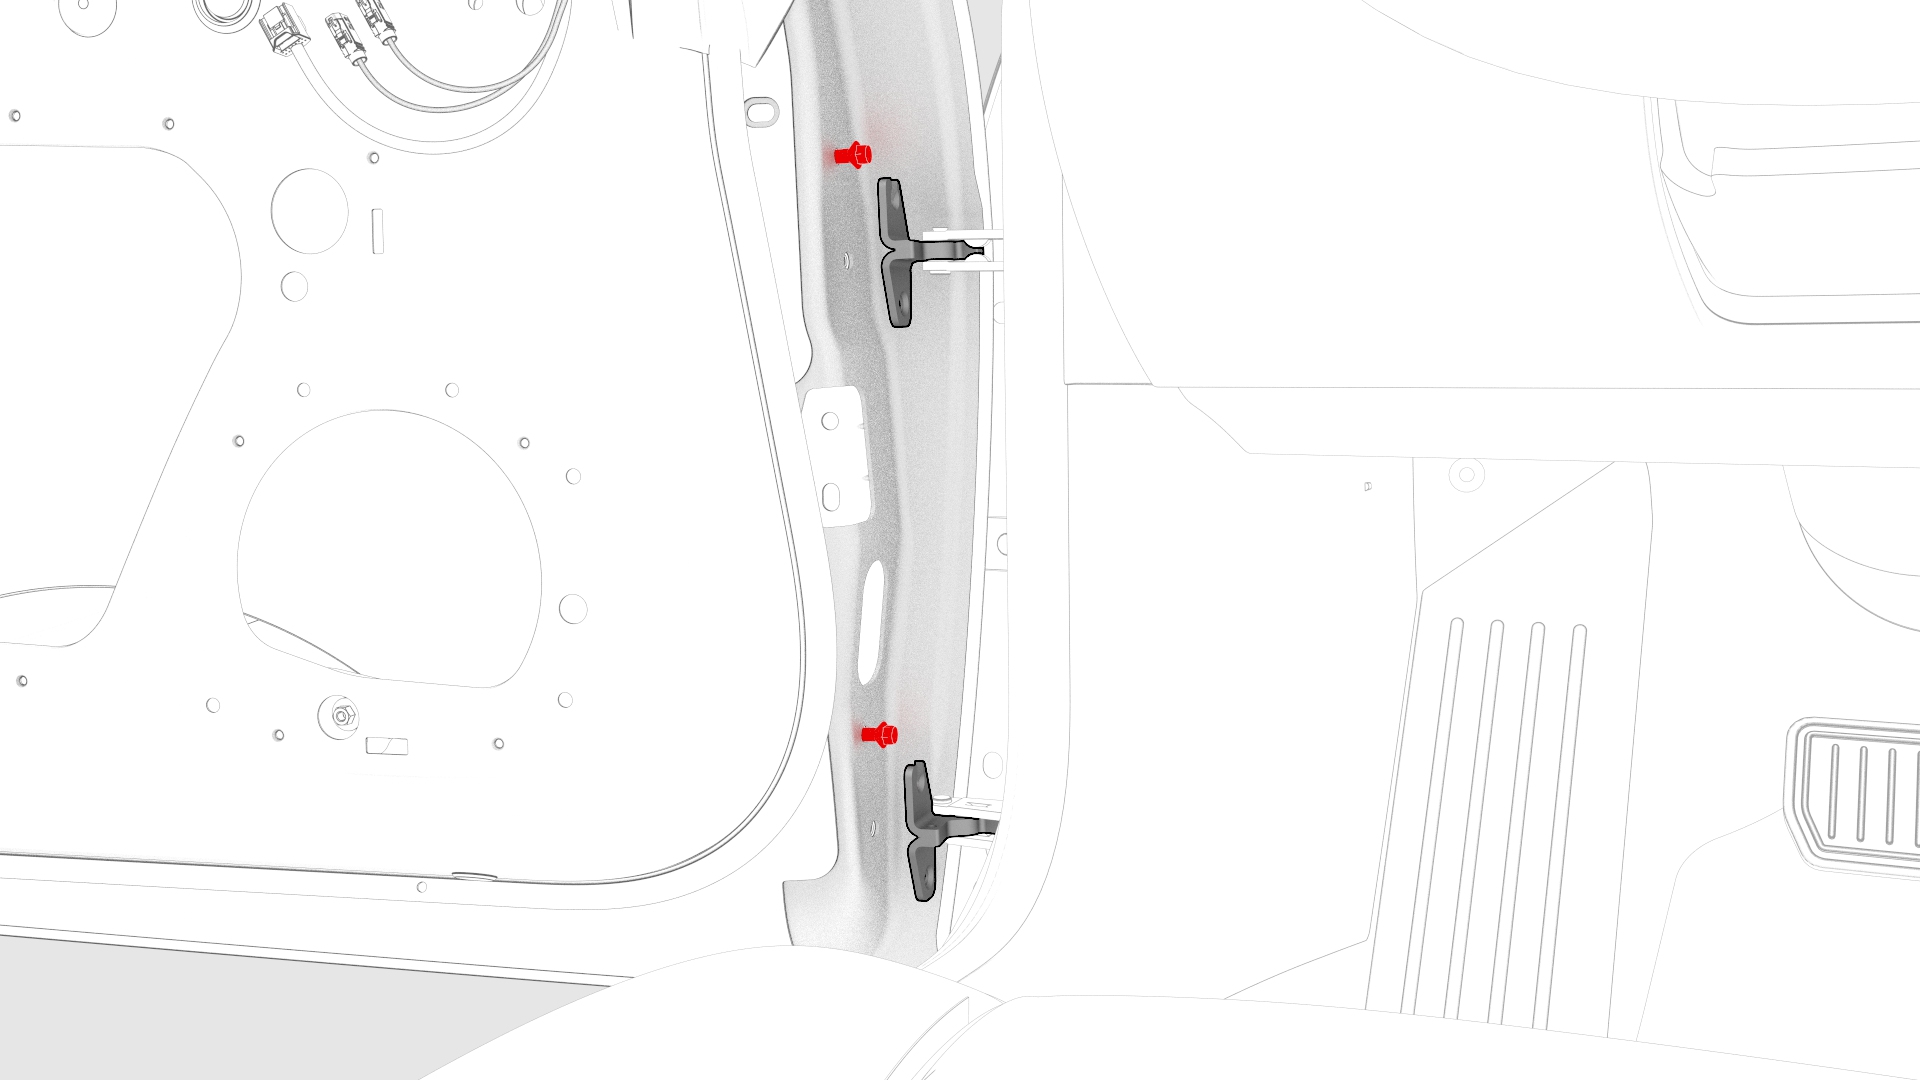
Loosen the hinge bolts, and then remove the lower bolts for each hinge.
 Torque 24 Nm
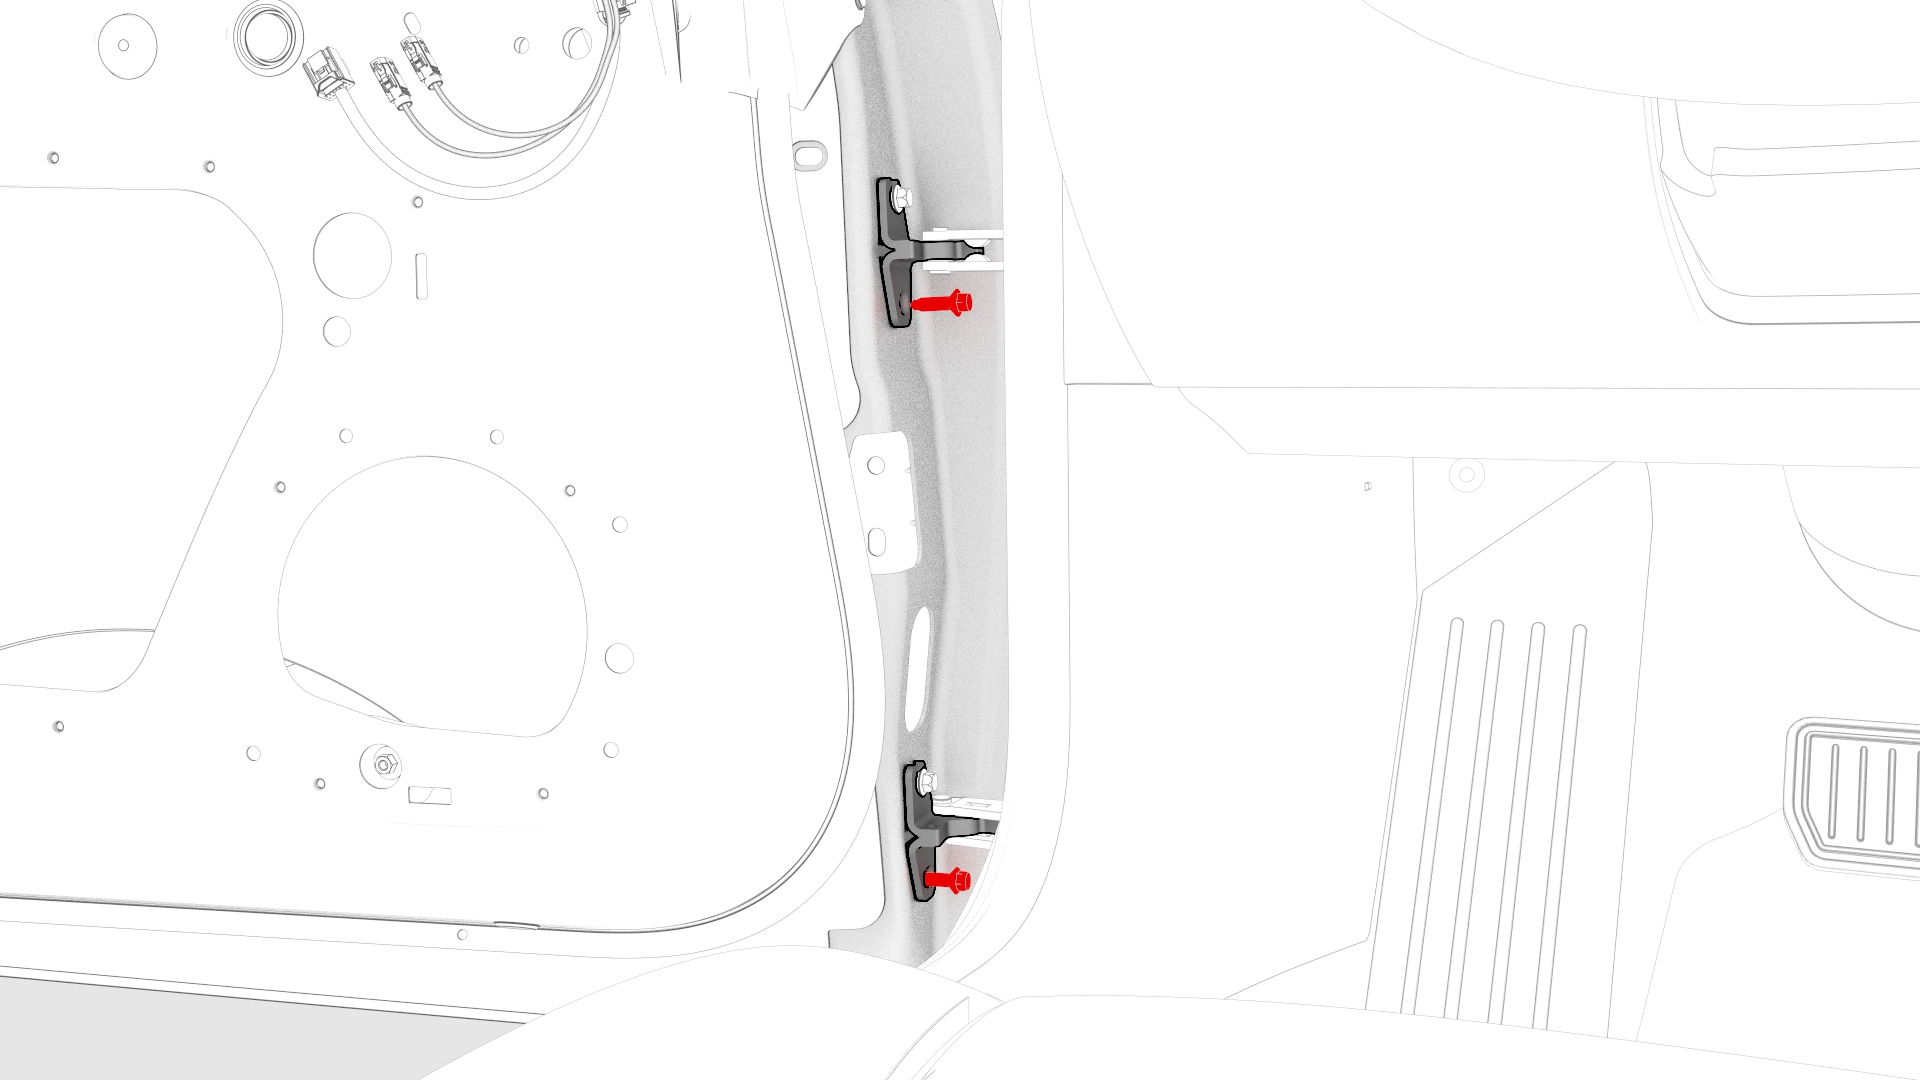
-
Partially unthread the upper bolt for each hinge, and with assistance, lift the LH front door away from the vehicle.
| 1 | Remove the 2nd row lower seat cushion. See Seat Cushion - Lower - 2nd Row (Remove and Replace). | ||
| 2 | Remove the rear underhood apron. See Underhood Apron - Rear (Remove and Replace). | ||
| 3 | Disconnect 12V power. See 12V Power (Disconnect and Connect). | ||
| 4 | Remove the LH instrument panel end cap. See End Cap - Instrument Panel - LH (Remove and Replace). | ||
| 5 | Remove the middle A-Pillar trim panel. See Trim - A-Pillar - Middle - LH (Remove and Replace). | ||
| 6 | Remove the LH lower A-pillar trim. See Trim - A-Pillar - Lower - LH (Remove and Replace). | ||
| 7 | Disconnect the LH front door electrical connectors from the LH body controller module. | |
| 8 | Release the electrical harness clip from the LH body controller module. | |
| 9 | Release the grommet, and then push the LH door electrical harness through the A-pillar bulkhead. | |
| 10 | Remove the bolt that attaches the LH front door check strap to the A-pillar. Torque 24 Nm Caution: Unbolting the door check allows the door to swing freely beyond opening limits.
| |
| 11 | Use tape to mark the mounting locations of the door hinges on the LH front door. | |
| 12 | Loosen the hinge bolts, and then remove the lower bolts for each hinge. Torque 24 Nm | |
| 13 | Partially unthread the upper bolt for each hinge, and with assistance, lift the LH front door away from the vehicle. |
Install
Installation procedure is the reverse of removal, except for the following:
Partially thread the upper bolt for each hinge in the door so that the door can set on the hinges to install the lower bolt.