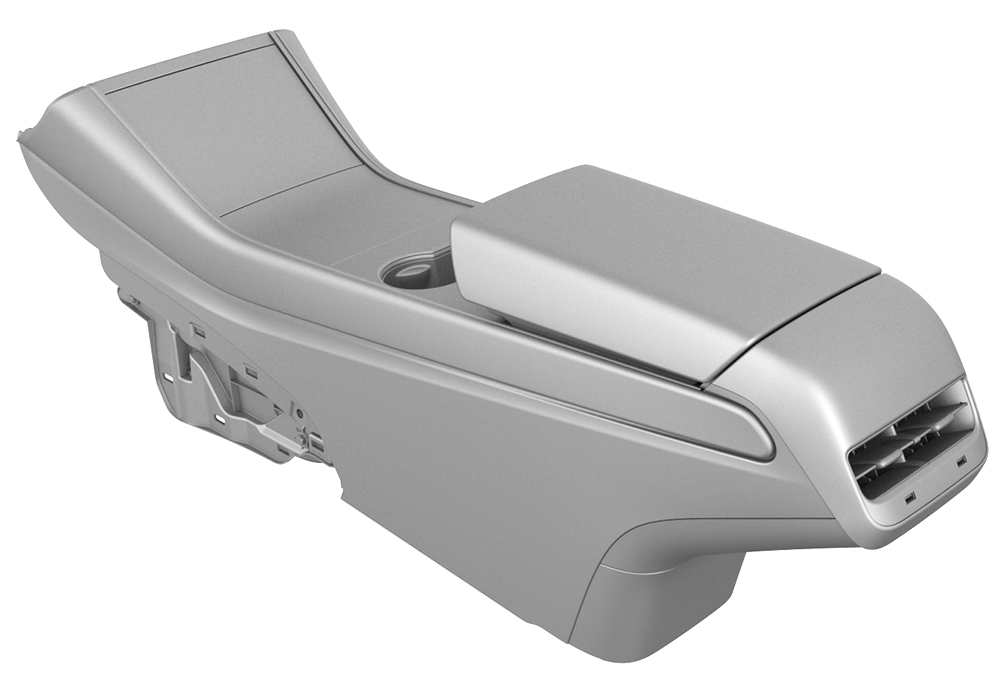
Center Console (Remove and Install)
Correction code 1519010115190101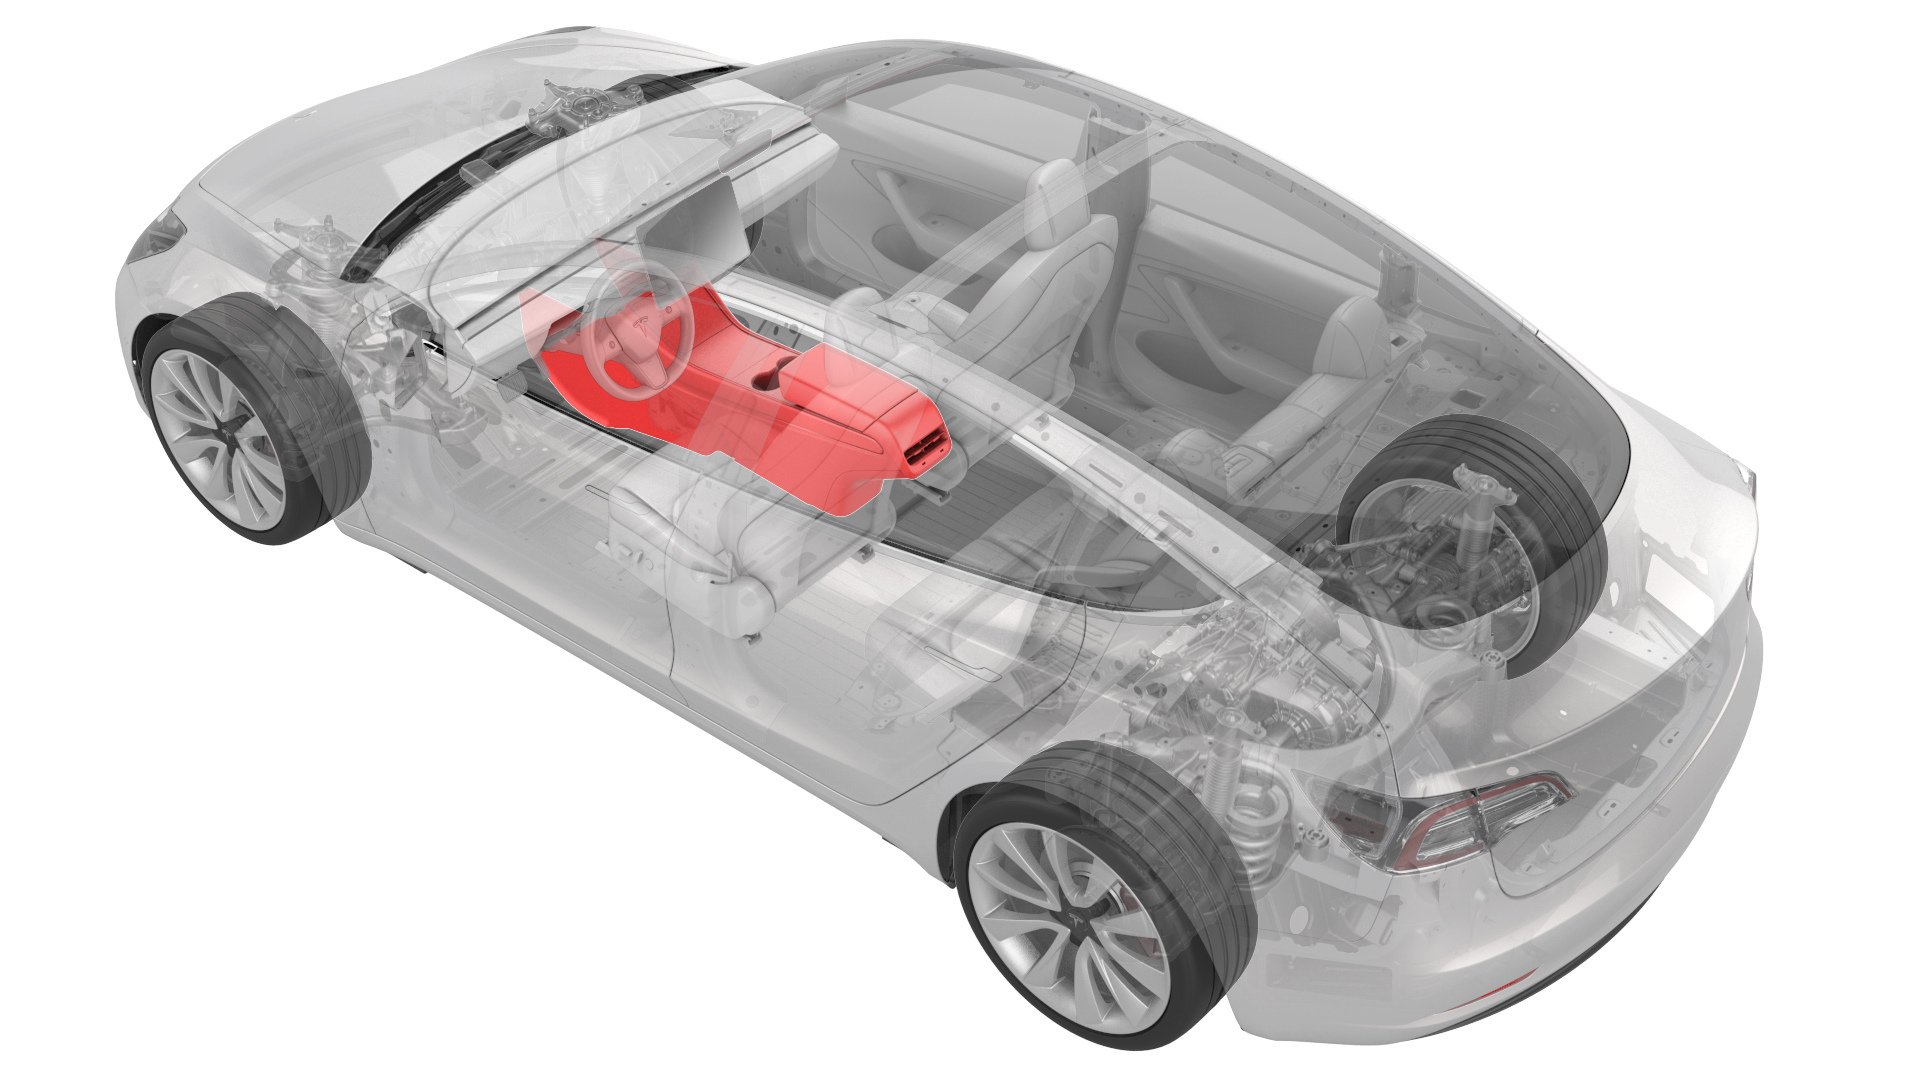
Remove
-
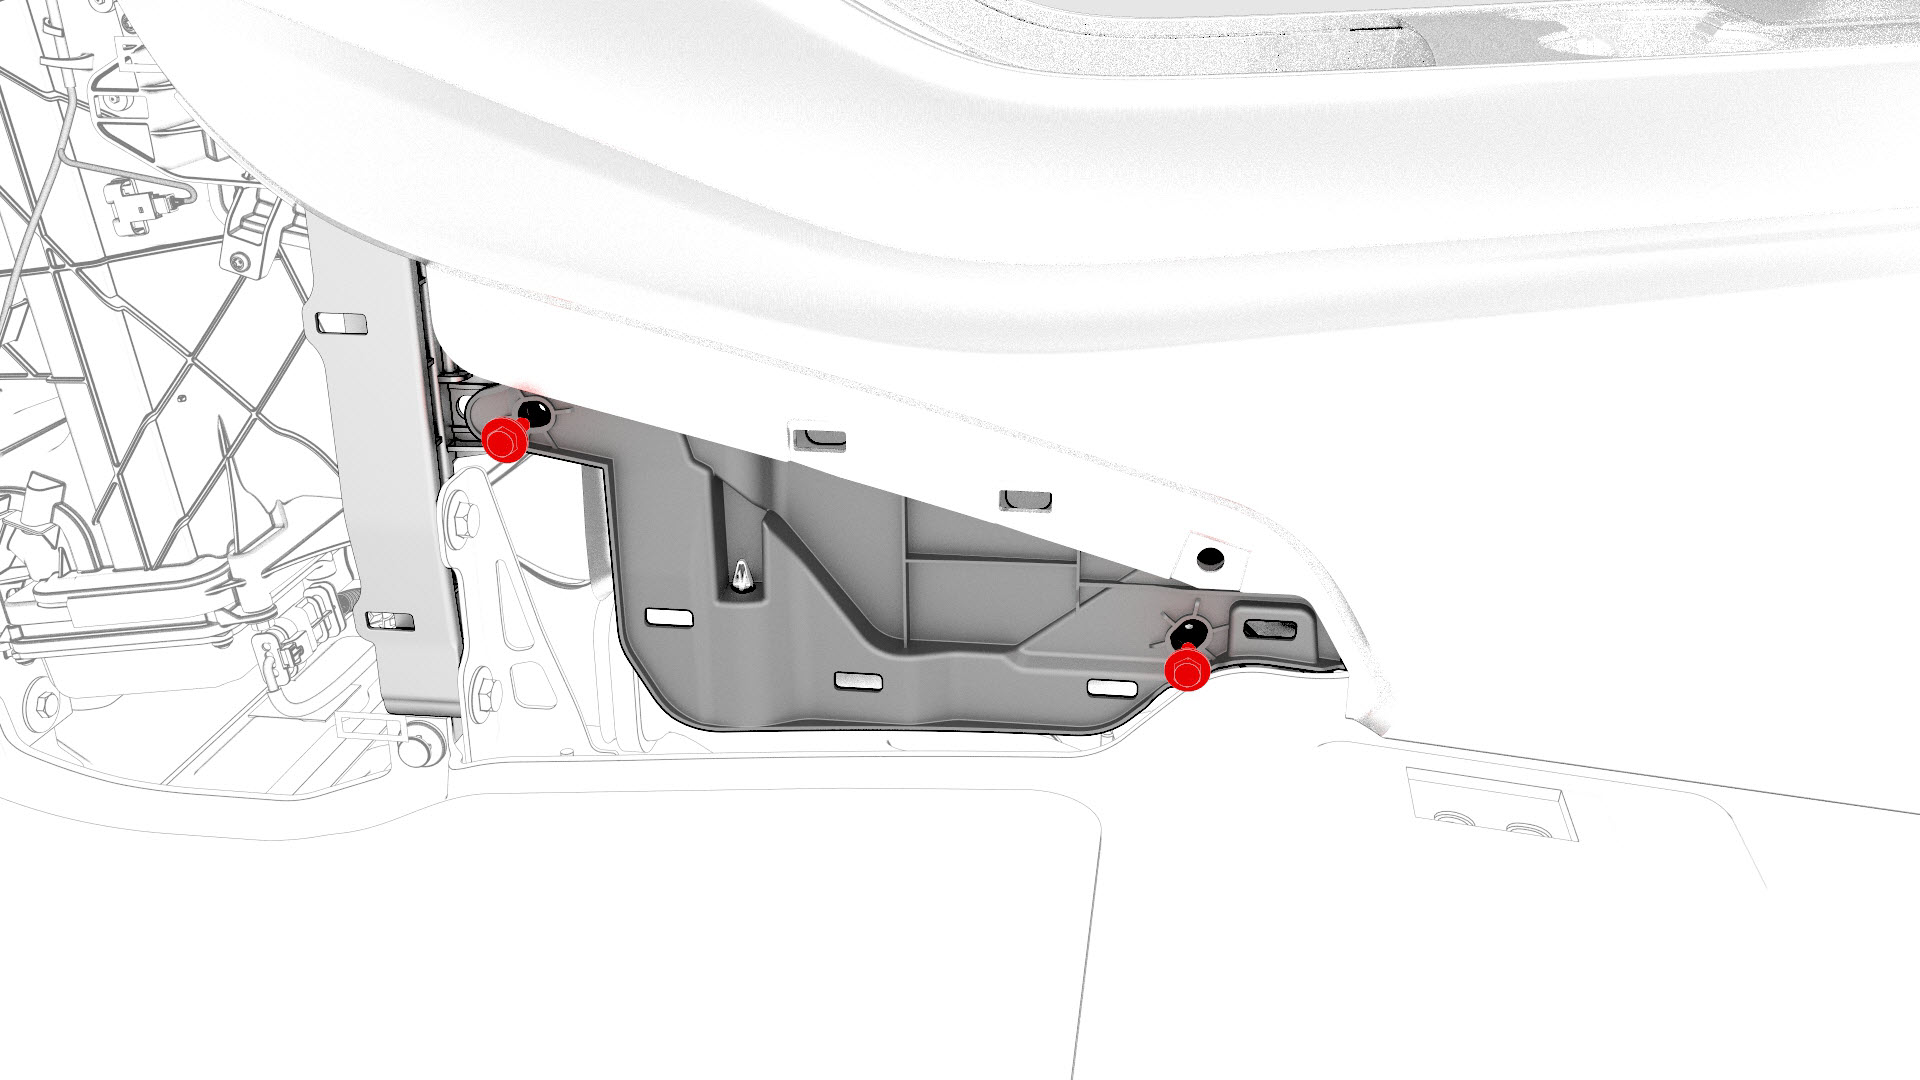
Remove the bolts that attach the LH front of the center console to the body.
-
Remove the bolts that attach the RH front of the center console to the body.
-
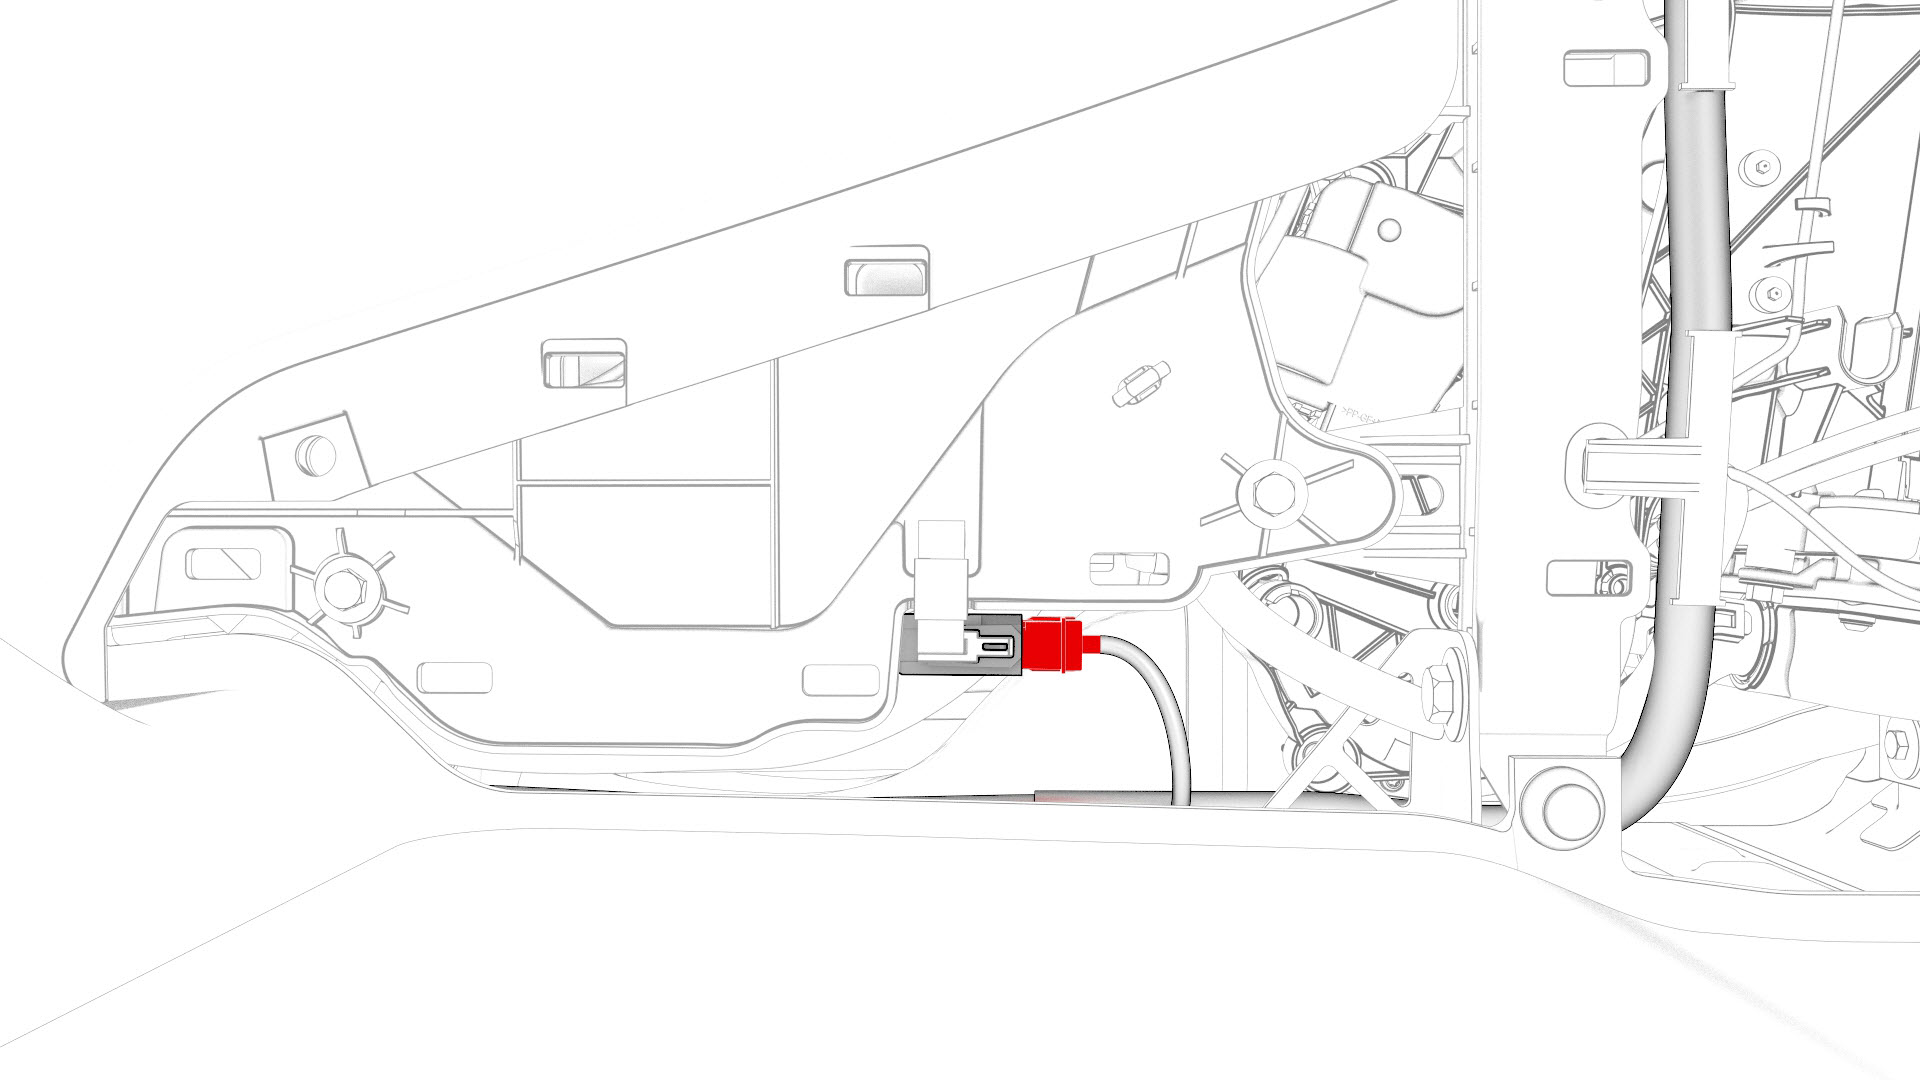
Disconnect the electrical connector that is located at the RH front of the center console.
-
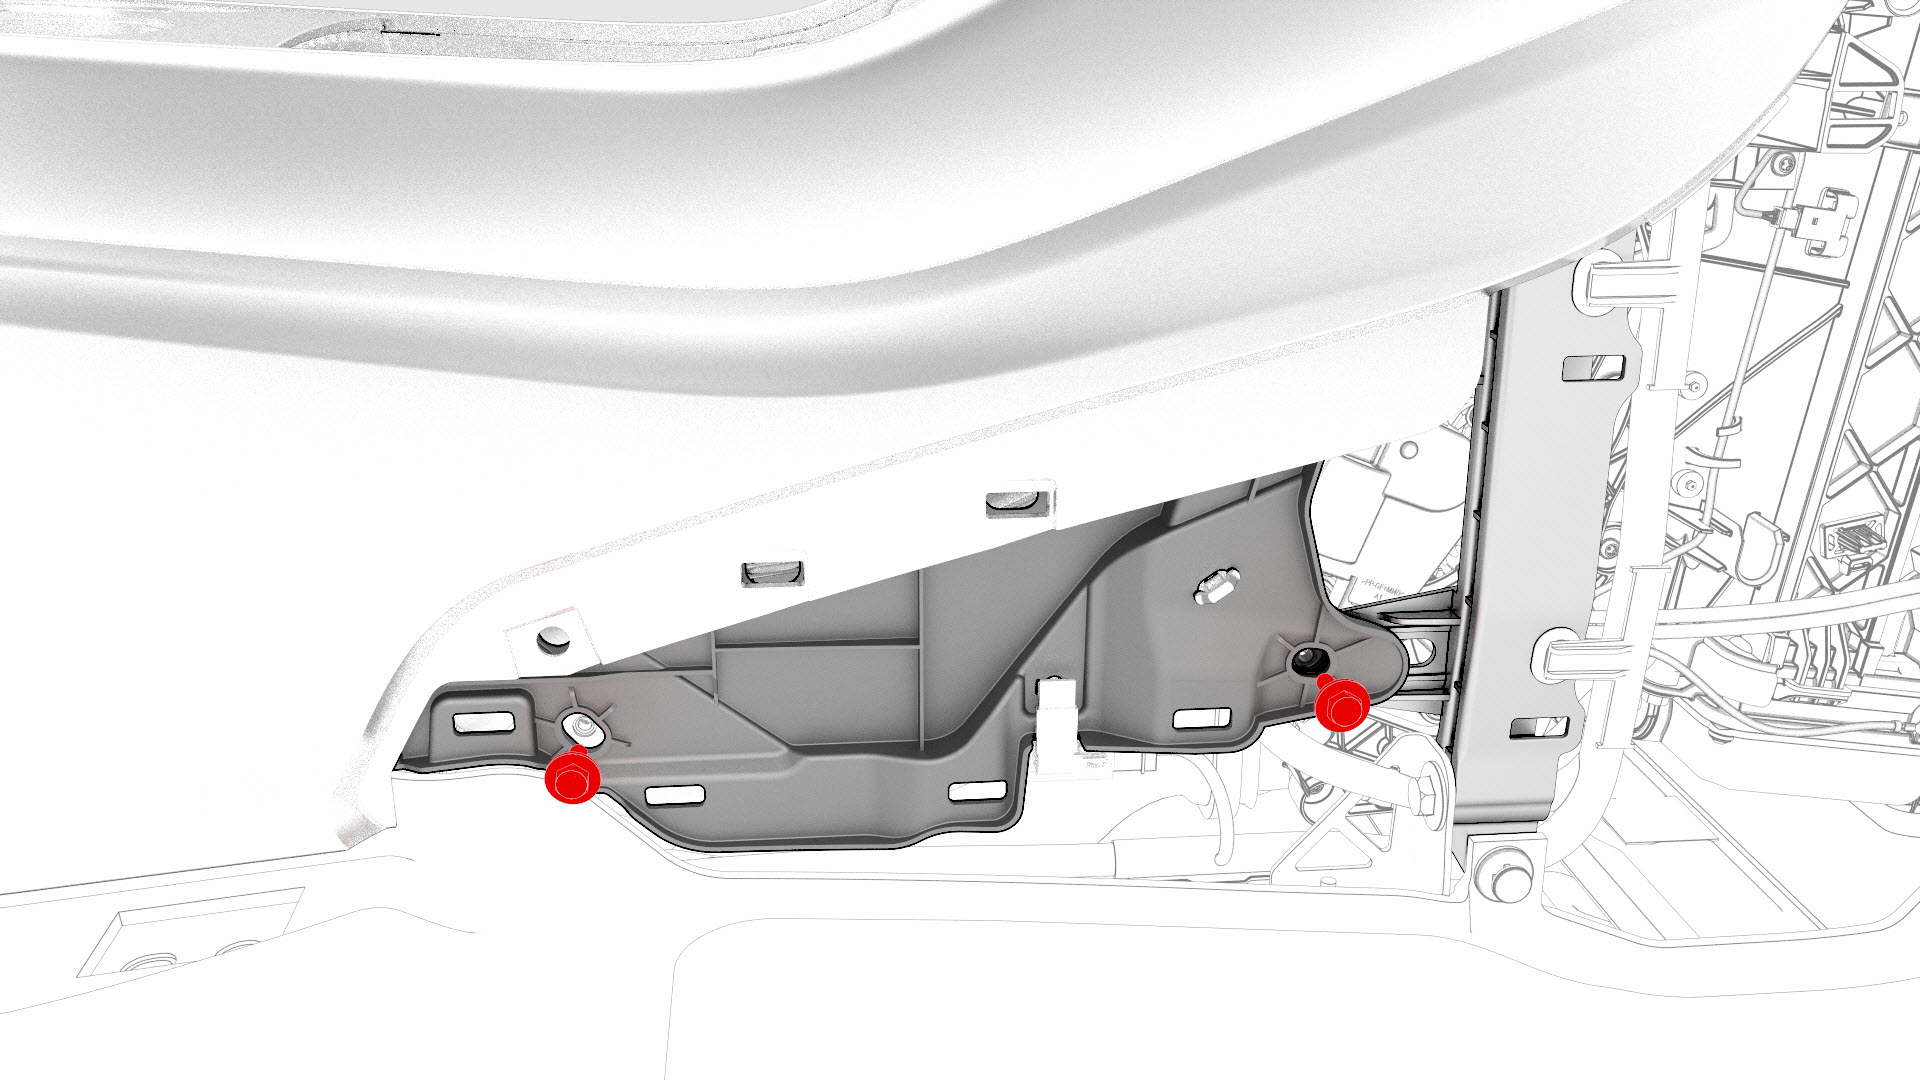
Remove the bolts that attach the front of the center console to the body.

-
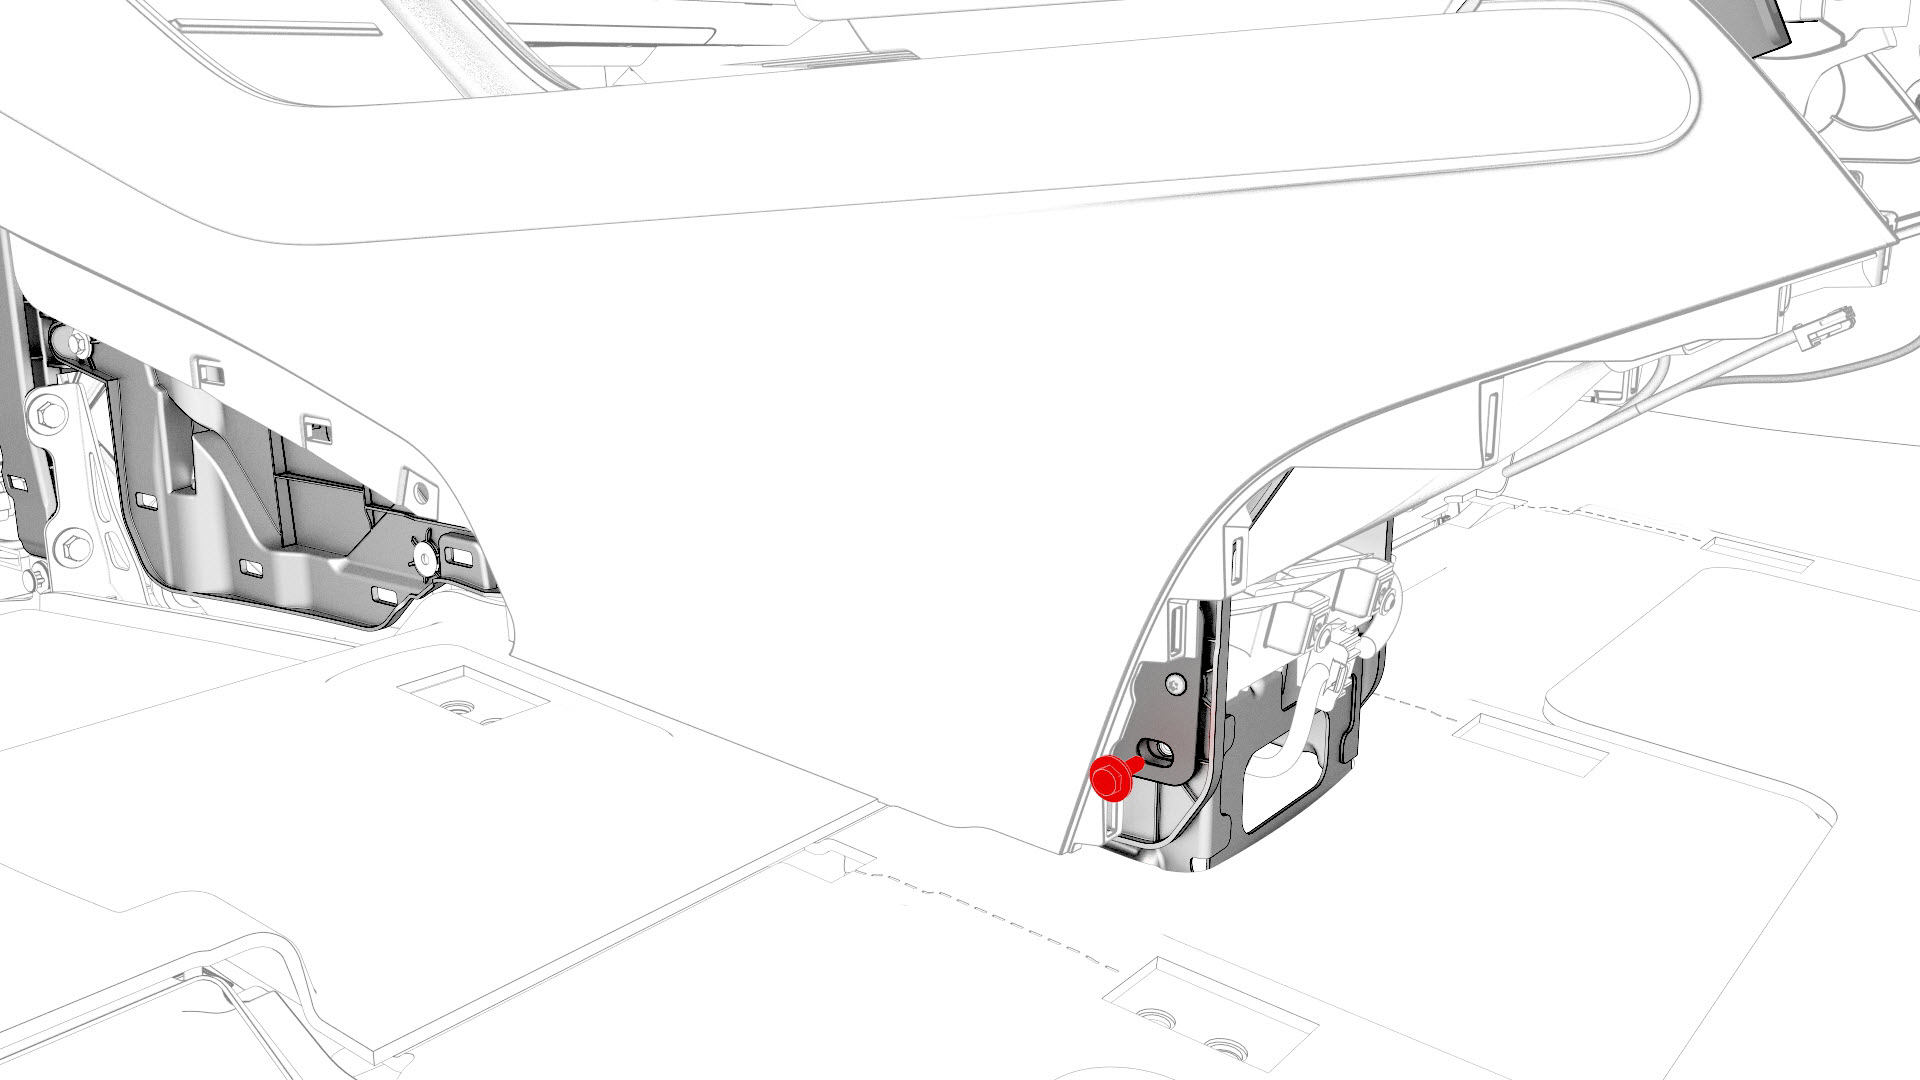
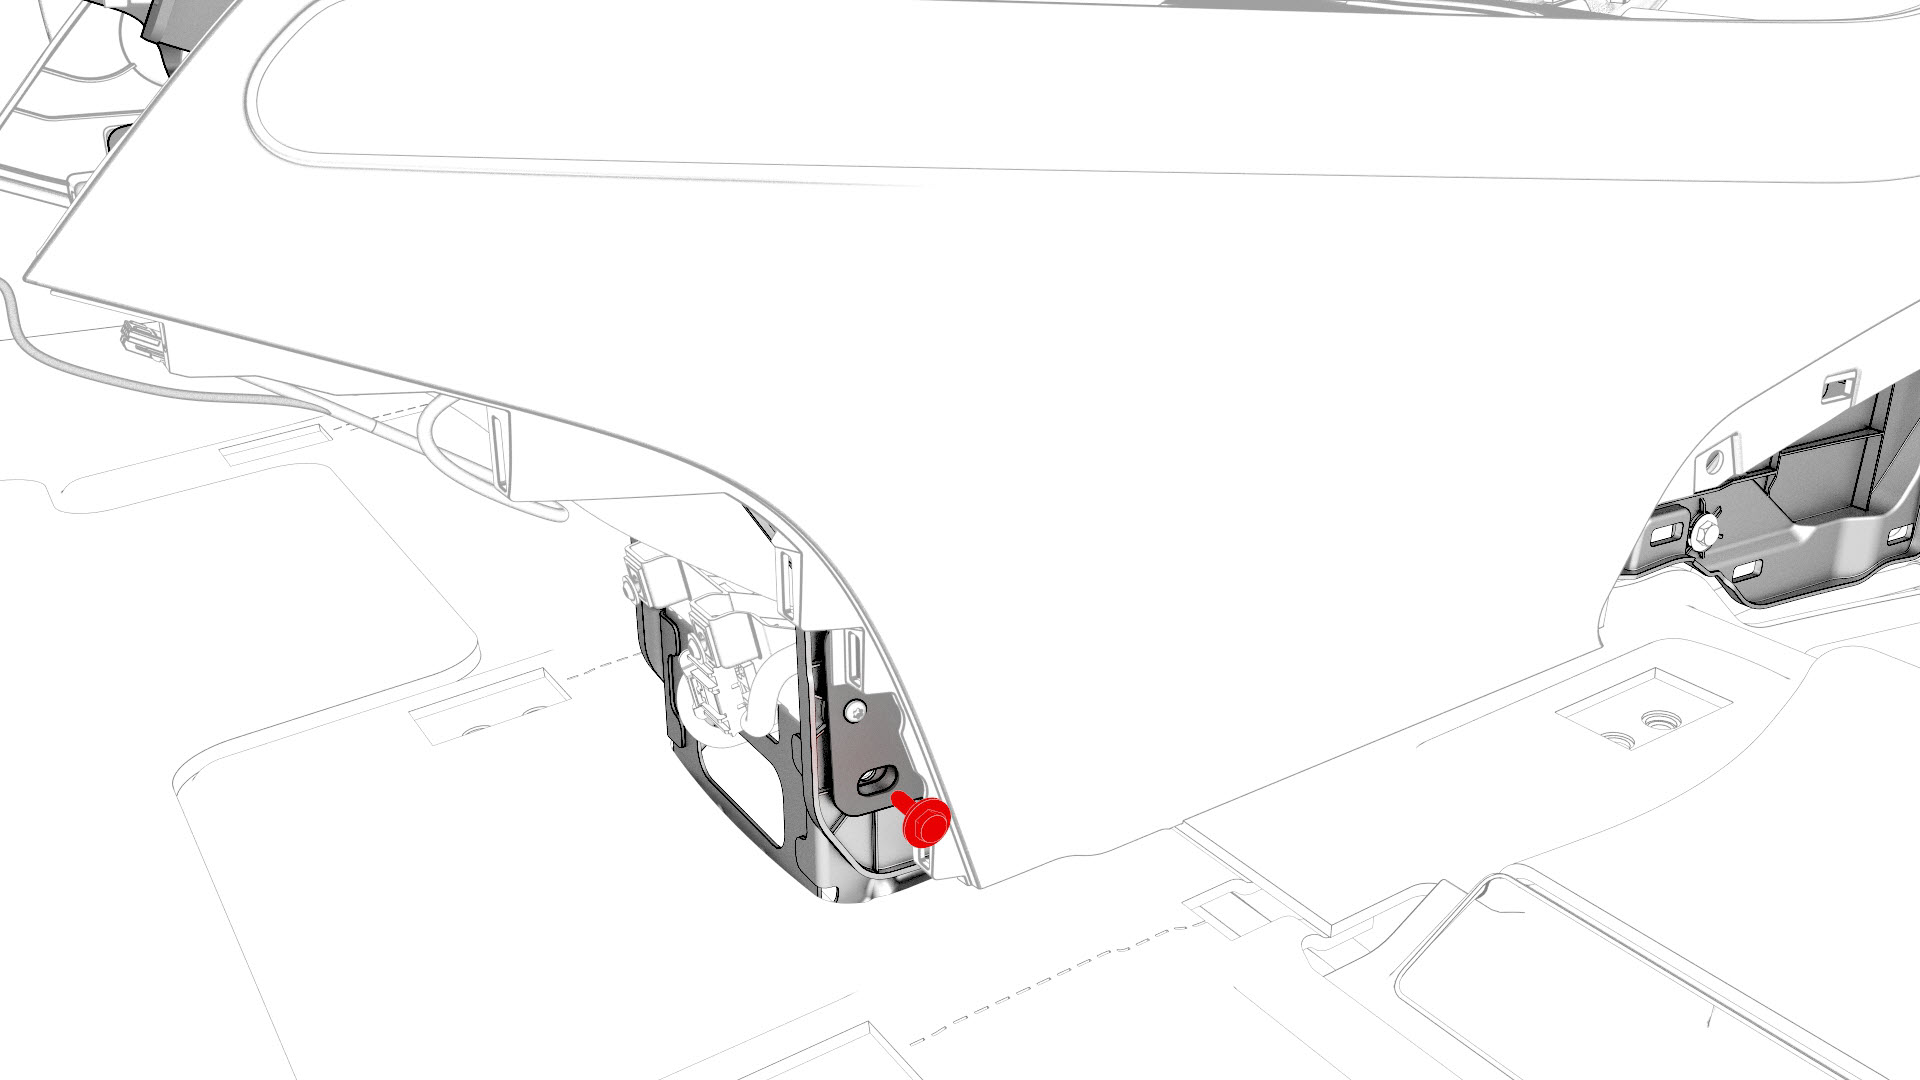
Remove the bolt that attaches the LH rear of the center console to the body.
-
Remove the bolt that attaches the RH rear of the center console to the body.
-
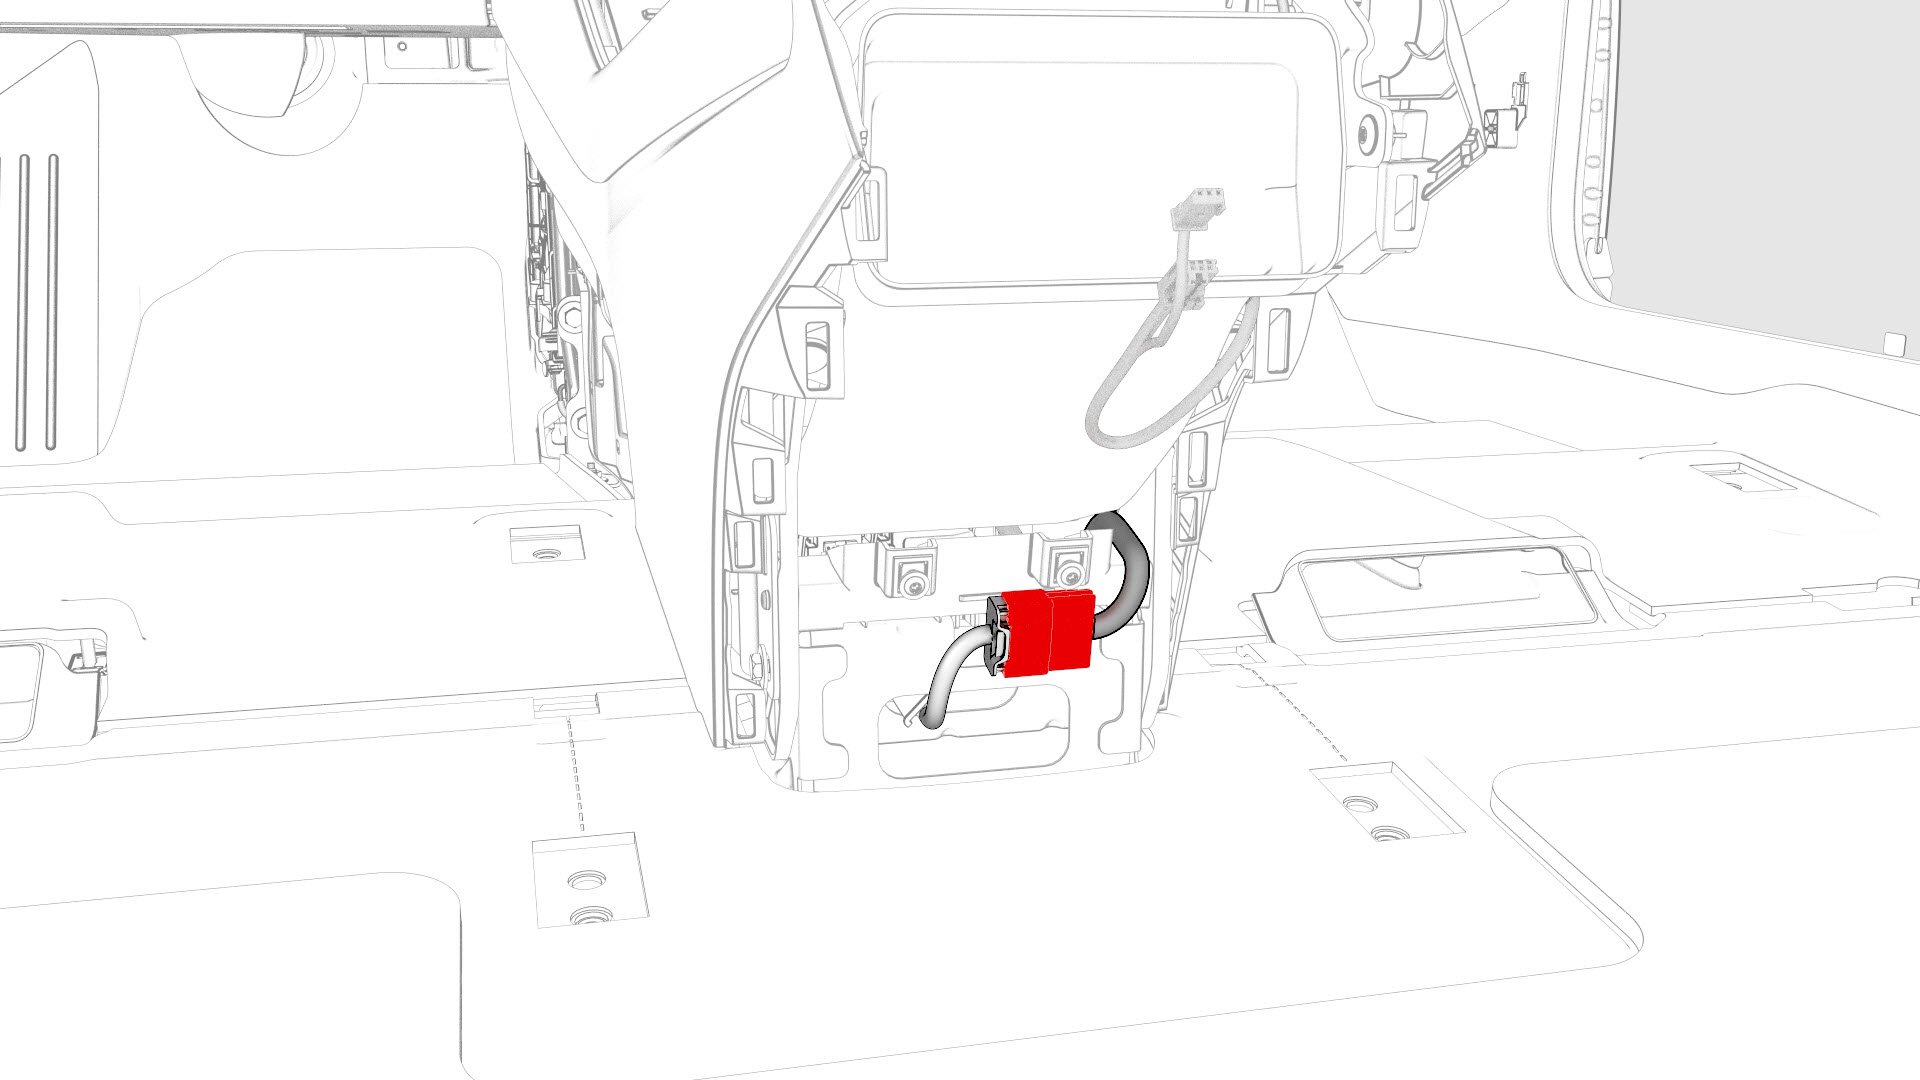
Disconnect the electrical connector from the rear of the center console.
-
With an assistant, remove the center console from the vehicle as follows:
- Tilt the rear of the center console upwards.
- Pull the center console towards the rear of the vehicle.
- Tilt the front of the center console upwards.
- Remove the center console through the passenger front door.
| 1 | Remove and attach the customer's belongings from the center console, if needed. | ||
| 2 | Remove the 2nd row lower seat cushion. See Seat Cushion - Lower - 2nd Row (Remove and Replace). | ||
| 3 | Remove the rear underhood apron. See Underhood Apron - Rear (Remove and Replace). | ||
| 4 | Remove the driver floormat. | ||
| 5 | Remove the LH center console side panel carpet. See Carpet - Side Panel - Center Console - LH (Remove and Replace). | ||
| 6 | Remove the bolts that attach the LH front of the center console to the body. | |
| 7 | Remove the front passenger floormat. | ||
| 8 | Remove the RH center console side panel carpet. See Carpet - Side Panel - Center Console - LH (Remove and Replace). | ||
| 9 | Remove the bolts that attach the RH front of the center console to the body. | |
| 10 | Disconnect the electrical connector that is located at the RH front of the center console. | |
| 11 | Remove the phone tray. See Phone Tray - Center Console (Remove and Replace). | ||
| 12 | Remove the bolts that attach the front of the center console to the body. | |
| 13 | Remove the center console lower rear panel. See Panel - Lower Rear - Center Console (Remove and Replace). | ||
| 14 | Remove the bolt that attaches the LH rear of the center console to the body. | |
| 15 | Remove the bolt that attaches the RH rear of the center console to the body. | |
| 16 | On the touchscreen, select to power off the vehicle. | ||
| 17 | Disconnect 12V power. See 12V Power (Disconnect and Connect). | ||
| 18 | Disconnect the electrical connector from the rear of the center console. | |
| 19 | Close the center console rotating lid to prevent it from getting stuck on the center display upon removal of the center console from the vehicle. | ||
| 20 | With an assistant, remove the center console from the vehicle as follows:
|
Install
-
Connect the electrical connector in the rear of the center console.
 Caution:Ensure the connector is properly installed. Perform a push-pull test before continuing this procedure.
 -
Install the bolt that attaches the RH rear of the center console to the body.
 Torque 7 Nm
 -
Install the bolt that attaches the LH rear of the center console to the body.Torque 7 Nm
-
Install the bolts that attach the front of the center console to the body.
 Torque 1.7 Nm
 -
Connect the electrical connector that is located at the RH front of the center console.
Caution:Ensure the connector is properly installed. Perform a push-pull test before continuing this procedure.
-
Install the bolts that attach the RH front of the center console to the body.Torque 7 Nm
-
Install the bolts that attach the LH front of the center console to the body.Torque 7 Nm
| 1 | With an assistant, install the center console into the vehicle as follows:
| ||
| 2 | Open the center console rotating lid. | ||
| 3 | Connect the electrical connector in the rear of the center console. Caution: Ensure the connector is properly installed. Perform a push-pull test before continuing this procedure.
| |
| 4 | Install the bolt that attaches the RH rear of the center console to the body. Torque 7 Nm | |
| 5 | Install the bolt that attaches the LH rear of the center console to the body. Torque 7 Nm | |
| 6 | Install the center console lower rear panel. See Panel - Lower Rear - Center Console (Remove and Replace). | ||
| 7 | Install the bolts that attach the front of the center console to the body. Torque 1.7 Nm | |
| 8 | Install the phone tray. See Phone Tray - Center Console (Remove and Replace). | ||
| 9 | Connect the electrical connector that is located at the RH front of the center console. Caution: Ensure the connector is properly installed. Perform a push-pull test before continuing this procedure.
| |
| 10 | Install the bolts that attach the RH front of the center console to the body. Torque 7 Nm | |
| 11 | Install the RH center console side panel carpet. See Carpet - Side Panel - Center Console - LH (Remove and Replace). | ||
| 12 | Install the front passenger floormat. | ||
| 13 | Install the bolts that attach the LH front of the center console to the body. Torque 7 Nm | |
| 14 | Install the LH center console side panel carpet. See Carpet - Side Panel - Center Console - LH (Remove and Replace). | ||
| 15 | Install the driver floormat. | ||
| 16 | Install the rear underhood apron. See Underhood Apron - Rear (Remove and Replace). | ||
| 17 | Install the 2nd row lower seat cushion. See Seat Cushion - Lower - 2nd Row (Remove and Replace). | ||
| 18 | Restore the customer's belongings into the center console, if needed. |