Hood (Remove and Replace)
Correction code 1010030210100302
This procedure assumes the hood striker, hinges, bump stops, and plugs are undamaged. Inspect these components from the old hood and if necessary, replace with new parts.
Remove
-
Release the clips that attach the LH and RH hood gas struts to the LH and RH hood strut brackets, and then set the struts aside.
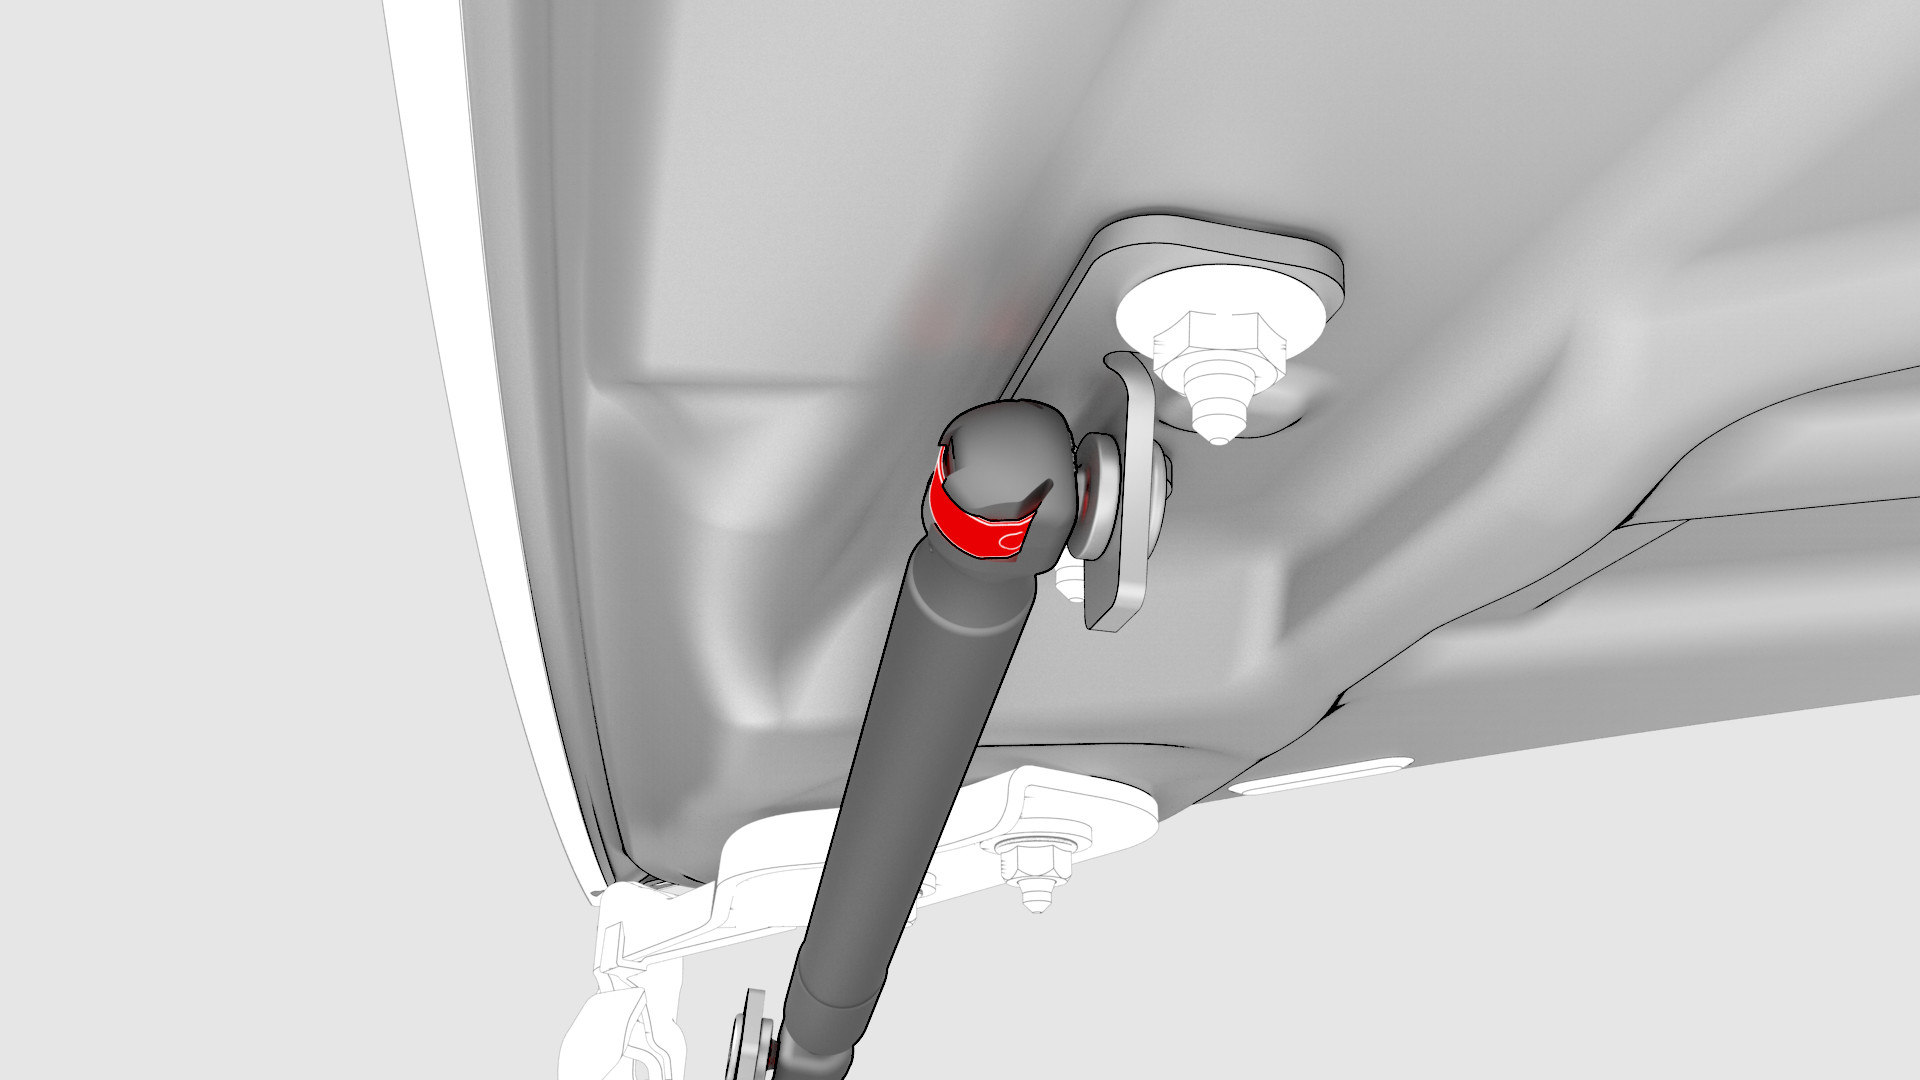 RH shown, LH similar
 -
With assistance, remove the nuts that attach the hood to the LH and RH hood hinges.
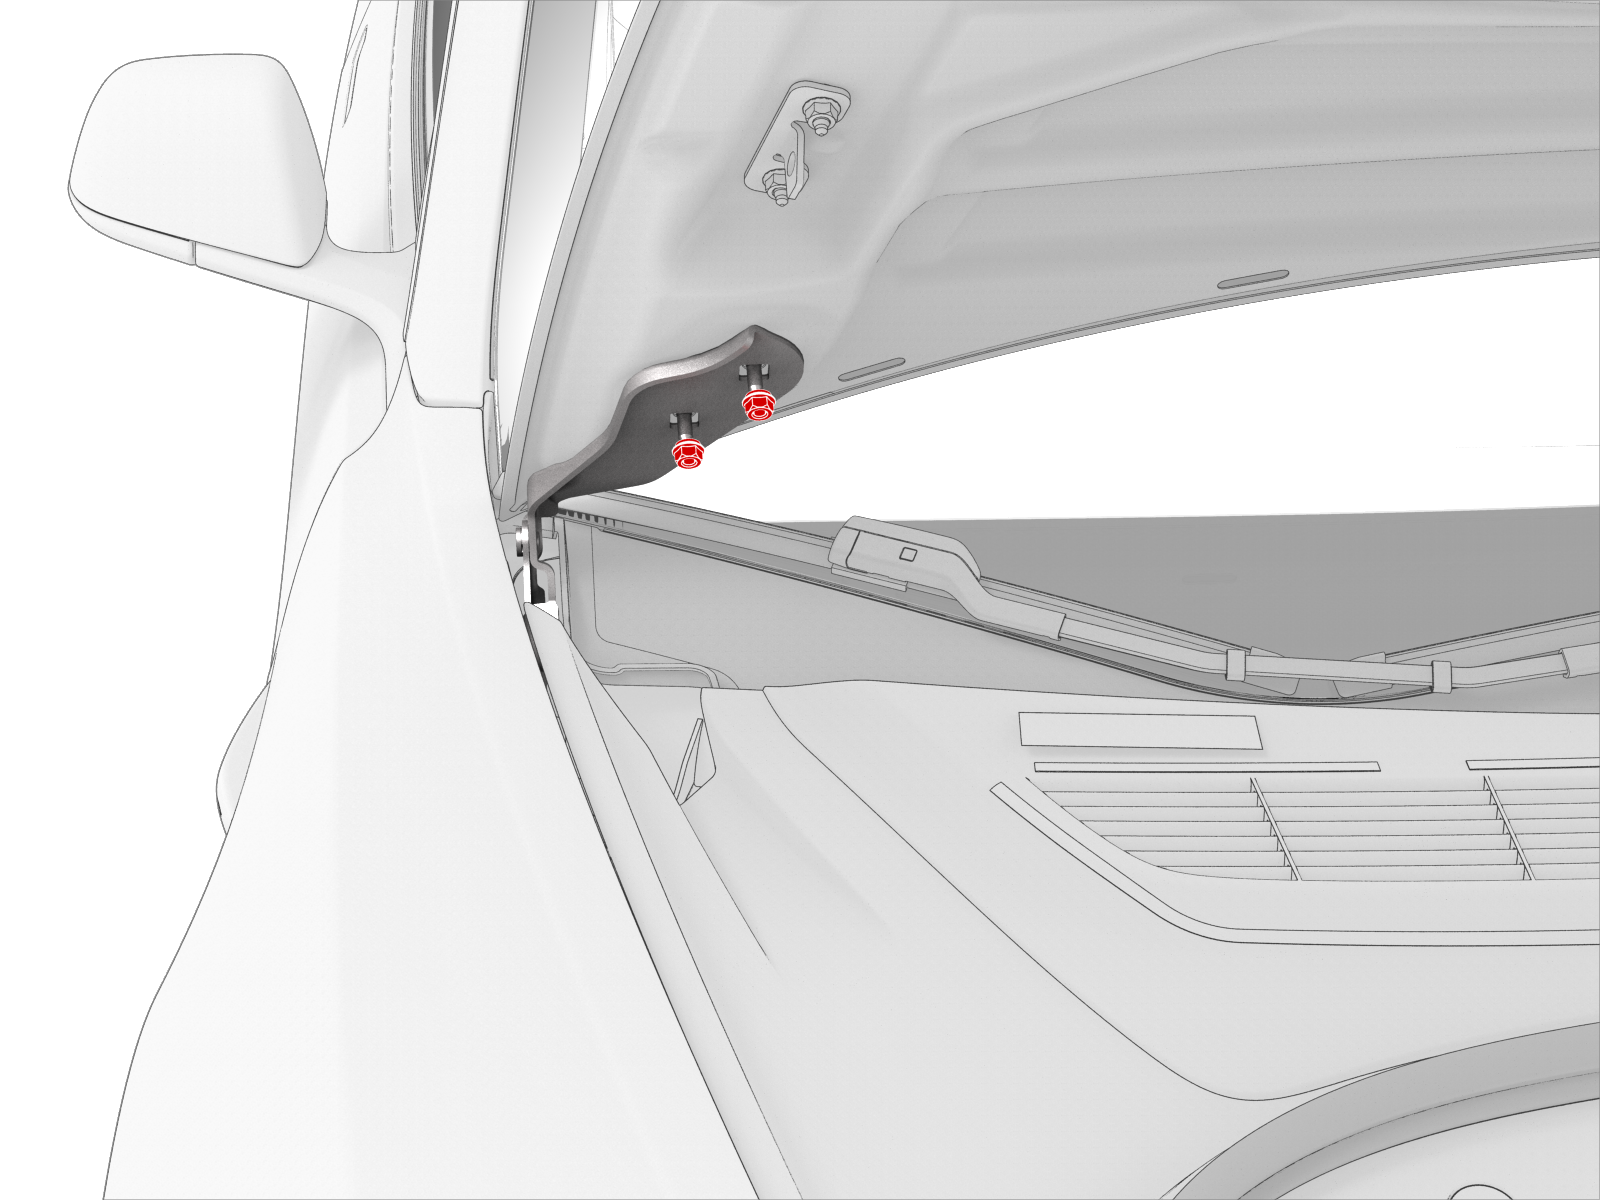 RH shown, LH similar
 -
Remove the nuts that attach the LH and RH hood strut brackets to the old hood, and then remove the brackets.

-
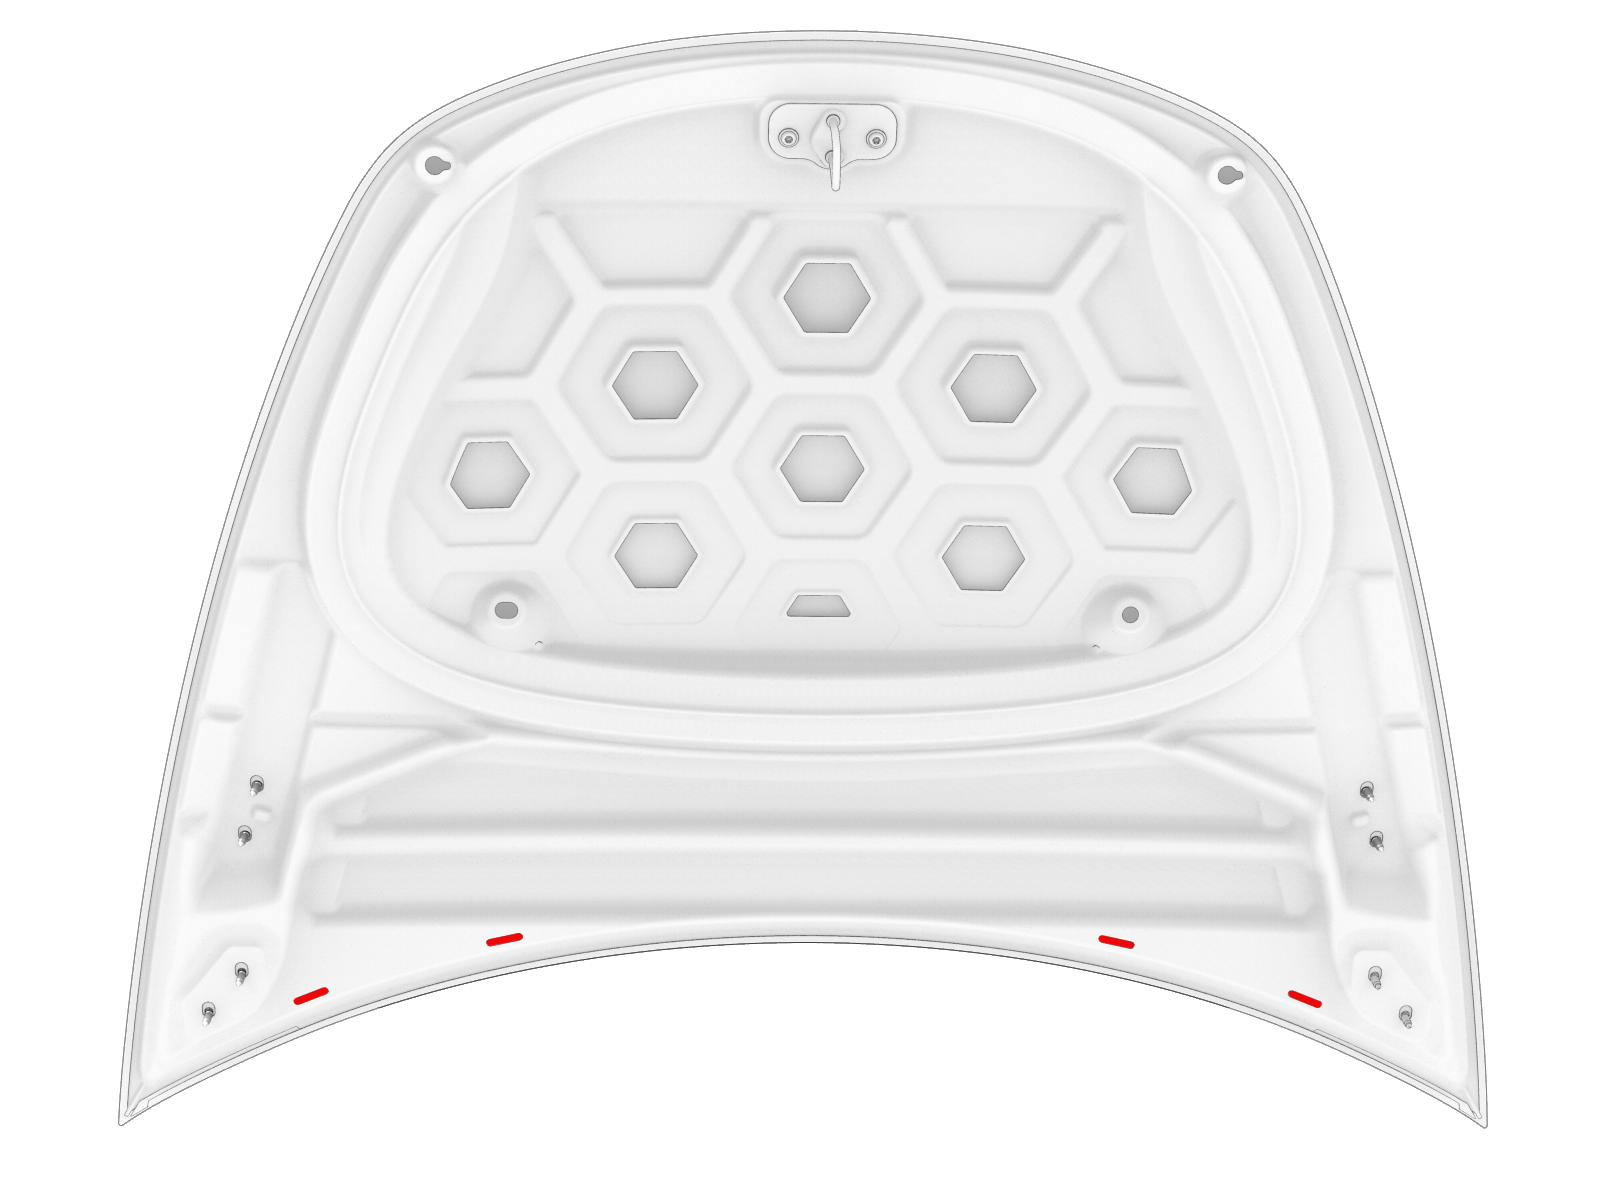
Remove the LH and RH bump stops from the old hood.
-
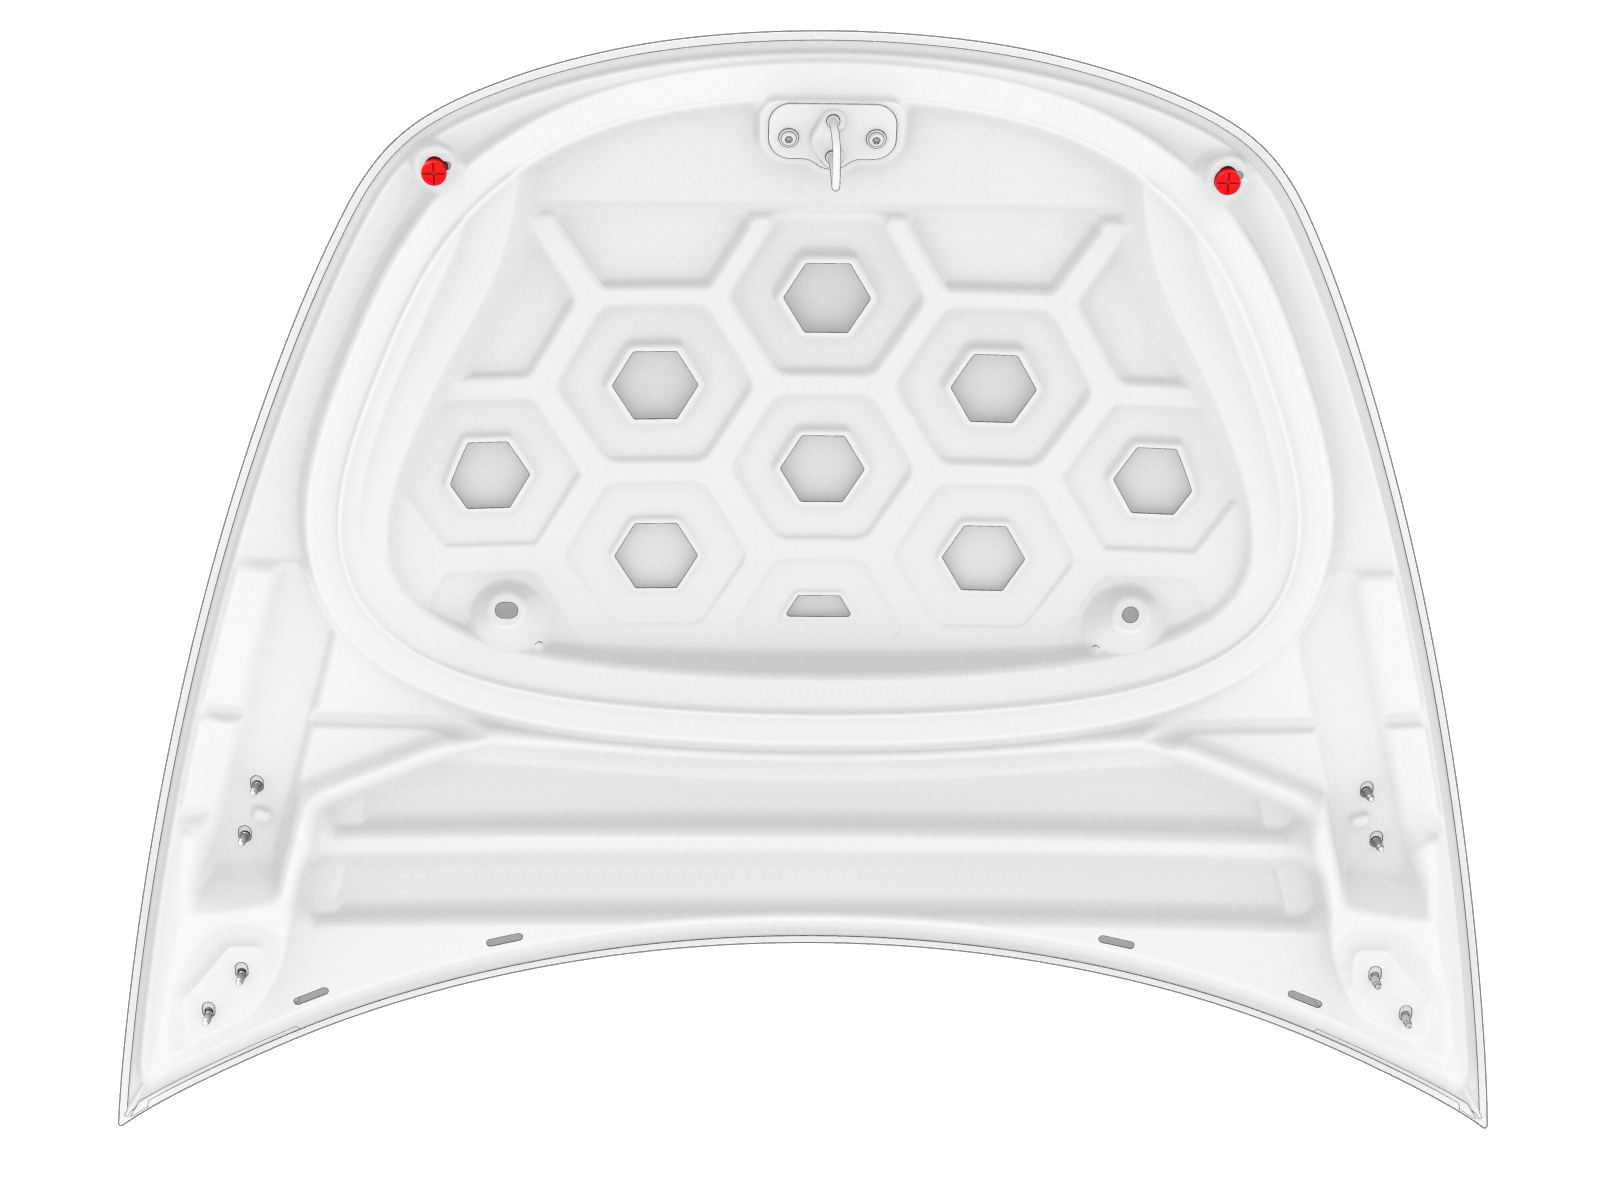
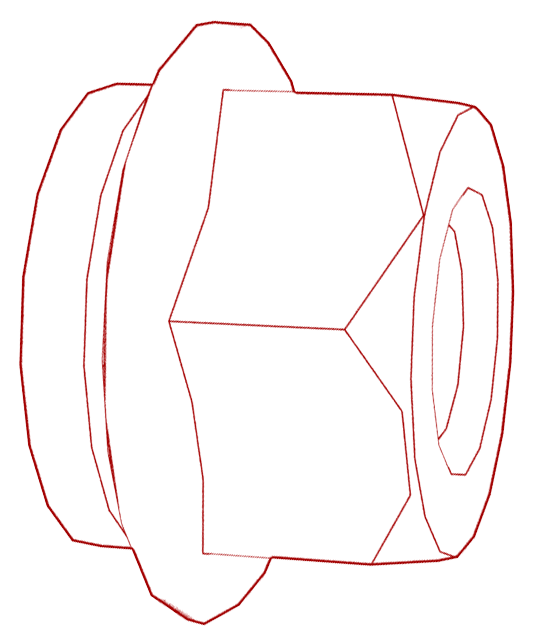
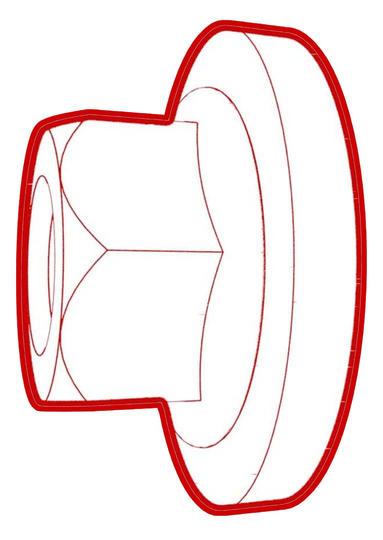
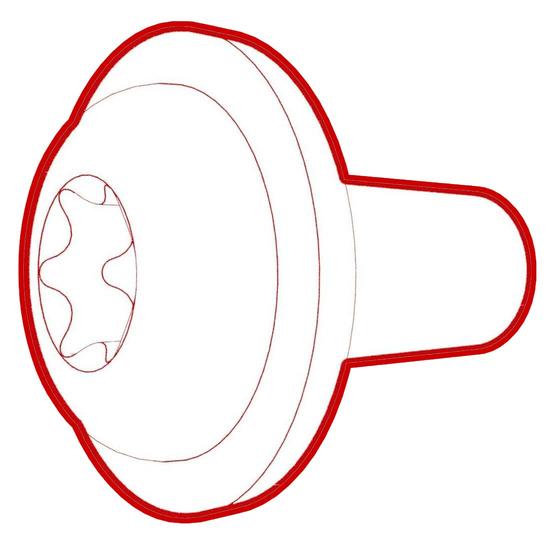
Remove the hood plugs (4x) from the old hood.
RH shown, LH similar
| 1 | Release the clips that attach the LH and RH hood gas struts to the LH and RH hood strut brackets, and then set the struts aside. | |
RH shown, LH similar
| 2 | With assistance, remove the nuts that attach the hood to the LH and RH hood hinges. | |
| 3 | With assistance, remove the hood from the vehicle, and then place it on a padded surface. | ||
| 4 | Remove the hood striker from the old hood. See Striker - Hood (Remove and Replace). Note: Do not mark the location of the hood striker on the old hood.
| ||
| 5 | Remove the nuts that attach the LH and RH hood strut brackets to the old hood, and then remove the brackets. | |
| 6 | Remove the LH and RH bump stops from the old hood. | |
| 7 | Remove the hood plugs (4x) from the old hood. |
Install
-
Install the hood plugs on the new hood.
-
Install the LH and RH bump stops on the new hood.
-
Position the LH and RH hood strut brackets on the new hood, and then tighten the nuts that attach the brackets to the hood.
 Torque 15 Nm
 -
With assistance, position the hood on the vehicle, and then hand tighten the nuts that attach the LH and RH hood hinges to the hood.
RH shown, LH similar
-
Position the LH and RH hood gas struts on the LH and RH hood hinges, and then install the clips that attach the struts to the hinges.
-
Tighten the nuts that attach the hood assembly to the LH and RH hood hinges.
 Torque 15 Nm
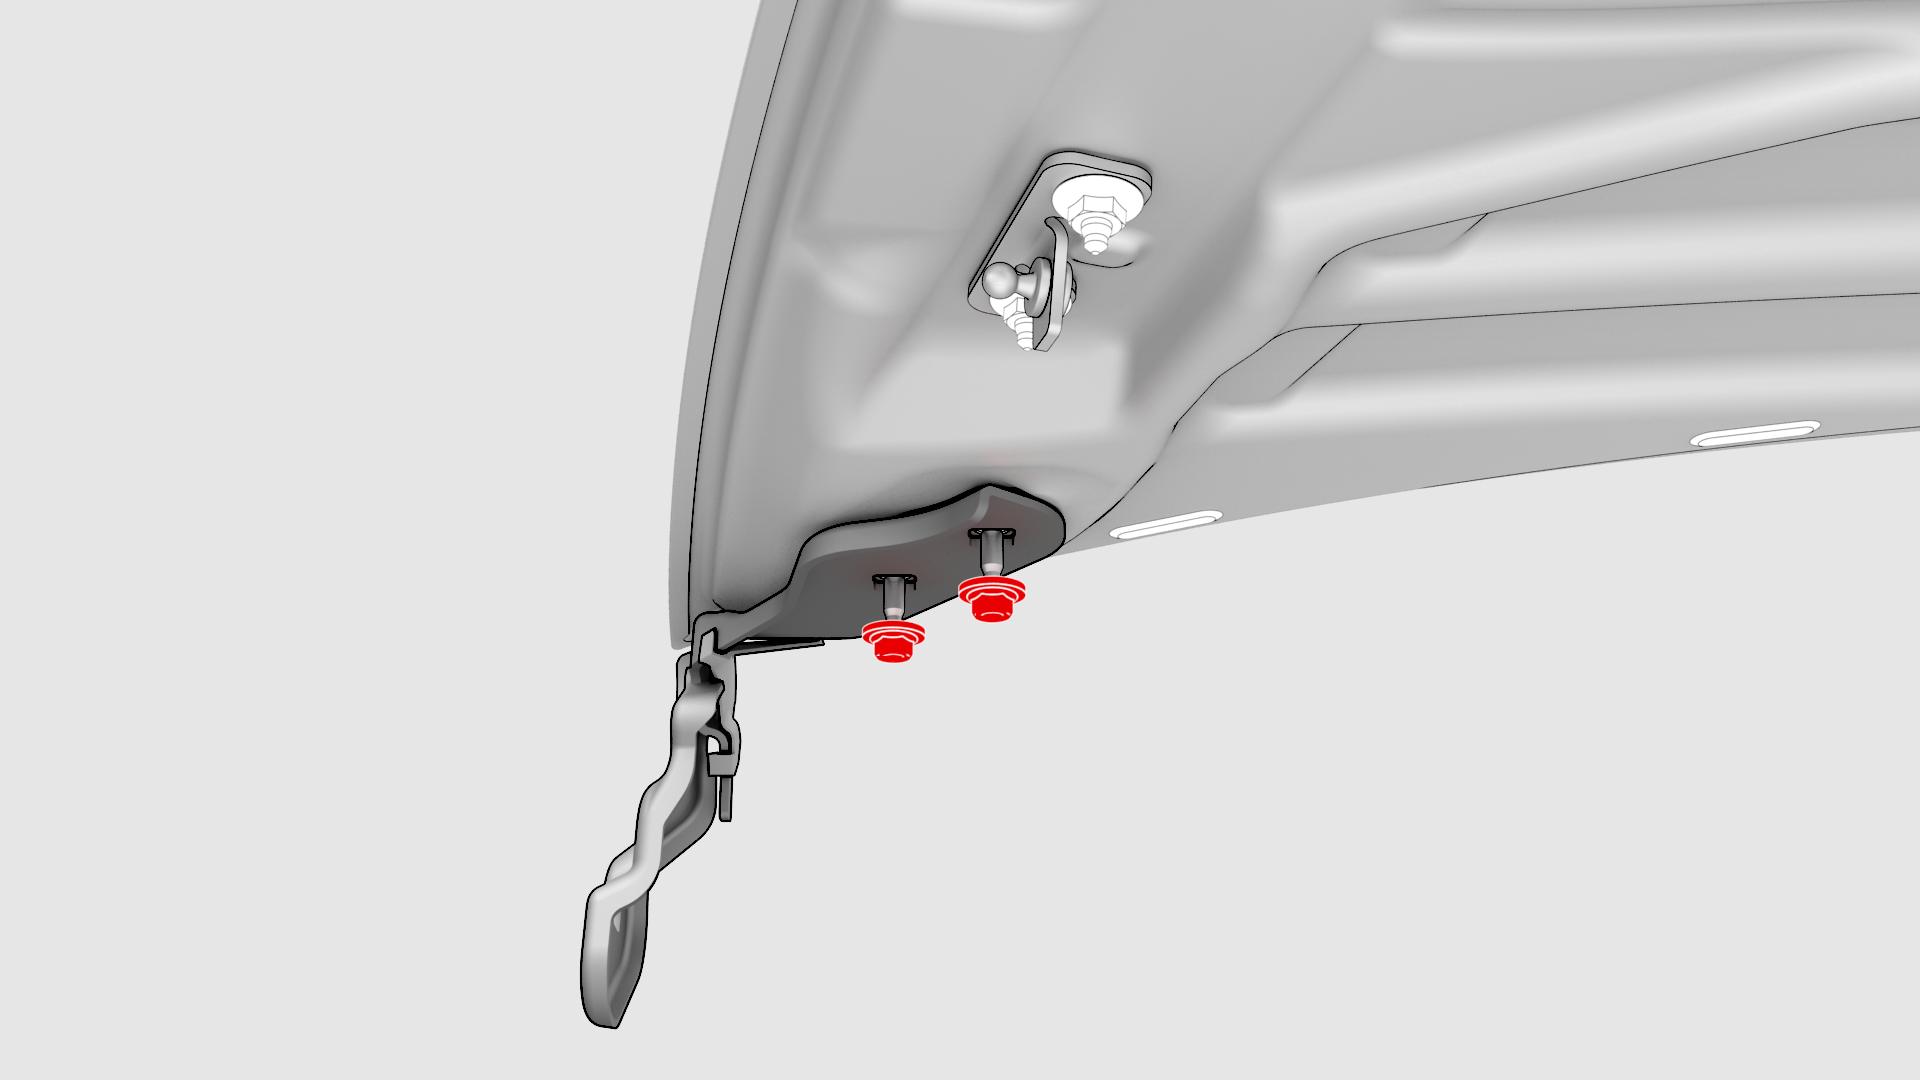
-
Tighten the bolts that attach the hood striker to the hood assembly.
 Torque 18 Nm
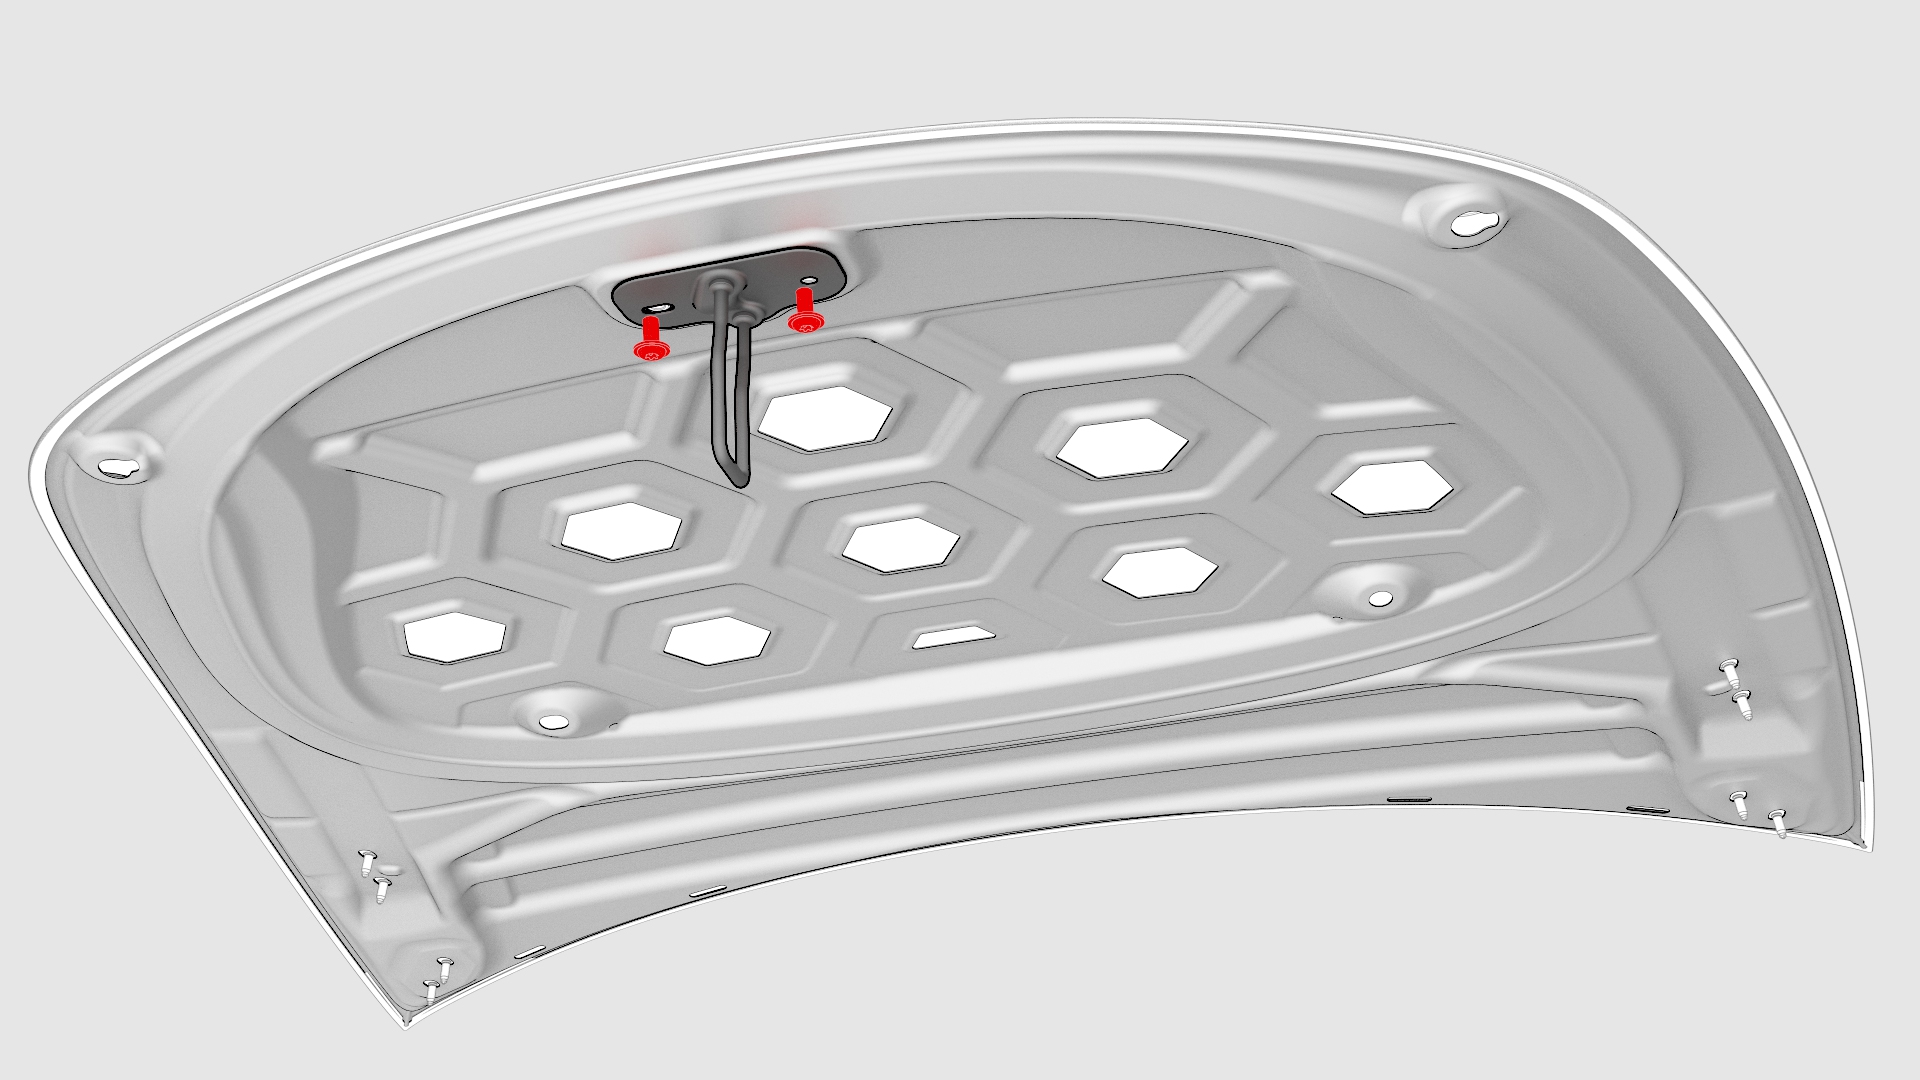
| 1 | Install the hood plugs on the new hood. | |
| 2 | Install the LH and RH bump stops on the new hood. | |
| 3 | Position the LH and RH hood strut brackets on the new hood, and then tighten the nuts that attach the brackets to the hood. Torque 15 Nm | |
| 4 | Position the hood striker on the new hood, and then hand tighten the bolts that attach the striker to the hood. | ||
RH shown, LH similar
| 5 | With assistance, position the hood on the vehicle, and then hand tighten the nuts that attach the LH and RH hood hinges to the hood. | |
| 6 | Support the hood with a hood prop. | ||
| 7 | Position the LH and RH hood gas struts on the LH and RH hood hinges, and then install the clips that attach the struts to the hinges. | |
| 8 | Carefully close the hood, and then check hood fitment. | ||
| 9 | Perform gap and flush adjustments on the hood assembly, if necessary. | ||
| 10 | Tighten the nuts that attach the hood assembly to the LH and RH hood hinges. Torque 15 Nm | |
| 11 | Tighten the bolts that attach the hood striker to the hood assembly. Torque 18 Nm | |
| 12 | Clean the LH and RH hood hinge bolts and the surrounding area with isopropyl alcohol (IPA), and then let dry for at least 1 minute. | ||
| 13 | If necessary, apply touch up paint matching the vehicle's body color to the LH and RH hood hinge studs/nuts. | ||
| 14 | Clean the front of the hood with IPA, and then install a front Tesla badge. See Tesla Badge - Front (Remove and Replace). |