SD Card - Car Computer (Remove and Replace)
Correction code 2115240221152402
Remove
-
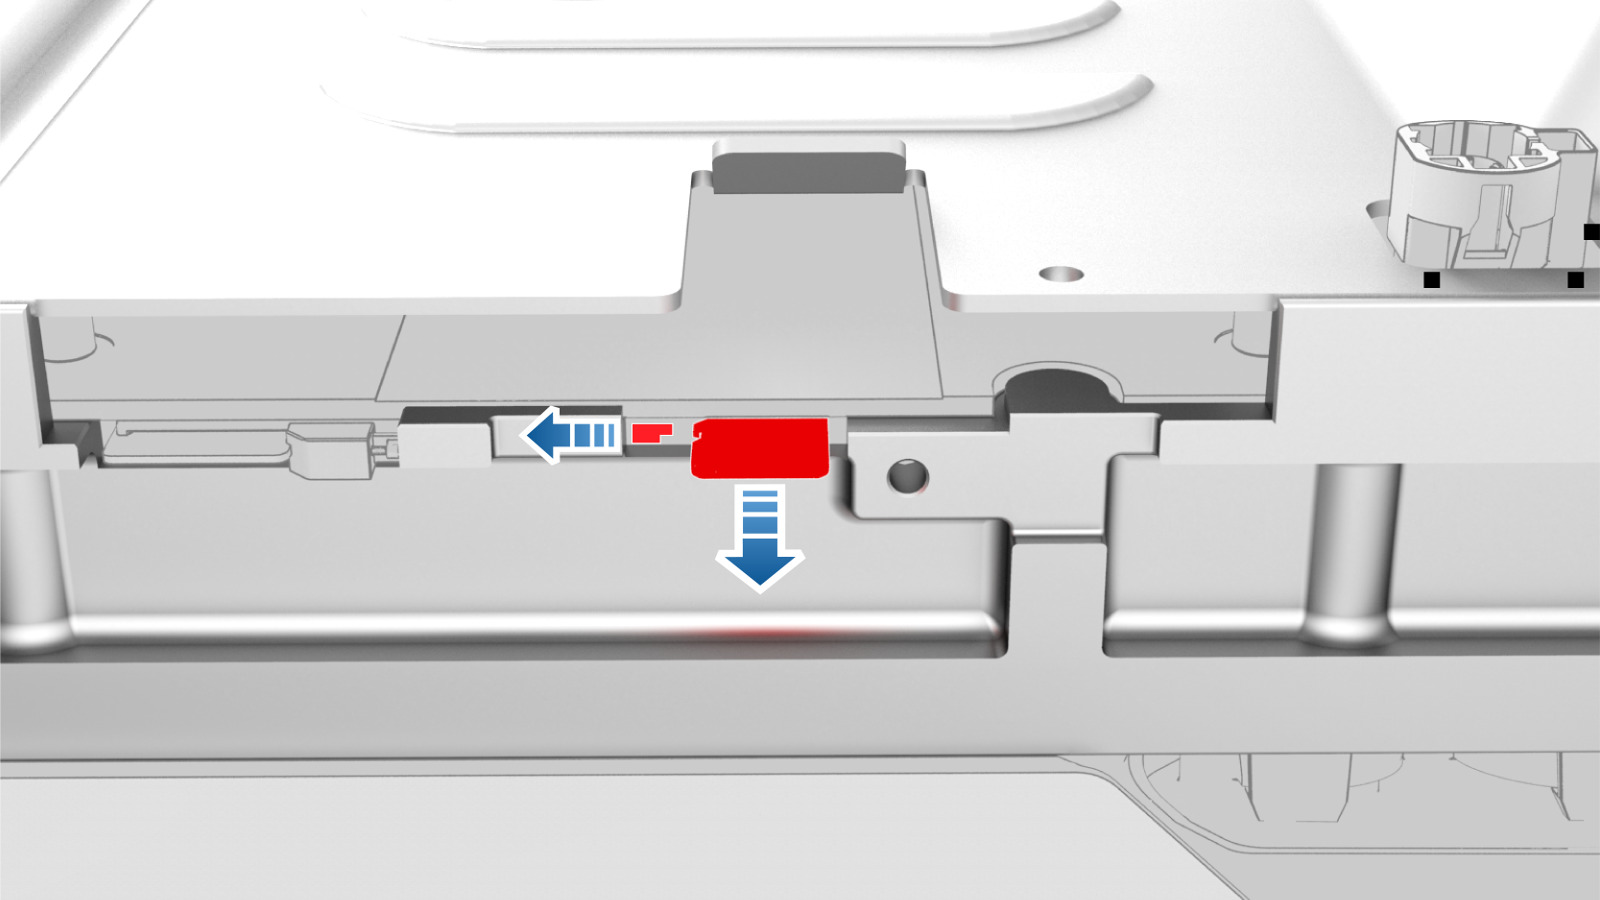
Use a trim tool to slide the SD card retaining tab over, and then use plastic tweezers to remove the SD card from the computer.
| 1 | Remove the 2nd row lower seat cushion. See Seat Cushion - Lower - 2nd Row (Remove and Replace). | ||
| 2 | Remove the rear underhood apron. See Underhood Apron - Rear (Remove and Replace). | ||
| 3 | Remove the cabin intake duct. See Duct - Cabin Intake (Remove and Replace) | ||
| 4 | Disconnect 12V power. See 12V Power (Disconnect and Connect). | ||
| 5 | Remove the underhood storage unit. See Underhood Storage Unit (Remove and Replace). | ||
| 6 | Remove the Outer HVAC plenum duct. See Duct - HVAC Plenum - Outer (Remove and Replace) | ||
| 7 | Remove the RH lower A-pillar trim. See Trim - A-Pillar - Lower - LH (Remove and Replace). | ||
| 8 | Remove the RH center console side panel carpet. See Carpet - Side Panel - Center Console - LH (Remove and Replace). | ||
| 9 | Remove the RH footwell duct. See Duct - Footwell - RH (Remove and Replace). | ||
| 10 | Remove the car computer. See #GUID-122A40DB-2F41-432F-B59E-BF78921DEC16. | ||
| 11 | Remove the car computer connectivity board. See Connectivity Board - Car Computer (Remove and Replace). | ||
| 12 | Use a trim tool to slide the SD card retaining tab over, and then use plastic tweezers to remove the SD card from the computer. |
Install
Installation procedure is the reverse of removal.