Brake Pedal (Remove and Replace)
Correction code 3325100233251002
ay
Remove
-
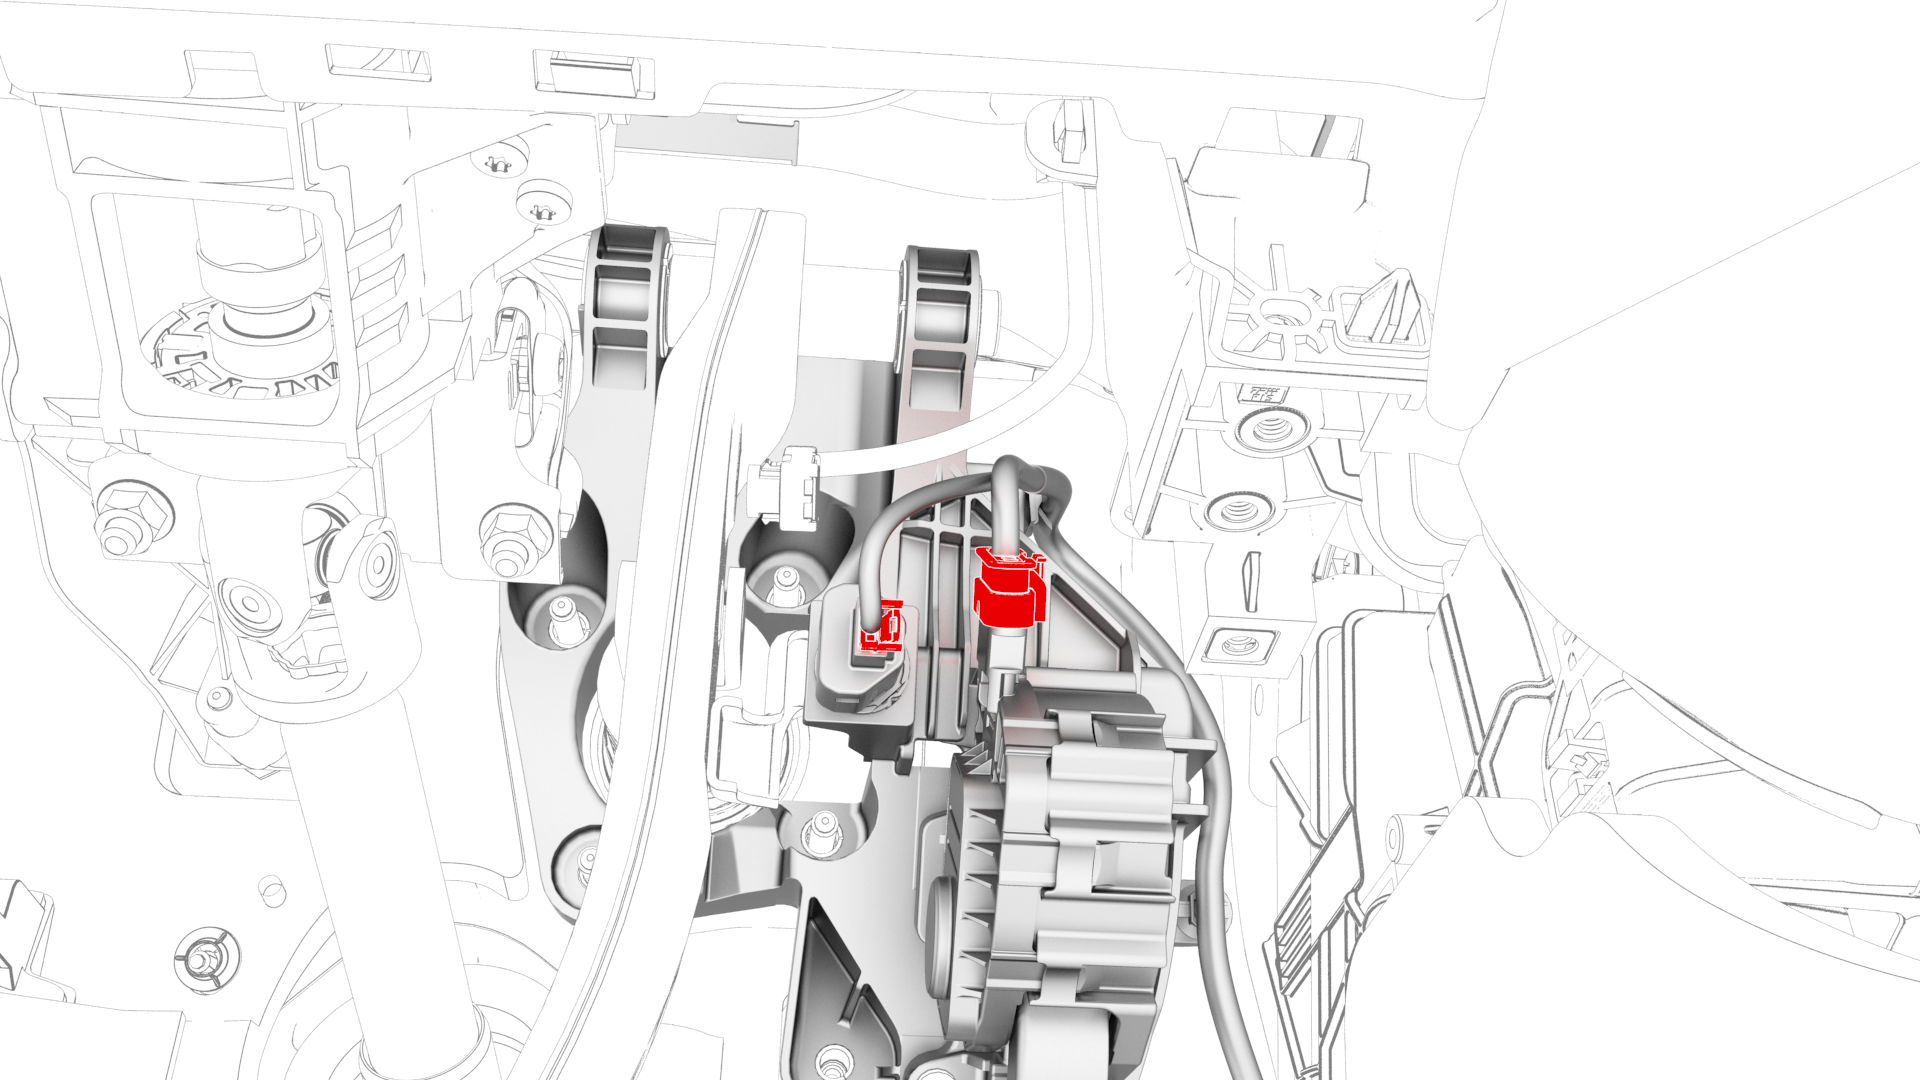
Disconnect the brake pedal and the accelerator pedal electrical connectors.
-
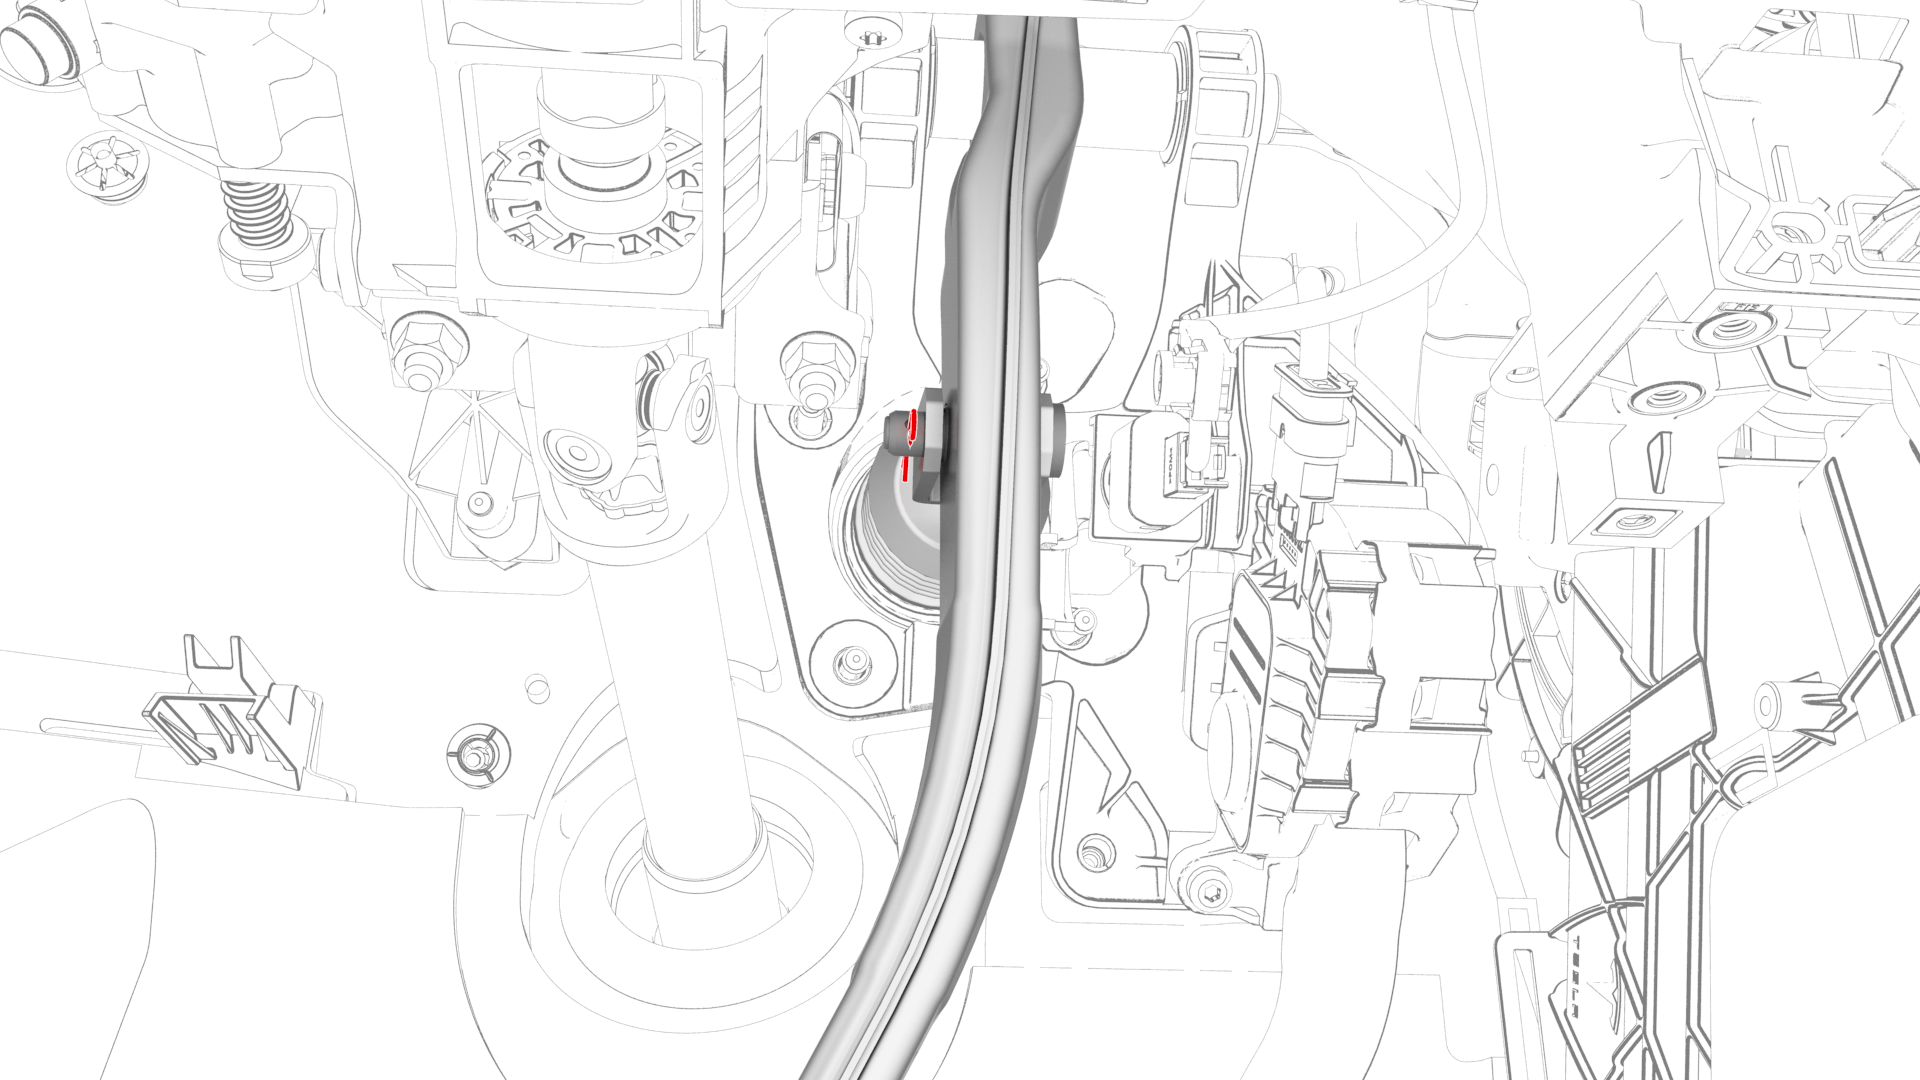
Remove the brake clevis pin cotter pin.
-
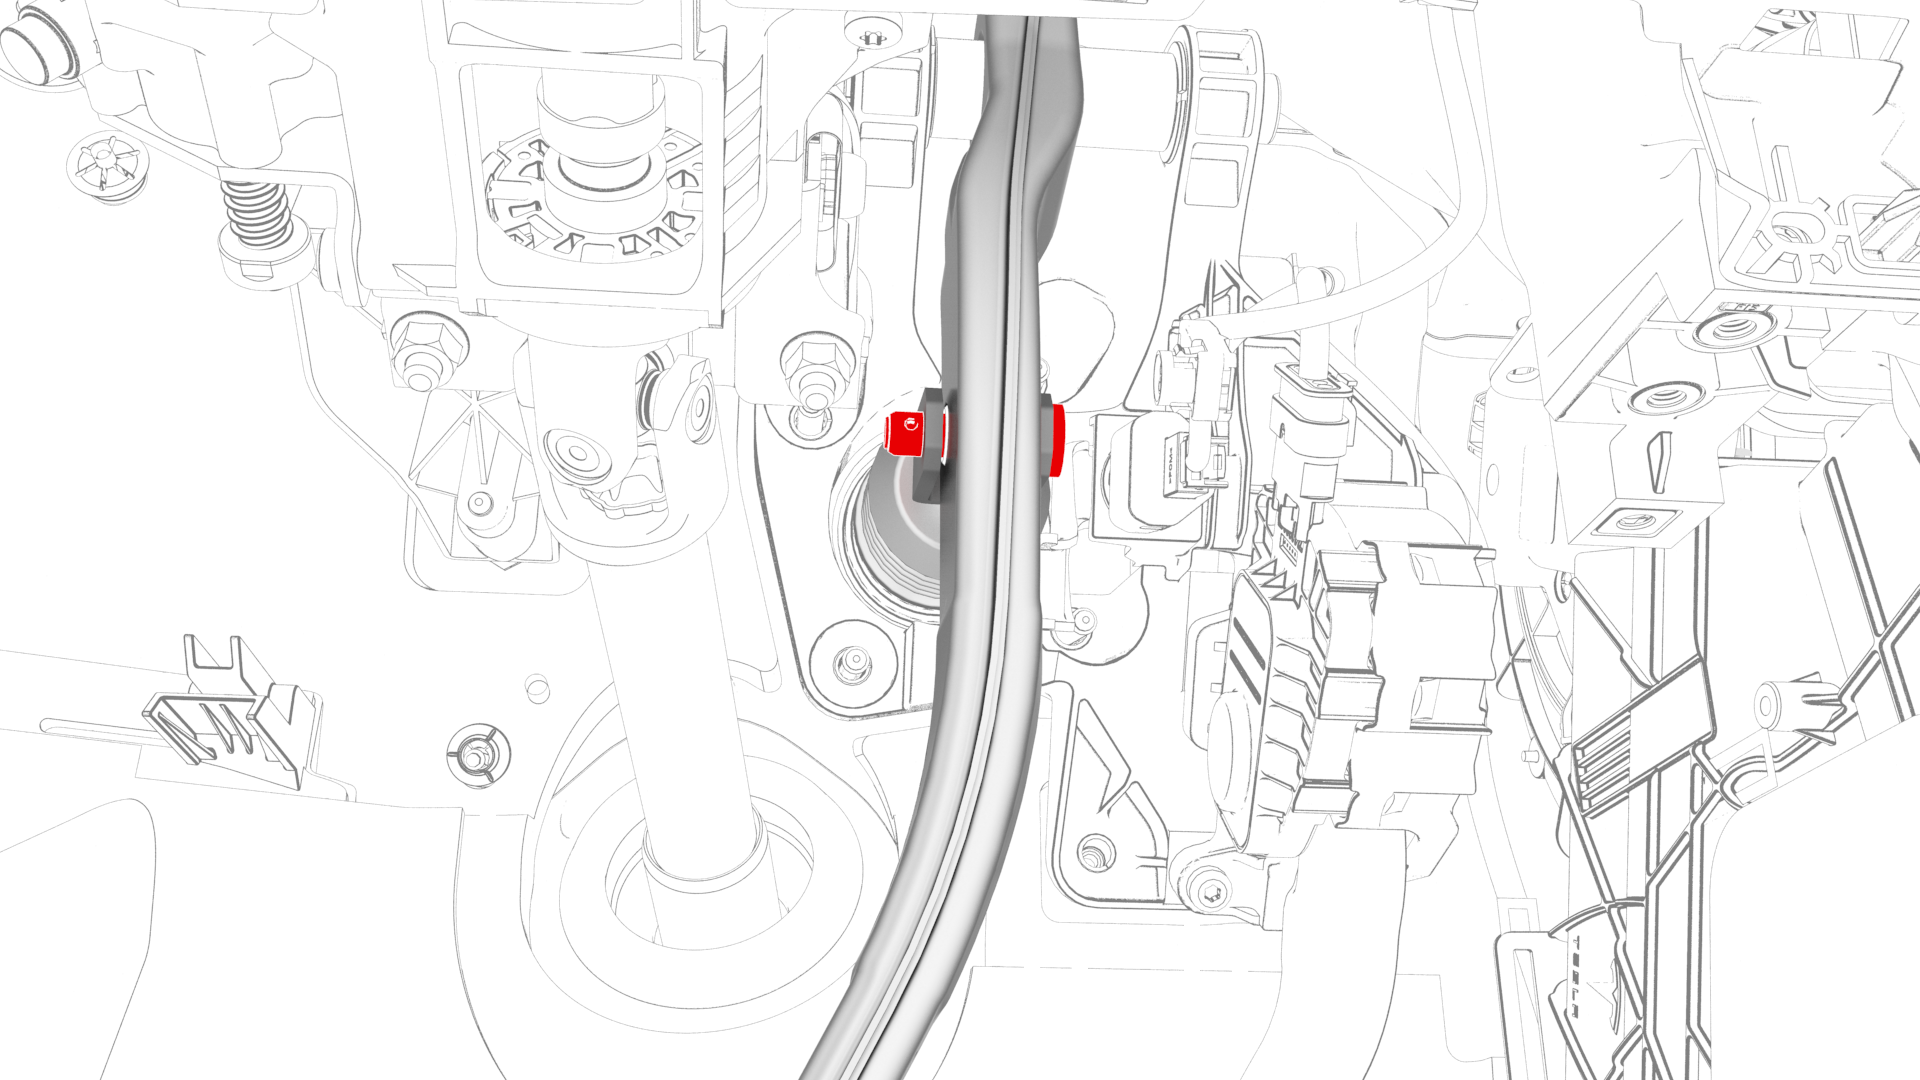
Remove the brake clevis pin that attaches the brake pedal to the electromechanical brake booster.
-
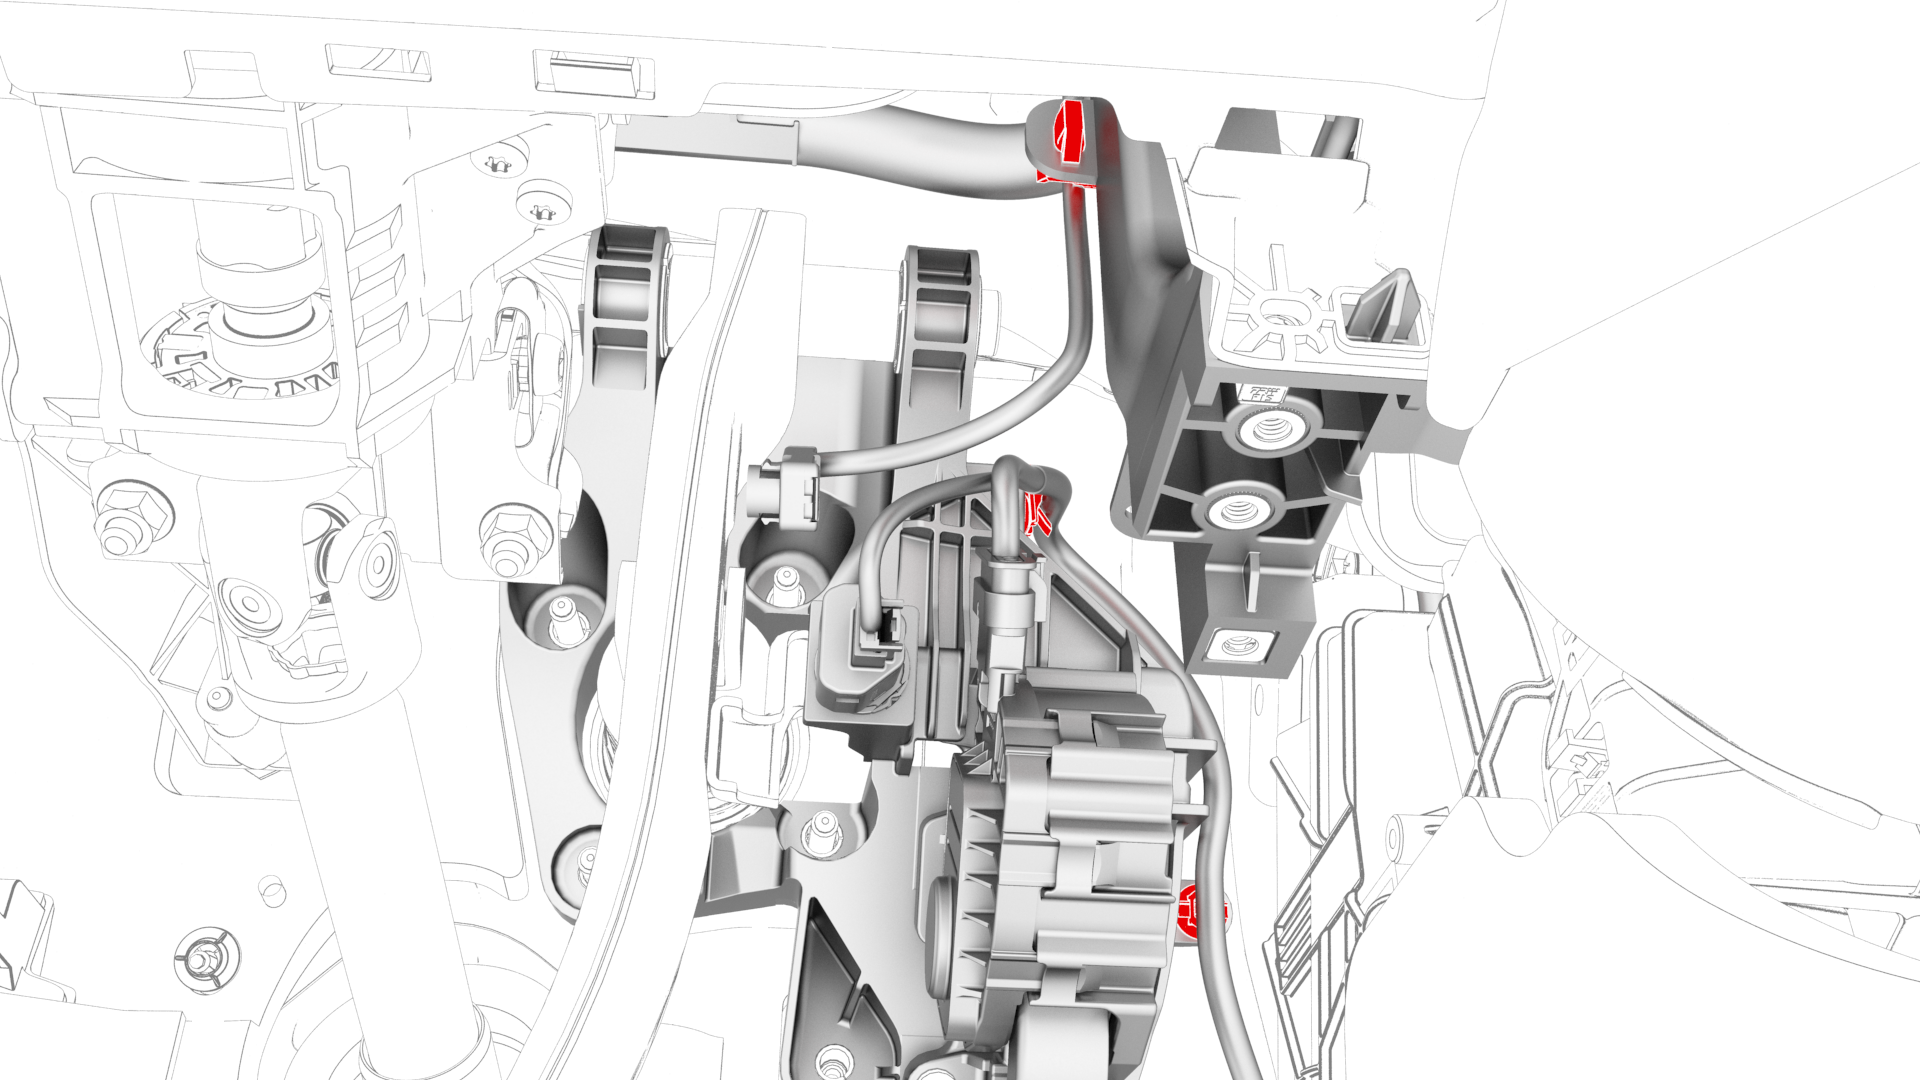
Release the clips that attach the electrical harness to the brake pedal assembly.
-
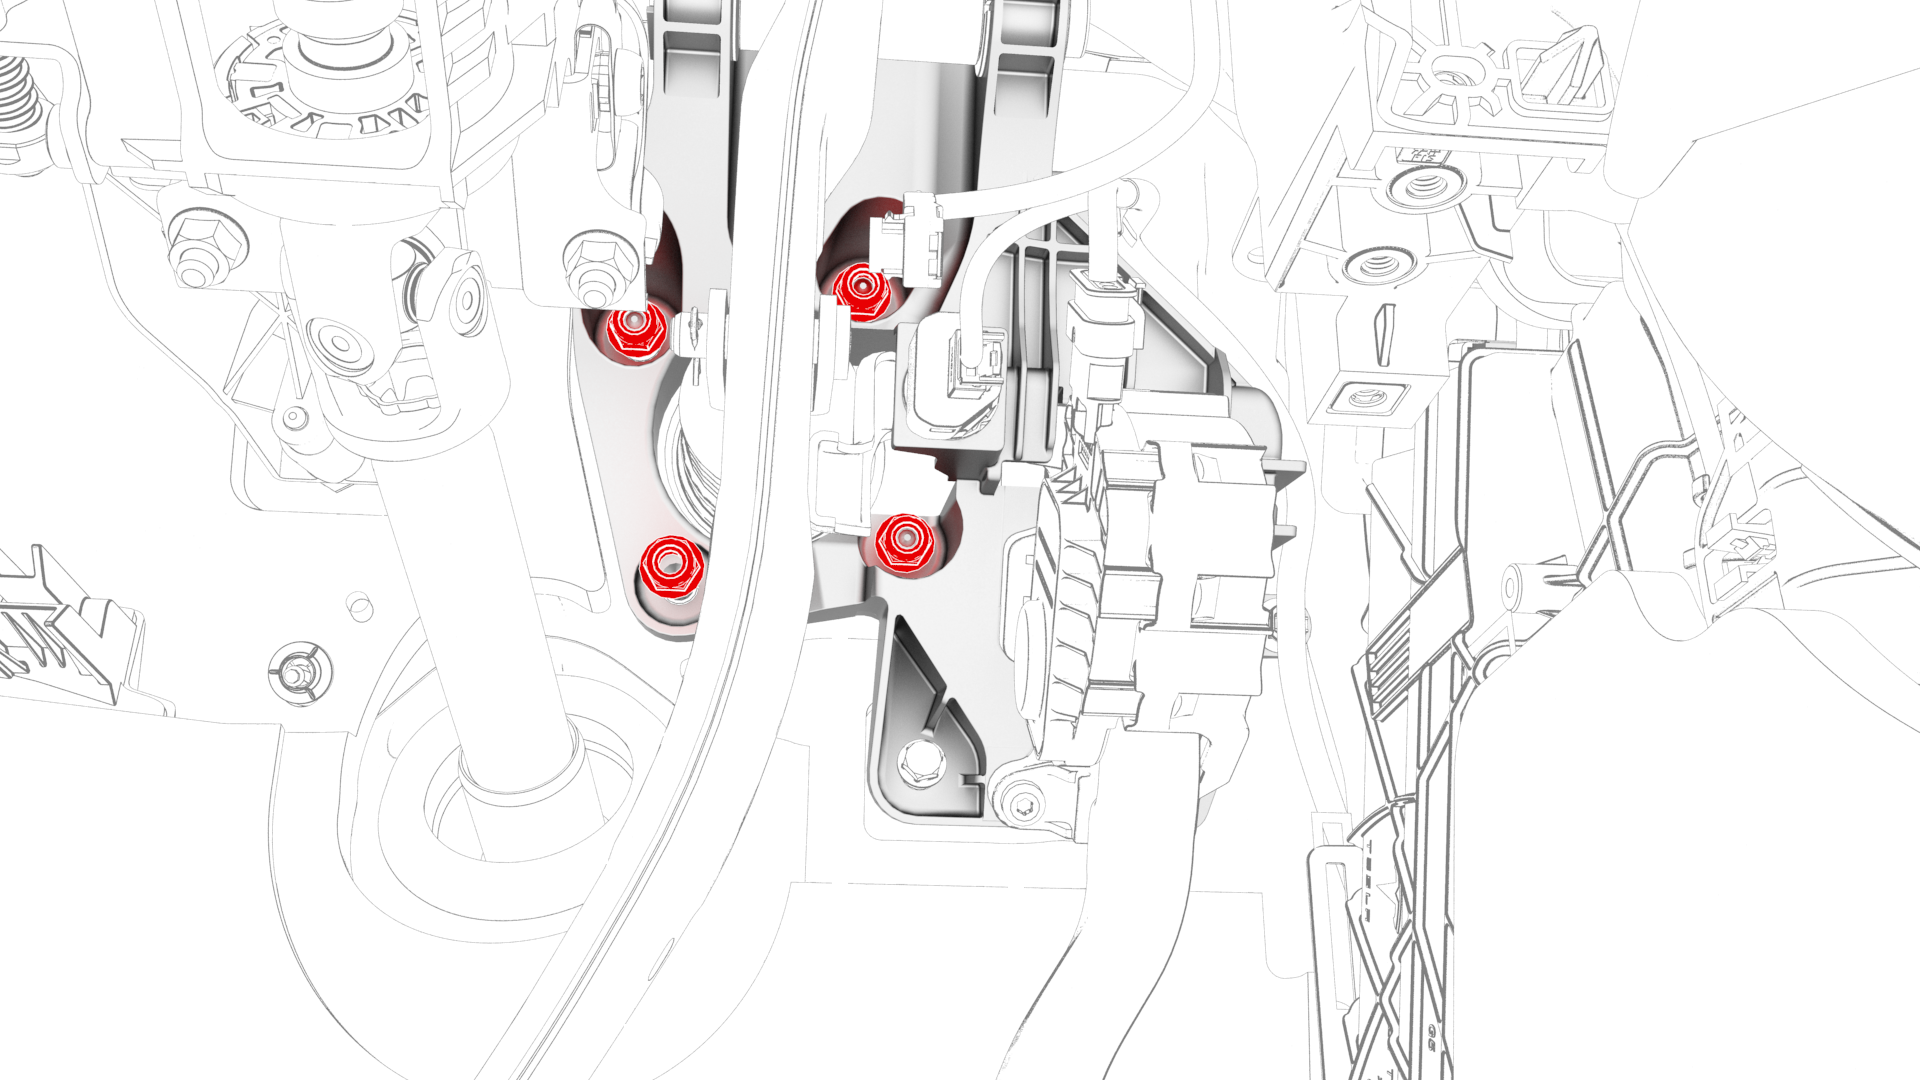
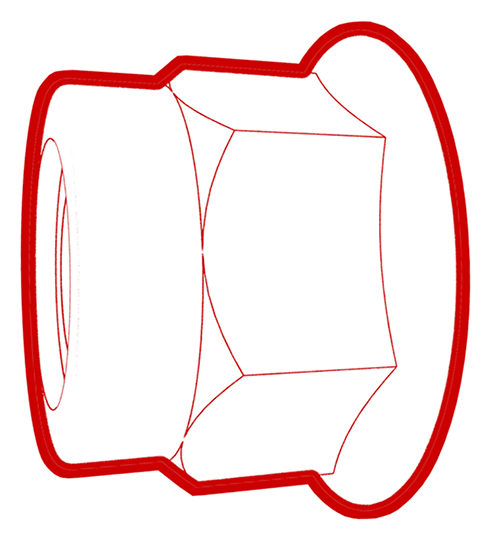
Remove and discard the nuts (x4) that attach the brake pedal assembly to the vehicle.
-
Remove the brake pedal and the accelerator pedal as an assembly from the vehicle.

| 1 | Remove the 2nd row lower seat cushion. See Seat Cushion - Lower - 2nd Row (Remove and Replace). | ||
| 2 | Remove the rear underhood apron. See Underhood Apron - Rear (Remove and Replace). | ||
| 3 | Disconnect 12V power. See 12V Power (Disconnect and Connect). | ||
| 4 | Remove the driver footwell cover. See Cover - Footwell - Driver (Remove and Replace). | ||
| 5 | Remove the driver knee airbag. See Airbag - Knee - Driver (Remove and Install). | ||
| 6 | Remove the LH footwell duct. See Duct - Footwell - LH (Remove and Replace) | ||
| 7 | Disconnect the brake pedal and the accelerator pedal electrical connectors. | |
| 8 | Remove the brake light switch. See Switch - Brake Light (Remove and Replace). | ||
| 9 | Remove the brake clevis pin cotter pin. | |
| 10 | Remove the brake clevis pin that attaches the brake pedal to the electromechanical brake booster. | |
| 11 | Release the clips that attach the electrical harness to the brake pedal assembly. | |
| 12 | Remove and discard the nuts (x4) that attach the brake pedal assembly to the vehicle. | |
| 13 | Remove the brake pedal and the accelerator pedal as an assembly from the vehicle. |
Install
-
Install new nuts (x4) to attach the brake pedal assembly to the vehicle.
 Torque 16.5 Nm
 -
Fasten the clips that attach the electrical harness to the brake pedal assembly.
-
Install the brake clevis pin that attaches the brake pedal to the electromechanical brake booster.
-
Install the brake clevis pin cotter pin.
-
Connect the brake pedal and the accelerator pedal electrical connectors.
| 1 | If a new brake pedal assembly is to be installed, install a new brake switch clip into the assembly. | ||
| 2 | Install the brake pedal assembly onto the studs (x4) of the body. | ||
| 3 | Install new nuts (x4) to attach the brake pedal assembly to the vehicle. Torque 16.5 Nm | |
| 4 | Fasten the clips that attach the electrical harness to the brake pedal assembly. | |
| 5 | Install the brake clevis pin that attaches the brake pedal to the electromechanical brake booster. | |
| 6 | Install the brake clevis pin cotter pin. | |
| 7 | Install the brake light switch. See Switch - Brake Light (Remove and Replace). Note: Confirm that the brake pedal is in the home position: Push the new brake pedal switch into the clip until it stops, and then twist the brake switch clockwise 45 degrees to set the brake switch in position. Do not push the brake pedal switch too hard as to move the brake pedal.
| ||
| 8 | Connect the brake pedal and the accelerator pedal electrical connectors. | |
| 9 | Install the LH footwell duct. See Duct - Footwell - LH (Remove and Replace) | ||
| 10 | Install the driver knee airbag. See Airbag - Knee - Driver (Remove and Install). | ||
| 11 | Install the driver footwell cover. See Cover - Footwell - Driver (Remove and Replace). | ||
| 12 | Connect 12V power. See 12V Power (Disconnect and Connect). | ||
| 13 | Install the rear underhood apron. See Underhood Apron - Rear (Remove and Replace). | ||
| 14 | Install the 2nd row lower seat cushion. See Seat Cushion - Lower - 2nd Row (Remove and Replace). | ||
| 15 | Connect a laptop with Toolbox to the vehicle. | ||
| 16 | Click on "Actions" and type "Brake Switch" into the search field. | ||
| 17 | Click the play button next to "TEST_BRAKE-DI_X_STIFFNESS-TEST-PRESSURE-UNBURNISHED-AND-DI-BRAKE-SWITCH", and then select Run.
|