Trunk (Remove and Replace)
Correction code 1010700210107002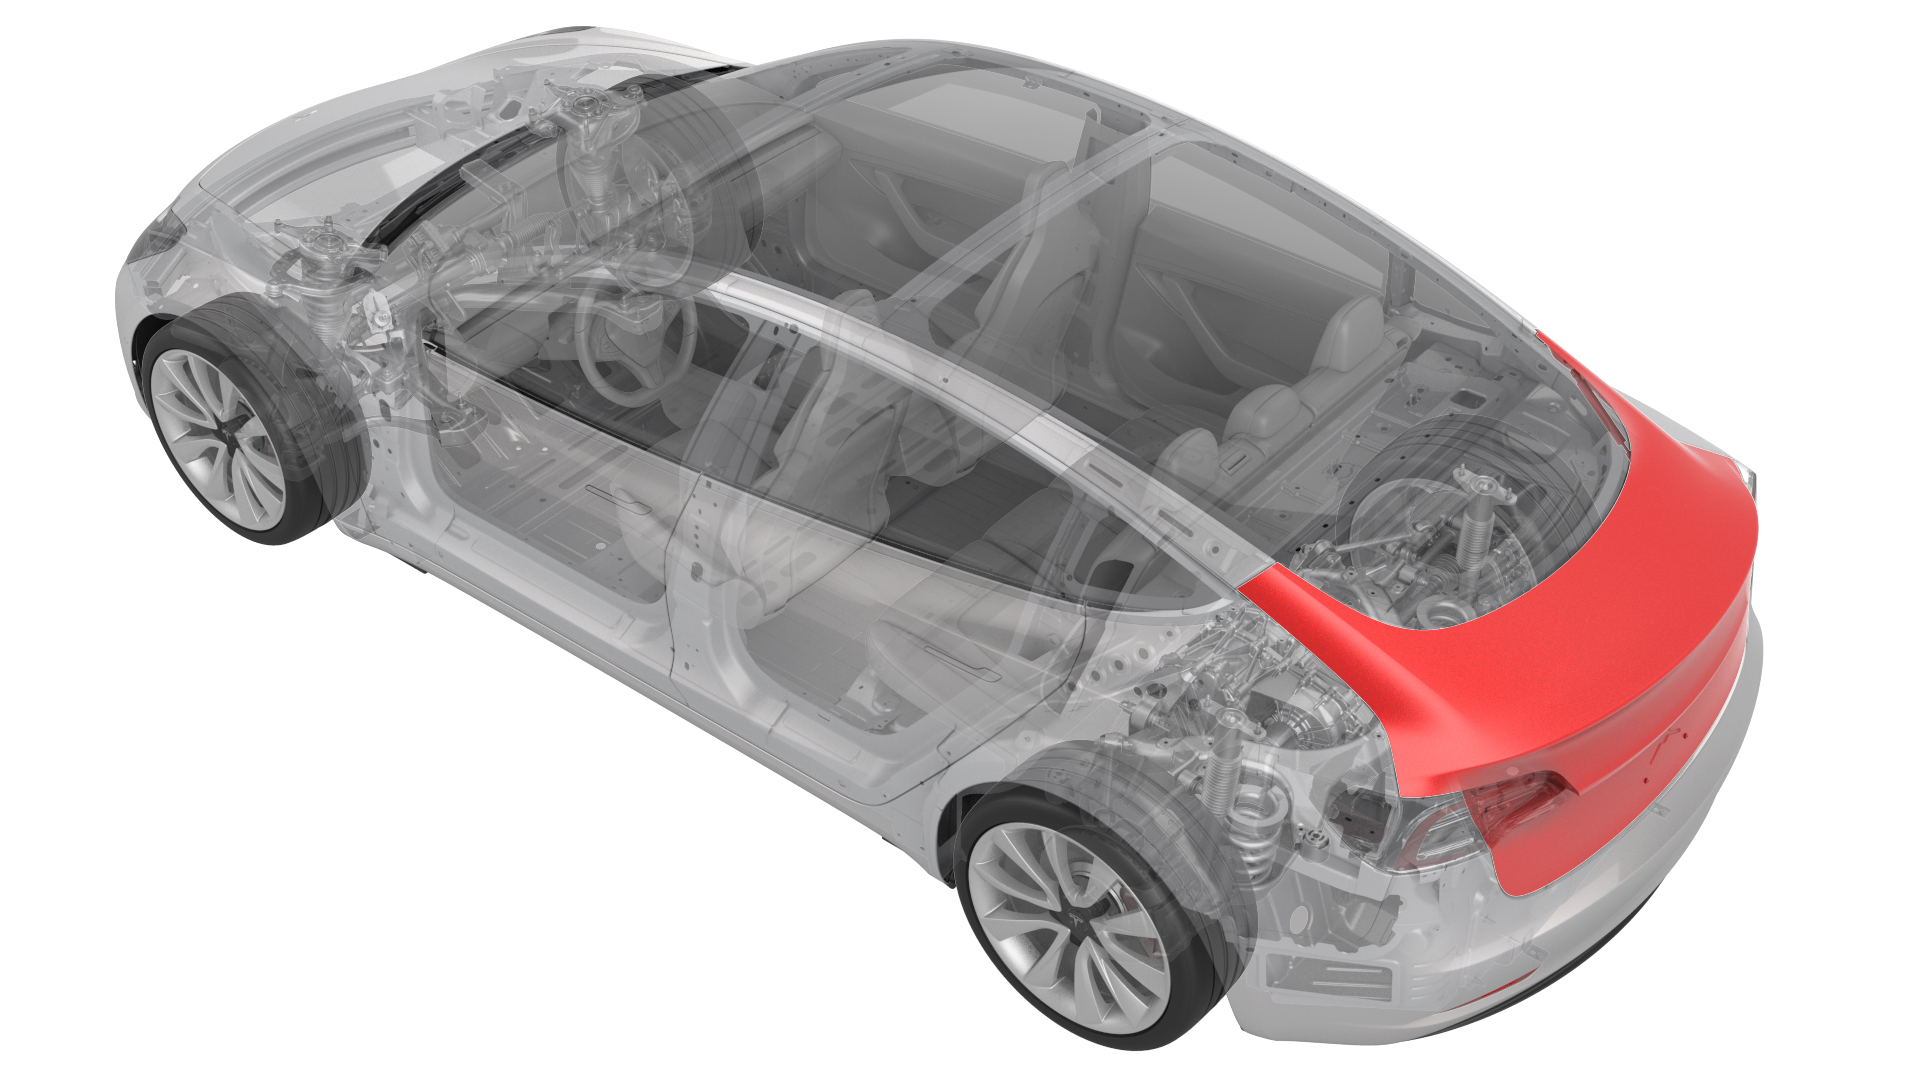
- 1134703-00-A Fixture, Rear Badge, Model 3
SPECIAL TOOLS
Fixture, Rear Badge, Model 3 (1134703-00-A) |
Remove
-
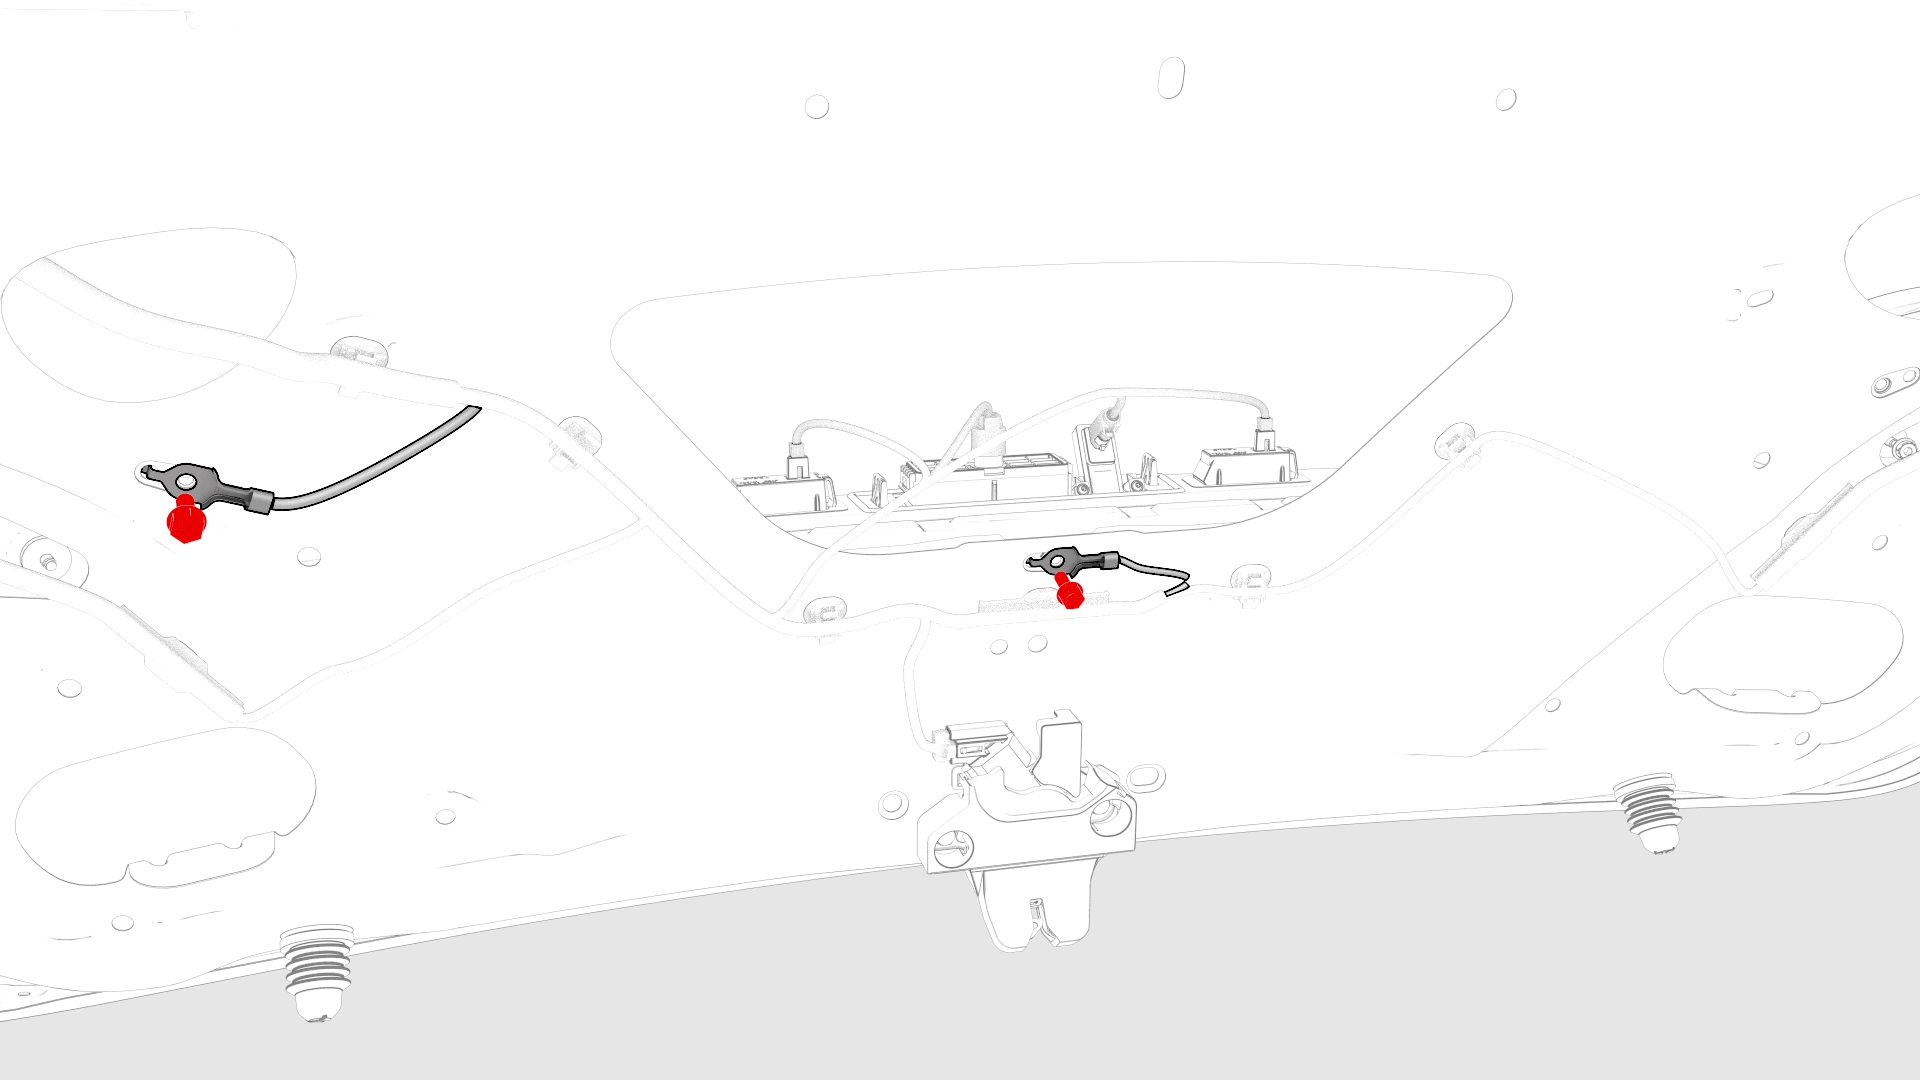
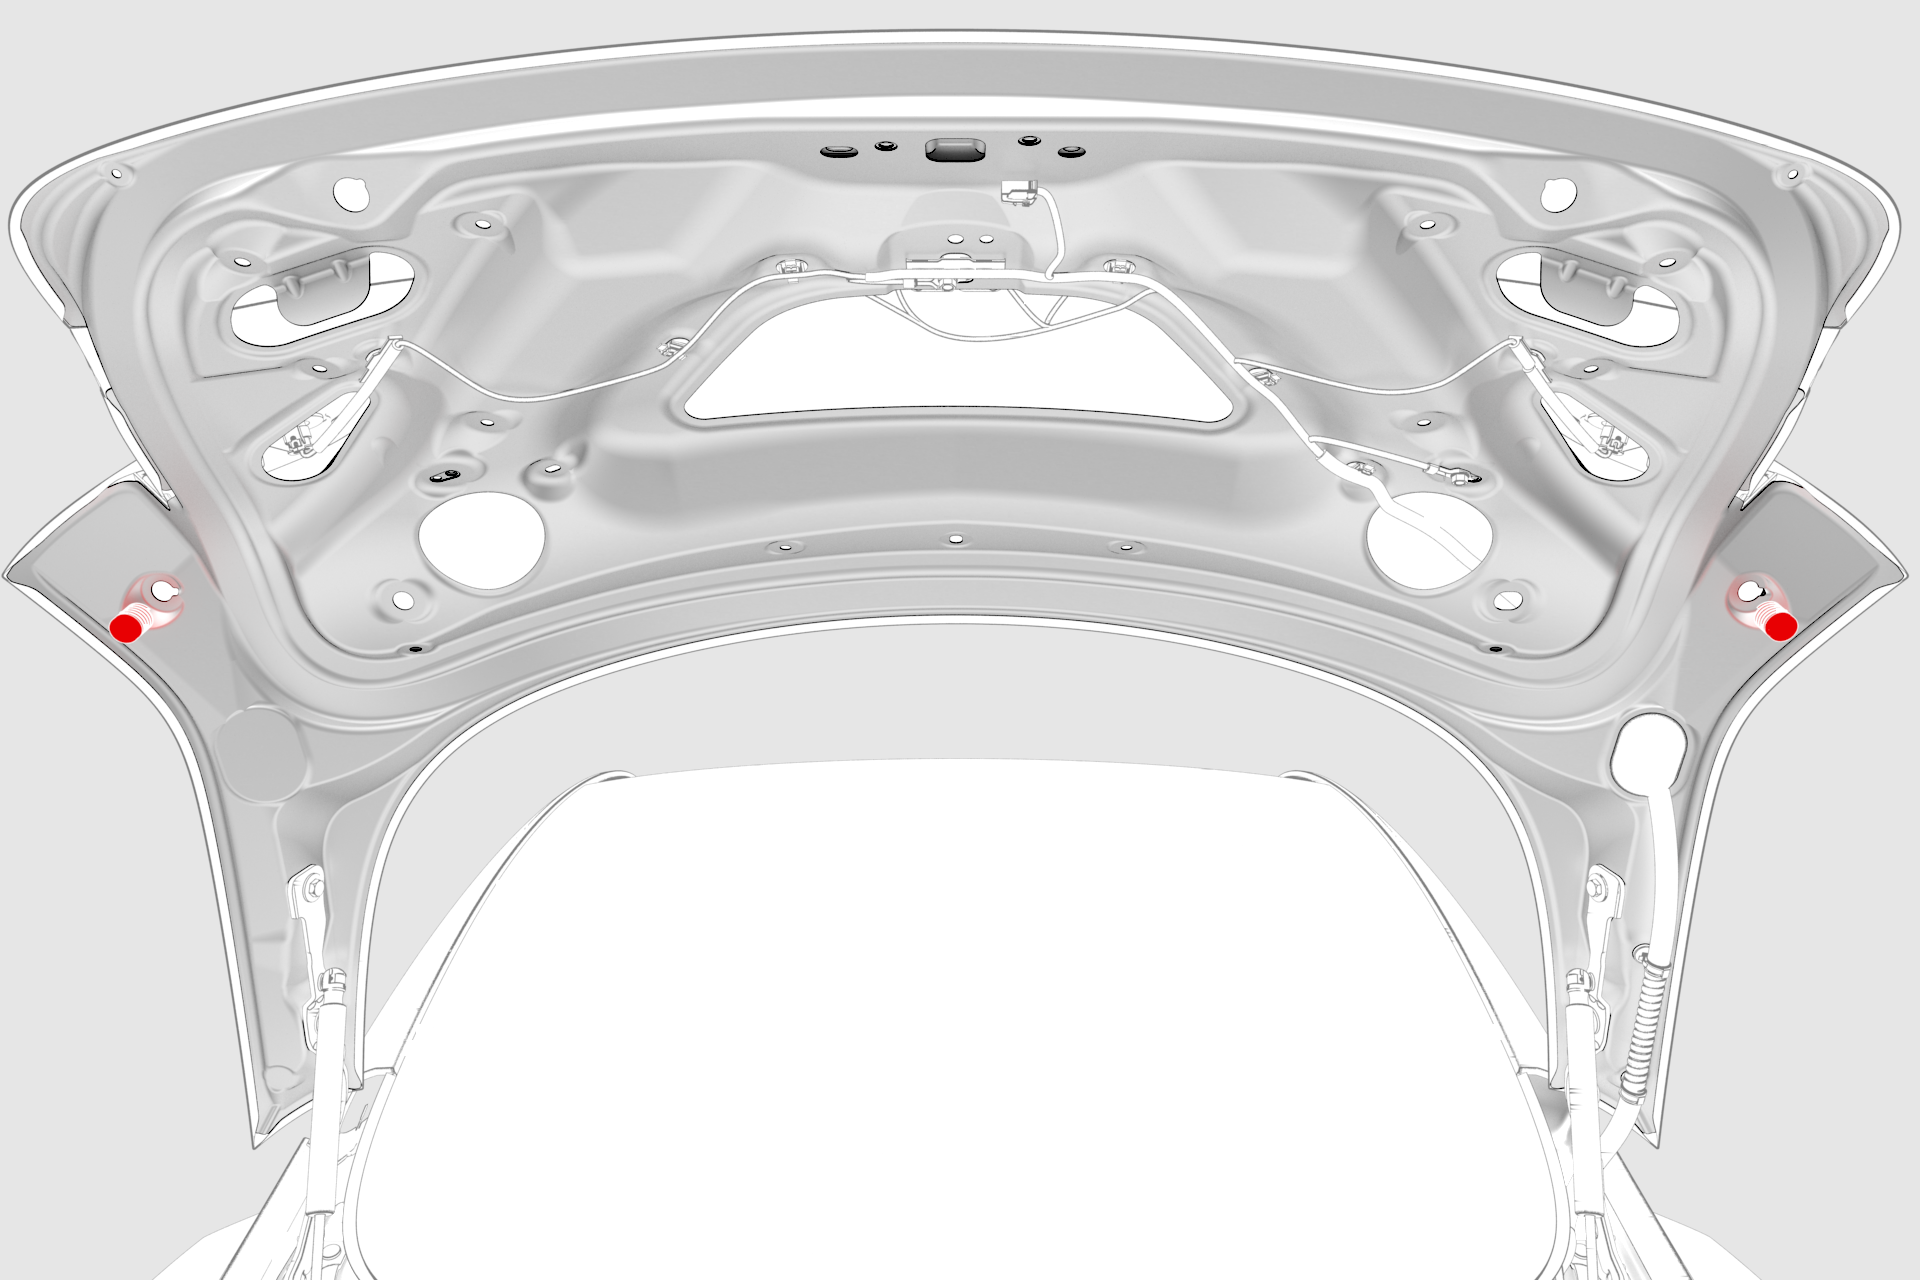
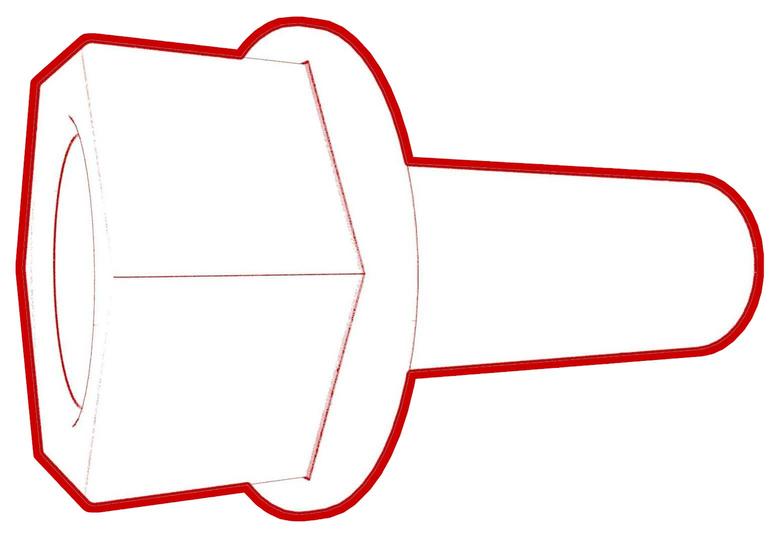
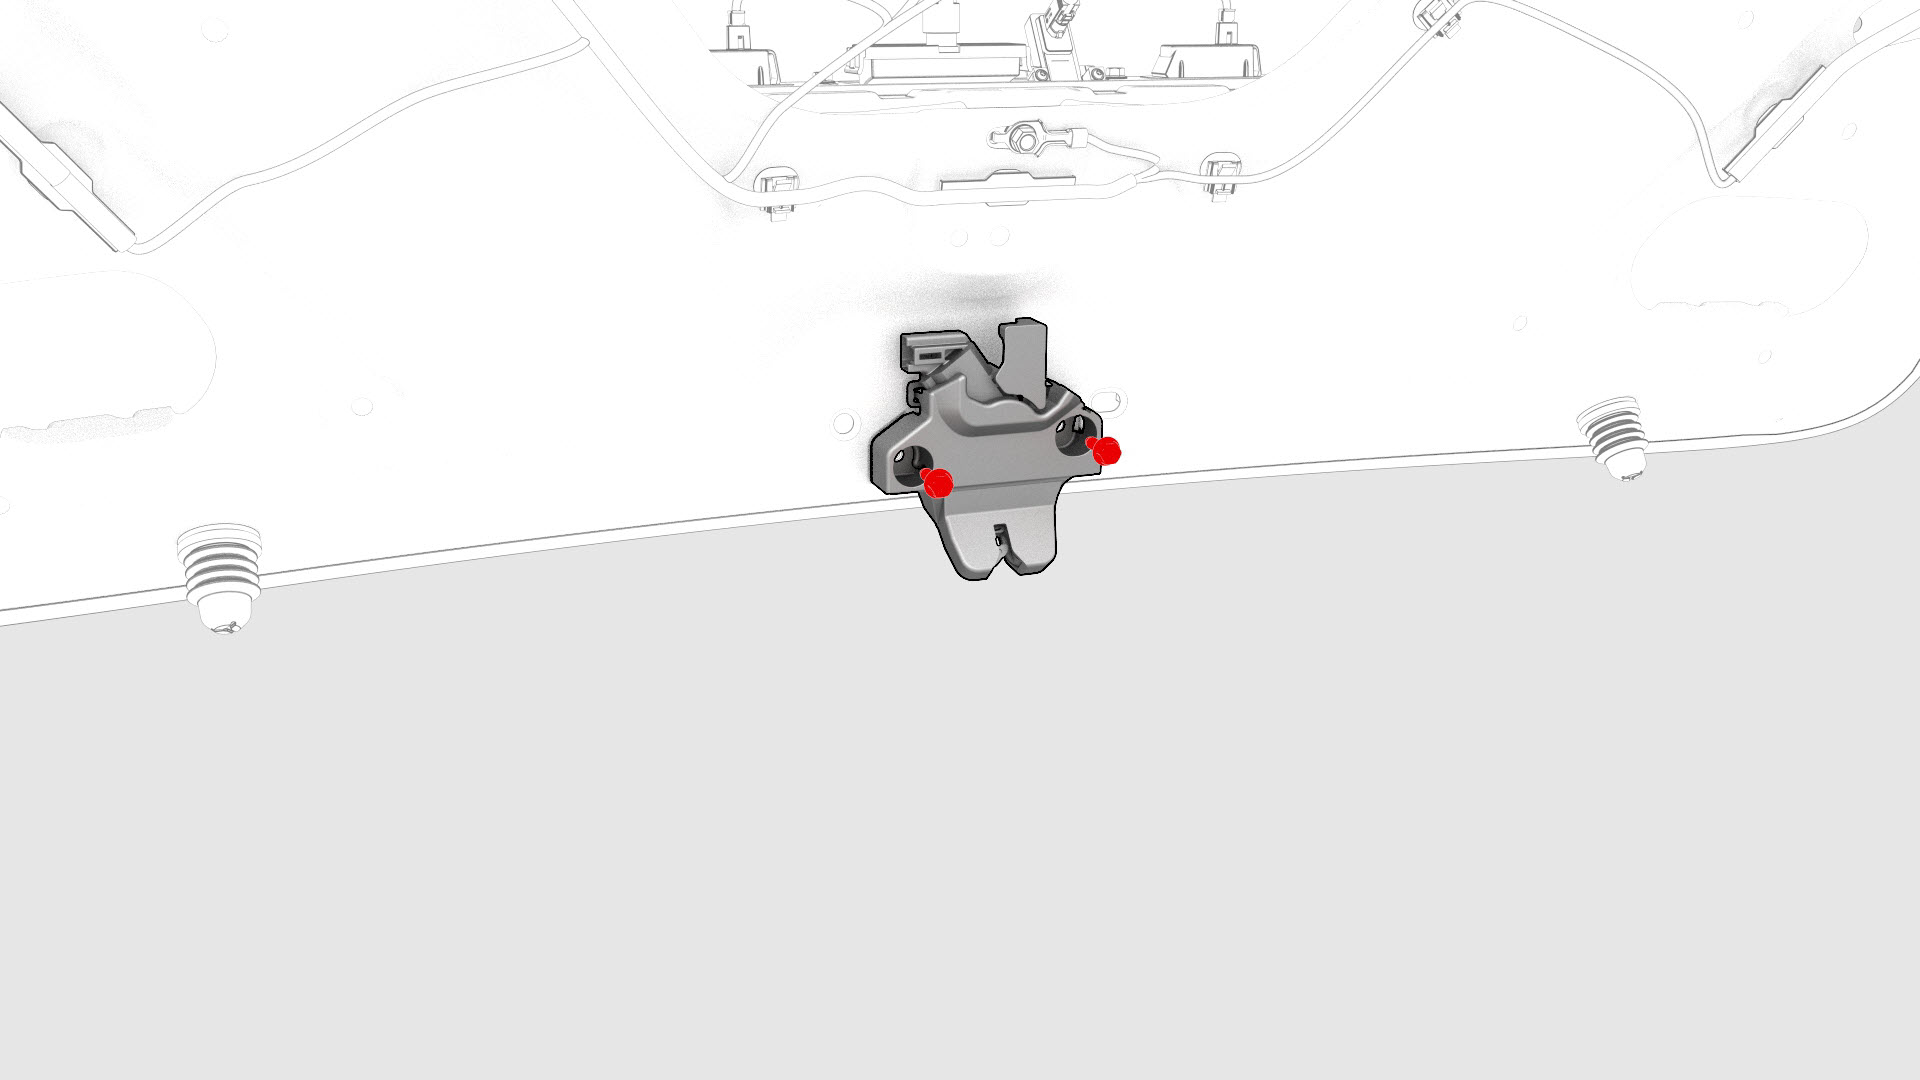
Remove and discard the bolts (x2) that attach the trunk electrical harness ground straps to the trunk lid.
-
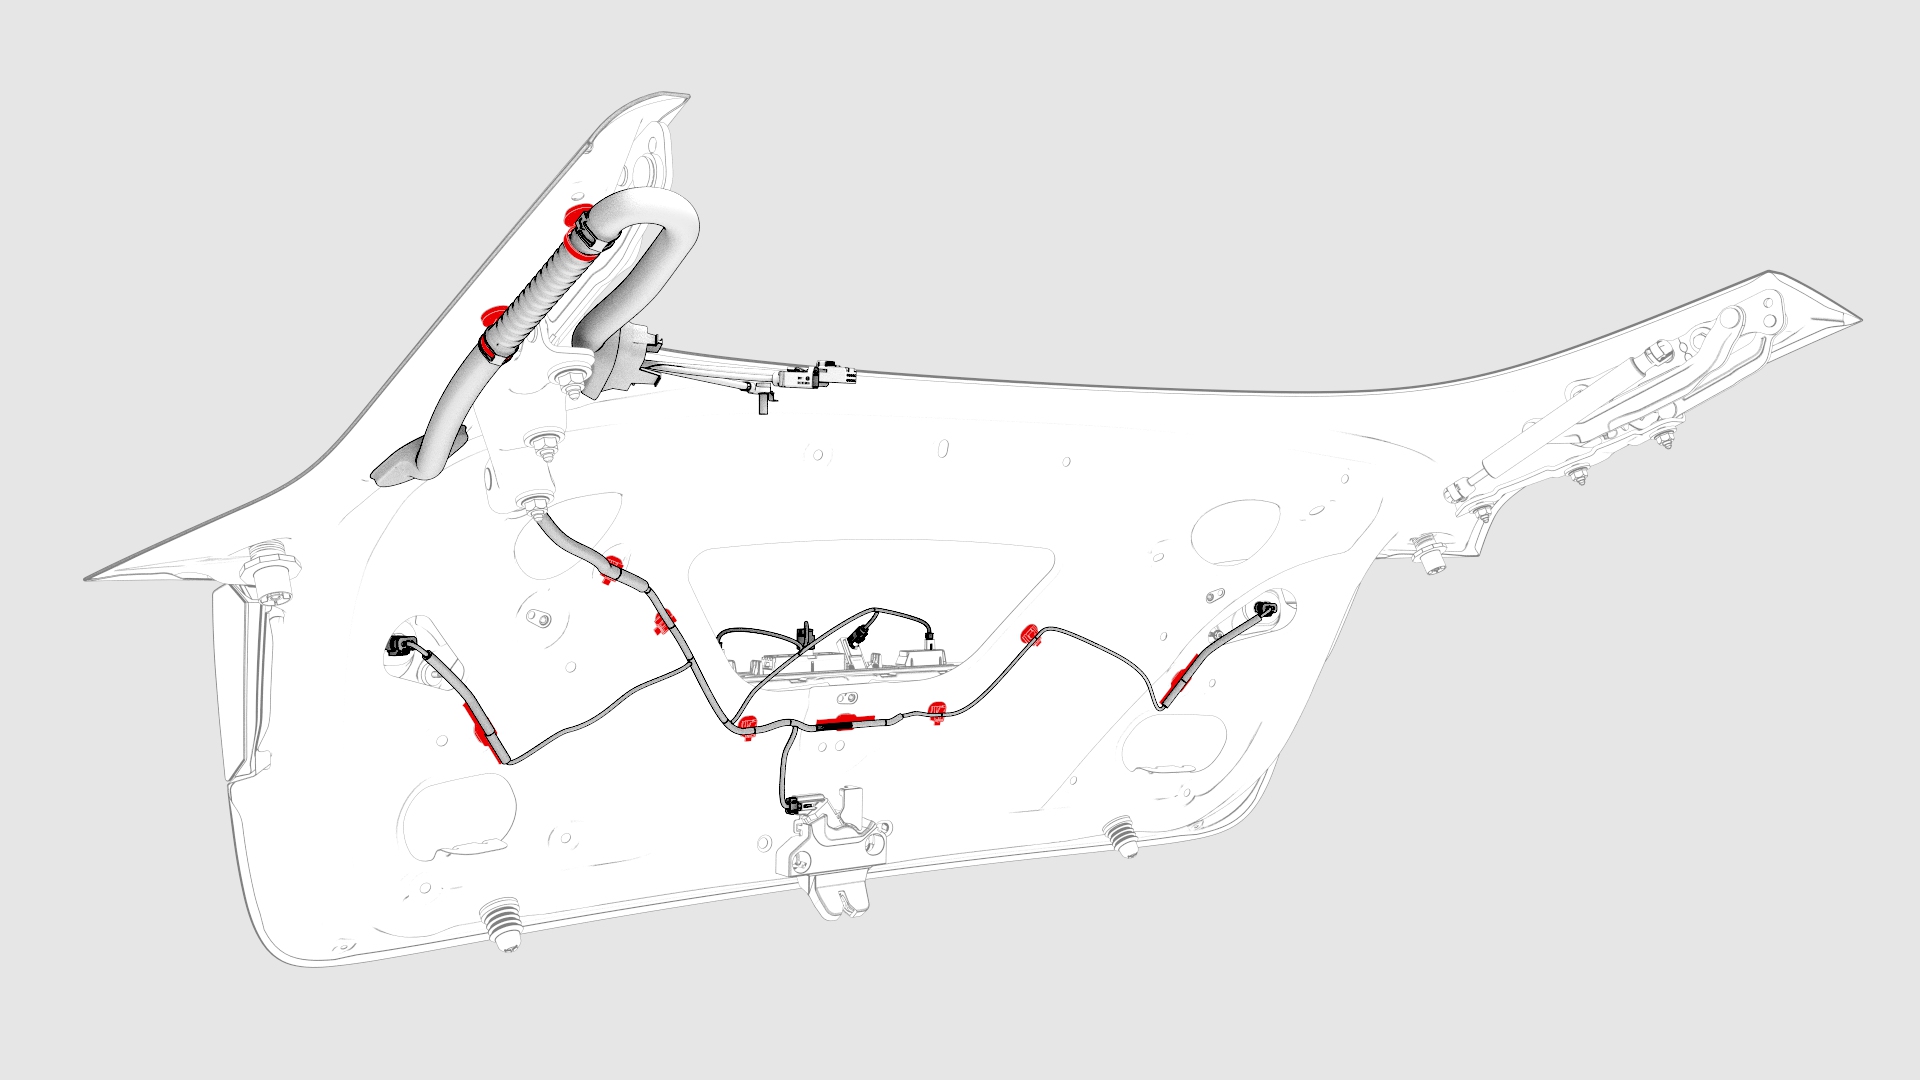
Release the clips that attach the trunk electrical harness to the trunk lid.
-
Release the electrical harness boot, and then move the trunk electrical harness through the trunk lid bulkhead and out of the trunk lid.

-
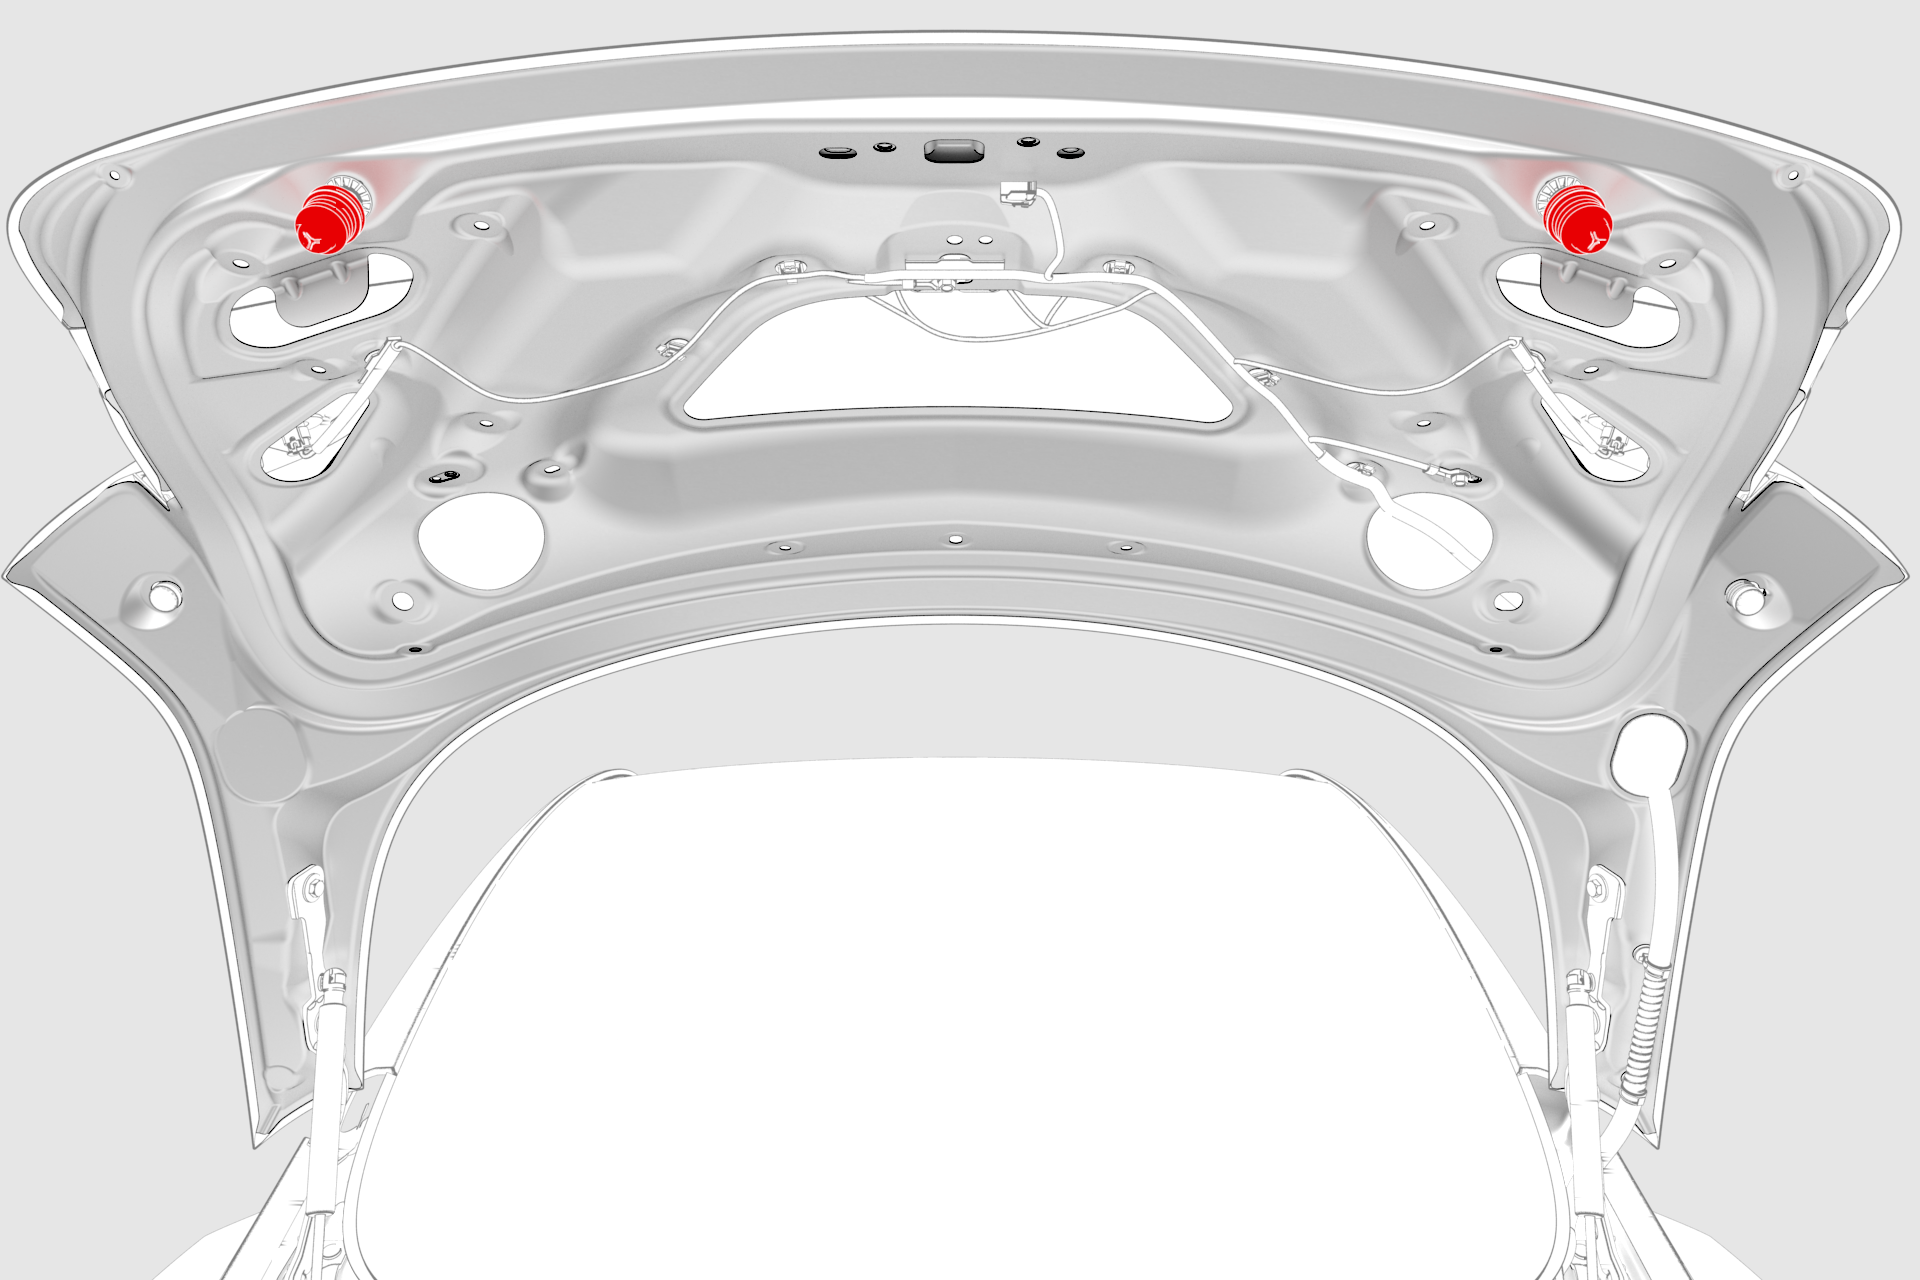
Release the clips that attach the LH and RH bump stops to the trunk lid, and then remove the stops from the trunk lid.
-
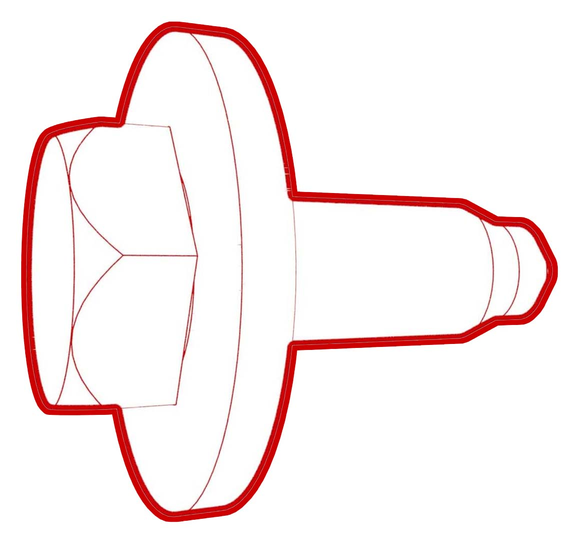
Unscrew the LH and RH over-slam bumpers from the trunk lid.
-
With assistance, remove the bolts that attach the trunk lid to the trunk hinges, and then remove the trunk from the hinges.
 Caution:Remove the bolts furthest from the body first, lift up on the trunk lid, and while doing so, remove the bolts closest to the body.
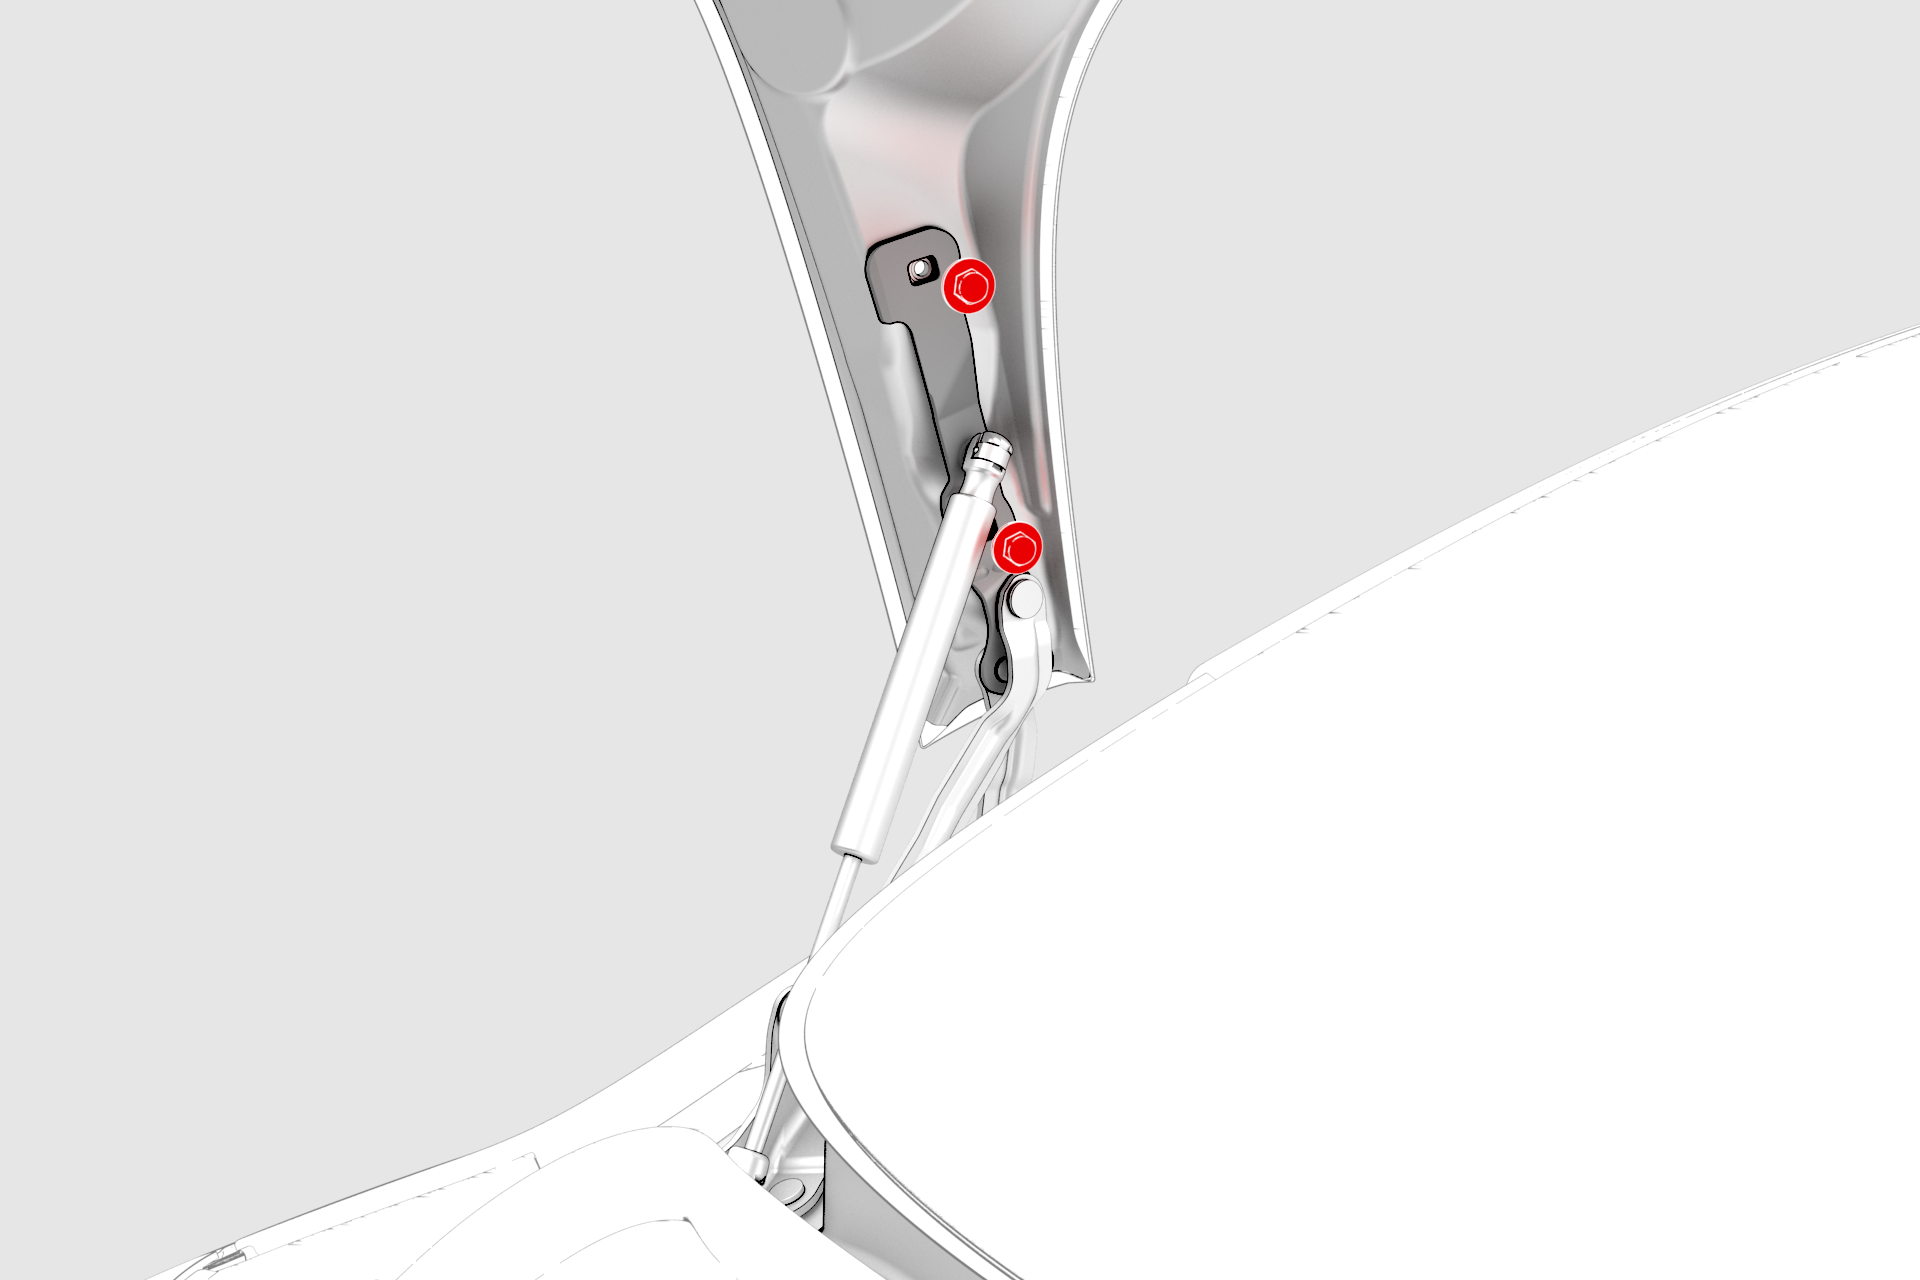 LH
LH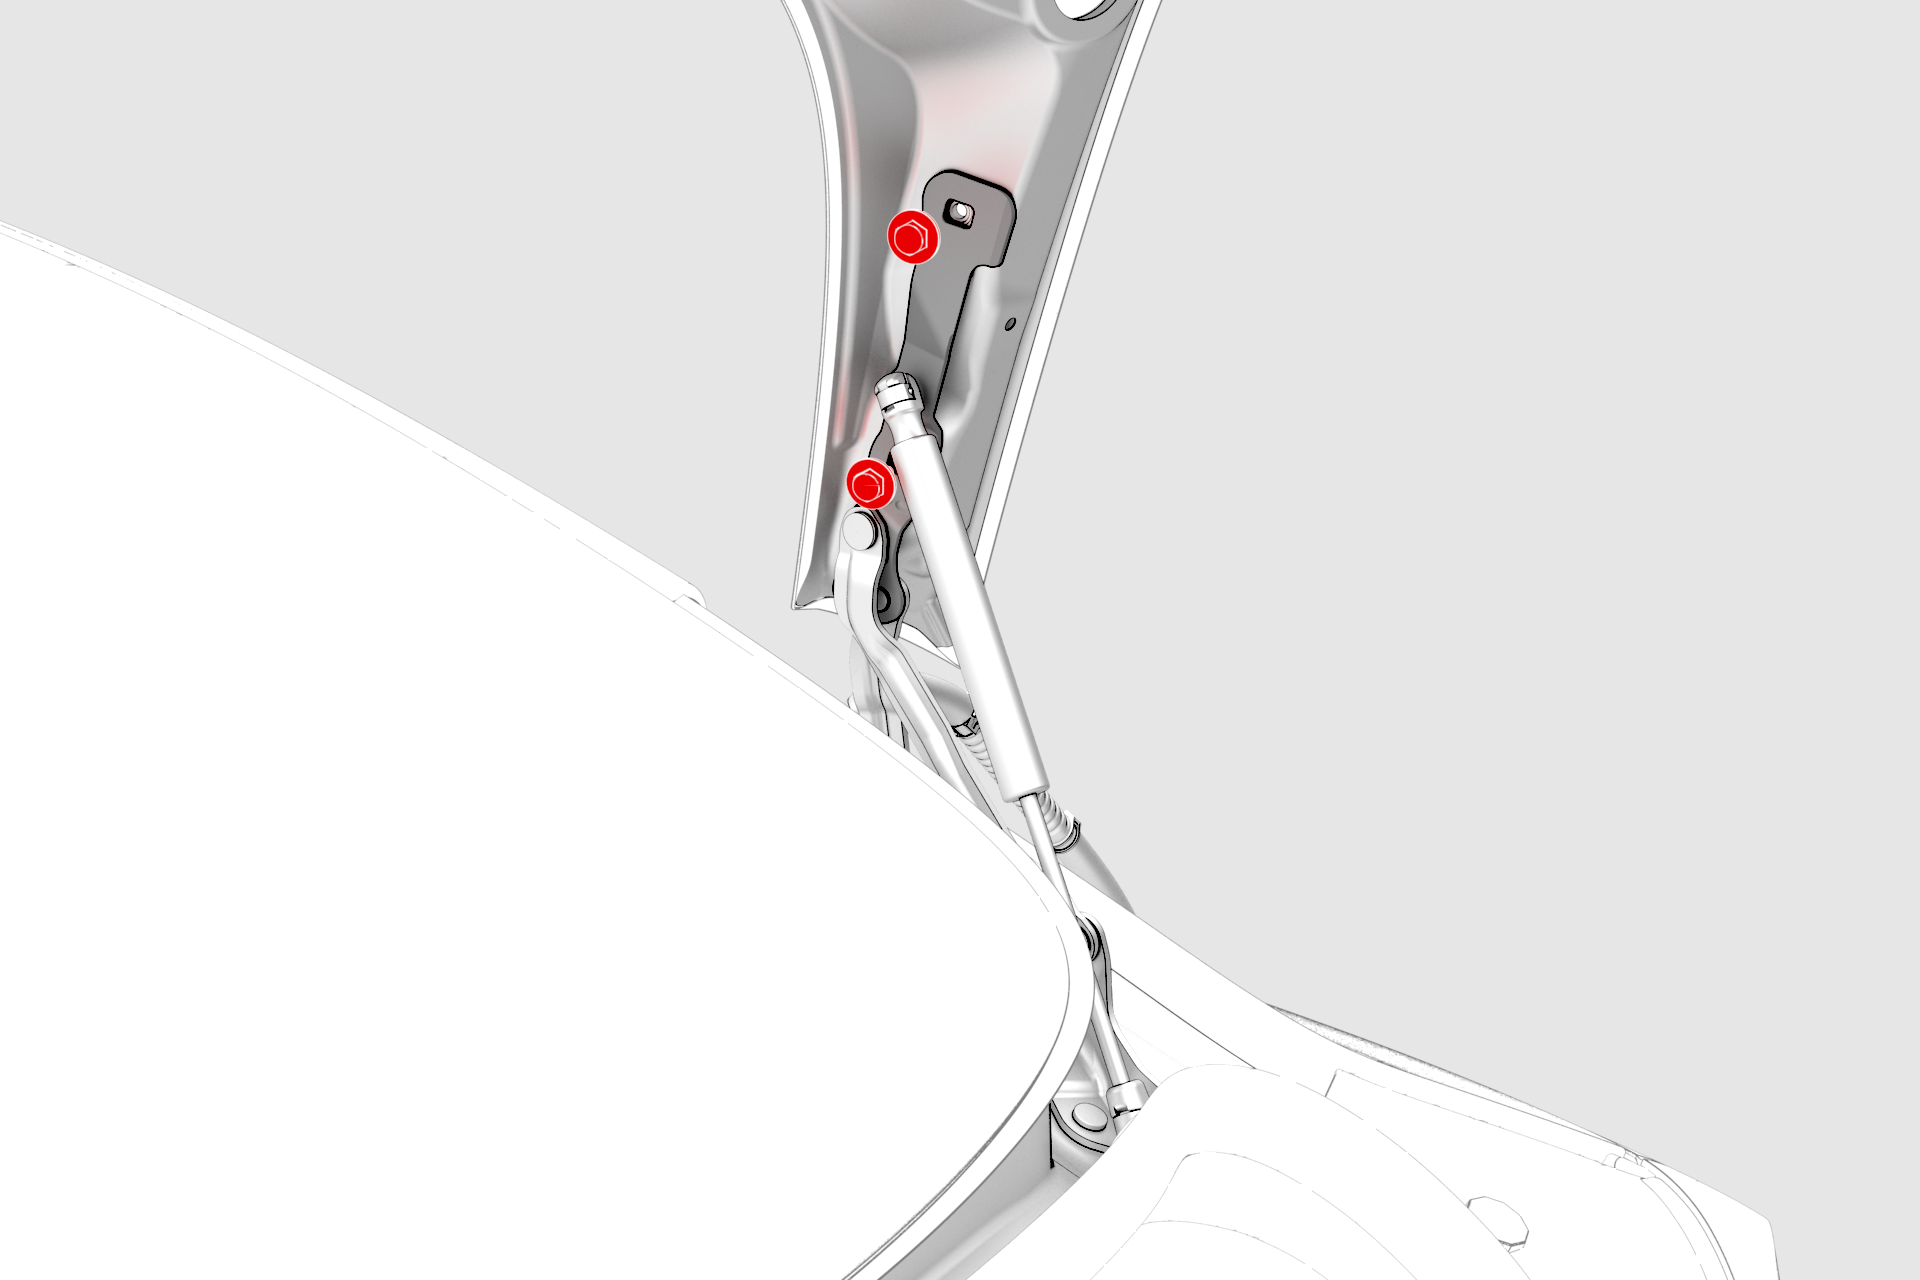 RH
RH
| 1 | Remove the rear license plate. | ||
| 2 | Remove the trunk lid trim. See Trim - Lid - Trunk (Remove and Replace). | ||
| 3 | Remove the LH and RH rear fog/reverse lights. See Light - Fog / Reverse - Rear - LH (Remove and Replace). | ||
| 4 | Remove the trunk exterior release switch. See Switch - Exterior Release - Trunk (Remove and Replace). | ||
| 5 | Remove the LH and RH license plate lights. See Light - License Plate (Remove and Replace). | ||
| 6 | Remove the trunk latch. See Latch - Trunk (Remove and Replace). | ||
| 7 | Remove and discard the bolts (x2) that attach the trunk electrical harness ground straps to the trunk lid. | |
| 8 | Release the clips that attach the trunk electrical harness to the trunk lid. | |
| 9 | Release the electrical harness boot, and then move the trunk electrical harness through the trunk lid bulkhead and out of the trunk lid. | |
| 10 | Release the clips that attach the LH and RH bump stops to the trunk lid, and then remove the stops from the trunk lid. | |
| 11 | Unscrew the LH and RH over-slam bumpers from the trunk lid. | |
LH
RH
| 12 | With assistance, remove the bolts that attach the trunk lid to the trunk hinges, and then remove the trunk from the hinges. Caution: Remove the bolts furthest from the body first, lift up on the trunk lid, and while doing so, remove the bolts closest to the body.
|
Install
-
With assistance, install the trunk to the trunk hinges, and then install the bolts that attach the trunk lid to the trunk hinges.
Caution:Install the bolts closest to the body first, and then install the bolts furthest from the body.Note: Hand tighten, but do not torque the bolts at this time.
LH
RH
-
Screw the LH and RH over-slam bumpers into the trunk lid.
-
Install the LH and RH bump stops into the trunk lid, and then fasten the clips that attach the stops to the lid.
-
Move the electrical harness in through the trunk lid bulkhead, and attach the harness boot to the trunk lid.
-
Fasten the clips that attach the trunk electrical harness to the trunk lid.
-
Install new bolts (x2) to attach the trunk electrical harness ground straps to the trunk lid.
 Torque 8 Nm
 -
Install the trunk latch to the trunk lid, and then install the bolts that attach the latch to the trunk lid.
Note: Hand tighten, but do not torque the bolts at this time.
-
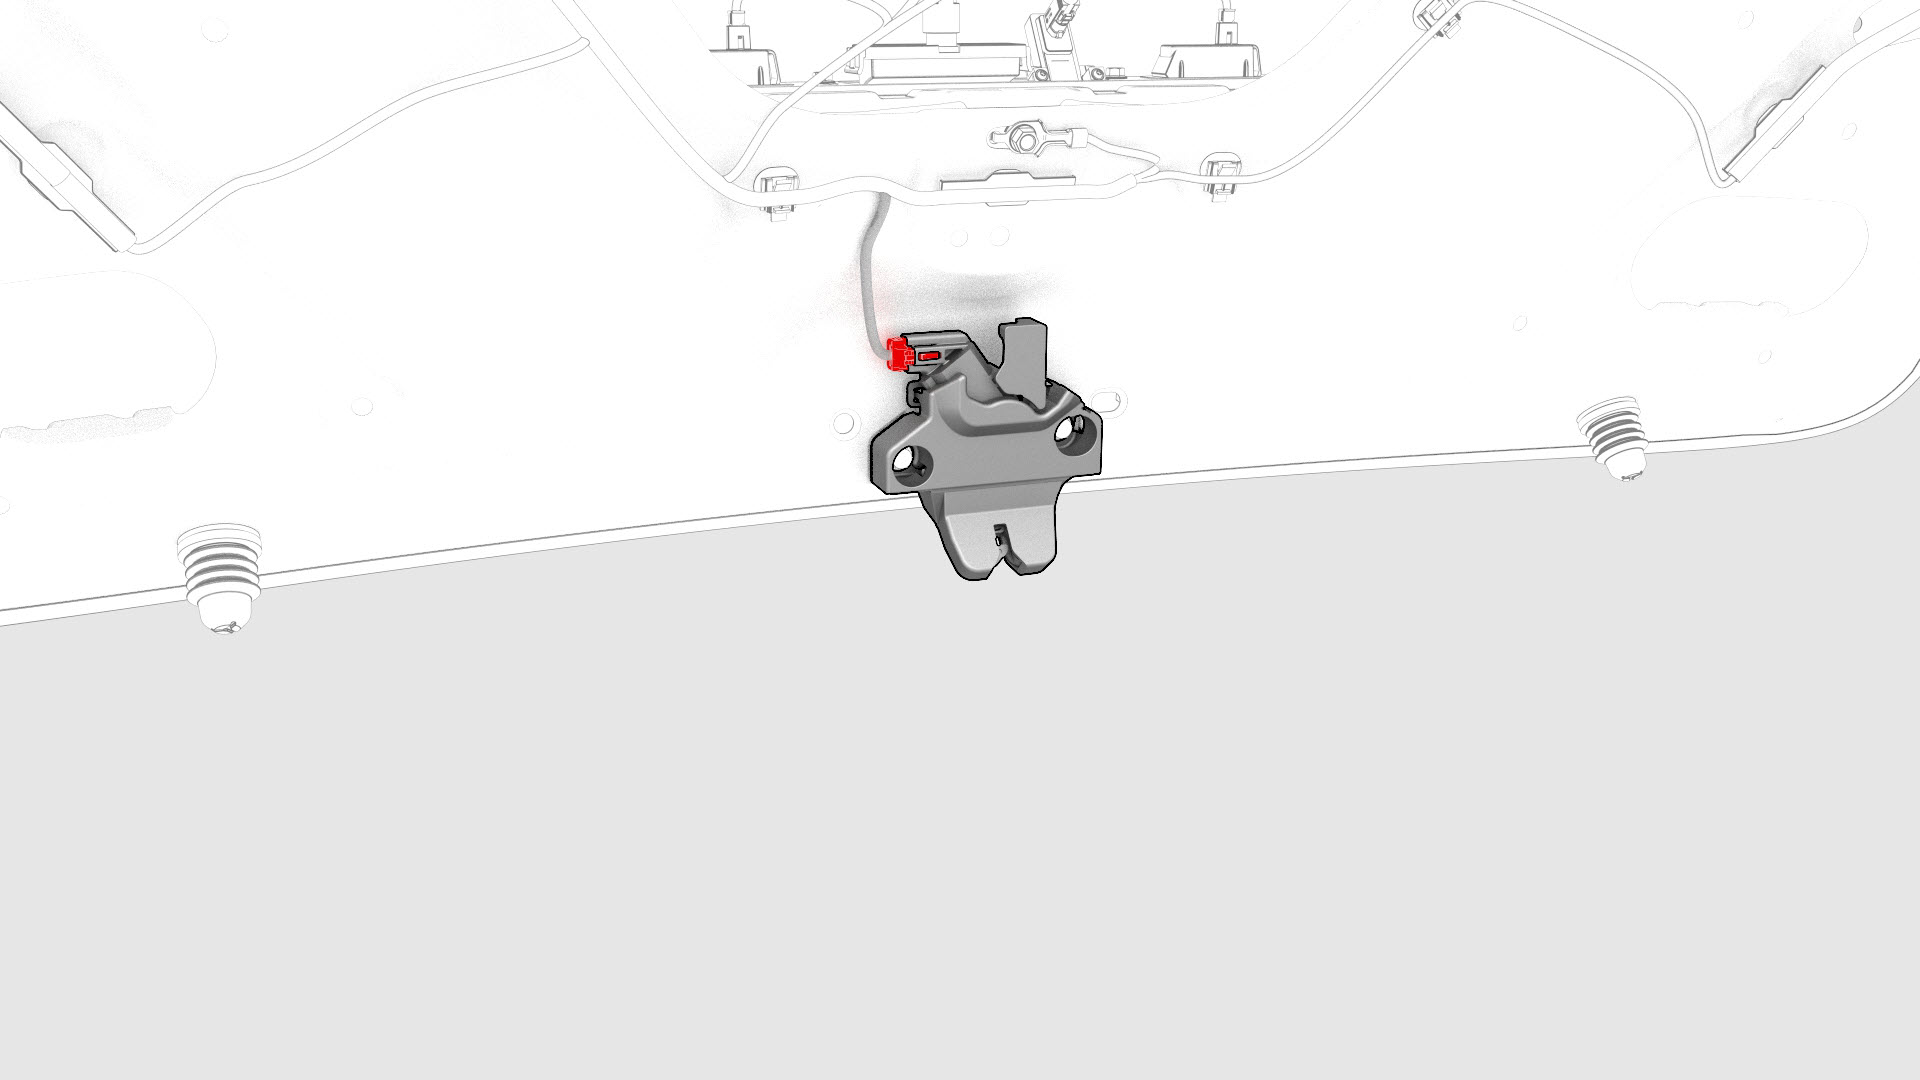
Connect the electrical connector to the trunk latch.
-
Torque the hinge bolts to specification.
 Torque 24 Nm
 -
Torque the trunk latch bolts to specification.
 Torque 8 Nm
 -
Install the rear license plate.
 Torque 1.5 Nm
LH
RH
| 1 | With assistance, install the trunk to the trunk hinges, and then install the bolts that attach the trunk lid to the trunk hinges. Caution: Install the bolts closest to the body first, and then install the bolts furthest from the body.
Note: Hand tighten, but do not torque the bolts at this time.
| |||||||||||||
| 2 | Screw the LH and RH over-slam bumpers into the trunk lid. | |||||||||||||
| 3 | Install the LH and RH bump stops into the trunk lid, and then fasten the clips that attach the stops to the lid. | |||||||||||||
| 4 | Move the electrical harness in through the trunk lid bulkhead, and attach the harness boot to the trunk lid. | |||||||||||||
| 5 | Fasten the clips that attach the trunk electrical harness to the trunk lid. | |||||||||||||
| 6 | Install new bolts (x2) to attach the trunk electrical harness ground straps to the trunk lid. Torque 8 Nm | |||||||||||||
| 7 | Install the trunk latch to the trunk lid, and then install the bolts that attach the latch to the trunk lid. Note: Hand tighten, but do not torque the bolts at this time.
| |||||||||||||
| 8 | Connect the electrical connector to the trunk latch. | |||||||||||||
| 9 | Install the LH and RH license plate lights. See Light - License Plate (Remove and Replace). | ||||||||||||||
| 10 | Install the trunk exterior release switch. See Switch - Exterior Release - Trunk (Remove and Replace). | ||||||||||||||
| 11 | Install the LH and RH rear fog/reverse lights. See Light - Fog / Reverse - Rear - LH (Remove and Replace). | ||||||||||||||
| 12 | Carefully close the trunk and check the trunk to body gap and fitment. | |||||||||||||
| 13 | Open the trunk, loosen the hinge bolts, adjust the trunk lid position, and tighten the bolts. | ||||||||||||||
| 14 | Repeat step 12 and step 13 until the gap and flush is minimal and uniform. | ||||||||||||||
| 15 | Torque the hinge bolts to specification. Torque 24 Nm | ||||||||||||||
| 16 | Torque the trunk latch bolts to specification. Torque 8 Nm | ||||||||||||||
| 17 | Install the trunk lid trim. See Trim - Lid - Trunk (Remove and Replace). | ||||||||||||||
| 18 | Use IPA wipes to thoroughly clean these locations on the trunk lid:
| ||||||||||||||
| 19 | Vigorously shake the vehicle color touch-up paint applicator for several minutes. | ||||||||||||||
| 20 | Apply a coat of touch-up paint to the discolored areas of the hinge bolts and washers, and allow at least 20 minutes to dry. Note: Perform the remainder of this procedure while the touch-up paint dries.
| ||||||||||||||
| 21 | Affix a new emissions sticker to the trunk lid, in the gap between the trunk lid lower lip and the trunk latch. | ||||||||||||||
| 22 | Install the rear Tesla badge. See Tesla Badge - Rear (Remove and Replace). | ||||||||||||||
| 23 | Install the rear license plate. Torque 1.5 Nm |