Ground Strap - Front Drive Unit (Remove and Replace)
Correction code 3901100239011002
Remove
-
Lift the high voltage (HV) cap straight up from over the DC input connector on the LH side of the penthouse, and then remove the HV cap from the vehicle.
-
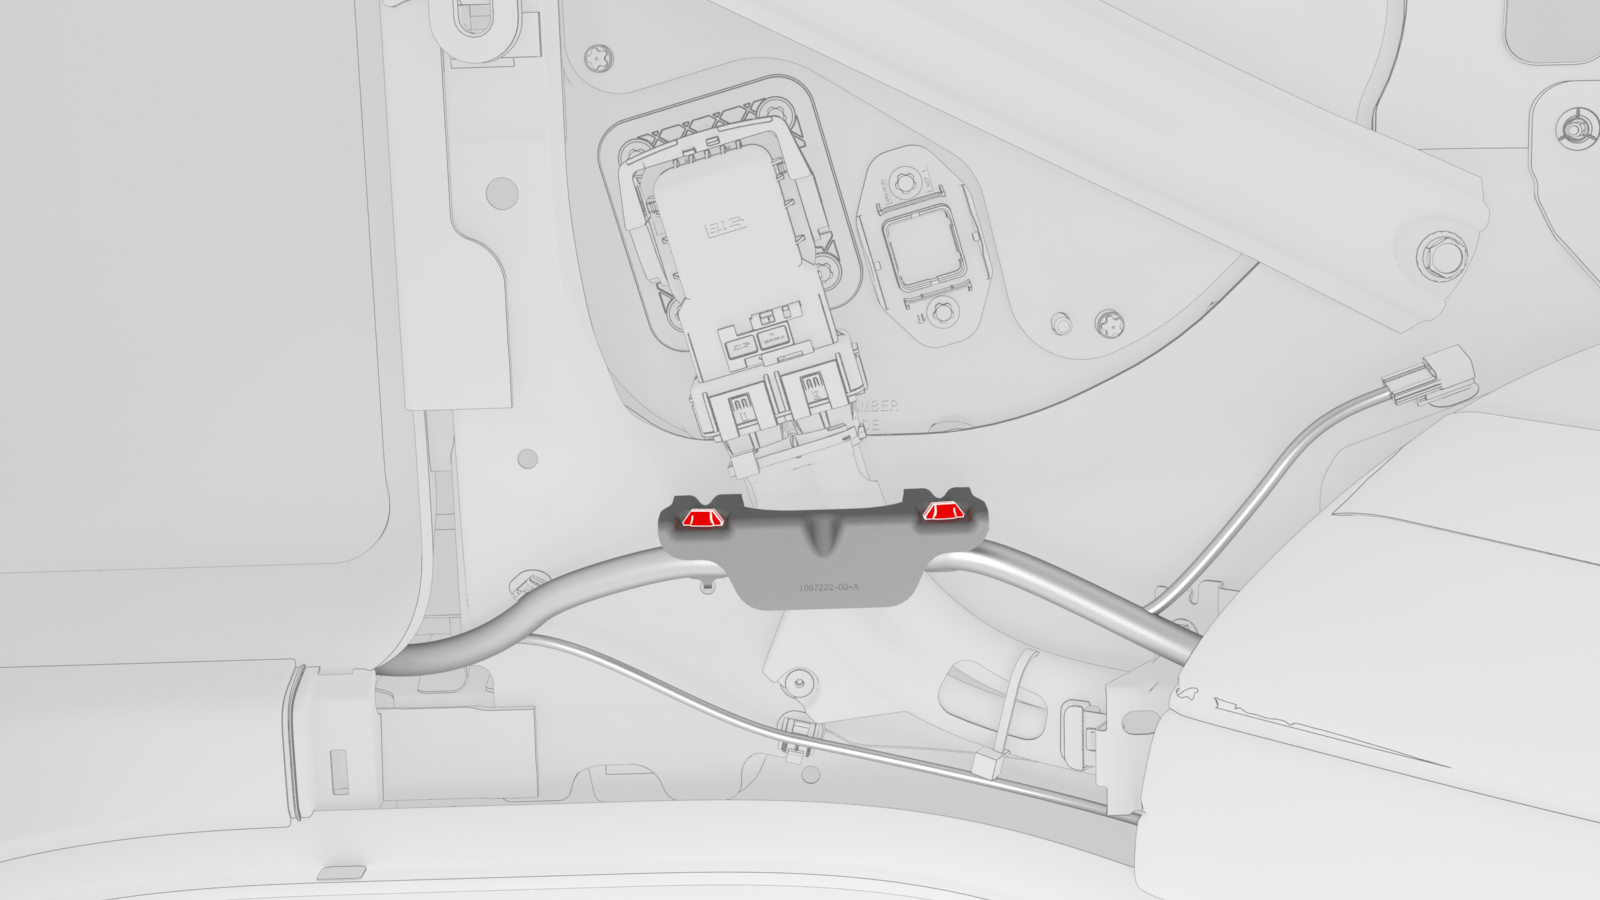
Release the clips that attach the low voltage electrical harness to the charge port high voltage (HV) battery harness bracket at the penthouse.
-
Remove the bolts that attach the charge port HV battery harness bracket to the penthouse, and then remove the bracket from the vehicle.
 Torque 10 Nm
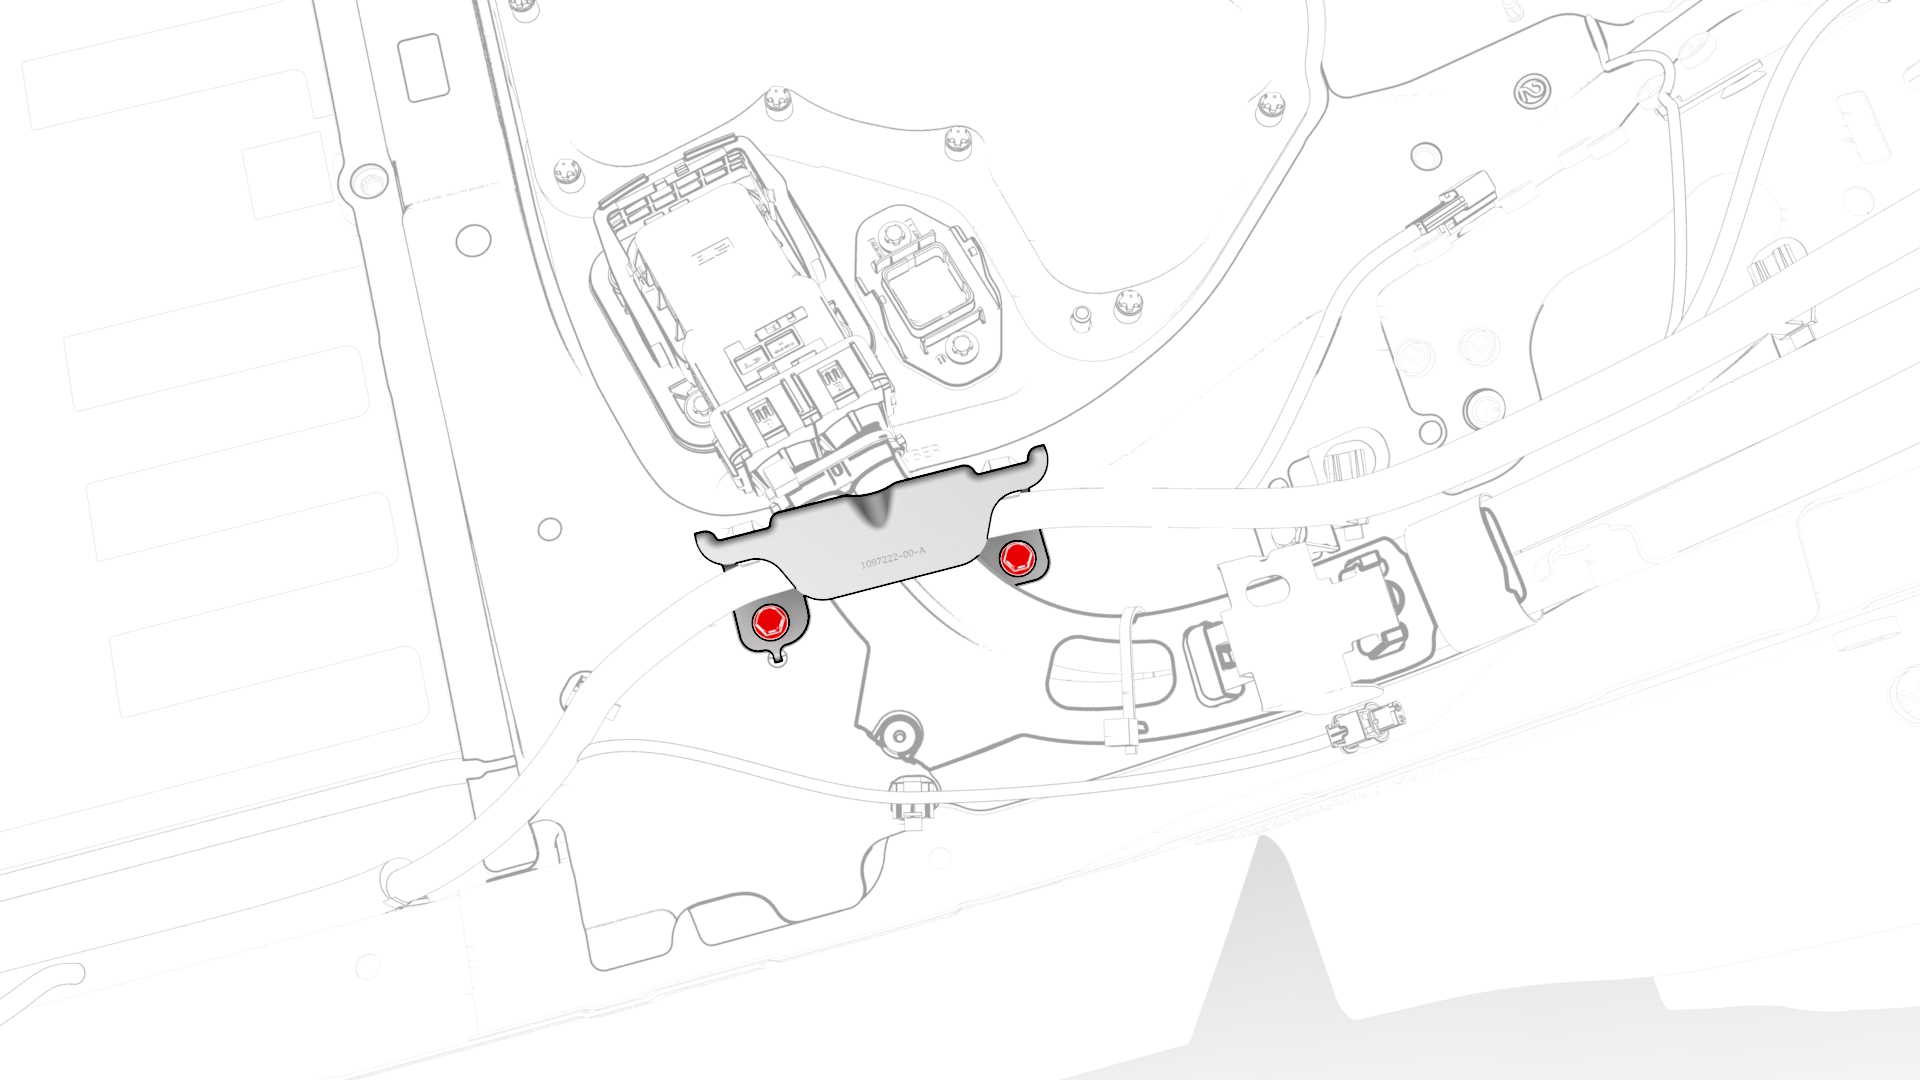
-
Release the clip that attaches the charge port HV battery harness to the LH lower C-pillar.
-
Raise the handle to disconnect the charge port HV battery harness from the penthouse, and then set the harness aside.
-
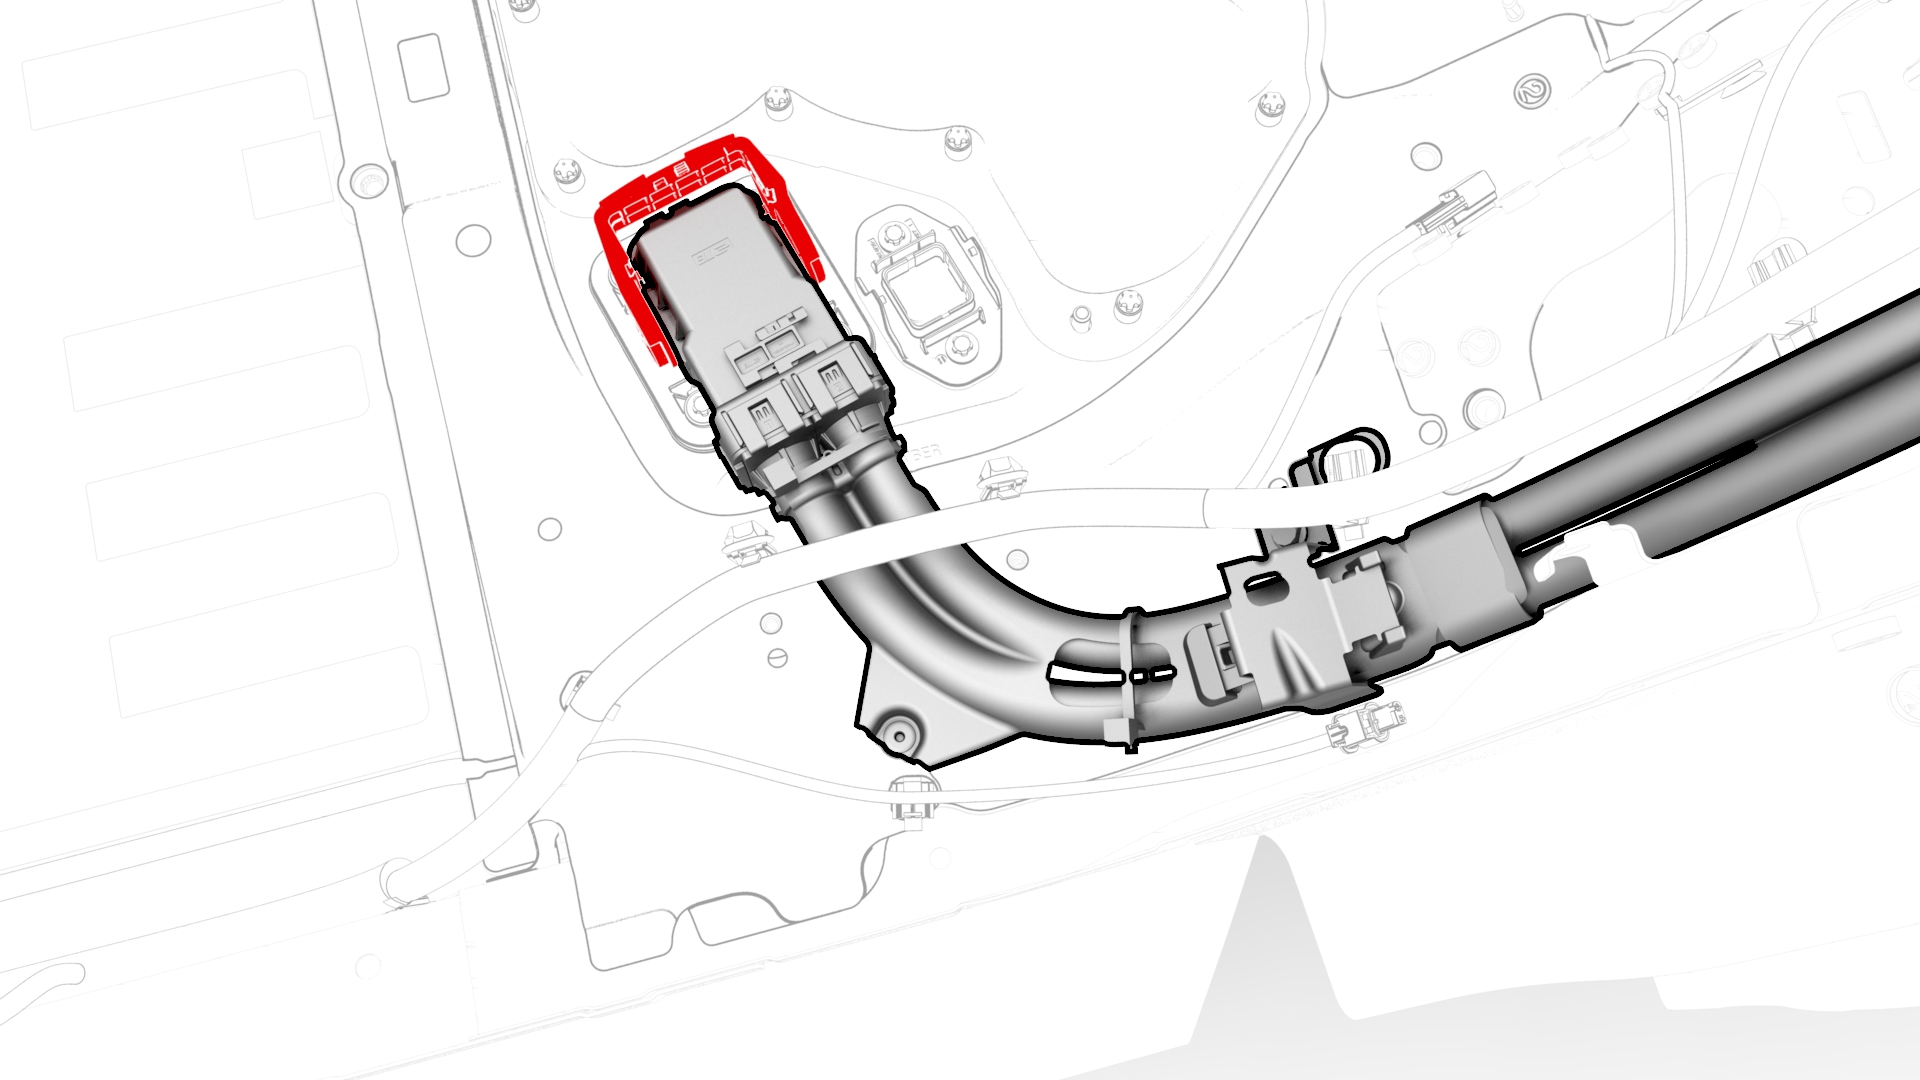
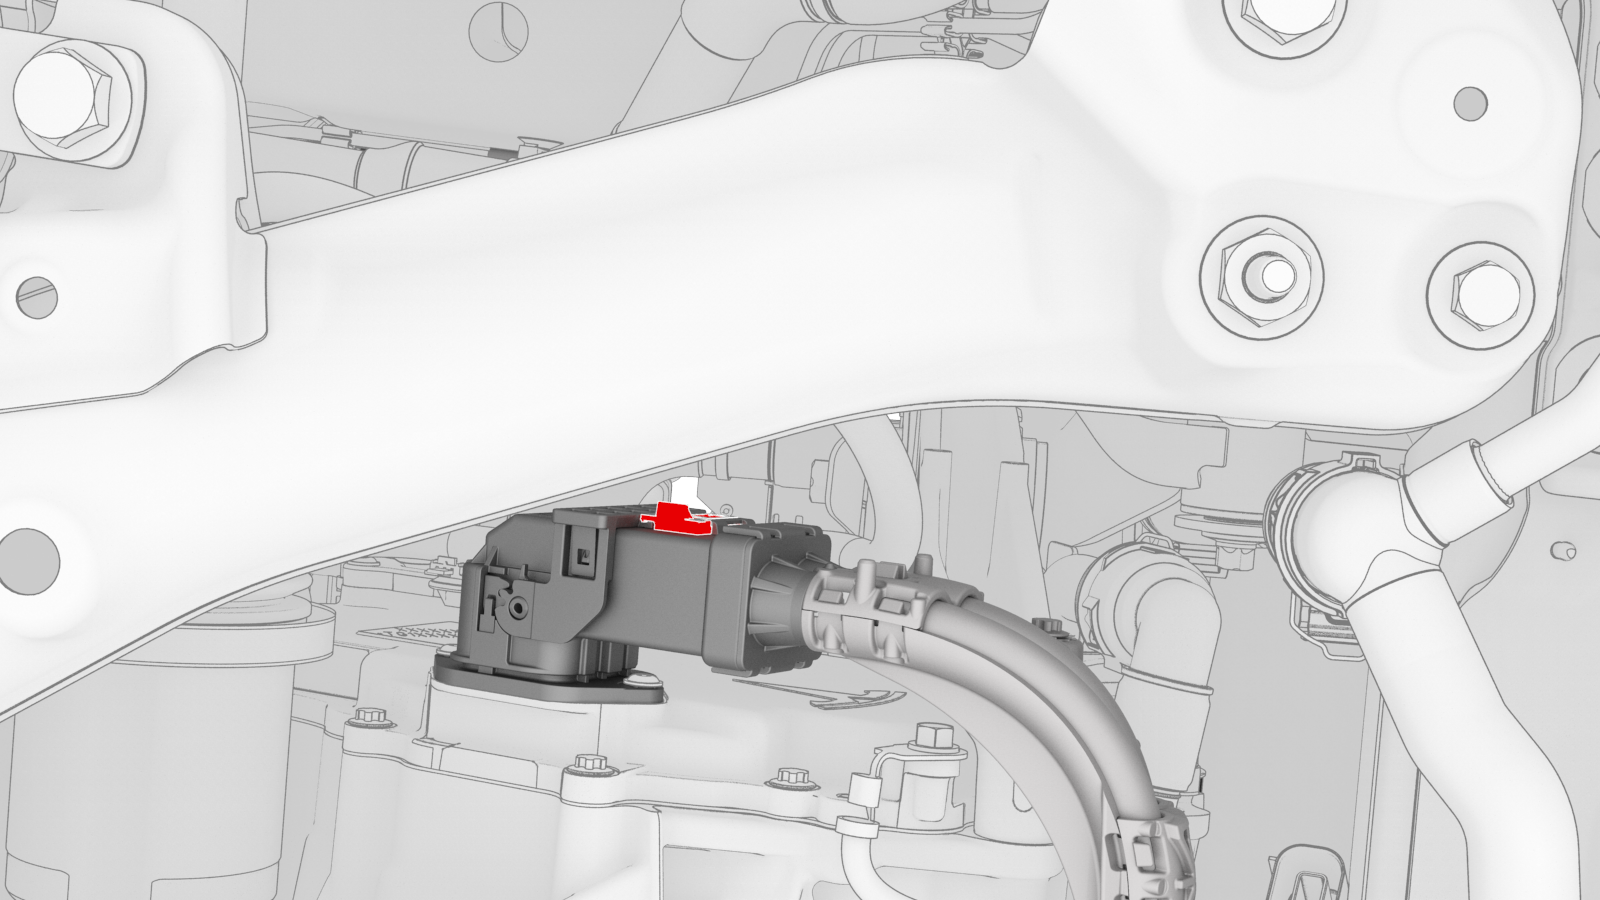
Remove the bolt that attaches the front drive unit HV harness to the front drive unit.
 Torque 10 Nm
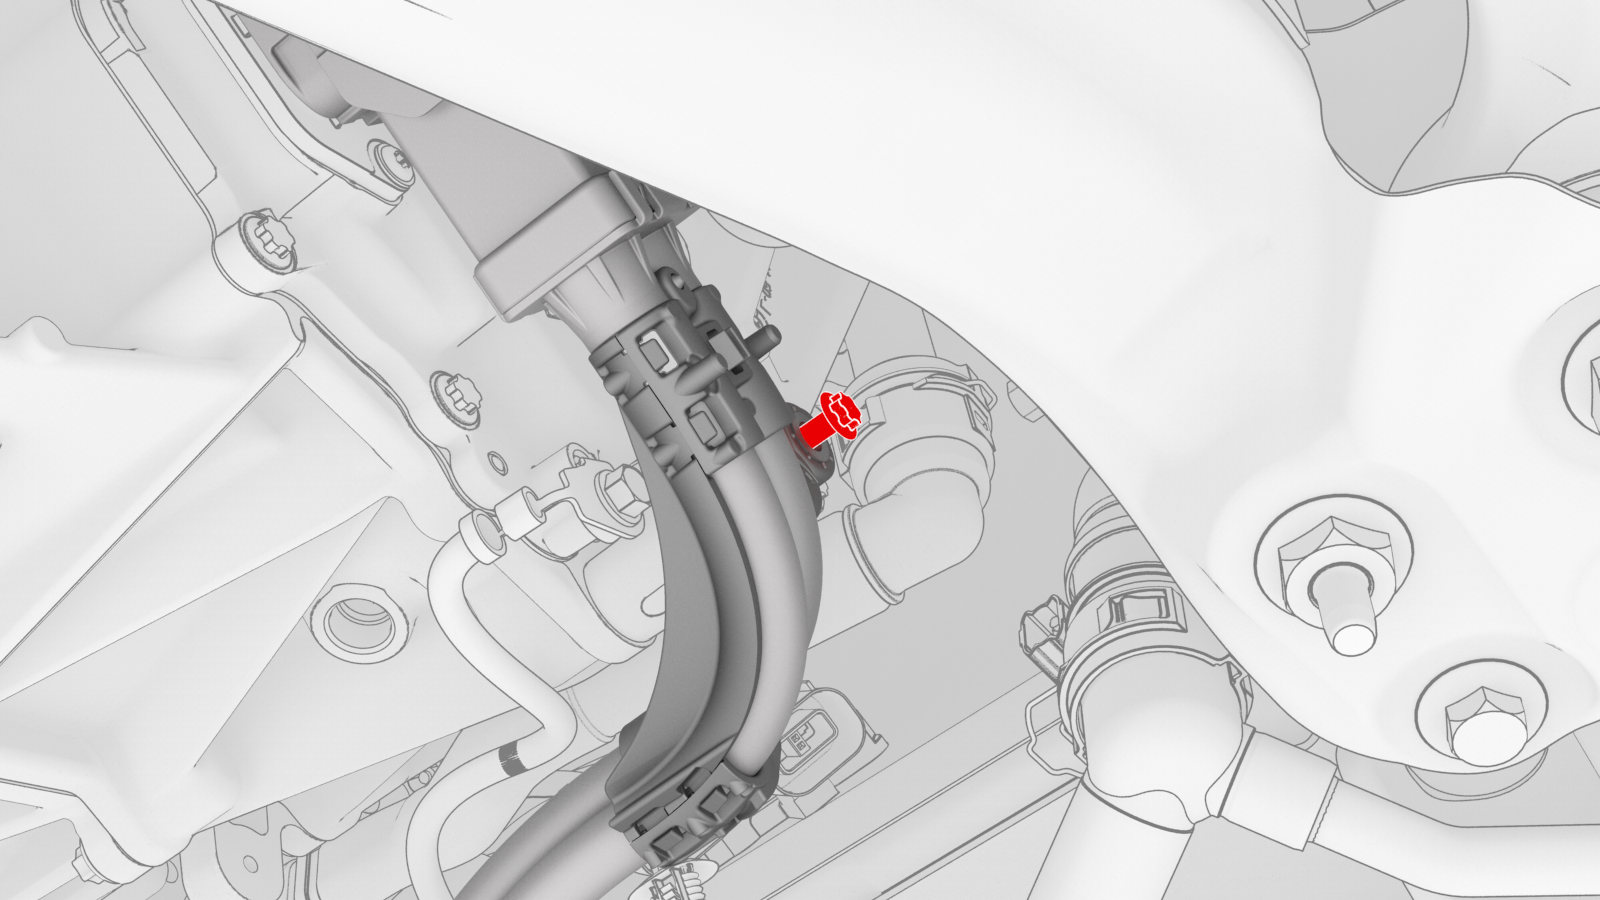
-
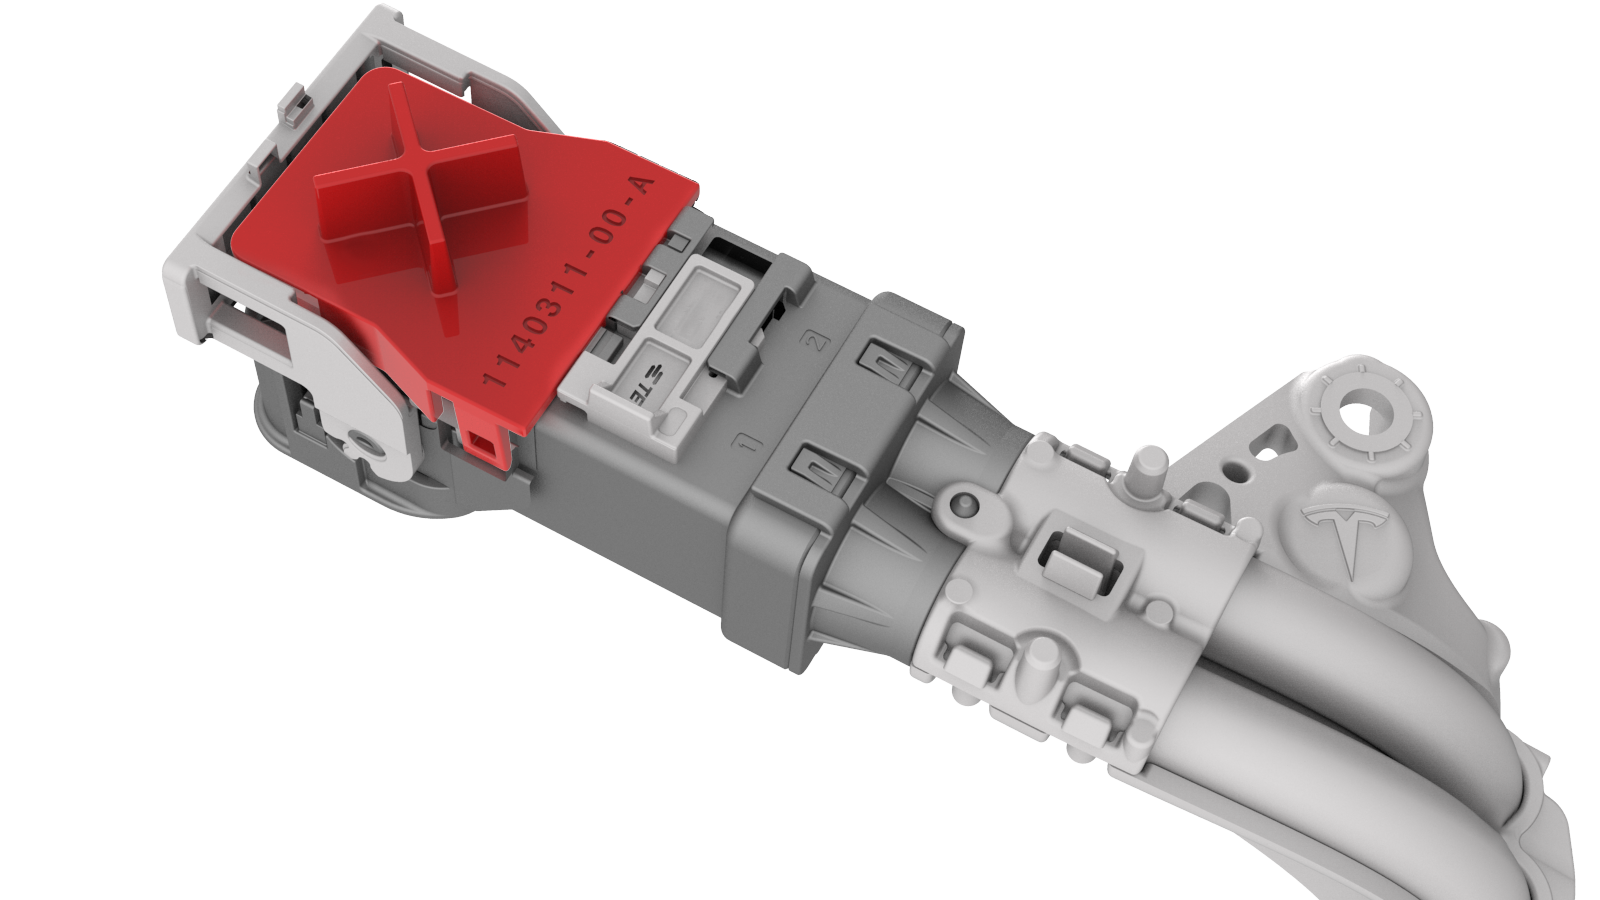
Slide the red release tab to unlock the front drive unit HV harness connector.
-
Slowly unlatch the release handle on the front drive unit HV harness connector, and then disconnect the connector from the front drive unit.
 Caution:Do not apply excessive force to the handle; doing so could damage the connector alignment tabs.
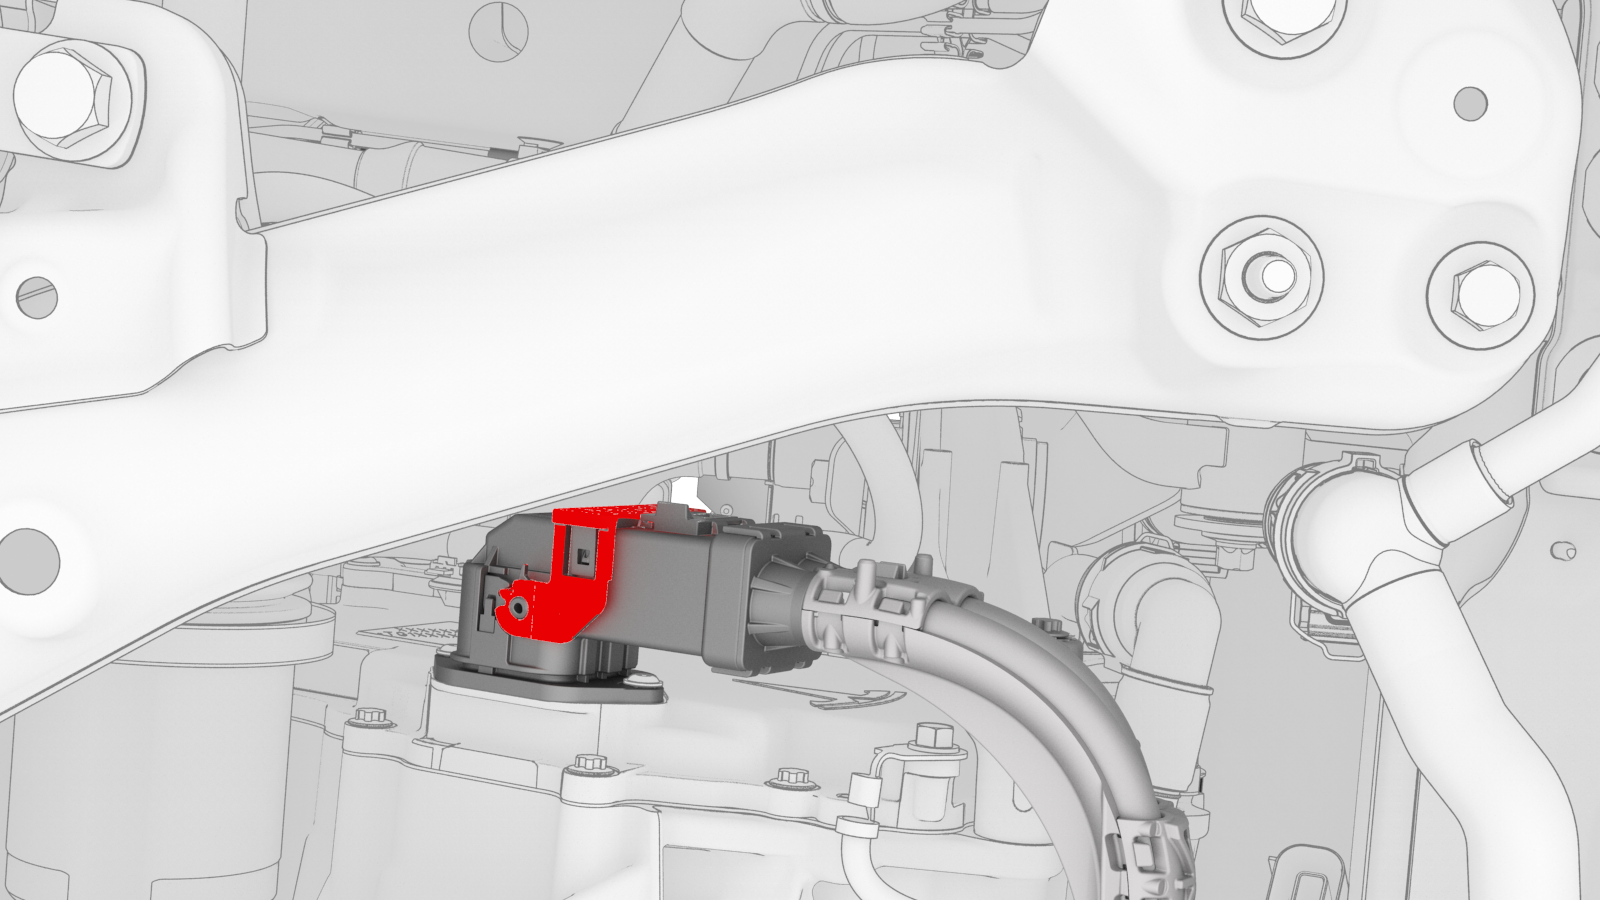
-
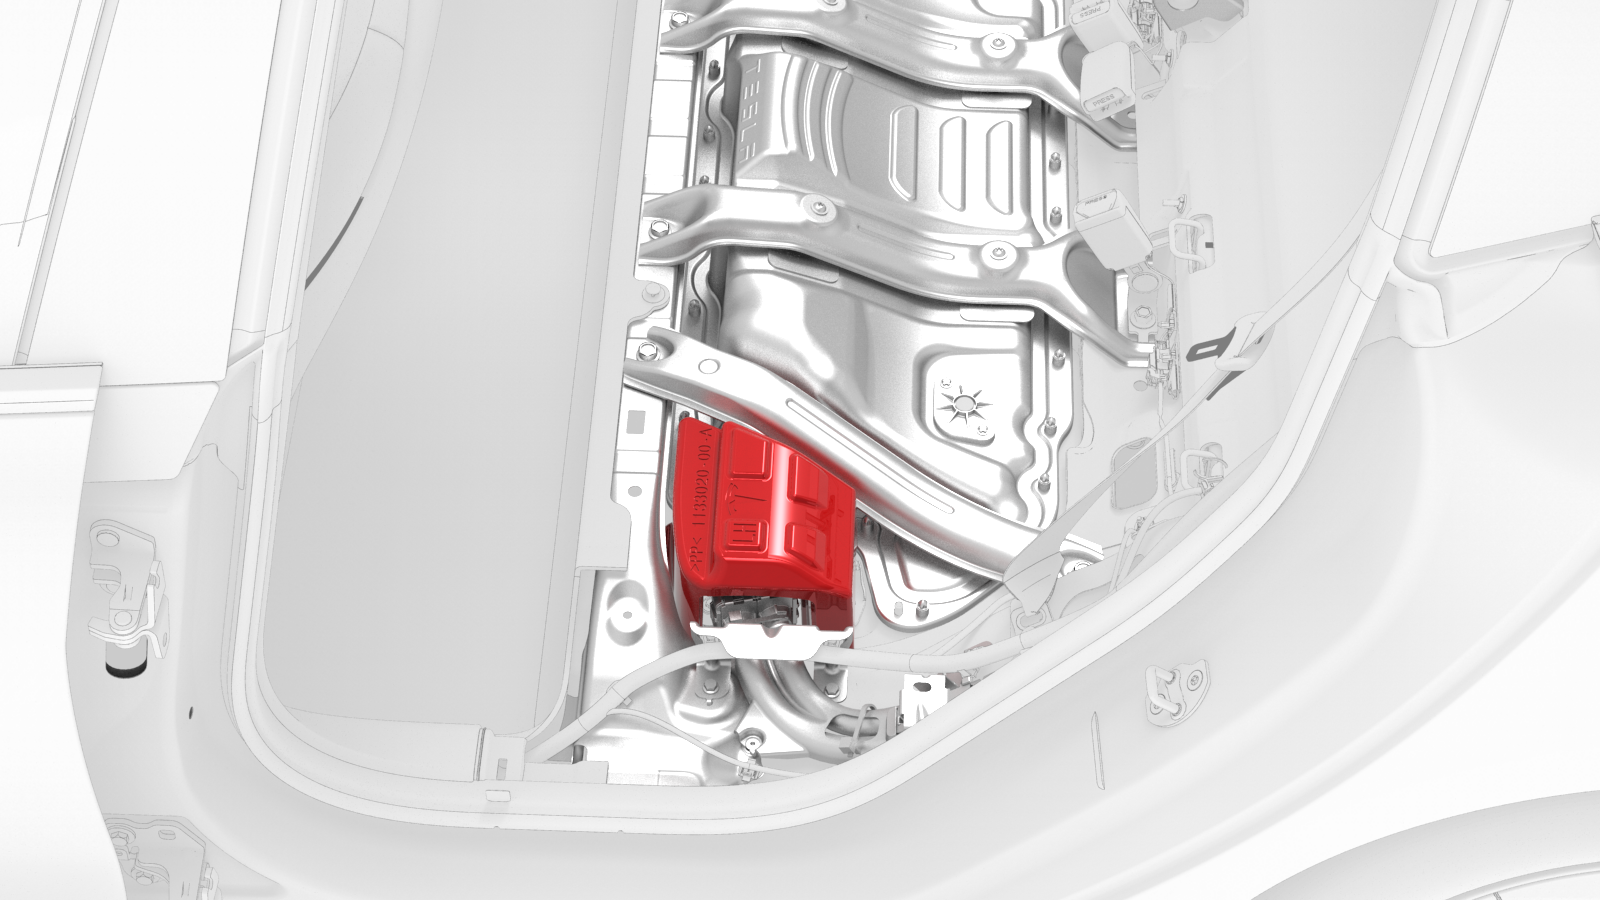
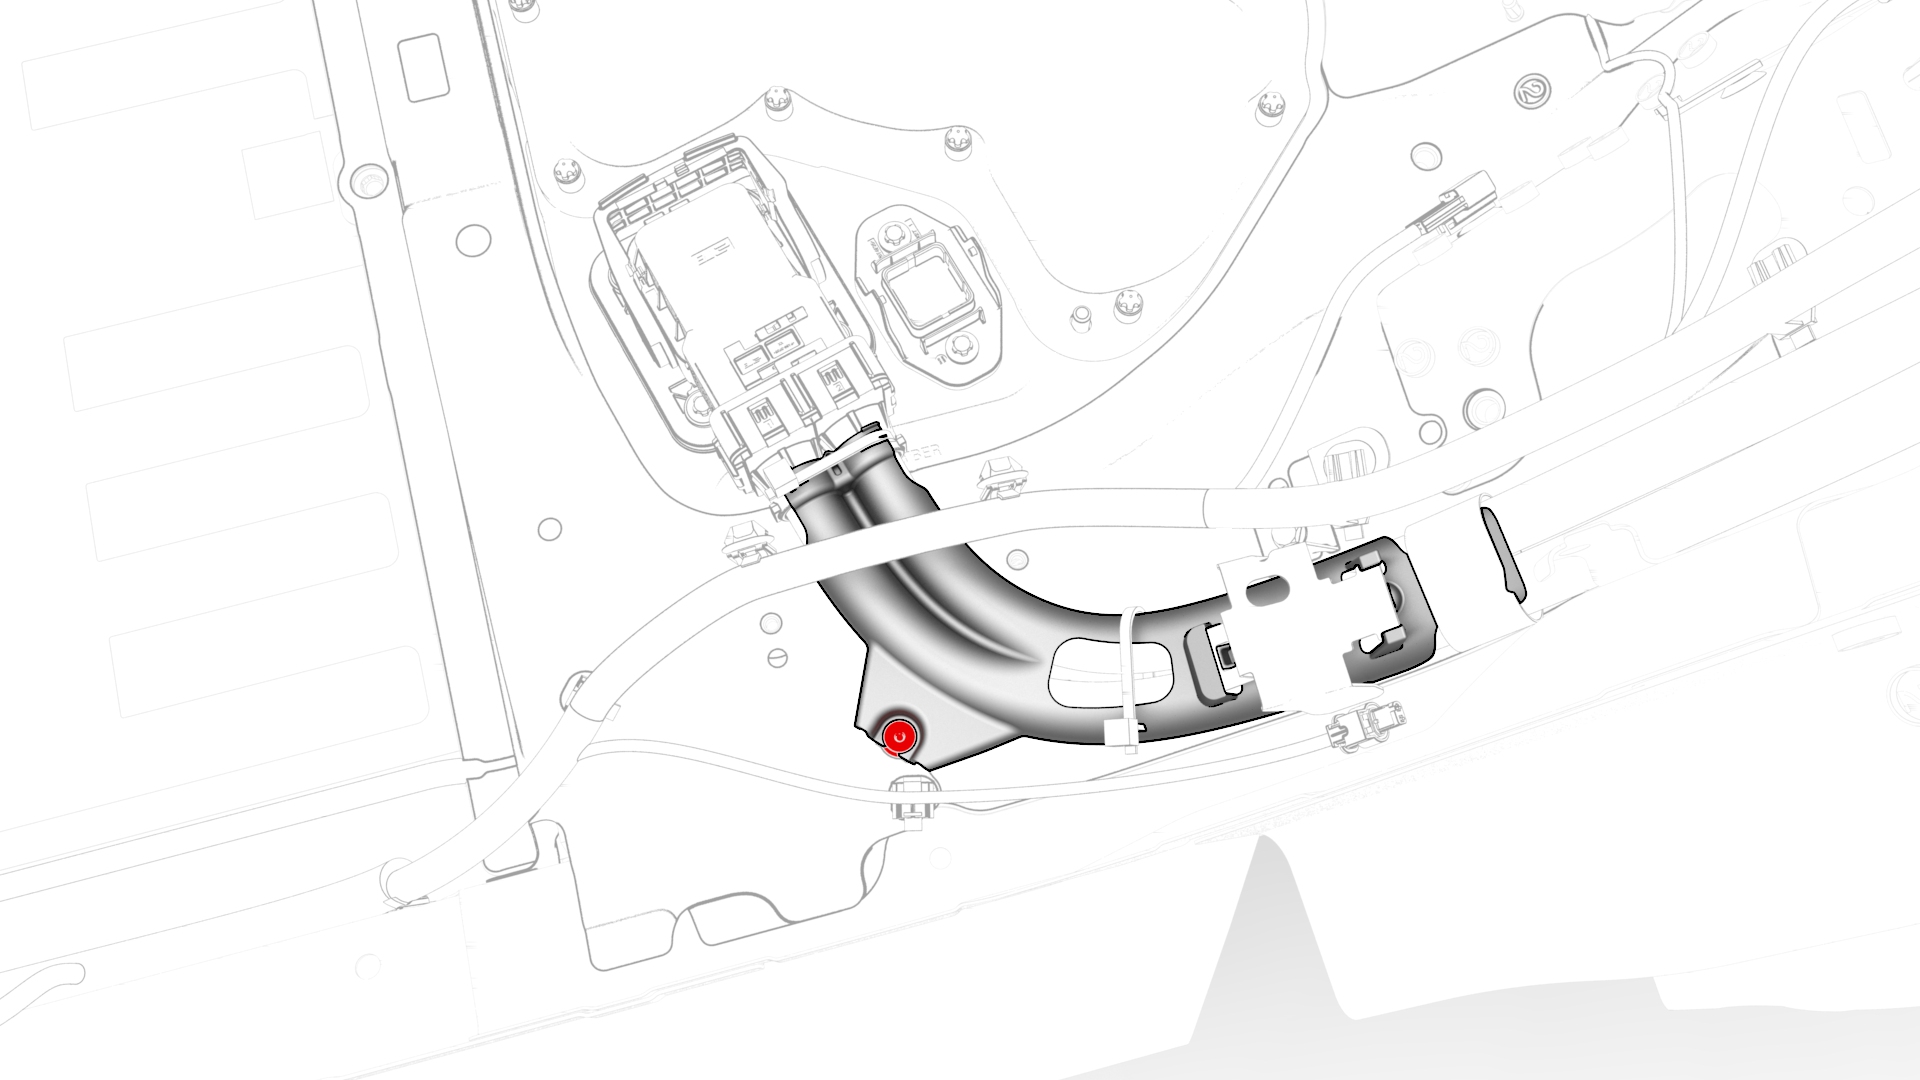
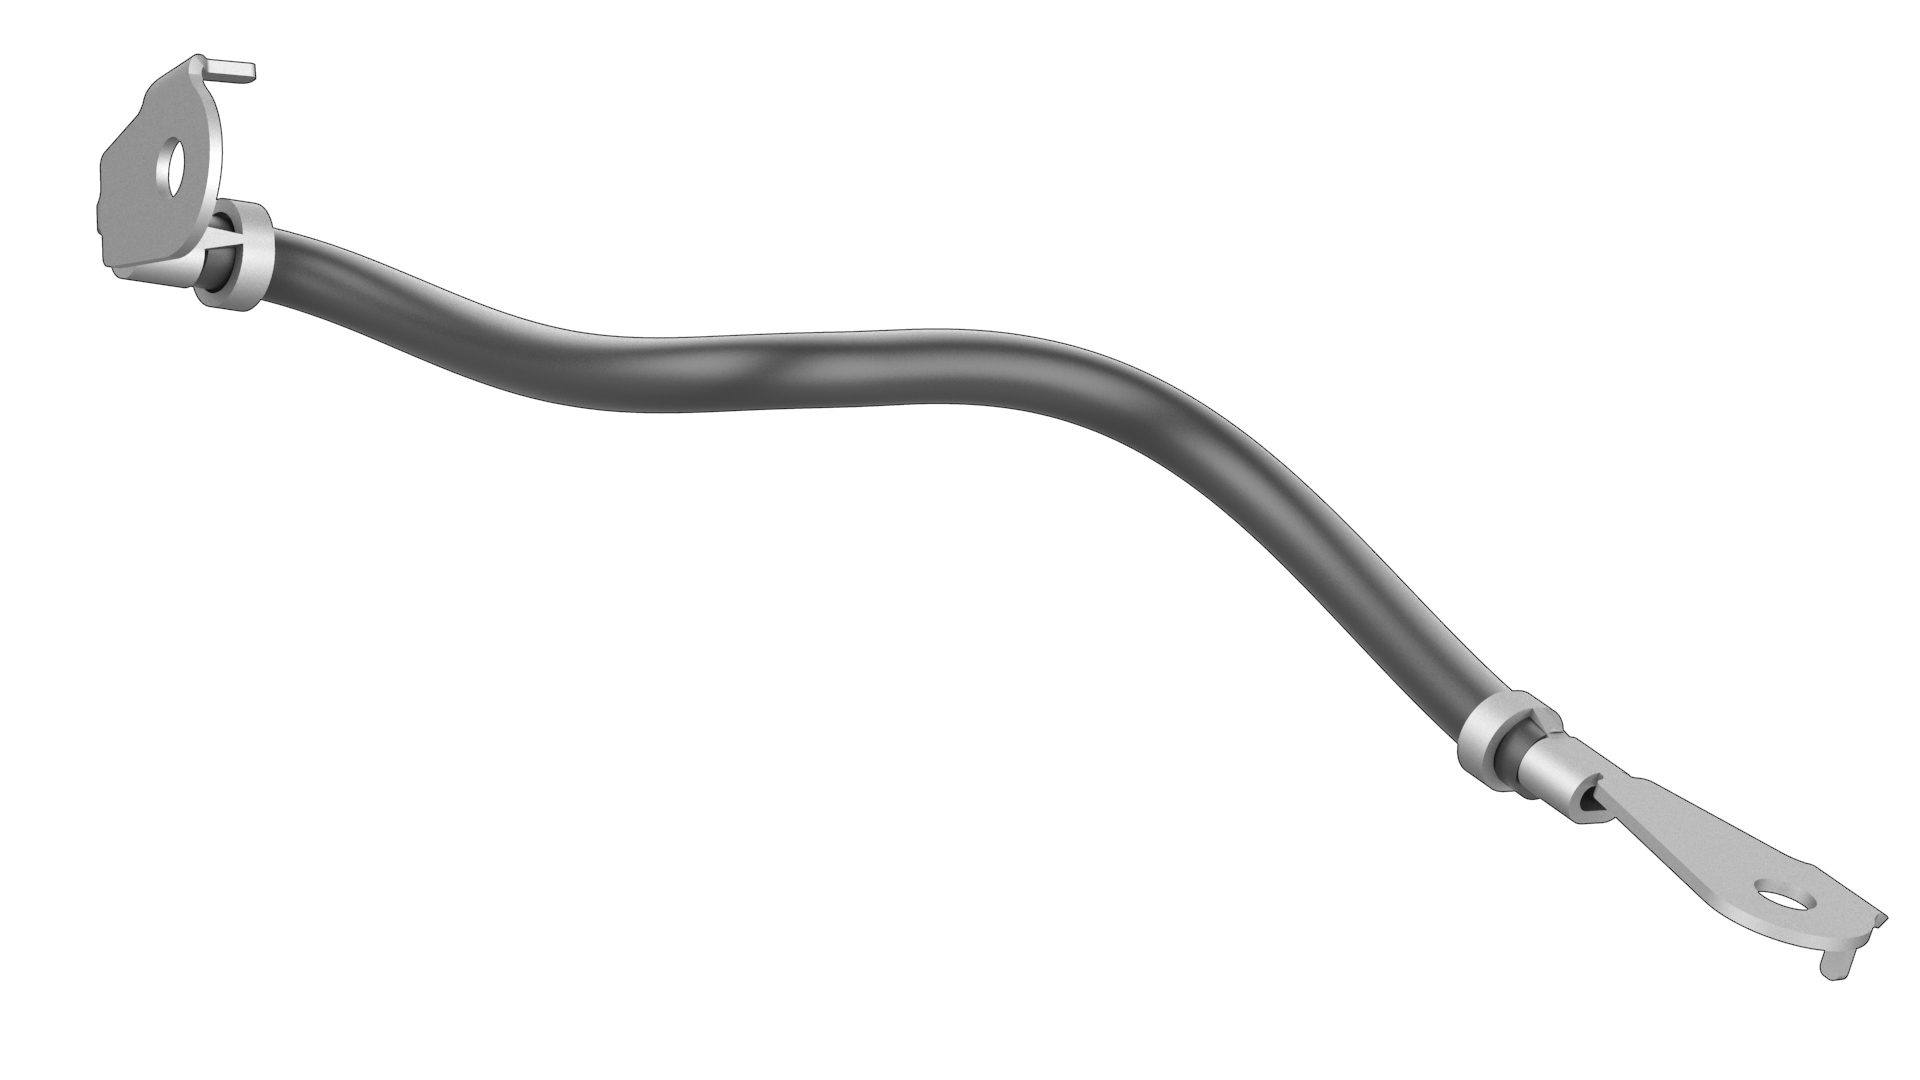
Remove the bolt that attaches the front drive unit ground strap to the front drive unit.
 Torque 6 Nm
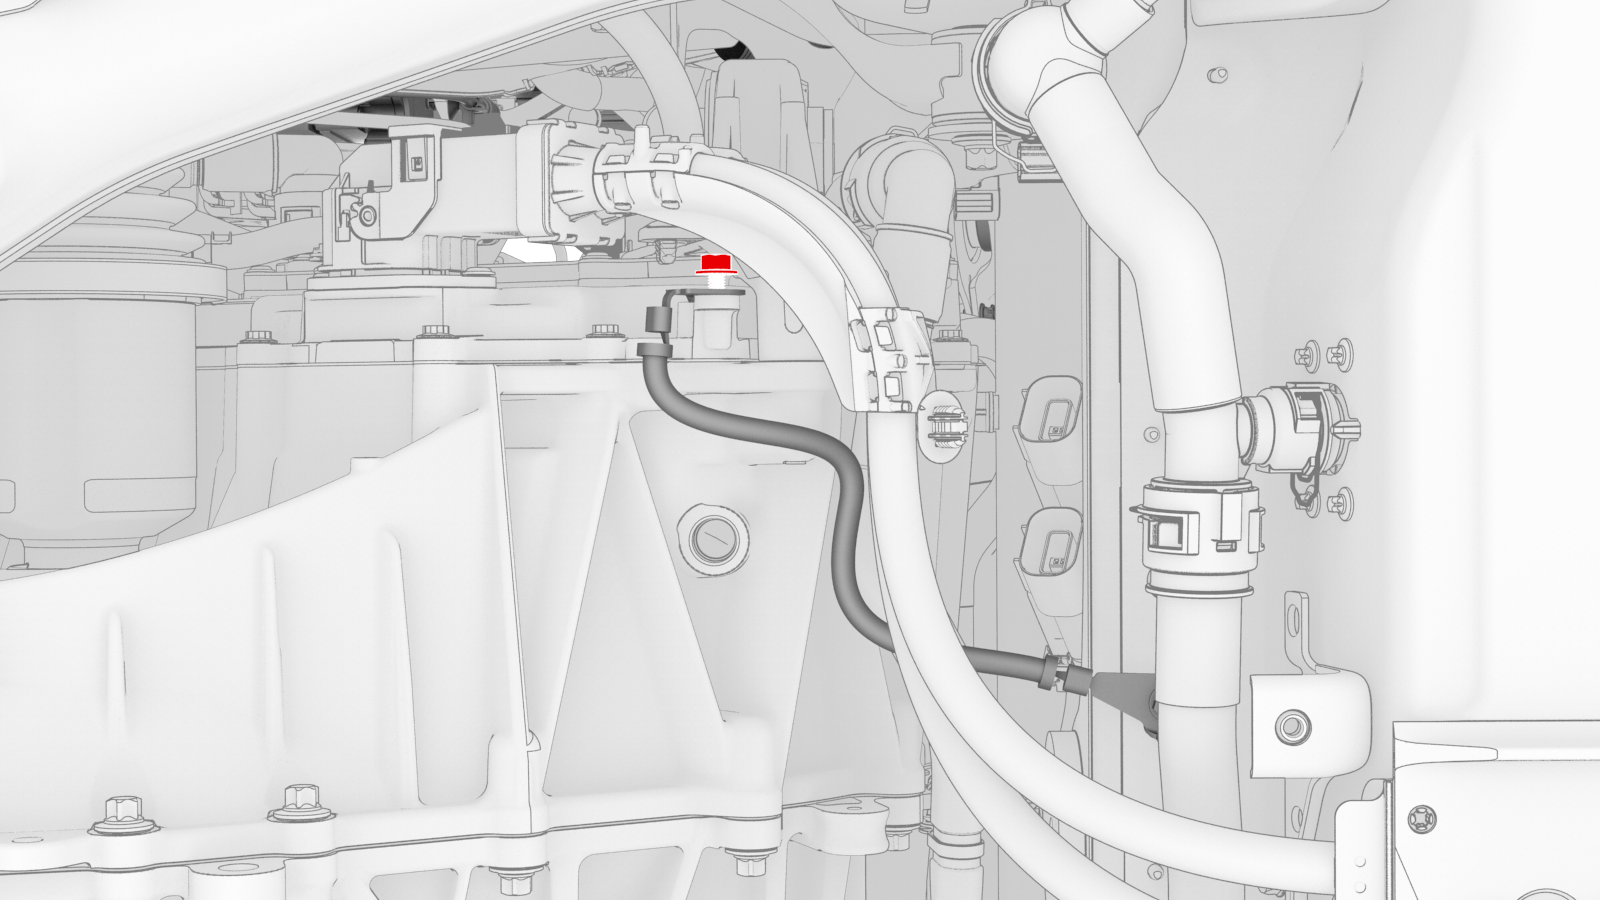
-
Release the clip that attaches the front drive unit ground strap to the front drive unit.

-
Remove the bolt that attaches the front drive unit ground strap to the HV battery, and then remove the ground strap from the vehicle.Torque 10 Nm
| 1 | Raise and support the vehicle. See Raise Vehicle - 2 Post Lift. | ||
| 2 | Remove the 2nd row lower seat cushion. See Seat Cushion - Lower - 2nd Row (Remove and Replace). | ||
| 3 | Remove the rear underhood apron. See Underhood Apron - Rear (Remove and Replace). | ||
| 4 | Disconnect 12V power. See 12V Power (Disconnect and Connect). | ||
| 5 | Perform the vehicle electrical isolation procedure. See Vehicle Electrical Isolation Procedure. | ||
| 6 | Lift the high voltage (HV) cap straight up from over the DC input connector on the LH side of the penthouse, and then remove the HV cap from the vehicle. | |
| 7 | Remove the LH 2nd row seat side bolster. See Bolster - Side - Seat - 2nd Row - LH (Remove and Replace). | ||
| 8 | Fold up the LH 2nd row seat. | ||
| 9 | Remove the LH rear sill panel trim. See Trim - Sill Panel - Rear - LH (Remove and Replace). | ||
| 10 | Release the clips that attach the low voltage electrical harness to the charge port high voltage (HV) battery harness bracket at the penthouse. | |
| 11 | Remove the bolts that attach the charge port HV battery harness bracket to the penthouse, and then remove the bracket from the vehicle. Torque 10 Nm | |
| 12 | Release the clip that attaches the charge port HV battery harness to the LH lower C-pillar. | |
| 13 | Raise the handle to disconnect the charge port HV battery harness from the penthouse, and then set the harness aside. | |
| 14 | Fully raise the vehicle. | ||
| 15 | Remove the front aero shield panel. See Panel - Aero Shield - Front (Remove and Replace). | ||
| 16 | Remove the bolt that attaches the front drive unit HV harness to the front drive unit. Torque 10 Nm | |
| 17 | Slide the red release tab to unlock the front drive unit HV harness connector. | |
| 18 | Slowly unlatch the release handle on the front drive unit HV harness connector, and then disconnect the connector from the front drive unit. Caution: Do not apply excessive force to the handle; doing so could damage the connector alignment tabs.
| |
| 19 | Remove the bolt that attaches the front drive unit ground strap to the front drive unit. Torque 6 Nm | |
| 20 | Release the clip that attaches the front drive unit ground strap to the front drive unit. | |
| 21 | Remove the bolt that attaches the front drive unit ground strap to the HV battery, and then remove the ground strap from the vehicle. Torque 10 Nm |
Install
Installation procedure is the reverse of removal, except for the following:
- Use the front drive unit HV harness connector special tool when reinstalling the front drive unit HV harness connector.
- When installing the front drive unit HV harness connector, slowly latch the release handle while pressing the front drive unit HV harness connector into the front drive unit.Note: The front drive unit alignment teeth and HV harness connector alignment teeth should be interlocked.
- Perform the penthouse air leak test after installing the front aero shield panel. See Penthouse Air Leak Test.
- The vehicle electrical isolation procedure does not need to be performed during installation.