Carpet - Rear (Remove and Replace)
Correction code 1530210215302102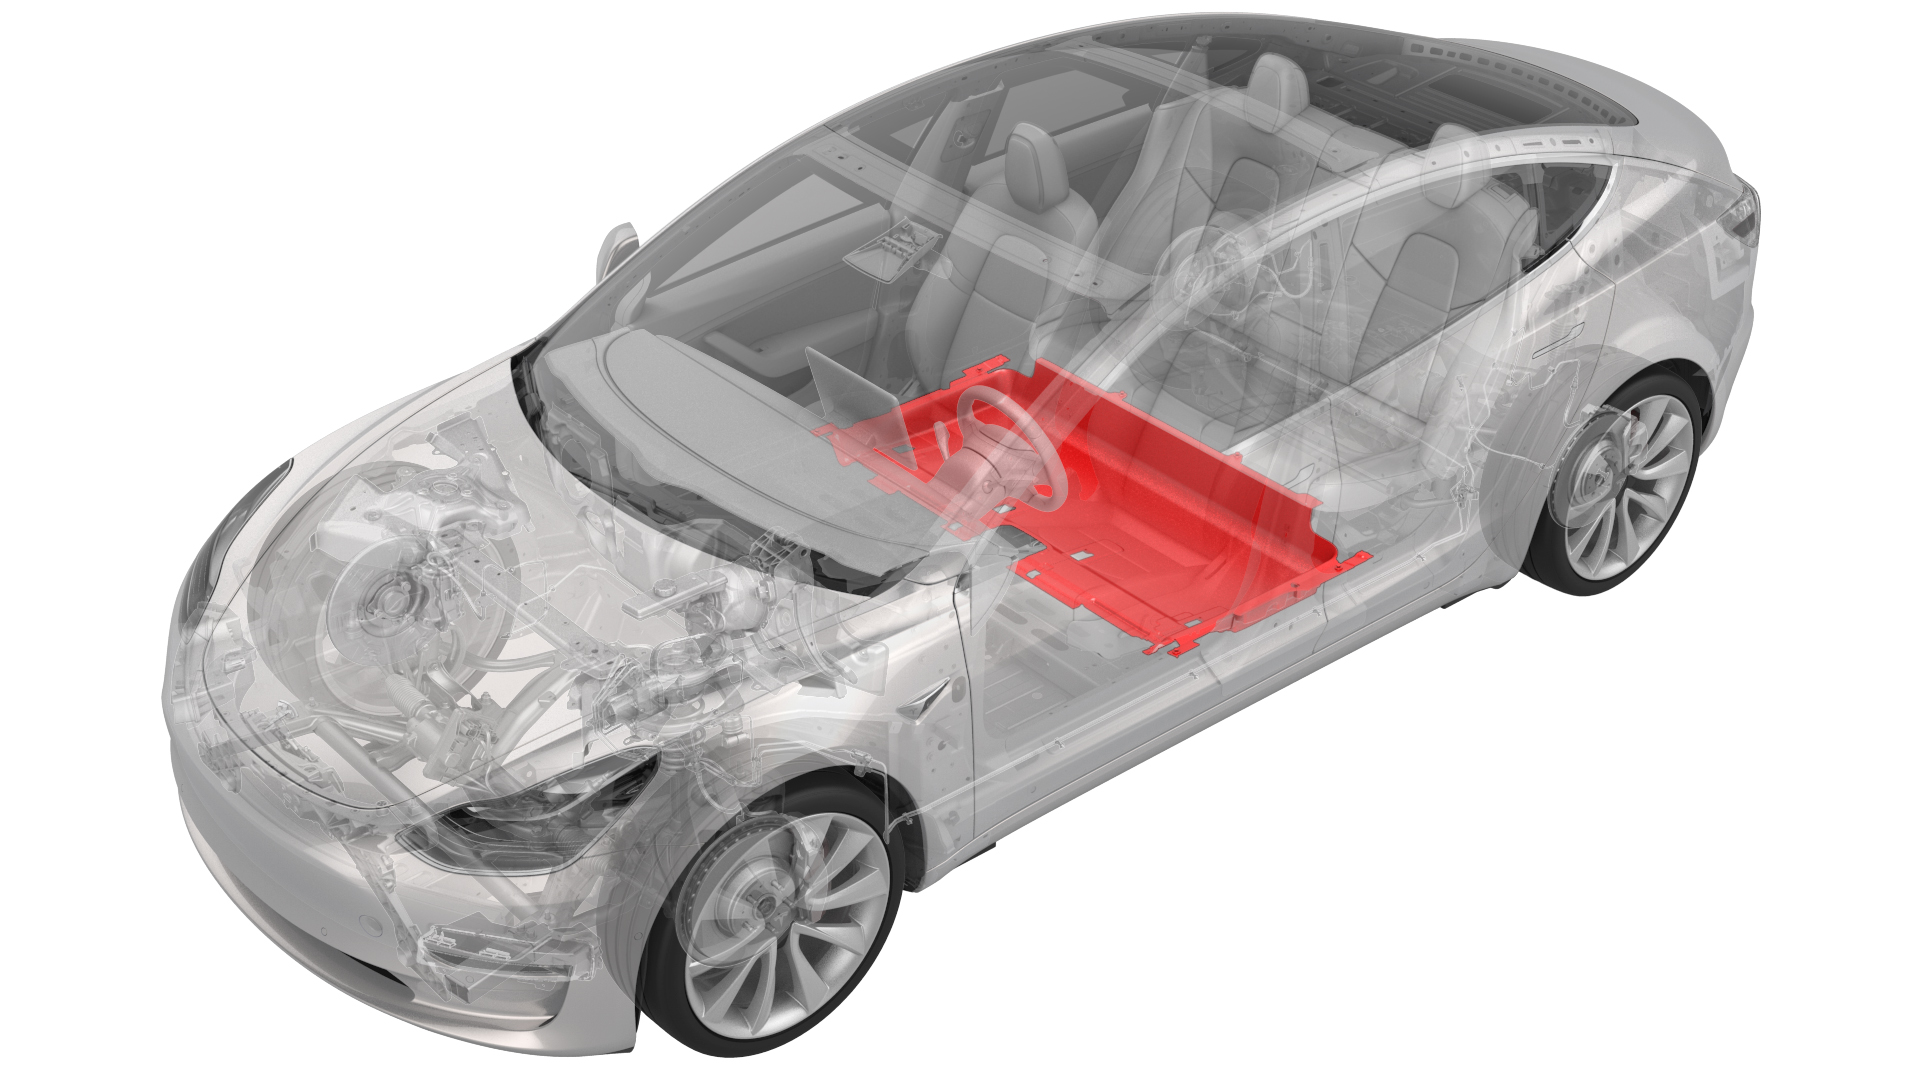
Remove
-
While wearing suitable gloves, spread the bottom of the LH upper B-pillar trim open, and then release the clips that attach the bottom of the trim to the LH lower B-pillar trim After setting aside the LH upper B-pillar trim, repeat this step on the RH upper B-pillar trim.
 Caution:Be careful not to pull the upper B-pillar trim too far, otherwise it might break the seat belt shoulder adjustment mechanism.Note: Move the body seals to aid removal.
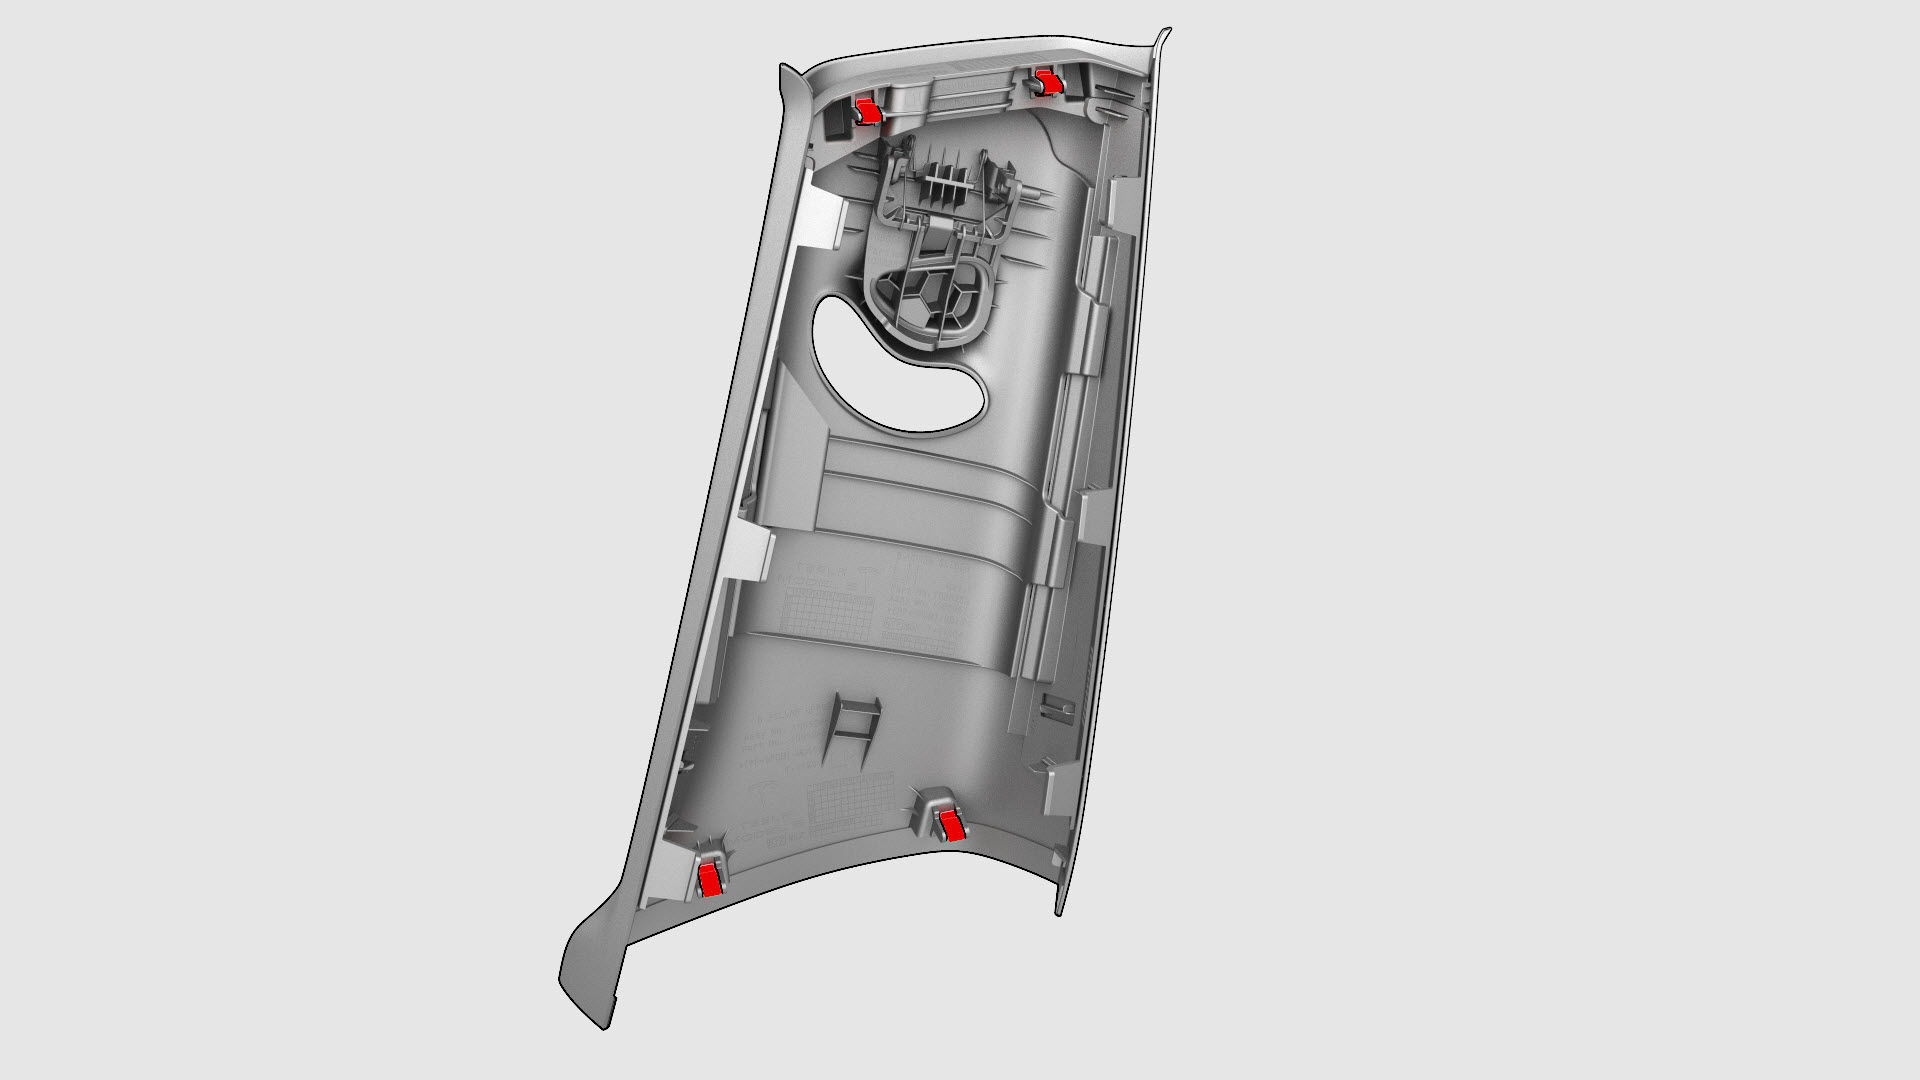
-
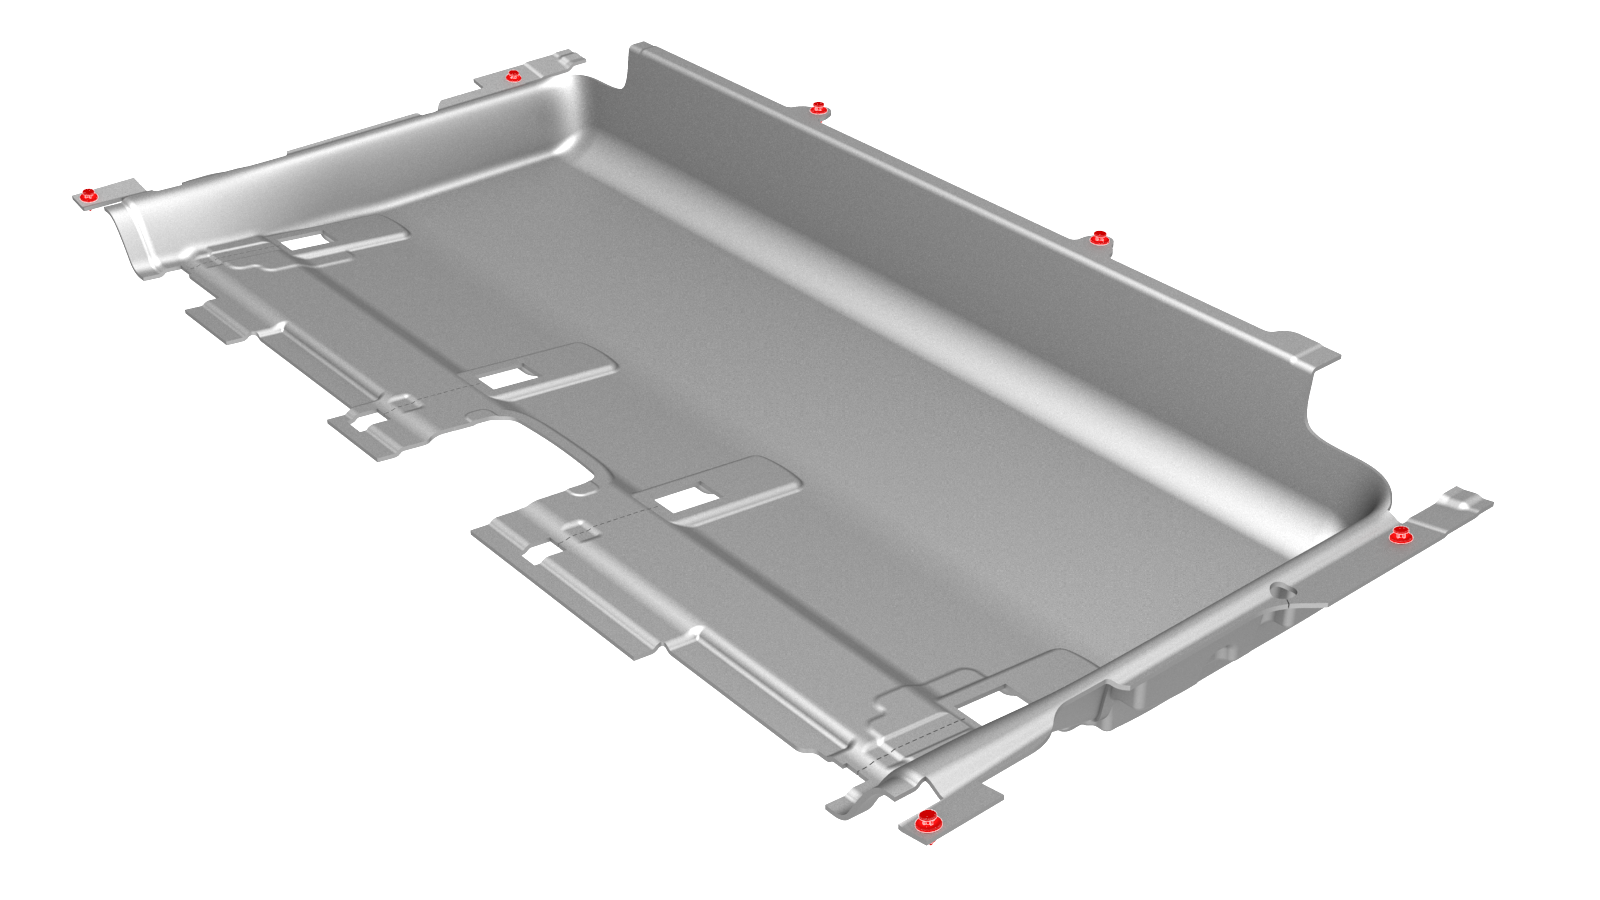
Remove the clips (x6) and release the hook and loop strips that attach the rear carpet to the body.
-
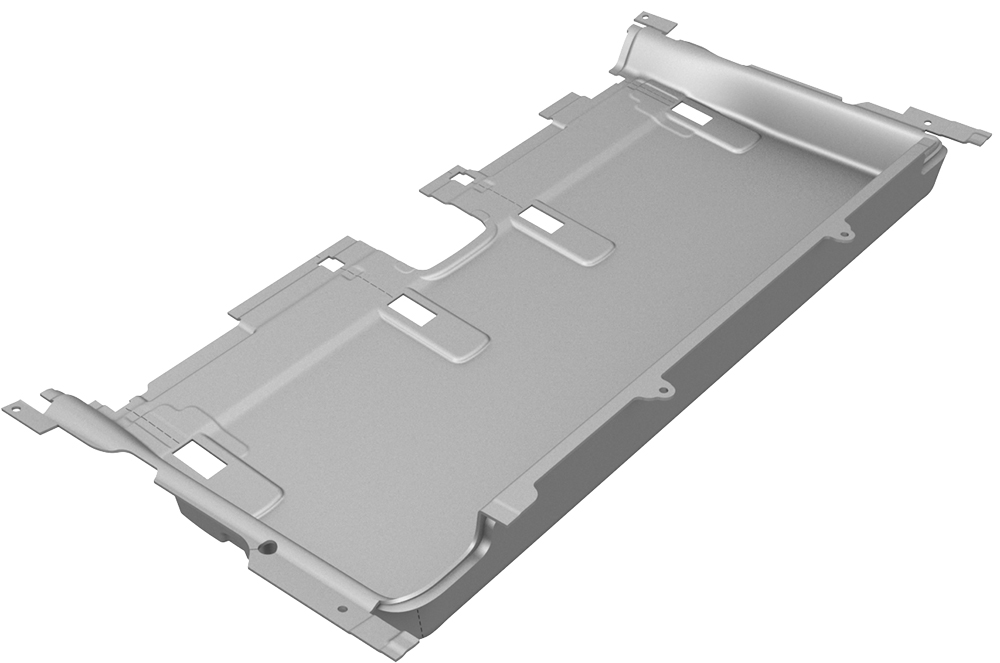
Remove the rear carpet from the vehicle.
| 1 | Open all doors. | ||
| 2 | Fully lower all windows. | ||
| 3 | Move the driver and front passenger seats fully forward. | ||
| 4 | Remove the 2nd row floor mat from the vehicle. | ||
| 5 | Remove the 2nd row lower seat cushion. See Seat Cushion - Lower - 2nd Row (Remove and Replace). | ||
| 6 | Open the hood. | ||
| 7 | Remove the rear underhood apron. See Underhood Apron - Rear (Remove and Replace). | ||
| 8 | Remove the LH and RH instrument panel end caps. See End Cap - Instrument Panel - LH (Remove and Replace). | ||
| 9 | Remove the LH and RH middle A-pillar trims. See Trim - A-Pillar - Middle - LH (Remove and Replace). | ||
| 10 | Remove the LH and RH lower A-pillar trims. See Trim - A-Pillar - Lower - LH (Remove and Replace). | ||
| 11 | Remove the driver and front passenger seats. See Seat - Driver (Remove and Replace). | ||
| 12 | Remove the LH and RH 2nd row seat side bolsters. See Bolster - Side - Seat - 2nd Row - LH (Remove and Replace). | ||
| 13 | Remove the LH and RH rear sill panel trims. See Trim - Sill Panel - Rear - LH (Remove and Replace). | ||
| 14 | While wearing suitable gloves, spread the bottom of the LH upper B-pillar trim open, and then release the clips that attach the bottom of the trim to the LH lower B-pillar trim After setting aside the LH upper B-pillar trim, repeat this step on the RH upper B-pillar trim. Caution: Be careful not to pull the upper B-pillar trim too far, otherwise it might break the seat belt shoulder adjustment mechanism.
Note: Move the body seals to aid removal.
| |
| 15 | Remove the LH and RH lower B-pillar trims. See Trim - B-Pillar - Lower - LH (Remove and Replace). | ||
| 16 | Remove the clips (x6) and release the hook and loop strips that attach the rear carpet to the body. | |
| 17 | Remove the rear carpet from the vehicle. |
Install
Installation procedure is the reverse of removal.