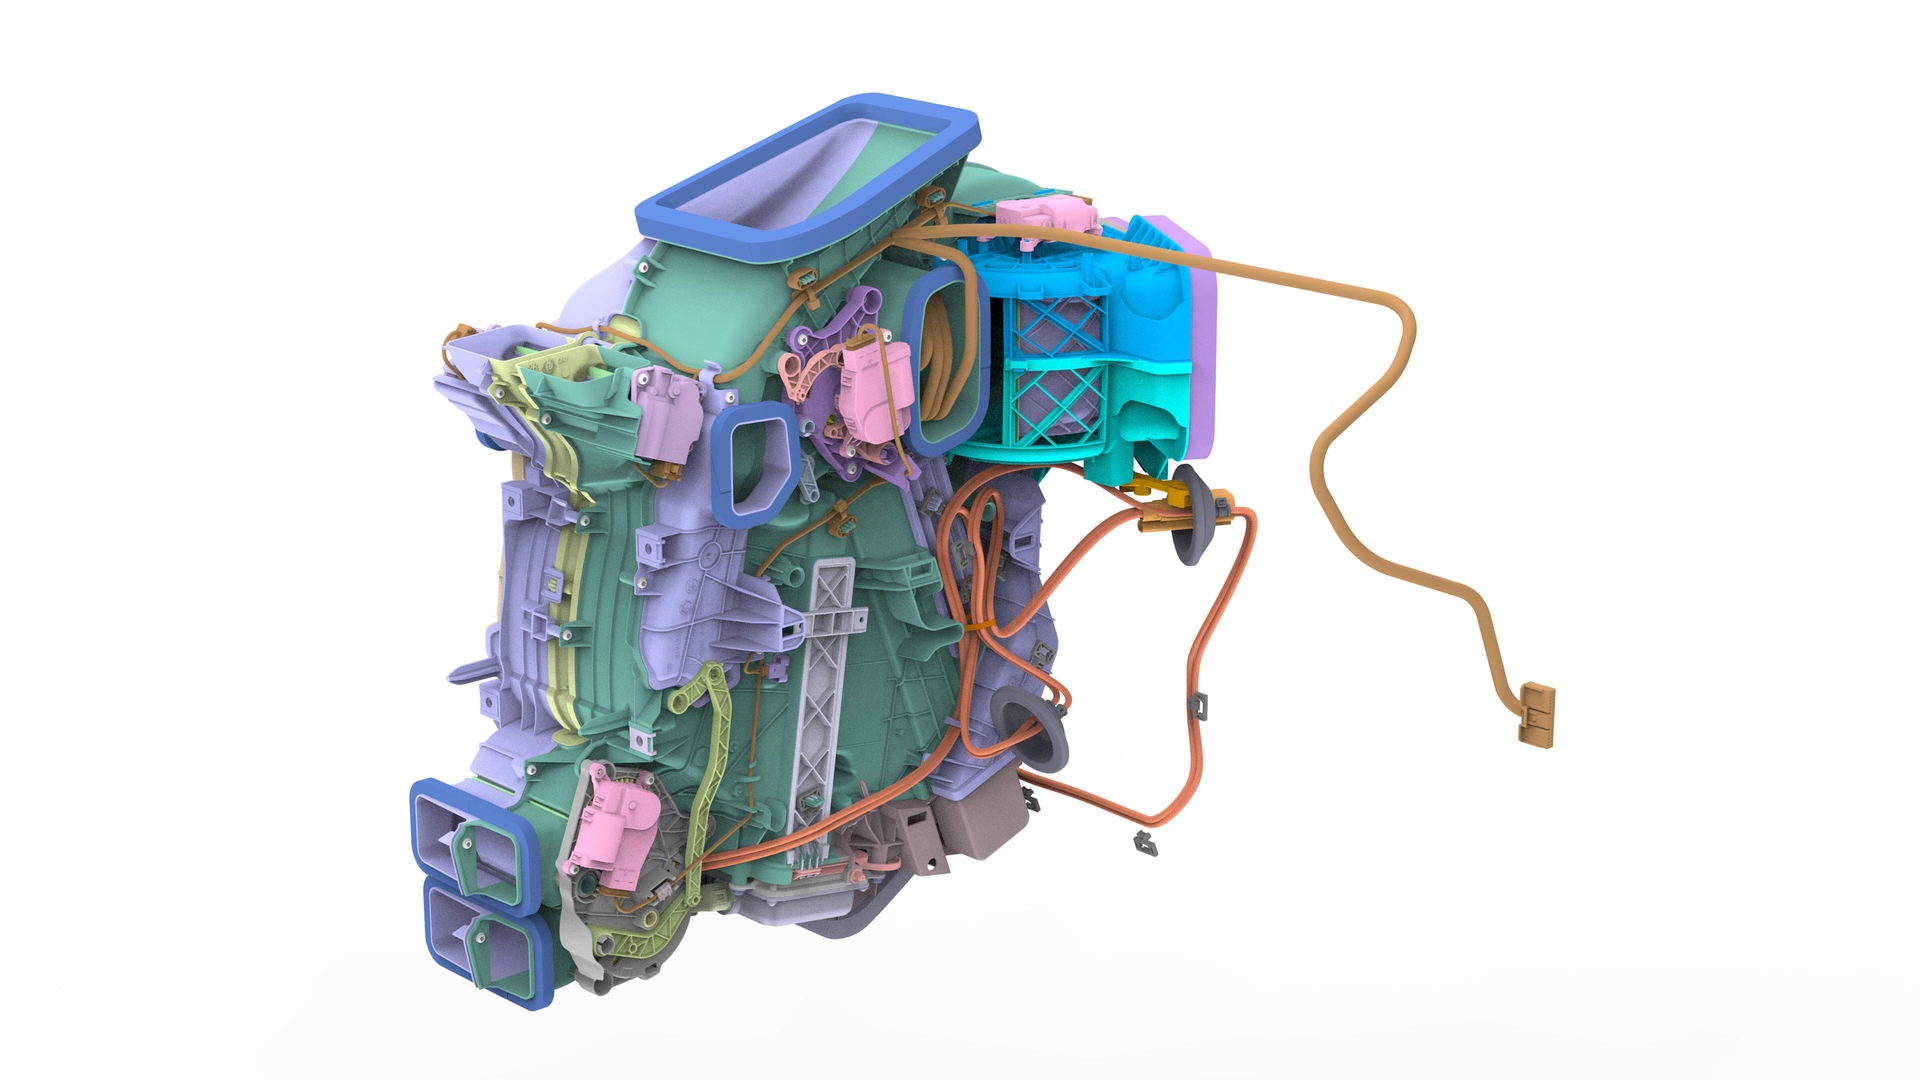
HVAC Assembly (Remove and Replace)
Correction code 1810100218101002
- 1134520-00-A Kit, EPB Release, Handheld
- 1129348-00-AXP-10 Power Supply, XP-10
SPECIAL TOOLS
Kit, EPB Release, Handheld (1134520-00-A) |
XP-10 Power Supply, XP-10 (1129348-00-A) |
Remove
-
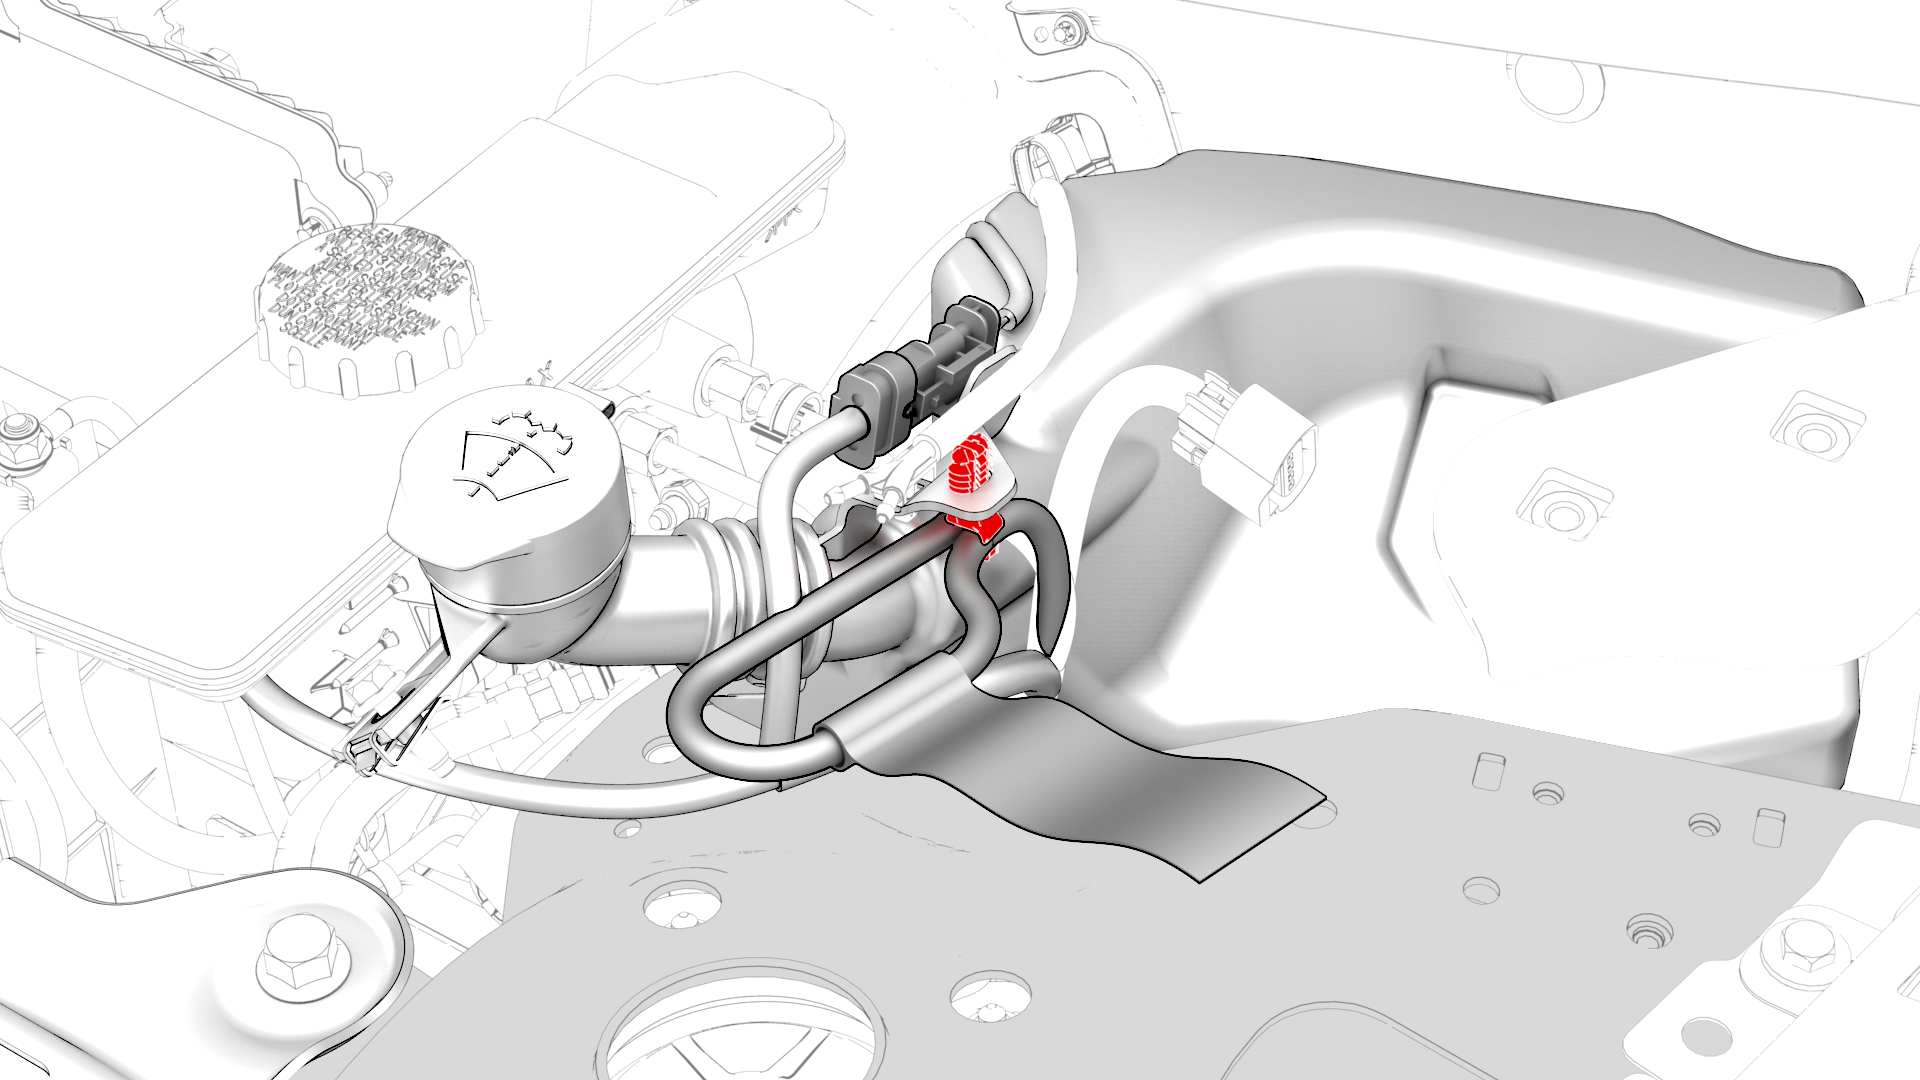
Release the clip that attaches the electrical harness to the windshield washer reservoir.
-
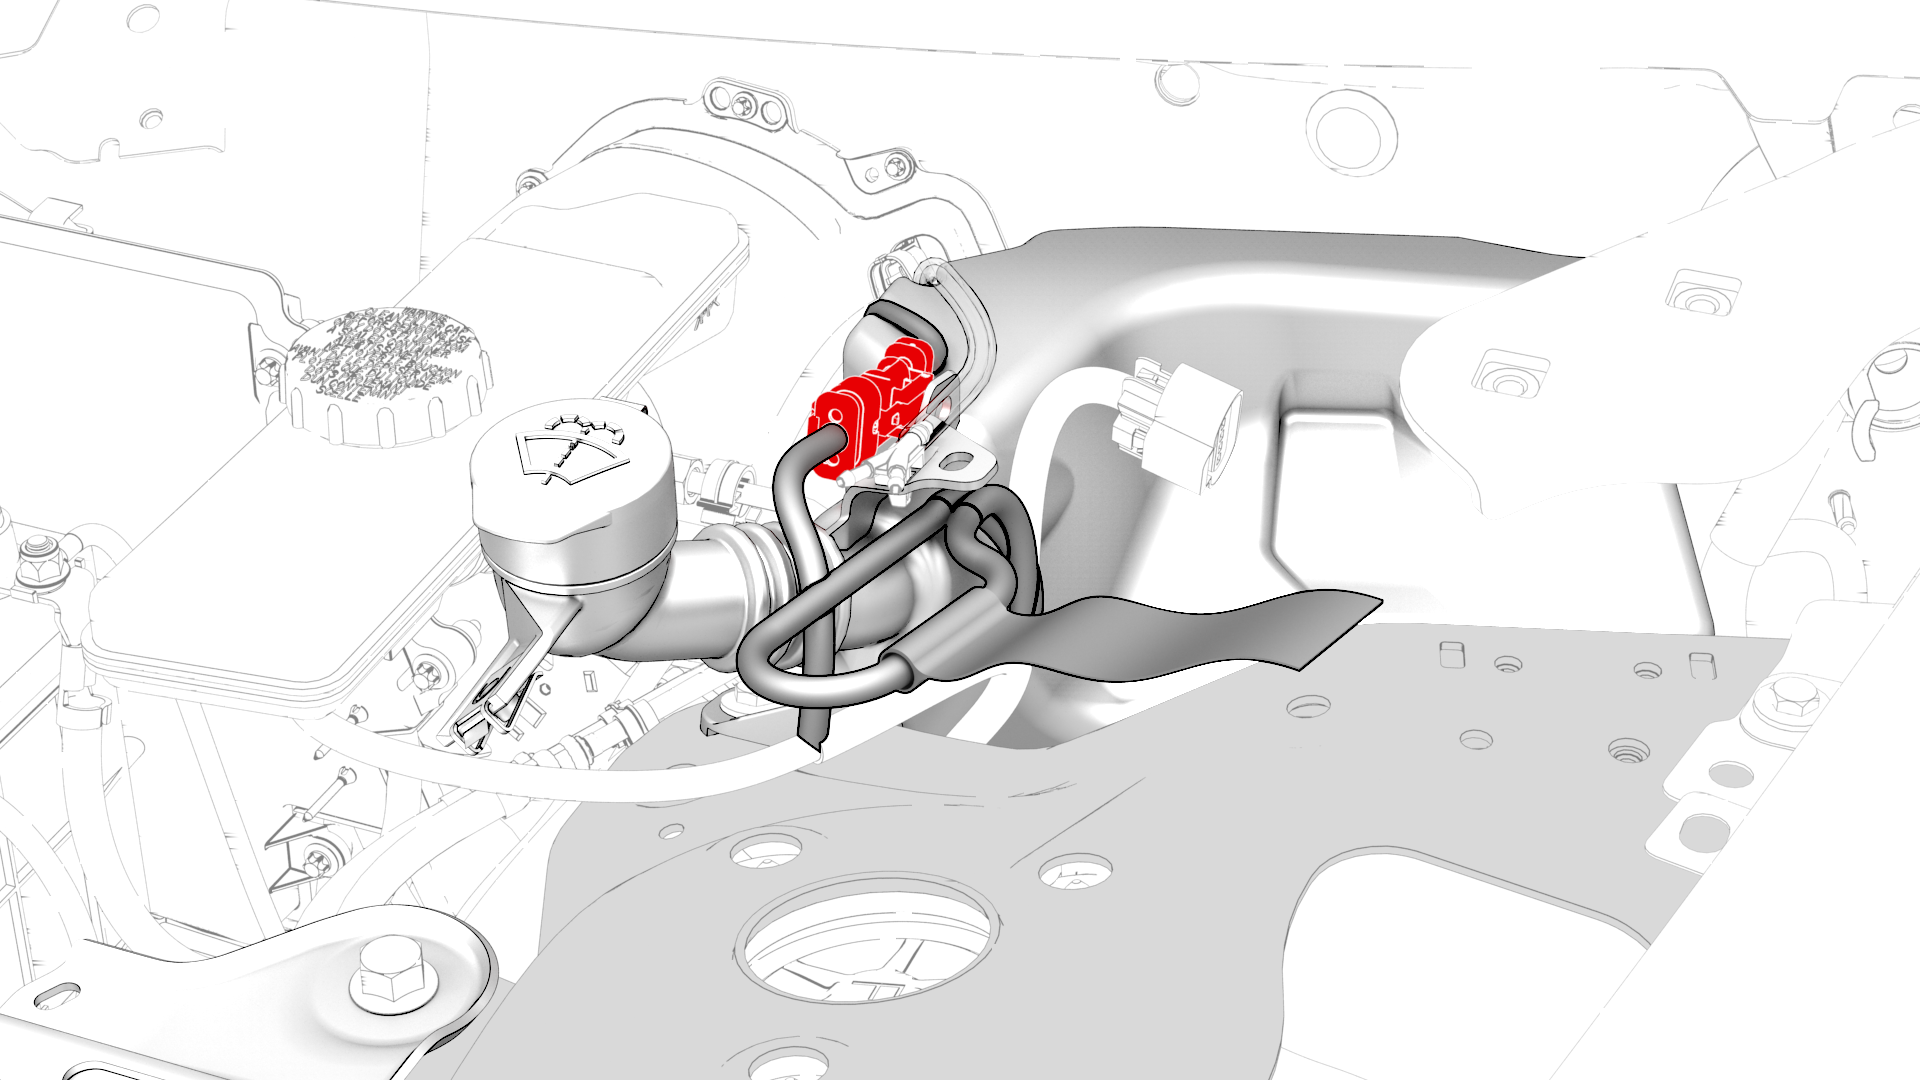
Disconnect the electrical connector from the windshield washer reservoir.
-
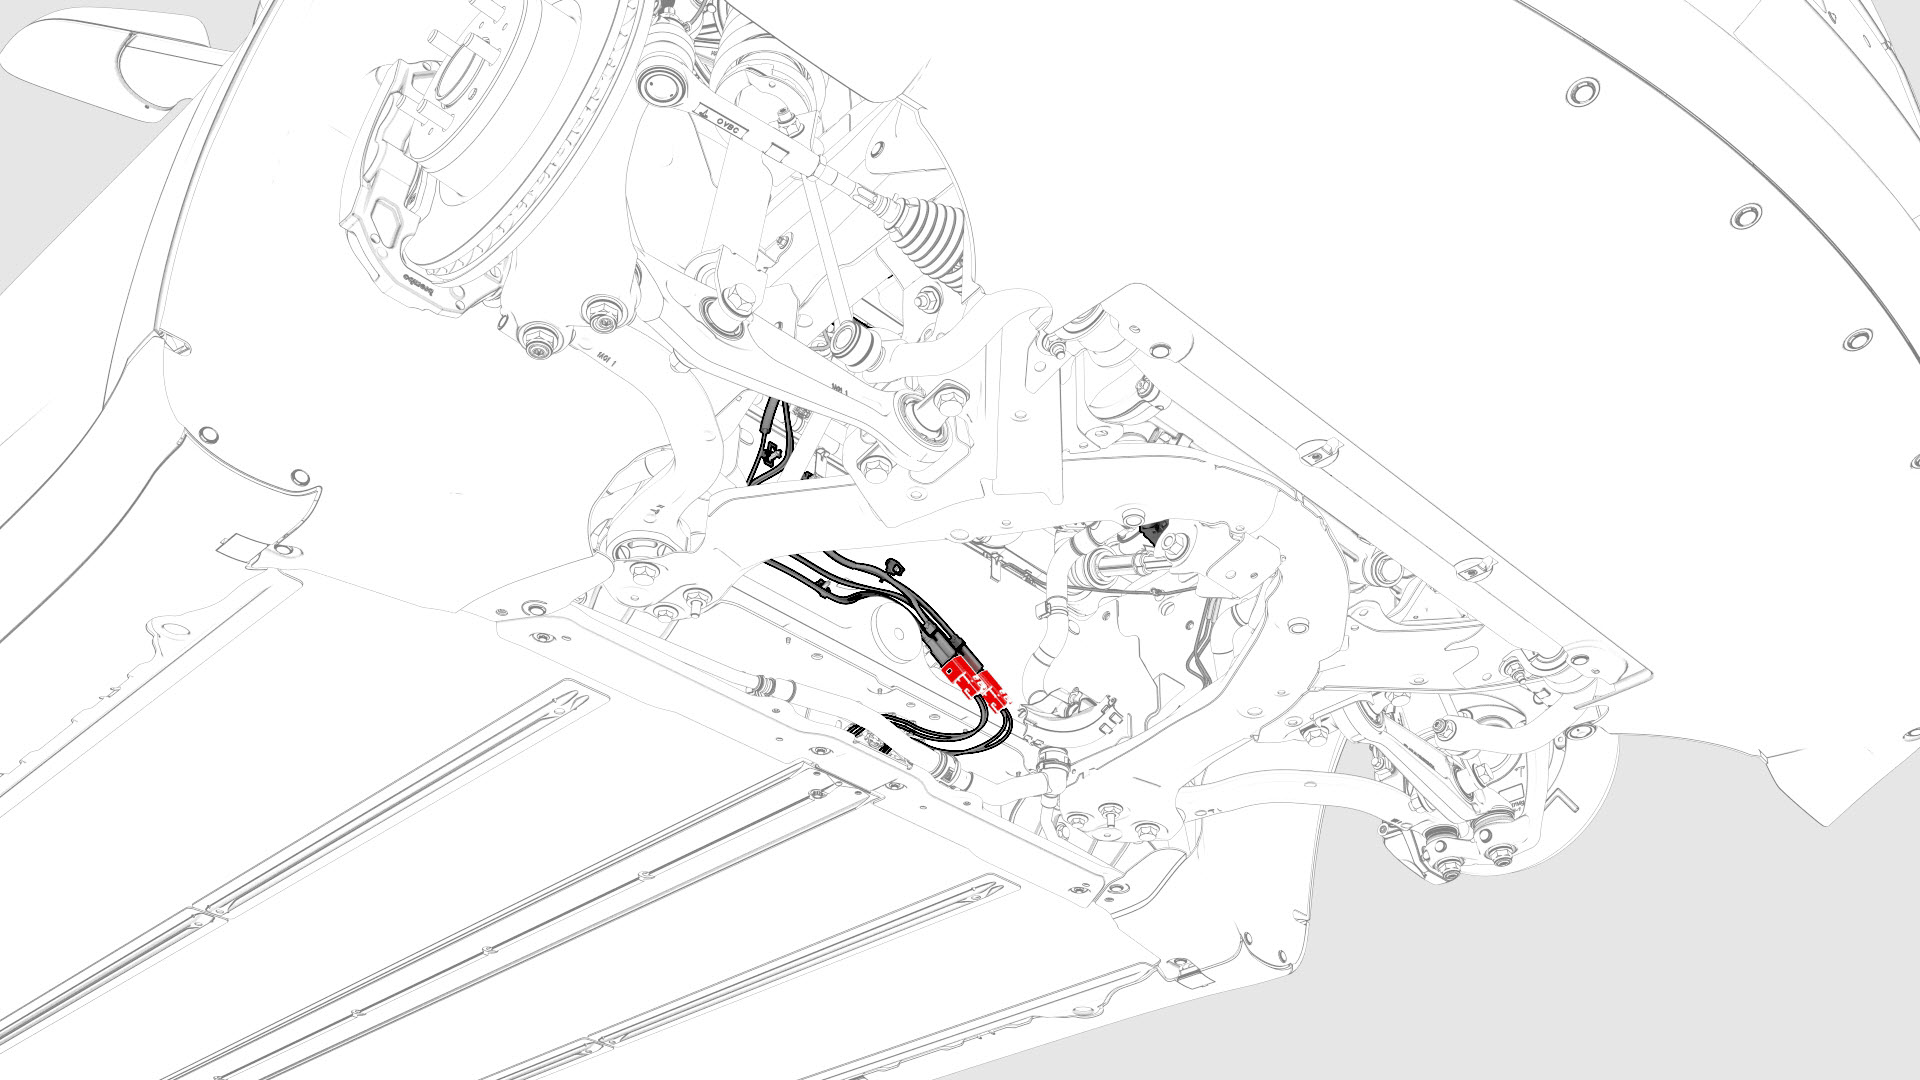
Disconnect the HV harness connector from the PTC heater.
-
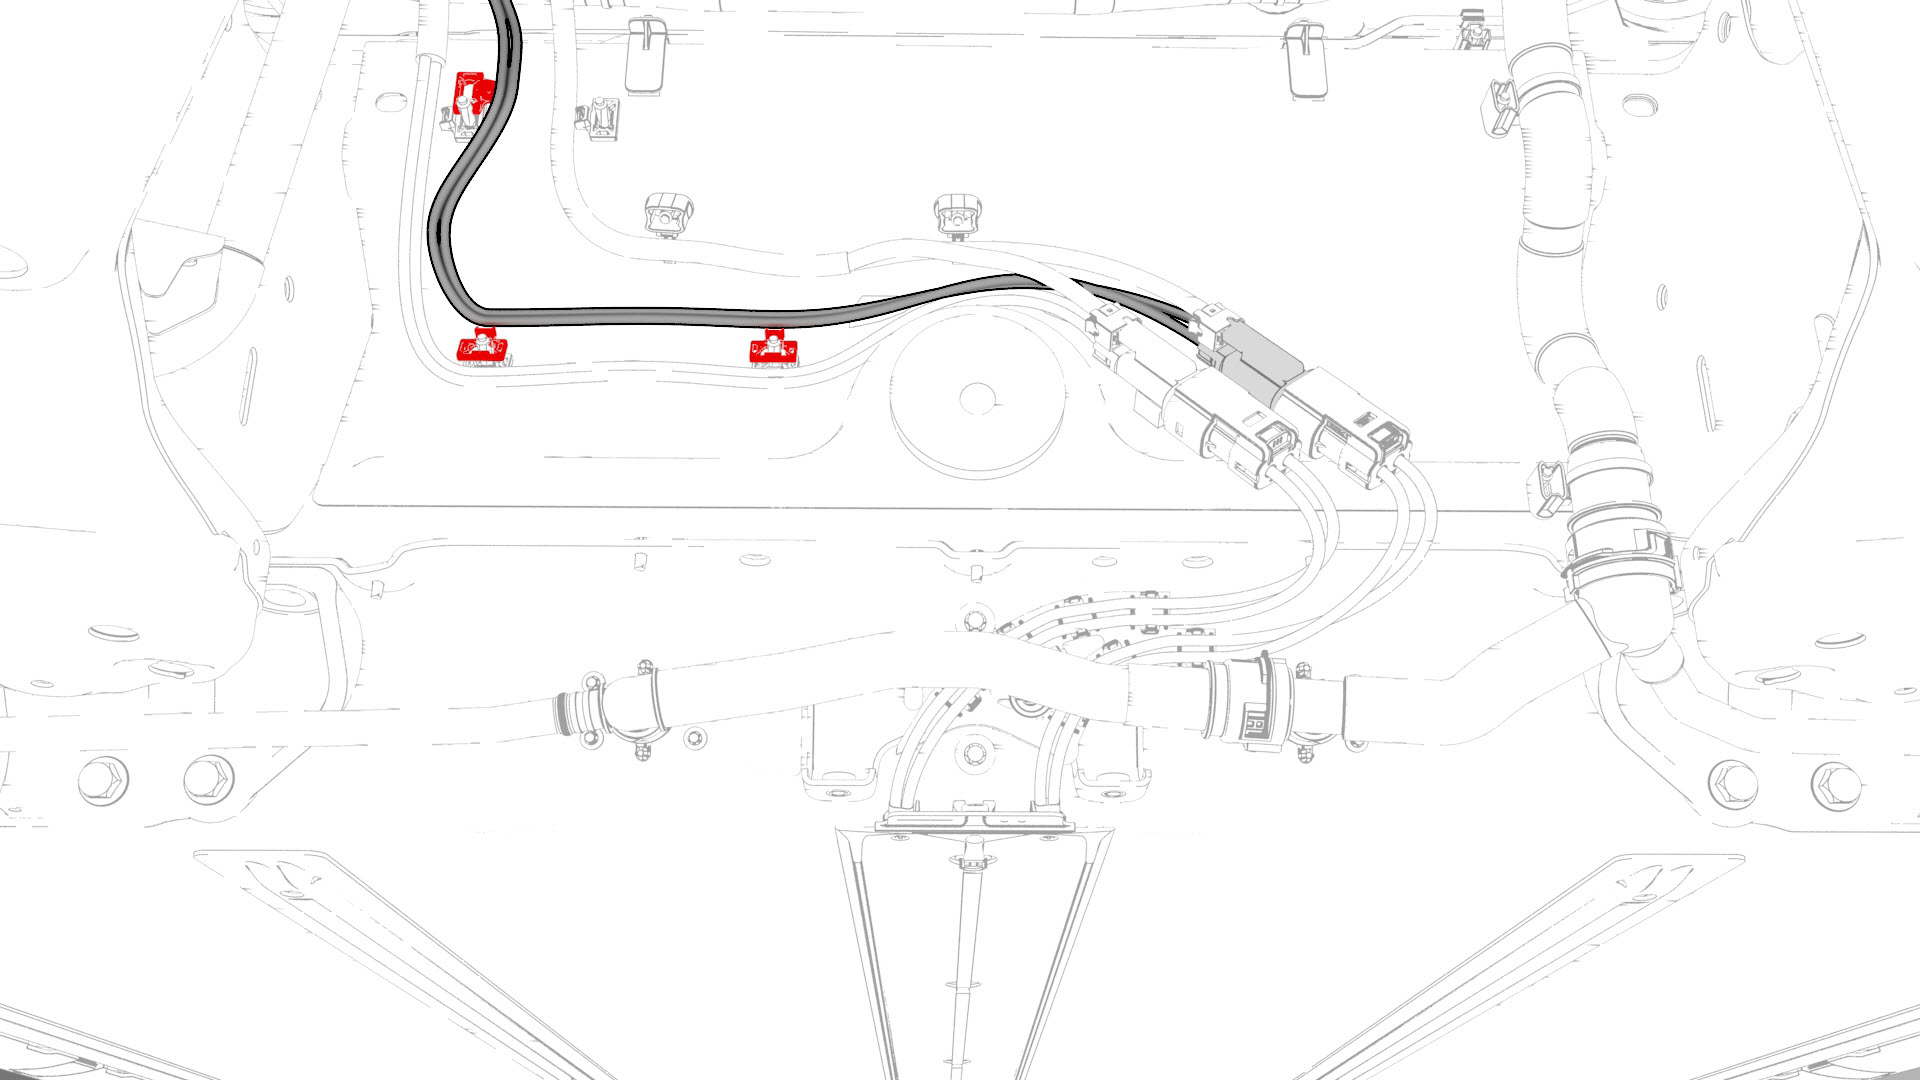
Release the clips that attach the PTC heater electrical connector to the body.
-
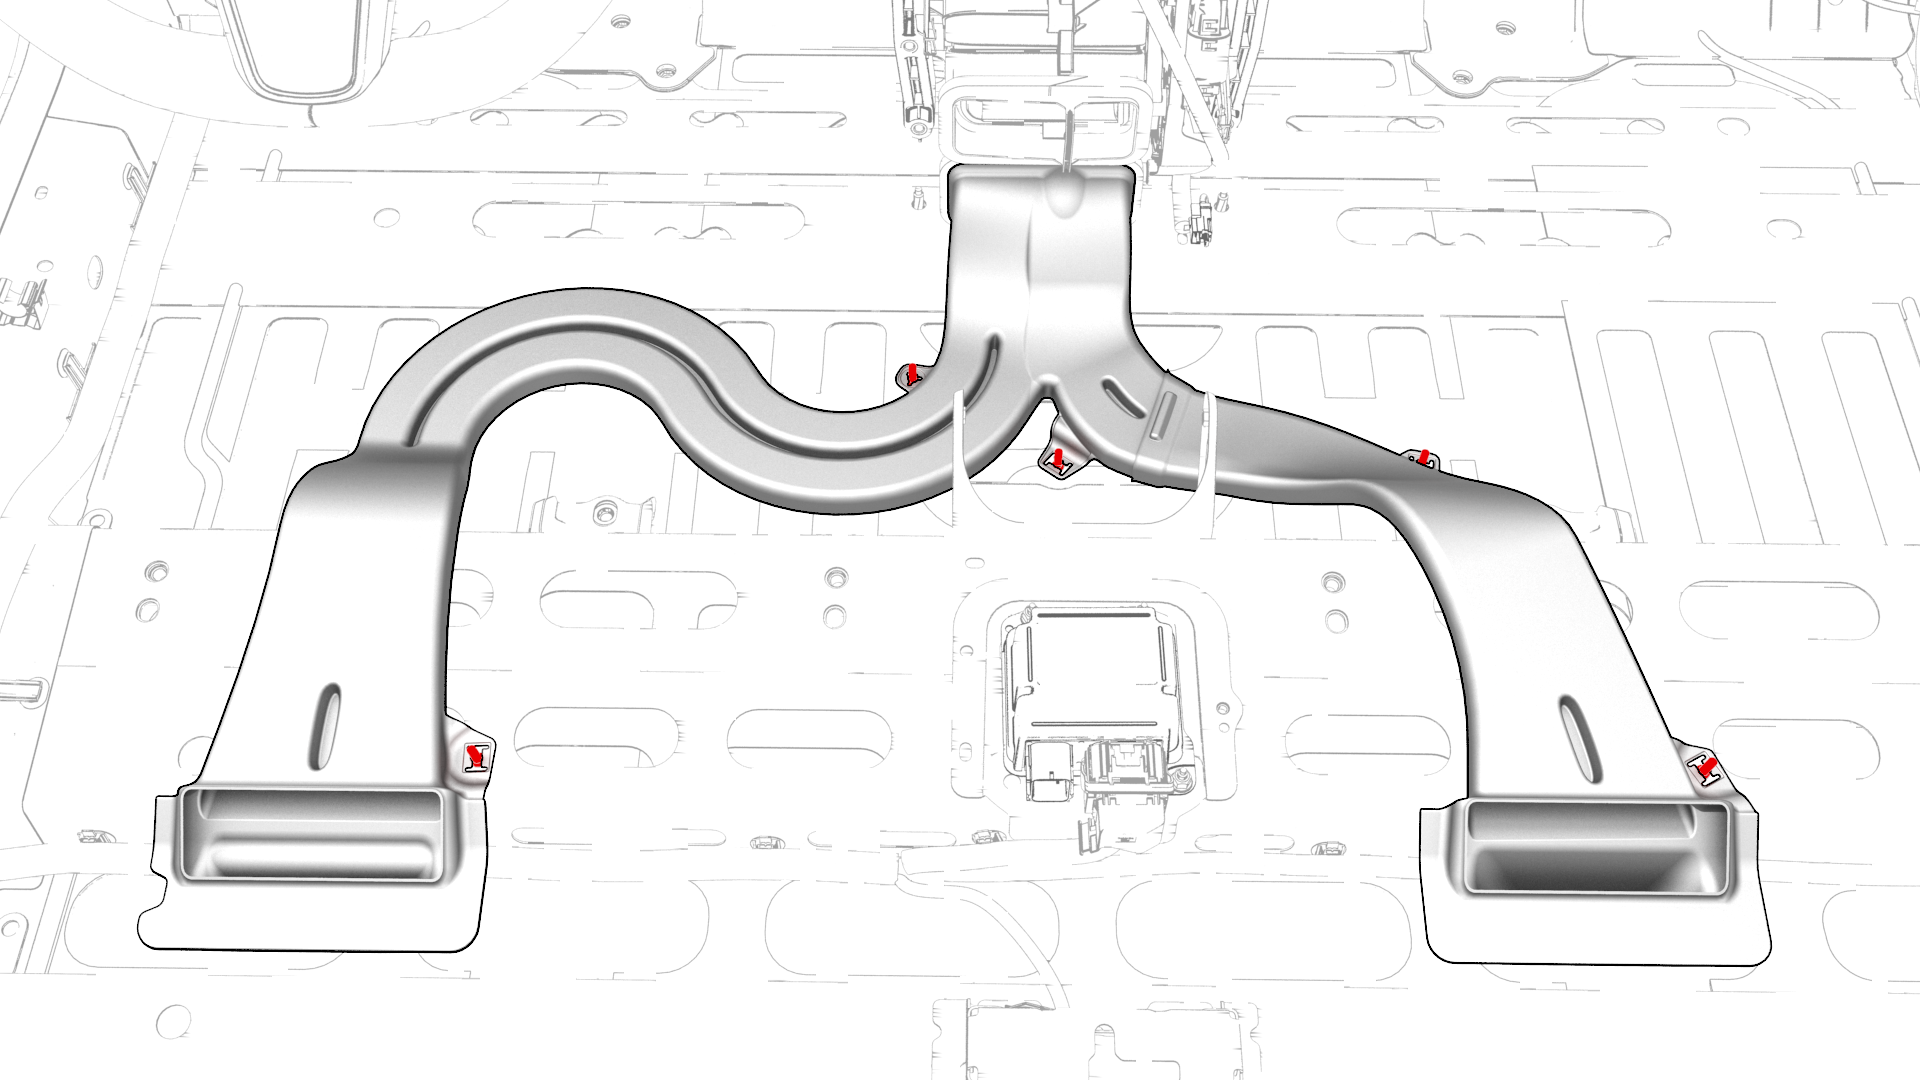
Release the clips that attach the RH and LH floor ducting to the floor, and remove the ducting.
-
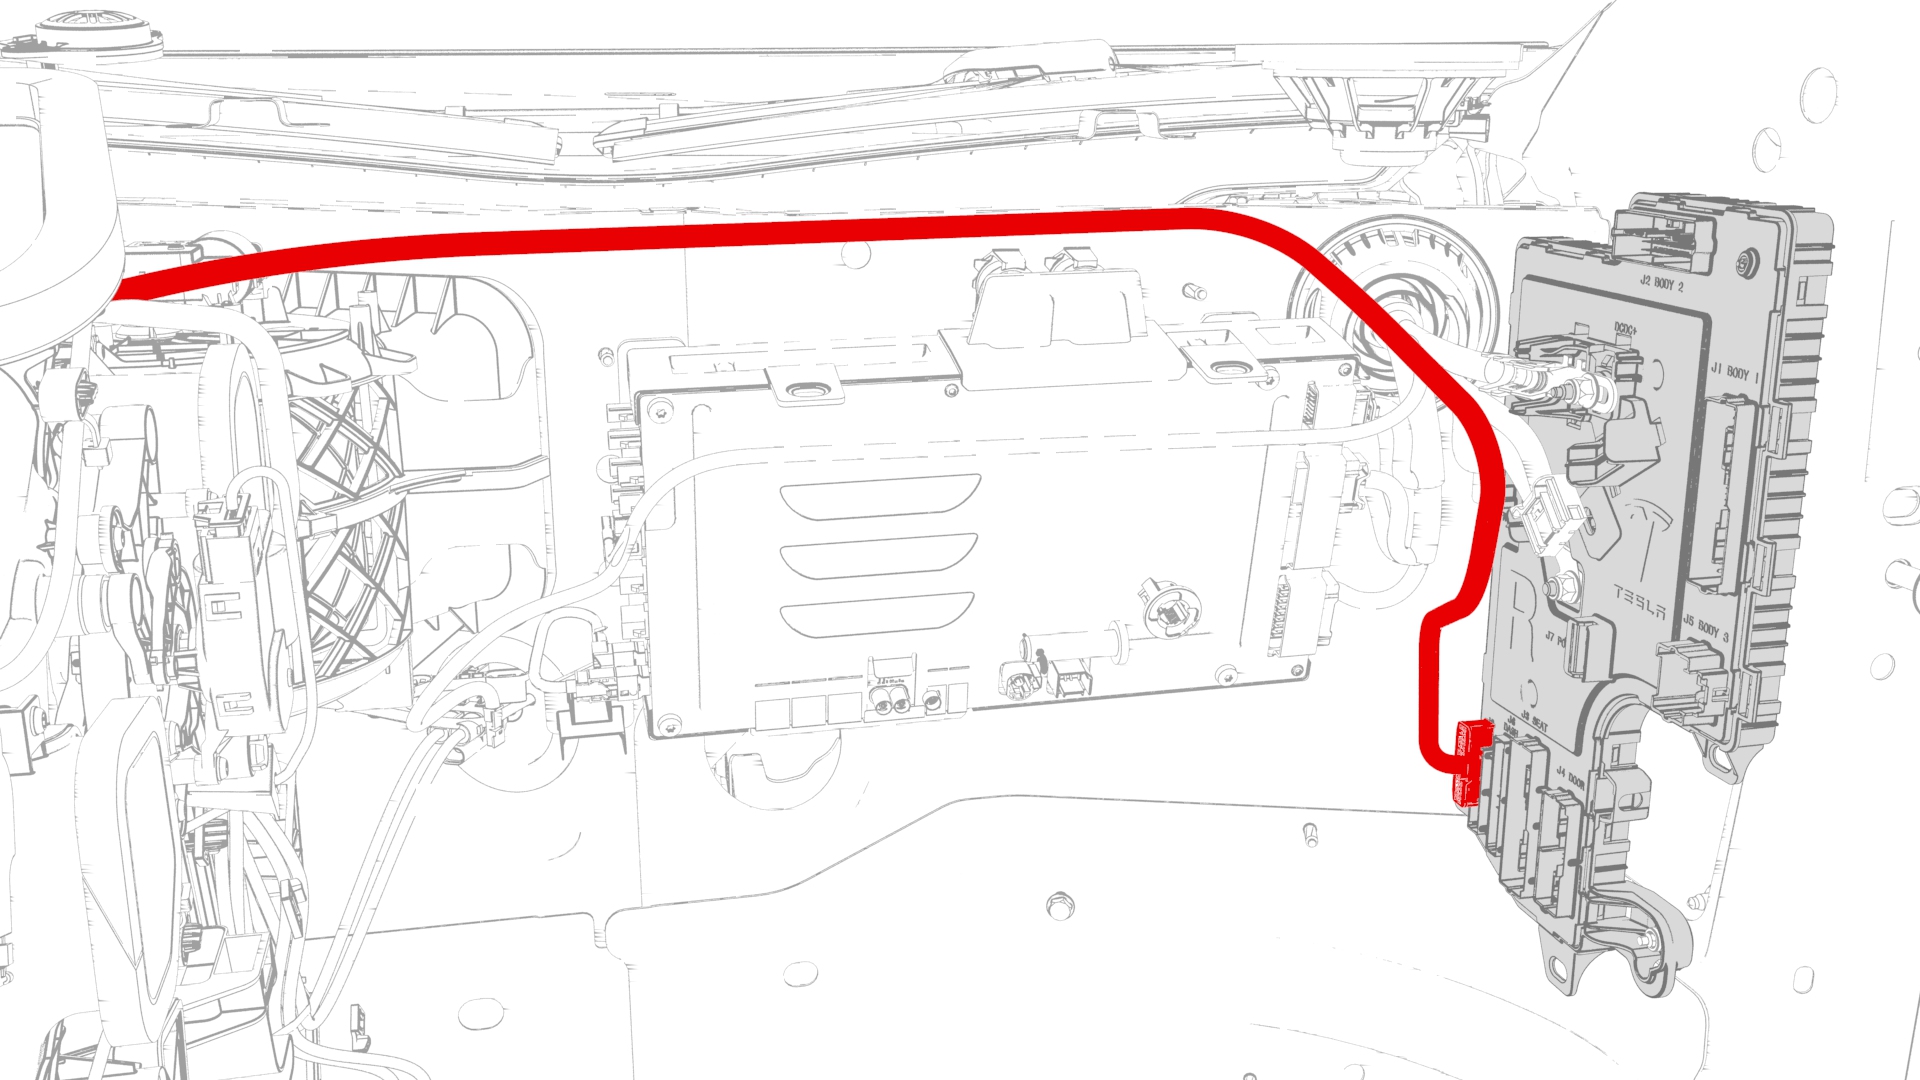
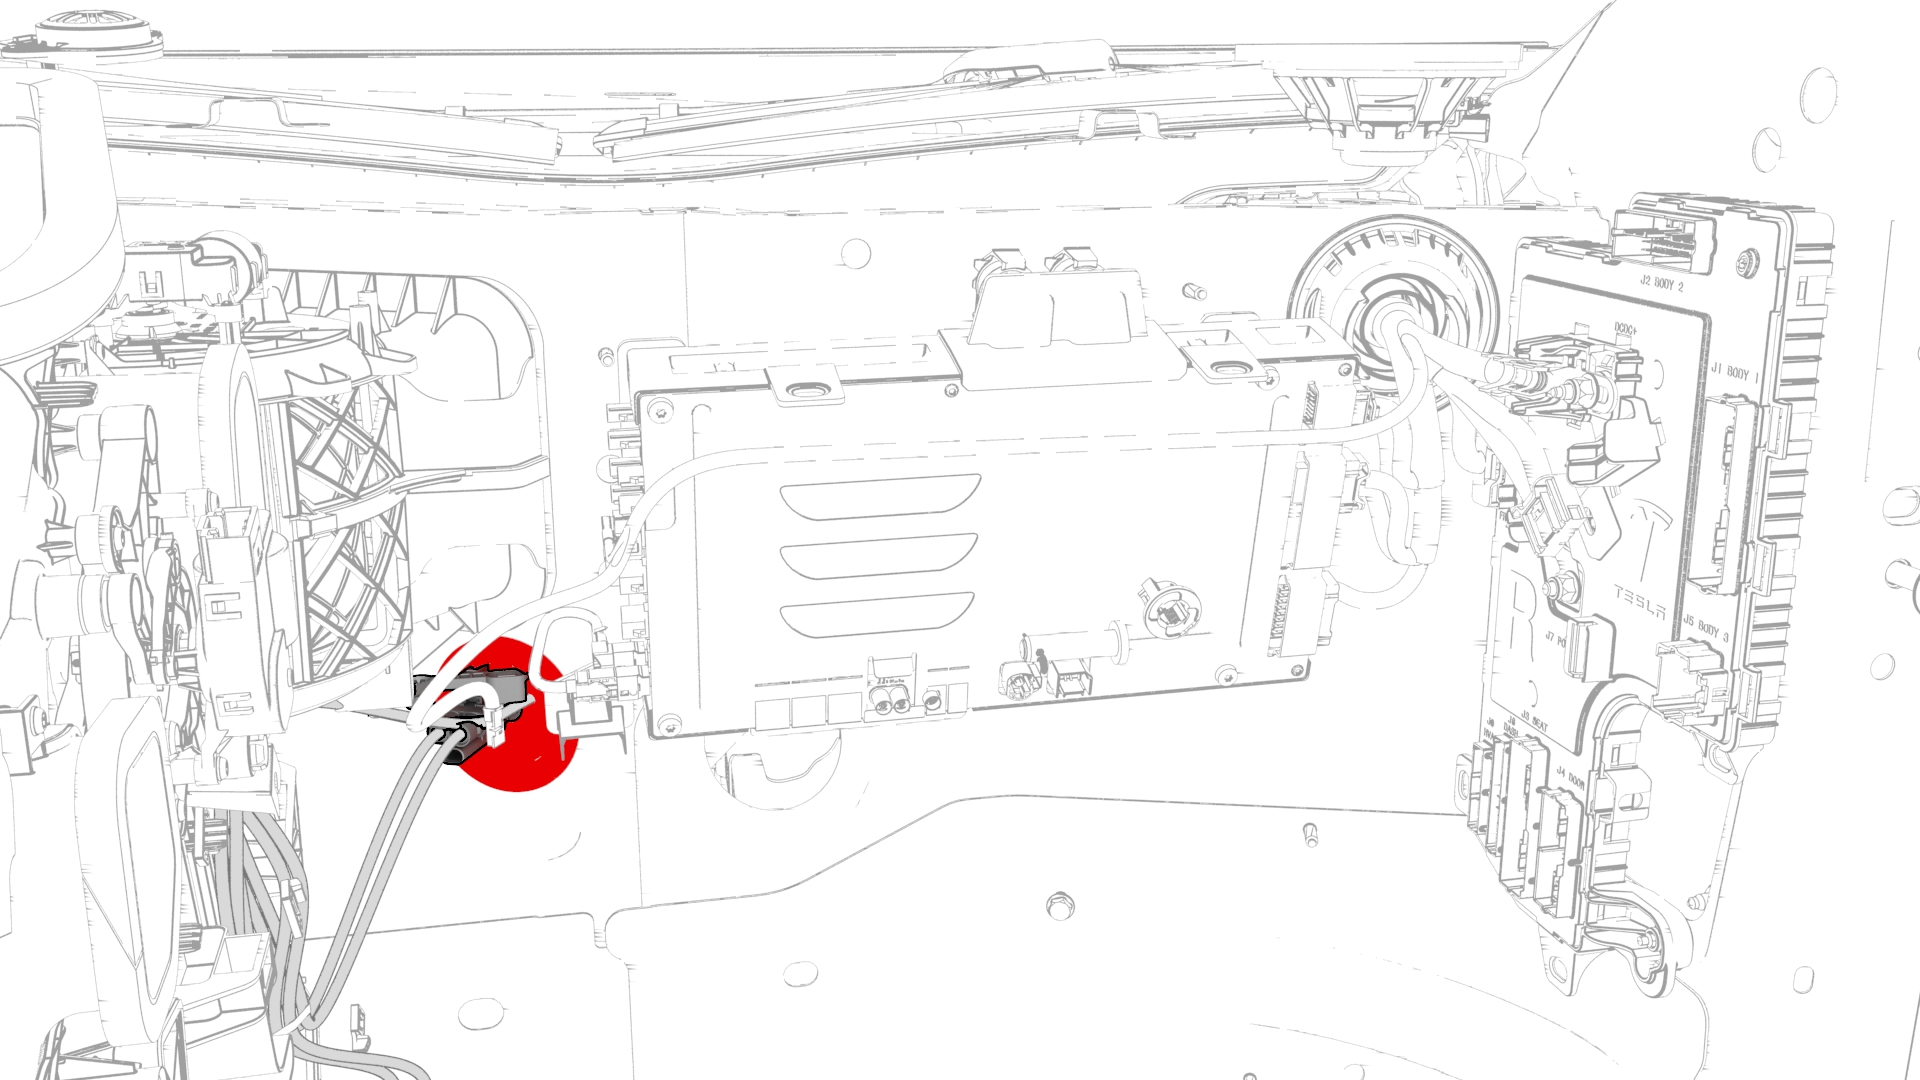
Disconnect the HVAC harness connector from the RH body controller.
-
Remove the bolt that attaches the HVAC module to the body.
 Torque 5.5 Nm
-
Remove the grommet and pull the PTC heater harness through the bulkhead.
-
Remove the bolt that attaches the lower LH side of the HVAC assembly to the vehicle.Torque 5.5 Nm
-
With assistance, remove the HVAC assembly from the vehicle.
| 1 | Remove the rear underhood apron. See Underhood Apron - Rear (Remove and Replace). | ||
| 2 | Remove the cabin intake duct. See Duct - Cabin Intake (Remove and Replace). | ||
| 3 | Remove the hood latch cover. See Cover - Hood Latch (Remove and Replace). | ||
| 4 | Remove the underhood storage unit. See Underhood Storage Unit (Remove and Replace). | ||
| 5 | Remove the LH and RH wiper arms. See Wiper Arms (Remove and Replace). | ||
| 6 | Remove the LH and RH shock tower covers. See Cover - Shock Tower - LH (Remove and Replace). | ||
| 7 | Remove the cowl screen panel. See Panel - Cowl Screen (Remove and Replace). | ||
| 8 | Remove the wiper motor. See Wiper Motor (Remove and Replace). | ||
| 9 | Release the clip that attaches the electrical harness to the windshield washer reservoir. | |
| 10 | Disconnect the electrical connector from the windshield washer reservoir. | |
| 11 | Remove the outer HVAC plenum duct. See Duct - HVAC Plenum - Outer (Remove and Replace). | ||
| 12 | Remove the inner HVAC plenum duct. See Duct - HVAC Plenum - Inner (Remove and Replace). | ||
| 13 | Perform the A/C refrigerant recovery procedure. See A/C Refrigerant (Recovery and Recharge). | ||
| 14 | Remove the 2nd row lower seat cushion. See Seat Cushion - Lower - 2nd Row (Remove and Replace). | ||
| 15 | Remove the LH and RH instrument panel end caps. See End Cap - Instrument Panel - LH (Remove and Replace). | ||
| 16 | Remove the LH and RH middle A-pillar trim. See Trim - A-Pillar - Middle - LH (Remove and Replace). | ||
| 17 | Remove the LH and RH lower A-pillar trim. See Trim - A-Pillar - Lower - LH (Remove and Replace). | ||
| 18 | Remove the LH and RH upper A-pillar trim. See Trim - A-Pillar - Upper - LH (Remove and Replace). | ||
| 19 | Remove the driver and front passenger footwell cover. See Cover - Footwell - Driver (Remove and Replace). | ||
| 20 | Perform steps 2 -7 of the removal of the driver and front passenger seats. See Seat - Driver (Remove and Replace). Note: Do not review the driver and front passenger seat at this time.
| ||
| 21 | Disconnect 12V power. See 12V Power (Disconnect and Connect). | ||
| 22 | Perform the vehicle electrical isolation procedure. See Vehicle Electrical Isolation Procedure. | ||
| 23 | Remove the LH and RH front wheels. See Wheel (Remove and Install). | ||
| 24 | Remove the LH front wheel arch liner. See Wheel Arch Liner - Front - LH (Remove and Replace). | ||
| 25 | Remove the windshield washer reservoir. See Reservoir - Windshield Washer (Remove and Replace). | ||
| 26 | Remove the front aero shield panel. See Panel - Aero Shield - Front (Remove and Replace). | ||
| 27 | Disconnect the HV harness connector from the PTC heater. | |
| 28 | Release the clips that attach the PTC heater electrical connector to the body. | ||
| 29 | Fully release the rear park brake calipers. See Parking Brake - Caliper - Rear - LH (Release). | ||
| 30 | Lower the vehicle partially. | ||
| 31 | Install the LH front wheel, but do not fully tighten the lug nut at this time. | ||
| 32 | With an assistant, push the vehicle away from the lift. Note: Secure the vehicle with wheel chocks.
| ||
| 33 | Perform step 8-12 for the removal of the driver and front passenger seats. See Seat - Driver (Remove and Replace). | ||
| 34 | Remove the driver knee airbag. See Airbag - Knee - Driver (Remove and Install). | ||
| 35 | Remove the LH footwell duct. See Duct - Footwell - LH (Remove and Replace). | ||
| 36 | Remove the center console. See Center Console (Remove and Install). | ||
| 37 | Remove the front passenger knee airbag. See Airbag - Knee - Front Passenger (Remove and Replace). | ||
| 38 | Remove the LH and RH air wave end cap. See End Cap - Air Wave - LH (Remove and Replace). | ||
| 39 | Remove the main instrument panel decor trim. See Decor Trim - Instrument Panel - Main (Remove and Replace). | ||
| 40 | Remove the glove box. See Glove Box (LHD) (Remove and Replace). | ||
| 41 | Remove the RH footwell duct. See Duct - Footwell - LH (Remove and Replace). | ||
| 42 | Remove the RH air wave duct. See Duct - Air Wave - RH (Remove and Replace). | ||
| 43 | Remove the driver air bag. See Airbag - Driver (Remove and Replace). | ||
| 44 | Remove the steering wheel. See Steering Wheel (Remove and Install). | ||
| 45 | Remove the steering column control module. See Module - Steering Column Control (Remove and Replace). | ||
| 46 | Remove the touchscreen. See Touchscreen (Remove and Replace). | ||
| 47 | Remove the LH front vent. See Vent - Front - LH (Remove and Replace). | ||
| 48 | Remove the RH front vent. See Vent - Front - RH (Remove and Replace). | ||
| 49 | Remove the RH air wave duct. See Duct - Air Wave - RH (Remove and Replace). | ||
| 50 | Remove the LH, center, and RH dash speakers. See Speaker - Dash - LH (Remove and Replace). | ||
| 51 | Remove the front passenger airbag. See Airbag - Front Passenger (Remove and Install). | ||
| 52 | Remove the IP carrier. See IP Carrier (Remove and Install). | ||
| 53 | Remove the LH air wave duct. See Duct - Air Wave - LH (Remove and Replace). | ||
| 54 | Remove the LH front carpet. See Carpet - Front - LH (Remove and Replace). | ||
| 55 | Remove the RH front carpet. See Carpet - Front - RH (Remove and Replace). | ||
| 56 | Remove the cross car beam. See Beam - Cross Car (Remove and Replace). | ||
| 57 | Release the clips that attach the RH and LH floor ducting to the floor, and remove the ducting. | |
| 58 | Disconnect the HVAC harness connector from the RH body controller. | |
| 59 | Remove the TXV valve. See TXV Valve - Evaporator (Remove and Replace). | ||
| 60 | Remove the bolt that attaches the HVAC module to the body. Torque 5.5 Nm | |
| 61 | Remove the grommet and pull the PTC heater harness through the bulkhead. | |
| 62 | Remove the bolt that attaches the lower LH side of the HVAC assembly to the vehicle. Torque 5.5 Nm | ||
| 63 | With assistance, remove the HVAC assembly from the vehicle. |
Install
-
Install the bolt that attaches the lower LH side HVAC assembly to the vehicle.Torque 5.5 Nm
-
Install the bolt that attaches the HVAC module to the body near the HVAC inlet.Torque 5.5 Nm
-
Connect the HVAC harness connector from the RH body controller.
-
Release the clips that attach the RH and LH floor ducting to the floor, and remove the ducting.
-
Install the clips that attach the PTC heater electrical connector to the body.
-
Install the HV harness connector to the PTC heater.
| 1 | With an assistant, position the HVAC assembly into the vehicle. Note: Align the drain hose and TXV housing.
| ||
| 2 | Install the bolt that attaches the lower LH side HVAC assembly to the vehicle. Torque 5.5 Nm | ||
| 3 | Push the PTC heater harness through the bulkhead, and then install the grommet. Note: Use caution not to damage the HV cable while passing the cable through the bulkhead.
| ||
| 4 | Install the bolt that attaches the HVAC module to the body near the HVAC inlet. Torque 5.5 Nm | |
| 5 | Install the TXV valve. See TXV Valve - Evaporator (Remove and Replace). | ||
| 6 | Perform the A/C refrigerant recharge. See A/C Refrigerant (Recovery and Recharge). | ||
| 7 | Connect the HVAC harness connector from the RH body controller. | |
| 8 | Release the clips that attach the RH and LH floor ducting to the floor, and remove the ducting. | |
| 9 | Install the cross car beam. See Beam - Cross Car (Remove and Replace). | ||
| 10 | Install the RH front carpet. See Carpet - Front - RH (Remove and Replace). | ||
| 11 | Install the LH front carpet. See Carpet - Front - LH (Remove and Replace). | ||
| 12 | Install the LH air wave duct. See Duct - Air Wave - LH (Remove and Replace). | ||
| 13 | Install the IP carrier. See IP Carrier (Remove and Install). | ||
| 14 | Install the front passenger airbag. See Airbag - Front Passenger (Remove and Install). | ||
| 15 | Install the LH, center, and RH dash speakers. See Speaker - Dash - LH (Remove and Replace). | ||
| 16 | Install the RH air wave duct. See Duct - Air Wave - RH (Remove and Replace). | ||
| 17 | Install the RH front vent. See Vent - Front - RH (Remove and Replace). | ||
| 18 | Install the RH footwell duct. See Duct - Footwell - LH (Remove and Replace). | ||
| 19 | Install the LH front vent. See Vent - Front - LH (Remove and Replace). | ||
| 20 | Install the touchscreen. See Touchscreen (Remove and Replace). | ||
| 21 | Remove the steering column control module. See Module - Steering Column Control (Remove and Replace). | ||
| 22 | Install the steering wheel. See Steering Wheel (Remove and Install). | ||
| 23 | Install the driver air bag. See Airbag - Driver (Remove and Replace). | ||
| 24 | Install the RH air wave duct. See Duct - Air Wave - RH (Remove and Replace). | ||
| 25 | Install the RH footwell duct. See Duct - Footwell - LH (Remove and Replace). | ||
| 26 | Install the glove box. See Glove Box (LHD) (Remove and Replace). | ||
| 27 | Install the main instrument panel decor trim. See Decor Trim - Instrument Panel - Main (Remove and Replace). | ||
| 28 | Install the LH and RH air wave end cap. See End Cap - Air Wave - LH (Remove and Replace). | ||
| 29 | Install the front passenger knee airbag. See Airbag - Knee - Front Passenger (Remove and Replace). | ||
| 30 | Install the center console. See Center Console (Remove and Install). | ||
| 31 | Install the LH footwell duct. See Duct - Footwell - LH (Remove and Replace). | ||
| 32 | Install the driver knee airbag. See Airbag - Knee - Driver (Remove and Install). | ||
| 33 | Install the driver seat. See Seat - Driver (Remove and Replace). | ||
| 34 | Install the windshield washer reservoir. See Reservoir - Windshield Washer (Remove and Replace). | ||
| 35 | Perform the platter enclosure air leak test. See Platter Enclosure Air Leak Test. | ||
| 36 | Install the clips that attach the PTC heater electrical connector to the body. | ||
| 37 | Install the HV harness connector to the PTC heater. | |
| 38 | Install the front aero shield panel. See Panel - Aero Shield - Front (Remove and Replace). | ||
| 39 | Install the LH front wheel arch liner. See Wheel Arch Liner - Front - LH (Remove and Replace). | ||
| 40 | Install the front aero shield panel. See Panel - Aero Shield - Front (Remove and Replace). | ||
| 41 | Install the LH front wheel. See Wheel (Remove and Install). | ||
| 42 | Reconnect 12V power. See 12V Power (Disconnect and Connect). | ||
| 43 | Use a laptop to update vehicle firmware | ||
| 44 | Install the front passenger seat. See Seat - Driver (Remove and Replace). | ||
| 45 | Install the driver and front passenger footwell cover. See Cover - Footwell - Driver (Remove and Replace). | ||
| 46 | Install the LH and RH upper A-pillar trim. See Trim - A-Pillar - Upper - LH (Remove and Replace). | ||
| 47 | Install the LH and RH lower A-pillar trim. See Trim - A-Pillar - Lower - LH (Remove and Replace). | ||
| 48 | Install the LH and RH middle A-pillar trim. See Trim - A-Pillar - Middle - LH (Remove and Replace). | ||
| 49 | Install the LH and RH instrument panel end caps. See End Cap - Instrument Panel - LH (Remove and Replace). | ||
| 50 | Install the 2nd row lower seat cushion. See Seat Cushion - Lower - 2nd Row (Remove and Replace). | ||
| 51 | Install the inner HVAC plenum duct. See Duct - HVAC Plenum - Inner (Remove and Replace). | ||
| 52 | Install the outer HVAC plenum duct. See Duct - HVAC Plenum - Outer (Remove and Replace). | ||
| 53 | Install the wiper motor. See Wiper Motor (Remove and Replace). | ||
| 54 | Install the cowl screen panel. See Panel - Cowl Screen (Remove and Replace). | ||
| 55 | Install the LH and RH shock tower covers. See Cover - Shock Tower - LH (Remove and Replace). | ||
| 56 | Remove the A/C lines from the vehicle. | ||
| 57 | Inject oil into the A/C system. | ||
| 58 | Install the caps onto the A/C ports. | ||
| 59 | Test the A/C function and make sure that the HVAC blows cold air. | ||
| 60 | Install the underhood storage unit. See Underhood Storage Unit (Remove and Replace). | ||
| 61 | Install the hood latch cover. See Cover - Hood Latch (Remove and Replace). | ||
| 62 | Install the cabin intake duct. See Duct - Cabin Intake (Remove and Replace). | ||
| 63 | Install the LH and RH wiper arms. See Wiper Arms (Remove and Replace). | ||
| 64 | Install the rear underhood apron. See Underhood Apron - Rear (Remove and Replace). |